
Articles
How To Melt Chocolate On Stove Top
Modified: December 7, 2023
Learn the best techniques to melt chocolate on the stove top with this informative article. Discover useful tips and tricks to achieve smooth and velvety melted chocolate every time.
(Many of the links in this article redirect to a specific reviewed product. Your purchase of these products through affiliate links helps to generate commission for Storables.com, at no extra cost. Learn more)
Introduction
Welcome to your ultimate guide on how to melt chocolate on a stovetop! Melting chocolate can be a tricky task if you’re not familiar with the proper techniques. Whether you’re a baking enthusiast or just want to indulge in some delicious homemade chocolate treats, knowing how to melt chocolate on a stovetop is a skill that will come in handy.
While there are various methods for melting chocolate, such as using a microwave or a chocolate melter, the stovetop method offers more control and consistency. By melting chocolate on the stovetop, you can achieve a smooth and creamy texture every time, making it perfect for dipping fruits, creating chocolate ganache, or making chocolate-covered treats.
In this article, we will walk you through the step-by-step process of melting chocolate on a stovetop, ensuring that you get perfect results every time. We will also provide tips and troubleshooting advice to help you overcome any challenges you may encounter along the way.
But first, let’s discuss some essential safety precautions to keep in mind before you begin the chocolate melting process. Safety is always a top priority, and being aware of potential hazards will help ensure a stress-free and enjoyable chocolate melting experience.
Key Takeaways:
- Master the art of melting chocolate on the stovetop with patience, attention to detail, and proper safety precautions. Elevate your culinary creations with smooth, velvety melted chocolate for a delectable indulgence.
- Choose high-quality chocolate, follow essential safety guidelines, and experiment with different melting methods to achieve perfect results every time. Embrace the delicious world of melted chocolate and enjoy the creative possibilities it offers.
Read more: How To Store Melted Chocolate
Safety Precautions
Before you start melting chocolate on the stovetop, it’s important to take certain safety precautions to prevent accidents or injuries. Here are some key guidelines to follow:
- Use a heatproof bowl: Ensure that the bowl you use to melt the chocolate is heatproof and can withstand high temperatures. Avoid using plastic or melamine bowls, as they can melt or release harmful chemicals when exposed to heat.
- Use a dry utensil: Any moisture coming into contact with the melting chocolate can cause it to seize or become lumpy. Make sure your utensils, such as spoons or spatulas, are completely dry before using them to handle the chocolate.
- Avoid water contact: Moisture is the enemy of melted chocolate, as it can cause the chocolate to seize or become grainy. Be cautious not to let any water or steam come in contact with the chocolate during the melting process.
- Watch out for overheating: Chocolate can easily burn if exposed to high heat for too long. Use a low to medium heat setting on your stovetop and stir the chocolate constantly to prevent it from scorching. It’s better to heat the chocolate slowly and be patient than to rush the melting process and risk burning the chocolate.
- Keep children away: Melted chocolate is extremely hot and can cause serious burns. Make sure to keep children and pets away from the cooking area to avoid any accidents.
- Handle hot utensils with care: When working with melted chocolate, the utensils, such as the bowl or the saucepan, can become very hot. Use oven mitts or heat-resistant gloves to handle them and avoid touching the hot surfaces directly.
By following these safety precautions, you can ensure a safe and enjoyable experience when melting chocolate on the stovetop. Now that you’re aware of the safety guidelines, let’s move on to choosing the right chocolate for melting.
Choosing the Right Chocolate
When it comes to melting chocolate on the stovetop, selecting the right chocolate is crucial to achieving the best results. While any type of chocolate can be melted, not all chocolates are created equal. Here are some tips to help you choose the right chocolate for melting:
- High-quality chocolate: It’s best to use high-quality chocolate for melting, as the flavor and texture will greatly impact the final outcome of your melted chocolate. Look for chocolate with a high cocoa content (around 70% or more) for a rich and decadent result.
- Real chocolate: Avoid using compound chocolates or candy melts, as they are made with vegetable oil instead of cocoa butter. Real chocolate, made from cocoa butter, will melt more smoothly and have a better taste.
- Choose the right type: Depending on your recipe or preference, you can choose between dark chocolate, milk chocolate, or white chocolate. Dark chocolate has a stronger, more intense flavor, while milk chocolate is sweeter and creamier. White chocolate does not contain cocoa solids, but it can still be melted for certain recipes.
- Chopped or couverture: It’s easier to melt chocolate that has been chopped into smaller pieces. If you’re using chocolate bars or chocolate blocks, it’s recommended to chop them into small chunks or grate them before melting. Couverture chocolate, which contains a higher percentage of cocoa butter, melts more smoothly and is ideal for creating a shiny and glossy finish.
- Avoid added ingredients: Some chocolate varieties may have additional ingredients like nuts, fruits, or caramel. While these can add flavor to your final product, they can also affect the melting process. Stick to plain chocolate without any added ingredients for easier melting.
Now that you know how to choose the right chocolate for melting, let’s move on to preparing your stovetop for the chocolate melting process.
Preparing Your Stovetop
Before you begin the process of melting chocolate on your stovetop, it’s essential to prepare your cooking area properly. Here are the steps you need to follow to ensure a smooth and successful chocolate melting experience:
- Clean and dry your stovetop: Start by ensuring that your stovetop is clean and free from any debris. Wipe it down with a damp cloth and dry it thoroughly to ensure no food particles or liquids are present.
- Gather your equipment: You will need a heatproof bowl or a stainless steel saucepan to melt your chocolate. Make sure the bowl or saucepan is clean and dry before using it.
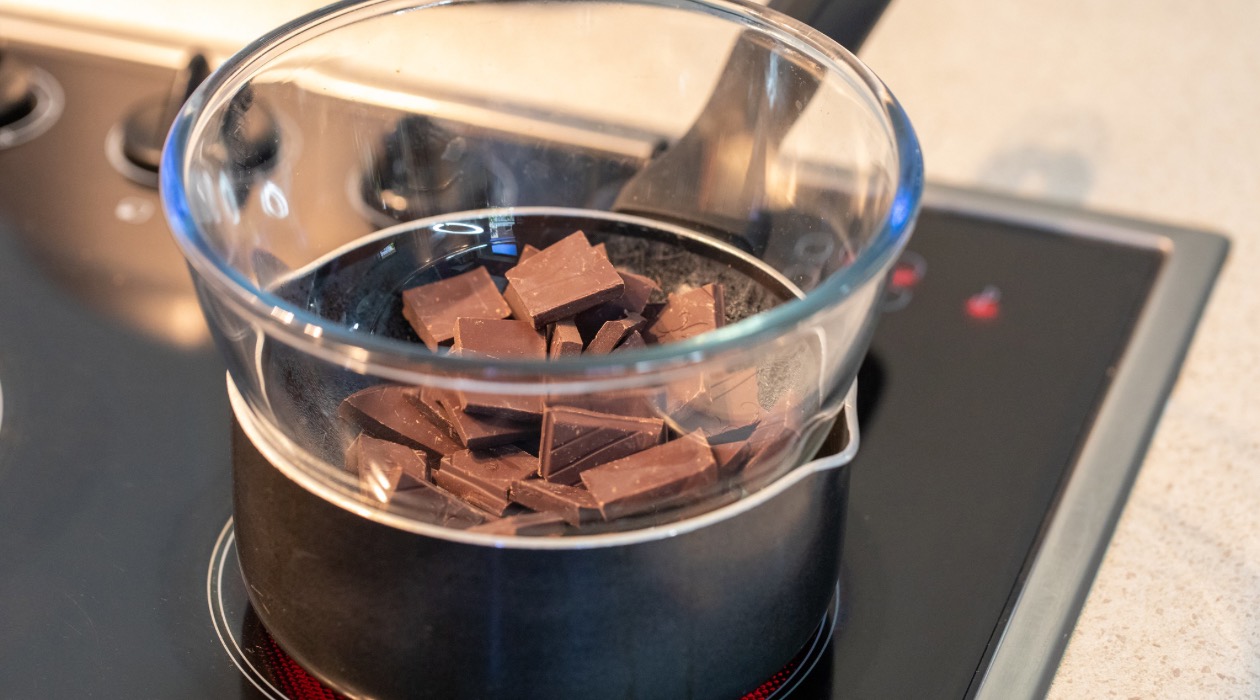
- Set up a double boiler: For more precise control over the melting process, you can create a double boiler by placing a heatproof bowl over a saucepan of simmering water. The bowl should fit snugly on top of the saucepan, but should not touch the water.
- Choose the right burner: If you’re using a saucepan directly on the stovetop, be sure to choose a burner that matches the size of the saucepan. This ensures even heating and prevents the sides of the saucepan from getting too hot.
- Adjust the heat: Set the heat to low or medium-low, depending on your stovetop. It’s important to melt chocolate slowly and gently to avoid scorching or burning it.
- Have a clean workspace: Clear a clean and spacious area near your stovetop where you can place your melted chocolate and other utensils. This will make it easier to transfer the melted chocolate from the stovetop without any spills or accidents.
By following these steps and ensuring that your stovetop is clean and ready, you are now prepared to start the chocolate melting process. In the next sections, we will discuss two popular methods for melting chocolate on the stovetop – the double boiler method and the saucepan method. Let’s dive in!
Melting Chocolate: The Double Boiler Method
The double boiler method is a popular and reliable technique for melting chocolate on the stovetop. It provides gentle and indirect heat, preventing the chocolate from burning or becoming overheated. Here’s how to melt chocolate using the double boiler method:
- Fill the saucepan: Fill a saucepan with about 1-2 inches of water and place it on the stovetop over medium heat. Bring the water to a simmer, but make sure it doesn’t come to a rolling boil.
- Prepare the bowl: Choose a heatproof bowl that fits snugly on top of the saucepan without touching the water. Place the bowl on top of the saucepan, ensuring it creates a tight seal to trap the steam.
- Add the chocolate: Chop your chocolate into small pieces or grate it, and place it in the heatproof bowl. Make sure the bowl is dry and clean before adding the chocolate.
- Begin melting: As the water in the saucepan simmers, the steam will gently heat the bowl and melt the chocolate. Stir the chocolate occasionally with a heatproof spatula or spoon to ensure even melting and prevent any hot spots.
- Monitor the temperature: To prevent overheating, it’s important to monitor the temperature of the chocolate. Use a candy thermometer or an instant-read thermometer to keep track. Dark chocolate should be melted until it reaches a temperature of around 110°F to 115°F (43°C to 46°C), while milk and white chocolate should be melted until they reach a temperature of around 105°F to 110°F (40°C to 43°C).
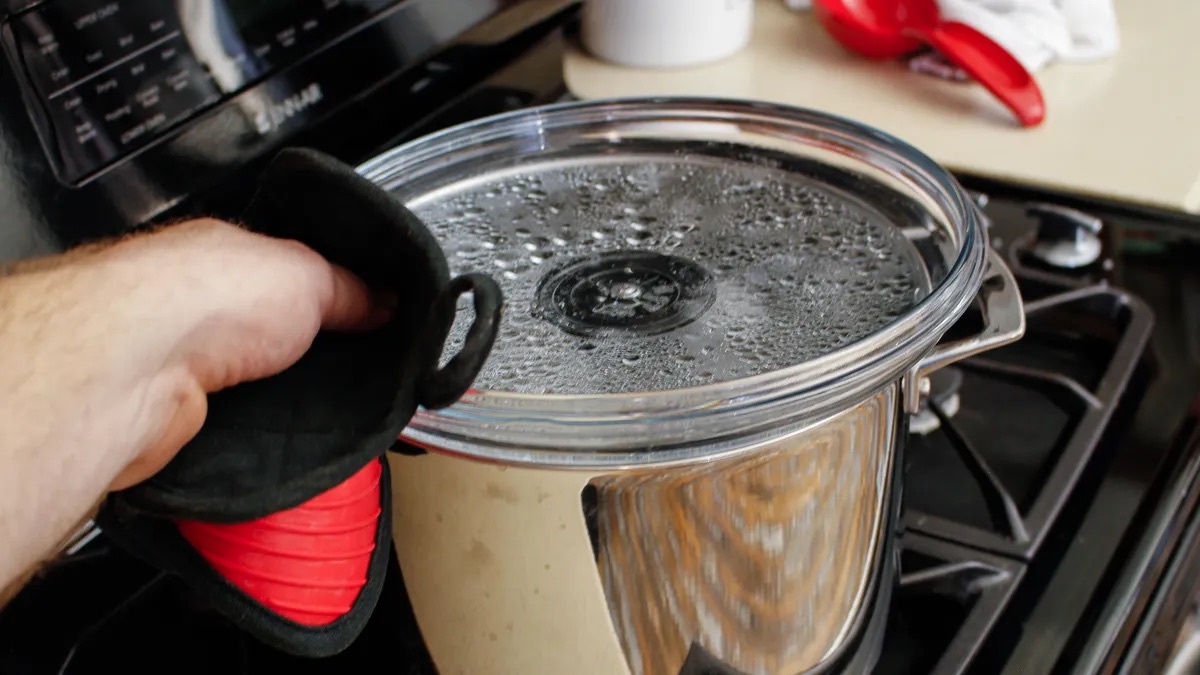
- Remove from heat: Once the chocolate is melted and reaches the desired temperature, carefully remove the bowl from the saucepan. Use oven mitts or heat-resistant gloves to handle the bowl, as it may be hot.
- Pat dry the bottom of the bowl: Before transferring the melted chocolate to a different container or using it in your recipe, make sure to carefully pat dry the bottom of the bowl. This prevents any water droplets from falling into the melted chocolate, which could cause it to seize or become lumpy.
The double boiler method provides gentle and controlled heat for melting chocolate, ensuring a smooth and velvety texture. It’s a reliable technique that is widely used in professional kitchens and by home cooks alike. However, if you don’t have a heatproof bowl or prefer a simpler method, you can also melt chocolate directly in a saucepan, which we’ll discuss next.
Read more: How To Get Melted Plastic Off A Stove Top
Melting Chocolate: The Saucepan Method
If you don’t have a heatproof bowl or prefer a more straightforward approach, you can melt chocolate directly in a saucepan. This method is quick and convenient, but it requires a bit more attention to ensure the chocolate doesn’t burn. Here’s how to melt chocolate using the saucepan method:
- Choose a saucepan: Select a stainless steel or heavy-bottomed saucepan that is suitable for melting chocolate. Avoid using non-stick pans as they can make it difficult to control the heat.
- Chop the chocolate: Chop your chocolate into small, even pieces or grate it to ensure it melts evenly. The smaller the pieces, the faster and more uniform the melting process will be.
- Heat the saucepan: Place the saucepan on the stovetop over low to medium-low heat. It’s important to start with low heat and gradually increase it if needed, as chocolate can easily scorch or burn if subjected to high temperatures.
- Add the chocolate: Once the saucepan is heated, add the chopped chocolate to the pan. Stir it continuously with a heatproof spatula or wooden spoon to ensure even heating and to prevent the chocolate from sticking to the bottom of the pan.
- Monitor the heat: Continuously monitor the heat of the pan and adjust the temperature as needed. The chocolate should melt slowly and gently without bubbling or sizzling. If you notice the chocolate is melting too quickly or starting to burn, reduce the heat immediately.
- Remove from heat: Once the chocolate is completely melted and smooth, remove the pan from the heat source. It is important not to leave the chocolate unattended as it can quickly go from melted to burnt if heated for too long.
- Transfer and use: Carefully pour or spoon the melted chocolate into another bowl or container to prevent residual heat from the saucepan from overcooking the chocolate. You can now use the melted chocolate in your recipes or for dipping and drizzling.
The saucepan method is a simple and efficient way to melt chocolate, especially if you don’t have a double boiler or prefer a more direct approach. Just be sure to keep a close eye on the heat and stir the chocolate continuously to prevent it from burning or seizing.
Now that you know how to melt chocolate using the double boiler and saucepan methods, let’s move on to the next steps: stirring and monitoring the chocolate to ensure it melts consistently and smoothly.
Use a double boiler to melt chocolate on the stove top. Place a heatproof bowl over a pot of simmering water, making sure the bottom of the bowl doesn’t touch the water. Stir the chocolate constantly until smooth.
Stirring and Monitoring the Chocolate
When melting chocolate on the stovetop, stirring and monitoring the chocolate is a crucial step to ensure even melting and prevent overheating or burning. Here are some important guidelines to follow when it comes to stirring and monitoring the chocolate:
- Stir gently and continuously: As the chocolate melts, it’s important to stir it gently and continuously. This helps distribute the heat evenly and prevents the chocolate from sticking to the bottom of the bowl or saucepan. Use a heatproof spatula or wooden spoon for stirring.
- Avoid vigorous stirring: While it’s important to stir continuously, avoid stirring the chocolate too vigorously. Aggressive stirring can cause air bubbles to form, which can result in a grainy texture in the melted chocolate. Keep the stirring gentle and smooth.
- Scrape the sides of the bowl or pan: As the chocolate melts, use your spatula or spoon to scrape the sides of the bowl or pan. This ensures that any unmelted chocolate on the edges gets incorporated into the melted chocolate, preventing it from burning or becoming lumpy.
- Be patient: Melting chocolate is a delicate process that requires patience. It may seem like the chocolate is taking a while to melt, but rushing the process by increasing the heat can lead to overheating and burnt chocolate. Keep the heat low to medium-low and allow the chocolate to melt slowly and gently.
- Monitor the chocolate’s temperature: As you stir the chocolate, monitor its temperature using a candy thermometer or an instant-read thermometer. Different types of chocolate have different melting points, and it’s important to heat them to the correct temperature. Dark chocolate should be melted until it reaches a temperature of around 110°F to 115°F (43°C to 46°C), while milk and white chocolate should be melted until they reach a temperature of around 105°F to 110°F (40°C to 43°C).
- Remove from heat at the right temperature: Once the chocolate reaches the desired temperature, remove it from the heat source immediately. Leaving it on the heat for too long can lead to overheating and potentially scorching the chocolate.
- Use a clean utensil for tasting: If you need to taste the melted chocolate for quality or to adjust the flavor, make sure to use a clean utensil each time you dip into it. This prevents any cross-contamination and ensures the chocolate stays clean and free from moisture.
By following these guidelines and staying attentive during the stirring and monitoring process, you can achieve perfectly melted chocolate every time. Next, let’s move on to removing the chocolate from the heat and the cooling process.
Removing from Heat and Cooling
Once your chocolate has reached the desired melted consistency, it’s time to remove it from the heat source and let it cool down. Properly handling this step is essential to maintain the smooth texture of the melted chocolate. Follow these steps to remove the chocolate from heat and cool it down:
- Turn off the heat: If you’re using a stove, turn off the burner once the chocolate has completely melted. This prevents any further heat from being applied to the chocolate and avoids overheating or burning.
- Remove the bowl or pan: Use oven mitts or heat-resistant gloves to carefully remove the heatproof bowl or saucepan from the stovetop. Place it on a heat-resistant surface or a heatproof trivet to protect your countertops or workspace.
- Allow it to cool naturally: Let the melted chocolate cool down naturally at room temperature. Avoid placing it in the refrigerator or freezer, as rapid temperature changes can cause the chocolate to seize or develop a dull appearance.
- Stir occasionally during cooling: While the chocolate is cooling, stir it occasionally to prevent a hardened layer from forming on the top. This will help maintain a smoother and more consistent texture.
- Adjust the consistency if needed: Depending on the recipe or your preferences, you may need to adjust the consistency of the cooled chocolate. If you find it too thick, you can gently reheat it using the same melting method. For thinning the chocolate, you can add a small amount of vegetable oil or cocoa butter and stir until the desired consistency is achieved.
Once the melted chocolate has cooled down and reached a manageable temperature for your desired recipe, it’s ready to be used. Whether you’re dipping fruits, drizzling over desserts, or creating a chocolate ganache, the cooled melted chocolate will provide a smooth and luxurious texture to your creations.
Now that you know how to remove the chocolate from the heat and let it cool down, let’s explore how to use melted chocolate in various recipes.
Using Melted Chocolate in Recipes
Now that you have successfully melted and cooled your chocolate, it’s time to put it to good use in various mouthwatering recipes. The possibilities are endless when it comes to incorporating melted chocolate into your culinary creations. Here are some popular ways to use melted chocolate:
- Dipping Fruits and Treats: Dip strawberries, bananas, pretzels, or cookies into the melted chocolate for a delightful treat. Allow them to cool and harden on wax paper or a silicone mat for a delicious and visually appealing snack.
- Drizzling over Desserts: Create beautiful chocolate designs by drizzling melted chocolate over cakes, muffins, or ice cream. Use a spoon or a piping bag to create intricate patterns or simply drizzle it with a fork for a more rustic look.
- Chocolate Bark: Spread melted chocolate onto a baking sheet lined with parchment paper, and top it with nuts, dried fruits, or crushed cookies. Allow it to cool and harden, then break it into pieces to enjoy as a decadent snack or gift it to friends and family.
- Chocolate Ganache: Melted chocolate is the key ingredient in making smooth and creamy chocolate ganache. Combine equal parts of melted chocolate and warm cream, and whisk until well combined. Use ganache as a glaze, filling, or frosting for cakes, pastries, and other desserts.
- Truffles and Chocolates: Roll small portions of melted chocolate into balls and let them set in the fridge. Once hardened, you can dust them with cocoa powder, roll them in chopped nuts, or coat them with melted white or dark chocolate to create homemade truffles or chocolates.
- Chocolate Sauce: Mix melted chocolate with a bit of milk or cream, and sweeten it with a touch of honey or sugar to create a velvety chocolate sauce. Drizzle it over pancakes, waffles, or ice cream for a decadent indulgence.
- Baking with Chocolate: Incorporate melted chocolate into your favorite baked goods, such as brownies, cookies, or cakes. Use it as a substitute for chocolate chips or cocoa powder to add a rich and moist texture to your recipes.
These are just a few ideas to get you started, but feel free to experiment and get creative with melted chocolate. From simple treats to elaborate desserts, melted chocolate adds a luxurious touch to any recipe.
Before you get started, here are a few final tips and troubleshooting advice to ensure you’re equipped with all the information you need for a successful chocolate melting experience.
Read more: How To Get Melted Fabric Off Glass Stove Top
Tips and Troubleshooting
While melting chocolate on the stovetop can be a rewarding process, it can also come with its challenges. Here are some valuable tips and troubleshooting advice to help you navigate through any potential issues:
- Avoid contact with water: Make sure all your utensils and equipment are completely dry before melting chocolate. Even a small amount of moisture can cause the chocolate to seize and become lumpy.
- Chop chocolate into small pieces: To ensure even melting, chop your chocolate into small, uniform pieces. This helps it melt faster and more consistently.
- Don’t rush the melting process: It’s better to melt chocolate slowly and gently than to rush the process and risk burning or scorching it. Be patient and use low to medium-low heat settings.
- Avoid overheating: As chocolate approaches its melting point, it can go from solid to burnt in a matter of seconds. Continuously monitor the temperature and remove it from the heat as soon as it’s fully melted.
- Rescue seized chocolate: If your chocolate seizes and becomes lumpy or grainy, you may be able to rescue it. Add a small amount of vegetable oil or cocoa butter and gently heat the mixture while stirring until it becomes smooth again.
- Avoid using wooden spoons: Wooden spoons can sometimes retain moisture, which can cause the chocolate to seize. It’s best to use a heatproof spatula or silicone spoon for stirring melted chocolate.
- Store melted chocolate properly: If you have any leftover melted chocolate, you can store it for future use. Allow it to cool completely, then transfer it to an airtight container and store it in a cool and dry place.
- Experiment with flavors: Get creative and experiment with flavorings and add-ins to your melted chocolate. You can add a drop of vanilla extract, a pinch of sea salt, or even a sprinkle of chili powder to elevate the taste of your melted chocolate.
- Have fun and practice: Melting chocolate can be a fun and enjoyable process. Don’t be discouraged if your first attempt doesn’t turn out perfect. With practice and experimentation, you’ll become more familiar with the process and achieve excellent results.
Remember, practice makes perfect! The more you experiment with melting chocolate on the stovetop, the more confident you’ll become in achieving the desired texture and taste.
Congratulations! You’re now equipped with the knowledge and techniques to melt chocolate on the stovetop like a pro. So go ahead, explore the delicious world of melted chocolate and enjoy the delectable creations you can make!
If you have any other questions or need further assistance, feel free to reach out. Happy chocolate melting!
Conclusion
Congratulations on completing this comprehensive guide on how to melt chocolate on the stovetop! You’ve learned essential safety precautions, how to choose the right chocolate, and the step-by-step process of melting chocolate using both the double boiler and saucepan methods. Additionally, you’ve discovered tips and troubleshooting advice to overcome common challenges that may arise during the process.
Melting chocolate on the stovetop opens up a world of possibilities for creating delicious homemade treats. Whether you’re dipping fruits, drizzling over desserts, or incorporating melted chocolate into your favorite recipes, the velvety texture and rich taste of melted chocolate will undoubtedly elevate your culinary creations.
Remember to be patient, gentle, and attentive throughout the melting process. From stirring and monitoring the chocolate to removing it from the heat and allowing it to cool, each step plays a crucial role in achieving a smooth and consistent texture.
Don’t be afraid to get creative and try different flavor combinations or add-ins to personalize your melted chocolate. Experiment with different types of chocolate and explore the endless possibilities for indulgence with your melted creations.
With practice and the knowledge gained from this guide, you’ll soon become a master at melting chocolate on the stovetop. Enjoy the process, savor the results, and share your delectable treats with family and friends. Just remember to keep their safety and enjoyment in mind by following the appropriate safety precautions.
Thank you for joining us on this chocolatey journey. If you have any further questions or need additional assistance, don’t hesitate to seek help. Now, have fun melting chocolate and let your creativity shine!
Frequently Asked Questions about How To Melt Chocolate On Stove Top
Was this page helpful?
At Storables.com, we guarantee accurate and reliable information. Our content, validated by Expert Board Contributors, is crafted following stringent Editorial Policies. We're committed to providing you with well-researched, expert-backed insights for all your informational needs.





0 thoughts on “How To Melt Chocolate On Stove Top”