Articles
How To Melt Dollar Tree Candles
Modified: January 4, 2024
Discover the best articles on how to melt Dollar Tree candles. Learn simple techniques to repurpose and create unique crafts from these affordable candles.
(Many of the links in this article redirect to a specific reviewed product. Your purchase of these products through affiliate links helps to generate commission for Storables.com, at no extra cost. Learn more)
Introduction
Melting Dollar Tree candles is a popular DIY project that allows you to repurpose and customize store-bought candles. Dollar Tree is known for its affordable and budget-friendly products, including candles of various scents and colors. By melting these candles, you can create your own unique designs, add personalized fragrances, and even experiment with different colors.
In this article, we will guide you through the step-by-step process of melting Dollar Tree candles, helping you transform them into beautiful and customized creations. Whether you are looking to make decorative candles for your home, create personalized gifts for loved ones, or simply enjoy the therapeutic process of candle-making, this article will provide you with all the information you need.
Before we dive into the steps, let’s go over the materials you will need for this DIY project.
Key Takeaways:
- Transform Dollar Tree candles into personalized creations with unique scents and colors, perfect for home decor or thoughtful gifts. Unleash your creativity and enjoy the therapeutic process of candle-making.
- Prioritize safety and patience while melting Dollar Tree candles to create one-of-a-kind decorative pieces. Embrace the endless possibilities of DIY candle-making and let your imagination run wild.
Read more: How To Make Dollar Tree Floral Arrangements
Materials Needed
Before you begin melting Dollar Tree candles, gather the following materials:
- Dollar Tree candles: Choose candles of your desired scent, color, and size. Dollar Tree offers a wide variety of candles, including votives, pillars, and jar candles. For this project, you can select multiple candles to mix and match.
- Heat-resistant container: Use a heat-resistant container to melt the candles. This can be a double boiler, a stainless steel pitcher, or an old saucepan dedicated for candle-making purposes.
- Heat source: You will need a heat source to melt the candles. This can be a stovetop, hot plate, or candle melting pot.
- Candle wick or pre-tabbed wick: If you plan to make new candles from the melted wax, you will need a candle wick or pre-tabbed wick. Ensure that the wick is suitable for the size and type of candles you are making.
- Fragrance oil or essential oil (optional): If you wish to add fragrance to your melted candles, have your chosen fragrance oil or essential oil on hand. Select scents that complement the candles you are melting.
- Candle dye or color blocks (optional): To add color to your melted candles, consider using candle dye or color blocks. Choose colors that align with your aesthetic or the theme you are aiming for.
- Stirring utensil: Use a heat-resistant stirring utensil, such as a wooden stick or a stainless steel spoon, to mix the melted wax and any additives.
- Mold or container: Decide what type of mold or container you want to pour the melted wax into. This can be a glass jar, tin container, or silicone mold, depending on the shape and size you desire for your new candles.
- Safety equipment: Remember to prioritize safety by wearing heat-resistant gloves and safety glasses. These will protect you from any potential splatters or burns during the melting process.
Now that you have gathered all the necessary materials, let’s move on to the step-by-step process of melting Dollar Tree candles.
Step 1: Choosing the Right Candles
The first step in melting Dollar Tree candles is to carefully select the candles you want to melt. Consider the following factors when choosing your candles:
- Scent: Dollar Tree offers a variety of scented candles, ranging from floral and fruity scents to cozy and seasonal aromas. Choose candles with scents that appeal to you or match the atmosphere you want to create.
- Color: Look for candles with colors that align with your desired aesthetic or the theme you have in mind. Dollar Tree offers candles in various shades, allowing you to get creative with your candle designs.
- Size and shape: Decide whether you want to melt small votive candles, larger pillars, or jar candles. Different sizes and shapes of candles will yield different amounts of melted wax, so keep this in mind when planning your project.
- Quantity: Determine how many candles you want to melt. Depending on the size of your container and molds, you may need more or fewer candles. Consider whether you want to mix different scents or colors together.
By carefully selecting your candles, you can ensure that the final result of your melted candles matches your vision and preferences. Once you have chosen the candles, proceed to the next step: preparing the candles for melting.
Step 2: Preparing the Candles
Before you can start melting the Dollar Tree candles, it’s important to properly prepare them. Follow these steps to get your candles ready:
- Remove any labels or stickers: Take off any labels, stickers, or decorations attached to the candles. This will prevent any unwanted residue from melting into the wax.
- Trim the wicks: Use scissors or wick trimmers to trim the wicks of the candles. Trim them to about ¼ inch to ensure a clean and even burn when you eventually use the candles. This step will also facilitate the melting process.
- Break or cut the candles into smaller pieces: If you are melting larger candles or want to mix different colors together, break or cut the candles into smaller pieces. This will help them melt more evenly and quickly. Use a knife, a sharp object, or your hands to break the candles into manageable sections.
- Sort the candles: If you have different scents or colors, sort the candles based on their attributes. This will make it easier to mix and match them later on, enabling you to create unique and personalized candles.
Once you have prepared the candles, it’s time to move on to the next step: melting the candles. Ensure you have all the necessary materials ready before proceeding.
Step 3: Melting the Candles
Now that you have prepared the candles, it’s time to start melting them. Follow these steps to melt the Dollar Tree candles:
- Set up your heat source: Place your heat-resistant container on a stovetop, hot plate, or candle melting pot. Ensure that it is stable and won’t tip over during the melting process.
- Add the candles to the container: Place the broken or cut candle pieces into the heat-resistant container. If you have sorted the candles based on scent or color, you can mix and match them now to create unique combinations.
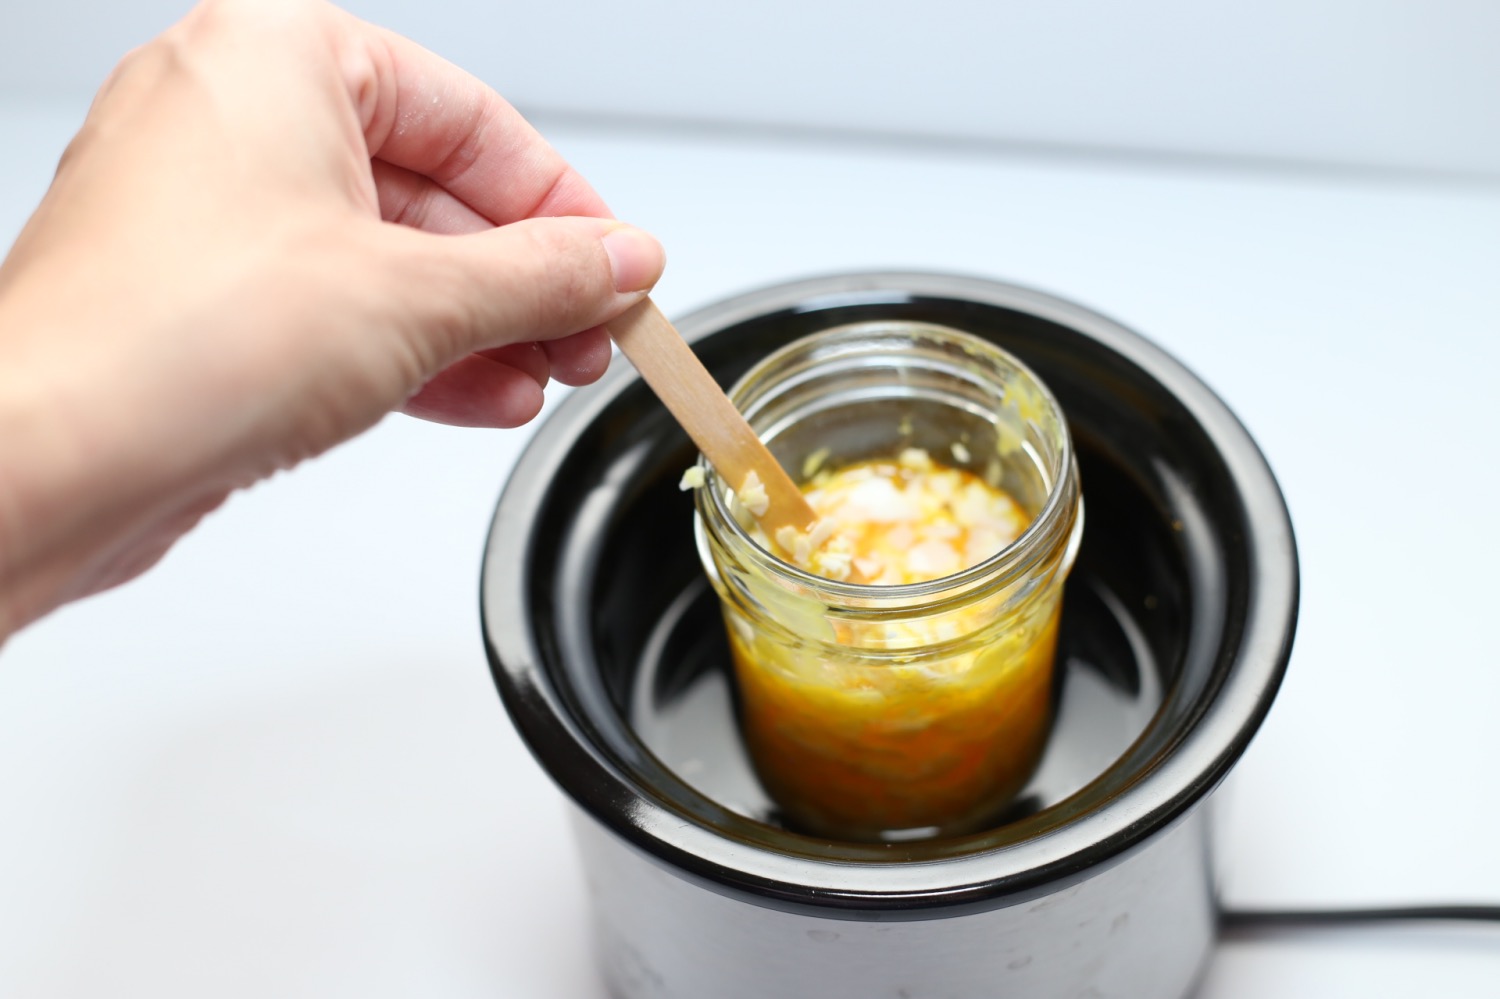
- Apply gentle heat: Gradually heat the container with the candles over a low to medium heat setting. Stir occasionally to ensure even melting. Be cautious not to overheat the wax, as it can lead to discoloration or burning.
- Monitor the melting process: Keep an eye on the candles as they melt. As the wax liquefies, you will notice a clear, smooth consistency. Stir gently to help the melting process along.
- Remove any debris: While the candles are melting, you may notice wick fragments or other debris floating in the melted wax. Use a spoon or a strainer to skim off and discard any unwanted materials.
- Continue melting until fully liquefied: Allow the candles to melt completely until the wax is smooth and free of any solid pieces. This may take around 10-15 minutes, depending on the size and type of candles you are melting.
Once the candles have melted, you’re ready to move on to the next step: adding fragrance or color to the melted wax. Stay tuned for step 4!
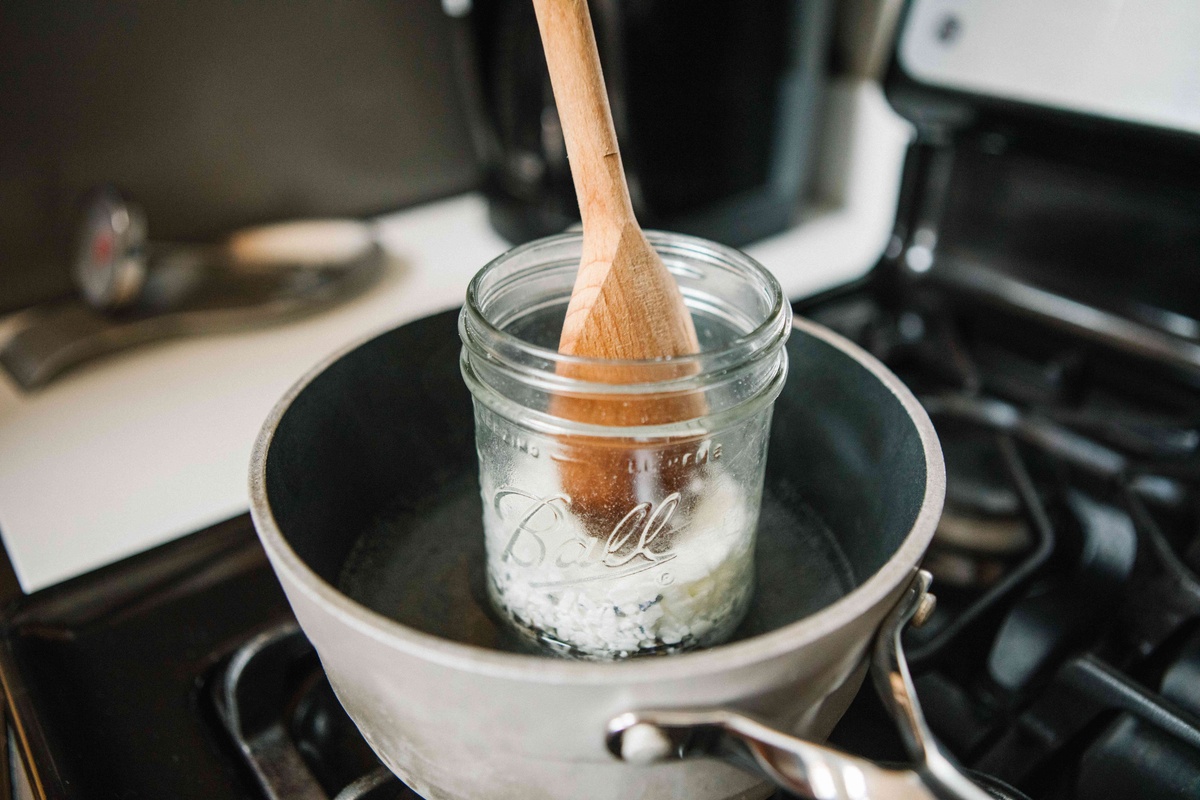
To melt Dollar Tree candles, place them in a double boiler or a heat-safe container over a pot of simmering water. This will melt the wax evenly without scorching it.
Read more: How To Melt Candles Down
Step 4: Adding Fragrance or Color (Optional)
Adding fragrance or color to your melted candles can elevate their appeal and create a personalized touch. Follow these steps to add fragrance or color to the melted wax:
- Fragrance:
- If you want to add fragrance to your melted candles, carefully choose your desired fragrance oil or essential oil. Consider scents that complement the candles you are melting and align with your preferences.
- Once the candles have melted, remove the heat-resistant container from the heat source and set it on a heat-resistant surface.
- Add a few drops of the fragrance oil or essential oil to the melted wax. Start with a small amount and gradually increase as desired, keeping in mind that some scents can be overpowering.
- Stir the melted wax gently to ensure the fragrance oil or essential oil is evenly distributed. This will help achieve a consistent scent throughout the candles.
- Color:
- If you want to add color to your melted candles, consider using candle dye or color blocks specifically designed for candle making. Choose colors that align with your aesthetic or the theme you have in mind.
- Remove the heat-resistant container from the heat source and set it on a heat-resistant surface.
- Add a small piece of the candle dye or color block to the melted wax. Start with a small amount and gradually add more to achieve the desired color intensity.
- Stir the melted wax gently to ensure the colorant is well incorporated. Keep stirring until the color is evenly distributed throughout the wax.
Remember that adding fragrance or color to your melted candles is optional. You can choose to leave them unscented or retain their original colors. Adding fragrance or color allows you to customize and make your candles more unique.
Once you have added fragrance or color to the melted wax, you’re ready to move on to the next step: pouring the melted wax into the desired container or mold. Stay tuned!
Step 5: Pouring the Melted Wax
With your melted and customized wax ready, it’s time to pour it into your desired containers or molds. Follow these steps to pour the melted wax:
- Prepare your containers or molds: Ensure that your chosen containers or molds are clean and dry. If you’re using glass jars, tin containers, or silicone molds, place them on a stable and heat-resistant surface.
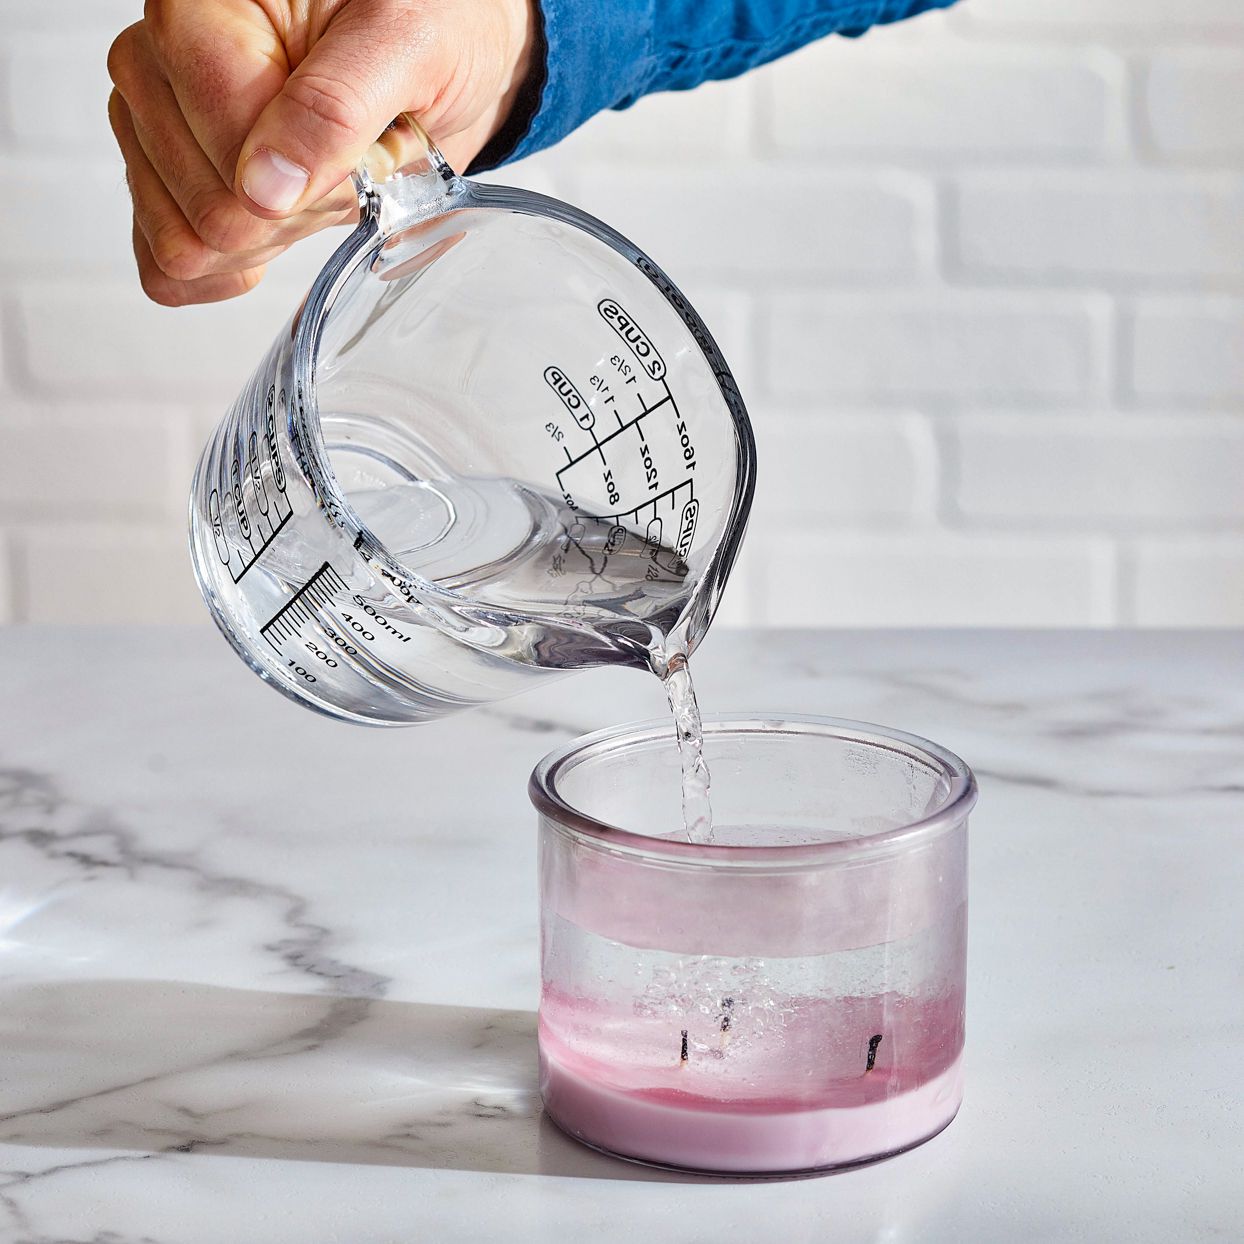
- Slowly pour the melted wax into the containers or molds: Carefully pour the wax into your selected containers, filling them to the desired level. Take your time to avoid spilling or splashing the hot wax.
- Avoid overfilling the containers or molds: Leave a small gap at the top of the containers or molds to allow space for the wick and any decorations you might want to add later.
- Keep the containers or molds steady: After pouring the wax, make sure to keep the containers or molds steady to prevent any shifting or leakage. You can use a level or place a small weight on top if needed.
Remember that the melted wax will start to solidify quickly, so work efficiently and carefully during the pouring process. If you have excess melted wax, you can pour it into additional containers or molds or save it for future projects.
Now that you’ve poured the melted wax, it’s time for the next step: cooling and setting the candles. Let’s move on!
Step 6: Cooling and Setting the Candles
Once you have poured the melted wax into the containers or molds, it’s important to allow the candles to cool and set properly. Follow these steps to ensure that your candles cool and set effectively:
- Let the candles cool naturally: Allow the candles to cool at room temperature. Avoid moving or disturbing them during this process as it can cause uneven cooling and potential cracks in the candles’ surfaces.
- Patience is key: Depending on the size and type of candles, the cooling process may take several hours or even overnight. Be patient and avoid touching or testing the candles until they are completely solidified.
- Avoid drafts or sudden temperature changes: Place the candles in a draft-free area to prevent any cool air drafts from affecting the cooling process. Sudden temperature changes can cause the wax to crack, so it’s best to maintain a consistent environment while the candles set.
- Check for any imperfections: Once the candles have completely solidified, inspect them for any imperfections, such as sinkholes or uneven surfaces. If you notice any flaws, you can always melt the candles again and pour them into new containers or molds.
Remember, the cooling and setting time may vary depending on various factors, including the size and thickness of the candles. It’s important to exercise patience throughout this step to ensure the best results.
Now that your candles have cooled and set, it’s time for the final step: trimming the wicks. Let’s proceed!
Step 7: Trimming the Wicks
After your candles have completely cooled and set, it’s time to trim the wicks. Trimming the wicks is an essential step to ensure a clean and efficient burn for your candles. Follow these steps to trim the wicks:
- Prepare your tools: Get a pair of sharp scissors or wick trimmers specifically designed for candles. Ensure they are clean and ready for use.
- Carefully examine the wicks: Inspect the wicks of each candle to determine if they need to be trimmed. Ideally, the wicks should be trimmed to approximately ¼ inch in length.
- Trim the wicks: Use the scissors or wick trimmers to gently trim the wicks to the desired length. Cut straight across for an even burn. Dispose of the trimmed wick pieces properly.
- Remove any debris: While trimming the wicks, you may notice any excess charred debris or wick residue. Use a tissue or cotton swab to gently wipe away any debris from the surface of the candles.
Trimming the wicks not only ensures a cleaner burn but also helps to prevent excessive soot or black smoke. By maintaining properly trimmed wicks, you can enjoy a longer-lasting and more efficient candle experience.
Now that you have trimmed the wicks, your candles are ready to be enjoyed. Light them up and revel in the glow and fragrance of your own custom-made candles!
Congratulations on successfully melting Dollar Tree candles and transforming them into personalized creations. Enjoy the ambiance and satisfaction of your DIY candle-making project!
Read more: How To Melt Wax To Make Candles
Conclusion
Melting Dollar Tree candles can be a fun and cost-effective way to repurpose store-bought candles and unleash your creativity. By following the step-by-step process outlined in this article, you can transform ordinary candles into unique, customized creations that reflect your personal style and preferences.
With materials readily available and easy-to-follow instructions, you can melt Dollar Tree candles to create decorative pieces for your home, thoughtful gifts for loved ones, or even start a small candle-making business. The process allows you to experiment with different scents, colors, and designs, giving you endless possibilities for creating one-of-a-kind candles.
Remember to prioritize safety throughout the melting process, and always follow the manufacturer’s instructions for the candles and other materials you use. Take your time, be patient, and enjoy the therapeutic experience of candle-making.
Whether you’re an experienced crafter or a beginner looking to explore your creative side, melting Dollar Tree candles opens up a world of possibilities. So gather your materials, prepare your candles, and let your imagination run wild as you embark on this enjoyable DIY journey.
Now that you have the knowledge and guidance, it’s time to unleash your creativity and start melting those Dollar Tree candles into beautiful works of art.
Frequently Asked Questions about How To Melt Dollar Tree Candles
Was this page helpful?
At Storables.com, we guarantee accurate and reliable information. Our content, validated by Expert Board Contributors, is crafted following stringent Editorial Policies. We're committed to providing you with well-researched, expert-backed insights for all your informational needs.