Articles
How To Melt Ice On Driveway
Modified: December 7, 2023
Looking for articles on how to melt ice on your driveway? Find the best tips and techniques for safely thawing icy surfaces and ensuring your driveway is ice-free.
(Many of the links in this article redirect to a specific reviewed product. Your purchase of these products through affiliate links helps to generate commission for Storables.com, at no extra cost. Learn more)
Introduction
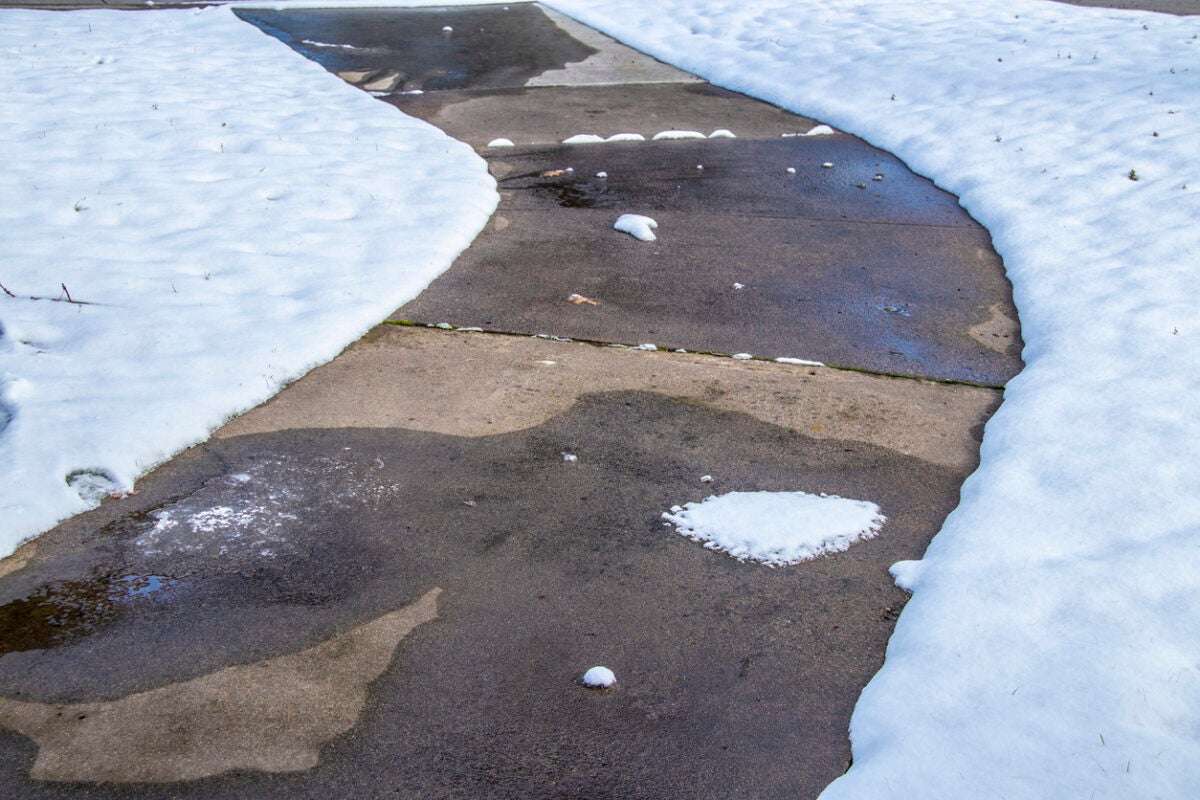
Welcome to our guide on how to melt ice on your driveway. Dealing with ice buildup can be a challenging and potentially dangerous task, especially during the winter months. The icy surface not only makes it difficult to walk and drive safely but can also cause damage to your driveway and vehicles. That’s why it’s crucial to find effective methods to melt the ice and keep your driveway clear.
In this article, we will explore different methods to melt ice on your driveway, ranging from traditional techniques to innovative solutions. We will provide insights into using salt/sand mixtures, chemical deicers, warm water, and electric heated mats to effectively combat icy conditions. Additionally, we will discuss the safety precautions you need to consider when using these methods.
Before diving into the specific methods, let’s take a moment to understand why it is important to melt ice on your driveway.
Key Takeaways:
- Prioritize safety and choose the right method to melt ice on your driveway, considering factors like effectiveness, cost, and environmental impact. Create a safer environment and protect your property.
- From traditional salt/sand mixtures to innovative electric heated mats, explore various methods to effectively melt ice on your driveway. Prioritize safety, maintain your driveway, and enjoy a clear, ice-free winter season.
Read more: How To Store Ice Melt
Why is it important to melt ice on your driveway?
Melting ice on your driveway is essential for several reasons. It not only ensures the safety of pedestrians and drivers but also protects your driveway from potential damage.
Firstly, melting ice helps prevent accidents and injuries. Walking or driving on a slippery surface increases the risk of slips, falls, and vehicle skidding. By melting the ice, you provide a safer environment for everyone, reducing the chances of accidents and the associated injuries.
Secondly, melting ice on your driveway helps to maintain its integrity. Ice can be extremely damaging to the surface of your driveway, especially when it expands and contracts due to freezing and thawing cycles. Over time, this can lead to cracks, potholes, and general deterioration. By melting the ice, you minimize the potential for freeze-thaw damage, thus prolonging the lifespan of your driveway.
Thirdly, removing ice from your driveway improves the efficiency of snow removal. If your driveway is covered in ice, it becomes harder to clean it properly when it snows. Snowplows and shovels are less effective on icy surfaces, which can lead to uneven snow removal and difficulty clearing the area. By melting the ice beforehand, you create a smoother surface that makes snow removal easier and more efficient.
Lastly, melting ice on your driveway improves accessibility. An icy driveway can make it difficult for vehicles, guests, and delivery services to access your property. This can be particularly problematic during emergencies or when you’re expecting important deliveries. By keeping your driveway ice-free, you ensure smooth access to your property and eliminate any unnecessary inconvenience.
Overall, melting ice on your driveway is crucial for safety, driveway maintenance, snow removal efficiency, and accessibility. Now that we understand why it’s important let’s explore different methods to effectively melt the ice.
Different methods to melt ice on a driveway
When it comes to melting ice on your driveway, there are several methods you can choose from. Each method has its pros and cons, so it’s important to consider factors such as effectiveness, cost, and environmental impact before deciding which one to use. Let’s explore some of the most common methods below:
1. Salt/Sand mixture
One of the most traditional and widely used methods is the application of a salt/sand mixture. This method involves spreading a combination of rock salt or calcium chloride and sand onto the icy surface. The salt helps to lower the freezing point of the ice, causing it to melt, while the sand provides traction, making it safer to walk or drive on.
Pros: This method is relatively affordable, readily available, and can be effective at melting ice. It also provides traction to prevent slips and falls.
Cons: Overuse of salt can harm plants, corrode metal surfaces, and damage concrete. Sand may need to be cleaned up after the ice melts, and it does not actively melt the ice like other methods.
2. Chemical deicers
Chemical deicers, such as calcium magnesium acetate (CMA) or potassium acetate, are another popular option. These products are specifically designed to melt ice and prevent its reformation. They are typically available in granular or liquid form and can be applied directly to the icy surface.
Pros: Chemical deicers are highly effective at melting ice, even at lower temperatures. They usually have minimal environmental impact and are less corrosive than traditional salt-based mixtures.
Cons: Chemical deicers can be more expensive than other methods, and repeated use may be necessary for prolonged icy conditions.
Read more: How To Melt Ice On Composite Decking
3. Warm water
If you’re looking for a natural and cost-effective option, you can melt ice on your driveway using warm water. Boiling water or using hot tap water can help to rapidly melt the ice, making it easier to remove or break up.
Pros: Warm water is readily available and inexpensive. It can quickly melt the ice and doesn’t pose any environmental concerns.
Cons: This method is more suitable for small areas, as it may require a significant amount of hot water for larger driveways. There’s also the risk of the water refreezing if the ambient temperature is below freezing.
4. Electric heated mats
For a convenient and long-term solution, electric heated mats are worth considering. These mats can be installed on your driveway and are designed to melt ice and snow. They usually have adjustable settings and can be controlled by a thermostat.
Pros: Electric heated mats offer a hands-free approach to melting ice. They are energy-efficient and can be controlled to only operate when needed. They provide consistent melting throughout the winter season.
Cons: Electric heated mats require upfront installation costs and may have an impact on your energy consumption. The mats need to be properly maintained and monitored for any damages or malfunctions.
Now that we have explored different methods to melt ice on your driveway, let’s move on to discussing the safety precautions you need to consider when using these methods.
Salt/Sand Mixture
A salt/sand mixture is one of the most common and traditional methods used to melt ice on driveways. This method involves spreading a combination of rock salt or calcium chloride and sand onto the icy surface. The salt helps to lower the freezing point of the ice, causing it to melt, while the sand provides traction, making it safer to walk or drive on.
When using a salt/sand mixture, it’s important to follow these steps:
Step 1: Prepare the mixture
Start by combining rock salt or calcium chloride with sand. The ratio of salt to sand can vary depending on the severity of the ice and personal preference. It’s generally recommended to use a higher proportion of sand to provide better traction.
Read more: How To Remove Ice On Driveway
Step 2: Spread the mixture
Using a shovel or spreader, evenly distribute the salt/sand mixture across the icy surface of your driveway. Pay extra attention to areas with thick ice or high foot traffic. Make sure to cover the entire surface for effective melting and traction.
Step 3: Allow time for melting
After spreading the salt/sand mixture, allow time for the salt to work its magic and melt the ice. This may take some time depending on the temperature and severity of the ice. Avoid walking or driving on the treated area until the ice has sufficiently melted.
Step 4: Monitor and reapply
Keep an eye on the treated area and monitor the ice melting progress. If necessary, reapply the salt/sand mixture to areas that have not fully melted or where new ice has formed. It’s important to remain vigilant, especially during harsh winter conditions.
While the salt/sand mixture method is effective in melting ice, there are a few considerations to keep in mind:
Pros:
- Relatively affordable and readily available
- Provides traction to prevent slips and falls
Cons:
- Overuse of salt can harm plants, corrode metal surfaces, and damage concrete
- Sand may need to be cleaned up after the ice melts and does not actively melt the ice like other methods
It’s important to be mindful of the environmental impact of using excessive salt. Consider using alternative methods or reducing the amount of salt used if possible. Additionally, regularly sweeping or hosing down your driveway in the spring can help remove any leftover salt residue.
Now that we have covered the salt/sand mixture method, let’s explore other methods to melt ice on driveways.
Chemical Deicers
Chemical deicers are another popular method for melting ice on driveways. These products are specifically designed to melt ice and prevent its reformation. They are available in granular or liquid form and can be applied directly to the icy surface.
Here are the steps to effectively use chemical deicers:
Read more: Why Is My Ice Melting In My Ice Maker
Step 1: Choose the right deicer
There are several types of chemical deicers available, including calcium magnesium acetate (CMA), potassium acetate, and sodium chloride. Consider the temperature range and environmental impact of each option before making a choice.
Step 2: Read and follow instructions
Before applying a chemical deicer, carefully read and follow the instructions provided by the manufacturer. This includes guidance on the proper application rates and any necessary safety precautions.
Step 3: Apply the deicer
Using a spreader or by hand, evenly distribute the deicer granules or spray the liquid on the icy surface. Pay extra attention to areas with thicker ice or high foot traffic. Ensure even coverage for effective ice melting.
Step 4: Allow time for melting
Give the chemical deicer time to work and melt the ice. This may take some time depending on the temperature and thickness of the ice. Avoid walking or driving on the treated area until the ice has sufficiently melted.
Read more: What Ice Melt Is Safe For Trex Decking
Step 5: Reapply as needed
Monitor the treated area and reapply the chemical deicer as necessary. If ice starts to form again or certain areas have not melted completely, additional application may be required. Follow the instructions for frequency of reapplication.
When using chemical deicers, it’s important to consider the pros and cons:
Pros:
- Highly effective at melting ice, even at lower temperatures
- Usually have minimal environmental impact
- Less corrosive than traditional salt-based mixtures
Cons:
- Can be more expensive than other methods
- Repeated use may be necessary for prolonged icy conditions
Keep in mind that some chemical deicers can still have a negative impact on plants, pets, and concrete surfaces. Be sure to follow the manufacturer’s instructions and apply the deicer responsibly to minimize any potential harm.
Now that we have covered the chemical deicers method, let’s explore other methods to melt ice on driveways.
Warm Water
Using warm water is a natural and cost-effective method to melt ice on your driveway. By adding heat to the ice, you can speed up the melting process and make it easier to remove or break up the ice.
Here are the steps to effectively use warm water to melt ice on your driveway:
Step 1: Boil water or use hot tap water
Start by boiling water on the stove or using hot tap water. You can use a kettle or heat-resistant container to boil the water. Alternatively, simply collect hot water from your tap.
Step 2: Pour the warm water onto the ice
Carefully and evenly pour the warm water onto the icy surface of your driveway. Start at one end and work your way across, ensuring that the water covers the entire icy area.
Step 3: Allow time for melting
Give the warm water time to work its magic and melt the ice. This may take some time, depending on the thickness of the ice and the ambient temperature. Avoid walking or driving on the treated area until the ice has sufficiently melted.
Step 4: Clear the melted ice
Once the ice has melted, use a shovel, broom, or ice scraper to clear the slushy mixture from your driveway. Be careful not to re-freeze any excess water by scraping or shoveling it to the side or into a drain.
When using warm water to melt ice, there are a few things to consider:
Pros:
- Readily available and inexpensive
- Quickly melts ice and doesn’t pose any environmental concerns
Cons:
- More suitable for smaller areas, as it may require a significant amount of hot water for larger driveways
- The risk of the water refreezing if the ambient temperature is below freezing
While warm water is an effective method, it is important to exercise caution when handling hot water and working with icy surfaces. Be aware of any potential hazards, such as slipping on the melted ice or burns from handling hot water.
Now that we have covered the warm water method, let’s explore other methods to melt ice on driveways.
Electric Heated Mats
Electric heated mats provide a convenient and long-term solution for melting ice on your driveway. These mats are designed to be installed on your driveway and are equipped with heating elements that effectively melt ice and snow.
Here are the steps to effectively use electric heated mats to melt ice on your driveway:
Step 1: Prepare the area
Clean and clear the area where the electric heated mats will be installed. Remove any debris, snow, or ice from the surface of your driveway. Ensure that the area is dry and free from any obstructions.
Step 2: Install the mats
Follow the manufacturer’s instructions to properly install the electric heated mats on your driveway. Most mats are designed to be connected to an electrical outlet. Make sure the mats are securely fastened and positioned correctly to cover the desired area.
Step 3: Connect and control the mats
Connect the electric heated mats to a power source and control them using the provided thermostat or timer. Adjust the temperature settings according to the severity of the ice and snow buildup. Some mats can be programmed to operate at specific times or heated on-demand.
Step 4: Monitor and maintain
Regularly monitor the performance of the electric heated mats and ensure they are functioning properly. Clear any accumulated snow or ice from the mats and inspect them for any damage or malfunctions. Follow the manufacturer’s maintenance guidelines to prolong the lifespan of the mats.
Using electric heated mats to melt ice on your driveway has several advantages and considerations:
Pros:
- Offer a hands-free approach to melting ice
- Energy-efficient and can be controlled to only operate when needed
- Provide consistent melting throughout the winter season
Cons:
- Require upfront installation costs
- May impact your energy consumption
- Need to be properly maintained and monitored for any damages or malfunctions
Electric heated mats are a convenient and effective solution for melting ice on driveways, particularly for those who want a hassle-free method. However, it’s important to ensure proper installation and maintenance to maximize the efficiency and longevity of the mats.
Now that we have covered the electric heated mats method, let’s move on to discussing the safety precautions you need to consider when melting ice on your driveway.
Safety Precautions to Consider
When melting ice on your driveway, it’s important to prioritize safety. Follow these precautions to ensure a safe and effective ice melting process:
Read more: How To Store Melted Butter
1. Wear protective gear
When applying deicers or working with warm water, wear protective gloves, goggles, and non-slip shoes to prevent any potential harm from chemicals or slipping on the ice.
2. Read and follow instructions
Always read and follow the manufacturer’s instructions when using deicers or other ice melting methods. Use the recommended amount of product and follow any safety guidelines provided.
3. Store deicers properly
Keep deicers out of reach of children and pets. Store them in a cool, dry place to maintain their effectiveness and prevent accidental ingestion or exposure.
4. Avoid overuse of chemicals
Excessive use of chemical deicers can harm plants, corrode metal surfaces, and damage concrete. Use them sparingly and consider alternative methods to minimize environmental impact.
Read more: How To Store Wax Melts
5. Clear snow before applying deicers
Remove any excess snow on the surface before applying deicers. This helps ensure even melting and prevents runoff or pooling of melted ice, which can refreeze and create hazardous conditions.
6. Be mindful of temperature conditions
Consider the temperature conditions when choosing the method to melt ice. Some methods may be less effective in extremely low temperatures, and refreezing can occur if the temperature drops below freezing after melting.
7. Keep an eye on weather forecasts
Stay updated on weather forecasts, especially during winter storms. Being prepared and proactive can help you prevent ice build-up on your driveway and take appropriate measures in advance.
8. Use caution while walking or driving
Even with ice melting methods, always exercise caution while walking or driving on your driveway during icy conditions. While the ice may be melted in certain areas, residual moisture can still make surfaces slippery.
Read more: How To Melt Candles Down
9. Regularly inspect your driveway
Inspect your driveway regularly for any cracks, potholes, or other damage caused by ice or ice melting methods. Address any issues promptly to prevent further deterioration.
By following these safety precautions, you can ensure a safe and effective ice melting process for your driveway. Taking the necessary precautions not only protects your property but also promotes the well-being of those using the driveway.
Now that we have covered safety precautions, let’s conclude our guide on how to melt ice on your driveway.
Conclusion
Melting ice on your driveway is essential to ensure the safety of pedestrians and drivers, protect your driveway from damage, and improve accessibility to your property. In this guide, we explored various methods to effectively melt ice on your driveway.
We started with the traditional salt/sand mixture, which provides both ice melting properties and traction. While affordable and widely available, it’s important to be cautious of the environmental impact and potential damage to plants and surfaces.
Next, we discussed the use of chemical deicers, which are specifically designed to melt ice and prevent its reformation. These deicers offer effective ice melting even at lower temperatures and have less environmental impact compared to traditional salt-based mixtures.
For a natural and cost-effective method, warm water can be used to accelerate the melting process. While suitable for smaller areas, it may require a significant amount of hot water for larger driveways and carries the risk of refreezing if the ambient temperature is below freezing.
Lastly, we explored the convenience and long-term solution of electric heated mats. These mats provide hands-free ice melting throughout the winter season but require upfront installation costs and proper maintenance.
Regardless of the method you choose, it’s important to prioritize safety. Wear protective gear, follow instructions, store deicers properly, and be mindful of temperature conditions. Clear snow before applying deicers, check weather forecasts, use caution while walking or driving, and regularly inspect your driveway for any damage.
By implementing these methods and precautions, you can effectively melt ice on your driveway, create a safer environment, protect your property, and improve accessibility.
Remember to choose the method that best suits your needs, taking into consideration factors such as effectiveness, cost, and environmental impact. Stay safe and enjoy a clear, ice-free driveway throughout the winter season!
Frequently Asked Questions about How To Melt Ice On Driveway
Was this page helpful?
At Storables.com, we guarantee accurate and reliable information. Our content, validated by Expert Board Contributors, is crafted following stringent Editorial Policies. We're committed to providing you with well-researched, expert-backed insights for all your informational needs.


0 thoughts on “How To Melt Ice On Driveway”