Articles
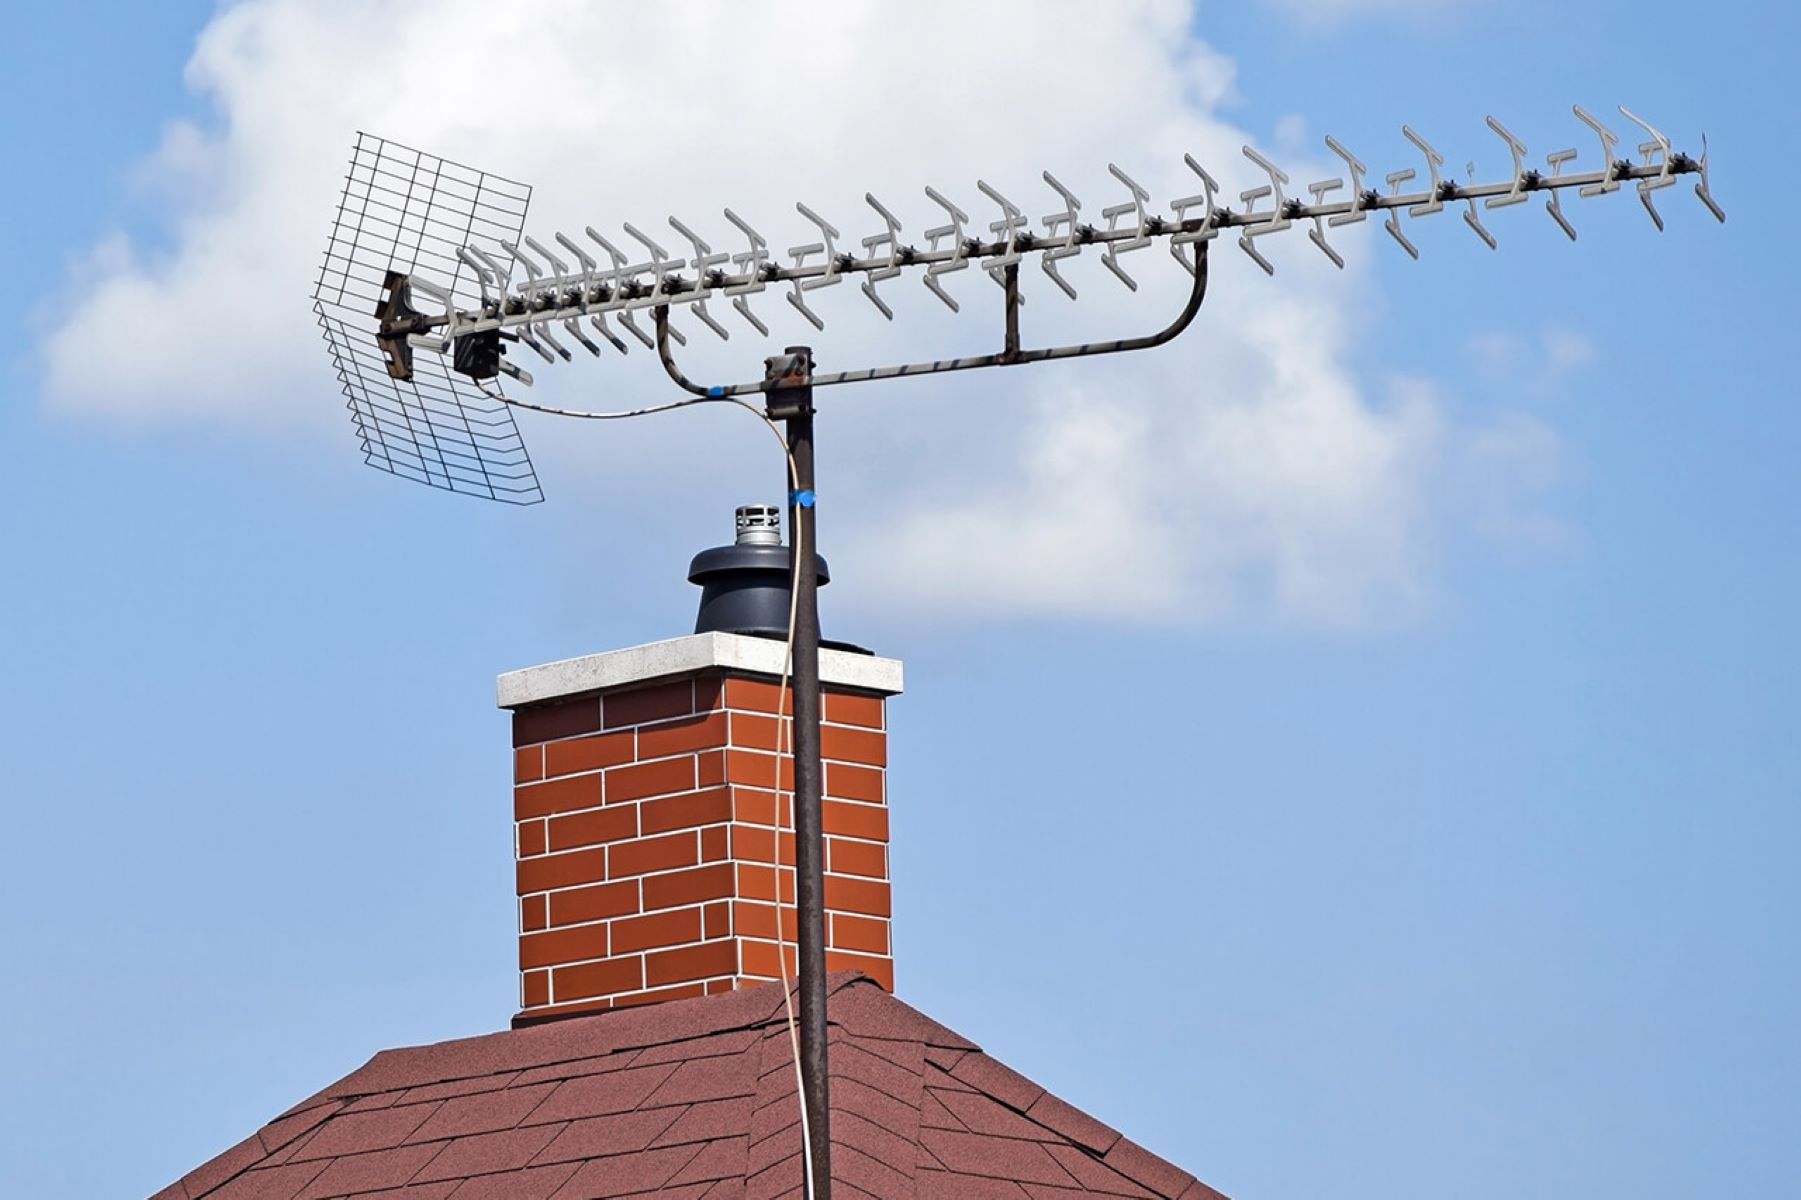
How To Mount An Antenna On A Chimney
Modified: December 7, 2023
Learn how to mount an antenna on a chimney with our informative articles. Find step-by-step guides and expert tips for a successful installation.
(Many of the links in this article redirect to a specific reviewed product. Your purchase of these products through affiliate links helps to generate commission for Storables.com, at no extra cost. Learn more)
Introduction
Welcome to our guide on how to mount an antenna on a chimney! If you”re looking to improve your TV reception or access a wider range of channels, mounting an antenna on your chimney can be an excellent option. Chimneys provide an elevated position for the antenna, allowing for better signal reception and reduced interference.
However, before you embark on this project, it”s important to ensure that you take the necessary safety precautions and gather all the materials and tools required. In this article, we will provide you with a step-by-step guide to help you mount an antenna on your chimney successfully.
Remember, safety should be your top priority throughout the entire process. If you feel uncomfortable working at heights or if your chimney is unstable, it”s best to hire a professional installer to do the job. Now, let”s dive into the safety precautions you need to consider.
Key Takeaways:
- Prioritize safety when mounting an antenna on your chimney by assessing the structure, using proper safety equipment, and being cautious around power lines. Consult a professional if needed for a secure and successful installation.
- Choose the right antenna, gather necessary materials and tools, and follow step-by-step instructions to mount the antenna, connect it to your TV, and test the signal for improved TV reception and access to a wide range of channels.
Read also: 11 Best Antenna Chimney Mount For 2025
Safety Precautions
Before you begin the process of mounting an antenna on your chimney, it is crucial to prioritize your safety. Working at heights and with potentially heavy equipment can be hazardous, so make sure to follow these safety precautions:
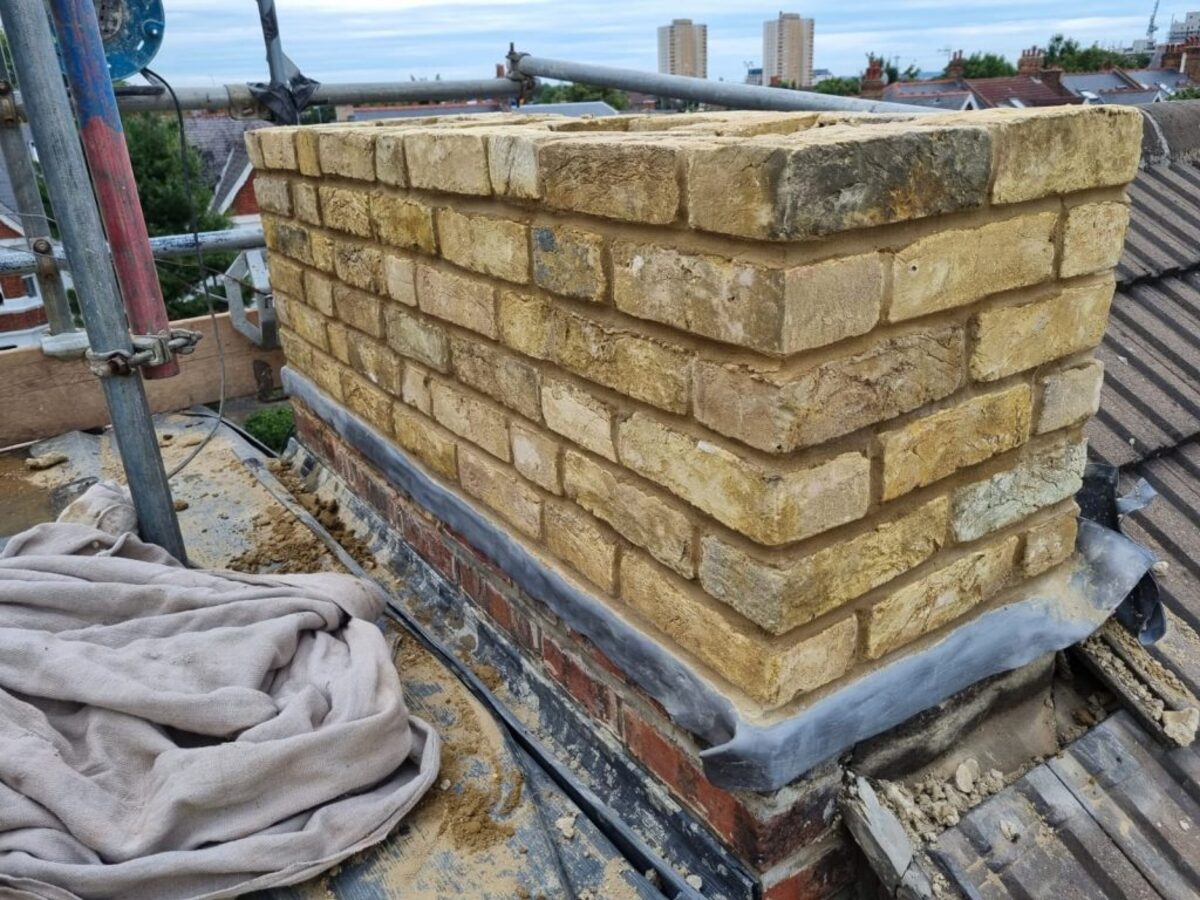
- Check the condition of your chimney: Ensure that your chimney is structurally sound and in good condition. Look for any signs of cracking, loose bricks, or instability. If you notice any issues, it”s best to have a professional inspect and repair the chimney before proceeding.
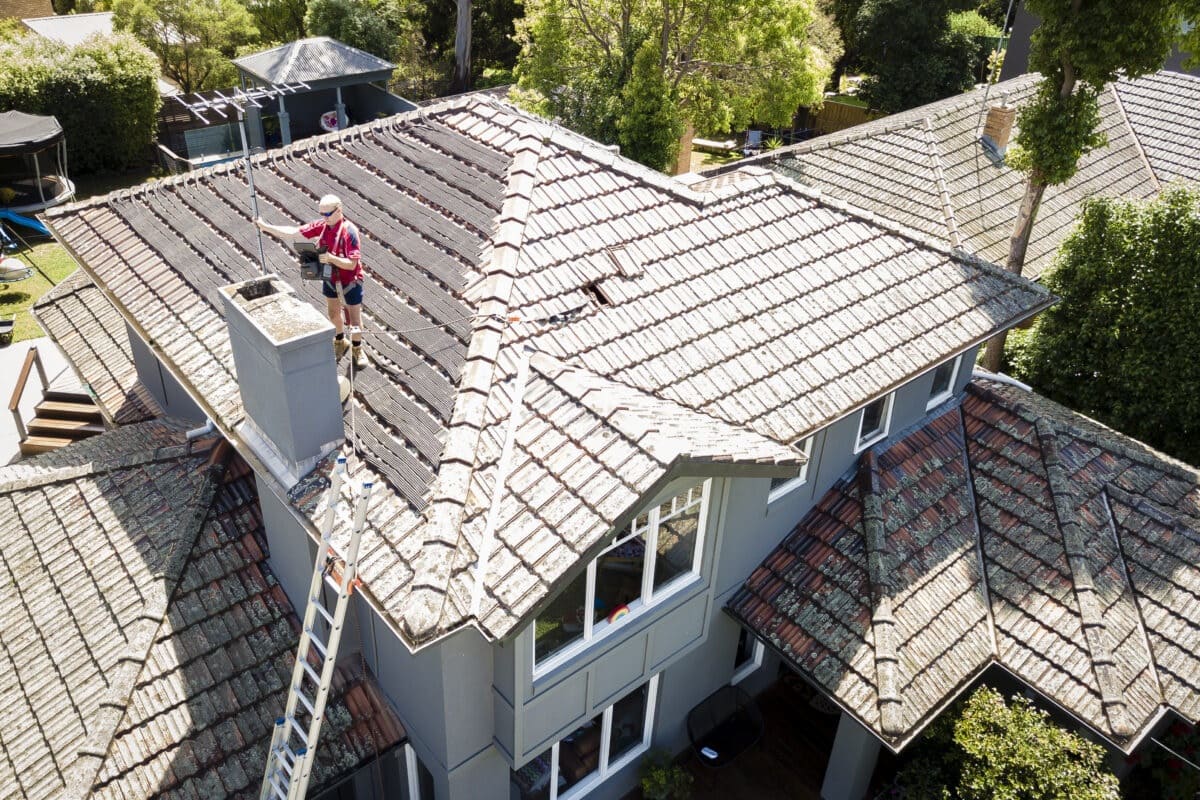
- Use proper safety equipment: Wear a sturdy pair of non-slip shoes or boots to ensure good traction while working on the roof. Additionally, consider using a safety harness or fall protection gear to prevent any accidents.
- Check for overhead power lines: Look for nearby electrical lines or cables that could pose a risk while working on the chimney. Make sure to maintain a safe distance from these power sources to avoid any electrical hazards.
- Keep your workspace clear: Remove any clutter or debris from your work area on the roof. This will help prevent any tripping hazards and ensure a safe and organized workspace.
- Use proper lifting techniques: If you need to lift heavy equipment or tools onto the roof, make sure to use proper lifting techniques to avoid strains or injuries. Ask for assistance if necessary.
- Check the weather conditions: Avoid working on the roof during inclement weather or strong winds. Slippery surfaces can increase the risk of accidents, so wait for clear and calm weather conditions before starting the installation.
- Secure the ladder: When using a ladder to access the roof, ensure that it is placed on a stable and level surface. Use ladder stabilizers or tie-offs to prevent it from slipping or shifting while you climb.
- Use caution around the chimney: Be mindful of the chimney”s heat and potential loose bricks or mortar. Avoid touching hot surfaces and take care not to dislodge any loose materials that could fall from the chimney.
By following these safety precautions, you can minimize the risks associated with mounting an antenna on your chimney and ensure a safe and successful installation process. Now that you are aware of the safety measures to take, let”s move on to the materials and tools you will need for the project.
Materials Needed
Before you start the process of mounting an antenna on your chimney, it’s important to gather all the necessary materials. Here’s a list of the materials you will need:
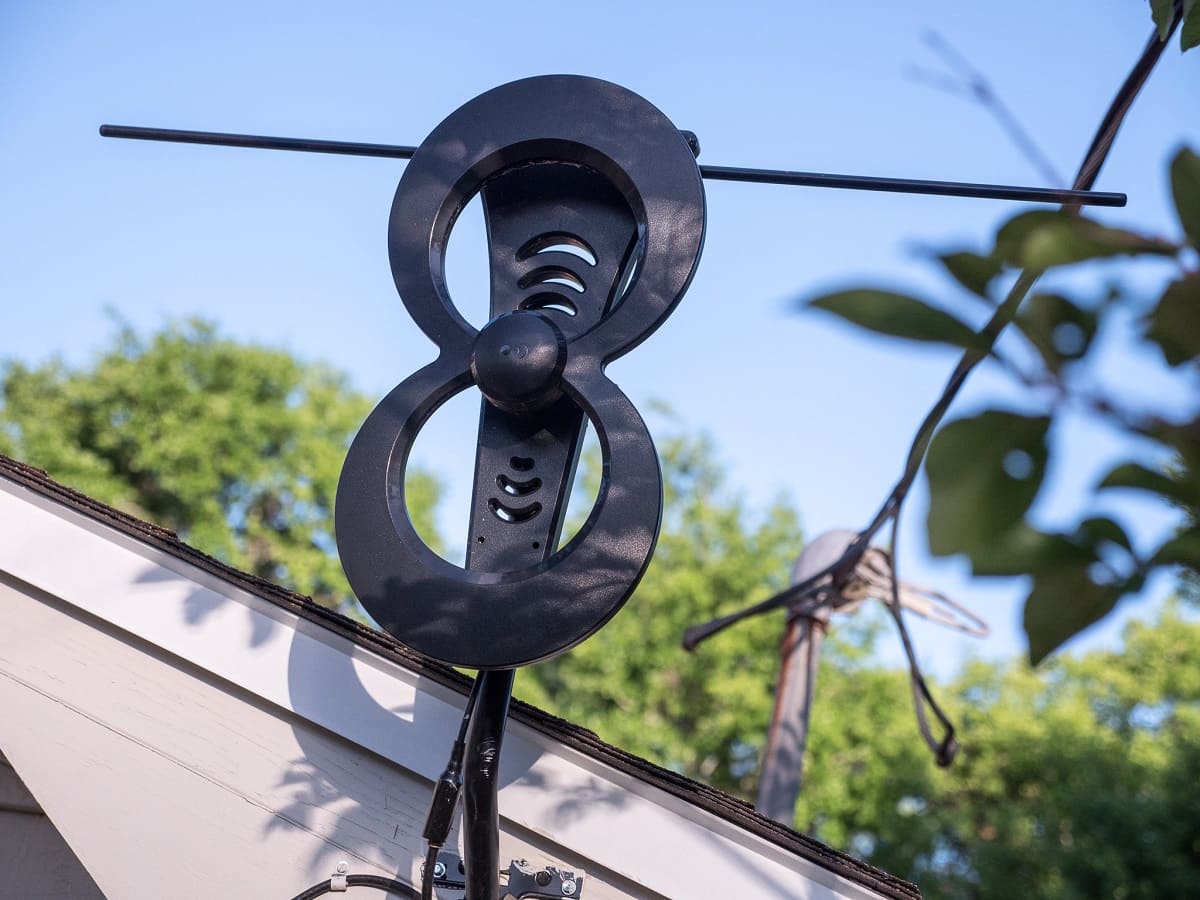
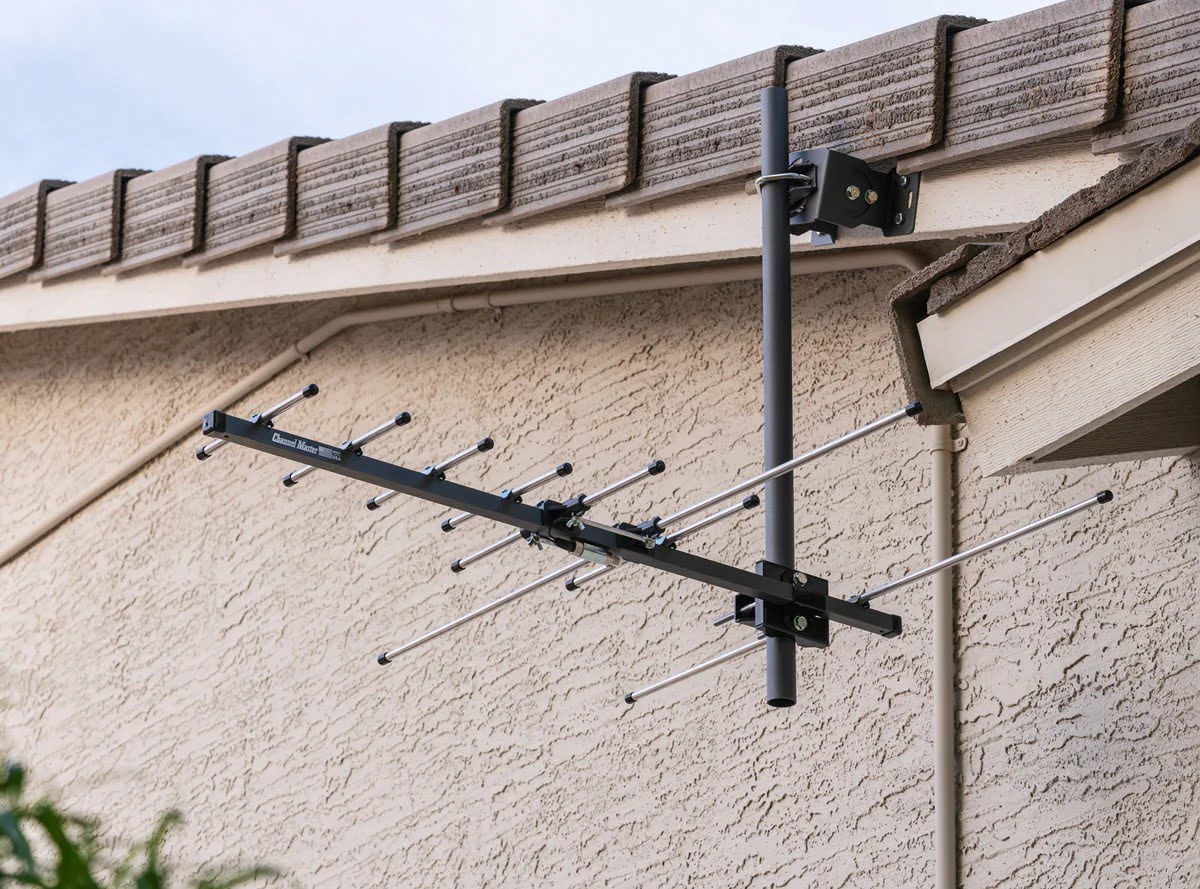
- Antenna: Choose an antenna that is suitable for your specific needs, such as a digital TV antenna or a satellite dish. Consider factors like the range, signal strength, and compatibility with your television or receiver.
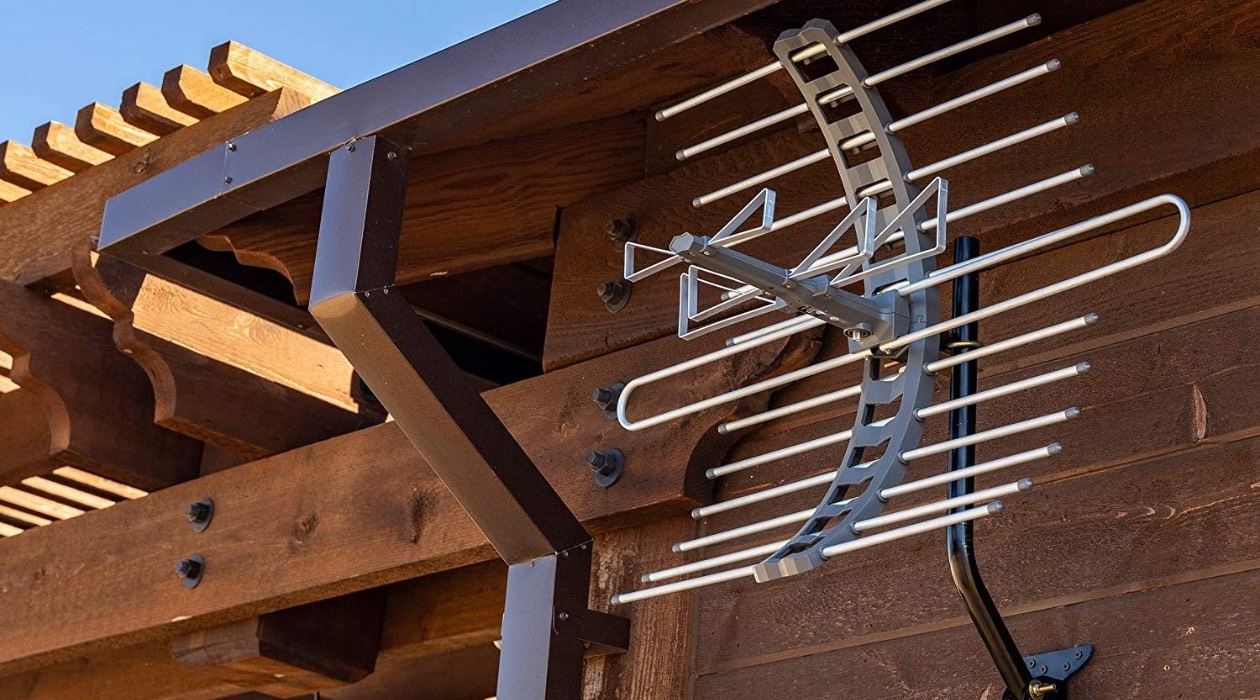
- Mounting bracket: Purchase a sturdy mounting bracket that is designed for chimney installations. Look for one that is adjustable, corrosion-resistant, and able to support the weight of your antenna.
- Antenna mast: An antenna mast is a pole or pipe that holds the antenna above the roofline. Choose a mast that is strong, weather-resistant, and of sufficient length to accommodate the height of your chimney.
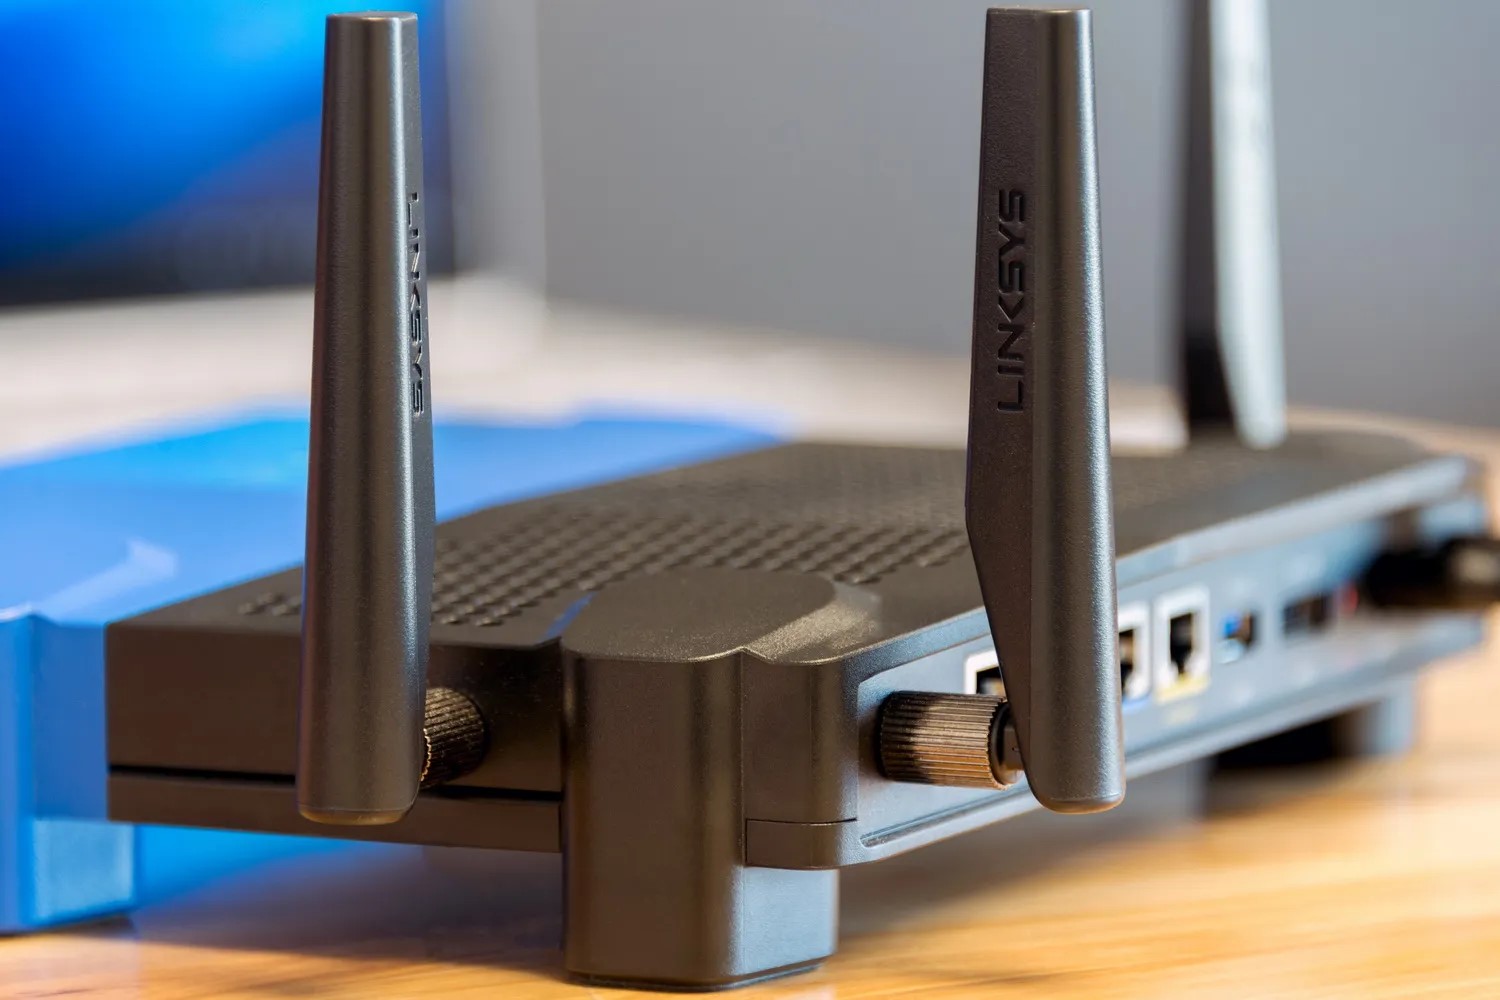
- Coaxial cable: You will need a length of coaxial cable to connect the antenna to your TV or receiver. Make sure to choose a high-quality cable that is suitable for outdoor use and has the necessary connectors.
- Grounding materials: It is important to properly ground your antenna for safety and to minimize the risk of lightning damage. Gather the necessary grounding rods, clamps, wire, and grounding block or plate.
- Hardware: Purchase the required hardware, such as screws, bolts, nuts, washers, and brackets, to secure the mounting bracket, antenna, and mast.
- Tools: Ensure you have the appropriate tools for the installation, including a ladder, drill, screwdriver, wrench, tape measure, level, pliers, cable cutter, and grounding tool.
- Sealant: Choose a high-quality weatherproof sealant to protect the area where the mast or mounting bracket attaches to the chimney. This will help prevent water leakage and ensure a secure installation.
- Safety equipment: Don’t forget to have safety equipment on hand, including a safety harness, safety glasses, gloves, and a hard hat if needed.
Make sure to gather all these materials before starting the installation process. Having everything ready will save you time and ensure a smoother and more efficient process. With the materials on hand, you’re now ready to move on to the first step: assessing the chimney.
Step 1: Assessing the Chimney
Before you begin the process of mounting an antenna on your chimney, it’s essential to assess the chimney’s suitability for installation. Here are the key points to consider during this assessment:
- Chimney Stability: Examine the chimney to ensure that it is structurally sound and can safely support the weight of the antenna and mounting hardware. Look for any signs of cracking, leaning, or loose bricks. If you have any concerns about the stability of the chimney, it is recommended to consult with a professional before proceeding.
- Chimney Material: Different chimney materials may require different mounting techniques. Assess the material of your chimney, whether it is brick, stone, metal, or another type, to determine the appropriate mounting method. Some materials may require additional hardware or techniques to ensure a secure and stable installation.
- Chimney Location: Consider the location of the chimney in relation to the surrounding environment. Is it exposed to strong winds, extreme weather conditions, or excessive moisture? Understanding these factors will help you choose the right materials and safeguard the antenna from potential damage.
- Chimney Height: Measure the height of the chimney to determine the length of the antenna mast you will need. Make sure the mast height allows for sufficient clearance above the roofline to ensure optimal signal reception.
- Roof Accessibility: Assess the accessibility of the roof where the chimney is located. Ensure that you have a safe and secure way to access the roof, such as a stable ladder or scaffolding. This will facilitate the installation process and ensure your safety while working at heights.
By thoroughly assessing your chimney, you will have a better understanding of its suitability for mounting an antenna. If you have any doubts or concerns during this assessment, it is advisable to consult with a professional before proceeding. Once you are confident in your chimney’s condition, you can move on to the next step: choosing the right antenna.
Step 2: Choosing the Right Antenna
Choosing the right antenna is crucial to ensure optimal TV reception and a satisfactory viewing experience. Here are some factors to consider when selecting an antenna:
- Signal Strength: Determine the signal strength in your area by checking online resources or using a signal strength app. This will help you choose an antenna with the appropriate range and capabilities to receive the available channels.
- Indoor or Outdoor: Decide whether you prefer an indoor or outdoor antenna. Outdoor antennas generally provide better reception as they are not obstructed by walls, but indoor antennas are more convenient and easier to install.
- Antenna Type: There are various types of antennas available, including multidirectional, unidirectional, and amplified antennas. Consider factors such as the broadcast tower locations and the direction of the signals to determine the best antenna type for your needs.
- Compatibility: Ensure that the selected antenna is compatible with your TV or receiver. Check the specifications and connections required to connect the antenna to your device.
- Appearance: Take into account the aesthetics of the antenna, especially if it will be installed in a visible location. Choose an antenna that blends well with your home’s exterior and doesn’t detract from its appearance.
- Reviews and Ratings: Read reviews and consider the ratings of different antennas to get a better understanding of their performance and reliability. Look for antennas with positive reviews and high ratings from customers.
It’s important to note that the antenna you choose should be capable of receiving the specific type of signals available in your area, whether that’s for digital TV, satellite, or other broadcasting mediums. Consider consulting with an antenna specialist or retailer to ensure that you select the most suitable antenna for your needs and geographic location.
Once you have chosen the right antenna, you can proceed to the next step: gathering the necessary tools for the installation process.
Step 3: Gathering the Necessary Tools
Before you begin mounting the antenna on your chimney, it’s important to gather all the necessary tools. Here’s a list of tools you will need for a successful installation:
- Ladder: A sturdy ladder is essential for accessing the roof and working at heights. Make sure it is in good condition and properly positioned for safe use.
- Drill: A drill will be needed for pre-drilling holes in the chimney and attaching the mounting bracket.
- Screwdriver: Use a screwdriver for tightening screws or bolts during the installation process.
- Wrench: A wrench will be needed for tightening nuts or bolts during the assembly of the antenna, mounting bracket, and mast.
- Tape Measure: Use a tape measure to accurately measure the height of the chimney and the distance for antenna placement.
- Level: A level is necessary to ensure that the mounting bracket and antenna are installed perfectly straight.
- Pliers: Pliers can be useful for holding and manipulating small parts during the installation process.
- Cable Cutter: A cable cutter is essential for trimming the coaxial cable to the desired length.
- Grounding Tool: For proper grounding, obtain a grounding tool to create the necessary grounding connections.
- Safety Equipment: Don’t forget to wear safety equipment such as gloves, safety glasses, and a hard hat if needed.
Make sure to double-check that you have all the required tools before starting the installation process. Having everything readily available will make the process smoother and more efficient. Once you have gathered the necessary tools, you can move on to the next step: measuring and marking the antenna placement.
Step 4: Measuring and Marking the Antenna Placement
Measuring and marking the antenna placement on the chimney is a crucial step in ensuring proper installation. Follow these steps to accurately measure and mark the antenna placement:
- Ascertain the ideal height: Determine the ideal height for the antenna by considering the height of the chimney and any obstructions in the surrounding area. A higher placement will generally provide better signal reception.
- Measure the distance from the edge: Measure the distance from the edge of the chimney to determine the optimal placement for the antenna. This distance will depend on the specific antenna and its recommended installation distance from any obstacles.
- Mark the antenna placement: Use a pencil or marker to mark the chosen location on the chimney where the bottom of the mounting bracket will be placed. Ensure the mark is clearly visible and easily identifiable.
- Measure the height of the chimney: Measure the height of the chimney from the roofline to determine the necessary length of the antenna mast. Take into account any additional clearance required above the roofline for optimal signal reception.
- Mark the mast placement: Decide on the desired location for the antenna mast and mark it on the chimney. This mark should indicate the spot where the bottom of the mast will be secured.
- Double-check the measurements: Before proceeding further, double-check all measurements to ensure accuracy. It’s important to be precise in order to achieve the best signal reception and overall installation.
Taking the time to measure and mark the antenna placement correctly will contribute to a successful and effective installation. Proper antenna placement is crucial for optimal signal reception and minimizing interference. With the antenna placement marked, you can now move on to the next step: assembling the mounting bracket.
When mounting an antenna on a chimney, use a sturdy mounting bracket and ensure it is securely attached to the chimney to withstand wind and weather. Also, use waterproof sealant to protect the chimney from potential water damage.
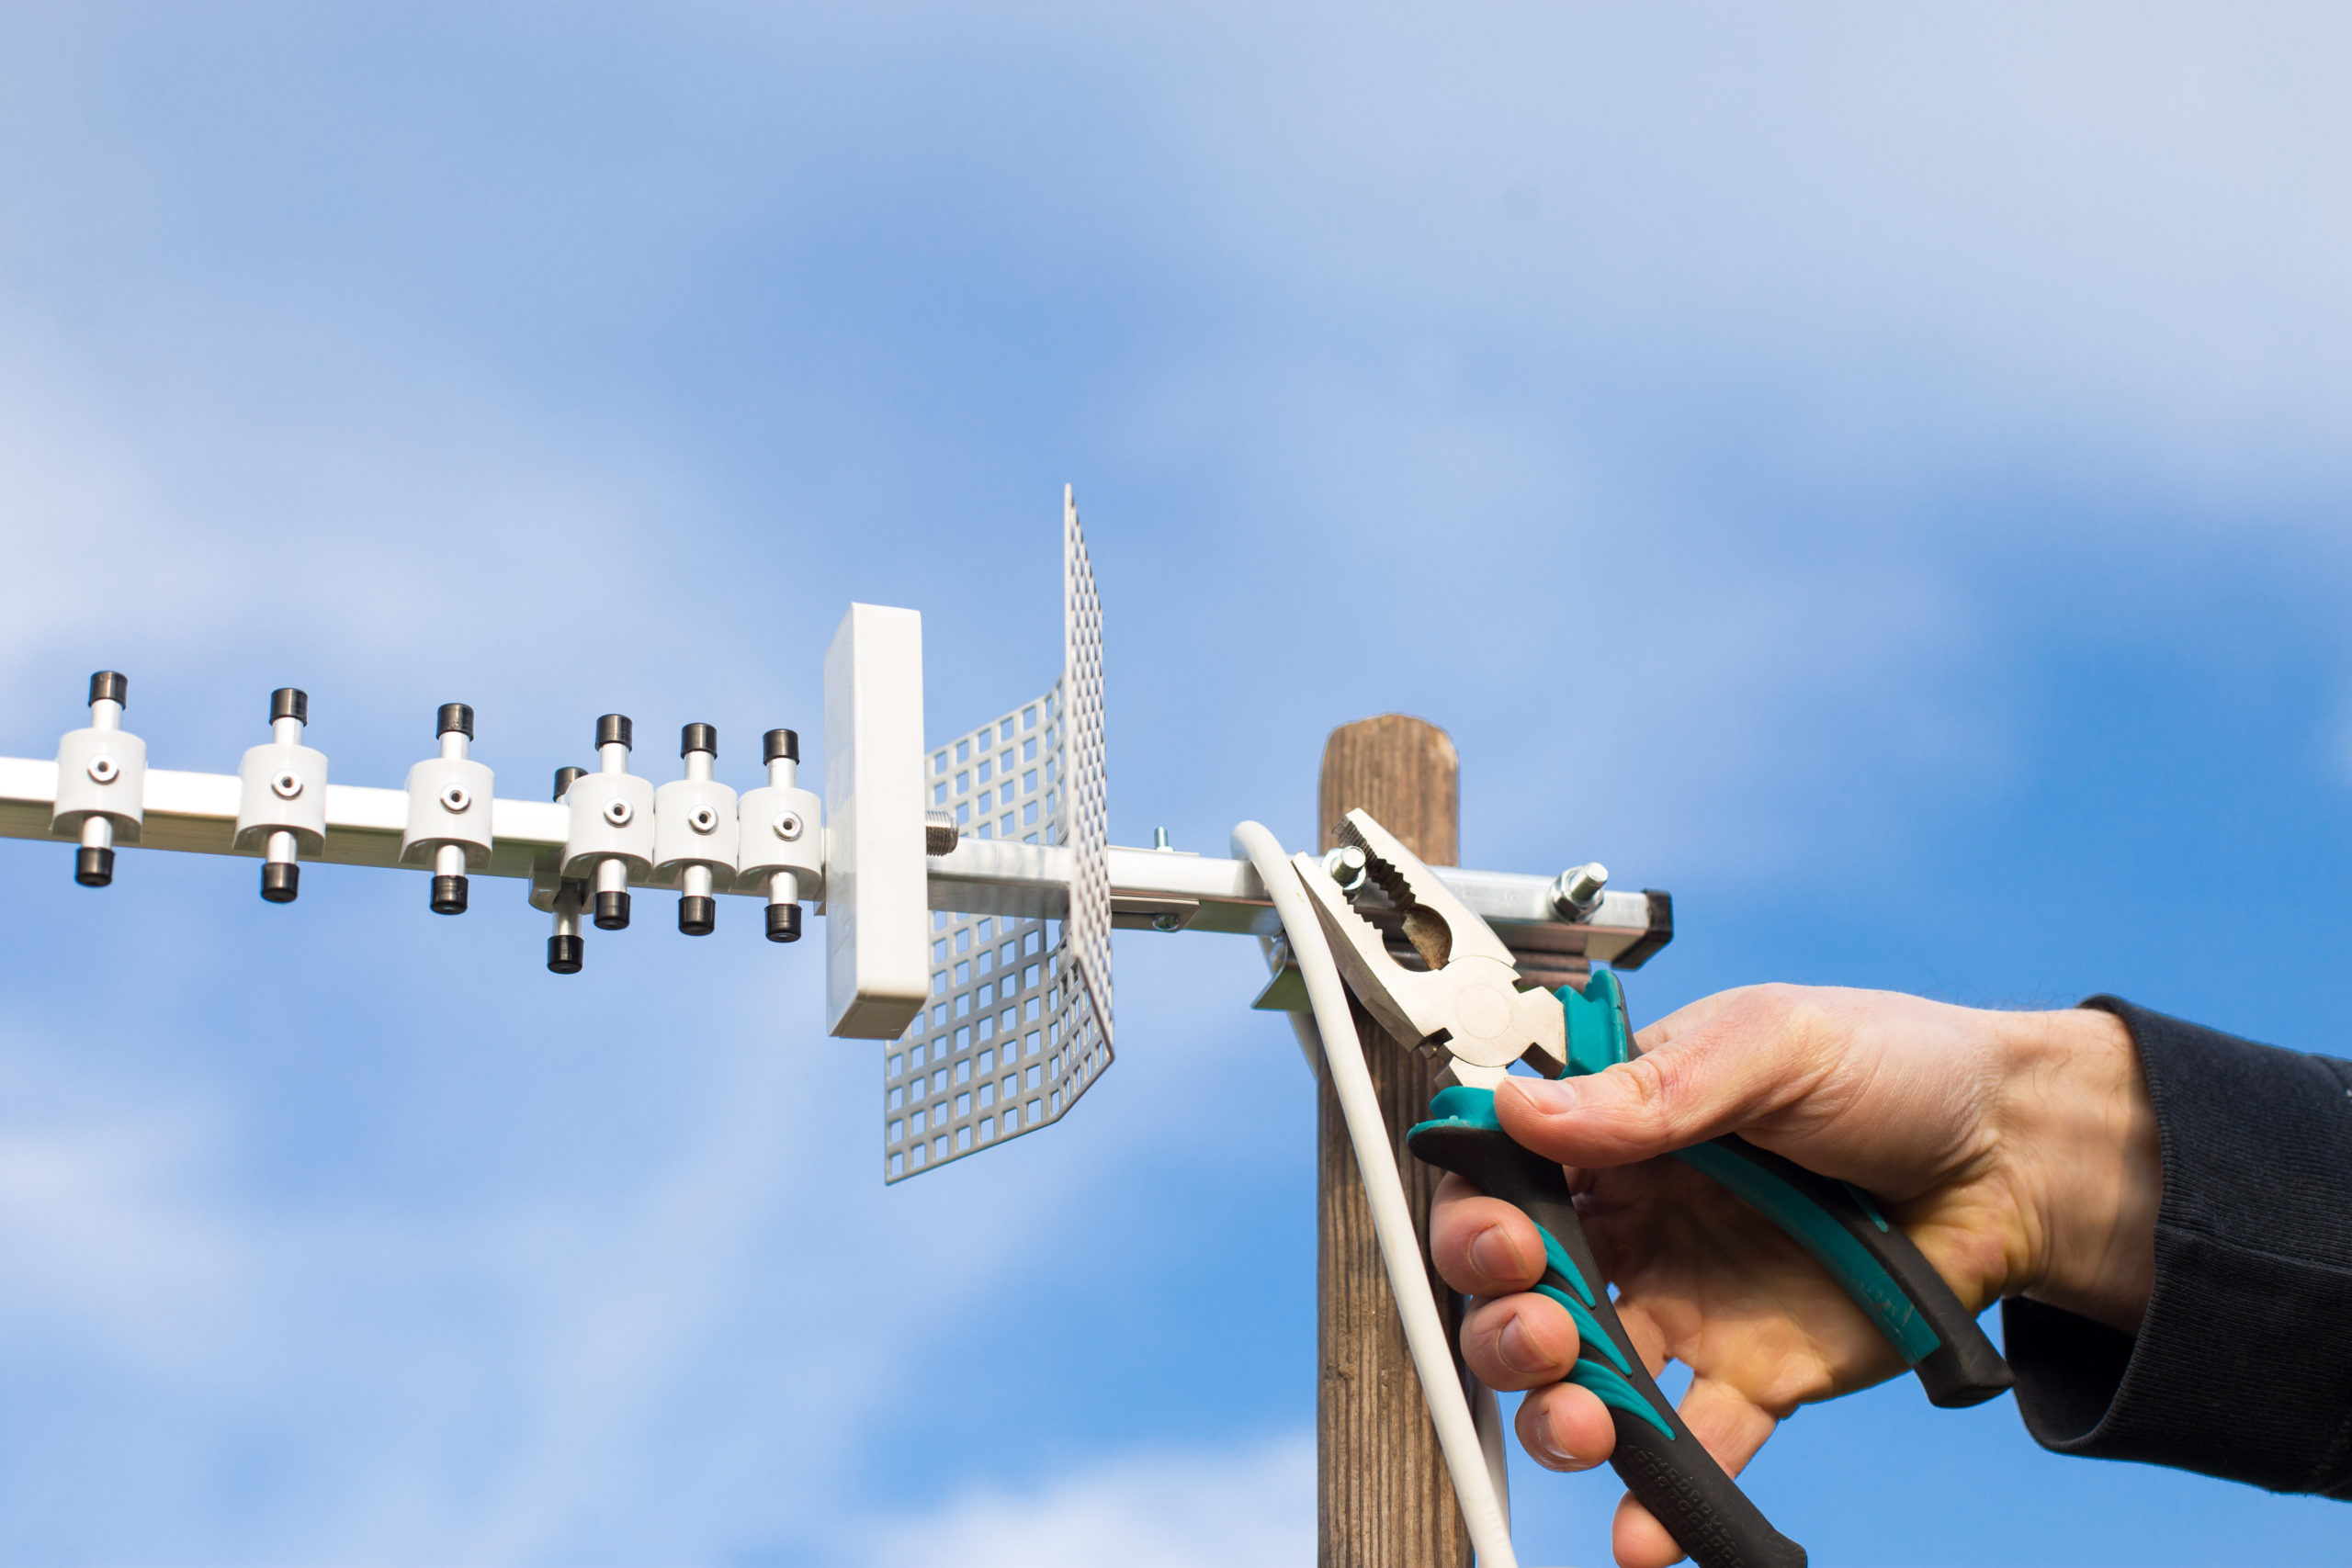
Step 5: Assembling the Mounting Bracket
Assembling the mounting bracket is an important step in preparing for the installation of the antenna on your chimney. Follow these steps to correctly assemble the mounting bracket:
- Read the instructions: Carefully read and familiarize yourself with the instructions provided with the mounting bracket. Each bracket may have specific instructions and variations, so make sure to follow them accordingly.
- Identify the components: Take out all the components of the mounting bracket and identify each part. This may include brackets, clamps, screws, and any additional hardware provided.
- Attach the brackets: Start by attaching the brackets to the back of the antenna using the screws provided. Make sure the brackets are securely fastened and aligned properly.
- Attach the mast clamp: Depending on the design of the mounting bracket, you may need to attach a mast clamp. This clamp will securely hold the antenna mast in place.
- Align and tighten: Once all the components are attached, carefully align the brackets and tighten the screws or bolts. Use a wrench or screwdriver to ensure a snug fit but avoid overtightening, as it may damage the bracket or antenna.
- Check for stability: Give the assembled mounting bracket a gentle shake to check for any loose components or instability. Make adjustments as needed to ensure a sturdy and secure attachment.
By properly assembling the mounting bracket, you are laying the foundation for a stable and secure installation of your antenna on the chimney. Once the bracket is assembled, you can proceed to the next step: mounting the antenna bracket on the chimney.
Step 6: Mounting the Antenna Bracket on the Chimney
Mounting the antenna bracket on the chimney is a critical step in ensuring a secure and stable installation. Follow these steps to properly mount the bracket on the chimney:
- Position the bracket: Place the assembled antenna bracket on the chimney at the marked location. Ensure that the bottom of the bracket aligns with the mark you made earlier. Check that the bracket is level and properly positioned.
- Mark the screw hole locations: Once the bracket is properly positioned, use a pencil or marker to mark the locations of the screw holes. These marks will guide you during the drilling process.
- Pre-drill the screw holes: Using a drill with the appropriate drill bit, carefully pre-drill the marked screw hole locations on the chimney. Take care to drill straight and make the holes deep enough to securely anchor the screws.
- Secure the bracket: With the pre-drilled holes, position the bracket back onto the chimney and align the holes with the drilled holes. Insert the screws through the bracket and into the chimney, tightening them firmly using a screwdriver or drill.
- Double-check stability: After securing the bracket, ensure that it is firmly attached to the chimney and does not move or wobble. Give it a gentle shake to confirm its stability.
- Apply sealant: To protect against water leakage and ensure a watertight seal, apply a weatherproof sealant around the screws and the edges of the bracket where it contacts the chimney. This will help prevent any moisture from seeping into the chimney.
By following these steps, you will securely mount the antenna bracket on the chimney, providing a solid foundation for the antenna installation. Once the bracket is mounted, you can move on to the next step: installing the antenna mast.
Read more: How To Point An Outdoor Antenna
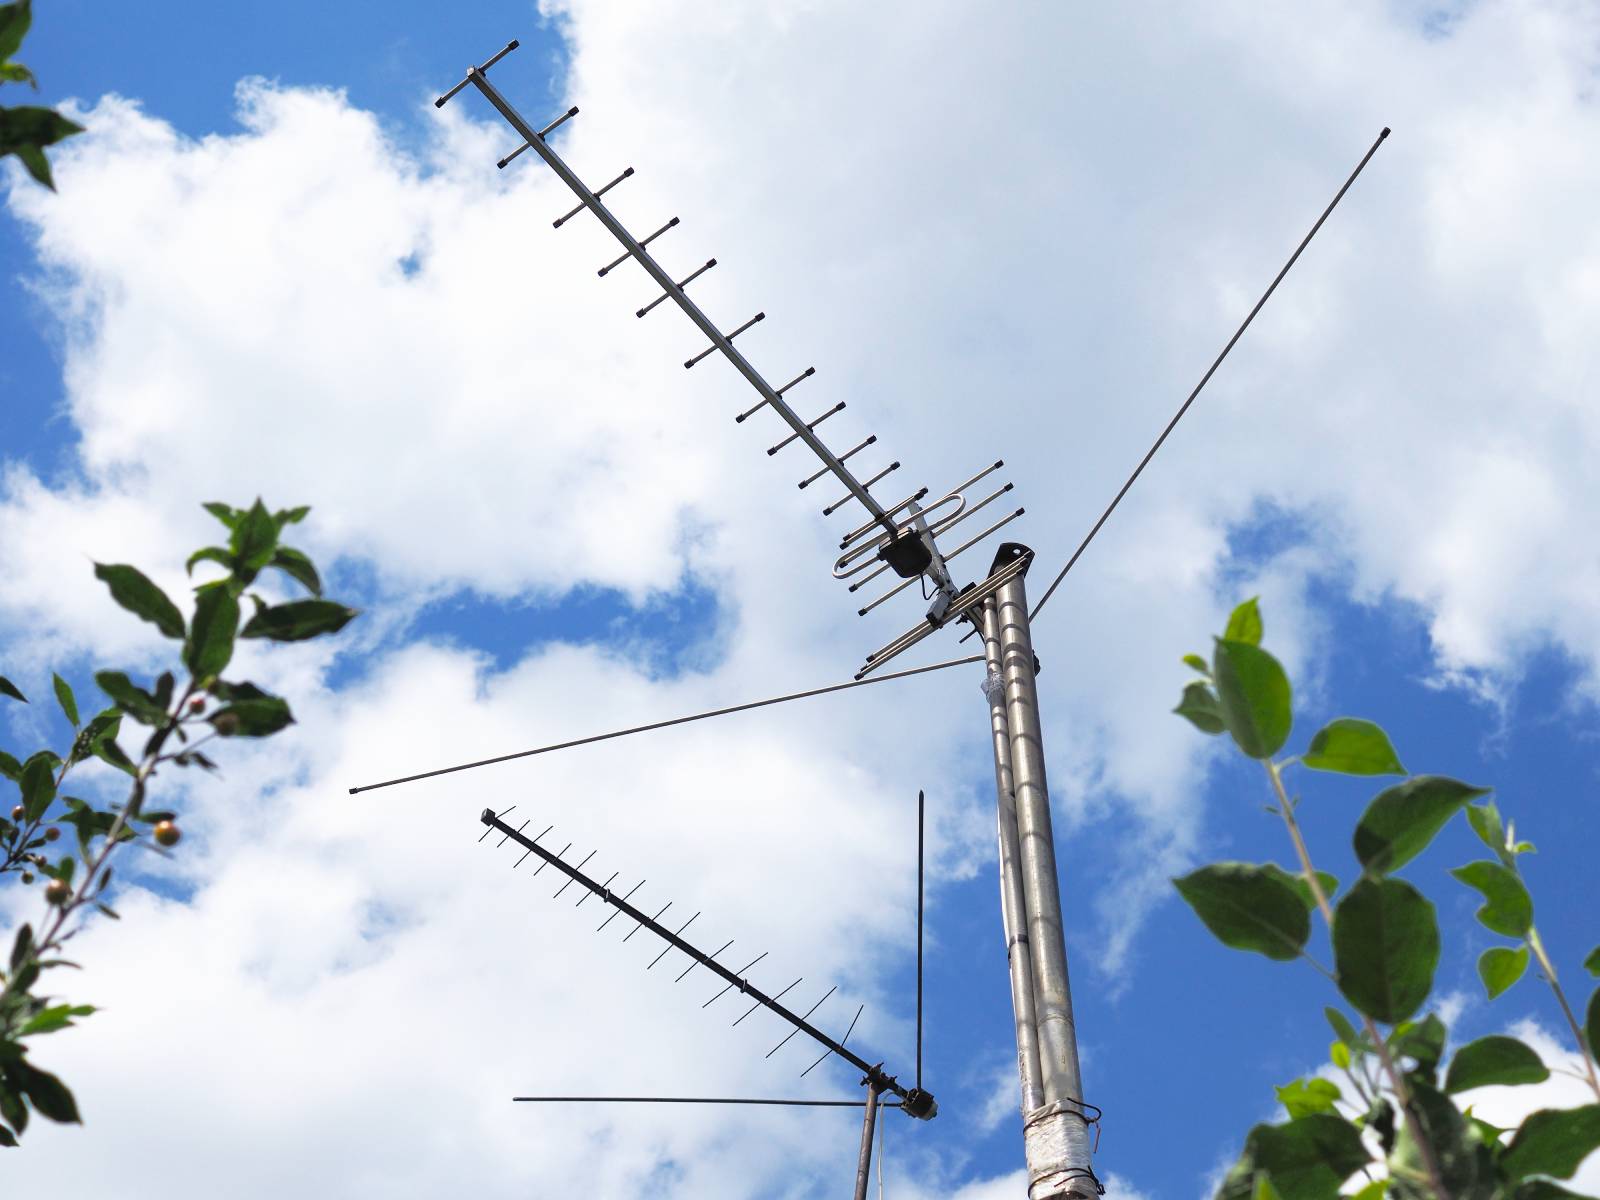
Step 7: Installing the Antenna Mast
Installing the antenna mast is a vital part of the mounting process as it supports the antenna above the roofline. Follow these steps to correctly install the antenna mast:
- Prepare the mast: Ensure the antenna mast is clean and free from any dirt or debris. If necessary, apply a coat of paint or rust-resistant coating to protect it from the elements.
- Attach the mast to the bracket: Position the bottom of the mast into the mast clamp or bracket attached to the chimney. Secure it tightly using the appropriate bolts, screws, or clamps provided with the mounting bracket.
- Align the mast: Adjust the mast so that it stands straight and perpendicular to the roofline. Use a level to ensure it is perfectly vertical. Make any necessary adjustments to achieve proper alignment.
- Tighten the mast: Once the mast is properly aligned, tighten the bolts or clamps to secure it in place. Ensure that the mast is securely fastened and does not move or sway.
- Check for stability: Give the mounted mast a gentle shake or apply slight pressure to verify its stability. Confirm that it is firmly anchored and does not wobble or shift.
- Extend the mast: If necessary, extend the mast to the desired height according to your antenna’s specifications. Take into account any additional clearance required above the roofline for optimal signal reception.
- Secure the mast sections: If your mast consists of multiple sections, use the provided hardware or clamps to secure and connect each section. Ensure that all connections are tight and secure.
By following these steps, you will successfully install the antenna mast, providing a stable and elevated platform for your antenna. Once the mast is installed, you can move on to the next step: connecting the antenna to the TV.
Step 8: Connecting the Antenna to the TV
Connecting the antenna to your TV is the next step in the installation process. Follow these steps to properly connect the antenna:
- Locate the antenna input: Identify the antenna input on the back of your TV. It is usually labeled as “ANT IN” or “RF IN.” Make sure the TV is turned off and unplugged from the power source.
- Prepare the coaxial cable: Take the coaxial cable and trim it to the desired length, leaving a bit of extra length for flexibility. Use a cable cutter to cut the cable smoothly and cleanly.
- Remove any cable shielding: Strip off approximately 1 inch of the cable shielding to expose the inner wire. Be careful not to damage the wire while stripping the shielding.
- Attach the connector: Slide the connector onto the exposed inner wire of the coaxial cable. Make sure it fits snugly and securely.
- Connect the cable to the antenna: Locate the antenna’s coaxial cable connector. It is generally found on the bottom, back, or side of the antenna. Connect the other end of the coaxial cable to the antenna’s connector, twisting it clockwise to ensure a tight connection.
- Connect the cable to the TV: Take the other end of the coaxial cable and connect it to the antenna input on the back of your TV. Twist it clockwise to secure the connection.
- Power on the TV: Plug in the TV and turn it on. Access the TV’s menu settings and navigate to the “Channel” or “Antenna” setup option.
- Scan for channels: Start a channel scan to allow the TV to detect and store available channels. This process may vary depending on your TV model; refer to the TV’s user manual for specific instructions.
- Adjust the antenna position: If you encounter any issues with signal reception or missing channels, try adjusting the position or orientation of the antenna. Experiment with different angles and directions to find the optimal setup.
Once the antenna is connected to the TV and the channel scan is complete, you should be able to access a wide range of free-to-air channels. Enjoy your improved TV reception and the variety of programs available! Now, it’s time to move on to the final step: testing the antenna signal.
Step 9: Testing the Antenna Signal
Testing the antenna signal is a crucial step to ensure that your installation has been successful and that you’re receiving a strong and clear TV signal. Follow these steps to test the antenna signal:
- Turn on the TV: Ensure that the TV is turned on and set to the correct input source for the antenna connection.
- Access the signal strength menu: Access the TV’s menu settings and navigate to the signal strength or signal quality option. This location may vary depending on your TV model, so refer to the user manual if needed.
- Scan for channels: Start a channel scan or auto-tune process to allow the TV to search for available channels. This step will detect and store the channels that can be received by your antenna.
- Check signal strength: Once the scan is complete, check the signal strength or quality displayed on the TV. Ideally, you want a high signal strength and minimal interference.
- Adjust the antenna position: If the signal strength is weak or you’re experiencing interference, try adjusting the position or orientation of the antenna. Move it around, both vertically and horizontally, to find the optimal placement for the best signal reception.
- Rescan if necessary: If you’ve made adjustments to the antenna position, initiate another channel scan to detect any additional channels that may be available in the new position.
- Test multiple channels: Tune into different channels to test the signal quality and ensure that all channels are clear and without any disturbances or pixelation.
- Make further adjustments if needed: If you’re still experiencing issues with signal strength or channel reception, continue fine-tuning the antenna position or consider consulting with an antenna specialist for further assistance.
By following these steps, you can test the antenna signal and ensure you’re receiving a high-quality and reliable TV signal. If everything is functioning properly, congratulations! You have successfully completed the antenna installation process and can now enjoy watching your favorite shows and channels.
Remember, signal strength may vary depending on your location and external factors. If you encounter ongoing issues with signal reception, you may need to consider other options such as signal amplifiers or consulting with a professional antenna installer for further assistance.
With the antenna signal tested and confirmed, you have completed the installation process. Enjoy your improved TV reception and the plethora of channels now available to you!
Thank you for following our guide on how to mount an antenna on a chimney. We hope this article has been helpful in achieving a successful antenna installation. If you have any questions or need further assistance, don’t hesitate to reach out.
Conclusion
Congratulations on completing the installation of your antenna on your chimney! By following the steps outlined in this guide, you have successfully mounted the antenna, connected it to your TV, and tested the signal. You can now enjoy improved TV reception and access a wider range of channels.
Throughout the installation process, it is important to prioritize safety. Always assess the condition of your chimney, use proper safety equipment, and exercise caution when working at heights. If you are unsure or uncomfortable with the installation process, consult a professional for assistance.
Remember, choosing the right antenna is crucial for optimal signal reception. Consider factors such as signal strength, antenna type, and compatibility with your TV or receiver. Reading reviews and seeking expert advice can help you make an informed decision.
Additionally, ensure that you have all the necessary tools and materials before beginning the installation. Having everything at hand will save you time and make the process more efficient.
Once the antenna is securely mounted and connected to your TV, perform a signal strength test to ensure optimal reception. Adjust the antenna position if needed to achieve the best signal quality and minimize interference.
We hope this guide has been helpful in assisting you with the installation of your antenna on your chimney. Enjoy your improved TV viewing experience and the wide range of channels available to you.
If you have any further questions or need additional assistance, feel free to reach out to professionals or experts in antenna installations.
Thank you for choosing our guide, and happy viewing!
Frequently Asked Questions about How To Mount An Antenna On A Chimney
Was this page helpful?
At Storables.com, we guarantee accurate and reliable information. Our content, validated by Expert Board Contributors, is crafted following stringent Editorial Policies. We're committed to providing you with well-researched, expert-backed insights for all your informational needs.


0 thoughts on “How To Mount An Antenna On A Chimney”