Articles
How To Open Ge Stacked Washer Dryer
Modified: October 18, 2024
Learn how to open a GE stacked washer dryer with these helpful articles. Get step-by-step instructions and troubleshooting tips for easy maintenance.
(Many of the links in this article redirect to a specific reviewed product. Your purchase of these products through affiliate links helps to generate commission for Storables.com, at no extra cost. Learn more)
Introduction
Opening a GE stacked washer dryer can seem like a daunting task, but with the right information and a little patience, it can be accomplished successfully. Whether you need to access the interior for repairs or maintenance, or you simply want to install a stacking kit to save space in your laundry area, this article will guide you through the process step by step.
It is important to note that safety should always be the top priority when working with any electrical appliance. Before attempting to open your GE stacked washer dryer, make sure to follow all necessary precautions to avoid injury or damage. This includes disconnecting the power supply and taking proper safety measures such as wearing gloves and eye protection.
In this article, we will provide you with a comprehensive guide on how to open a GE stacked washer dryer. We will cover the tools and materials you will need, as well as the step-by-step process to follow. So, let’s get started!
Key Takeaways:
- Prioritize safety by disconnecting the power, wearing protective gear, and following manufacturer instructions when opening your GE stacked washer dryer. Gather necessary tools and materials for a smooth process.
- Whether it’s for repairs, maintenance, or installing a stacking kit, the step-by-step guide provides comprehensive instructions for safely opening, working on, and restoring full functionality to your GE stacked washer dryer.
Read more: How To Open Kenmore Stacked Washer Dryer
Safety Precautions
Before you begin opening your GE stacked washer dryer, it is crucial to prioritize safety. By following these safety precautions, you can minimize the risk of accidents and ensure a safe working environment:
- Disconnect the power: The first and most important step is to disconnect the power supply to the washer dryer. This can usually be done by unplugging the unit from the wall outlet or turning off the circuit breaker that supplies power to the appliance.
- Use protective gear: When working with any electrical appliance, it is essential to wear protective gear to guard against potential hazards. Wear gloves to protect your hands from sharp edges and electrical components, and wear safety glasses to shield your eyes from debris or any potential sparks.
- Clear the area: Make sure the surrounding area is clear of any obstacles or clutter, as you might need extra space to maneuver and work comfortably. Remove any items that could pose a tripping hazard or obstruct your access to the washer dryer.
- Follow manufacturer instructions: Refer to the owner’s manual or any instructional guides provided by the manufacturer for specific safety instructions for your particular GE stacked washer dryer model. Different models may have specific safety measures that need to be observed.
- Work on a secure surface: Ensure that your GE stacked washer dryer is placed on a stable and level surface. This will prevent any potential accidents caused by the appliance tipping or wobbling during the opening process.
- Avoid excessive force: While working on opening the washer dryer, be mindful not to use excessive force that could potentially damage the appliance, its components, or cause harm to yourself. If you encounter resistance or difficulty during any step, stop and reassess the situation before proceeding.
- Inspect for wear and tear: Before proceeding with opening your GE stacked washer dryer, take a moment to inspect the unit for any obvious signs of wear and tear such as frayed wires, loose connections, or damaged components. If you notice any issues, it is best to consult a professional technician for assistance rather than attempting the opening process yourself.
- Keep children and pets away: Ensure that children and pets are kept away from the work area to prevent any accidents or potential hazards. It’s best to have a designated space where they can be supervised and kept safe during the procedure.
By adhering to these safety precautions, you can minimize the risk of accidents and ensure a safe working environment while opening your GE stacked washer dryer.
Tools and Materials Needed
Before you begin opening your GE stacked washer dryer, it’s important to gather all the necessary tools and materials. Having everything prepared will save you time and ensure a smooth process. Here’s a list of tools and materials you’ll need:
- Flathead screwdriver: This tool will be used to remove screws and pry open panels, if needed.
- Phillips screwdriver: Similar to the flathead screwdriver, the Phillips screwdriver is necessary for removing screws from various components of the washer dryer.
- Pliers: Pliers will come in handy for disconnecting and reconnecting wiring connections.
- Adjustable wrench: You may need an adjustable wrench to loosen or tighten bolts during the opening process.
- Stacking kit (if applicable): If you’re planning on stacking your washer and dryer, make sure you have a compatible stacking kit. This kit typically includes brackets, screws, and instructions for safely stacking the appliances.
- Gloves: It’s important to protect your hands by wearing gloves while working on the washer dryer. This will prevent any injuries from sharp edges or electrical components.
- Safety glasses: Protect your eyes from debris or any potential sparks by wearing safety glasses during the opening process.
- Owner’s manual: Keep the owner’s manual for your GE stacked washer dryer nearby. It will provide specific instructions and diagrams related to your particular model, which may vary slightly from the general guidelines provided.
- Clean cloth or towel: Have a clean cloth or towel ready to wipe away any dust or debris that may accumulate during the opening process.
- Container or tray: You may want to have a container or tray nearby to place screws or small components as you remove them from the washer dryer. This will help prevent losing or misplacing these items.
By gathering these tools and materials before starting the opening process, you’ll have everything you need to successfully complete the job. Having them readily available will save you time and ensure a smooth and efficient process.
Step 1: Gather all necessary information
Before you start opening your GE stacked washer dryer, it’s important to gather all the necessary information about your specific model. This will facilitate the process and ensure that you have a clear understanding of what needs to be done. Here are some key points to consider:
- Model number: Locate the model number of your GE stacked washer dryer. It is usually located on a sticker or tag on the back, side, or inside of the appliance. Write down the model number or take a picture of it, as you may need it for reference or when ordering specific replacement parts.
- Owner’s manual: Consult the owner’s manual that came with your washer dryer. It will provide detailed information and instructions specific to your model. Review the manual to familiarize yourself with the components, controls, and any specific opening instructions or precautions mentioned.
- Online resources: Visit the GE Appliances website or search online for additional resources related to your model. The manufacturer’s website may have specific guides, videos, or FAQs that can provide further guidance on opening your particular GE stacked washer dryer.
- Identify the problem or purpose: Determine the reason for opening your GE stacked washer dryer. Are you trying to repair a specific issue, perform routine maintenance, or install a stacking kit? Knowing the purpose will help you stay focused and find the appropriate information and resources.
- Preparation steps: Understand any preparatory steps you need to take before opening the appliance. This could include turning off the power, unplugging the unit, or removing any items stored on top of or around the washer dryer. Following these steps will ensure a safe and clear working environment.
Gathering all this necessary information will provide you with a solid foundation and understanding of your specific GE stacked washer dryer model. It will help you navigate the opening process with confidence and enable you to address the issue or complete the desired task effectively.
Step 2: Turn off the power
Before you begin opening your GE stacked washer dryer, it is crucial to ensure your safety by disconnecting the power supply to the appliance. Turning off the power will prevent any potential electrical hazards while you work. Follow these steps to turn off the power:
- Locate the power source: Identify the power source for your GE stacked washer dryer. It is typically a wall outlet or a circuit breaker specifically dedicated to the appliance.
- Unplug the unit: If your washer dryer is plugged into a wall outlet, gently pull the plug out to disconnect it from the power source. Make sure to hold the plug itself rather than pulling on the cord to avoid damaging the cord or the outlet.
- Switch off the circuit breaker: If your washer dryer is connected to a dedicated circuit breaker, locate the breaker panel in your home or building. Look for the breaker corresponding to your washer dryer and flip it to the “Off” position. This will cut off the power supply to the appliance.
- Check if the power is off: Double-check that the power is indeed disconnected by attempting to turn on the washer dryer. If it does not power on, you can be confident that the power is successfully turned off.
By turning off the power to your GE stacked washer dryer, you eliminate the risk of electric shock and other electrical hazards while you work on opening or performing maintenance on the appliance. Always prioritize safety and ensure the power is disconnected before proceeding with any further steps.
Read more: How To Remove A Stacked Washer And Dryer
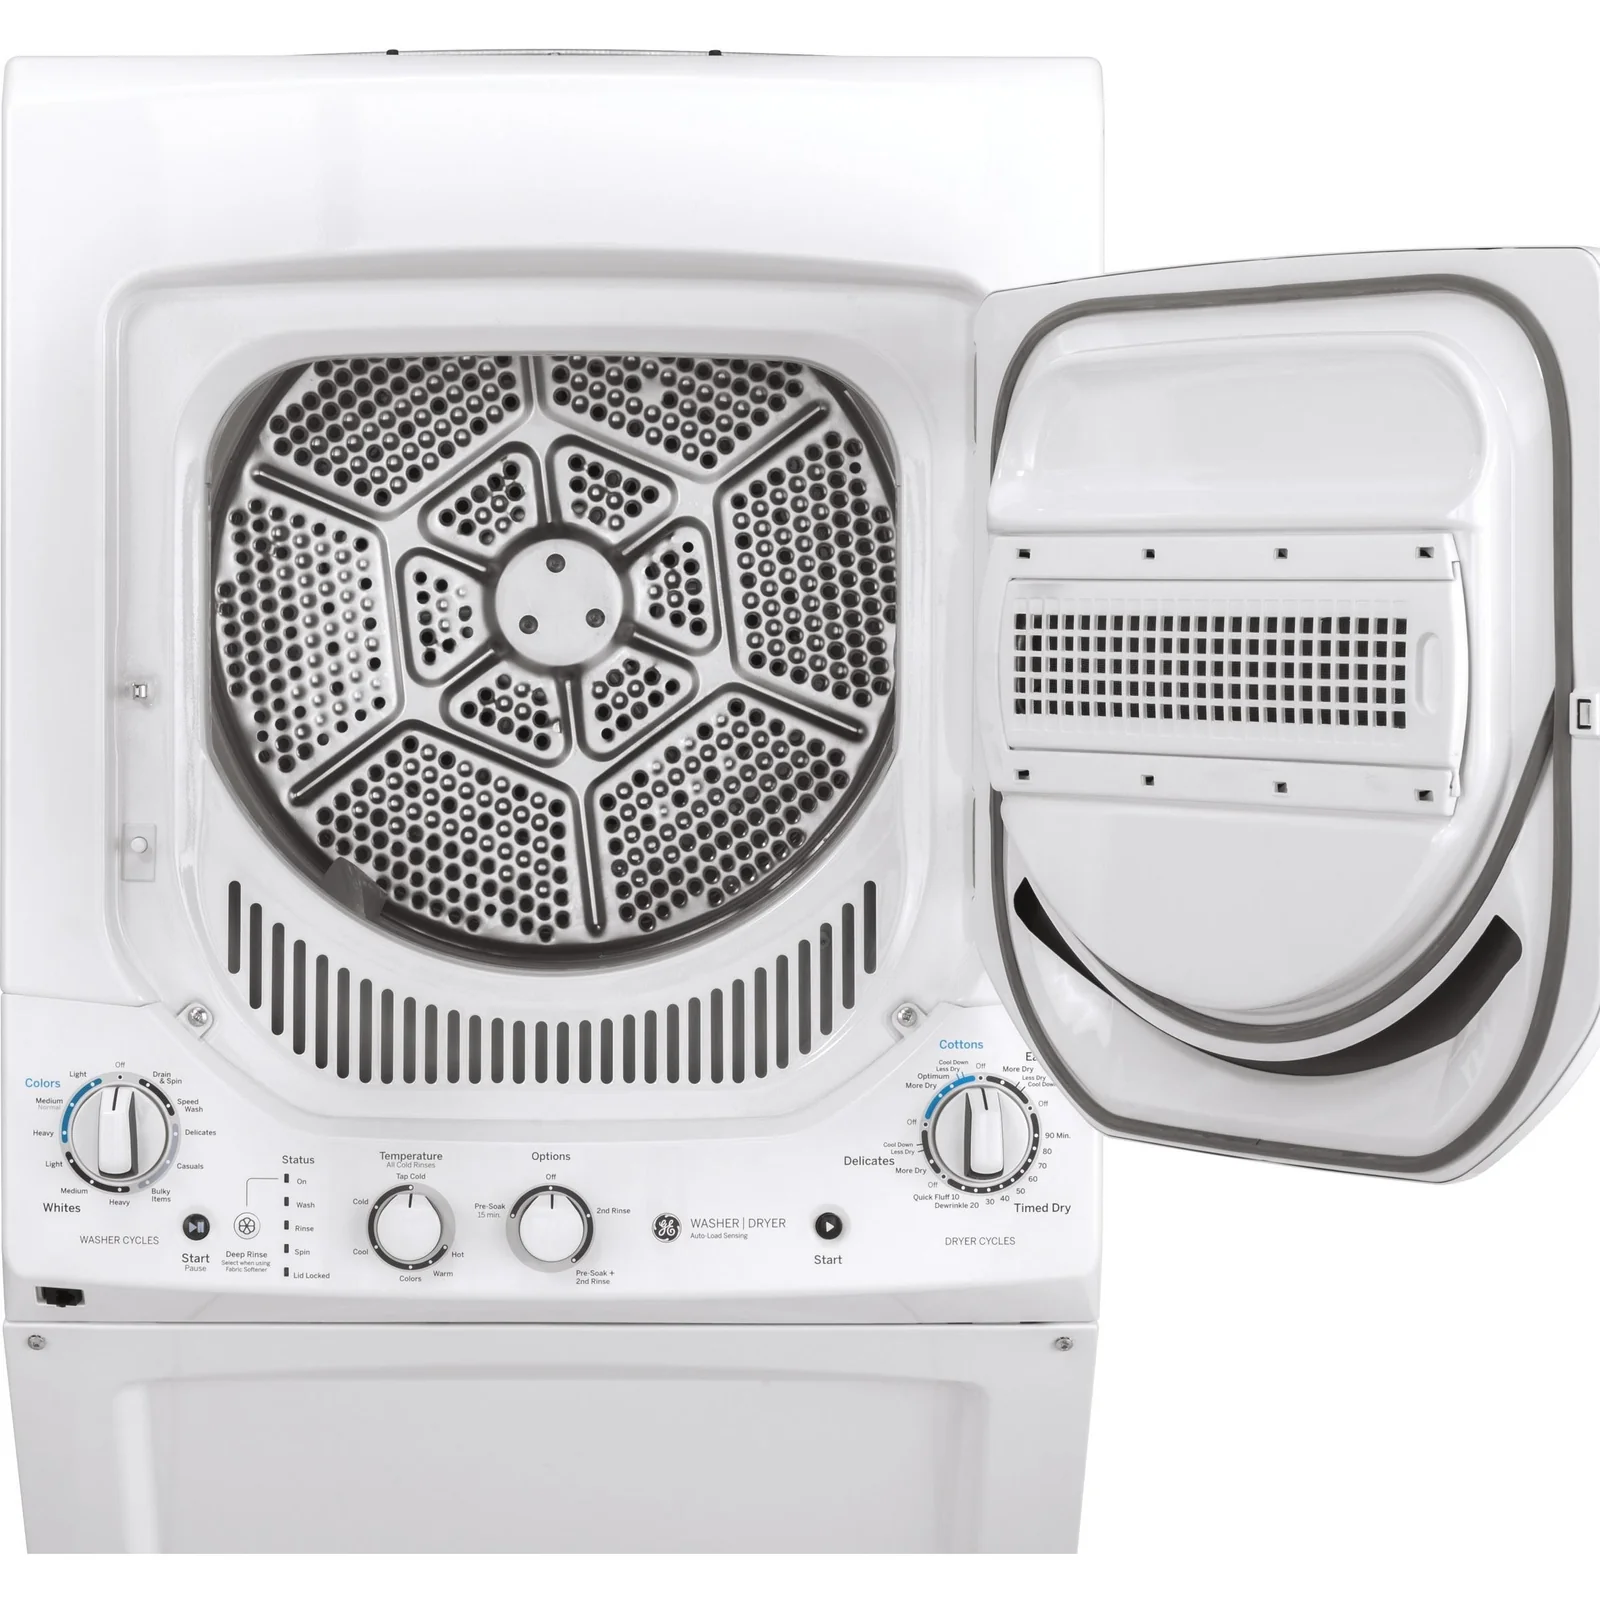
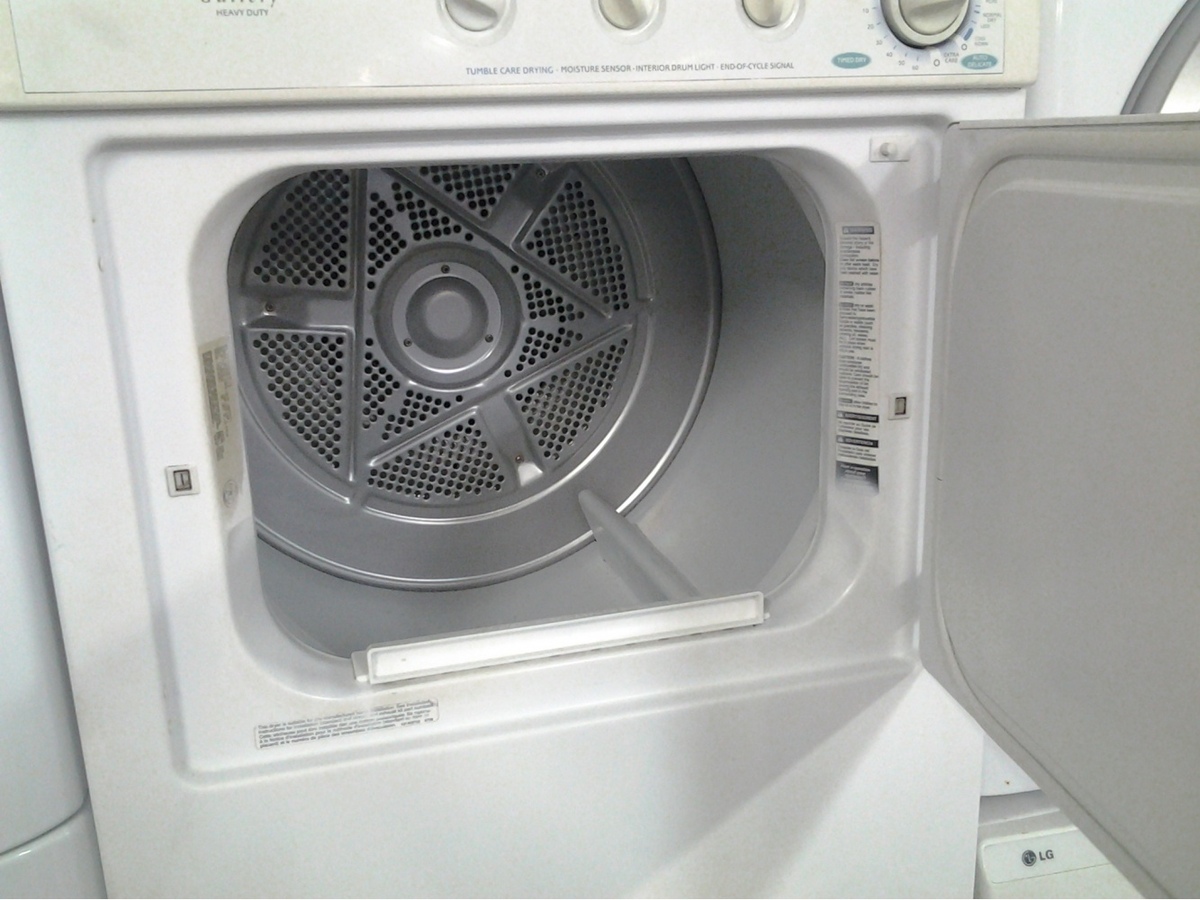
Step 3: Remove the top panel
Now that you have turned off the power to your GE stacked washer dryer, you can proceed with removing the top panel. This will give you access to the internal components of the appliance. Follow these steps to remove the top panel:
- Locate the retaining clips or screws: Depending on the model of your GE stacked washer dryer, the top panel may be held in place with retaining clips or screws. These clips or screws are typically located at the rear of the appliance.
- Release the retaining clips: If your washer dryer has retaining clips, use a flathead screwdriver or a similar tool to gently pry them open. Insert the screwdriver into the space between the top and the sides of the machine and lift the clips to release them. Be careful not to damage the clips or the surrounding area.
- Remove the screws: If your washer dryer has screws securing the top panel, use a screwdriver (either Phillips or flathead, depending on the type of screws used) to loosen and remove them. Place the screws in a safe container to prevent loss or misplacement.
- Lift and remove the top panel: Once the retaining clips are released or screws removed, carefully lift the top panel of the washer dryer. It may be helpful to have an extra pair of hands to assist you in safely lifting and removing the panel.
- Set aside the top panel: Find a safe and stable location to set aside the removed top panel. Make sure it is placed in a way that prevents it from falling or causing any obstructions in your work area.
With the top panel removed, you now have better access to the internal components of your GE stacked washer dryer. Be cautious when working with the exposed interior and avoid touching any electrical or moving parts. Remember to handle the top panel with care to avoid any accidental damage. Proceed with the next steps according to your specific goal, whether it’s repairing a component, performing maintenance, or installing a stacking kit.
Step 4: Detach the control panel
Now that you have removed the top panel of your GE stacked washer dryer, you can proceed with detaching the control panel. The control panel houses the various buttons, dials, and electronic components of the appliance. Follow these steps to detach the control panel:
- Locate the mounting screws or clips: Depending on the model of your GE stacked washer dryer, the control panel may be secured in place with mounting screws or clips. These are typically located at the top or along the sides of the panel.
- Remove the mounting screws: If your control panel is held in place with screws, use a screwdriver (either Phillips or flathead) to loosen and remove the screws. Carefully set them aside in a safe place to avoid misplacing them.
- Release the mounting clips: If your control panel is held in place with clips, look for any tabs or release mechanisms on the sides or back of the panel. Gently press or pry these tabs to release the clips, allowing the control panel to become loose.
- Disconnect the wiring connectors: Once the control panel is loosened or detached, you will notice several wiring connectors attached to it. These connectors allow the control panel to communicate with the internal components of the washer dryer. Carefully disconnect the wiring connectors by gently pulling them apart. Take note of their placements and orientation for easy reconnection later.
- Set aside the control panel: Place the detached control panel in a secure location, ensuring it won’t be damaged or interfere with your work area.
By detaching the control panel, you gain access to the inner workings of your GE stacked washer dryer. Be cautious when handling the control panel and the wiring connectors, as they are delicate and can be easily damaged. If you’re unsure about disconnecting the wiring connectors, consult the owner’s manual or seek professional assistance to avoid any mishaps.
With the control panel removed, you can now proceed with the next steps according to your specific goal, such as repairing a component, performing maintenance, or installing a stacking kit.
Step 5: Disconnect the wiring
With the control panel detached, the next step in opening your GE stacked washer dryer is to disconnect the wiring. Properly disconnecting the wiring connections is essential for safe and effective maintenance or repairs. Follow these steps to disconnect the wiring:
- Identify the wiring connections: Take a close look at the wiring connections on the control panel and the interior of the washer dryer. There may be multiple wiring connections, each serving a specific function.
- Label the wiring connections: To make the reconnection process easier later, it is recommended to label each wiring connection. You can use colored tape, labels, or take pictures to identify which wire goes where. This will help ensure correct reassembly of the connections.
- Disconnect the wiring connectors: Carefully disconnect the wiring connectors by gently pulling them apart. Avoid applying excessive force or pulling on the wires themselves as this can damage the connectors or wires. Hold the connector itself and wiggle it if necessary to detach it from the corresponding socket.
- Secure the disconnected wiring: Once the wiring connectors are detached, avoid letting them hang loose or come in contact with other metal parts during the opening process. Safely secure them using tape or tie wraps, making sure they are organized and out of the way to prevent any accidental damage.
By disconnecting the wiring, you ensure that there is no power flow during maintenance or repairs and reduce the risk of electrical accidents. Additionally, labeling the wiring connections will save you time and confusion when it’s time to reassemble the appliance.
Remember, if you’re not confident in properly disconnecting or reconnecting the wiring, consult the owner’s manual or seek professional assistance. It’s always better to be safe and have a professional handle the electrical connections if you’re unsure.
With the wiring disconnected, you can now proceed with the next steps according to your specific goal, such as repairing a component, performing maintenance, or installing a stacking kit.
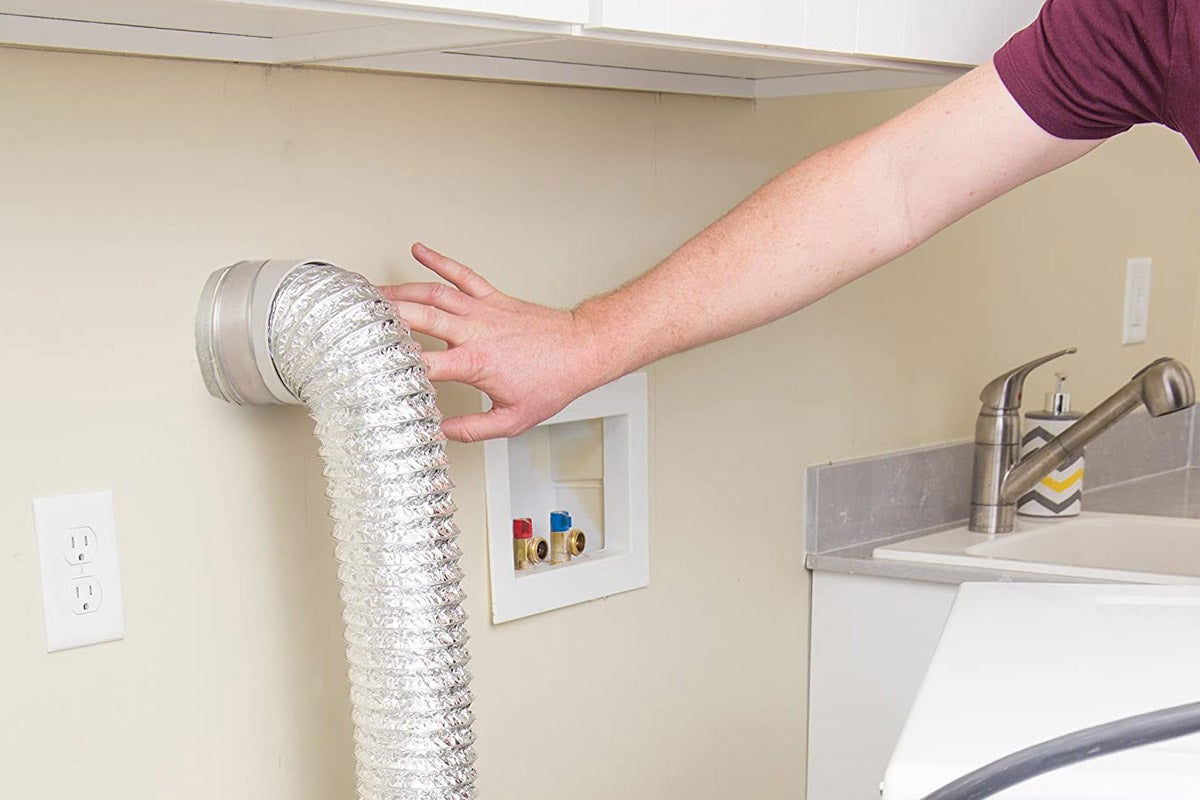
When opening a GE stacked washer dryer, start by unplugging the unit and removing any screws or fasteners holding the top panel in place. Then, carefully lift and remove the top panel to access the internal components. Always refer to the user manual for specific instructions.
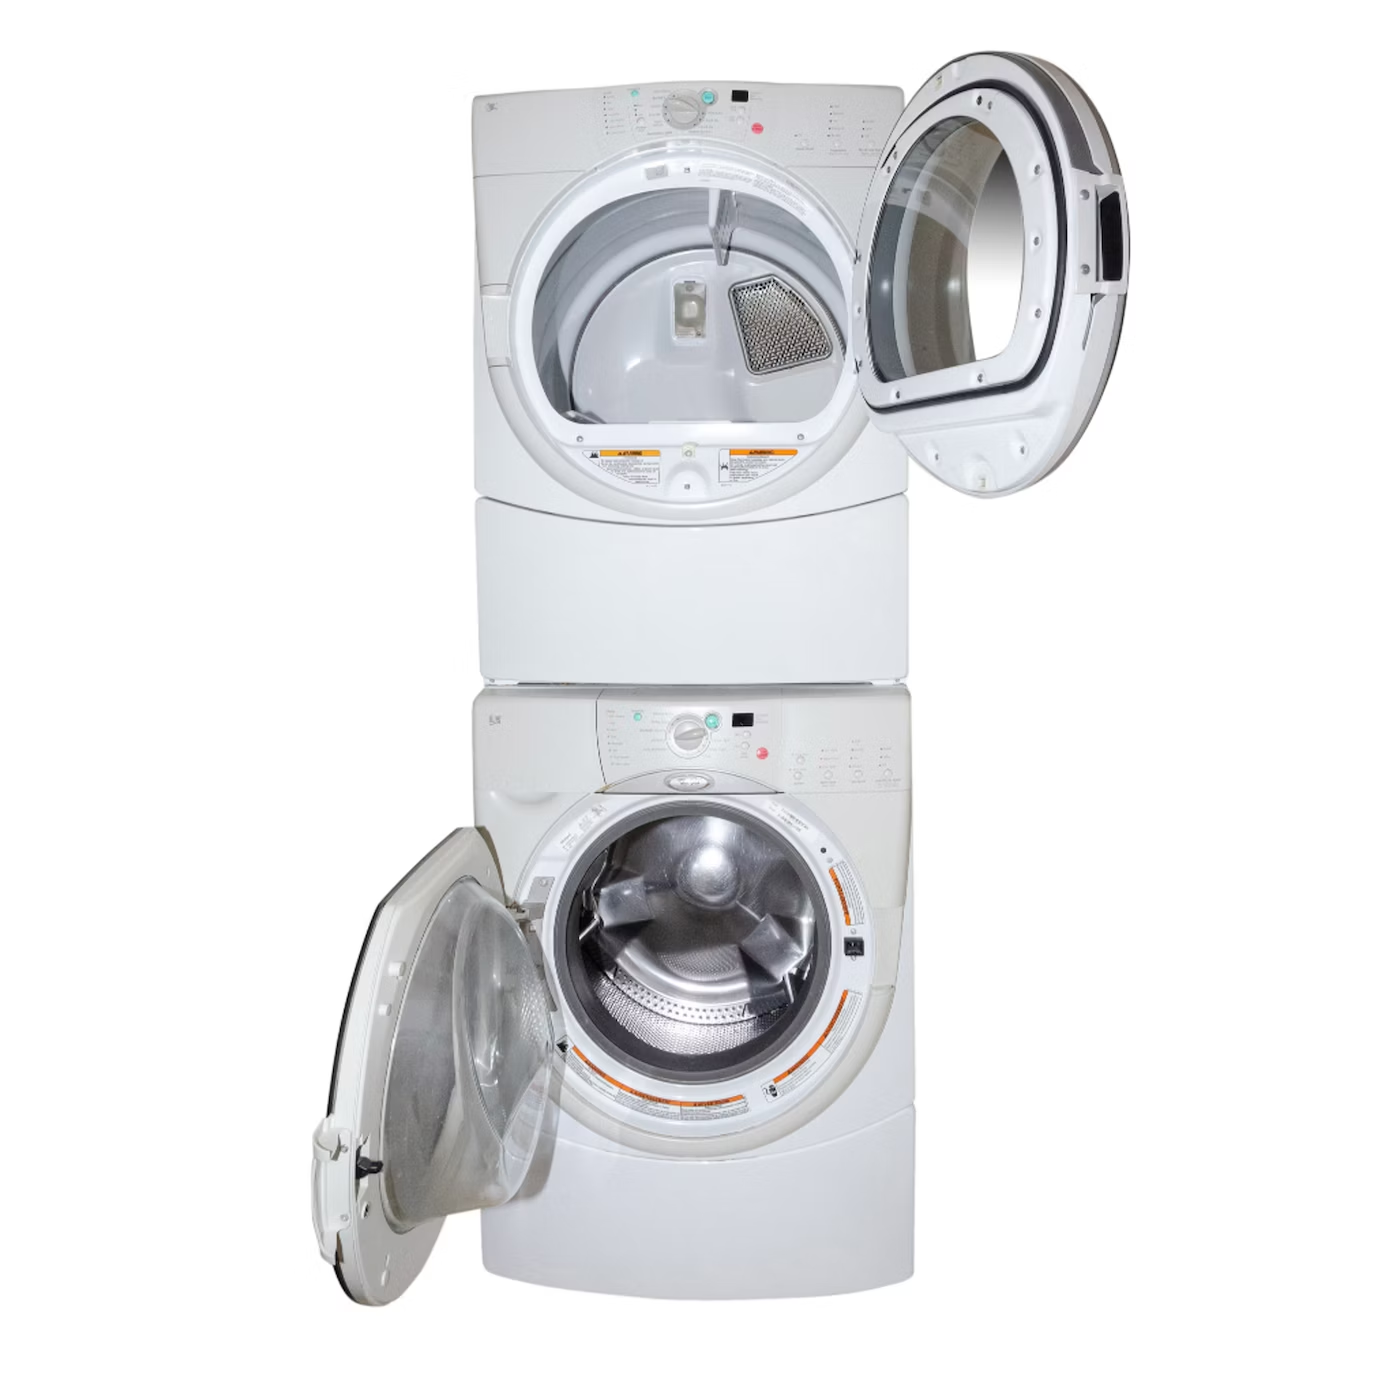
Step 6: Remove the dryer from the washer
If you’re looking to access the internal components of your GE stacked washer dryer, removing the dryer unit from the washer is often necessary. This step allows you to work on the dryer independently and provides easier access to both the washer and dryer components. Follow these steps to remove the dryer from the washer:
- Unplug the power cord: Before proceeding, ensure that the power cord of the unit is unplugged to prevent any electrical accidents.
- Locate the dryer securing mechanism: Depending on the specific model of your GE stacked washer dryer, there are various mechanisms used to secure the dryer to the washer unit. Common methods include brackets, straps, or screws.
- Follow the manufacturer’s instructions: Consult the owner’s manual to determine the specific instructions for your model. The manual will provide detailed steps on how to release or remove the dryer from the washer unit.
- Detach the securing mechanism: Once you have identified the securing mechanism, follow the instructions to detach it. This may involve loosening screws, unfastening straps, or depressing levers or clips.
- Carefully separate the dryer from the washer: With the securing mechanism released, gently pull the dryer unit away from the washer, ensuring all connections are detached and wires are not strained or caught on any parts.
- Set the dryer unit aside: Find a safe and stable location to place the separated dryer unit. Keep it away from any obstructions or hazards to prevent damage or accidents.
Removing the dryer unit from the washer provides you with easier access to both appliances during maintenance, repair, or cleaning. It also allows you to work on the dryer independently, if needed.
Remember to consult the owner’s manual specific to your model for any additional guidelines or precautions. If you are unsure about any aspect of the removal process, it’s best to seek professional assistance to prevent damage to the appliances or yourself.
With the dryer unit removed, you can proceed with the necessary tasks such as repairing or maintaining specific components, or continuing with the installation of a stacking kit if that is your objective.
Read more: How Tall Is A Stacked Washer Dryer
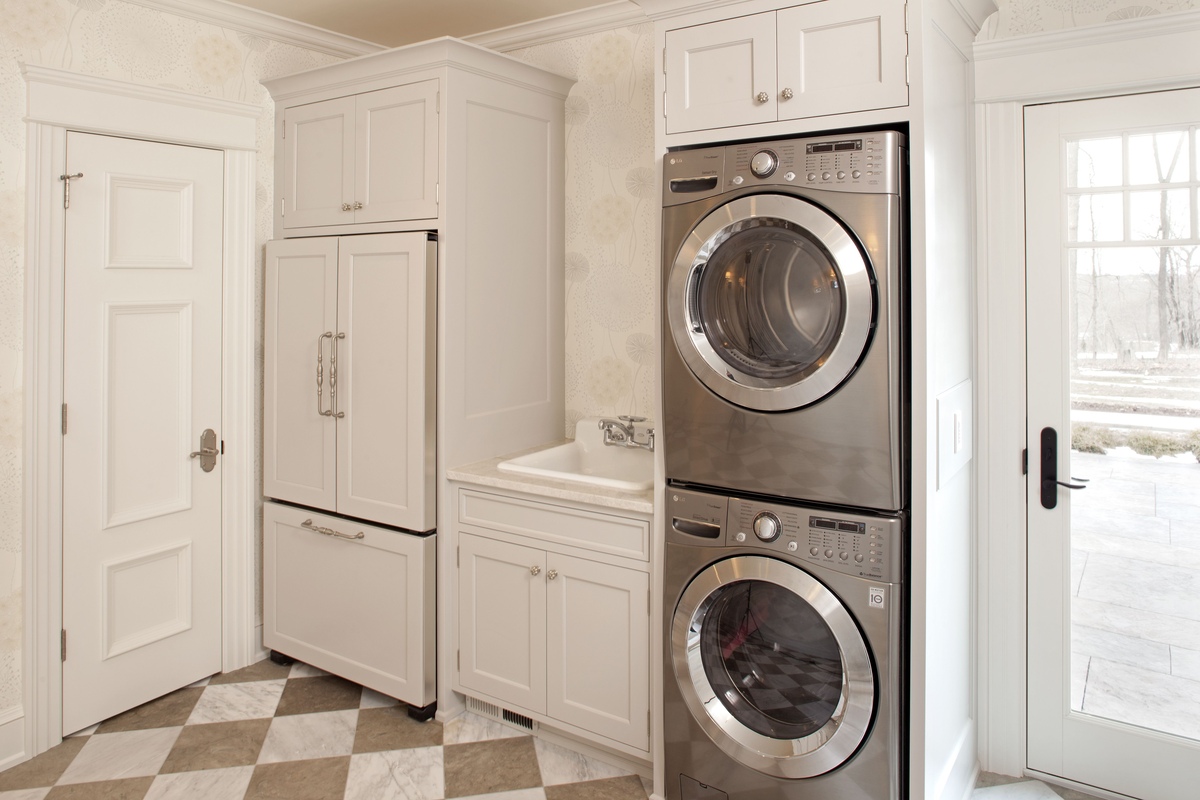
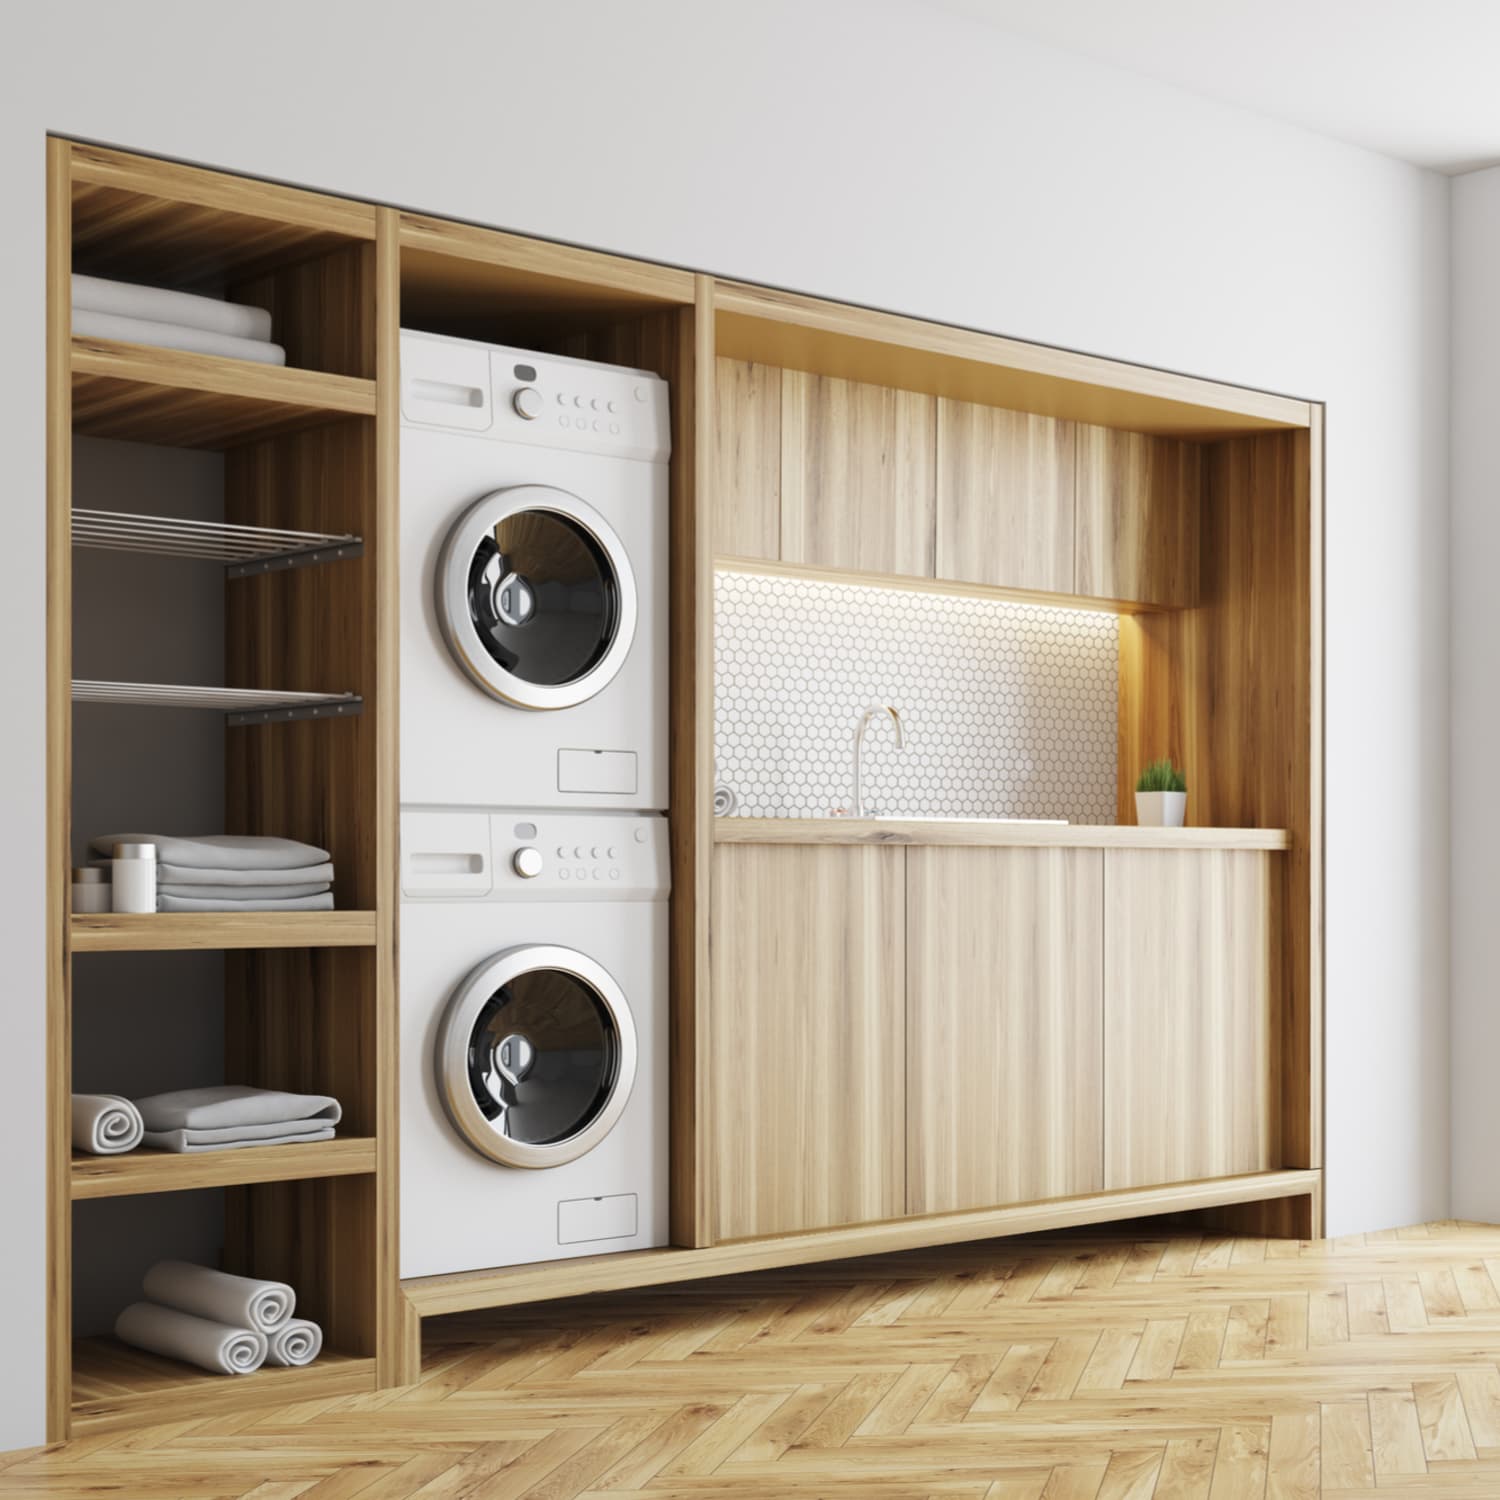
Step 7: Attach the stacking kit
If you want to save space in your laundry area, you can stack your GE washer and dryer. This can be achieved by attaching a stacking kit, which securely holds the dryer on top of the washer. Follow these steps to attach the stacking kit:
- Ensure compatibility: Before proceeding, make sure you have a stacking kit that is compatible with your specific GE washer and dryer models. Refer to the owner’s manual or consult the manufacturer’s website for information on recommended stacking kits.
- Prepare the washer: Start by ensuring the washer is properly positioned and leveled. Placing a level on top of the washer can help you determine if it is balanced. Make any necessary adjustments to ensure stability.
- Attach the stacking kit brackets: Locate the stacking kit brackets that will connect the dryer to the washer. These brackets are typically included in the stacking kit and designed to fit your specific models. Follow the instructions provided by the manufacturer to attach the brackets securely to the top of the washer.
- Secure the dryer to the brackets: Lift the dryer and carefully place it on top of the washer, aligning it with the stacking kit brackets. Make sure the dryer is level and centered on the brackets. Once properly aligned, use the supplied screws or other fastening mechanism to secure the dryer to the brackets. Follow the specific instructions provided by the manufacturer for your stacking kit.
- Double-check stability: Once the dryer is securely attached to the brackets, gently push and pull the stacked units to ensure they are stable and properly aligned. Make any necessary adjustments to ensure a secure fit.
- Test the stability: Give the stacked units a gentle shake to ensure they are securely attached and stable. If they wobble or feel loose, double-check your installation and ensure all brackets and screws are properly tightened.
Attaching a stacking kit is a great way to maximize space in your laundry area. It’s important to carefully follow the instructions provided by the manufacturer of the stacking kit to ensure a secure and stable stack. If you have any doubts or concerns about the installation process, consult the owner’s manual or seek professional assistance to avoid any potential issues.
With the stacking kit properly attached, your GE stacked washer and dryer units are now securely stacked, saving you valuable floor space in your laundry area.
Step 8: Reconnect the wiring
After completing the necessary maintenance, repairs, or stacking installation, it’s time to reconnect the wiring in your GE stacked washer dryer. Properly reconnecting the wiring is crucial to ensure the appliances function correctly and safely. Follow these steps to reconnect the wiring:
- Identify the wiring connections: Refer to the labels or notes you made when disconnecting the wiring to identify the correct connections. If you did not label the wiring, consult the owner’s manual or schematic diagram specific to your model for guidance.
- Unsecured wiring connectors: Locate the unsecured wiring connectors on the control panel and the interior of the washer and dryer units. Ensure that the connectors are clean and free from any debris or corrosion.
- Align and connect the wiring connectors: Align the connectors properly, making sure they fit together securely. Gently push the connectors together until you hear or feel a click, indicating they are firmly joined. Avoid forcing the connectors together as it may damage the wiring or connectors themselves.
- Secure the wiring: Once the connectors are connected, ensure that the wiring is neatly organized and secured to prevent tangling or interference with other components. You can use wire ties or tape to bundle the wiring, making sure it does not interfere with any moving parts or airflow.
- Check for proper connection: Double-check that all wiring connections are secure and properly aligned. Give each connection a gentle tug to ensure it is snugly connected and won’t come loose during operation.
Reconnecting the wiring restores the electrical connections between the control panel and the internal components of your GE stacked washer dryer. It ensures that the appliances function correctly and safely during operation.
Take your time to ensure each wiring connection is correctly reestablished. If you encounter any difficulties or uncertainty during the process, consult the owner’s manual or seek professional assistance to avoid any potential issues.
With the wiring successfully reconnected, your GE stacked washer dryer is now ready for use. Make sure to follow any specific instructions provided by the manufacturer regarding power-up procedures or initial setup to ensure optimal performance.
Step 9: Install the control panel
Now that you have completed the necessary maintenance, repairs, or installation of a stacking kit, it’s time to reinstall the control panel on your GE stacked washer dryer. The control panel houses the buttons, dials, and electronic components that allow you to operate the appliance. Follow these steps to install the control panel:
- Inspect the control panel: Before installing the control panel, inspect it for any damage or dirt. Ensure that it is clean and free from debris that could interfere with its operation.
- Align the control panel: Carefully align the control panel with the designated slots or tabs on the washer or dryer. Make sure it is positioned correctly and level.
- Reconnect the wiring connectors: Refer to the labels or notes you made when disconnecting the wiring connectors. Align the connectors properly and securely plug them back into their respective sockets on the control panel.
- Secure the control panel: Once the wiring connectors are connected, use the mounting screws or clips (depending on your specific model) to secure the control panel in place. If screws are used, tighten them securely but be cautious not to overtighten and damage the control panel or the housing.
- Test the control panel: With the control panel securely installed, proceed to test its functionality. Ensure that all buttons, dials, and other controls are working as intended. Check for any irregularities or issues in the operation of the panel.
Installing the control panel brings your GE stacked washer dryer back to its fully operational state. It allows you to use the appliance’s various functions and settings with ease.
Take your time during the installation to ensure that the control panel is properly aligned and securely attached. If you encounter any difficulties or uncertainty during the process, refer to the owner’s manual or seek professional assistance to avoid any potential issues.
With the control panel installed, your GE stacked washer dryer is now ready to be used. Enjoy the convenience and functionality it provides for your laundry needs.
Step 10: Replace the top panel
As you near the end of the process of opening your GE stacked washer dryer, it’s time to replace the top panel. The top panel provides structural integrity and a finished appearance to the appliance. Follow these steps to replace the top panel:
- Position the top panel: Align the top panel with the openings and edges on the washer or dryer unit. Ensure that it is properly aligned and level before proceeding.
- Insert retaining clips: If your GE stacked washer dryer uses retaining clips, gently slide them back into their respective slots. Make sure they are fully engaged and securely hold the top panel in place. Be mindful not to force the clips or damage the surrounding area.
- Secure the top panel with screws: If your appliance uses screws to secure the top panel, insert them in the designated holes. Use a screwdriver to tighten the screws securely, but be careful not to over-tighten and strip the holes or damage the top panel.
- Verify a snug fit: Once the top panel is in place and secured, give it a gentle wiggle to ensure it is snug and properly seated. Check that it is securely attached and does not move or rattle during operation.
Replacing the top panel completes the process of opening your GE stacked washer dryer. The panel restores the appliance’s aesthetics and protects the internal components.
Take care to align the top panel correctly and ensure that it is properly secured. If you encounter any difficulties during this process, refer to the owner’s manual or seek professional assistance to avoid any potential issues.
With the top panel replaced, your GE stacked washer dryer is now restored to its original appearance and ready to be used safely and effectively.
Read more: How To Hide A Stacked Washer Dryer
Step 11: Turn on the power
After completing all the necessary steps to open your GE stacked washer dryer, it’s time to turn on the power and bring the appliance back to full functionality. Follow these steps to safely turn on the power:
- Ensure everything is in place: Before turning on the power, double-check that all components, panels, and connections are securely in place. This includes the top panel, control panel, and any wiring connections that were previously disconnected or reconnected.
- Verify the power source: Ensure that the power cord of your GE stacked washer dryer is properly plugged into a functioning electrical outlet if it was temporarily unplugged. Make sure that the power source is reliable and capable of providing the necessary electricity for the appliance.
- Reset the circuit breaker: If you previously turned off the circuit breaker that supplies power to the appliance, make sure to reset it to the “On” position before using the appliance. This will restore the power supply to the washer dryer.
- Switch on the power: Once you have confirmed that everything is in place and the power source is ready, switch on the power to your GE stacked washer dryer. This can be done by pressing the power button or flipping the switch, depending on the specific model. Refer to the control panel or owner’s manual for guidance if needed.
- Monitor the initial start-up: As you turn on the power, closely observe the appliance for any unusual sounds, smells, or error messages. This is particularly important if you have performed maintenance or repairs on the appliance. If you notice anything out of the ordinary, consult the owner’s manual or seek professional assistance.
By following these steps, you can safely turn on the power to your GE stacked washer dryer and resume its regular operation. It’s important to be vigilant during the initial start-up to ensure that everything is functioning as expected.
If you experience any issues or concerns during the power-up process, refer to the troubleshooting section in the owner’s manual or contact GE Appliances customer support for further assistance.
With the power turned on, your GE stacked washer dryer is now ready to be used for all your laundry needs. Enjoy the convenience and performance of your appliance!
Conclusion
Opening a GE stacked washer dryer may initially seem like a daunting task, but with the right knowledge and careful steps, it can be accomplished successfully. Whether you need to access internal components for maintenance or repair, or you want to install a stacking kit to save space, this comprehensive guide has provided you with a step-by-step process to follow.
Safety should always be a top priority when working with any electrical appliance. Before beginning the opening process, ensure you have taken all necessary safety precautions, including turning off the power supply and wearing appropriate protective gear.
Gathering all the necessary information about your specific GE stacked washer dryer model is vital for a smooth opening process. Refer to the owner’s manual, online resources, and any other available documentation to understand the unique features and guidelines for your appliance.
The step-by-step instructions provided in this guide have covered each stage of the opening process. From turning off the power and removing the top panel to detaching the control panel, disconnecting the wiring, and removing the dryer from the washer, you have learned how to navigate each step effectively.
If your goal is to install a stacking kit, the guide has also provided instructions on attaching the kit, securing the dryer to the brackets, and ensuring stability. This innovation allows you to maximize space in your laundry area without compromising functionality.
After completing maintenance, repairs, or installation tasks, reconnecting the wiring, reinstalling the control panel, and replacing the top panel are crucial for bringing your GE stacked washer dryer back to its fully operational state. These steps ensure that the appliance functions correctly and safely.
Finally, turning on the power is the last step to restore full functionality to your GE stacked washer dryer. Closely monitor the initial start-up to ensure everything is working as expected, and promptly address any concerns or issues through troubleshooting or professional assistance if necessary.
By following this comprehensive guide, you have gained the knowledge and confidence to successfully open your GE stacked washer dryer. Remember to always prioritize safety, consult the owner’s manual or manufacturer’s resources when needed, and seek professional assistance for any tasks that may be beyond your expertise.
Now, armed with valuable insights and step-by-step instructions, you can confidently open your GE stacked washer dryer for maintenance, repairs, or to enhance its functionality with a stacking kit. Enjoy the improved performance and convenience that comes with a well-maintained and properly functioning appliance!
Frequently Asked Questions about How To Open Ge Stacked Washer Dryer
Was this page helpful?
At Storables.com, we guarantee accurate and reliable information. Our content, validated by Expert Board Contributors, is crafted following stringent Editorial Policies. We're committed to providing you with well-researched, expert-backed insights for all your informational needs.


0 thoughts on “How To Open Ge Stacked Washer Dryer”