Articles
How To Exhaust A Stacked Washer Dryer
Modified: August 28, 2024
Learn how to properly exhaust a stacked washer dryer with these helpful articles. Improve ventilation and prevent potential hazards.
(Many of the links in this article redirect to a specific reviewed product. Your purchase of these products through affiliate links helps to generate commission for Storables.com, at no extra cost. Learn more)
Introduction
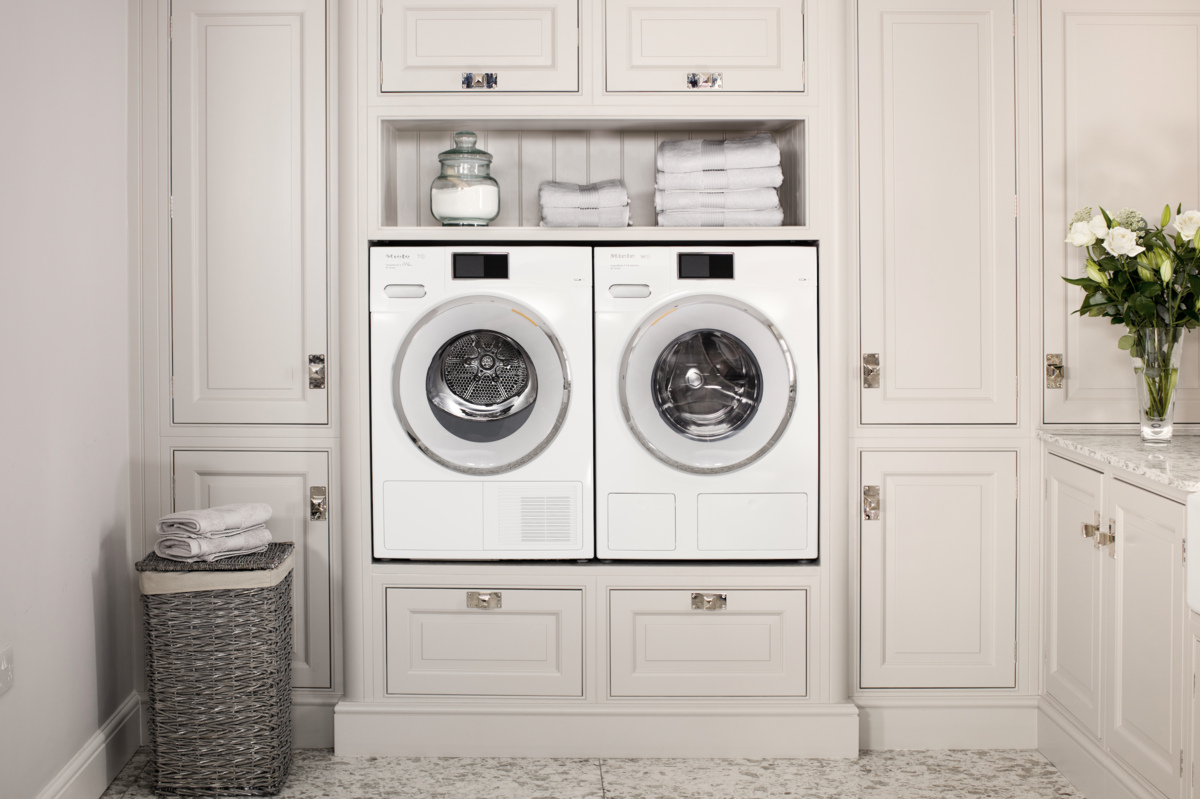
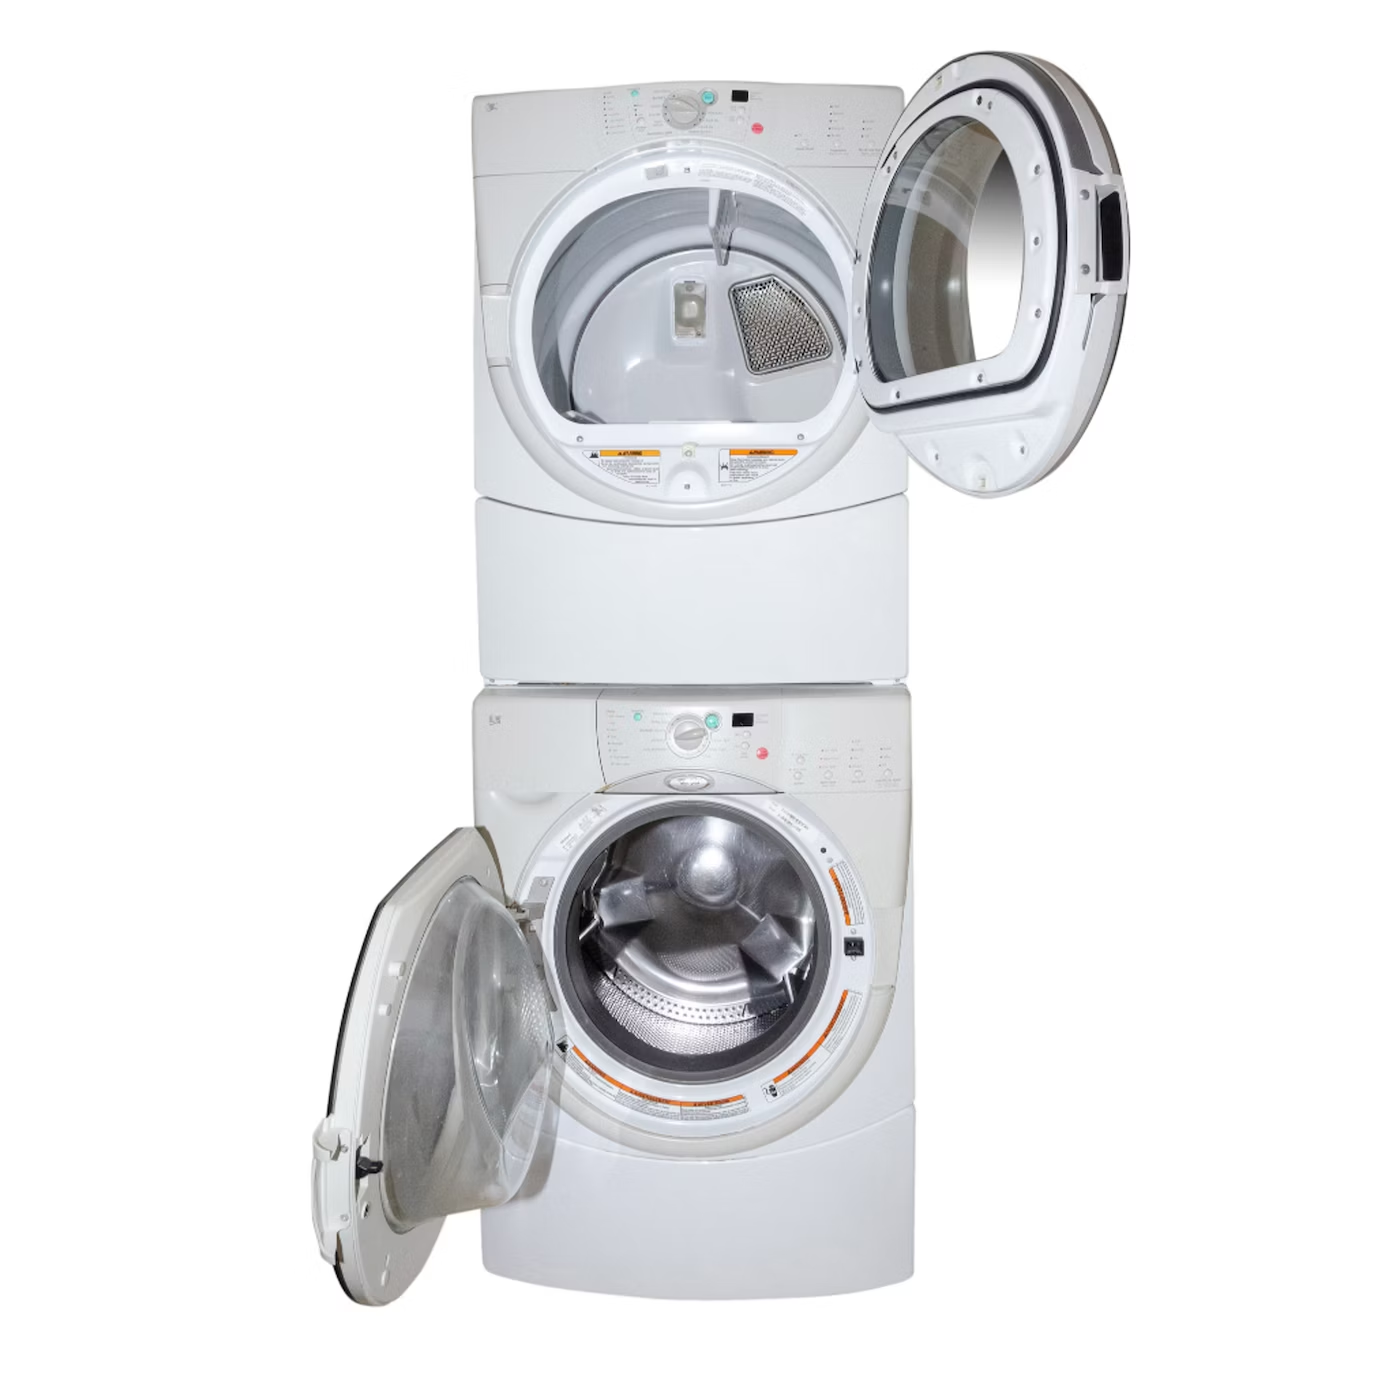
Doing laundry is a daily chore that we all have to tackle, and having a stacked washer dryer can make the process much more efficient. A stacked washer dryer combines the convenience of a washer and dryer in one compact unit, perfect for those with limited space. But how do you make the most of your stacked washer dryer and ensure that your clothes come out clean and dry every time?
In this article, we will guide you through a step-by-step process on how to exhaust a stacked washer dryer effectively. We will cover everything from preparing your machine to selecting the appropriate wash and dry settings, as well as loading and transferring your laundry. By following these steps, you can ensure that your clothes are washed and dried to perfection, saving you time and energy.
So, let’s get started and discover how to optimize your stacked washer dryer experience!
Key Takeaways:
- Properly preparing and selecting the right settings for your stacked washer dryer is crucial for achieving optimal laundry results. Attention to detail and care in loading, washing, and drying your clothes will ensure clean, fresh-smelling garments every time.
- Efficiently transferring damp clothes from the washer to the dryer and selecting the appropriate dry cycle are essential steps in the laundry process. Monitoring the drying process and promptly removing and folding your clothes will help maintain their quality and appearance.
Read more: How To Remove A Stacked Washer And Dryer
Step 1: Preparing Your Stacked Washer Dryer
Before using your stacked washer dryer, it’s essential to ensure that it’s properly prepared. Follow these steps to get your machine ready for a successful laundry cycle:
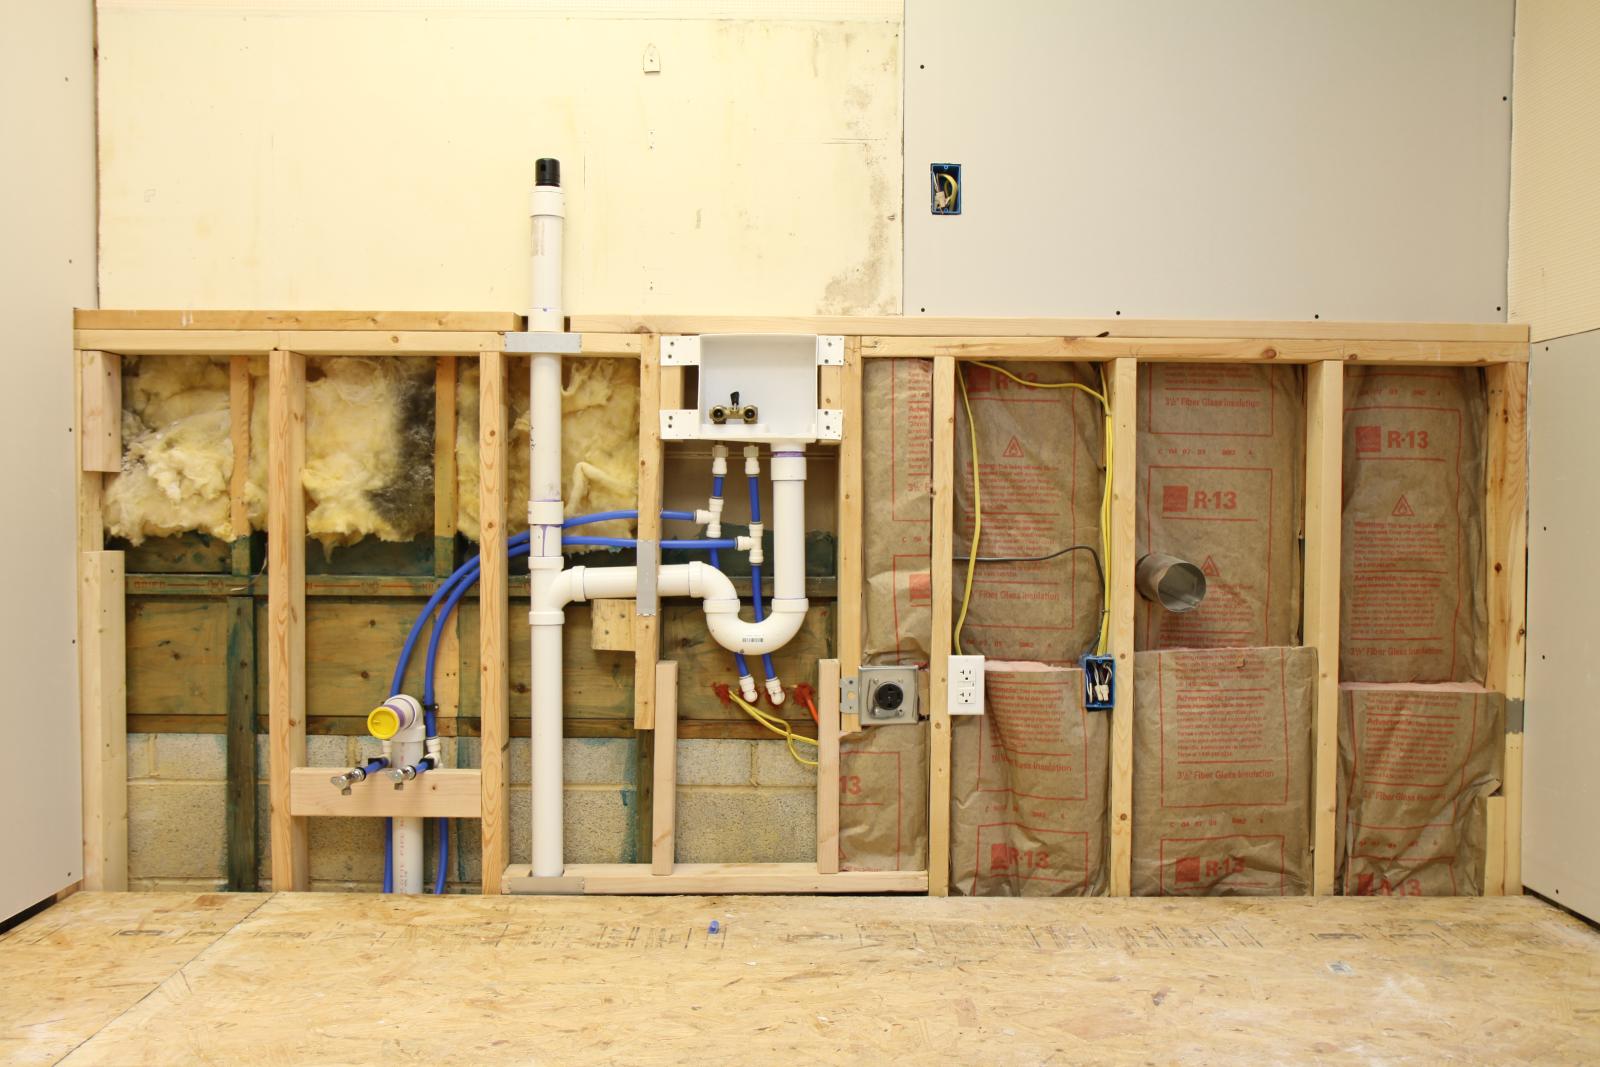
- Check the connections: Begin by inspecting the water and power connections to ensure they are secure. Make sure that both the water supply and the power cord are properly connected and functioning.
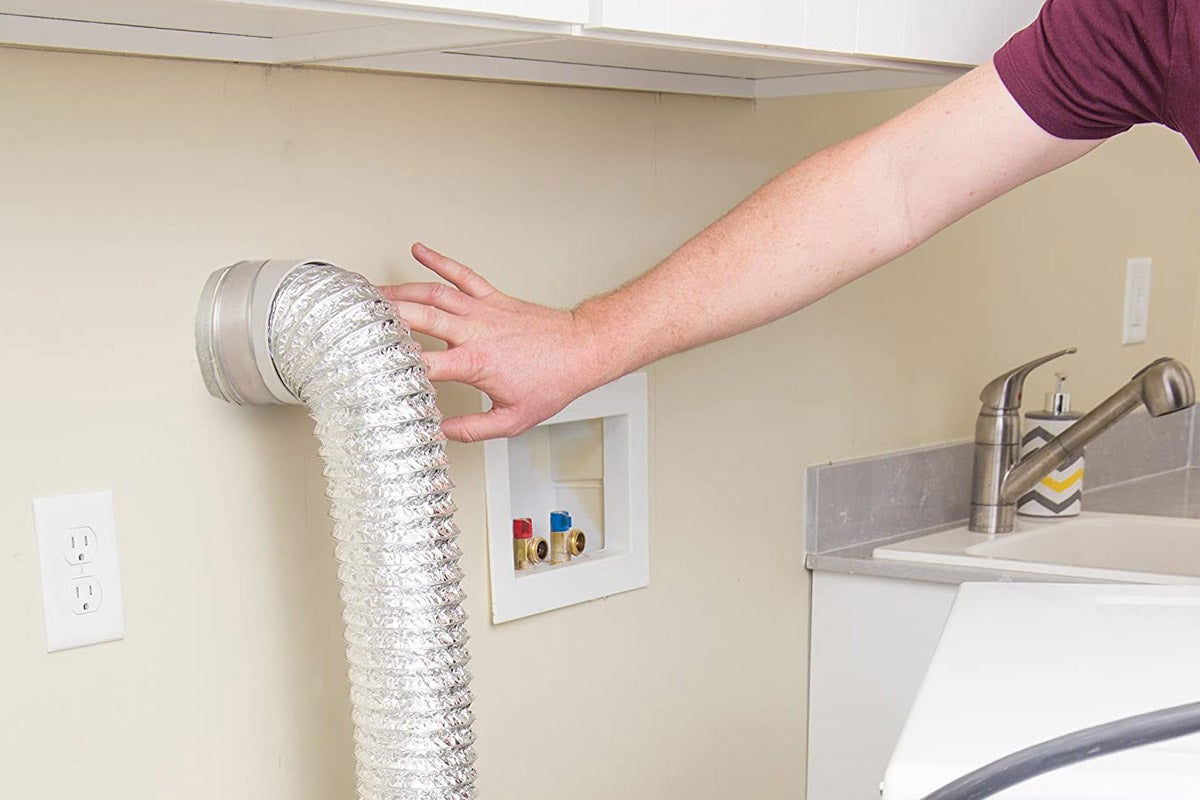
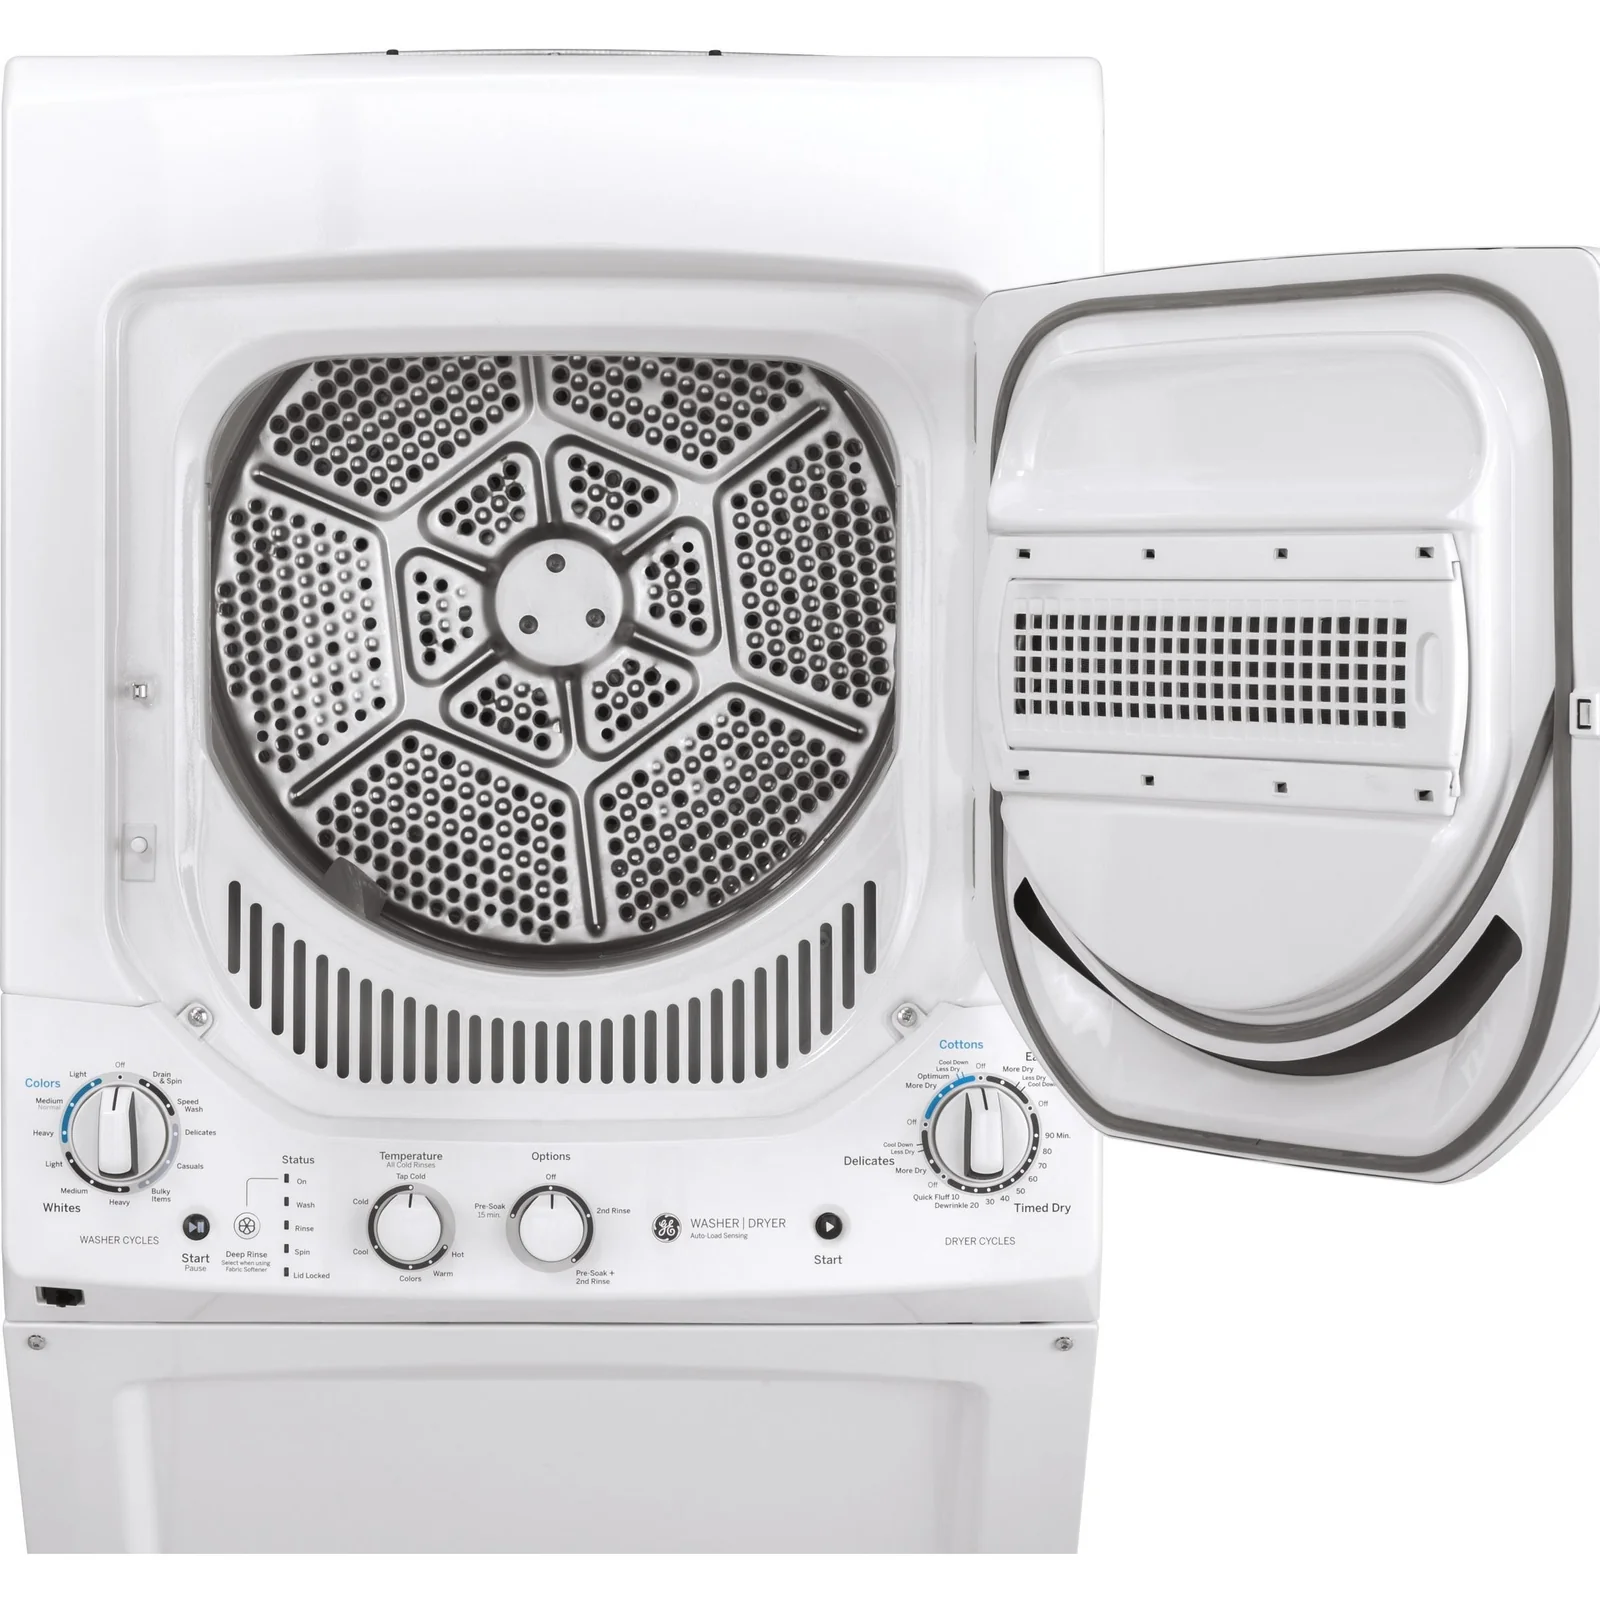
- Clean the lint trap: Locate the lint trap, which is typically located near the dryer door. Pull it out and clean it thoroughly, removing any built-up lint or debris. This will help prevent clogs and maintain proper airflow during the drying process.
- Level the machine: Use a level to ensure that your stacked washer dryer is properly balanced. Adjust the feet of the machine if necessary to ensure stability and prevent it from vibrating or moving excessively during operation.
- Check the detergent and fabric softener: Make sure you have the appropriate detergent and fabric softener for your laundry. Read the manufacturer’s instructions for recommended amounts and types of products to use.
- Review the user manual: Take a few minutes to familiarize yourself with the specific features and settings of your stacked washer dryer. Refer to the user manual for any specific instructions or guidelines provided by the manufacturer.
By following these preparation steps, you can ensure that your stacked washer dryer is ready to deliver optimal performance for your laundry needs. Taking the time to properly prepare the machine will help you avoid any potential issues and ensure a smooth and efficient laundry process.
Step 2: Selecting the Appropriate Wash and Dry Settings
Once your stacked washer dryer is prepared, it’s time to select the appropriate wash and dry settings for your laundry. The settings you choose will depend on factors such as the type of fabric, level of soiling, and desired level of dryness. Follow these steps to ensure you choose the right settings:
- Sort your laundry: Before loading your laundry into the washer, sort the items by color and fabric type. This will allow you to select the appropriate wash settings for each load.
- Choose the water temperature: Consider the recommended water temperature for the type of fabric you’re washing. Hot water is most effective for removing stains and sanitizing heavily soiled items, while cold water is suitable for delicate fabrics that require gentle care.
- Select the wash cycle: Depending on your machine’s options, choose a wash cycle that suits your needs. Common options include normal, delicate, heavy-duty, and quick wash. Refer to the user manual for guidance on the available cycles.
- Adjust the spin speed: Some stacked washer dryers allow you to adjust the spin speed. Higher spin speeds remove more moisture from the clothes, resulting in shorter drying times. Choose a speed appropriate for the fabric type and desired dryness level.
- Select the dry cycle: Once the wash cycle is complete, it’s time to select the appropriate dry cycle. Options may include regular, delicate, timed dry, or sensor dry. Consider the fabric type and desired level of dryness when making your selection.
- Choose the dryness level: If your stacked washer dryer offers different dryness levels, select the one that best fits your needs. Options often include extra dry, normal dry, and damp dry. Adjusting the dryness level allows you to customize the drying process based on your preferences.
By carefully selecting the appropriate wash and dry settings, you can ensure that your laundry is being treated in the best possible way. Paying attention to details such as water temperature, cycle type, and dryness level will help you achieve optimal results and prolong the life of your clothes.
Step 3: Loading Your Laundry into the Washer
Now that you’ve selected the appropriate wash settings for your laundry, it’s time to load your clothes into the washer. Proper loading techniques will not only ensure an effective wash but also prevent any damage to your garments. Follow these steps to load your laundry properly:
- Check the washer capacity: Determine the maximum load capacity of your washer. Overloading the machine can lead to poor cleaning results and excessive wear and tear on the drum and motor.
- Separate items by fabric type: Group similar fabrics together to prevent damage and ensure proper care during the wash cycle. Wash delicate items separately from heavy-duty clothing items.
- Turn garments inside out: For items with delicate or printed surfaces, turn them inside out to protect the color and design during the wash cycle.
- Pre-treat stains: If you have any stains on your clothes, pre-treat them with a stain remover or detergent before loading them into the washer. This will help in achieving better stain removal during the wash cycle.
- Distribute clothes evenly: Distribute your laundry evenly inside the machine to ensure balanced weight distribution during the wash cycle. This will prevent the machine from becoming unbalanced and vibrating excessively.
- Avoid overloading: Avoid stuffing too many clothes into the washer, as this can limit the machine’s ability to clean effectively. Leave some room for the clothes to move around freely.
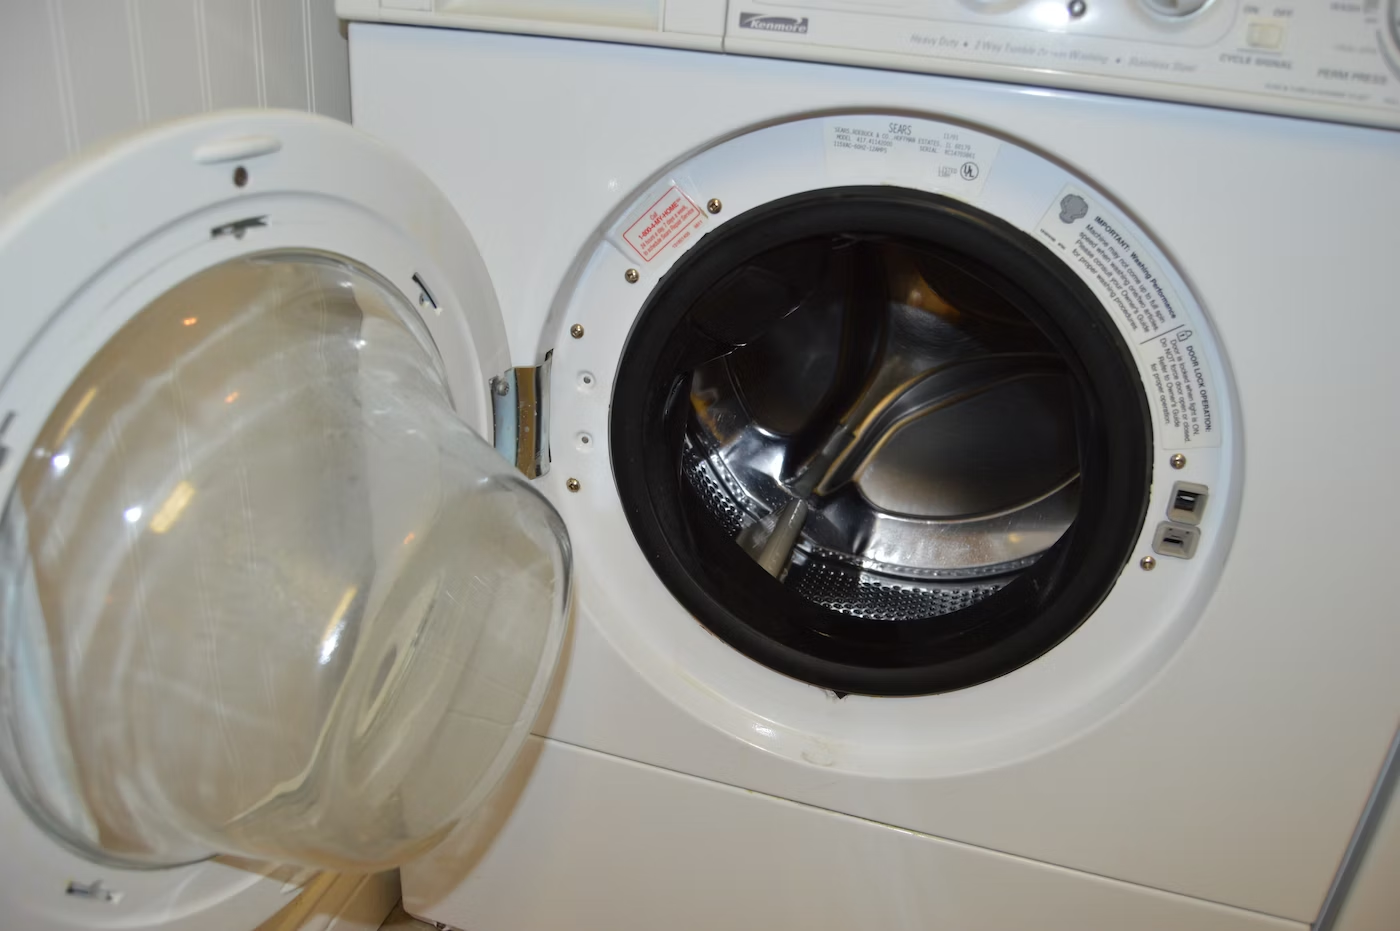
- Close the washer door: Once you’ve loaded your laundry, close the washer door securely. Make sure it is locked properly before starting the wash cycle.
By following these steps, you can ensure that your clothes are loaded correctly into the washer, allowing for an efficient and effective cleaning process. Proper loading techniques will help to protect your garments and optimize the performance of your stacked washer dryer.
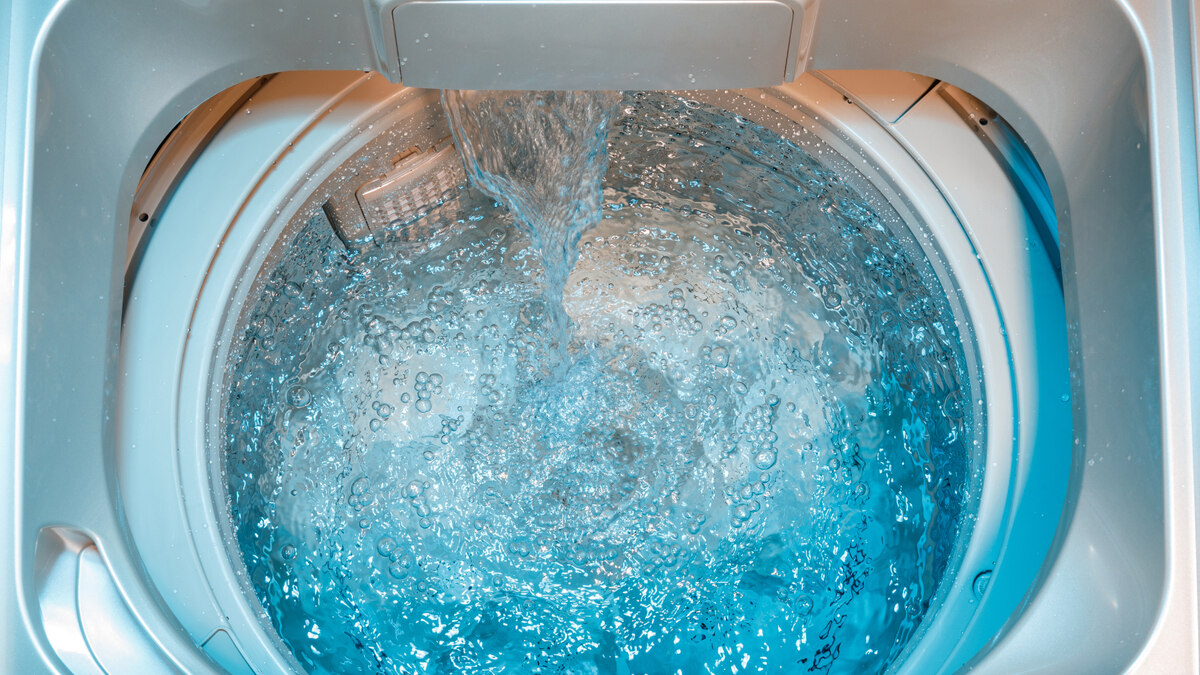
Step 4: Starting the Wash Cycle
With your laundry properly loaded into the washer, it’s time to start the wash cycle. Follow these steps to begin the cleaning process:
- Add detergent: Use the recommended amount of detergent for your load size and the level of soil in your clothes. Refer to the detergent packaging or the manufacturer’s guidelines for specific instructions.
- Select the desired wash cycle: Choose the wash cycle that best suits your laundry needs. Options may include normal, delicate, heavy-duty, or other specialized cycles. Select the appropriate cycle based on the fabric type and level of dirt on your clothes.
- Adjust any additional settings: Depending on your stacked washer dryer model, there may be additional settings available, such as water temperature, spin speed, or rinse options. Adjust these settings according to your preferences and the specific requirements of your laundry load.
- Start the wash cycle: Once you have set your desired wash settings, press the start button or follow the instructions on your machine to initiate the wash cycle.
- Monitor the progress: Keep an eye on the washing machine as it completes the cycle. Depending on the cycle you selected, the duration of the wash may vary. Use this time to attend to other tasks or relax until the cycle is complete.
- Remove clothes promptly: Once the wash cycle finishes, promptly remove your clothes from the washer to avoid excessive wrinkling or musty odors. Transfer the clothes to the dryer or hang them up to air dry if applicable.
Starting the wash cycle correctly is crucial to achieving clean and fresh-smelling clothes. By following these steps, you can ensure that your laundry receives the appropriate treatment and comes out of the washer ready for the drying process.
Read more: How Tall Is A Stacked Washer Dryer
Step 5: Transferring Damp Clothes to the Dryer
Once the wash cycle is complete, it’s time to transfer your damp clothes from the washer to the dryer. Follow these steps to ensure a seamless transition:
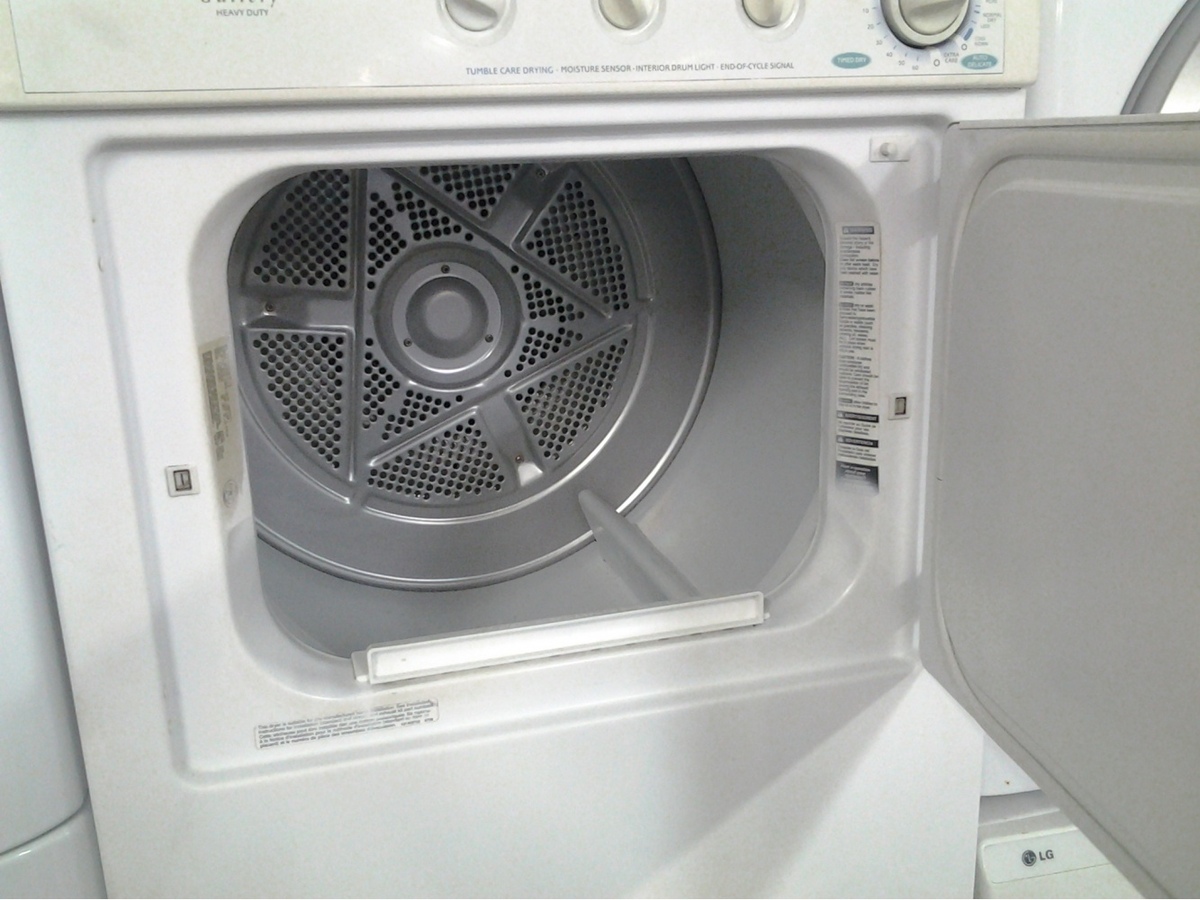
- Check the capacity of the dryer: Before transferring your clothes, check the capacity of your dryer to ensure it can accommodate the size of your laundry load. Overloading the dryer can lead to inefficient drying and wrinkling.
- Remove excess water: Before transferring your clothes, give them a gentle shake or wring out any excess water. This will help reduce drying time and improve the efficiency of the drying process.
- Empty the lint trap: Before starting the dryer, take a moment to clean out the lint trap. A clean lint trap improves airflow and prevents lint buildup, reducing the risk of fire and improving drying performance.
- Load the clothes into the dryer: Place the damp clothes into the dryer, being mindful not to overload it. Leave enough space for the clothes to move freely and allow for effective drying.
- Close the dryer door securely: Once you’ve loaded your clothes into the dryer, close the door securely to ensure that it is properly sealed during the drying process.
- Check for any special care instructions: Before selecting the drying cycle, check the care labels on your clothes for any specific instructions. Some items may require air drying or delicate settings.
By following these steps, you can ensure a smooth and efficient transition from the washer to the dryer. Properly transferring your damp clothes will help facilitate effective drying and minimize the chances of clothes getting tangled or wrinkled.
Make sure to clean the lint trap after every use to maintain proper airflow and prevent the dryer from overheating. This will help to ensure efficient drying and prevent potential fire hazards.
Step 6: Selecting the Desired Dry Cycle
Now that your damp clothes are transferred to the dryer, it’s time to select the appropriate dry cycle. The right dry cycle will ensure that your clothes are dried efficiently and effectively without causing any damage. Follow these steps to choose the desired dry cycle:
- Check the fabric care labels: Before selecting the dry cycle, check the care labels on your clothes for any specific drying instructions. Some garments may require low heat or delicate drying settings to prevent shrinking or damage.
- Consider the desired dryness level: Think about how dry you want your clothes to be. Most dryers have options such as normal dry, extra dry, or damp dry. Choose the dryness level that best suits your preference and the garments you are drying.
- Select the appropriate drying cycle: Depending on your dryer model, there may be various drying cycles available, including regular, delicate, timed dry, or sensor dry. Choose the cycle that aligns with the fabric type and drying needs of your laundry load.
- Adjust any additional settings: Some dryers offer additional settings such as temperature control, wrinkle prevention, or air fluff. Adjust these settings according to your preferences and the specific requirements of your clothes.
- Start the drying cycle: Once you have selected the desired dry cycle and adjusted any necessary settings, press the start button or follow the instructions on your dryer to initiate the drying process.
- Monitor the drying process: Keep an eye on the dryer as it progresses through the cycle. This will allow you to make any necessary adjustments or remove delicate items that dry more quickly.
By following these steps, you can choose the appropriate dry cycle for your clothes and ensure that they dry efficiently and safely. Properly selecting the dry cycle will help you avoid over- or under-drying your garments, resulting in fresh, dry clothes ready for folding and storing.
Step 7: Starting the Dry Cycle
With the desired dry cycle selected, it’s time to start the drying process for your clothes. Follow these steps to begin the dry cycle on your stacked washer dryer:
- Ensure the lint trap is clean: Before starting the dryer, make sure the lint trap is clean and free from any lint or debris. A clean lint trap enhances the dryer’s airflow and efficiency.
- Double-check the dryer settings: Confirm that you have selected the appropriate dry cycle and adjusted any necessary settings, such as temperature or dryness level.
- Load any additional accessories: If you have items like dryer balls or fabric softener sheets, add them to the dryer before starting the cycle. These accessories can help reduce static and add a pleasant scent to your clothes.
- Close the dryer door securely: Ensure that the door of the dryer is closed properly and securely before starting the dry cycle. This will ensure that the dryer can function safely and effectively.
- Start the dry cycle: Press the start button or follow the instructions specific to your stacked washer dryer model to begin the dry cycle.
- Monitor the drying process: It’s important to keep an eye on the dryer as it progresses through the dry cycle. This allows you to check for any potential issues, adjust the settings if needed, and ensure that the clothes are drying properly.
- Interrupt cycle for delicate items: If you have delicate garments that may require shorter drying times, you can pause the cycle and remove them earlier to prevent them from over-drying or becoming damaged.
By following these steps, you can start the dry cycle on your stacked washer dryer and ensure that your clothes are effectively and efficiently dried. Monitoring the process and taking care of any specific needs will help you achieve the best results and keep your clothes in excellent condition.
Step 8: Removing Dry Clothes from the Dryer
Once the dry cycle is complete, it’s time to remove your dry clothes from the dryer. Properly handling and removing the clothes ensures they stay in good condition and ready to be folded and stored. Follow these steps to safely remove your dry clothes:
- Drum cleanout: Before removing your clothes, take a quick look inside the dryer drum to make sure no items have been left behind.
- Empty the lint trap: Start by emptying the lint trap once again. This will remove any lint that has accumulated during the drying process and prepare it for the next use.
- Check for residual heat: Depending on the type of dryer you have, there may still be residual heat inside. Use caution and avoid touching hot surfaces to prevent burns.
- Remove clothes promptly: Promptly remove your dry clothes to prevent wrinkling. Leaving them in the dryer for an extended period can result in garments becoming creased or needing additional pressing.
- Check for clothes shrinking: While the dryer should have properly dried your clothes, it’s always a good idea to check for any signs of shrinkage. If an item appears smaller or tighter, it may have shrunk, and you may need to adjust your future drying settings for similar garments.
- Hang or fold the clothes: Once you have removed the clothes from the dryer, take the time to hang or fold them immediately. Properly hanging or folding the clothes will help them maintain their shape and reduce the need for ironing later.
- Clean the dryer exterior: After removing your clothes, take a moment to wipe down the exterior of the dryer with a damp cloth to keep it clean and free from any lint or residues.
By following these steps, you can safely and efficiently remove your dry clothes from the dryer. Taking care to promptly address each item will help ensure that your clothes stay fresh, wrinkle-free, and ready to be worn or stored.
Read more: How To Hide A Stacked Washer Dryer
Step 9: Folding and Storing Your Laundry
Once your clothes are dry and removed from the dryer, it’s time to fold and store them properly. Proper folding and storage techniques will help keep your clothes organized, maintain their appearance, and make it easier to find what you need when getting dressed. Follow these steps to fold and store your laundry:
- Separate by clothing type: Sort your clothes into distinct piles based on their type, such as shirts, pants, or underwear. This will make it easier to fold and store them.
- Fold clothes neatly: Take each item and fold it neatly according to its specific requirements. Use techniques like the KonMari fold or the classic rectangle fold to maximize space and maintain the garment’s shape.
- Stack folded clothes: After folding each item, stack them in specific categories or by clothing type. This will help keep your clothes organized and easily accessible in your closet or drawers.
- Hang delicate or wrinkle-prone items: Hang delicate or easily wrinkled items, such as dresses or suits, on appropriate hangers. Use padded hangers for delicate fabrics to avoid snagging or stretching.
- Utilize drawer dividers or organizers: If using drawers, consider using dividers or organizers to separate items such as socks, underwear, or accessories. This will keep them neatly arranged and easily visible.
- Arrange shoes and accessories: Organize your shoes and accessories in a designated area, such as a shoe rack or storage bins. This will minimize clutter and make it easier to find the items you need.
- Clean up the laundry area: Once everything is folded and stored, take a moment to tidy up the laundry area. Put away any remaining laundry supplies and wipe down surfaces to maintain a clean and organized space.
By following these steps, you can ensure that your clothes are properly folded and stored, making it easier to maintain an organized and clutter-free living space. Taking the time to fold and store your laundry properly will also help extend the life of your garments and make getting dressed a breeze.
Conclusion
Congratulations! You have successfully learned the step-by-step process of how to exhaust a stacked washer dryer effectively. By following these steps, you can optimize the performance of your stacked washer dryer and ensure that your clothes come out clean and dry every time.
From preparing your machine and selecting the appropriate wash and dry settings to loading and transferring your laundry, each step plays a crucial role in achieving optimal results. By carefully following these guidelines, you can save time and energy while keeping your clothes in excellent condition.
Remember to always check the fabric care labels on your clothes for specific instructions and adjust the settings accordingly. Additionally, regularly cleaning the lint trap and maintaining proper balance in your stacked washer dryer will improve its efficiency and longevity.
Lastly, make sure to properly fold and store your laundry. By organizing your clothes and keeping them neat, you can easily find what you need and maintain the overall cleanliness and tidiness of your living space.
Now that you have mastered the art of exhausting a stacked washer dryer, it’s time to put your knowledge into practice and enjoy the benefits of an efficient and convenient laundry routine. So go ahead, tackle your laundry with confidence, and revel in fresh, clean clothes!
Frequently Asked Questions about How To Exhaust A Stacked Washer Dryer
Was this page helpful?
At Storables.com, we guarantee accurate and reliable information. Our content, validated by Expert Board Contributors, is crafted following stringent Editorial Policies. We're committed to providing you with well-researched, expert-backed insights for all your informational needs.


0 thoughts on “How To Exhaust A Stacked Washer Dryer”