Articles
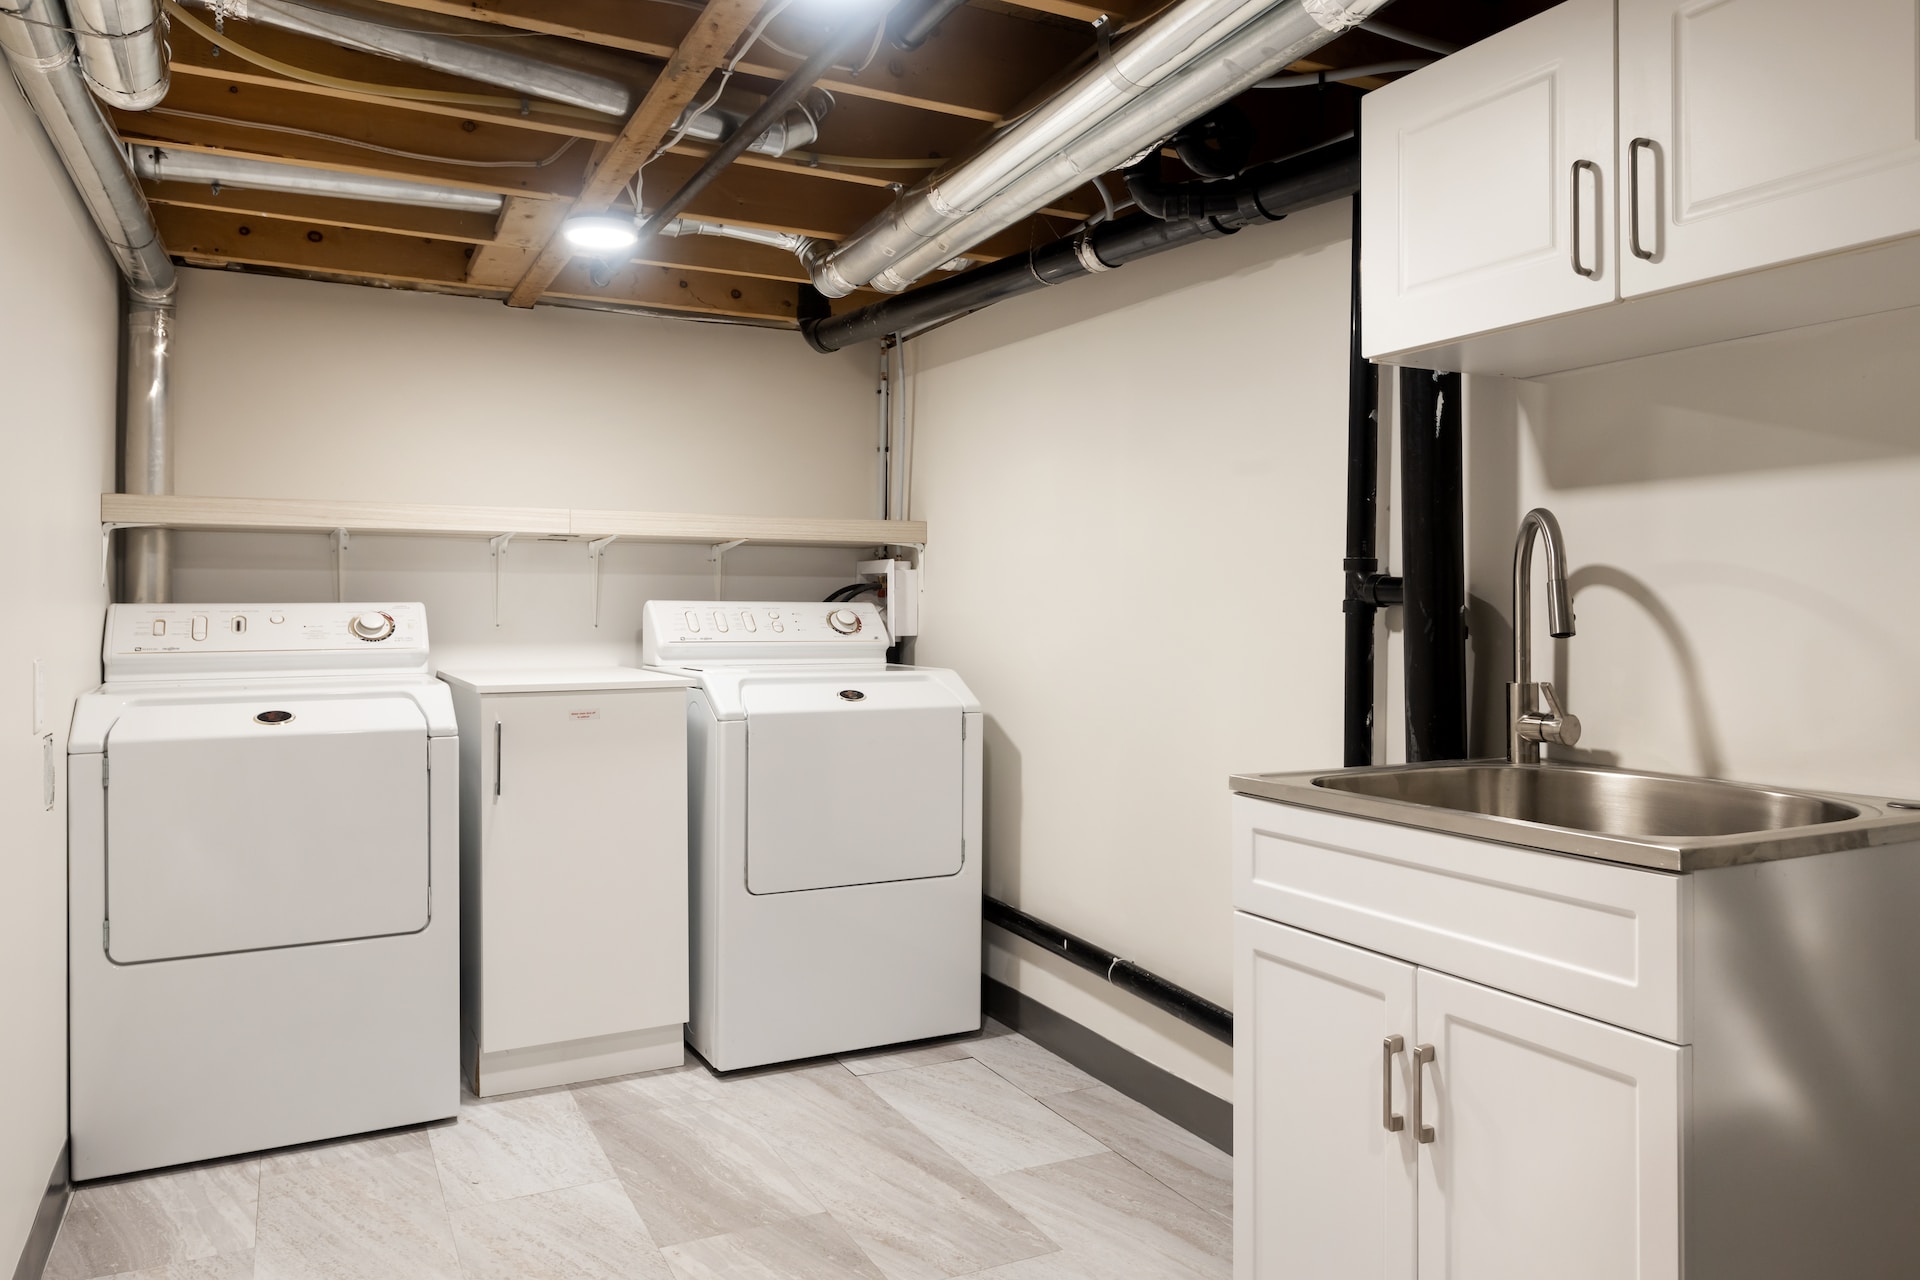
How To Disconnect Washer And Dryer
Modified: October 19, 2024
Learn how to disconnect your washer and dryer easily with our informative articles. Gain expert knowledge and master the process with step-by-step instructions.
(Many of the links in this article redirect to a specific reviewed product. Your purchase of these products through affiliate links helps to generate commission for Storables.com, at no extra cost. Learn more)
Introduction
When it comes time to move or replace your washer and dryer, it is important to know how to properly disconnect them. Safely disconnecting your washer and dryer not only ensures no damage occurs during the process, but also allows for an easy and efficient reinstallation in the future. Whether you are moving to a new home, upgrading your appliances, or simply need to relocate your washer and dryer within your current space, following the correct steps will help you disconnect them with ease.
In this article, we will provide you with a comprehensive guide on how to disconnect your washer and dryer properly. We will cover the tools and materials you will need, as well as step-by-step instructions to ensure a smooth disconnection process. By following these guidelines, you will be able to disconnect your washer and dryer safely and efficiently.
Before we get started, please note that this article assumes you have a basic understanding of home appliances and electrical systems. If you are uncomfortable or unsure about any step, it is always recommended to consult a professional for assistance.
Now, gather your tools and let’s begin the process of disconnecting your washer and dryer!
Key Takeaways:
- Safely disconnecting your washer and dryer requires proper tools, safety precautions, and step-by-step processes. Following these guidelines ensures a smooth disconnection and prepares appliances for relocation or storage.
- Taking safety precautions, unplugging the appliances, and properly disconnecting water and power sources are crucial steps in safely disconnecting your washer and dryer. Following these steps ensures a successful disconnection process and prepares appliances for relocation or storage.
Read more: How To Disconnect Wires From Stacked Washer
Tools and Materials Needed
Before you begin disconnecting your washer and dryer, it is important to gather the necessary tools and materials to ensure a smooth disconnection process. Here is a list of items you will need:
- Adjustable wrench or pliers
- Screwdriver (if necessary)
- Bucket or towel
- Teflon tape
- Electrical tape
- Moving blankets or padding
It is important to have these tools and materials ready before you start the disconnection process. They will help you easily disconnect the necessary components and ensure everything is properly secured for transportation or storage.
Additionally, it is a good idea to have a friend or family member available to assist you during the disconnection process. Moving appliances like washers and dryers can be heavy and require extra hands to safely maneuver.
Now that you have gathered your tools and materials, let’s move on to the step-by-step process of disconnecting your washer and dryer.
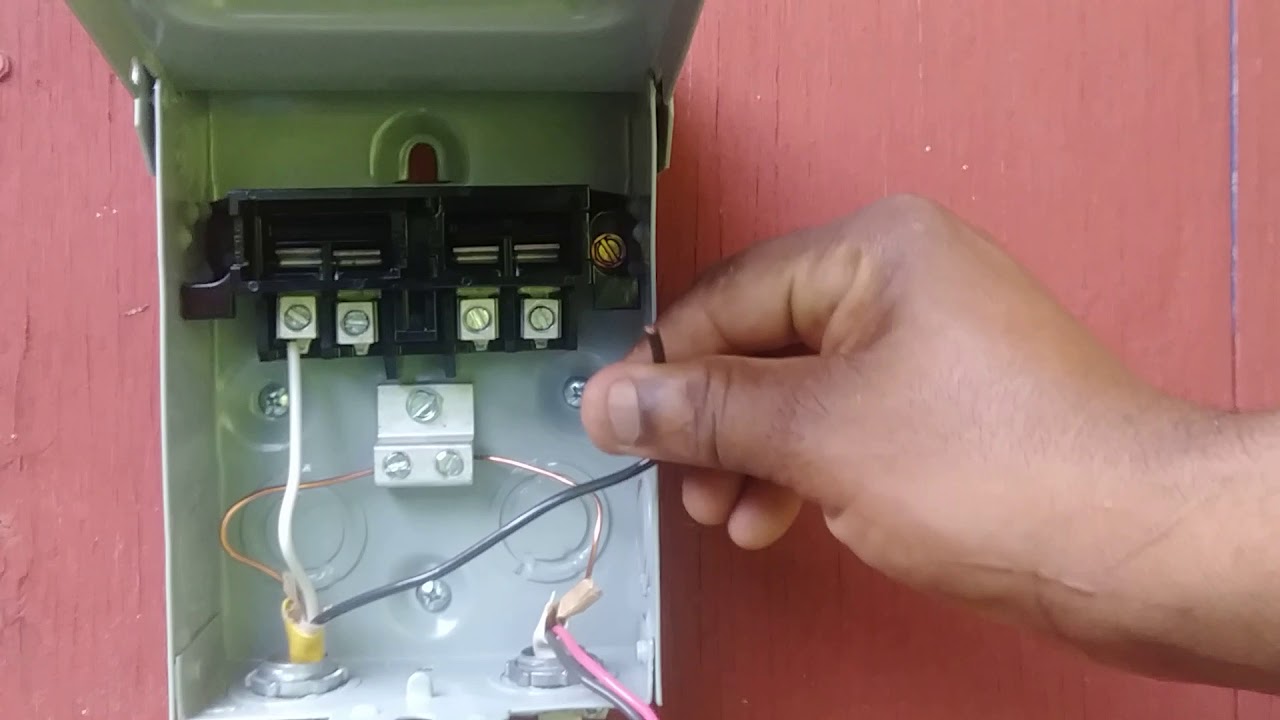
Step 1: Safety Precautions
Before you begin disconnecting your washer and dryer, it is important to take some safety precautions to ensure your well-being and prevent any accidents. Here are the safety measures you should follow:
- Turn off the power: Locate the electrical panel in your home and turn off the circuit breaker that supplies power to the washer and dryer. This will prevent any electrical shocks while disconnecting the appliances.
- Wear protective gear: It is advisable to wear safety gloves and goggles to protect your hands and eyes during the disconnection process. This will help prevent any injuries or mishaps.
- Unplug the appliances: Before touching any electrical components, make sure to unplug the washer and dryer from the power outlets. This eliminates the risk of electric shock and ensures your safety.
- Secure the area: Clear any obstacles or clutter around the washer and dryer to create a safe working environment. This will allow you to move around freely without the risk of tripping or falling.
- Read the manufacturer’s instructions: Familiarize yourself with the user manual or any instructions provided by the manufacturer for your specific washer and dryer models. This will give you a better understanding of the disconnection process and any specific precautions to be taken.
By following these safety precautions, you minimize the risk of accidents or injuries while disconnecting your washer and dryer. Remember, safety should always be the top priority when working with electrical appliances.
Now that you have taken the necessary safety measures, you can proceed to the next step: unplugging the washer and dryer.
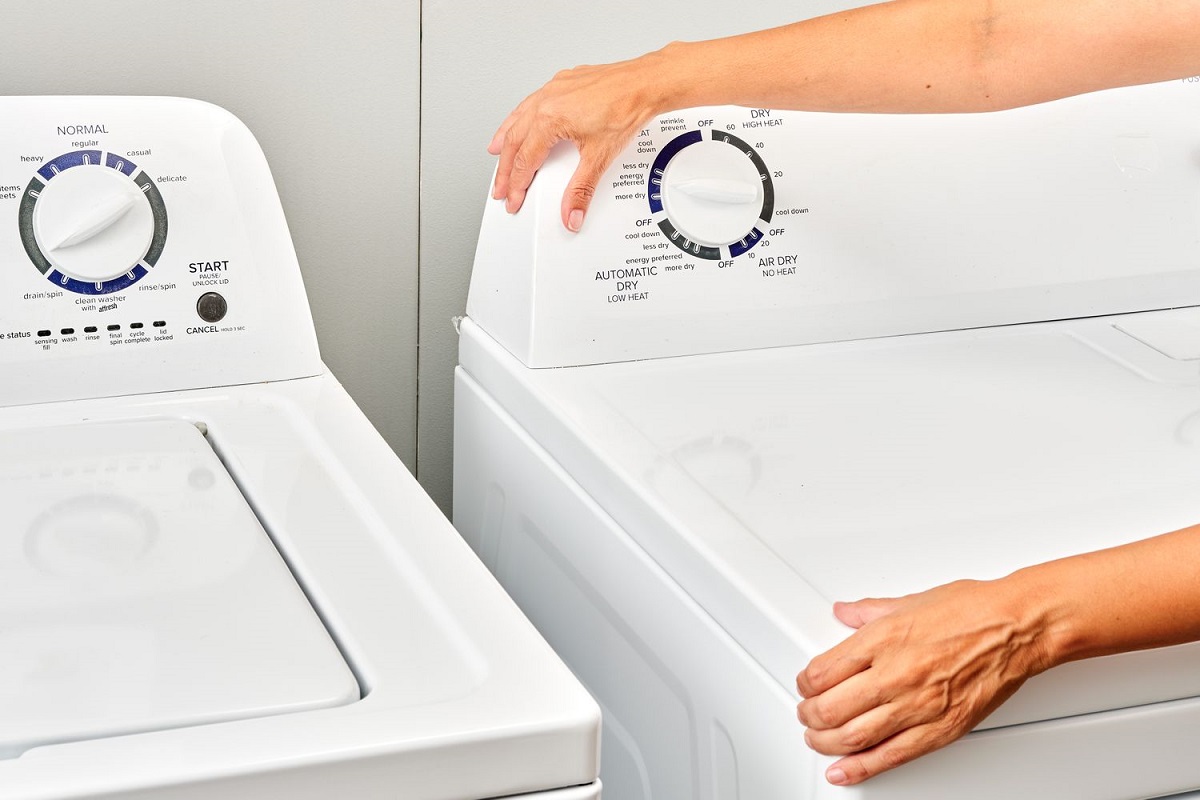
Step 2: Unplug the Washer and Dryer
Now that you have ensured your safety, it’s time to unplug the washer and dryer from the power source. Follow these steps to safely disconnect the appliances:
- Locate the power cord: The power cords for both the washer and dryer are typically located at the back of the machines. Gently move the appliances away from the wall to access the power cords.
- Disconnect the power cords: Once you have access to the power cords, carefully unplug them from the electrical outlets. Be sure to hold onto the plug itself and not pull on the cord to avoid any damage.
- Tuck the power cords away: After unplugging the power cords, neatly tuck them away so they don’t get tangled or cause any tripping hazards. You can use electrical tape or zip ties to secure the cords to the back of the appliances.
By following these steps, you have successfully unplugged the washer and dryer from the power source. This ensures the safety of both yourself and the appliances during the disconnection process.
Next, we will move on to shutting off the water supply for the washer. This step is crucial to prevent any water leaks or damage during the disconnection.
Step 3: Shut Off the Water Supply
Before you disconnect the water hoses from your washer, it is essential to shut off the water supply. This will prevent any water leaks or damage during the disconnection process. Follow these steps to safely shut off the water supply:
- Locate the water shut-off valves: The water shut-off valves are typically located behind or near the washer. Look for two valves, one for hot water and one for cold water.
- Turn off the water supply: Use an adjustable wrench or pliers to turn the valves clockwise until they are fully closed. This will shut off the water supply to the washer.
- Test the water supply: To ensure that the water supply is completely shut off, turn on a faucet or another water source nearby. If no water comes out, it means the supply is closed off successfully.
It is important to shut off the water supply before disconnecting the water hoses to avoid any potential water leaks or flooding. Taking this precautionary measure will protect your home and make the disconnection process much smoother.
Now that you have shut off the water supply, we will move on to the next step: disconnecting the water hoses.
Read more: How To Disconnect Doorbell
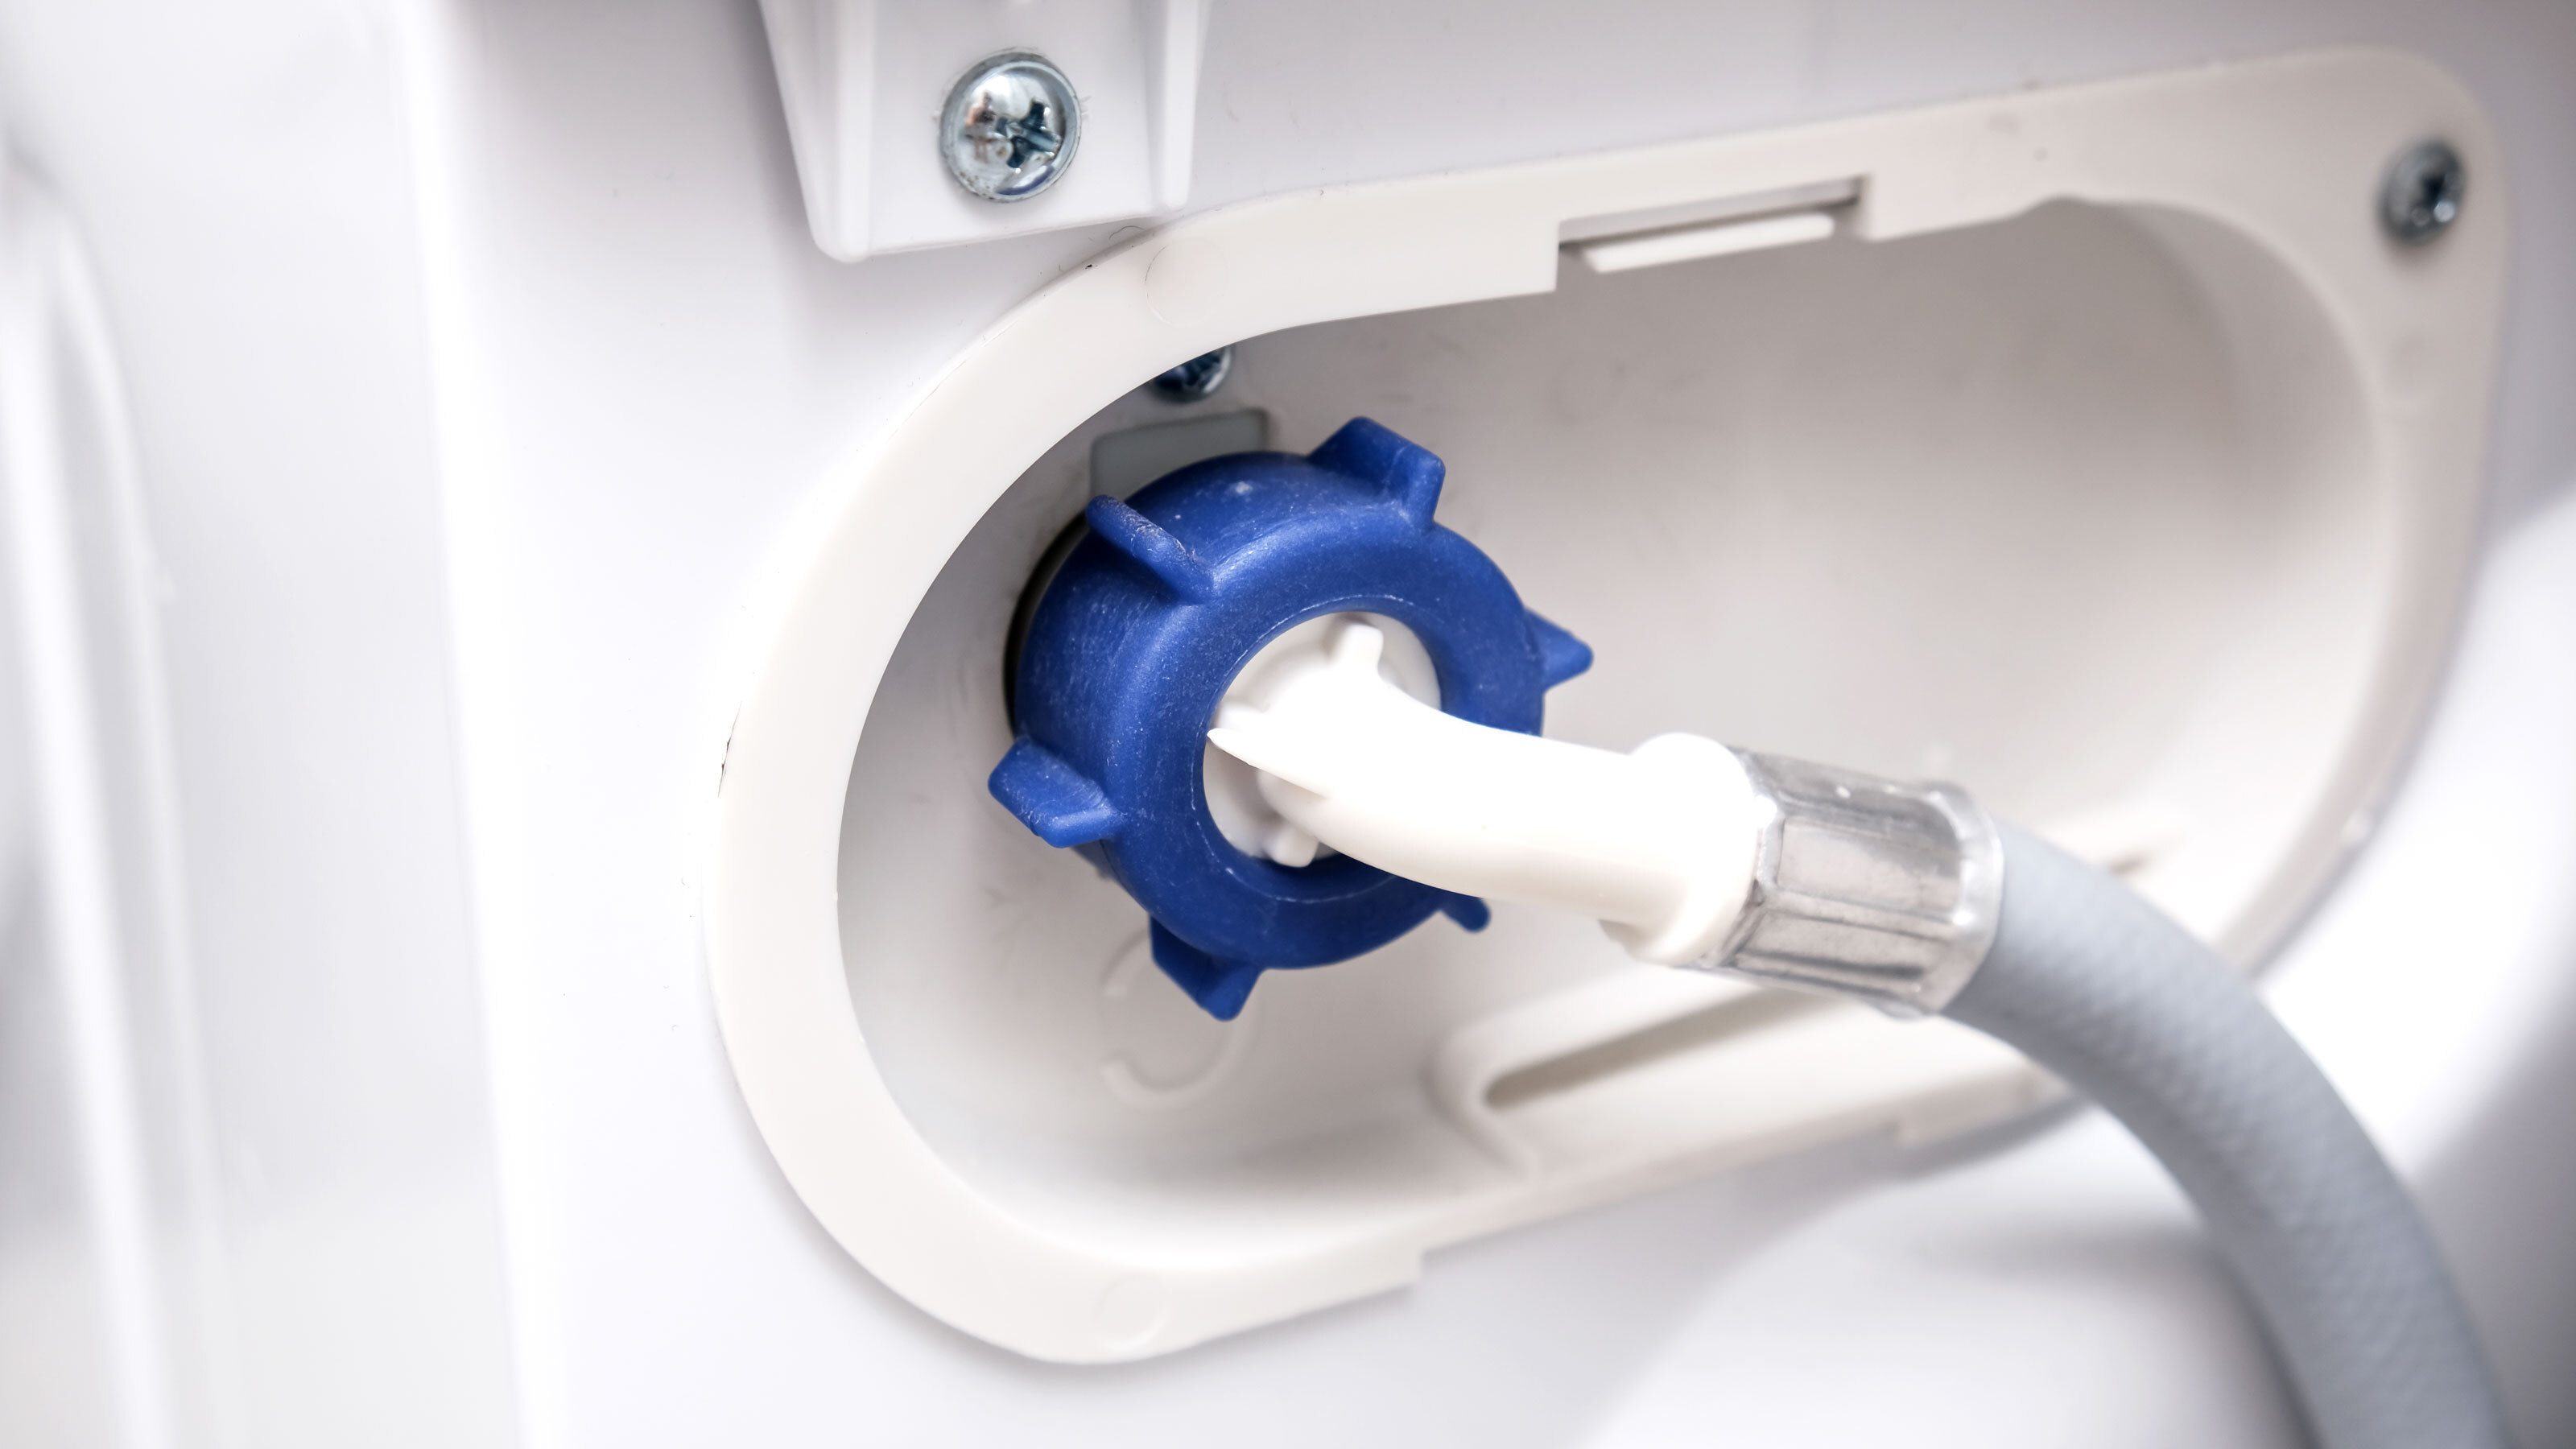
Step 4: Disconnect the Water Hoses
Now that you have shut off the water supply, it is time to disconnect the water hoses from your washer. Follow these steps to safely disconnect the hoses:
- Prepare a bucket or towel: Place a bucket or towel under the hoses to catch any residual water that may spill during the disconnection.
- Inspect the hoses: Before disconnecting the hoses, visually inspect them for any signs of damage or wear. If you notice any cracks or leaks, it is recommended to replace the hoses before reconnecting your washer.
- Use an adjustable wrench: With the bucket or towel in place, use an adjustable wrench to loosen the hose connections. Turn the nut counterclockwise to loosen it gradually until you can remove it by hand.
- Disconnect the hoses: Once the connections are loose, gently pull the hoses away from the back of the washer. Be cautious of any remaining water in the hoses.
- Drain any remaining water: If there is any water remaining in the hoses, carefully drain it into the bucket or sink before completely removing the hoses.
- Inspect the hose connections: While the hoses are disconnected, take a moment to inspect the hose connections on the back of the washer for any debris or buildup. Clean the connections if necessary.
By following these steps, you have successfully disconnected the water hoses from your washer. Make sure to keep the hoses and their connections clean and free from any debris before reinstallation.
Next, we will move on to disconnecting the drain hose from your washer. This step is necessary to avoid any water leakage during the disconnection process.
Before disconnecting your washer and dryer, make sure to unplug them from the power source. Then, turn off the water supply and disconnect the hoses. For the dryer, disconnect the vent hose. Finally, carefully move the appliances away from the wall.
Step 5: Disconnect the Drain Hose
Disconnecting the drain hose from your washer is an important step in the disconnection process to avoid any water leakage. Follow these steps to safely disconnect the drain hose:
- Locate the drain hose: The drain hose is typically connected to the back of the washer. It is usually secured with a clamp or a plastic connector.
- Remove the clamp or connector: Use a screwdriver or pliers to loosen and remove the clamp or connector that is holding the drain hose in place.
- Disconnect the drain hose: Once the clamp or connector is removed, gently pull the drain hose away from the washer. Be cautious of any water that may still be in the hose.
- Drain any remaining water: If there is any water remaining in the drain hose, carefully drain it into a bucket or sink before completely removing the hose.
By following these steps, you have successfully disconnected the drain hose from your washer. Make sure to keep the drain hose clean and clear of any obstructions before reinstallation.
Next, we will move on to disconnecting the power cord from your dryer. This step is crucial to ensure the safety of the disconnection process.
Step 6: Disconnect the Power Cord
Disconnecting the power cord from your dryer is a vital step to ensure safety during the disconnection process. Follow these steps to safely disconnect the power cord:
- Locate the power cord: The power cord for your dryer is typically located at the back of the appliance. It is connected to the electrical outlet by a plug.
- Unplug the power cord: Gently pull the plug of the power cord out of the electrical outlet. Avoid pulling on the cord itself to prevent any damage to the cord or the outlet.
- Secure the power cord: After unplugging the power cord, it is recommended to secure it in place to prevent it from dragging or tangling during the move or storage. You can use electrical tape or zip ties to secure the cord to the back of the dryer.
By following these steps, you have successfully disconnected the power cord from your dryer. Keep the power cord in a secure place and ensure it is not damaged or frayed before reinstallation.
Next, if you have a dryer, we will move on to removing the venting and ductwork. This step is specific to dryers and should be followed to ensure the proper disconnection.
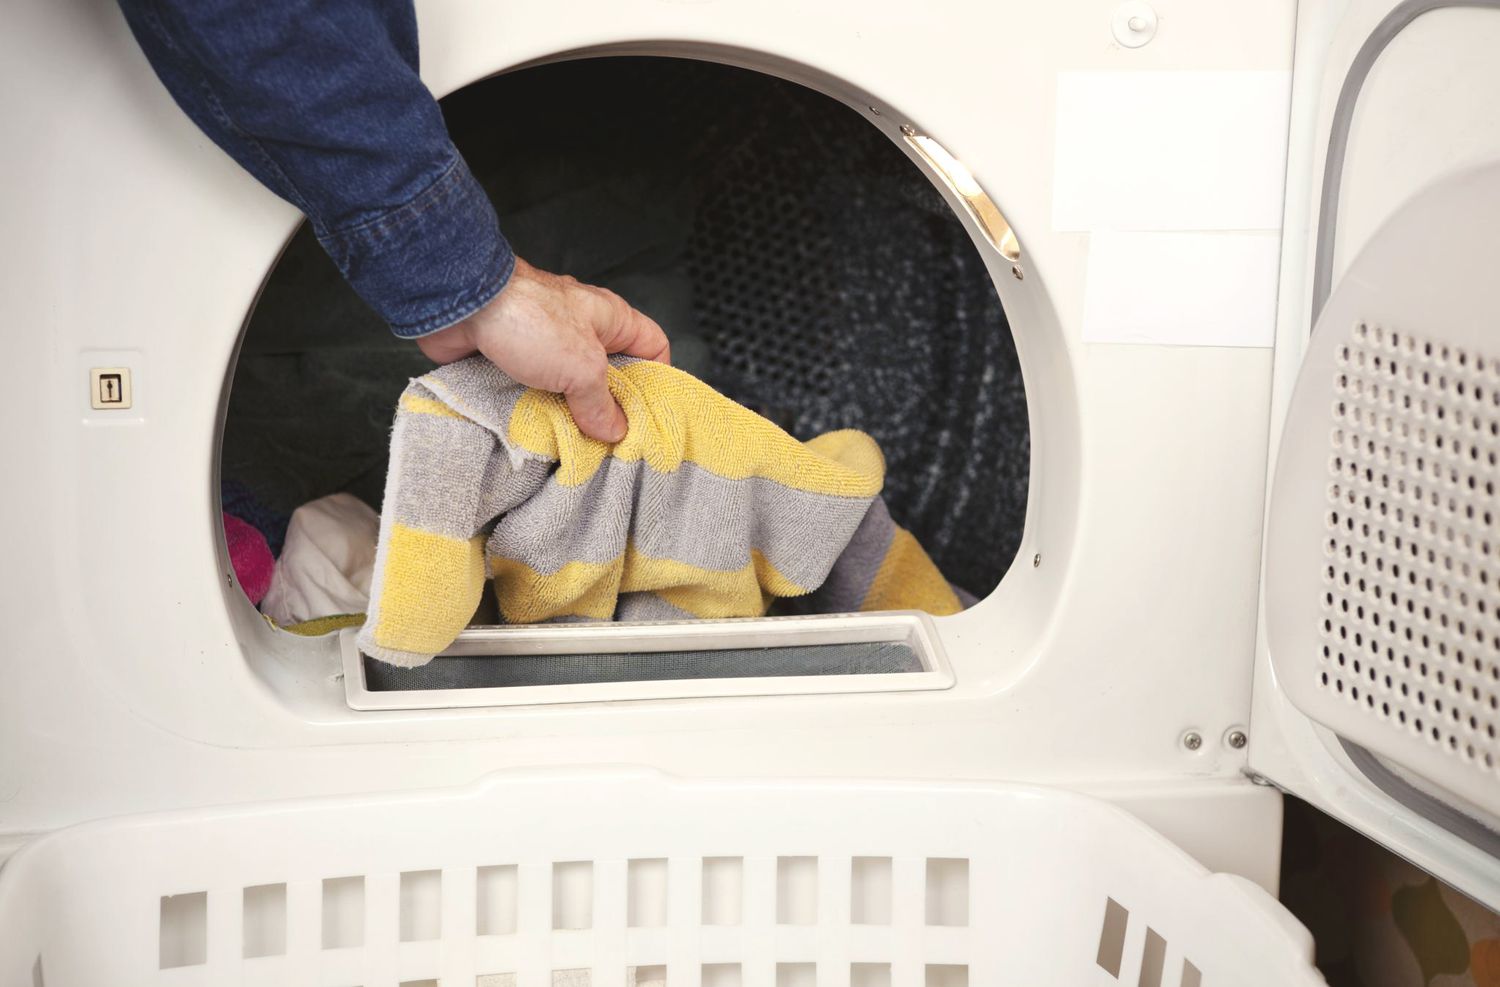
Step 7: Remove Venting and Ductwork (for Dryer)
If you have a dryer, it is important to remove the venting and ductwork before disconnecting it. This will ensure a proper disconnection and prevent any damage during the process. Follow these steps to safely remove the venting and ductwork:
- Locate the dryer vent: The dryer vent is typically located at the back of the appliance. It is connected to the wall or a venting system with a clamp or metal connector.
- Loosen the vent clamp or connector: Use a screwdriver or pliers to loosen and remove the clamp or connector that is securing the venting to the dryer. This will allow you to disconnect the venting more easily.
- Disconnect the venting: Once the clamp or connector is loosened, gently pull the venting away from the dryer. Be cautious of any lint or debris that may be present in the venting.
- Remove the ductwork (if necessary): In some cases, the dryer may be connected to a ductwork system that directs the air outside. If this is the case, carefully disconnect the ductwork from the back of the dryer. This may require removing screws or releasing additional clamps or connectors.
By following these steps, you have successfully removed the venting and ductwork from your dryer. Make sure to inspect the venting and ductwork for any blockage or damage before reinstallation.
Now that you have disconnected the venting and ductwork, we will move on to the next step: moving the washer and dryer.
Read more: How To Disconnect A Nest Thermostat
Step 8: Move the Washer and Dryer
Now that you have disconnected all the necessary components, it’s time to move your washer and dryer to their new location or storage area. Follow these steps to safely move your appliances:
- Ensure a clear path: Before moving the washer and dryer, ensure that there is a clear and unobstructed path to their destination. Remove any obstacles, such as furniture or rugs, that may impede the movement.
- Secure the drum (for washer): If your washer has a drum inside that can move independently, it is recommended to secure it to prevent any damage during the move. Refer to the manufacturer’s instructions to find out how to secure the drum.
- Use moving blankets or padding: Place moving blankets or padding around the washer and dryer to protect them from scratches and bumps during transportation. Secure the blankets or padding with tape or straps, if needed.
- Enlist the help of others: Moving washers and dryers can be heavy and awkward to handle, so it is advised to have one or more people assist you. This will make the process smoother and reduce the risk of injury.
- Lift with care: Lift the washer and dryer with proper lifting techniques, using your legs instead of your back. Avoid jerking or tilting the appliances to prevent any damage.
- Transport the appliances: Carefully transport the washer and dryer to their new location or storage area. Take care not to bump the appliances against walls or door frames during the movement.
By following these steps, you can safely move your washer and dryer without causing any damage to the appliances or your surroundings. Remember to take your time and work together with your helpers to ensure a smooth and successful move.
Now that you have moved the washer and dryer, we will proceed to the next step: cleaning and storing the hoses and power cords.
Step 9: Clean and Store Hoses and Cords
After disconnecting and moving your washer and dryer, it is important to properly clean and store the hoses and power cords. This will help maintain their functionality and prevent any damage or tangling. Follow these steps to clean and store the hoses and cords:
- Inspect for damage: Before cleaning, inspect the hoses and power cords for any signs of damage or wear. If you notice any cracks, leaks, or frayed wires, it is recommended to replace them before storing.
- Clean the hoses: Use a damp cloth or sponge to wipe down the exterior of the hoses. You can also use a mild detergent to remove any dirt or residue. Allow the hoses to fully dry before storing them.
- Coil the hoses: Gently coil the hoses into loops, making sure not to kink them. Use velcro ties or zip ties to secure the coils and prevent them from unraveling during storage.
- Secure the power cords: Wrap the power cords neatly, avoiding any tight bends or twists. Use velcro ties or zip ties to secure the cords and prevent tangling. If the cords are detachable, store them separately from the appliances.
- Store in a dry and safe place: Find a dry and secure area to store the hoses and power cords. Avoid areas that may be prone to humidity, excessive heat, or sharp objects that could potentially damage them.
By following these steps, you can ensure the longevity and proper functioning of your hoses and power cords. When the time comes to reinstall your washer and dryer, you can easily retrieve and reconnect them without any issues.
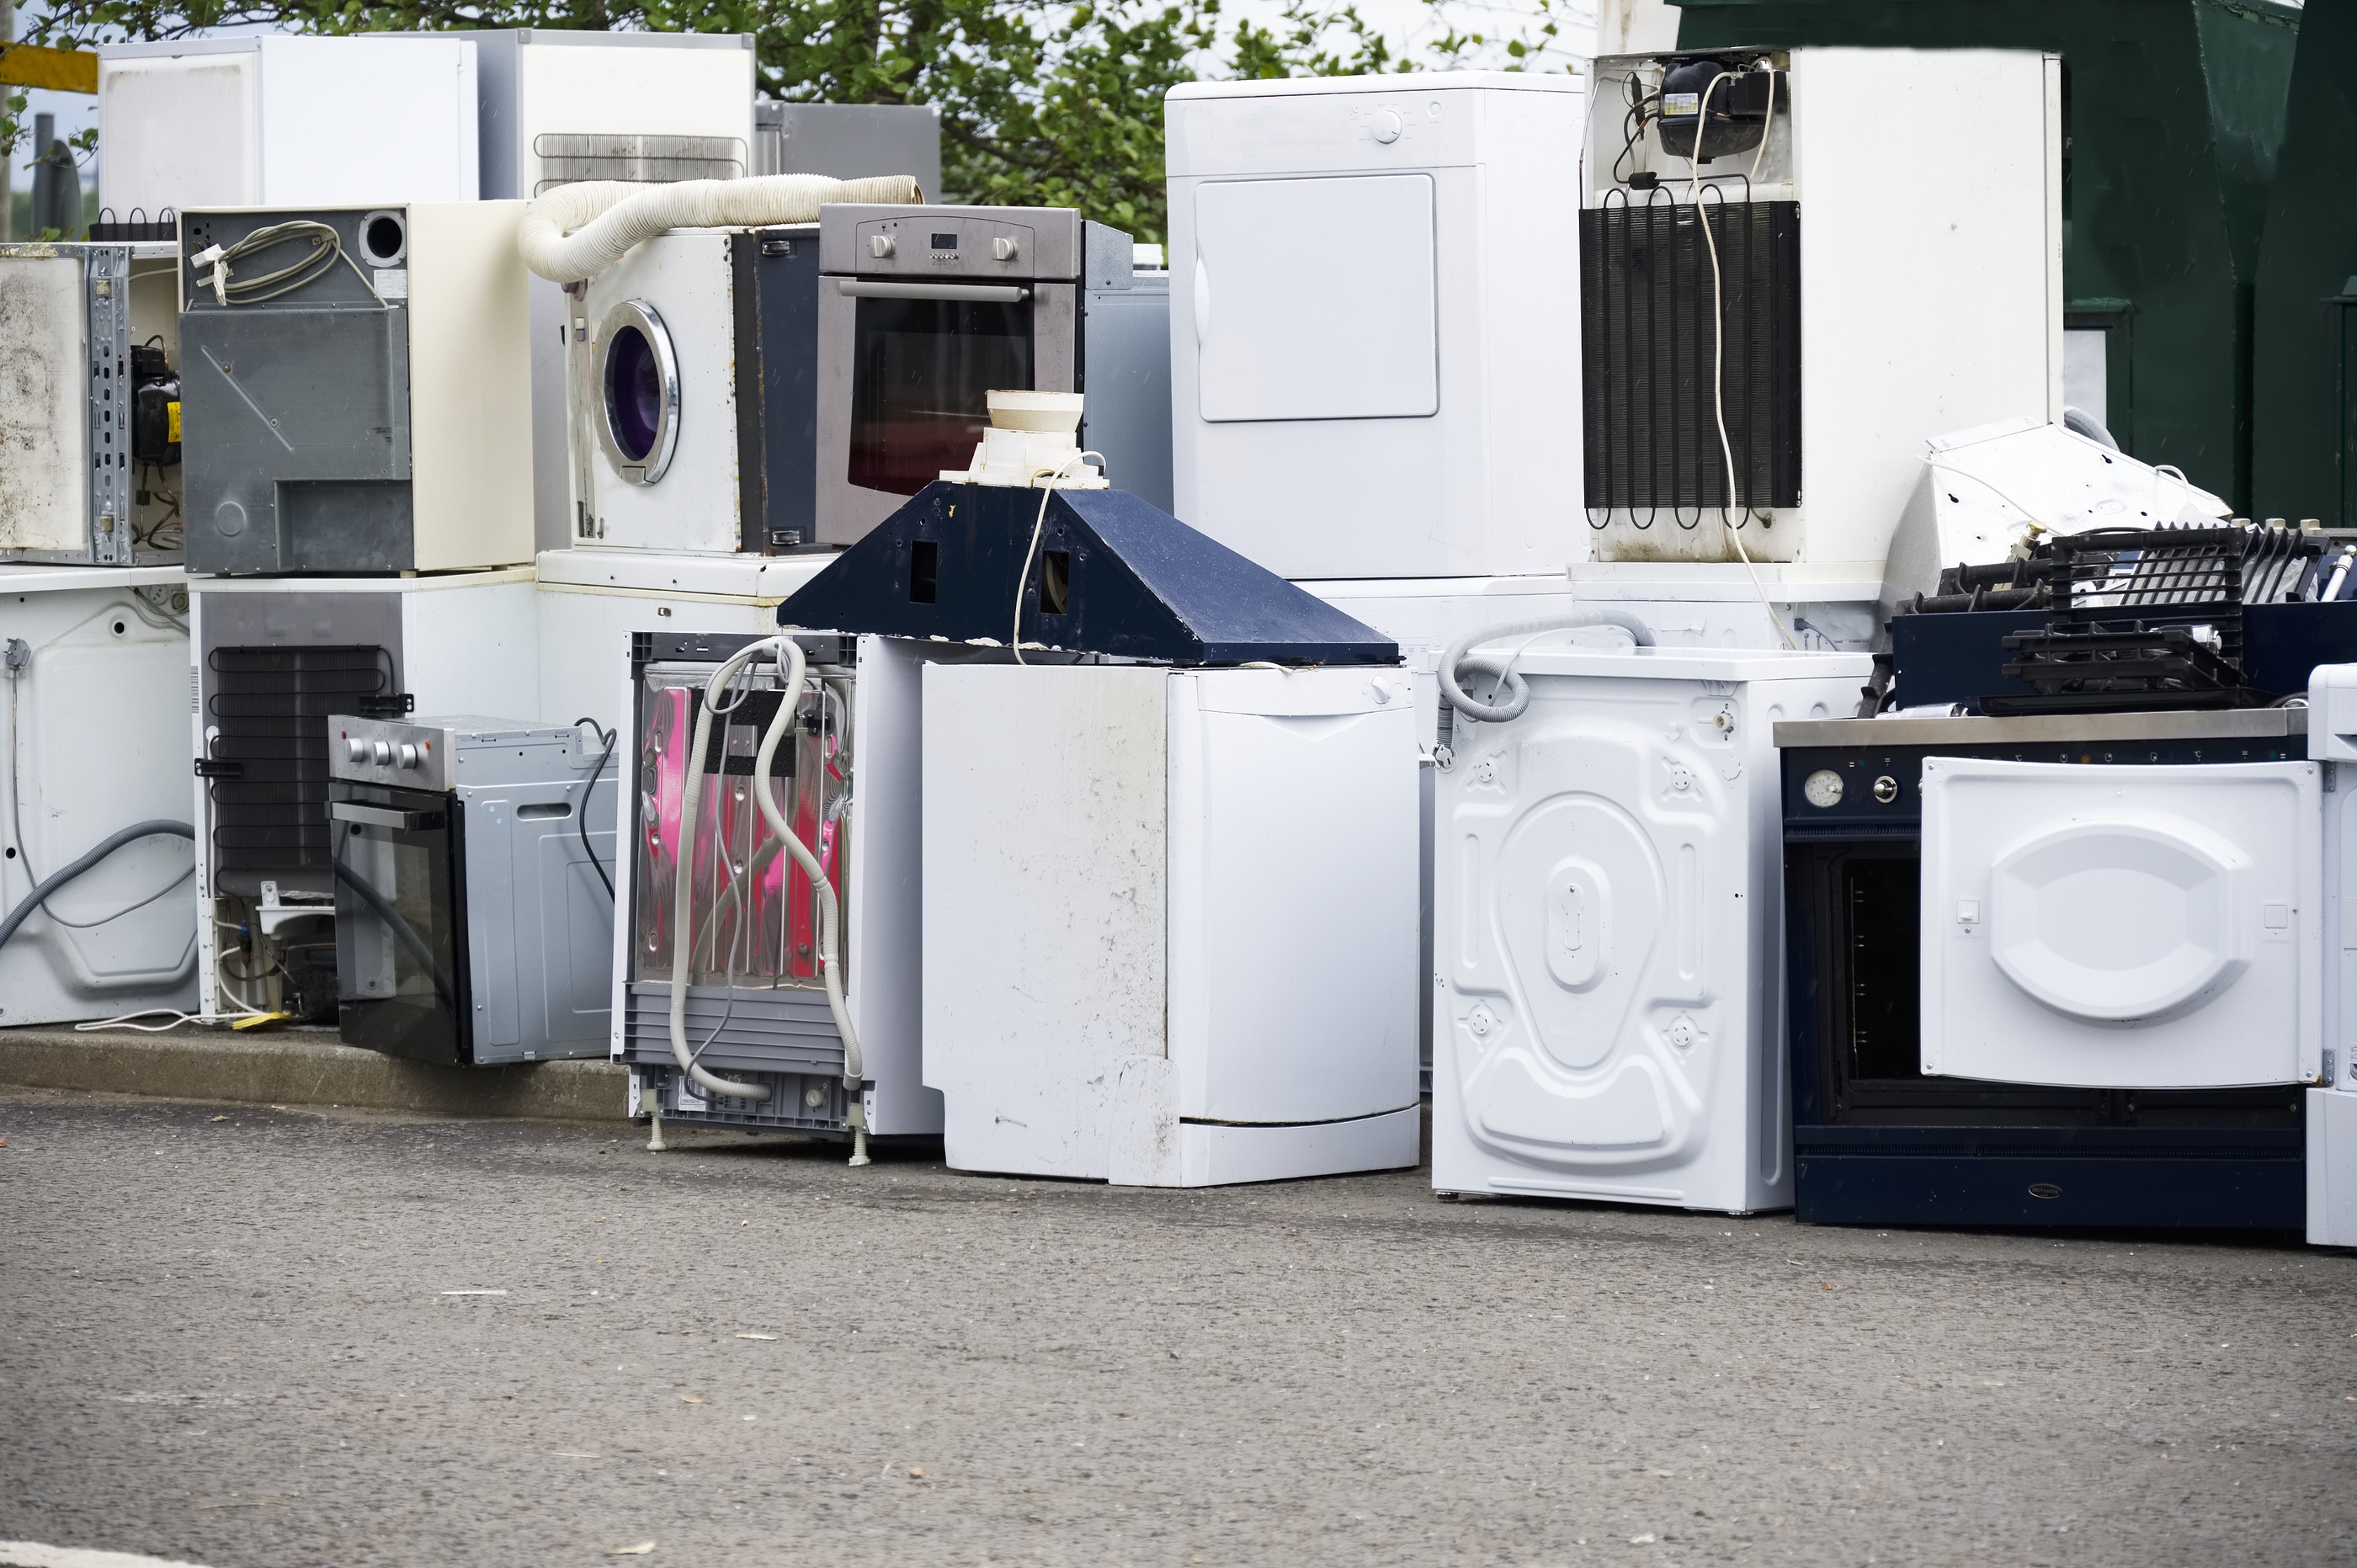
With this, you have successfully completed the process of disconnecting, moving, and storing your washer and dryer. Whether you are upgrading your appliances, relocating, or simply need temporary storage, these steps will guide you through the proper disconnection and preparation process.
Remember, if you are unsure about any step or encounter any difficulties along the way, it is always recommended to consult the manufacturer’s instructions or seek professional assistance.
Congratulations on successfully disconnecting your washer and dryer!
+
Conclusion
Disconnecting your washer and dryer may seem like a daunting task, but with the right knowledge and steps, it can be done safely and efficiently. By following the guidelines provided in this article, you can confidently disconnect your appliances without causing any damage or mishaps. Properly disconnecting your washer and dryer not only ensures a smooth disconnection process but also allows for easy reinstallation in the future.
Throughout the article, we discussed the tools and materials needed for the disconnection process, as well as nine important steps to follow:
- Take safety precautions
- Unplug the washer and dryer
- Shut off the water supply
- Disconnect the water hoses
- Disconnect the drain hose
- Disconnect the power cord
- Remove venting and ductwork (for dryer)
- Move the washer and dryer
- Clean and store hoses and cords
By carefully following these steps, you can ensure a successful disconnection process and prepare your washer and dryer for relocation or storage.
Remember, while this guide provides a comprehensive overview, it is important to consult the user manuals or manufacturer’s instructions specific to your washer and dryer models for any additional details or precautions.
We hope that this article has given you the confidence and knowledge to disconnect your washer and dryer effectively. Whether you are moving to a new home, upgrading appliances, or simply need to store your washer and dryer temporarily, proper disconnection is crucial. Take the necessary safety precautions, gather the right tools, and follow the steps outlined in this article for a smooth and successful disconnection process.
With everything said and done, you are now ready to embark on the journey of disconnecting your washer and dryer with confidence. Good luck!
Frequently Asked Questions about How To Disconnect Washer And Dryer
Was this page helpful?
At Storables.com, we guarantee accurate and reliable information. Our content, validated by Expert Board Contributors, is crafted following stringent Editorial Policies. We're committed to providing you with well-researched, expert-backed insights for all your informational needs.


0 thoughts on “How To Disconnect Washer And Dryer”