Articles
How To Stack Washer And Dryer Samsung
Modified: January 8, 2024
Learn how to stack your Samsung washer and dryer with these helpful articles. Easily maximize your laundry space and improve efficiency.
(Many of the links in this article redirect to a specific reviewed product. Your purchase of these products through affiliate links helps to generate commission for Storables.com, at no extra cost. Learn more)
Introduction
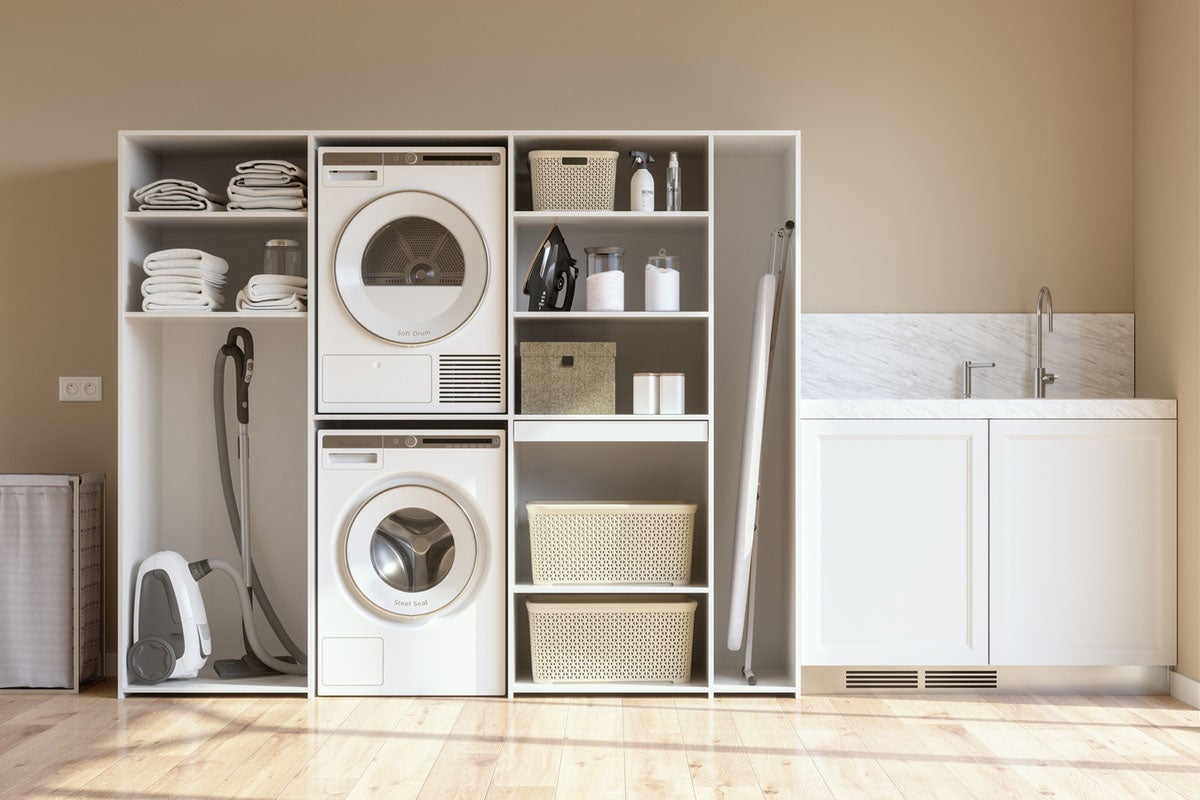
Stacking a washer and dryer can be a great space-saving solution for those who have limited room in their laundry area. With the right appliances and equipment, you can create a functional and efficient laundry setup. If you have a Samsung washer and dryer, this article will guide you through the process of how to stack them safely and securely.
Before you proceed, it’s important to note that stacking a washer and dryer requires careful consideration and adherence to safety precautions. Taking the time to prepare, gather the necessary tools, and follow the step-by-step instructions will ensure a successful and secure installation.
In this article, we will walk you through the entire process of stacking your Samsung washer and dryer, from measuring the available space to troubleshooting common issues. By the end of this guide, you’ll have all the knowledge you need to stack your appliances with confidence.
Key Takeaways:
- Prioritize safety by following manufacturer’s instructions, using a compatible stacking kit, and securing the appliances properly when stacking your Samsung washer and dryer for a space-saving laundry solution.
- Ensure a successful stacking process by measuring the available space, preparing the area, and testing the stack for stability, while addressing common troubleshooting needs for optimal performance.
Read more: How To Stack Samsung Washer And Dryer
Safety Precautions
Before you start stacking your Samsung washer and dryer, it’s crucial to prioritize safety. Here are some important precautions to keep in mind:
- Read the manufacturer’s instructions: Familiarize yourself with the specific guidelines provided by Samsung for stacking their washer and dryer models. This will ensure that you follow the correct procedures and avoid any potential risks.
- Ensure a stable foundation: Before stacking the appliances, make sure the floor or platform is sturdy enough to support the combined weight of the washer and dryer. Uneven or weak surfaces can lead to instability and potential accidents.
- Use a compatible stacking kit: Samsung offers stacking kits that are designed to safely and securely stack their washer and dryer models. Make sure to use the recommended stacking kit for your specific appliances. Using unauthorized or improvised methods may compromise stability and safety.
- Secure the stacked appliances properly: Each stacking kit comes with installation instructions. Follow them carefully to ensure that the washer and dryer are securely attached to each other. Improper installation can result in the appliances tipping over or vibrating excessively during operation.
- Consult a professional if needed: If you are unsure about any aspect of the installation process or encounter difficulties, it’s always better to seek assistance from a qualified technician or professional. They can provide valuable guidance and ensure a safe installation.
- Disconnect power and water supply: Before attempting to stack the washer and dryer, turn off the power supply and disconnect any water connections. This will prevent any accidents during the installation process.
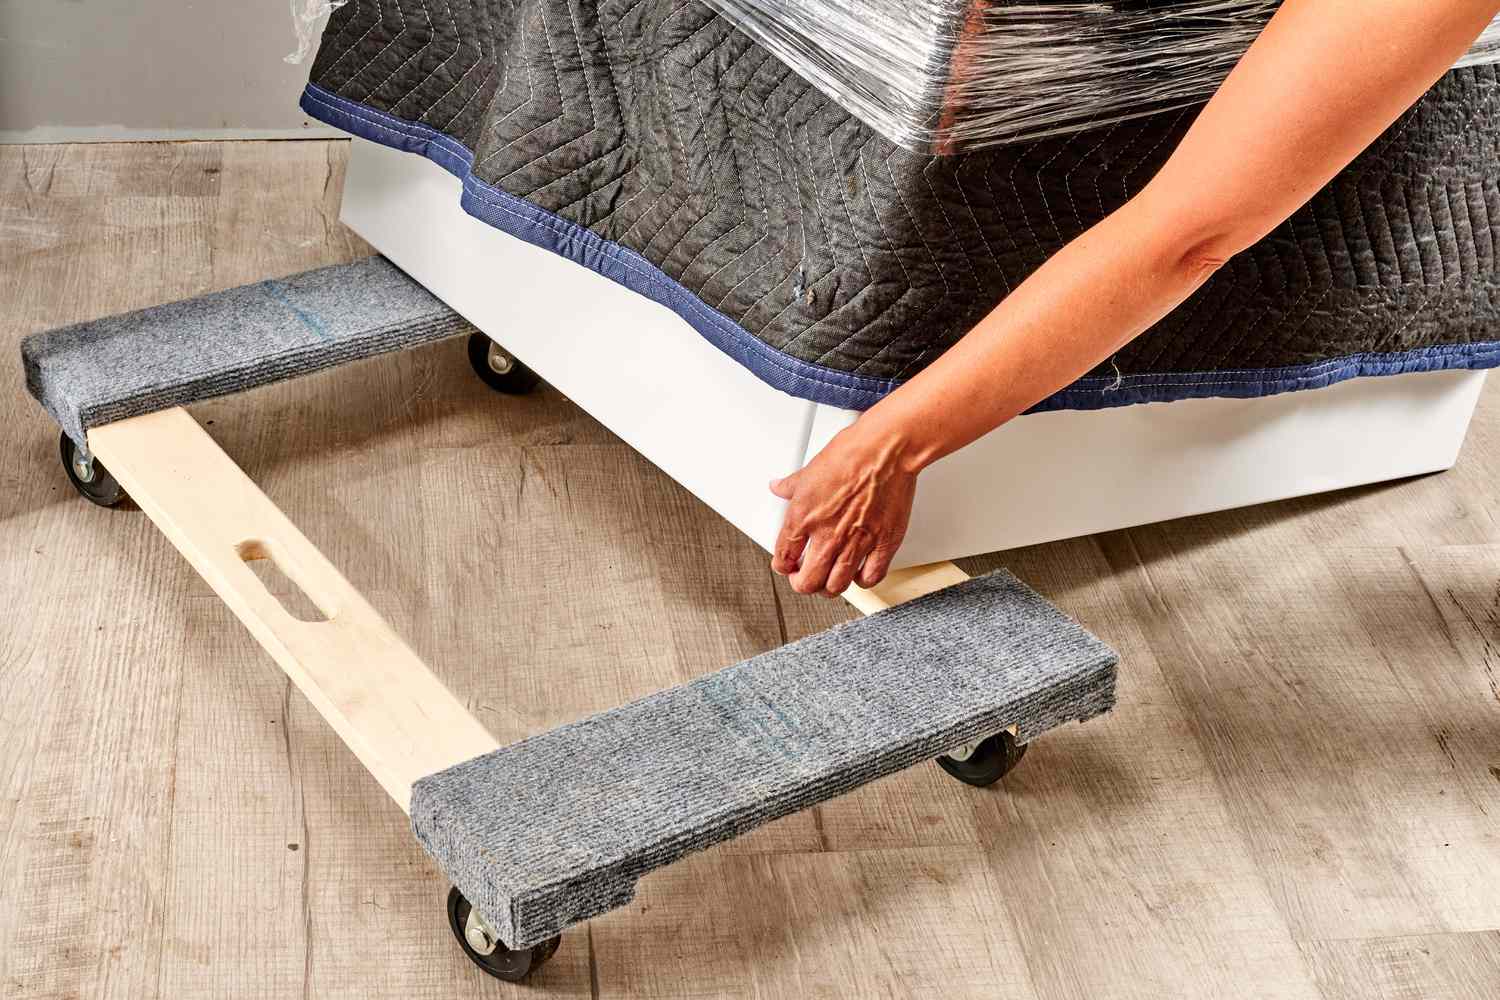
- Use proper lifting techniques: Stacking the appliances requires some physical effort. When lifting heavy objects, always use proper lifting techniques, such as bending your knees, keeping your back straight, and using your leg muscles. If needed, ask for help to avoid straining your body or causing injuries.
- Keep children and pets away: During the stacking process, it’s important to keep children and pets safely away from the area. This will minimize the risk of accidents and ensure everyone’s well-being.
- Regular maintenance and inspection: After the stacking is complete, periodically check the stability of the appliances and ensure that all connections are secure. Regular maintenance and inspection will help identify any potential issues early on and prevent accidents.
By following these safety precautions, you can ensure a safe and worry-free stacking process for your Samsung washer and dryer.
Required Tools
Before you begin the process of stacking your Samsung washer and dryer, gather the following tools to ensure a smooth installation:
- Measuring tape: This will come in handy for measuring the available space and ensuring a proper fit for the stacked appliances.
- Level: A level will help ensure that your washer and dryer are aligned and balanced once they’re stacked.
- Stacking kit: You’ll need a stacking kit that is compatible with your Samsung washer and dryer models. This kit typically includes brackets, screws, and other necessary hardware for secure stacking.
- Adjustable wrench: An adjustable wrench will be necessary for tightening bolts and securing the stacking brackets.
- Screwdriver: Depending on the stacking kit and your specific model, you may need a screwdriver for removing or adjusting certain parts of the appliances.
- Plumbing tape: If you need to connect the water supply line to your stacked appliances, plumbing tape will help ensure a tight and secure seal.
- Sturdy platform: If your laundry area doesn’t have a suitable platform, you may need to purchase or build one to provide a stable foundation for the stacked washer and dryer. Ensure that the platform can handle the combined weight of the appliances.
- Protective gloves: It’s always a good idea to wear protective gloves when handling heavy objects or working with tools to protect your hands.
Having these tools on hand will streamline the stacking process and help you complete the installation efficiently.
Once you’ve gathered all the necessary tools, you’re ready to move on to the step-by-step instructions for stacking your Samsung washer and dryer. Remember to refer to the manufacturer’s instructions and safety precautions throughout the process to ensure a successful and secure installation.
Step-by-step Instructions
Follow these step-by-step instructions to properly stack your Samsung washer and dryer:
- Measure the available space: Use a measuring tape to determine the height, width, and depth of the area where you plan to stack the appliances. Ensure that you have enough vertical clearance and a suitable platform to support the combined weight of the washer and dryer.
- Preparing the area: Clear the designated area and ensure it is clean and free of any obstructions. Remove any accessories, such as dryer lint screens or control panel accessories, that may interfere with the stacking process.
- Installing the stacking kit: Refer to the instructions provided with your stacking kit, as the installation process may vary depending on the kit and your specific washer and dryer models. Generally, you’ll attach the brackets to the back of the washer and dryer using the provided screws. Ensure that the brackets are aligned and secure.
- Stacking the washer and dryer: With the help of another person, carefully lift the dryer and place it on top of the washer. Make sure the dryer is centered and aligned with the washer. Use a level to ensure that the appliances are evenly balanced. Adjust the positioning if necessary.
- Securing the stacked appliances: Use the screws provided with the stacking kit to secure the dryer to the washer. This step will further stabilize the stacked appliances and prevent any movement or tipping during operation.
- Connecting the appliances: If your washer and dryer models require water and power connections, follow the manufacturer’s instructions to make the necessary connections. Use plumbing tape to achieve a tight seal on any water connections.
- Testing the stack for stability: Once the appliances are stacked and connected, test their stability by gently rocking them. If they feel secure and stable, you can proceed. If you notice any excessive movement or instability, double-check the installation and make any necessary adjustments.
- Troubleshooting tips: If you encounter any issues or complications during the stacking process, refer to the manufacturer’s instructions or consult a professional for assistance. It’s important to address any problems to ensure the safety and efficiency of the stacked appliances.
By carefully following these step-by-step instructions, you can confidently stack your Samsung washer and dryer and create a more efficient and space-saving laundry setup.
Measure the Available Space
The first step in stacking your Samsung washer and dryer is to measure the available space in your laundry area. This is crucial to ensure that the stacked appliances will fit properly and have enough clearance for optimal functionality.
Here’s how you can measure the available space:
- Height: Use a measuring tape to measure the height from the floor to the top of the desired location for the stacked appliances. Make sure to account for any baseboards or molding in your measurements.
- Width: Measure the width of the area where you plan to place the stacked washer and dryer. Take note of any obstacles, such as walls or cabinets, that may restrict the width.
- Depth: Measure the distance from the back wall to the front of the area where the stacked appliances will be positioned. This measurement will ensure that the appliances won’t protrude too far into the room.
- Clearance: Check for any overhead obstructions, such as cabinets or shelves, that may limit the height clearance needed for the stacked washer and dryer. Ensure that there is enough space above the appliances to allow for proper ventilation.
Once you have measured the available space, compare the measurements to the dimensions of your Samsung washer and dryer models. This will help you determine if the appliances will fit comfortably in the designated area. Additionally, consult the manufacturer’s guidelines for recommended clearances and space requirements specific to your washer and dryer models.
It’s essential to consider not only the physical dimensions of the appliances but also the space needed for proper airflow and ventilation. Adequate ventilation is crucial to prevent overheating and ensure optimal performance.
By accurately measuring the available space and ensuring that it aligns with the dimensions and clearance requirements of your Samsung washer and dryer, you can proceed to the next steps with confidence, knowing that the appliances will fit properly and function efficiently in their stacked configuration.
Preparing the Area
Once you have measured the available space for your stacked Samsung washer and dryer, the next step is to prepare the area before beginning the installation process. Proper preparation will ensure a clean and safe environment for stacking the appliances.
Here are the steps to prepare the area:
- Clear the area: Remove any items, such as laundry baskets, cleaning supplies, or other objects, from the area where you plan to stack the washer and dryer. This will create a clear workspace and prevent any obstructions.
- Clean the area: Use a broom or vacuum cleaner to clean the floor and surrounding surfaces in the designated area. Remove any dirt, debris, or dust that may have accumulated to ensure a clean installation space.
- Check for level flooring: Inspect the floor to ensure that it is level. Uneven flooring can affect the stability of the stacked appliances. If the floor is uneven, you may need to use shims to level it or consider placing a sturdy platform to create a level surface.
- Remove accessories: Check if there are any accessories attached to your dryer, such as lint screens or control panel attachments. Remove these accessories as they may interfere with the stacking process or affect the stability of the stacked appliances. Refer to the manufacturer’s instructions for guidance on removing any specific accessories.
- Consider space constraints: Take note of any space constraints, such as nearby walls, cabinets, or other fixtures. Ensure that there is enough space for the appliances to be stacked and for easy access to operate them effectively. It is essential to leave clearance for any doors or drawers that may be adjacent to the stacked appliances.
Preparing the area before stacking your Samsung washer and dryer will create a clean and organized space for installation. Taking the time to clear the area, clean the surfaces, and address any level flooring issues will contribute to a smoother and more secure installation process.
With the area prepared, you can move on to the next step of installing the stacking kit and proceeding with stacking your Samsung washer and dryer.
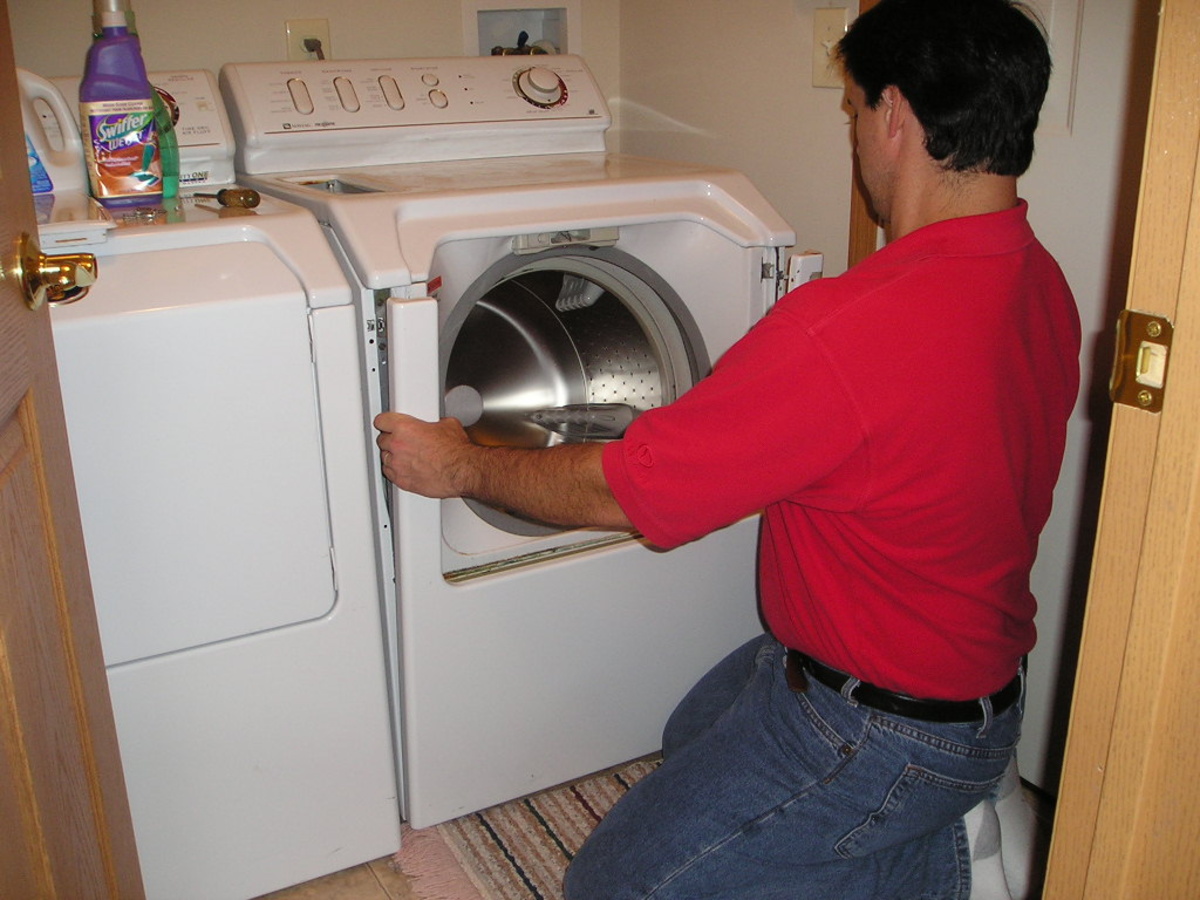
Installing the Stacking Kit
Installing the stacking kit is a crucial step in safely and securely stacking your Samsung washer and dryer. The stacking kit provides the necessary hardware and brackets to securely attach the appliances together, ensuring stability and minimizing the risk of accidents.
Follow these steps to install the stacking kit:
- Read the instructions: Start by carefully reading the instructions provided with your stacking kit. Familiarize yourself with the components and understand the specific installation process recommended by Samsung.
- Prepare the washer and dryer: Before installing the stacking kit, ensure that both the washer and dryer are turned off and disconnected from power. It’s crucial to prioritize safety and avoid any potential electrical hazards.
- Identify the stacking brackets: Locate the stacking brackets included in your kit. These brackets will attach to the back of the washer and dryer to secure them together.
- Position the brackets: Carefully position the brackets on the back of the washer and dryer, ensuring proper alignment and spacing. Refer to the instructions for specific guidelines on bracket placement for your particular models.
- Attach the brackets: Use the screws provided with the stacking kit to securely attach the brackets to the back of the appliances. Ensure that the screws are tightened properly but avoid overtightening, which could damage the appliances.
- Check for stability: Once the stacking brackets are installed, check the stability of the appliances. Gently rock the washer and dryer to ensure that they are securely attached and don’t wobble or tilt excessively. If needed, adjust the bracket positioning or tighten the screws as necessary.
- Follow additional instructions: Some stacking kits may include additional steps or components depending on the specific models or design of the washer and dryer. Follow any additional instructions provided with your stacking kit to ensure a proper and secure installation.
By following these steps and referring to the instructions provided with your stacking kit, you can safely and effectively install the stacking brackets and prepare your Samsung washer and dryer for the stacking process.
With the stacking kit installed, proceed to the next step of stacking the washer and dryer on top of each other.
When stacking a Samsung washer and dryer, make sure to use the manufacturer’s stacking kit to ensure proper installation and safety. Follow the instructions carefully to avoid any damage to the appliances.
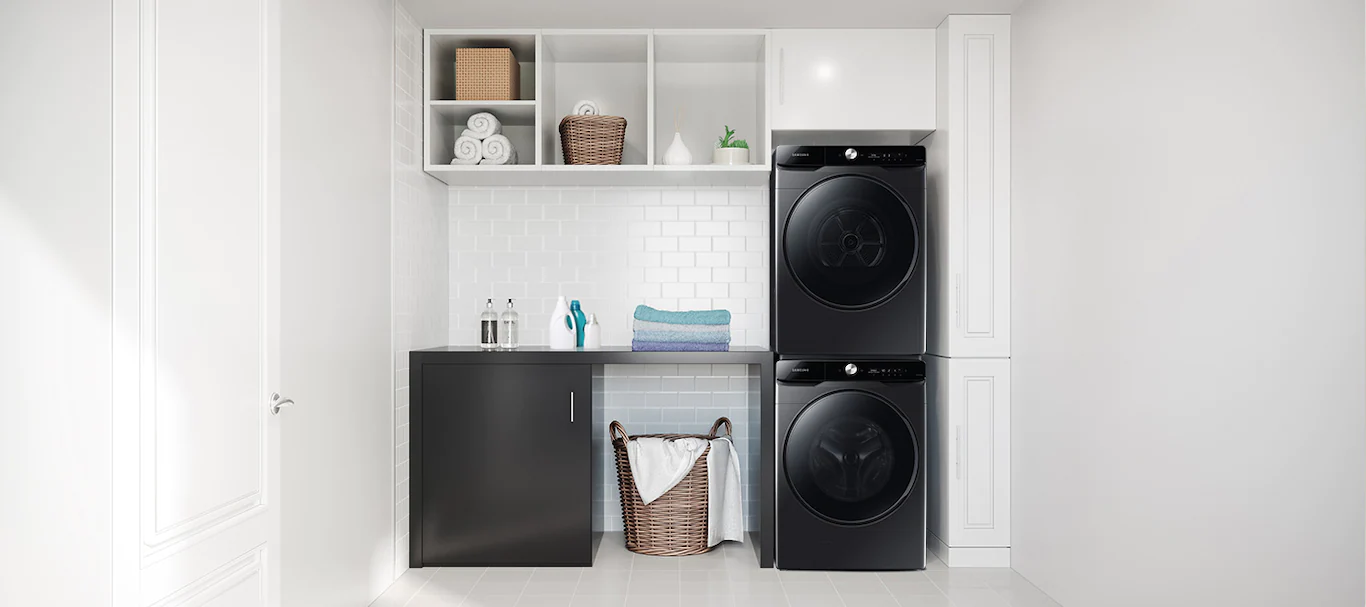
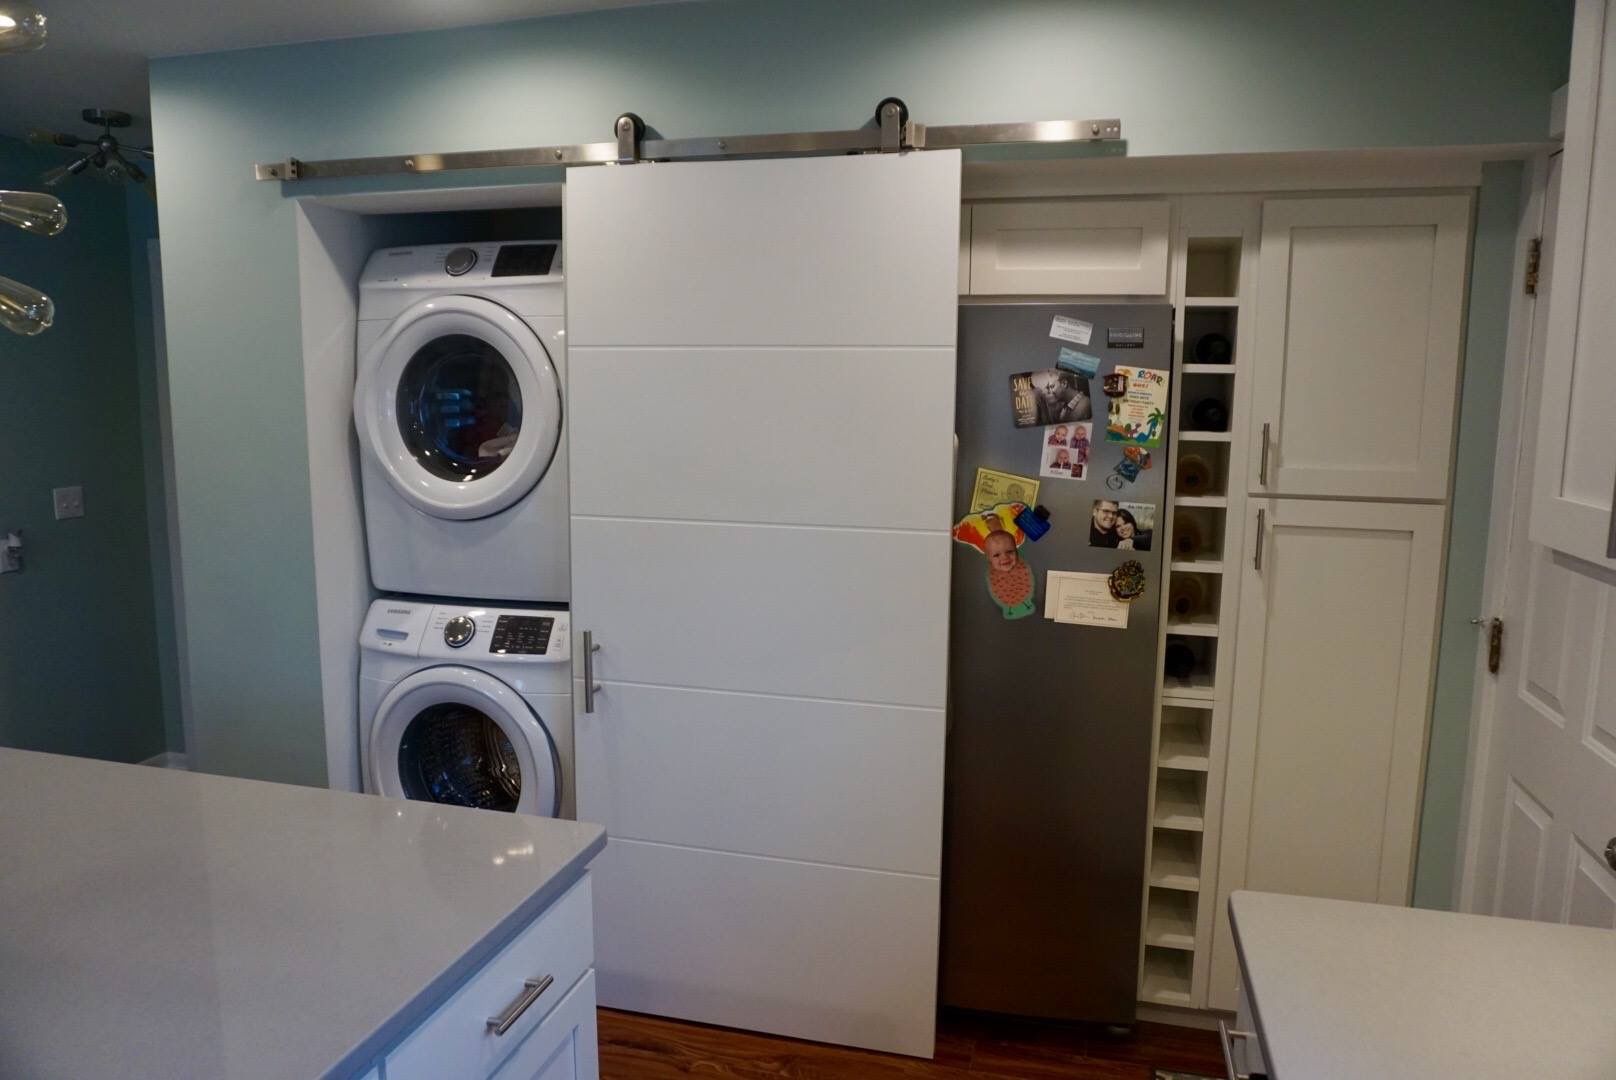
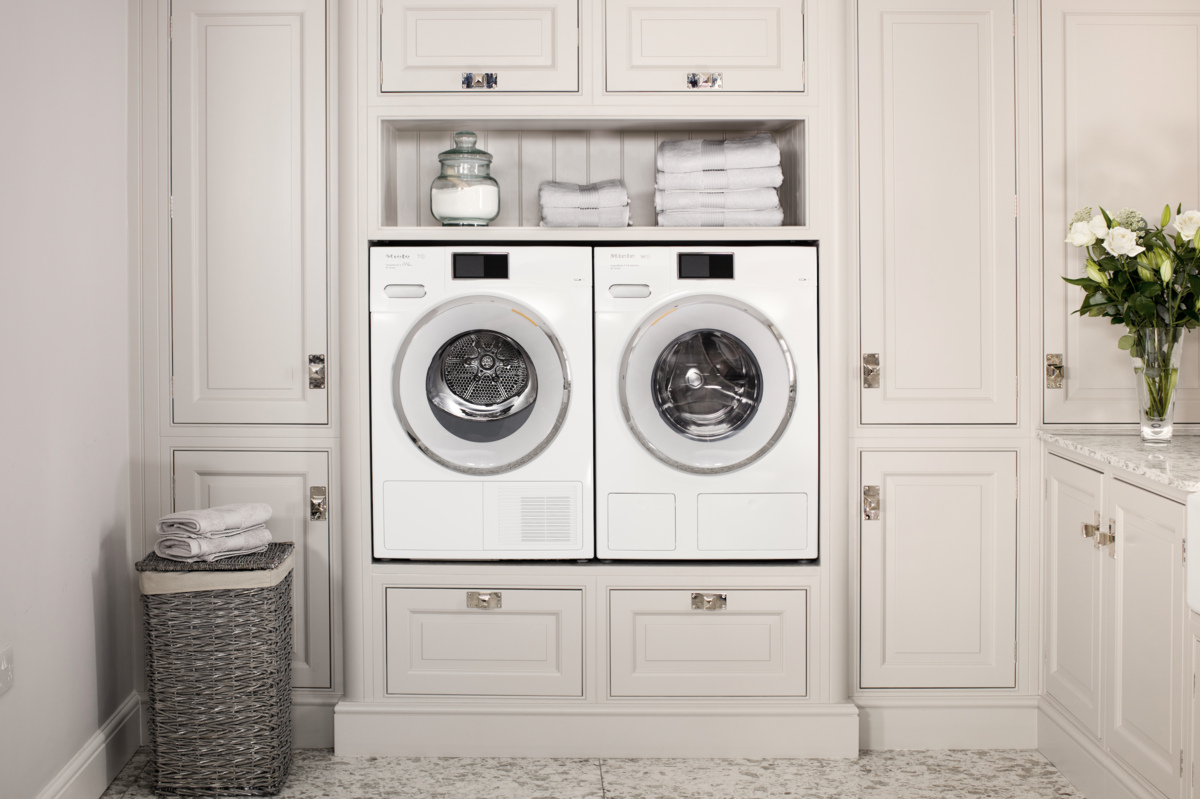
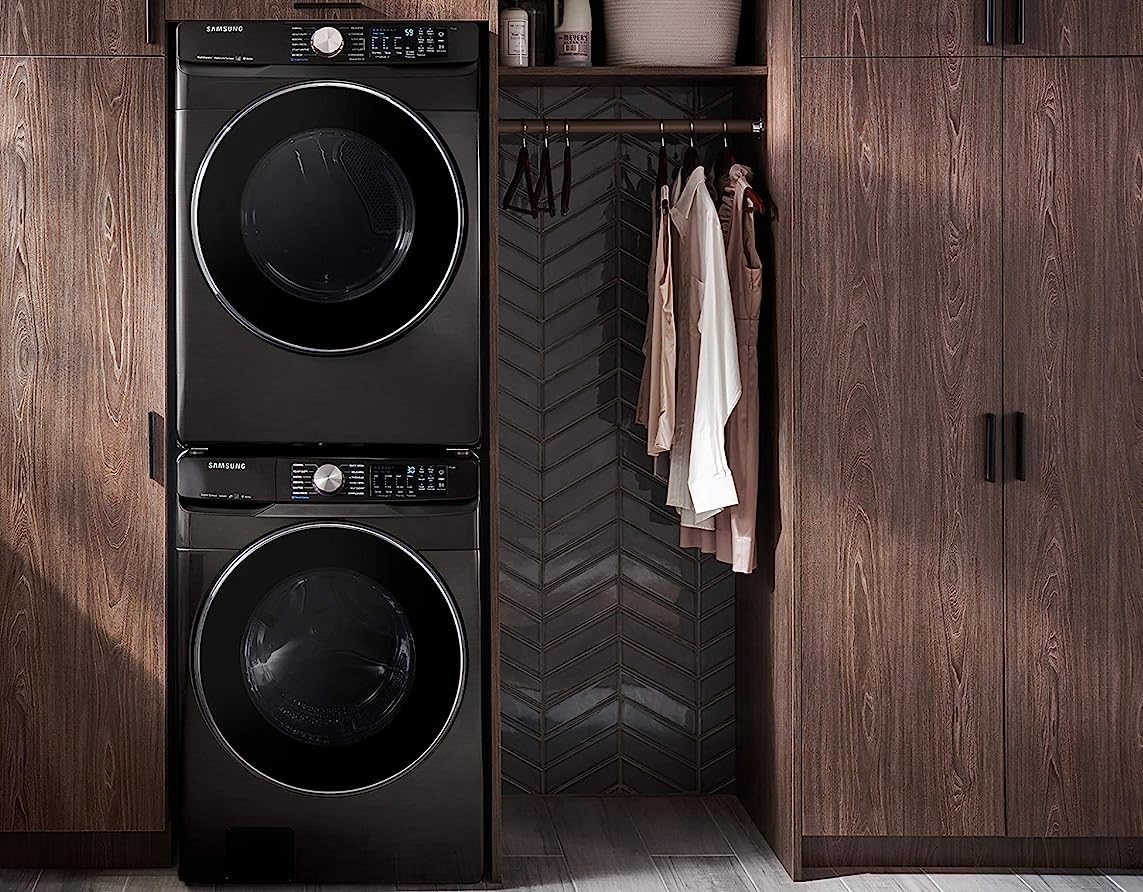
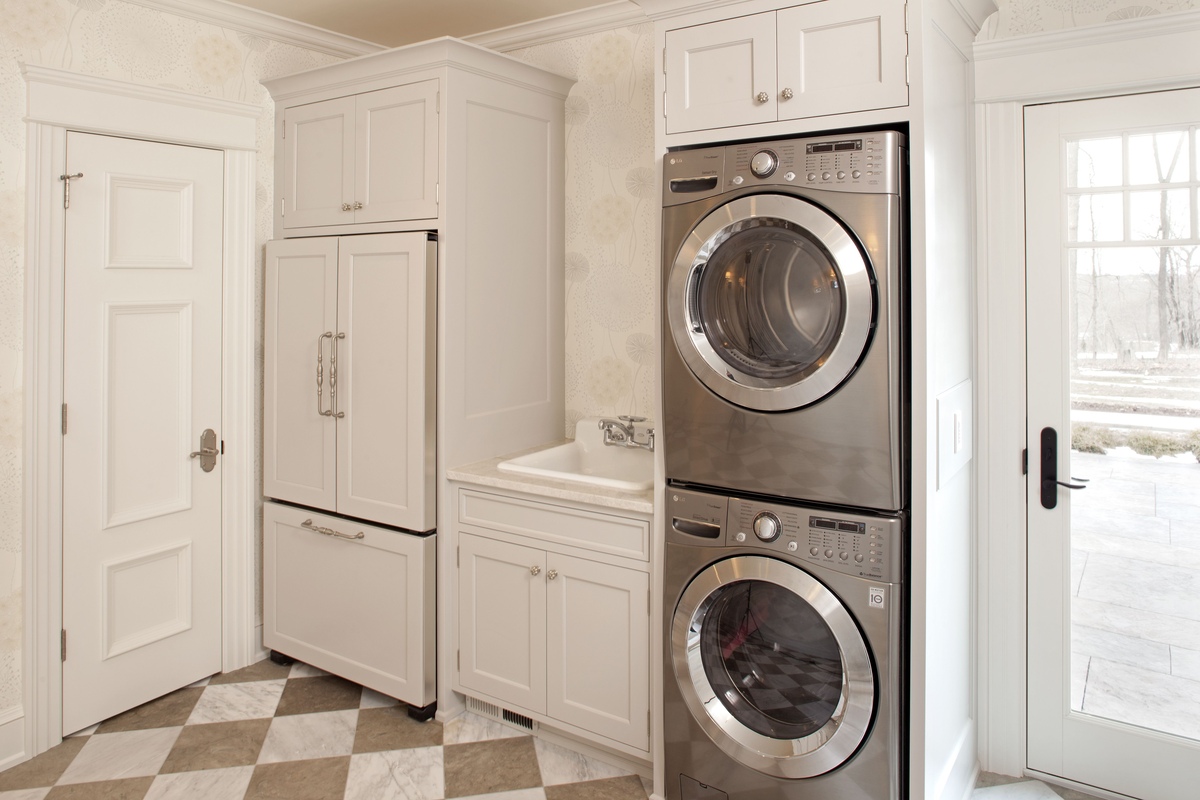
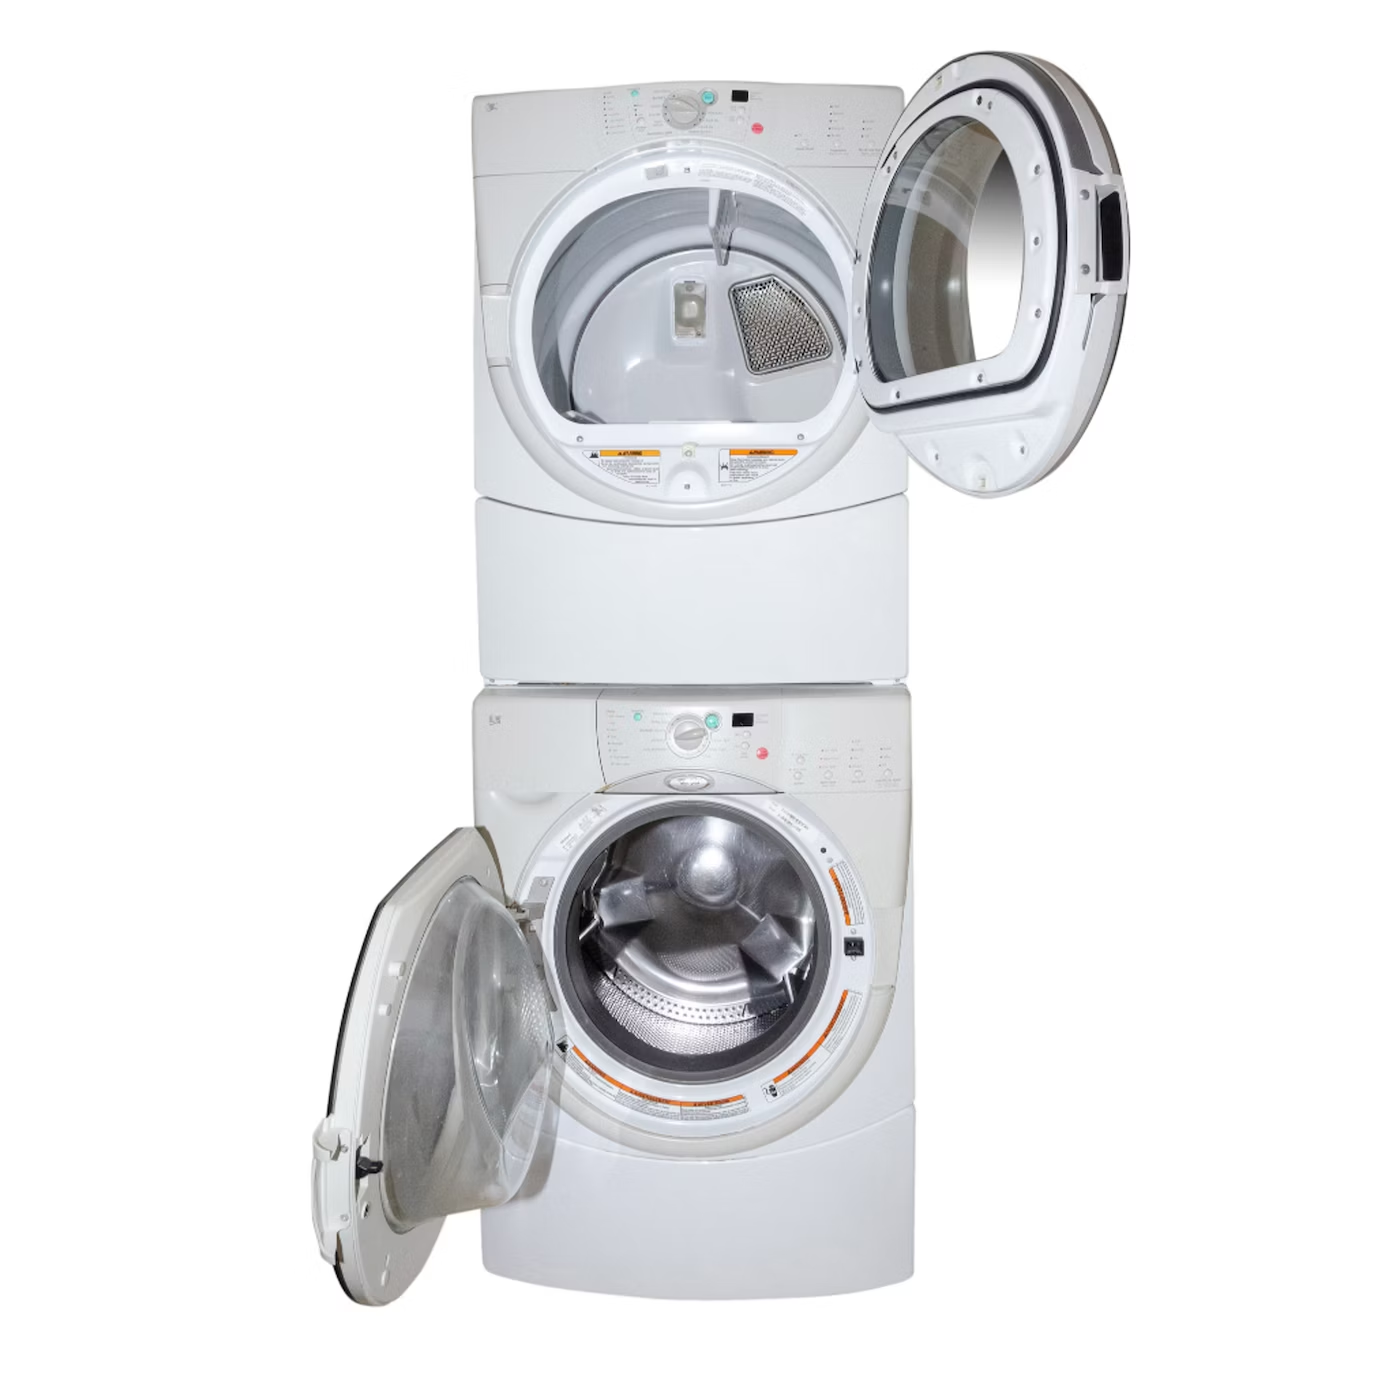
Stacking the Washer and Dryer
Once you have installed the stacking kit on your Samsung washer and dryer, it’s time to carefully stack the appliances on top of each other. Stacking the washer and dryer properly is essential for stability and ensuring a secure and functional laundry setup.
Follow these steps to stack the washer and dryer:
- Enlist the help of another person: Stacking heavy appliances can be challenging and potentially hazardous. It’s recommended to have another person assist you in lifting and positioning the dryer on top of the washer.
- Ensure proper alignment: Carefully lift the dryer and place it on top of the washer, aligning the corners and edges as closely as possible. Take your time to ensure that the dryer is centered and evenly positioned on the washer.
- Use a level: Place a level on top of the stacked appliances to check for proper alignment and balance. Adjust the positioning of the dryer if necessary to achieve a level and stable configuration.
- Check for stability: Gently rock the stacked washer and dryer to ensure that they are secure and stable. If you notice any excessive movement or wobbling, double-check the alignment and make any necessary adjustments to ensure stability.
- Ensure proper clearance: Verify that there is enough clearance for the stacked appliances to function properly. Ensure that there is space for the dryer’s exhaust vent and that there are no obstructions that could impede the operation or create potential safety risks.
It’s important to exercise caution and enlist the help of another person to ensure a safe and successful stacking process. Take the time to align the appliances properly and check for stability before proceeding to the next step.
Stacking your Samsung washer and dryer maximizes the use of space while maintaining functionality and convenience. With the appliances properly stacked, continue to the next step of securing them together to ensure long-term stability.
Securing the Stacked Appliances
After stacking your Samsung washer and dryer, it’s essential to secure them together to ensure stability and minimize the risk of accidents or shifting during operation. Properly securing the stacked appliances will provide peace of mind and ensure safe and efficient laundry cycles.
Follow these steps to secure the stacked washer and dryer:
- Locate the provided screws: Refer to the stacking kit instructions to identify the screws specifically designed for securing the stacked appliances. These screws will typically be provided with the stacking kit.
- Position the screws: Place the screws in the designated holes on the back of the dryer. These holes are usually located near the top of the dryer. Refer to the stacking kit instructions and the dryer’s manual for precise screw placement.
- Tighten the screws: Use an adjustable wrench or screwdriver to tighten the screws securely. Be careful not to overtighten, as this could damage the appliances. Tighten the screws until they are firm and hold the dryer securely in place.
- Check for stability: After securing the stacked appliances, test their stability by gently rocking them. Ensure that they feel secure and do not wobble excessively. If you notice any instability, double-check the screw placement and tightness, making any necessary adjustments.
Properly securing the stacked appliances is crucial for maintaining their stability and preventing any movement or tipping. By following these steps and referring to the stacking kit instructions, you can confidently secure your Samsung washer and dryer together.
Once the appliances are securely attached, you can proceed to the next step of connecting them to the necessary utilities for operation.
Read more: How To Stack Washer And Dryer
Connecting the Appliances
After securely stacking your Samsung washer and dryer, the next step is to connect them to the necessary utilities for operation. This includes connecting the power and, if applicable, the water supply for your washer.
Here are the steps to connect the appliances:
- Power connection: Ensure both the washer and dryer are turned off and disconnected from the power source before proceeding. Plug the power cords of both appliances into separate electrical outlets. Make sure the outlets are compatible and properly grounded.
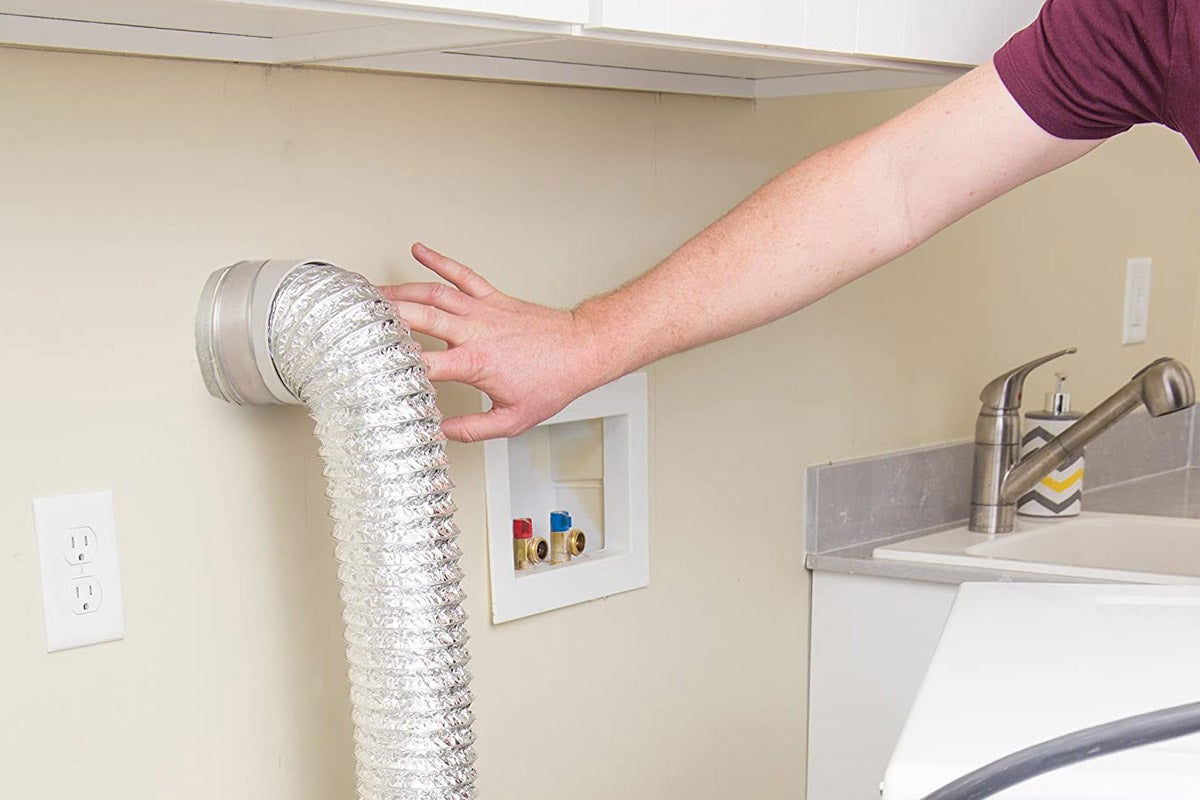
- Water supply connection: If your washer requires a water supply connection, locate the water inlet valve on the back of the washer. Connect one end of the water supply hose to the water inlet valve, and the other end to the appropriate water source. Use plumbing tape to achieve a tight seal on the threaded connections.
- Drain hose placement: Position the washer’s drain hose in a suitable drain pipe or utility sink. Ensure that the drain hose is securely in place and that there are no kinks or blockages that could impede proper drainage.
- Verify connections: Double-check all the connections, including the power cords and water supply hoses, to ensure they are properly secured and free of any leaks. Test the water supply and drain connections by running a short wash cycle to ensure everything is functioning correctly.
It’s important to follow the manufacturer’s instructions provided with your Samsung washer and dryer for the specific guidelines on power and water supply connections. This will ensure that you are connecting the appliances correctly and according to their requirements.
Take the necessary precautions when working with electrical and water connections. If you are uncertain about any aspect of the connections or encounter difficulties, consult a professional or refer to the manufacturer’s customer support for assistance.
With the appliances properly connected, you can move on to the next step of testing the stability of the stacked appliances for final adjustments.
Testing the Stack for Stability
Once you have completed the installation and connection of your stacked Samsung washer and dryer, it’s crucial to test the stability of the appliances. Testing for stability ensures that the stack is secure and minimizes the risk of accidents or damage during operation.
Follow these steps to test the stack for stability:
- Gently rock the stack: Stand in front of the stacked appliances and apply gentle pressure to the top and sides, rocking them back and forth. Observe any movement or wobbling in the stack.
- Check alignment: While rocking the stack, check for any misalignment or unevenness. Ensure that the appliances are aligned and that they do not shift or tilt excessively.
- Inspect the brackets and screws: Examine the stacking brackets and screws to ensure that they are securely fastened. Look for any signs of loosening or instability. If necessary, tighten the screws or make any adjustments to ensure a secure connection.
- Listen for unusual noises: Pay attention to any unusual noises such as rattling or knocking during the rocking process. These sounds could indicate a loose connection or an unstable stack.
- Repeat the stability test: Perform the rocking test a few times to ensure consistent stability. If the stack remains stable and shows no signs of movement, it is secure and ready for use.
If you notice any instability, wobbling, or excessive movement during the stability test, it is important to address the issue promptly. Double-check the installation, tightening screws, and making necessary adjustments as outlined in the manufacturer’s instructions.
By thoroughly testing the stack for stability, you can ensure a safe and reliable operation of your stacked Samsung washer and dryer.
With the stack confirmed to be stable, you have successfully completed the installation process. However, it’s important to familiarize yourself with some troubleshooting tips for potential issues that may arise. This will help you address any concerns and maintain the optimal performance of your stacked appliances.
Troubleshooting Tips
While stacking your Samsung washer and dryer can be a convenient and space-saving solution, it’s important to be aware of potential issues that may arise during usage. Here are some troubleshooting tips to address common problems you may encounter:
- Unbalanced loads: If the washer or dryer vibrates excessively during operation, it may be due to an unbalanced load. Ensure that the laundry is evenly distributed inside the drum and try to redistribute the load to balance it.
- Noise or vibration: Excessive noise or vibration can be caused by an imbalanced stack, loose screws, or uneven flooring. Check the stability of the stack and tighten any loose screws. Additionally, ensure that the stacked appliances are placed on a level surface.
- Improper draining: If you notice water pooling in the washer or drainage issues, check the drain hose for any blockages or kinks. Ensure that the hose is properly connected to the drain pipe or utility sink.
- Power or control panel issues: If the washer or dryer is not powering on or experiencing control panel malfunctions, check that the power cords are securely connected to the electrical outlets. Additionally, verify that the breakers haven’t tripped and all settings and controls are properly configured.
- Water leaks or plumbing issues: If you encounter water leaks from the washer or have issues with the water supply, check the water inlet hoses for any leaks or loose connections. Ensure that the plumbing connections are tight and that the water supply valves are fully open.
- Inadequate ventilation: Proper ventilation is crucial for the efficient operation of the dryer. If you notice that the drying time is prolonged or the dryer becomes excessively hot, check the dryer vent for any blockages or restrictions. Clean the vent periodically to prevent lint buildup.
- Error codes: If your Samsung washer or dryer displays an error code, refer to the appliance’s manual to identify the specific issue. Error codes provide valuable information to help diagnose and resolve problems.
- Consult the manufacturer: If you are unable to resolve an issue or require further assistance, don’t hesitate to contact Samsung’s customer support or consult a professional technician who specializes in Samsung appliances. They can provide expert advice and guidance to address any complex or persistent problems.
Remember to always prioritize safety when troubleshooting. If necessary, disconnect the power supply and consult a professional for assistance with more complex issues or repairs.
By familiarizing yourself with these troubleshooting tips, you can address common issues and maintain the optimal performance of your stacked Samsung washer and dryer.
Conclusion
Stacking a Samsung washer and dryer can be a practical solution to maximize space efficiency in your laundry area. By following the step-by-step instructions and safety precautions outlined in this guide, you can successfully stack your appliances while ensuring stability and functionality.
Throughout the process, it is important to prioritize safety by reading the manufacturer’s instructions, using the recommended stacking kit, and securing the stacked appliances properly. Taking the time to measure the available space, prepare the area, and install the stacking kit will set the foundation for a successful and secure stacking process.
Connecting the appliances to power and, if applicable, the water supply helps to complete the installation. Testing the stack for stability and checking for any potential issues or troubleshooting needs are crucial for ensuring optimal performance and addressing any concerns that may arise during usage.
Remember to refer to the manufacturer’s instructions and seek professional assistance if needed, especially when encountering complex issues or repairs.
By following the guidelines and taking necessary precautions, you can enjoy the benefits of a stacked Samsung washer and dryer – a space-saving laundry solution that maximizes efficiency and functionality in your home.
Stacking your Samsung washer and dryer is an investment in creating a well-organized and efficient laundry area. Enjoy the convenience and space-saving advantages that come with a properly stacked washer and dryer, and happy laundering!
Frequently Asked Questions about How To Stack Washer And Dryer Samsung
Was this page helpful?
At Storables.com, we guarantee accurate and reliable information. Our content, validated by Expert Board Contributors, is crafted following stringent Editorial Policies. We're committed to providing you with well-researched, expert-backed insights for all your informational needs.


0 thoughts on “How To Stack Washer And Dryer Samsung”