Articles
How To Hang String Lights On Covered Porch
Modified: May 6, 2024
Learn how to hang string lights on your covered porch with these helpful articles. Illuminate your outdoor space and create a cozy atmosphere.
(Many of the links in this article redirect to a specific reviewed product. Your purchase of these products through affiliate links helps to generate commission for Storables.com, at no extra cost. Learn more)
Introduction
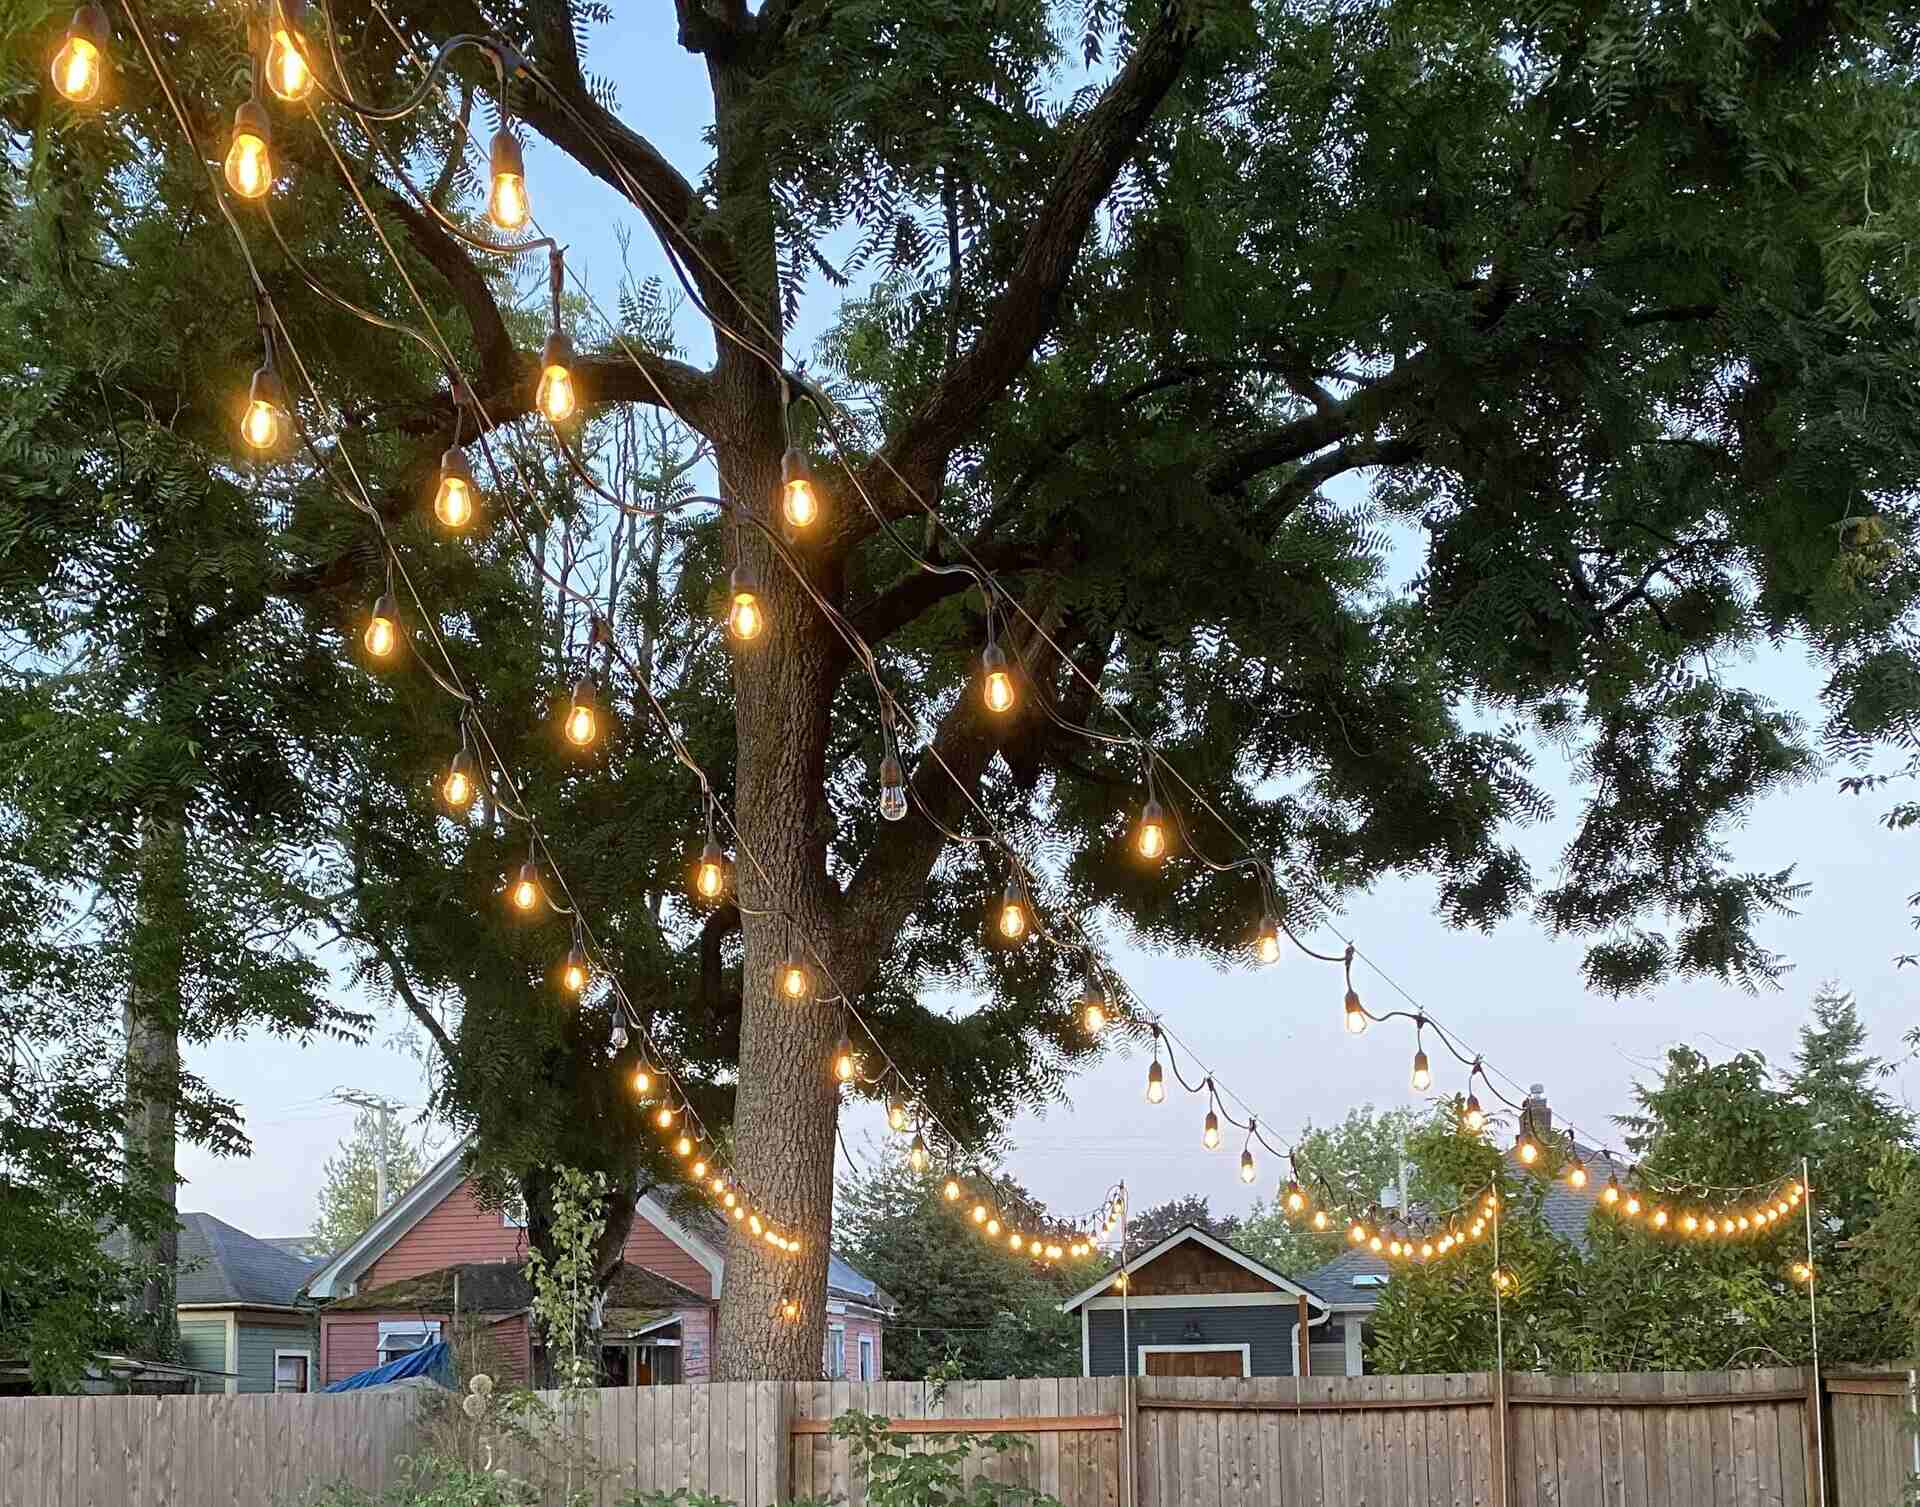
Adding string lights to a covered porch is a fantastic way to create a cozy and inviting ambiance. Whether you’re looking to enjoy some evening relaxation or host a memorable outdoor gathering, string lights can transform your porch into a magical space. Hang them along the porch roof, railings, or pergola, and watch as the night comes alive with a warm and enchanting glow.
In this guide, we will walk you through the step-by-step process of hanging string lights on your covered porch. We’ll cover everything from safety precautions to choosing the right lights and installing support structures. By following these instructions, you’ll be able to create an enchanting outdoor space that you’ll love spending time in.
Before we dive into the details, it’s important to note that safety should be your top priority when working with electricity and hanging lights. Always ensure you have the proper tools and materials, and never hesitate to ask for assistance if needed.
Key Takeaways:
- Create a magical outdoor space by safely hanging string lights on your covered porch. Prioritize safety, choose the right lights, and follow the step-by-step process for a cozy and enchanting ambiance.
- Transform your covered porch into a warm and inviting retreat with the perfect string lights. From planning and preparation to installation and testing, enjoy the cozy glow of a well-lit outdoor space.
Read more: How To Hang String Lights On Fence
Safety Precautions
Before you begin hanging string lights, it’s crucial to prioritize safety. Here are some important precautions to keep in mind:
- Turn off any power sources before handling electrical components.
- Use outdoor-rated lights specifically designed for outdoor use.
- Check the lights for any damage before installation, and replace any broken bulbs.
- Only use waterproof connectors and sockets.
- Avoid overloading electrical outlets by using appropriate extension cords and adapters.
- Securely fasten all wires and cords to prevent tripping hazards.
- If you’re unsure about any aspect of the installation process, consult a professional electrician.
By taking these safety precautions seriously, you can minimize the risk of accidents or electrical hazards and enjoy your string lights with peace of mind.
Key Takeaways:
- Create a magical outdoor space by safely hanging string lights on your covered porch. Prioritize safety, choose the right lights, and follow the step-by-step process for a cozy and enchanting ambiance.
- Transform your covered porch into a warm and inviting retreat with the perfect string lights. From planning and preparation to installation and testing, enjoy the cozy glow of a well-lit outdoor space.
Read more: How To Hang String Lights On Fence
Safety Precautions
Before you embark on the process of hanging string lights on your covered porch, it is crucial to prioritize safety. Taking the necessary precautions will ensure that you can enjoy your beautifully lit porch without any risks. Here are some essential safety guidelines to keep in mind:
- Turn off the power: Before handling any electrical components, make sure to turn off the power to the area where you’ll be working. This will help prevent any accidental electric shocks.
- Use outdoor-rated lights: It is vital to use lights that are specifically designed for outdoor use. These lights are weather-resistant and built to withstand different environmental conditions.
- Inspect the lights: Before installation, carefully inspect the string lights for any signs of damage, such as frayed wires or cracked bulbs. Replace any damaged bulbs or sets to avoid potential issues.
- Waterproof connectors: When connecting the lights or extension cords, ensure that you use waterproof connectors and sockets. This will protect the electrical components from moisture and reduce the risk of short circuits or electrical hazards.
- Avoid overloading electrical outlets: Make sure not to overload the electrical outlets by daisy-chaining too many lights together. Follow the manufacturer’s instructions regarding the maximum number of strings that can be connected.
- Secure wires and cords: To prevent tripping hazards, securely fasten all wires and cords along the porch ceiling or walls. Use clips or adhesive hooks designed for outdoor use to keep the wires in place.
- Consult a professional: If you are unsure about any aspect of the installation process or if the electrical work seems too complex, it is always wise to seek the guidance of a professional electrician.
Remember, safety should always be your top priority. By following these safety precautions, you can ensure a smooth and secure installation process. Now that we have covered the safety guidelines, let’s move on to the tools and materials you will need for hanging your string lights on the covered porch.
Tools and Materials Needed
Before you start hanging string lights on your covered porch, gather the following tools and materials:
Tools:
- Ladder or step stool: Depending on the height of your porch, you may need a ladder or step stool to reach the desired installation areas safely.
- Tape measure: A tape measure will help you accurately measure the length of the porch and determine how many lights you’ll need.
- Pencil or marker: You’ll need a pencil or marker to mark the spots where you plan to install the support structures.
- Drill: A drill with the appropriate drill bit will be needed to create holes for the support structures.
- Screwdriver: A screwdriver will be needed to secure the support structures and attach the string lights.
- Wire cutters: Wire cutters will come in handy for trimming excess wire or adjusting the length of the string lights.
- Zip ties or cable clips: These can be used to secure the wires or cords to the porch ceiling or walls.
Read more: How To Hang String Lights On A Pergola
Materials:
- String lights: Opt for high-quality outdoor-rated string lights that are suitable for outdoor use and can withstand different weather conditions.
- Support structures: Depending on the layout of your porch, you may need hooks, brackets, or other support structures to hang the string lights. Choose sturdy support structures that can hold the weight of the lights.
- Extension cords: If the nearest power outlet is not within reach, you’ll need extension cords that are rated for outdoor use.
- Waterproof connectors: Ensure you have waterproof connectors and sockets to connect the lights and extension cords securely.
- Electrical tape: Electrical tape can be used to cover and secure any exposed wiring or connections.
- Optional decorations: If desired, you may also consider additional decorations such as lanterns, potted plants, or other outdoor elements to complement the string lights.
Make sure you have all the necessary tools and materials before you begin the installation process. Being well-prepared will help streamline the process and ensure that you have everything you need to hang your string lights successfully. Now that you have your tools and materials ready, let’s move on to the next step: measuring and planning for your string lights installation.
Step 1: Measure and Plan
The first step in hanging string lights on your covered porch is to measure the area and plan where you want to install them. This will help you determine the amount of lights you’ll need and where to position them for the desired effect. Here’s how to do it:
- Measure the porch: Using a tape measure, carefully measure the length and height of your covered porch. This will give you an idea of how much string lights you’ll need and where to place them.
- Consider the layout: Take a moment to visualize how you want your string lights to be positioned. Decide whether you want them hanging along the roofline, draped along the railing, or suspended from a pergola, for example.
- Mark the spots: Use a pencil or marker to mark the spots where you plan to install the support structures. These will be the anchor points for your string lights.
- Account for power source: Determine the nearest power source and plan your string light installation accordingly. If the power outlet is not within reach, you may need to use extension cords.
- Consider the spacing: Think about the spacing between each string light. Depending on your preference, you can have them close together for a more intimate setting or spaced farther apart for a more whimsical effect.
- Calculate the length: Based on the measurements of your porch and the desired spacing between the lights, calculate the total length of string lights you’ll need to cover the planned area.
By measuring the porch and carefully planning the installation, you can ensure that your string lights are positioned exactly as you envision. Taking the time to plan ahead will save you from any surprises or setbacks later on. With your measurements and plan in hand, it’s time to move on to the next step – choosing the right string lights for your covered porch.
Step 2: Choose the Right String Lights
When it comes to choosing the right string lights for your covered porch, there are several factors to consider. The type, color, length, and bulb style all play a role in creating the desired ambiance. Here’s how to choose the perfect string lights for your porch:
- Consider the style: Think about the overall style and theme of your porch. Are you looking for a classic, vintage-inspired look or a more modern and vibrant atmosphere? Choose string lights that complement the existing décor and create the desired mood.
- Choose the right bulb style: String lights come in various bulb styles, such as incandescent, LED, or Edison bulbs. Each style offers a unique look and ambiance. LED bulbs are energy-efficient and last longer, while Edison bulbs emit a warm and nostalgic glow.
- Check the length: Determine the length of string lights you’ll need based on the measurements and plan you created in the previous step. Consider the distance between each anchor point and ensure the lights are long enough to cover the intended area.
- Decide on color: String lights are available in a wide range of colors. Whether you prefer classic white lights for an elegant look or multicolored lights for a festive vibe, choose a color that aligns with your porch’s theme and your personal taste.
- Ensure outdoor durability: Opt for string lights that are specifically designed for outdoor use. These lights are weather-resistant and built to withstand the elements, ensuring their longevity and safety.
- Consider additional features: Some string lights come with additional features, such as dimmable options, remote controls, or timer settings. Assess your requirements and choose lights that offer the features you desire.
By carefully considering these factors, you can select the perfect string lights that will enhance the atmosphere of your covered porch. Once you’ve chosen the lights, it’s time to prepare the porch for installation in the next step.
Step 3: Prepare the Porch
Before you start hanging the string lights on your covered porch, it’s important to prepare the area to ensure a smooth and successful installation. Taking the time to prepare the porch will make the process easier and help ensure the lights have a secure and aesthetically pleasing setup. Here’s how to prepare the porch:
- Clean the porch: Clear any debris, dust, or spider webs from the porch area where you plan to install the string lights. A clean surface will help the lights hang better and improve the overall appearance.
- Check the stability: Inspect the porch structure and make sure it is sturdy enough to support the weight of the string lights. Tighten any loose screws or bolts, and reinforce any weak areas if necessary.
- Prepare the anchor points: If you’re using hooks or brackets as support structures, securely install them in the marked spots on the porch. Make sure the hooks or brackets are properly screwed into place and can hold the weight of the lights.
- Assess the power source: Confirm that the power source you’ll be using is in good working condition. Check the outdoor electrical outlet or extension cord for any signs of damage, and ensure it is rated for outdoor use.
- Check the proximity to water sources: Avoid installing the lights too close to water sources, such as sprinklers or outdoor faucets. Water and electricity do not mix, so maintain a safe distance to prevent any potential hazards.
- Plan for extension cords: If you’ll be using extension cords to reach the power source, plan their layout, and secure them in a way that avoids tripping hazards and protects them from the elements.
By preparing the porch beforehand, you’ll create a solid foundation for your string lights installation. This will ensure that the lights are securely mounted and reduce the risk of any accidents or damage. With the porch prepped and ready, it’s time to move on to the next step: installing the support structures for the string lights.
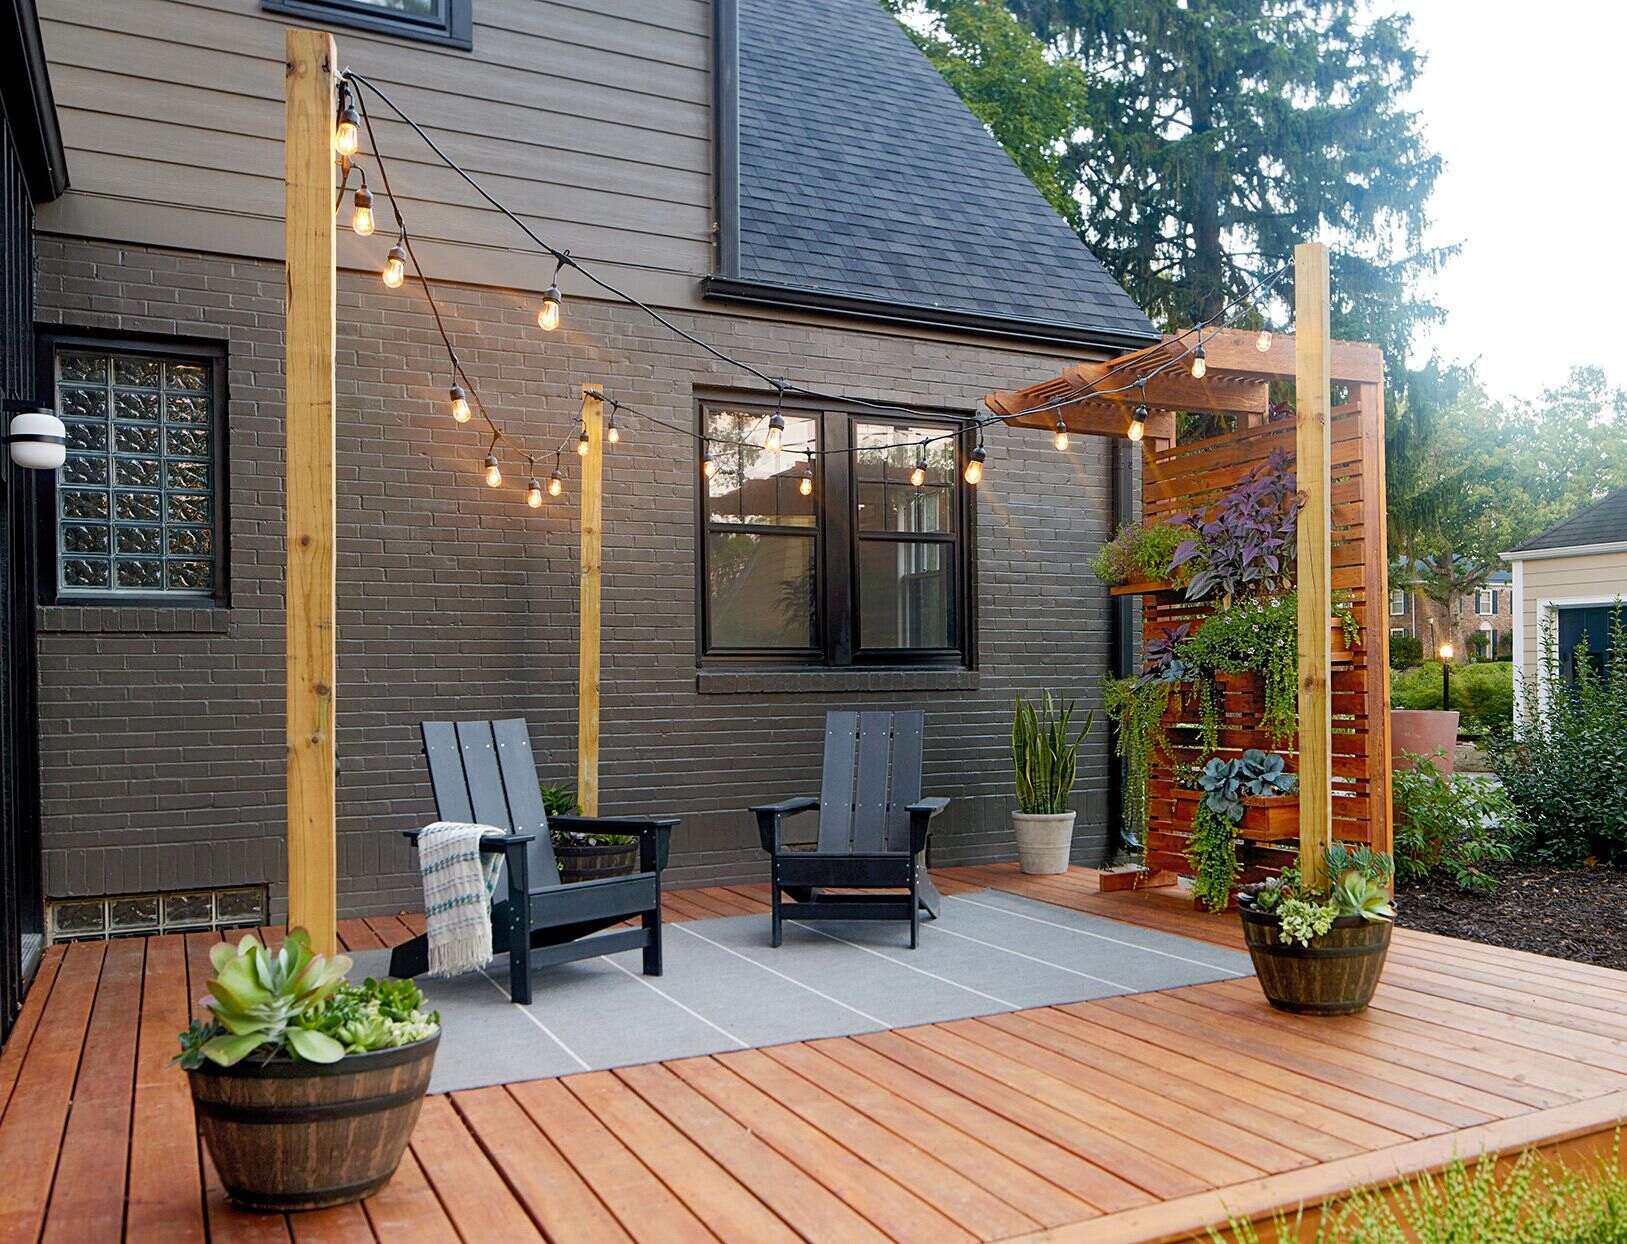
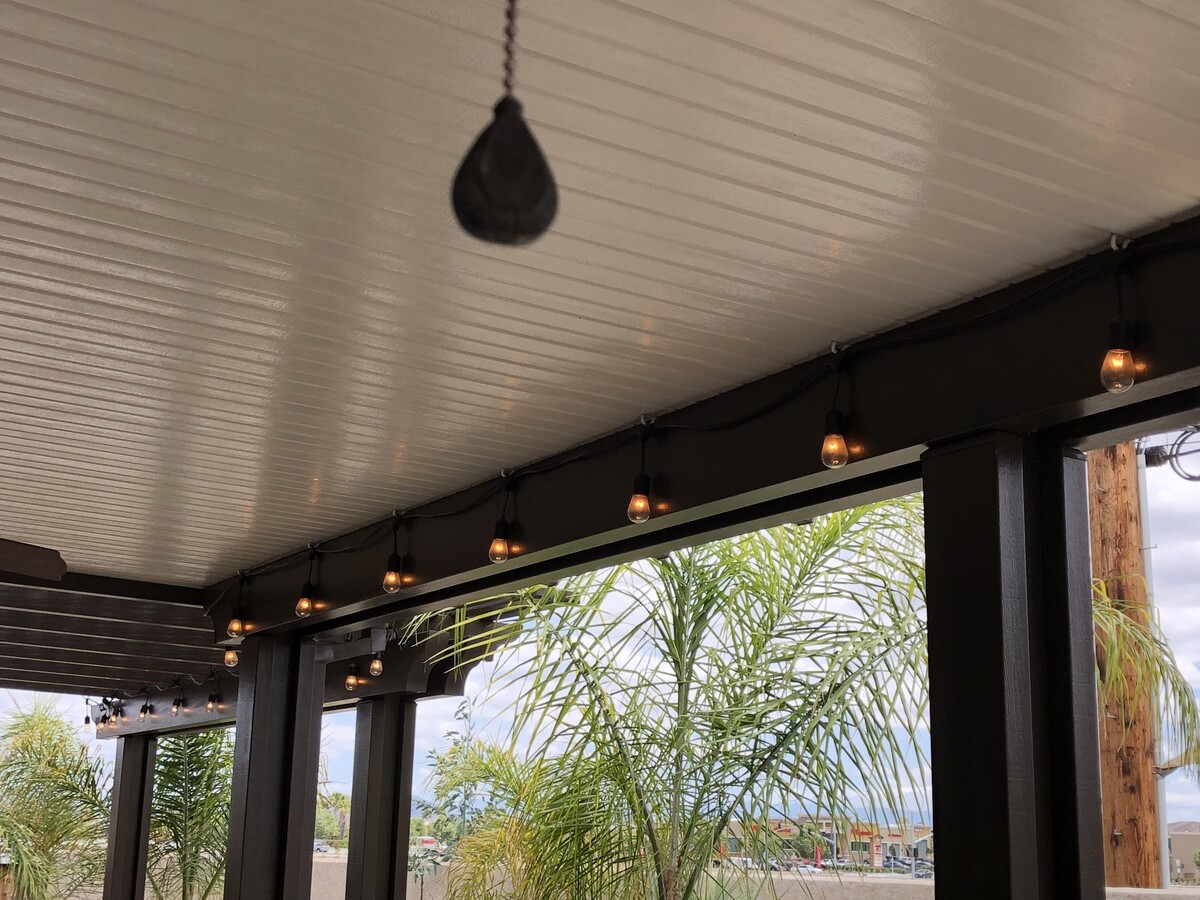
Use adhesive hooks or screw-in hooks to hang string lights along the perimeter of the covered porch. Make sure to measure the length of the area and use outdoor-rated lights for durability.
Read more: How To Hang String Lights On Gutters
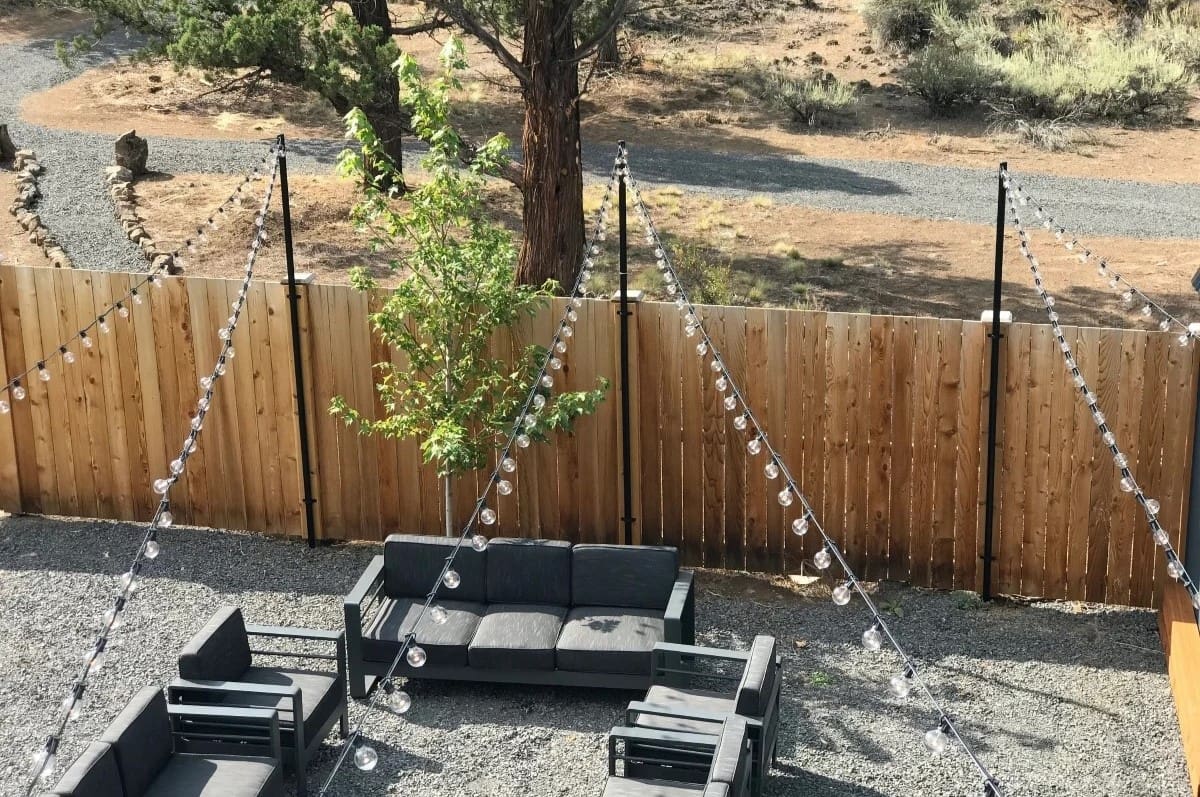
Step 4: Install Support Structures
Now that your porch is prepared, it’s time to install the support structures for hanging the string lights. The support structures will serve as anchor points to secure the lights and ensure they are evenly distributed along your covered porch. Follow these steps to install the support structures:
- Choose the appropriate support method: Depending on your porch layout and personal preference, you can use hooks, brackets, or other support methods. Make sure the chosen method is suitable for the weight of the lights and can be securely attached to your porch.
- Mark the locations: Use a pencil or marker to mark the spots where you’ll be installing the support structures. Ensure the marks are evenly spaced and aligned with your overall design plan.
- Drill pilot holes: If necessary, use a drill with the appropriate drill bit to create pilot holes at the marked spots. Pilot holes will make it easier to screw in the hooks or brackets later on.
- Attach the support structures: Starting with one end of the porch, attach the hooks or brackets to the pilot holes. Use a screwdriver to secure them in place, making sure they are firmly attached.
- Check stability: After attaching each support structure, give it a gentle shake to ensure it is secure. If there is any wobbling or instability, adjust and tighten the screws as necessary.
- Continue with remaining support structures: Repeat the process of drilling pilot holes and attaching the support structures until you have installed them in all the marked spots along your porch.
By installing sturdy support structures, you’ll provide a reliable framework for hanging the string lights. These structures will ensure that the lights are securely mounted and evenly distributed, creating a visually appealing and balanced display. With the support structures in place, it’s time to move on to the exciting step of hanging the string lights.
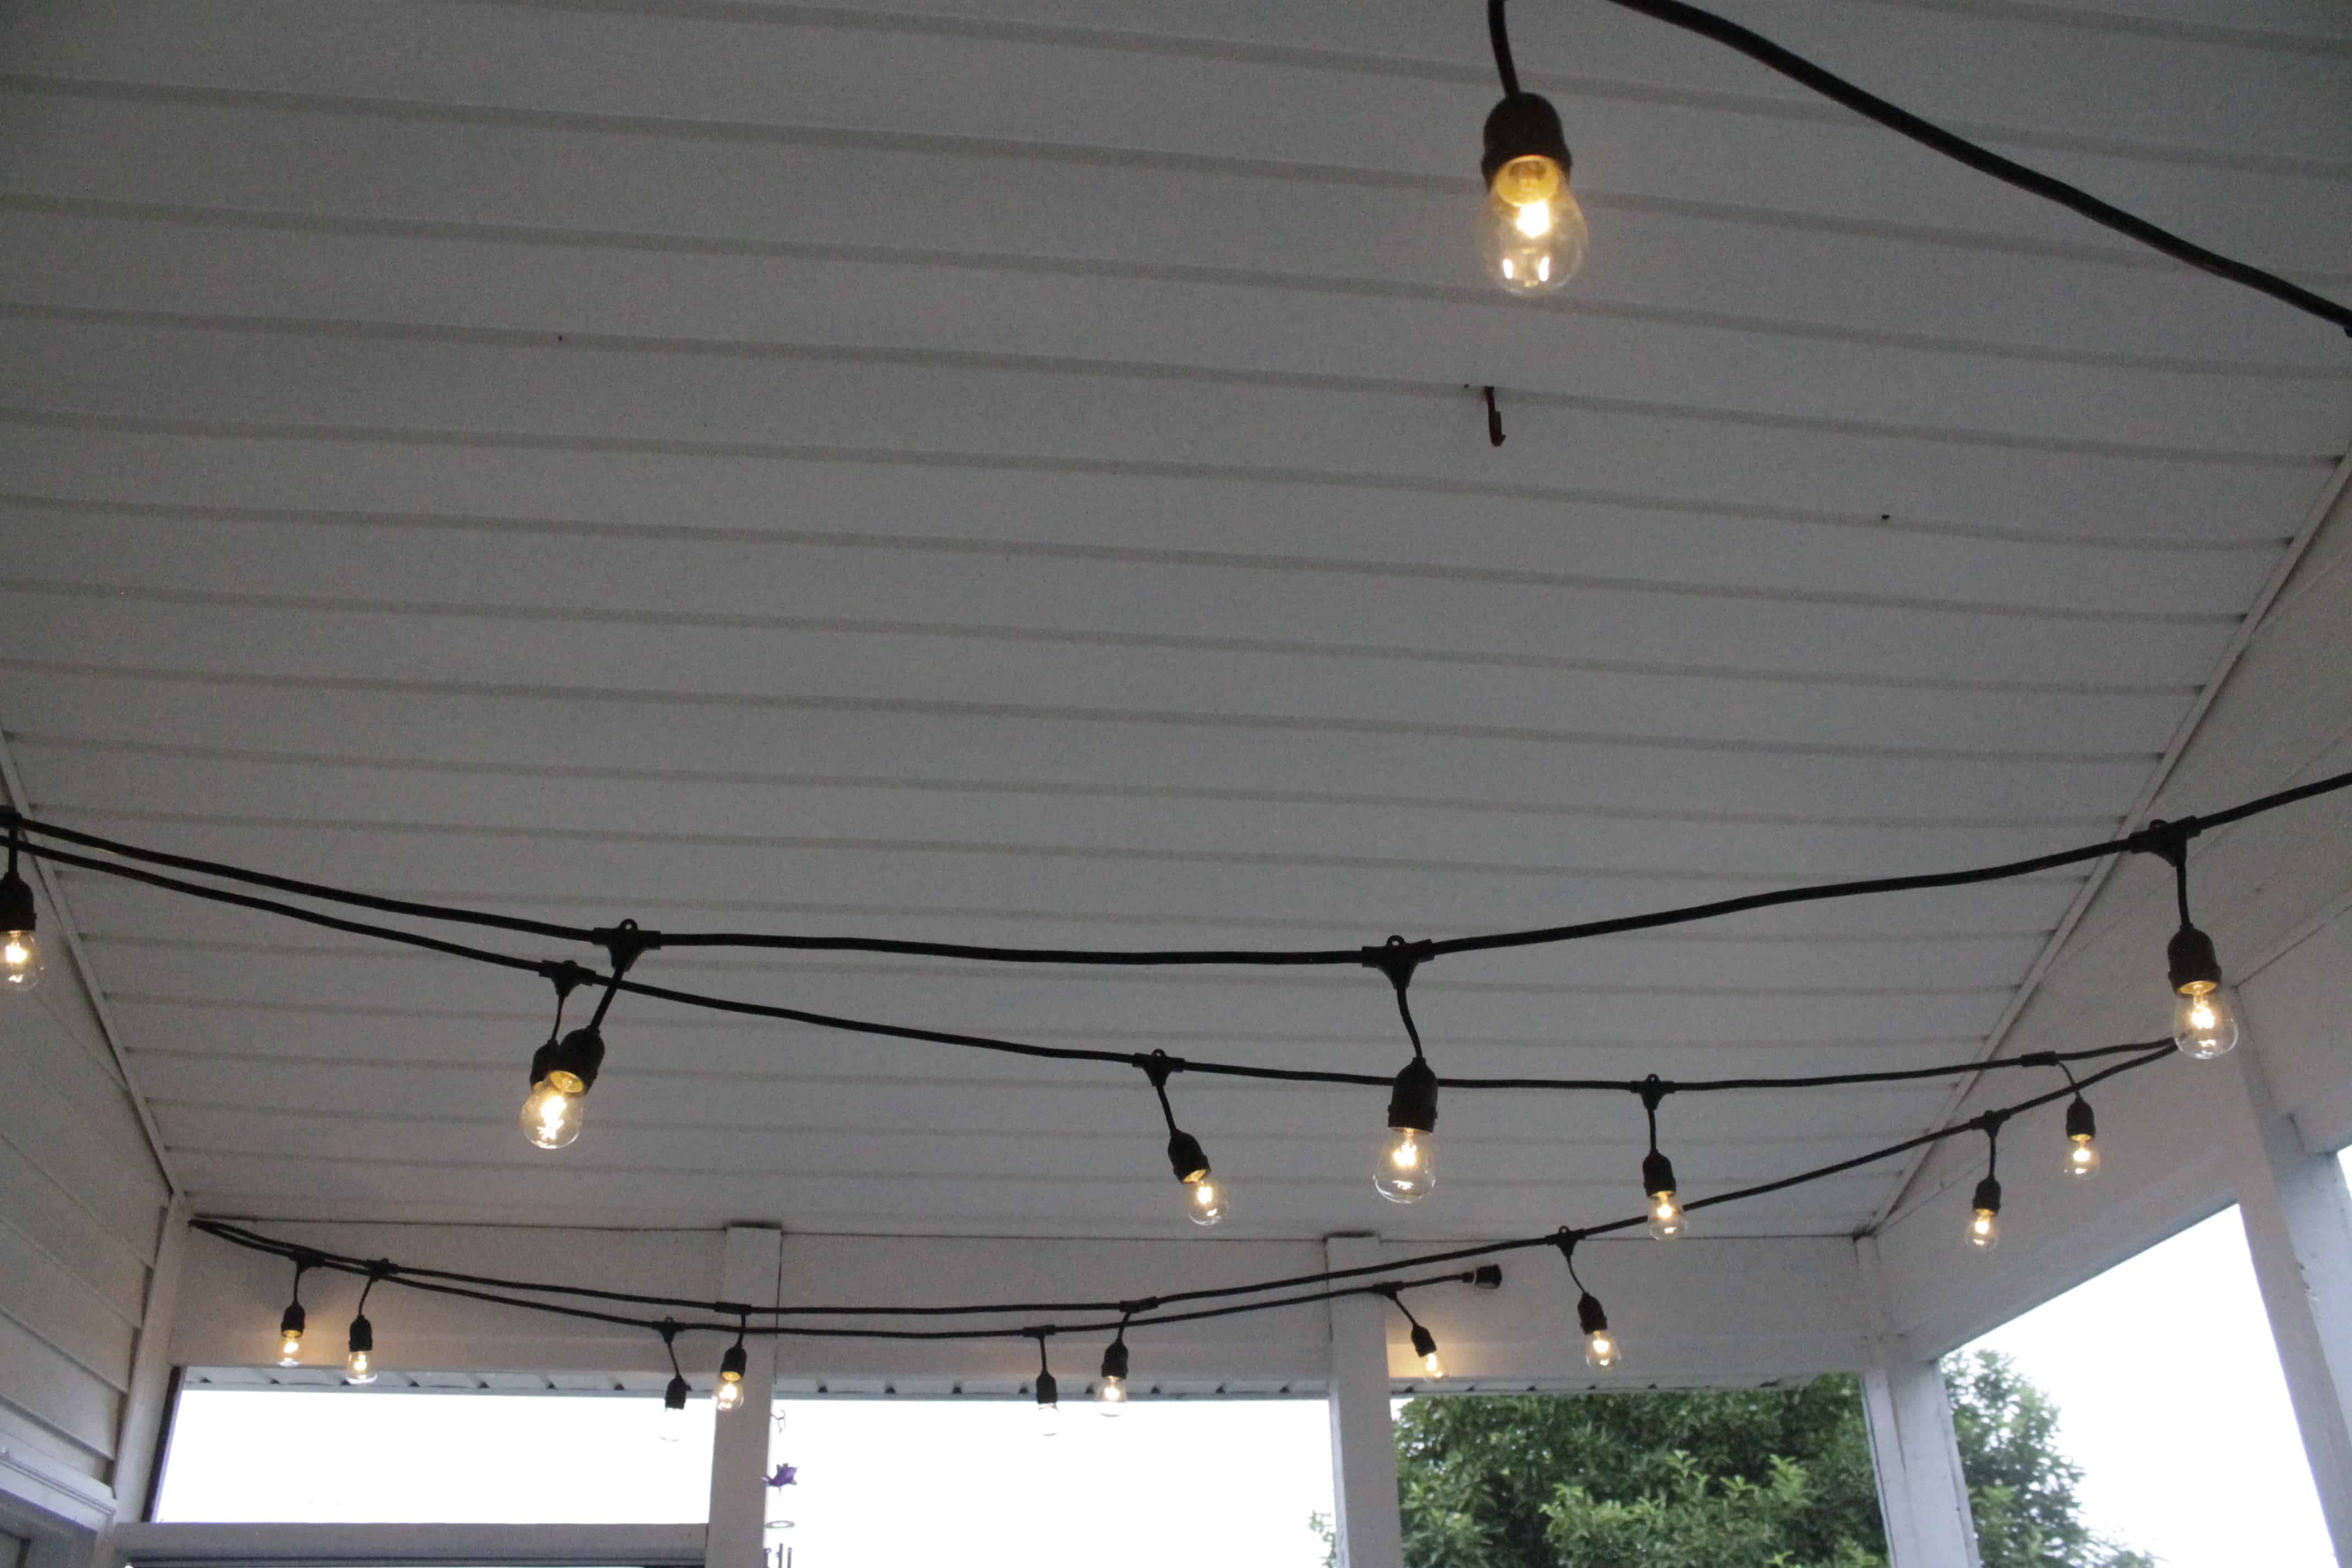
Step 5: Hang the String Lights
With the support structures installed, it’s time to hang the string lights and bring your covered porch to life with a warm and inviting glow. Follow these steps to hang the string lights:
- Start at one end: Begin at one end of your porch, near the power source or where the first support structure is located. This will serve as your starting point for hanging the lights.
- Unroll the string lights: Carefully unroll the string lights, keeping them tangle-free as you go along. Work your way from one end of the porch to the other, following the path you have planned.
- Attach the lights: Depending on the type of string lights you have, there are different attachment methods. If your lights have hooks or clips, simply attach them to the support structures. For lights without built-in attachments, use zip ties or cable clips to secure them in place.
- Maintain even spacing: As you hang the lights, make sure to maintain an even spacing between each bulb or section of the string lights. This will create a balanced and visually pleasing display.
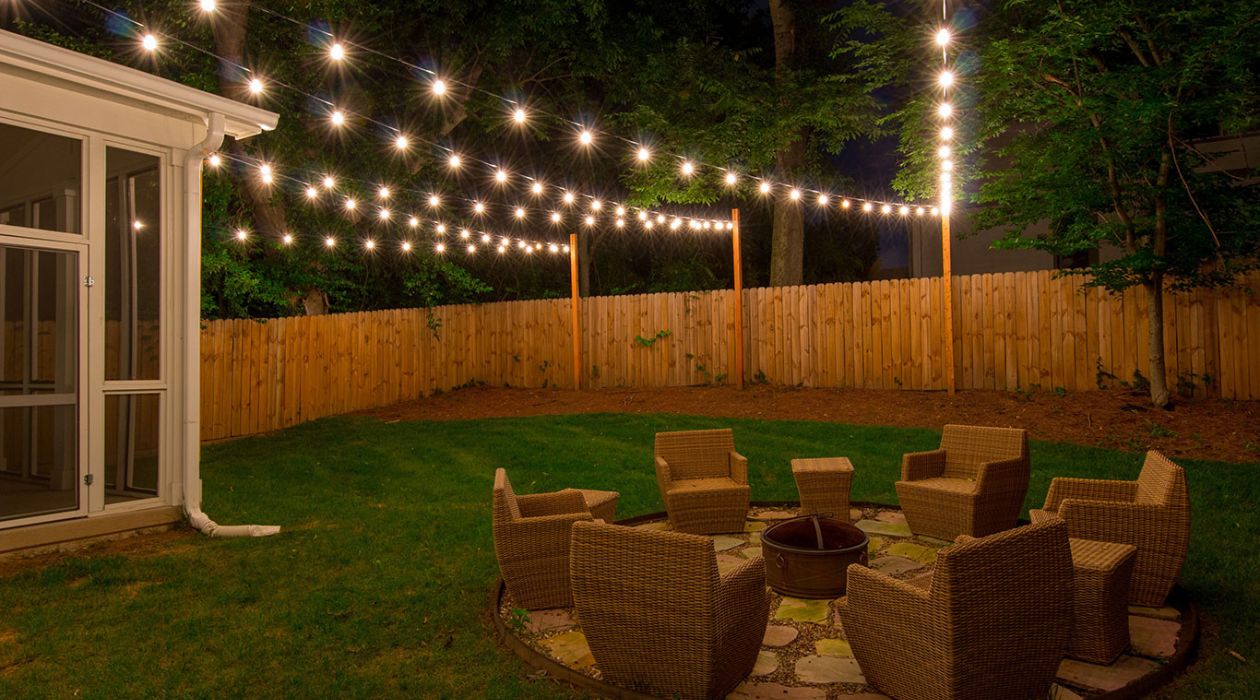
- Shape the lights: Adjust and shape the string lights as you go to achieve your desired look. You can drape them along the porch roofline, weave them through the railings, or suspend them from a pergola. Be creative and experiment with different arrangements.
- Tighten and straighten: Once you’ve hung all the lights, go back and double-check that they are securely attached and straight. Make any necessary adjustments to ensure a neat and professional-looking installation.
Take your time with this step, making sure the string lights are installed according to your vision. With each bulb carefully placed, you’ll start to see your covered porch come alive with the warm glow of the lights. The next step is to connect and test the lights to ensure they are functioning correctly.
Step 6: Connect and Test
After hanging the string lights on your covered porch, it’s time to connect and test them to ensure they are functioning properly. Follow these steps to connect and test your string lights:
- Locate the power source: Identify the power source you’ll be using to connect the string lights. It can be an outdoor electrical outlet or an extension cord connected to an indoor outlet.
- Plug in the lights: Carefully plug in the string lights to the power source. If you’re using extension cords, ensure they are securely connected.
- Test the lights: Turn on the lights to see if they are working correctly. Check that all the bulbs are lit and there are no flickering or dim sections.
- Check for any signs of damage: Inspect the lights for any signs of damage or defects, such as broken bulbs or exposed wiring. If you notice any issues, replace the faulty bulbs or contact the manufacturer for support.
- Ensure even illumination: Take a step back and observe the overall illumination of the porch. Make sure the string lights are evenly distributed and there are no areas that appear significantly brighter or darker than others.
- Adjust and finesse: If needed, make any adjustments to the position or arrangement of the lights to achieve the desired illumination and ambiance. Tweak the spacing or shape of the lights as necessary.
By connecting and testing the string lights, you can ensure that everything is in working order before enjoying the warm glow of your illuminated porch. If any issues are detected, address them promptly to avoid any further complications. Now that the lights are connected and tested, it’s time to move on to the final step: adjusting and securing the string lights for long-lasting enjoyment.
Step 7: Adjust and Secure
Once you’ve connected and tested your string lights on your covered porch, the final step is to adjust and secure them for long-lasting enjoyment. This step ensures that the lights are positioned correctly, securely attached, and will stay in place throughout their use. Follow these steps to adjust and secure your string lights:
- Reposition any lights: Take a moment to step back and assess the overall appearance of the string lights. If needed, adjust the position of any bulbs or sections to ensure an even and visually pleasing distribution of light.
- Straighten drooping or sagging sections: If any parts of the string lights are drooping or sagging, use zip ties or adhesive clips to secure them in place. This will prevent any untidy or uneven sections.
- Tighten connections: Double-check that all the connections, including where the string lights attach to the support structures, are securely tightened. Ensure there are no loose or wobbly sections.
- Secure loose wires or cords: Use zip ties or cable clips to secure any loose wires or cords along the porch ceiling or walls. This will prevent them from hanging or becoming tangled, ensuring a neat and professional appearance.
- Cover exposed wiring: If there are any exposed wiring or connections, use electrical tape to cover and secure them. This will protect the wiring and reduce the risk of accidents or damage.
- Check for any potential hazards: Take a final look at the porch and surrounding area to ensure there are no potential hazards, such as tripping hazards or exposed electrical components. Make any necessary adjustments to eliminate or mitigate these risks.
By adjusting and securing your string lights, you not only enhance the visual appeal but also ensure their longevity and your safety. Take the time to make these final adjustments, as they will contribute to a well-maintained and enjoyable outdoor space. With the string lights adjusted and secured, your covered porch is ready to be enjoyed day or night.
Congratulations! You have successfully followed the step-by-step process to hang and secure string lights on your covered porch. Sit back, relax, and soak up the cozy and enchanting ambiance that these lights bring to your outdoor space.
Read more: How To Hang String Lights From The Ceiling
Conclusion
Adding string lights to your covered porch can completely transform the atmosphere and create a warm and inviting outdoor space. By following the step-by-step guide outlined in this article, you have learned how to safely hang and secure string lights for maximum impact and enjoyment.
Throughout the process, we emphasized the importance of safety and provided essential precautions to ensure a secure installation. From choosing the right string lights to measuring and planning, preparing the porch, installing support structures, and connecting and testing the lights, each step contributed to a successful outcome.
Remember to prioritize safety at all times by turning off power sources before handling electrical components, using outdoor-rated lights, and securing wires and cords to prevent tripping hazards. Additionally, be mindful of proper spacing, adjusting the lights for even illumination, and securing the connections for a neat and professional look.
Once the string lights are hung and secured, take a moment to appreciate the warm and enchanting glow they provide. Whether you’re lounging on your porch, entertaining guests, or enjoying a quiet evening, the ambiance created by the string lights will add a touch of magic to your outdoor living space.
Now, with the knowledge and skills acquired from this guide, you have the ability to transform any covered porch into a cozy and inviting retreat. So go ahead, unleash your creativity, and enjoy the delightful glow of string lights on your covered porch.
Now that your porch shines bright with new lights, why not take outdoor ambiance up a notch? Discover innovative patio lighting ideas that add flair and function to any outdoor space. Whether preparing for a quiet evening or a festive gathering, these tips ensure your exterior is not only well-lit but also stylish. Next, dive into refreshing your porch with decor trends set to make a splash in 2024. From minimalist to eclectic, find inspiration to transform your porch into a welcoming retreat for family and friends.
Frequently Asked Questions about How To Hang String Lights On Covered Porch
Was this page helpful?
At Storables.com, we guarantee accurate and reliable information. Our content, validated by Expert Board Contributors, is crafted following stringent Editorial Policies. We're committed to providing you with well-researched, expert-backed insights for all your informational needs.


0 thoughts on “How To Hang String Lights On Covered Porch”