Articles
How To Paint Next To A Carpet
Modified: January 23, 2024
Learn how to paint next to a carpet without making a mess. Our articles provide step-by-step guidance for achieving a flawless finish.
(Many of the links in this article redirect to a specific reviewed product. Your purchase of these products through affiliate links helps to generate commission for Storables.com, at no extra cost. Learn more)
Introduction
When it comes to painting a room, one of the common challenges is how to paint next to a carpet without getting paint on it. Accidentally splattering paint on your carpet can be frustrating and can ruin the aesthetic appeal of your space. However, with a few precautions and the right techniques, you can successfully paint alongside your carpet while keeping it protected.
In this article, we will guide you through the step-by-step process of painting next to a carpet. We will cover everything from preparing the area to choosing the right supplies and applying the paint carefully. By following these tips, you can achieve a professional-looking paint job without any paint mishaps on your carpet.
So, let’s dive in and learn how to paint next to a carpet like a pro!
Key Takeaways:
- Protect your carpet while painting by preparing the area, using drop cloths, and applying painter’s tape to achieve clean and professional-looking results.
- Choose the right supplies, including paintbrushes and painter’s tape, and apply paint carefully to achieve precise lines and protect your carpet from accidental spills or splatters.
Read more: How To Paint Baseboards With Carpet
Preparing the Area
Before you start painting next to your carpet, it’s important to properly prepare the area to minimize the risk of paint splatters or spills. Here are the steps you should follow:
Step 1: Clearing the Space
Begin by removing any furniture or objects from the area where you will be painting. Clearing the space will give you more room to maneuver and reduce the likelihood of accidentally bumping into something and causing paint to splatter.
Step 2: Cleaning the Area
Next, clean the area thoroughly. Vacuum the carpet to remove any loose dirt, dust, or debris. Use a damp cloth to wipe down the baseboards and walls, removing any grime or grease that could interfere with the adhesion of the paint.
Step 3: Applying Painter’s Tape
Painter’s tape is a crucial tool for protecting your carpet while painting. Carefully apply painter’s tape along the baseboards, making sure to press it down firmly to create a tight seal between the tape and the carpet. This will create a barrier that prevents paint from seeping onto your carpet.
Step 4: Using Drop Cloths
To provide an extra layer of protection, lay down drop cloths or old sheets on the carpet around the area you will be painting. This will catch any paint drips or spills and prevent them from reaching your carpet. Make sure the drop cloths are securely tucked under the painter’s tape to prevent them from shifting during the painting process.
By following these preparation steps, you will create a clean and protected area to paint next to your carpet. With the groundwork laid, you can now gather the necessary supplies to begin the painting process.
Protecting the Carpet
Protecting your carpet is essential to ensure that it remains free from any accidental paint splatters or spills during the painting process. Here are some measures you can take to safeguard your carpet:
1. Use Plastic Sheeting: Consider using plastic sheeting to cover the carpet. Secure the sheeting along the baseboards with painter’s tape, creating a barrier between the carpet and the painted surface. This will provide an extra layer of protection against any potential paint drips or spills.
2. Lay Down Cardboard or Masonite Sheets: If plastic sheeting is not available, you can also use cardboard or Masonite sheets to cover the carpet. Cut them to fit the area you will be painting and place them on top of the drop cloths or directly on the carpet. Ensure they are securely in place to create a barrier and prevent any paint from reaching the carpet fibers.
3. Use Transparent Plastic Drop Cloths: Transparent plastic drop cloths allow you to see the carpet underneath while still providing protection. Place them over the drop cloths or directly on the carpet, ensuring they are firmly in place and secured with painter’s tape.
4. Trim the Carpet: If you have a long pile or shag carpet, consider trimming the area where you will be painting. Use a pair of sharp scissors to carefully trim the carpet fibers, creating a shorter pile in the immediate vicinity of the painting area. This will minimize the chances of paint seeping into the carpet and make it easier to clean up any accidental spills.
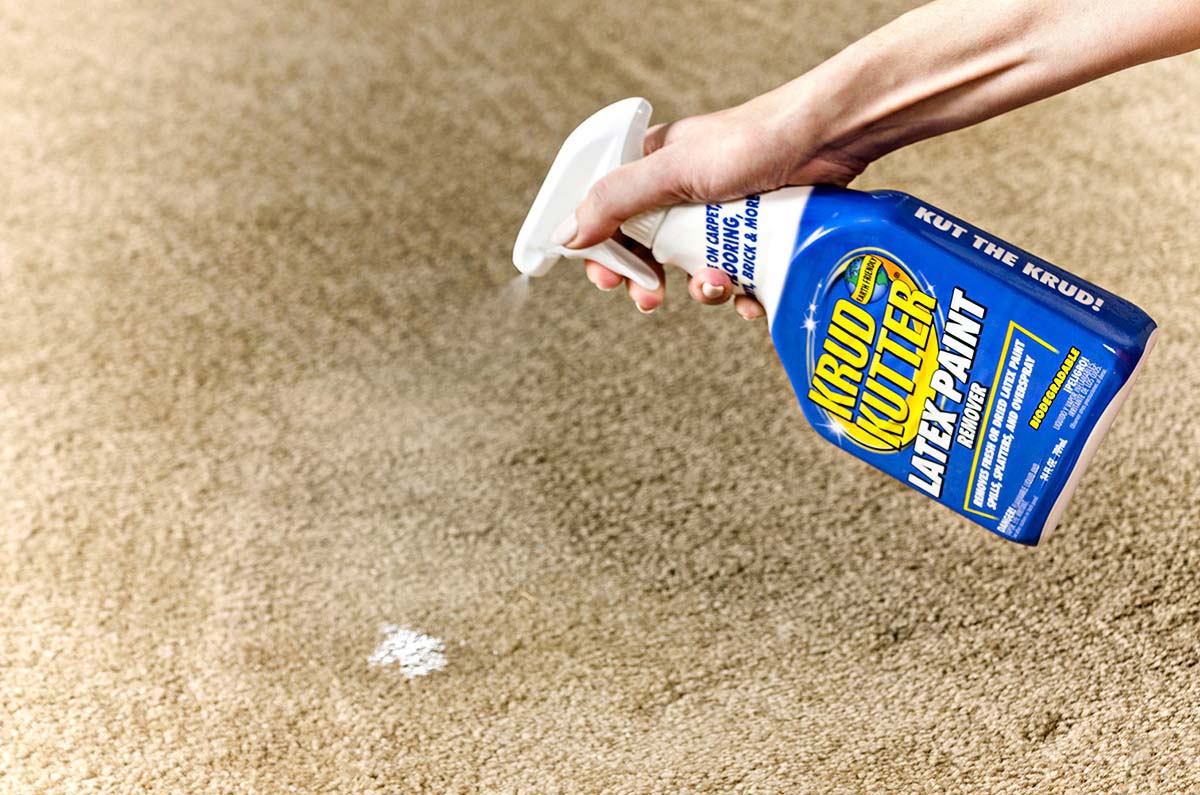
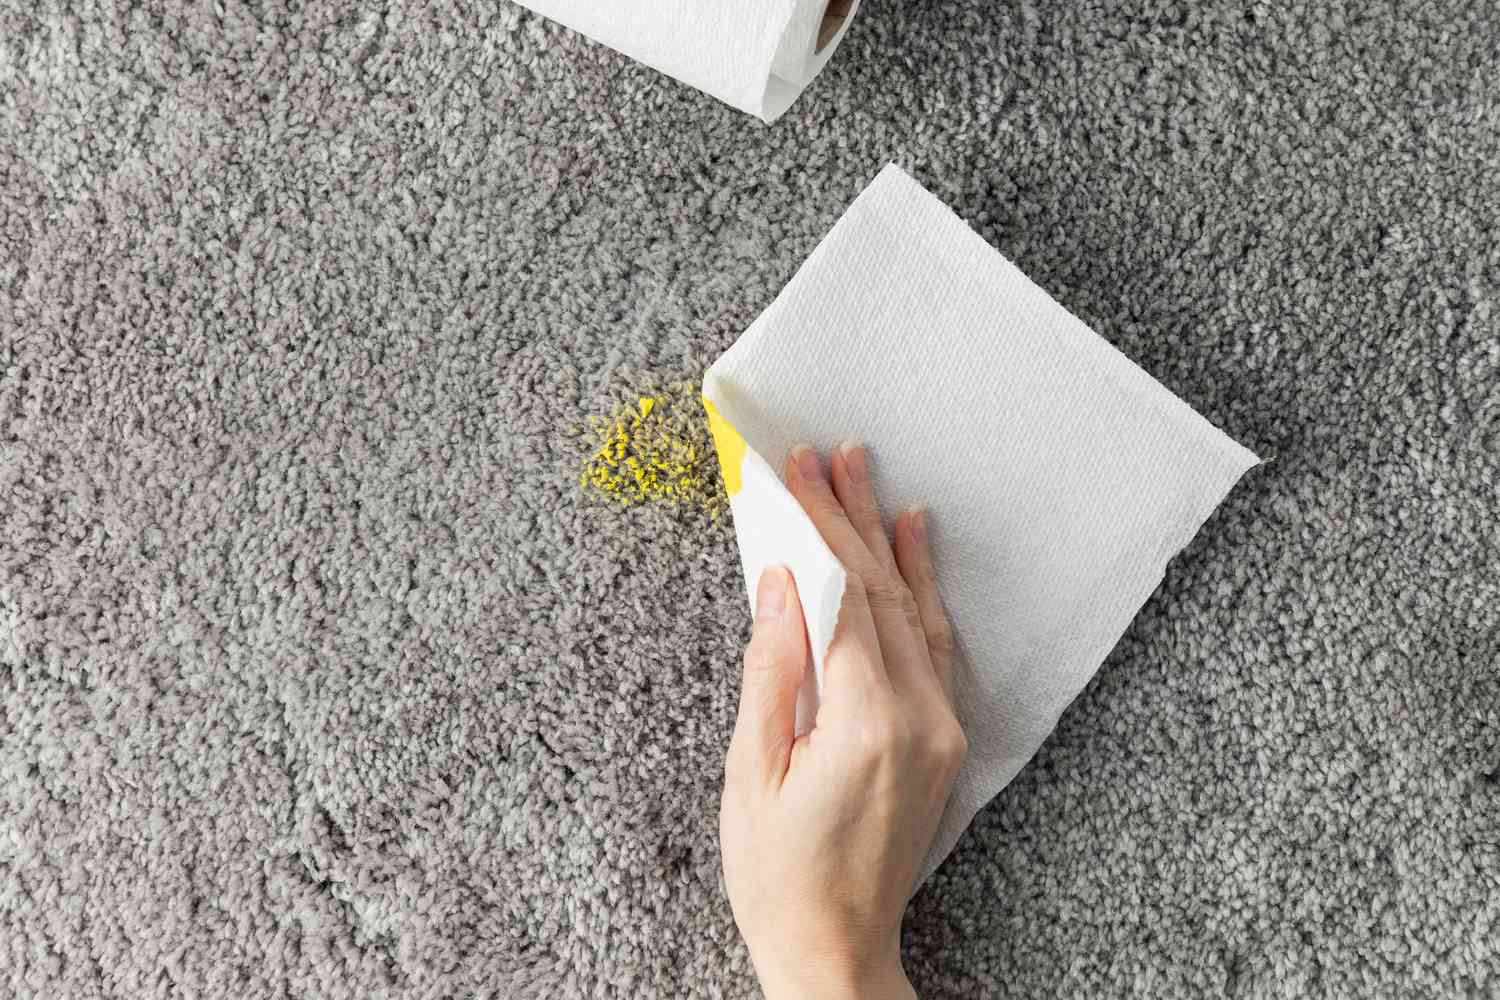
5. Keep Clean-Up Supplies Handy: Accidents can happen, even with the best precautions. Have clean-up supplies readily available, such as a cloth or sponge and a bucket of warm, soapy water. If any paint does happen to land on the carpet, blot it gently with a damp cloth as quickly as possible to prevent it from setting.
By taking these protective measures, you can significantly reduce the risk of any paint damage to your carpet while painting. With your carpet properly safeguarded, you can now focus on gathering the necessary supplies for the painting process.
Gathering the Necessary Supplies
Before you begin painting next to your carpet, it’s important to gather all the necessary supplies. Having the right tools on hand will make the process smoother and more efficient. Here are some key supplies you will need:
1. Paint: Choose the color and type of paint that suits your project. Consider the finish as well, whether you want a matte, satin, or glossy look. Make sure to select a paint that is suitable for the surface you will be painting.
2. Paintbrushes: Opt for high-quality paintbrushes that will provide smooth and even coverage. For painting next to a carpet, it is recommended to use a small angled brush or a trim brush. These types of brushes can help you navigate tight spaces and achieve clean lines.
3. Painter’s Tape: Invest in good quality painter’s tape designed for delicate surfaces. This will help protect your carpet and ensure crisp, clean edges when painting alongside it. Make sure to choose the appropriate width for your project.
4. Drop Cloths or Plastic Sheeting: Use drop cloths or plastic sheeting to cover the surrounding area and protect your carpet from any accidental paint drips or spills. These should be large enough to extend beyond the area you’ll be painting.
5. Paint Tray or Roller Tray: If you will be using a roller for larger areas, grab a paint tray or roller tray to hold the paint. This will make it easier to load the roller evenly with paint.
6. Rags or Paper Towels: Have some rags or paper towels on hand for cleaning up any spills or drips that may occur. These will come in handy for wiping brushes or blotting paint from the carpet if needed.
7. Optional: Paint Edger Tool: A paint edger tool can be helpful if you want to achieve precise lines without using painter’s tape. This tool allows you to cut in the edges neatly and accurately, creating a professional-looking finish near the carpet.
Make sure to gather these supplies before you start painting to ensure a smooth and efficient painting process. With everything in place, you’re ready to proceed to the next steps of painting next to your carpet.
Step 1: Clearing the Space
The first step in painting next to a carpet is to clear the space of furniture and any other objects that may obstruct your painting process. By creating a clear and spacious area, you’ll have more room to work and reduce the risk of accidentally bumping into something and causing paint splatters. Here’s how to clear the space effectively:
1. Remove Furniture: Start by removing any furniture present in the area you’re planning to paint. Take out chairs, tables, decorations, or any other movable items. This will allow you to freely move around and access all the necessary surfaces without any hindrances.
2. Store Furniture Elsewhere: If possible, store the furniture in a separate room or cover it with drop cloths or plastic sheets to protect it from dust or paint splatters from the painting process. This will ensure that your furniture remains clean and undamaged during the painting project.
3. Take Down Wall Decorations: Remove any wall decorations, such as frames, mirrors, or artwork, from the walls. This will make it easier to paint the walls near the carpet without the risk of accidentally knocking or splattering paint on the decorations.
4. Cover Large Fixed Objects: In some cases, you may have large fixed objects, such as built-in shelves or cabinets, that cannot be moved. In such situations, cover them with plastic sheets or painter’s tape to protect them from paint splatters. Ensure that the covering is securely fixed and provides adequate protection.
5. Clear the Floor: Lastly, make sure the floor is clear of any loose items like toys, shoes, or debris. This will prevent potential tripping hazards and allow you to move around safely while painting.
By following these steps, you can create a clear and clutter-free workspace, ensuring a smooth painting process and minimizing the risk of accidents or damage to your carpet. With the area cleared, you can move on to the next step of preparing the area before painting.
Read more: How To Clean Paint Off Carpet
Step 2: Cleaning the Area
Before you start painting next to your carpet, it is essential to clean the area thoroughly. This ensures that the surface is free from dust, dirt, and any other substances that could affect the quality of your paint job. Here’s how to clean the area effectively:
1. Vacuum the Carpet: Begin by vacuuming the carpet within the area you’ll be painting. This will remove any loose dust, dirt, or debris that may have accumulated. Pay special attention to the edges of the carpet where it meets the baseboards, as these areas are more prone to collecting dust and dirt.
2. Dust the Baseboards and Walls: Use a clean, dry cloth or a soft duster to remove any dust buildup from the baseboards and walls around the carpeted area. It’s important to have a clean surface before painting to ensure proper paint adhesion and a smooth finish.
3. Remove Grease or Grime: If you notice any grease or grime on the walls or baseboards, it’s important to clean those areas thoroughly. Use a mild detergent mixed with warm water and a sponge or cloth to gently scrub away any dirt or residue. Rinse the area with clean water and allow it to dry completely before moving on to the next step.
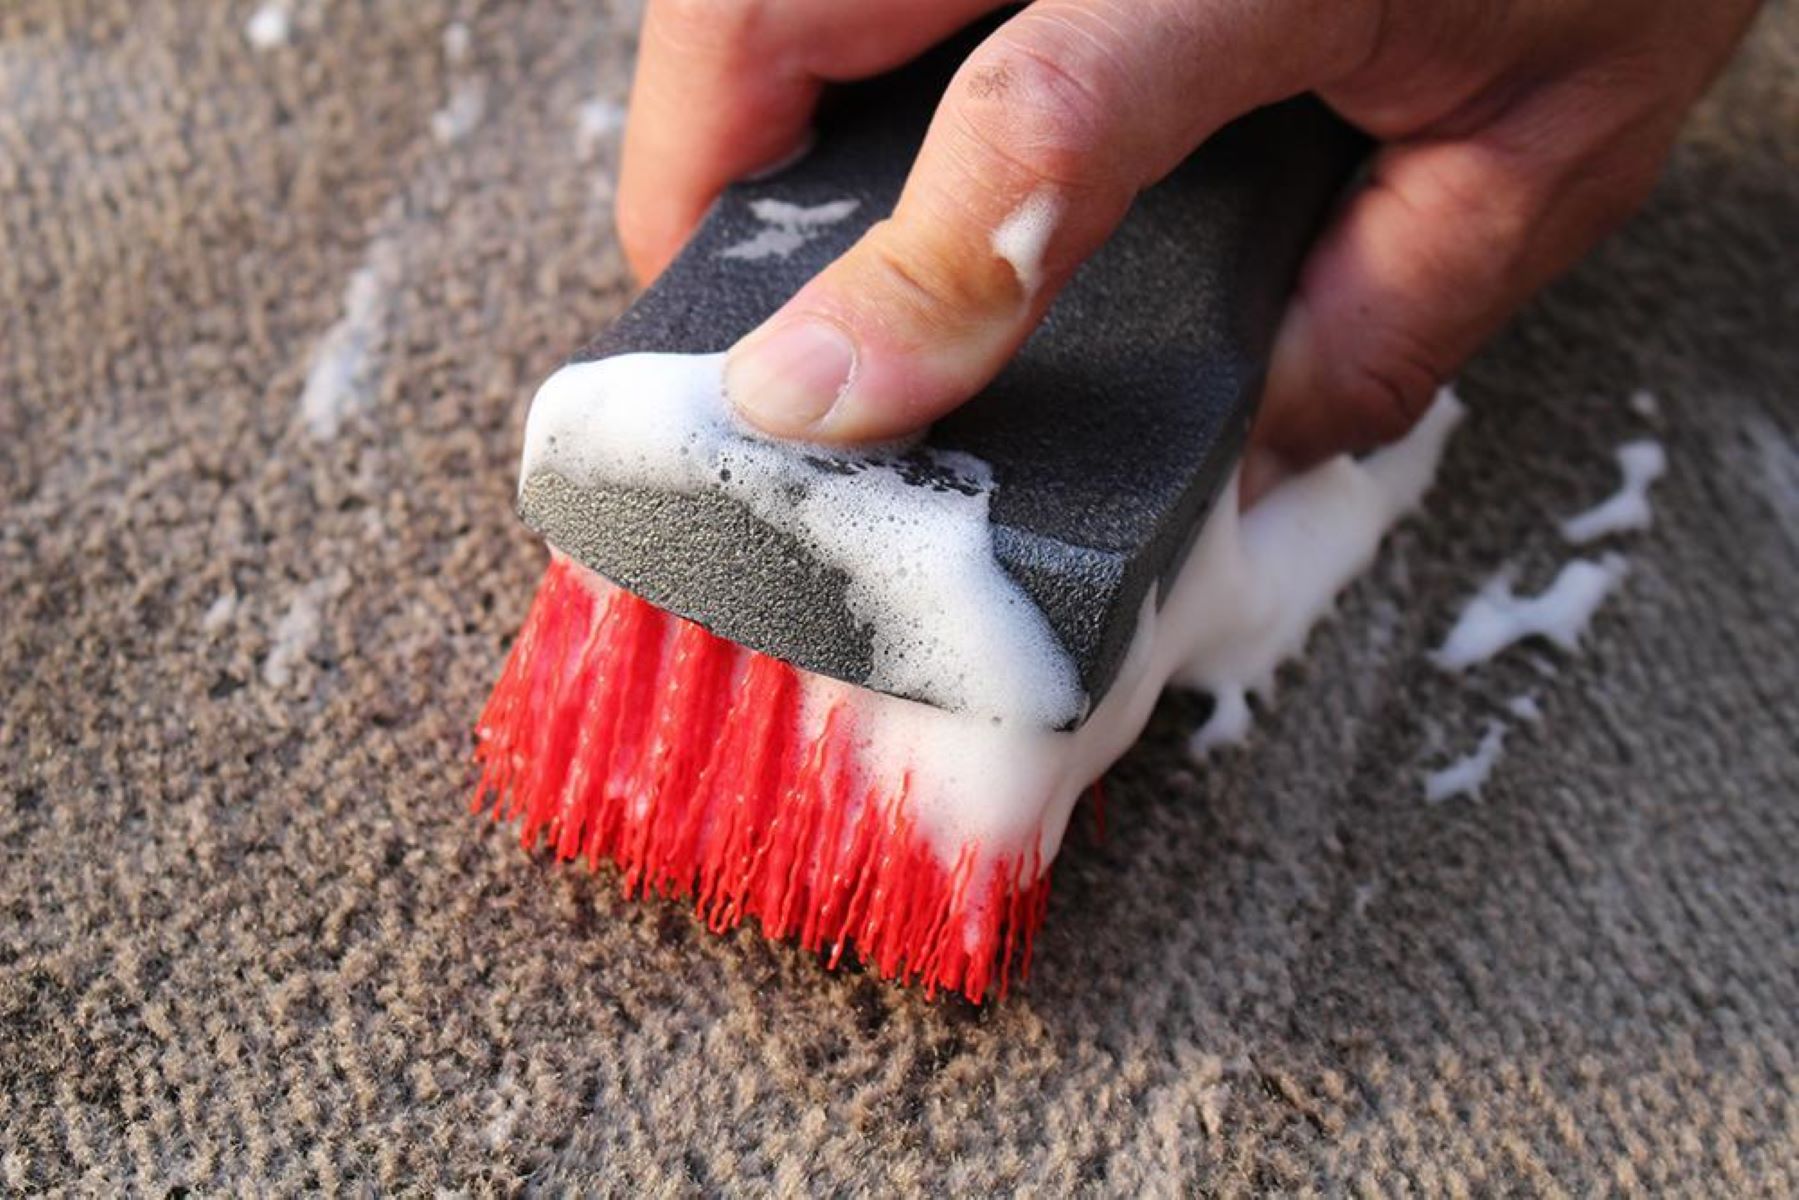
4. Check for Stains: Inspect the carpet for any stains or spills that may need to be addressed. If you notice any, spot clean them using the appropriate carpet cleaner or stain remover. Follow the instructions on the product and allow the carpet to dry completely before proceeding with the painting process.
5. Dust Off Furniture: If you have any furniture or items that will be returned to the space after painting, take this opportunity to dust them off and wipe away any dirt or debris. This will prevent any particles from settling onto your freshly painted walls or carpet.
By cleaning the area before painting, you ensure a clean and smooth surface for the paint to adhere to. This will result in a more professional-looking and long-lasting finish. Once the area is clean, you can move on to the next step of applying painter’s tape to protect the carpet.
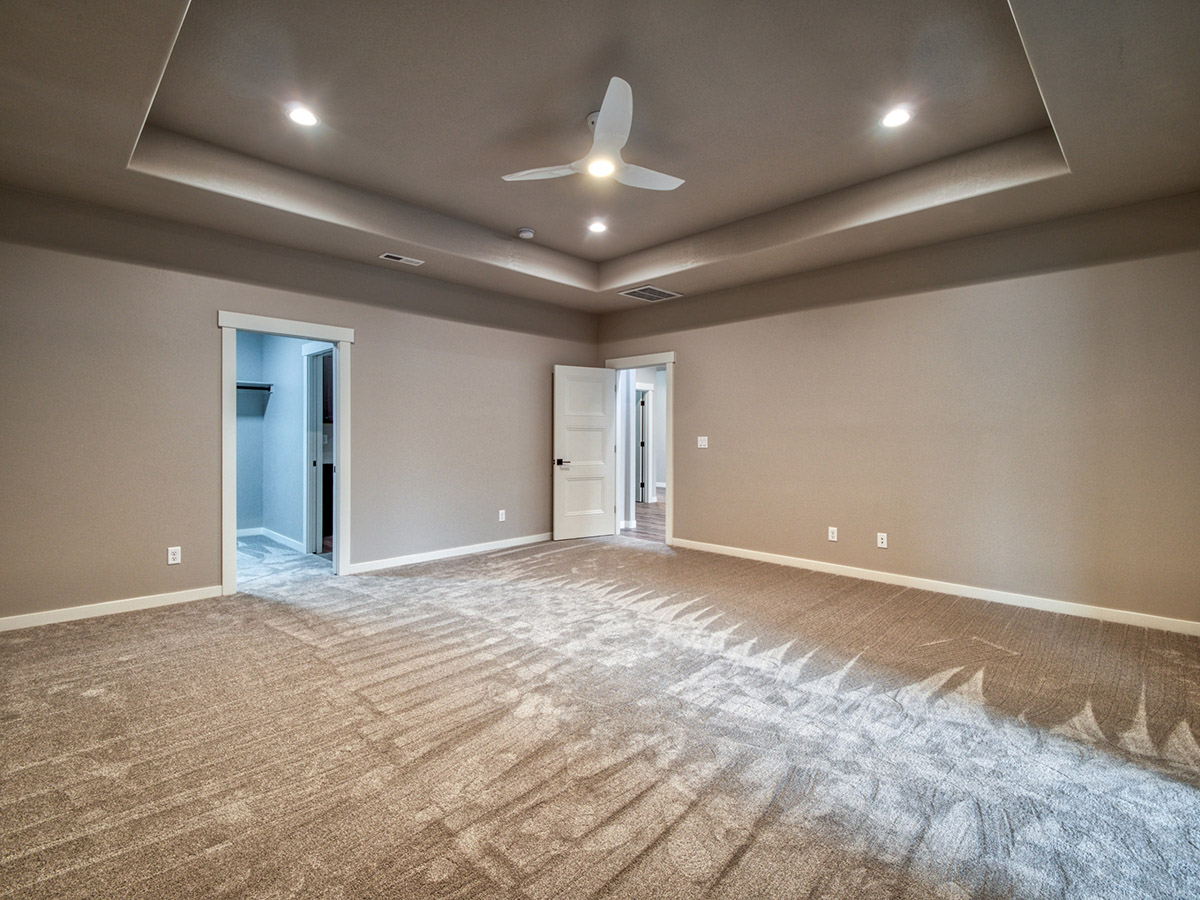
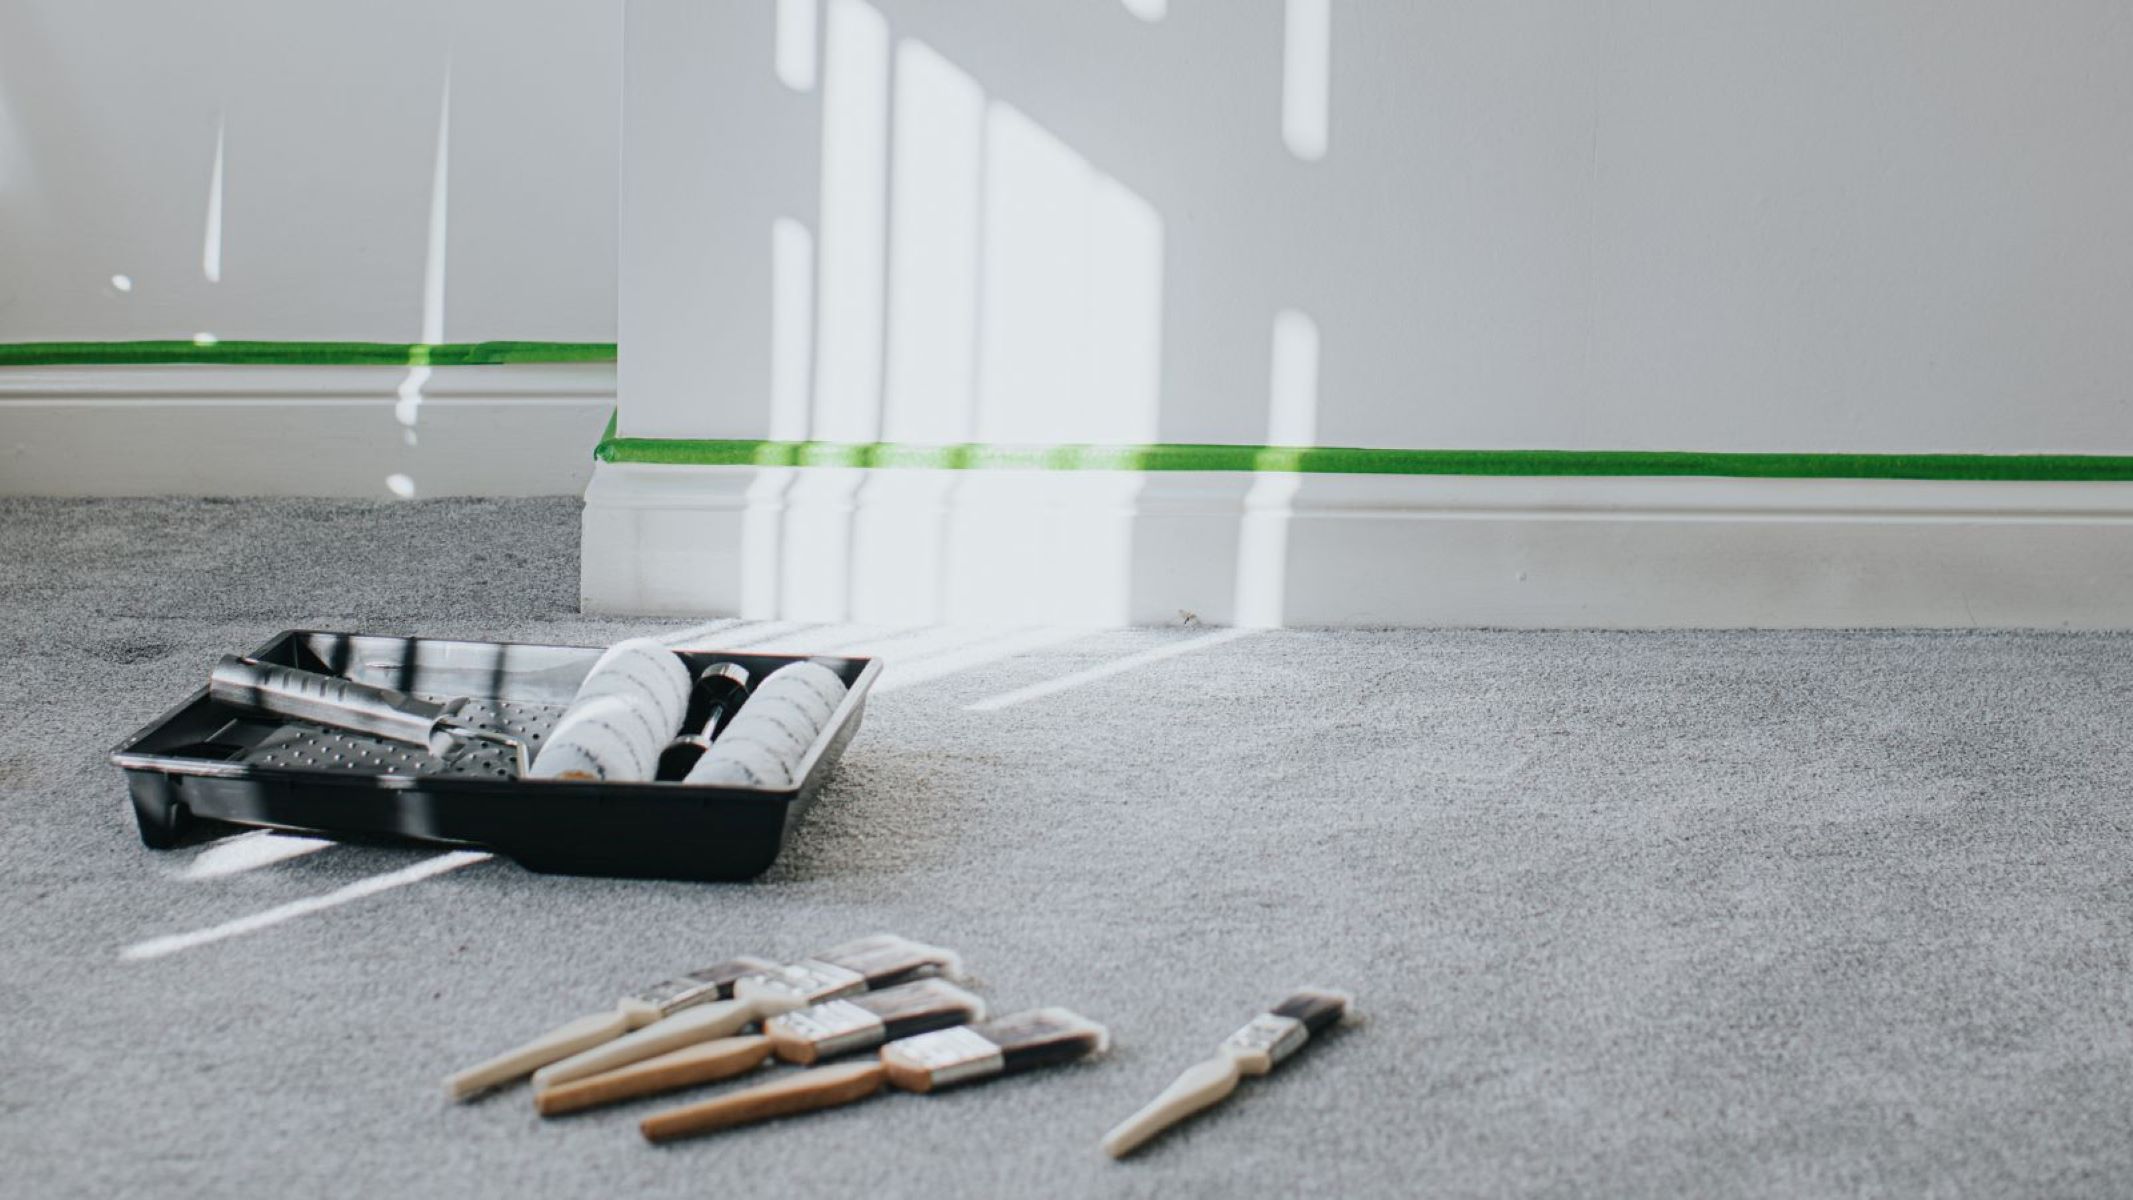
Use painter’s tape to protect the edges of the carpet before painting. Press the tape firmly to ensure a clean line and easy removal.
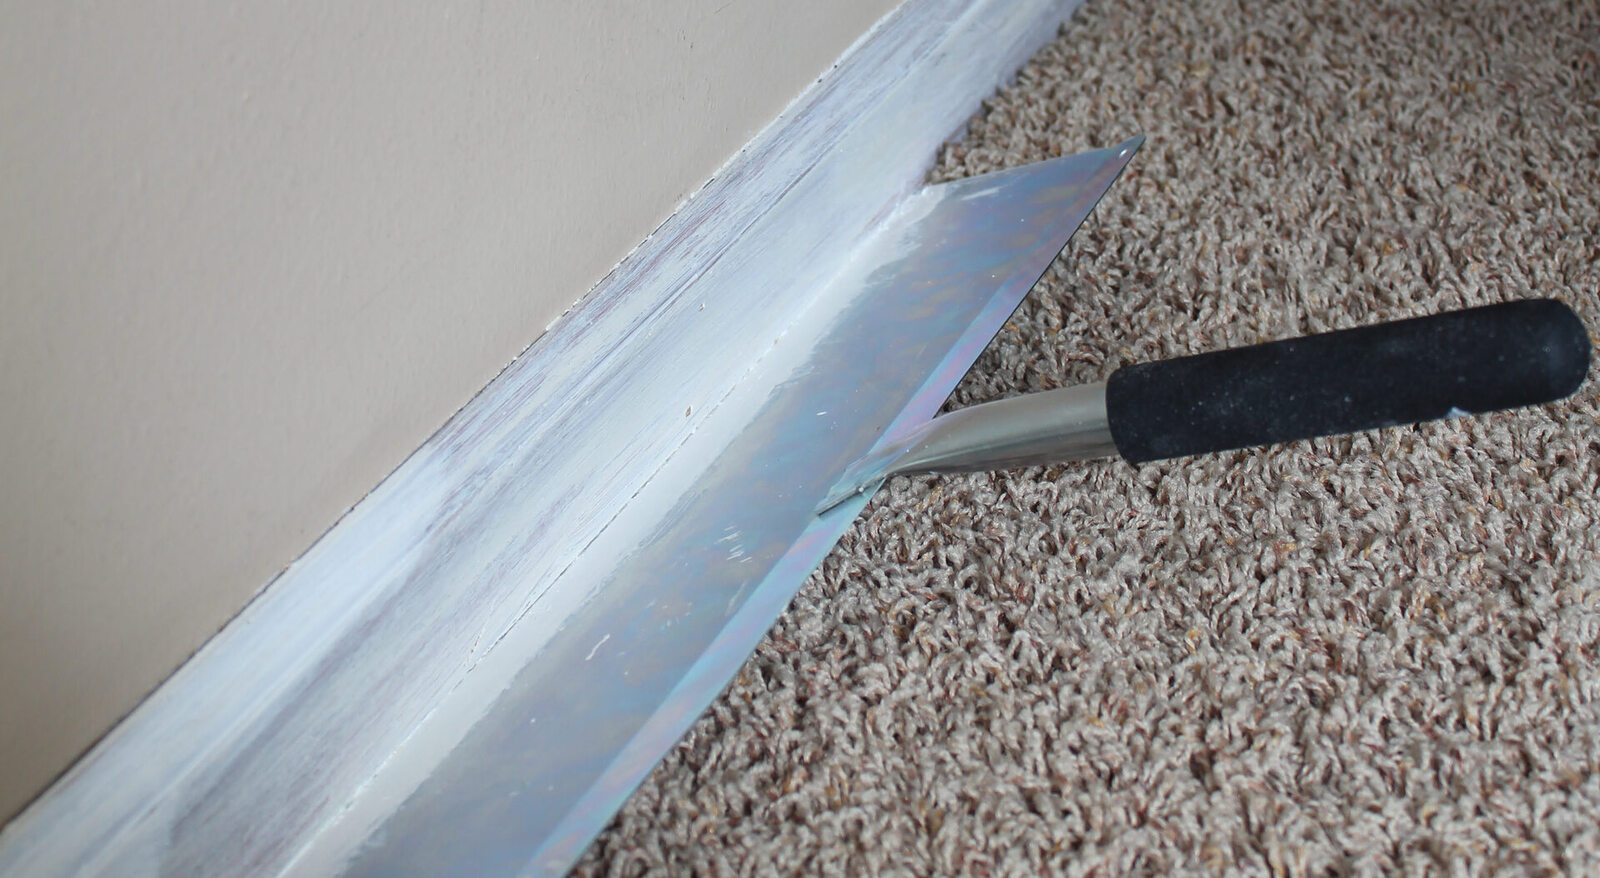
Step 3: Applying Painter’s Tape
Applying painter’s tape is a crucial step when painting next to a carpet. This tape acts as a protective barrier, preventing accidental paint splatters or smudges on your carpet. Properly applying and removing painter’s tape will help achieve clean and crisp lines. Follow these steps to apply painter’s tape accurately:
1. Select the Right Painter’s Tape: Choose painter’s tape specifically designed for delicate surfaces, such as walls or carpets. Look for low-tack or medium-tack tape to ensure it can be easily removed without damaging the carpet fibers or leaving behind residue.
2. Start with Clean and Dry Surfaces: Before applying the tape, ensure that the area is clean and completely dry. Remove any dust, dirt, or moisture from the baseboards and the edges of the carpet. This will ensure better adhesion of the tape and prevent it from peeling off prematurely.
3. Measure and Cut Tape: Take measurements of the baseboards and the desired distance from the carpet where you want to apply the tape. Cut the painter’s tape into manageable lengths, ensuring they are long enough to extend across the entire length of the baseboard or the desired area.
4. Align and Press the Tape: Starting from one end, align the edge of the painter’s tape along the baseboard, ensuring it covers the edge or slightly overlaps the carpet. Press down firmly on the tape to ensure it adheres well to both the baseboard and carpet fibers. Continue applying the tape along the entire length of the area you want to protect.
5. Smooth the Tape: After applying the tape, run your fingers along the edge to ensure it is firmly adhered and there are no air bubbles or gaps. This will help create a tight seal and prevent any paint from seeping underneath.
6. Check Adhesion: Once you have applied the tape, double-check the adhesion by gently pulling on the edge of the tape. If it begins to peel off or feels loose, press it down again to ensure a secure seal.
By applying painter’s tape correctly, you can protect your carpet and achieve clean, professional-looking paint lines. With the tape in place, you are now ready to move on to the next step of using drop cloths to provide additional carpet protection.
Step 4: Using Drop Cloths
Using drop cloths is an essential step in protecting your carpet while painting. Drop cloths create a barrier between the paint and the carpet, preventing any accidental spills or drips from damaging the carpet fibers. Follow these steps to effectively use drop cloths:
1. Choose the Right Drop Cloth: Select high-quality drop cloths that are thick enough to absorb any paint that may accidentally drip or spill. Look for drop cloths made of canvas or heavy-duty plastic. The size of the drop cloth will depend on the area you need to cover.
2. Position the Drop Cloth: Lay the drop cloth on the floor, extending it beyond the walls and baseboards to ensure complete coverage. Make sure the drop cloth is centered and properly aligned with the area you will be painting.
3. Secure the Drop Cloth: Use painter’s tape to secure the edges of the drop cloth to the baseboards or walls. This will prevent the drop cloth from shifting during the painting process, ensuring maximum protection for your carpet.
4. Consider Overlapping Drop Cloths: If you are painting a larger area, you may need to use multiple drop cloths. In this case, overlap the edges of the drop cloths slightly to create a seamless and continuous barrier. Secure the overlapping edges with painter’s tape to keep them in place.
5. Inspect and Adjust: Once the drop cloth is secured, inspect it to ensure there are no gaps or areas where the carpet is exposed. If you notice any gaps, adjust the positioning and re-secure the drop cloth as needed to provide complete coverage.
6. Create a Pathway: If you need to move around the room during the painting process, create a designated pathway on top of the drop cloth. Fold or roll a section of the drop cloth to create a clear, protected pathway, ensuring that you have a clean surface to walk on and reducing the risk of accidentally stepping on unpainted areas.
By using drop cloths effectively, you can provide an additional layer of protection for your carpet during the painting process. With the drop cloths in place and securely taped down, you are now ready to move on to the next steps of choosing the right paintbrush and applying the paint carefully.
Step 5: Choosing the Right Paintbrush
Choosing the right paintbrush is crucial when painting next to a carpet. The right brush will help you achieve clean lines and ensure precise application of paint without causing any accidental smudges or spills on the carpet. Consider the following factors when selecting a paintbrush:
1. Brush Width: The width of the brush depends on the size of the area you will be painting next to the carpet. For smaller areas, such as baseboards or trims, opt for a narrow brush with a width of 1 to 2 inches. For larger surfaces, you may need a wider brush for more efficient coverage.
2. Bristle Type: The bristle type will vary depending on the type of paint you are using and personal preference. Synthetic bristle brushes, such as nylon or polyester, are suitable for latex or water-based paints. Natural bristle brushes, like those made from hog hair, are ideal for oil-based paints. Consider the type of paint you’ll be using and choose a brush with bristles that are compatible with it.
3. Angled or Straight: An angled brush is often preferred for painting next to a carpet. The angled shape allows for better control and precision, making it easier to create clean lines and reach corners or tight spaces. However, a straight brush can also work well, especially if you have a steady hand and are comfortable with its application.
4. Handle Comfort: Consider the handle of the paintbrush and ensure it is comfortable to grip and hold. A brush with a comfortable handle will make it easier to maneuver and control the brush while painting next to the carpet, reducing the risk of accidental slips or smudges.
5. Quality: Invest in high-quality paintbrushes that are durable and offer good paint pickup and release. Quality brushes tend to provide smoother application and better coverage, resulting in a more professional-looking finish.
6. Consider Specialized Brushes: Depending on the intricacy of the area you are painting next to the carpet, you may want to consider specialized brushes such as sash brushes or trim brushes. These brushes often have a longer, thinner profile that can make it easier to paint detailed edges or narrow spaces.
By choosing the right paintbrush for the job, you can achieve precise and clean lines while minimizing the risk of accidental paint splatters on your carpet. With the paintbrush selected, you are now ready to move on to the next step of applying the paint carefully.
Read more: How To Get Spray Paint Off Carpet
Step 6: Applying Paint Carefully
When it comes to painting next to a carpet, applying the paint with care is vital to avoid any accidental spills, drips, or smudges on the carpet. Follow these steps to apply paint carefully and achieve a clean and professional-looking result:
1. Load the Brush Properly: Dip the brush about one-third of the way into the paint, ensuring that the bristles are evenly coated with paint. Do not overload the brush with an excessive amount of paint, as it can lead to drips or messy application.
2. Tap Off Excess Paint: Lightly tap or brush the loaded brush against the side of the paint can or tray to remove any excess paint. This helps to control the amount of paint on the brush, preventing drips and ensuring a smoother application.
3. Start with a Test Stroke: Before applying paint next to the carpet, start with a test stroke on a scrap piece of material or an inconspicuous area. This allows you to check the consistency, coverage, and color of the paint before applying it near the carpeted surface.
4. Establish a Firm Hand: Maintain a steady hand while painting next to the carpet. Use smooth and controlled brush strokes to create clean lines. Avoid rushing or applying too much pressure, as this increases the risk of paint splatters or accidental smudges.
5. Work in Sections: Divide the area into manageable sections and paint one section at a time. This allows you to maintain control over the paint application and ensures even coverage. Paint from top to bottom or left to right, depending on your preference, to maintain a consistent direction of brush strokes.
6. Blend Paint at Edges: To achieve a seamless transition between the painted area and the carpet, blend the paint at the edges by feathering the brush strokes slightly. This helps to create a smooth and natural transition, avoiding any harsh lines.
7. Check for Drips or Spills: Regularly inspect the painted area for any drips or spills that may have accidentally landed on the carpet. If you notice any, immediately wipe them off with a damp cloth or sponge, being careful not to smear or spread the paint further.
By applying paint carefully and following these steps, you can minimize the risk of paint mishaps on your carpet and achieve a flawless finish. With the paint applied, you can now move on to the final step of removing the painter’s tape.
Step 7: Removing Painter’s Tape
Removing painter’s tape properly is essential to reveal your beautifully painted edges without causing any damage to the paint or the carpet. Follow these steps to remove the painter’s tape effectively:
1. Check Paint Dryness: Before removing the painter’s tape, ensure that the paint is completely dry. Refer to the drying time specified on the paint can, as drying times can vary based on the type of paint and the environmental conditions. Waiting for the paint to dry fully will help prevent any smudging or peeling of the paint when the tape is removed.
2. Lift the Tape at an Angle: Start by selecting a corner of the tape and slowly lift it at a 45-degree angle away from the painted surface. Pull the tape back slowly and evenly, taking care not to rip or tear it. This angle helps to minimize the chances of lifting any fresh paint along with the tape.
3. Pull the Tape Back on Itself: As you continue to peel the tape, pull it back on itself rather than lifting it straight up. This technique prevents the tape from pulling against the carpet fibers and potentially causing damage or fraying.
4. Remove in a Controlled Manner: Remove the tape in a controlled and steady manner, moving along the painted edge. Take your time to ensure that the tape is coming off clean and that no paint is being pulled away with it. If you encounter any resistance or notice paint pulling up, gently press down on the paint with your finger as you continue to remove the tape.
5. Inspect for Touch-Ups: After removing the tape, inspect the painted edges carefully. If you notice any areas where the paint has bled or if there are any imperfections, use a small brush and touch up those spots to achieve a seamless and professional finish.
6. Dispose of the Tape Properly: Dispose of the used painter’s tape responsibly by rolling it up to prevent any paint or sticky residue from transferring to other surfaces. You can also consider placing it in a plastic bag or garbage bin lined with a trash bag to avoid any accidental paint smears.
By following these steps, you can safely and effectively remove the painter’s tape, ensuring that your paint edges are clean and flawless. With the tape removed, take a moment to appreciate your freshly painted space next to the carpet.
Conclusion
Congratulations! You have successfully learned how to paint next to a carpet while keeping it protected. By following the steps outlined in this guide, you can achieve a professional-looking paint job without any unwanted paint splatters or spills on your carpet.
Remember to begin by preparing the area, which involves clearing the space of furniture and cleaning the area thoroughly. Applying painter’s tape and using drop cloths provide an additional layer of protection for your carpet. Choosing the right paintbrush and applying paint carefully ensure clean and precise lines. Finally, removing the painter’s tape in a controlled manner reveals your beautifully painted edges.
Throughout the process, it’s crucial to work with patience and attention to detail. Take your time to ensure proper paint application and protection of your carpet. If any accidents or spills occur, make sure to address them promptly to minimize any permanent damage to the carpet.
By following these steps and incorporating necessary precautions, you can transform your space with a fresh coat of paint while maintaining the integrity and cleanliness of your carpet. Enjoy the sense of accomplishment that comes with a beautifully painted room, and take pride in your ability to handle a potentially tricky task like painting next to a carpet.
Now, gather your supplies, prepare your space, and get ready to create a vibrant and inviting environment with a freshly painted room!
Frequently Asked Questions about How To Paint Next To A Carpet
Was this page helpful?
At Storables.com, we guarantee accurate and reliable information. Our content, validated by Expert Board Contributors, is crafted following stringent Editorial Policies. We're committed to providing you with well-researched, expert-backed insights for all your informational needs.