Home>Articles>How To Paint Your Walls To Look Like Marble For A Classic Touch
Articles
How To Paint Your Walls To Look Like Marble For A Classic Touch
Modified: November 1, 2024
Learn how to transform your walls into stunning marble with our step-by-step guide. Elevate your space with this classic touch. Read more in our articles.
(Many of the links in this article redirect to a specific reviewed product. Your purchase of these products through affiliate links helps to generate commission for Storables.com, at no extra cost. Learn more)
Introduction
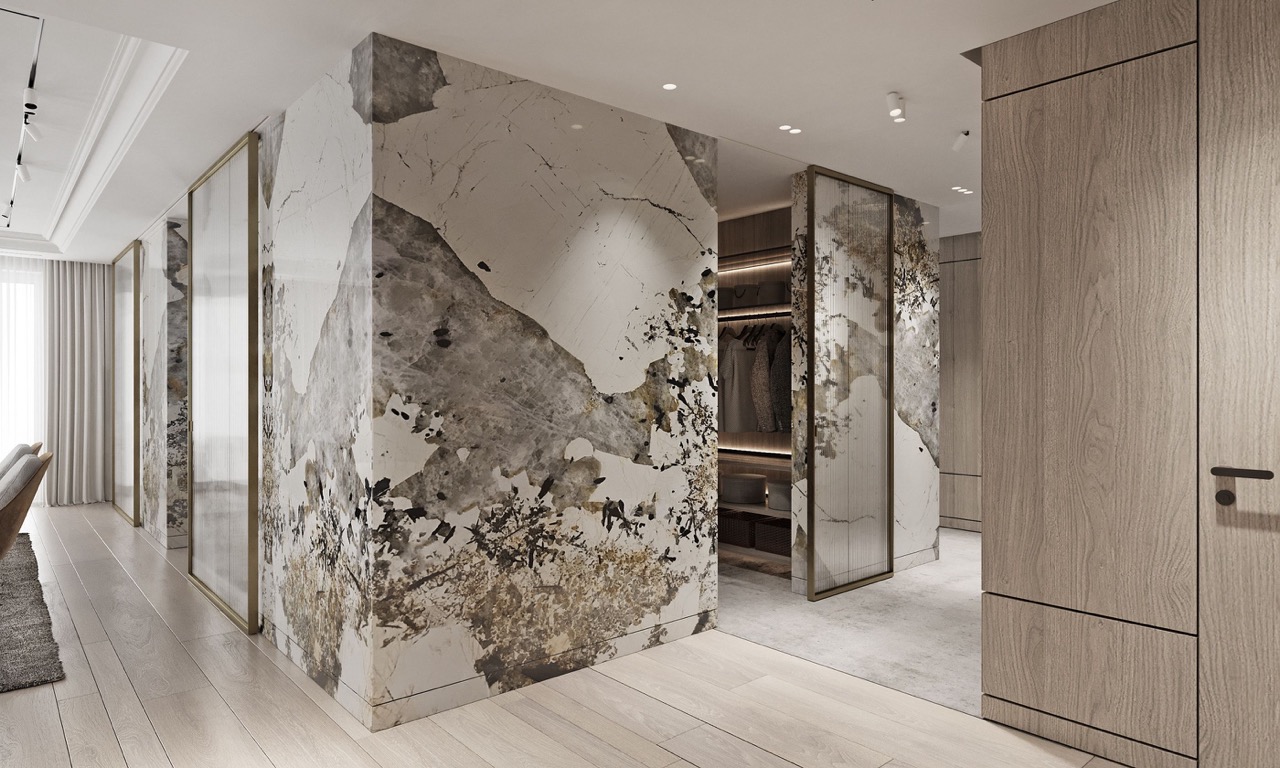
When it comes to home decor, the walls are a prominent feature that can greatly impact the overall look and feel of a space. While classic marble walls exude elegance and sophistication, they can be quite expensive to install. However, there is a cost-effective and creative solution – painting your walls to look like marble.
By using the right techniques and materials, you can achieve the luxurious and timeless look of marble without breaking the bank. This article will guide you through the process of transforming your walls into stunning marble masterpieces, adding a touch of class to your living space.
Before diving into the steps, it’s important to gather all the necessary materials. You will need a base color paint, a faux marble paint kit, various paintbrushes, paint trays, painter’s tape, a plastic sheet or drop cloth to protect the surrounding area from any accidental paint splatters, sandpaper for optional sanding, and a clean cloth for cleaning up.
Now that you have all the materials ready, let’s get started on the process of creating the marble effect on your walls. It’s time to unleash your creativity and transform your space into an exquisite work of art.
Key Takeaways:
- Transform your space with faux marble walls using cost-effective painting techniques. Elevate your home’s elegance and sophistication without the expense of real marble installation.
- Enjoy the creative journey of painting your walls to resemble luxurious marble. From preparing the walls to adding intricate veining details, achieve a stunning and realistic marble effect with patience and attention to detail.
Materials Needed
To successfully paint your walls to look like marble, you will need the following materials:
- Base color paint: Choose a color that will serve as the background for your faux marble walls. Opt for a neutral shade that complements the overall decor of your space.
- Faux marble paint kit: This kit contains the necessary paints and tools to create the marble effect on your walls. It typically includes a base coat, veining paint, and a glaze or topcoat.
- Paintbrushes: Invest in a variety of paintbrushes to handle different aspects of the painting process. A combination of small brushes for detailed work and larger brushes for broader strokes will come in handy.
- Paint trays: These will be used to hold the paint during application and make the process more convenient.
- Painter’s tape: Use painter’s tape to protect areas that you don’t want to be painted, such as baseboards, trim, and windows. It helps create clean and neat edges.
- Plastic sheet or drop cloth: Cover the surrounding area with a plastic sheet or drop cloth to protect it from accidental paint splatters and spills.
- Sandpaper: Although not always necessary, sandpaper can be used for optional sanding to smooth out any imperfections on the walls before painting.
- Clean cloth: Keep a clean cloth on hand for wiping away excess paint, cleaning brushes, and tidying up any mess that may occur during the painting process.
Make sure you have all these materials ready before you begin the painting process. Having everything prepared in advance will ensure a smooth and efficient paint job.
Preparing the Walls
Before you start painting your walls to look like marble, it’s important to properly prepare the surface. This will ensure that the paint adheres well and that you achieve the desired results. Follow these steps to get your walls ready:
Clearing the Area
Begin by clearing the area around the walls you plan to paint. Move any furniture, decor items, or other obstacles away from the walls to create a clear and spacious working area. This will prevent any accidental damage to your belongings and allow for easier access to the walls.
Cleaning the Walls
Next, thoroughly clean the walls to remove any dirt, dust, or grease that may interfere with the paint application. Use a damp cloth or sponge with a mild detergent solution to wipe down the walls. Pay special attention to areas near light switches, outlets, and corners. Allow the walls to completely dry before moving on to the next step.
Read more: How To Make Countertops Look Like Marble
Applying Painter’s Tape
To create crisp and clean edges, apply painter’s tape along the edges of the walls, where they meet baseboards, trim, windows, or any other area that you don’t want to be painted. Make sure the tape is securely adhered and press it down firmly to prevent any paint from seeping underneath.
The painter’s tape will act as a barrier, protecting these areas from the paint and allowing you to achieve a professional-looking finish. Take your time to ensure that the tape is applied straight and evenly along the edges for the best results.
By taking the time to clear the area, clean the walls, and apply painter’s tape, you are setting the stage for a successful painting process. These steps will help you achieve a smooth and flawless marble effect on your walls.
Applying the Base Coat
Now that your walls are prepped and ready, it’s time to apply the base coat. The base coat will serve as the background color for your faux marble walls. Follow these steps to ensure a smooth and even application:
Choosing the Base Color
When selecting the base color, consider the overall color scheme and aesthetic of your space. Opt for a neutral shade that will complement the faux marble effect and blend seamlessly with your existing decor. Popular choices include off-white, light gray, or beige. Test a small patch of your chosen base color on the wall to ensure that you are satisfied with the result before proceeding.
Painting the Walls with the Base Coat
Start by pouring the base color paint into a paint tray. Dip a paintbrush into the paint tray and begin applying the paint to the walls in even, vertical strokes. Work section by section, gradually covering the entire wall surface with the base coat. Take care to avoid drips or streaks by applying the paint evenly and smoothing it out as you go.
If you have larger areas to cover, consider using a roller for a more efficient and consistent application. Roll the paint onto the walls in a “W” or “M” motion and then use a paintbrush to smooth out any edges or corners that the roller may have missed.
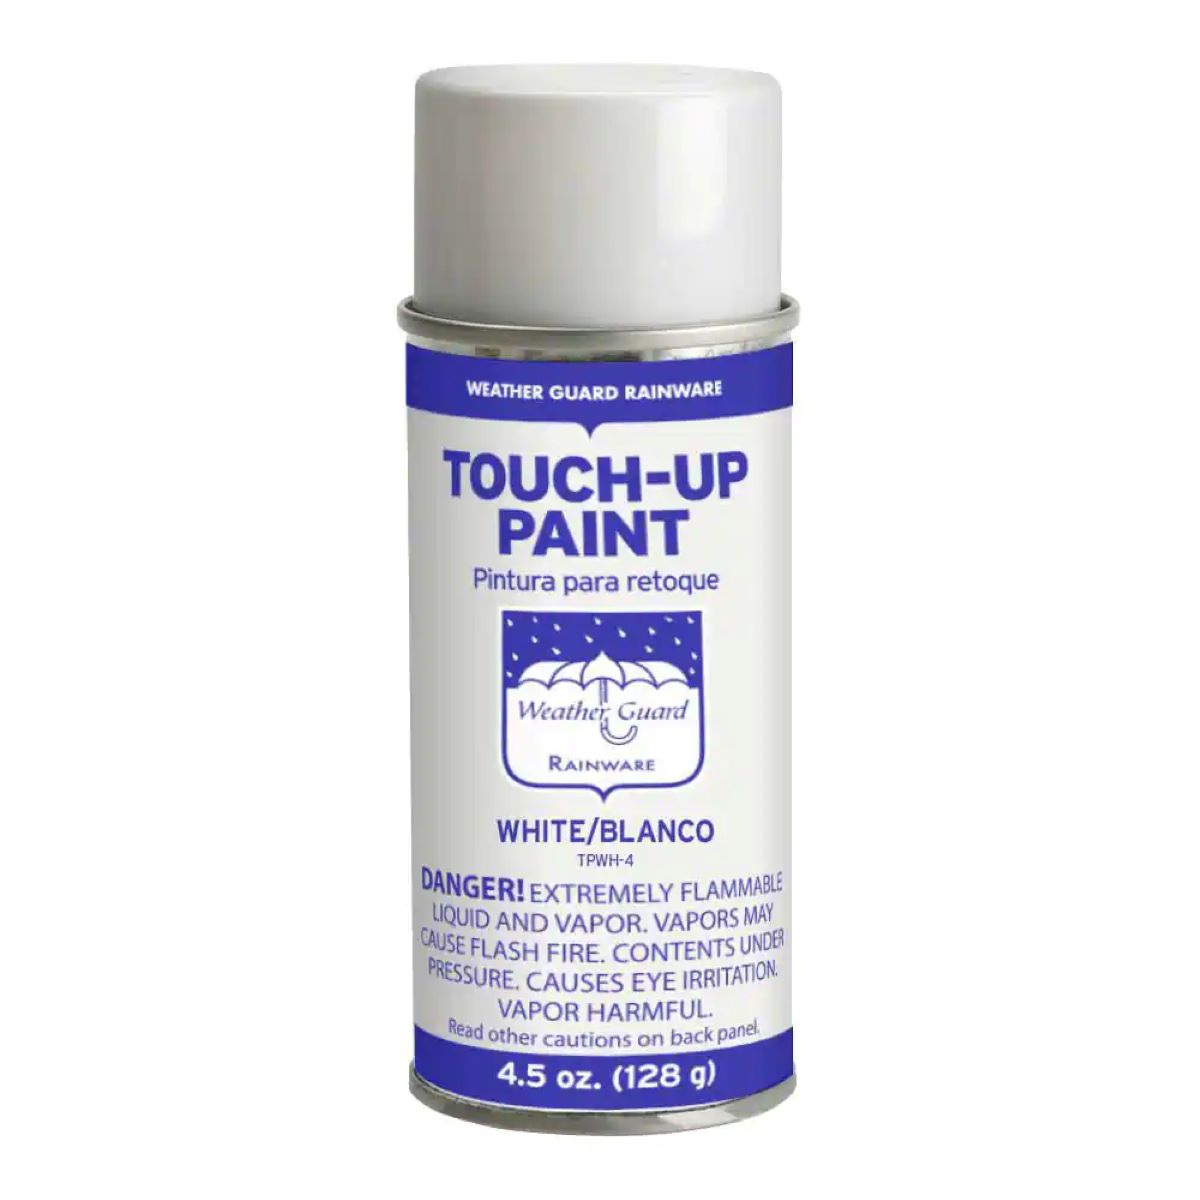
Read more: How To Touch Up Paint On Walls
Allowing the Base Coat to Dry
Once you have finished applying the base coat, allow it to dry according to the manufacturer’s instructions. This is usually around 24 hours, but it’s important to check the label for specific drying times. Avoid touching or disturbing the base coat while it’s drying to prevent smudges or unevenness.
During the drying period, keep the room well-ventilated to promote airflow and aid in drying. This will also help to minimize any strong paint odors. Once the base coat is completely dry, you can proceed with creating the marble effect using the faux marble paint kit.
By carefully selecting your base color, applying it evenly to the walls, and allowing it to fully dry, you are setting the foundation for a realistic and stunning faux marble finish.
Creating the Marble Effect
With the base coat dried and ready, it’s time to create the striking marble effect on your walls using the faux marble paint kit. Follow these steps to achieve a realistic and beautiful marble finish:
Preparing the Faux Marble Paint Kit
Read the instructions provided with your faux marble paint kit thoroughly before proceeding. The kit will typically include a base coat, veining paint, and a glaze or topcoat. Make sure you have all the necessary supplies and tools ready for the process.
Testing the Paint on a Small Area
Before applying the faux marble paint on the entire wall, it’s important to test it on a small, inconspicuous area. This will allow you to familiarize yourself with the techniques and observe how the paint reacts to the base coat. Adjustments can be made if needed before moving forward.
Read more: How To Paint Vases To Look Like Pottery
Applying the First Layer of Faux Marble Paint
Begin by applying the first layer of the faux marble paint onto the wall. Use a paintbrush or sponge in a swirling motion to create organic patterns and texture. Work in small sections at a time to prevent the paint from drying too quickly.
Keep in mind that you don’t need to cover the entire wall with the faux marble paint. Leave some areas of the base coat showing through to mimic the natural variations of marble. This will add depth and realism to the finished look.
Adding Veining Details
Once the first layer of paint is applied, it’s time to add the veins that are characteristic of marble. Use a small brush or a fine-tipped paintbrush to create veining details in contrasting colors to the base coat. Lighter shades tend to work well for this purpose.
Study photographs or real marble patterns to guide you in creating natural-looking veins. Remember, marble veins are irregular and vary in thickness and direction. Be artistic and create veins that flow organically across the wall.
Blending the Veining
After adding the veining details, use a dry brush or a feathering technique to blend the veins and soften their appearance. This will make the veining look more seamless and natural.
Practice this technique on a separate surface or paper before applying it to the wall. It may take a bit of trial and error to achieve the desired effect, so don’t be afraid to experiment.
Applying Additional Layers (if desired)
If you want to add more depth and dimension to your faux marble walls, you can apply additional layers of the faux marble paint. Follow the same process of adding the paint, veining, and blending until you achieve the desired result. Remember to allow each layer to dry before applying the next.
Keep in mind that less can sometimes be more. It’s better to start with a subtle effect and build up if necessary rather than applying too much paint and overpowering the marble effect.
By following these steps and being patient with the process, you can create a stunning marble effect on your walls that will impress all who see it. Enjoy the creative journey as you transform your space into a work of art.
Read more: How To Paint Brick To Look Like Stone
Finishing Touches
Now that you have completed the painting process and created the beautiful marble effect on your walls, it’s time to focus on the finishing touches. Follow these steps to bring the project to a close and achieve a polished and stunning final result:
Sanding the Walls (Optional)
If desired, you can lightly sand the walls to achieve a smoother finish and remove any minor imperfections. Use a fine-grit sandpaper and gently go over the painted surface in a circular motion. Be careful not to apply too much pressure, as you don’t want to remove the paint entirely. Wipe away any dust with a clean cloth or sponge once you’re done sanding.
Removing Painter’s Tape
Peel off the painter’s tape carefully and slowly to make sure you don’t damage any of the painted areas. Pull the tape away at a 45-degree angle for a clean edge. Dispose of the tape properly and inspect the edges for any touch-ups or areas that may need some extra attention.
Cleaning Up Any Mess
Take the time to clean up any mess that may have been made during the painting process. Remove the plastic sheet or drop cloth, making sure to dispose of any paint drips or spills properly. Wipe down any paint splatters on surrounding surfaces and clean your brushes and paint trays for future use.
Read more: How To Paint Marble Fireplace
Allowing the Paint to Fully Dry
Allow the paint on your walls to fully dry according to the manufacturer’s instructions. This may take a few days, depending on the type of paint and environmental conditions. Avoid touching or placing objects near the walls until the paint has completely cured to prevent any smudges or damage.
Evaluating the Finished Result
Step back and take a moment to evaluate the finished result of your faux marble walls. Examine the overall look and feel of the space. Does the marble effect meet your expectations? Are there any areas that may require touch-ups or further blending? Make note of any adjustments that may be needed.
Invite others to see the transformation and gather their feedback as well. Their perspective can help you gain a fresh insight and make any necessary refinements.
Congratulations! You have successfully painted your walls to resemble luxurious marble, adding a classic touch to your living space. Take pride in your creative achievement and enjoy the elegant and timeless ambiance that your faux marble walls bring to your home.
Conclusion
Painting your walls to look like marble is a fantastic way to elevate the aesthetic of your space without the hefty price tag of real marble installation. With the right materials and techniques, you can achieve a stunning and realistic marble effect that adds a touch of elegance and sophistication to any room.
Throughout this article, we have covered the step-by-step process of painting your walls to resemble marble. From clearing the area and preparing the walls to applying the base coat and creating the intricate marble effect, each stage plays a crucial role in achieving a professional result.
By carefully selecting the base color, applying it evenly, and allowing it to dry, you create the foundation for your faux marble walls. The intricate veining details and blending techniques add depth and realism to mimic the unique patterns found in natural marble.
Remember to take your time and enjoy the creative journey. Practice on small areas, experiment with different techniques, and evaluate the finished result along the way. Adjustments can always be made to ensure you achieve the desired effect.
Once the painting process is complete, be sure to remove the painter’s tape, clean up any mess, and allow the paint to fully dry. Step back and admire the transformation of your space. The beauty of faux marble walls lies in the perfect blend of artistry and affordability.
Now, sit back, relax, and enjoy the refined and classic ambiance that your faux marble walls bring to your home. Whether it’s in your living room, bedroom, or even a hallway, your painted marble walls will be the envy of all who see them.
With a little creativity, patience, and attention to detail, you can transform your walls into stunning works of art that exude timeless beauty. So, gather your materials, unleash your inner artist, and let your walls shine with the elegance of faux marble.
Now that you've mastered creating marble effects on your walls, why not broaden your painting skills further? Dive into our detailed guide on painting techniques where experts share their favorite methods. Whether you're aiming to refresh a room or add a unique flair, these techniques will equip you with the skills to achieve beautiful results. Don't miss out on elevating your painting game with expert tricks that make all the difference.
Frequently Asked Questions about How To Paint Your Walls To Look Like Marble For A Classic Touch
Was this page helpful?
At Storables.com, we guarantee accurate and reliable information. Our content, validated by Expert Board Contributors, is crafted following stringent Editorial Policies. We're committed to providing you with well-researched, expert-backed insights for all your informational needs.

0 thoughts on “How To Paint Your Walls To Look Like Marble For A Classic Touch”