Articles
How To Quilt Applique Patterns?
Modified: January 5, 2024
Learn how to quilt applique patterns with our informative articles. Discover tips, techniques, and step-by-step instructions for creating beautiful quilts.
(Many of the links in this article redirect to a specific reviewed product. Your purchase of these products through affiliate links helps to generate commission for Storables.com, at no extra cost. Learn more)
Introduction
Quilting is an art form that allows you to create beautiful and functional pieces using fabric, thread, and a lot of creativity. One popular technique in quilting is applique, which involves adding fabric shapes and designs onto a base fabric to create intricate patterns and designs. Quilt applique patterns can range from simple shapes to more complex designs, and mastering this technique opens up endless possibilities for creating unique and personalized quilts.
In this article, we will explore the process of quilting with applique patterns, from preparing the materials to finishing the quilt edges. Whether you are a beginner or an experienced quilter, this guide will provide you with the necessary steps and tips to successfully incorporate applique into your quilting projects.
Before we dive into the details, it’s important to note that quilting applique can be done by hand or by machine. In this article, we will focus on the hand applique method, as it allows for more control and precision when working with intricate patterns.
So, if you’re ready to embark on a quilting adventure and add a touch of creativity to your projects, let’s jump into the world of quilting with applique patterns!
Key Takeaways:
- Dive into the world of quilting with applique patterns to unleash your creativity and personalize your projects with unique and intricate designs. Enjoy the process and let your individual style shine through!
- Master the art of applique quilting by carefully preparing materials, choosing the right patterns, and skillfully positioning and attaching the appliques. Embrace imperfections, practice patience, and enjoy the creative journey!
Read more: How Do I Applique On A Quilt
Preparing the Materials
Before you start quilting with applique patterns, it’s essential to gather all the necessary materials. Here are the items you’ll need:
- Fabric: Choose high-quality quilting fabric in various colors and patterns for the applique shapes and the base fabric.
- Fusible Interfacing: This is a thin fabric that will provide stability and prevent fraying. It is used to back the fabric before cutting out the applique shapes.
- Template Material: You’ll need a material, such as cardstock or template plastic, to create templates of the applique shapes.
- Scissors: Invest in a good pair of fabric scissors for cutting out the applique shapes.
- Thread: Select a thread color that matches or complements your fabric choices.
- Needles: Choose needles suitable for hand sewing.
- Marking Tools: Use fabric markers or chalk to trace the applique shapes onto the fabric.
- Iron: You’ll need an iron to press the fabric and fuse the applique shapes.
Once you have gathered all the materials, it’s important to prepare your fabric before cutting out the applique shapes:
- Pre-wash the fabrics: It’s recommended to pre-wash all the fabrics to remove any residues and prevent shrinkage.
- Press the fabric: Use an iron to press the fabric and remove any wrinkles or creases. This will ensure accurate cutting and placement of the applique shapes.
- Back the fabric with fusible interfacing: Cut pieces of fusible interfacing slightly larger than your fabric. Place the rough side of the interfacing onto the wrong side of the fabric, and then press with an iron on a low heat setting. This will stabilize the fabric and prevent fraying when you cut out the applique shapes.
By preparing your materials properly, you’ll have a solid foundation for successful applique quilting. Now that you have everything ready, it’s time to move on to the next step: choosing the right applique patterns.
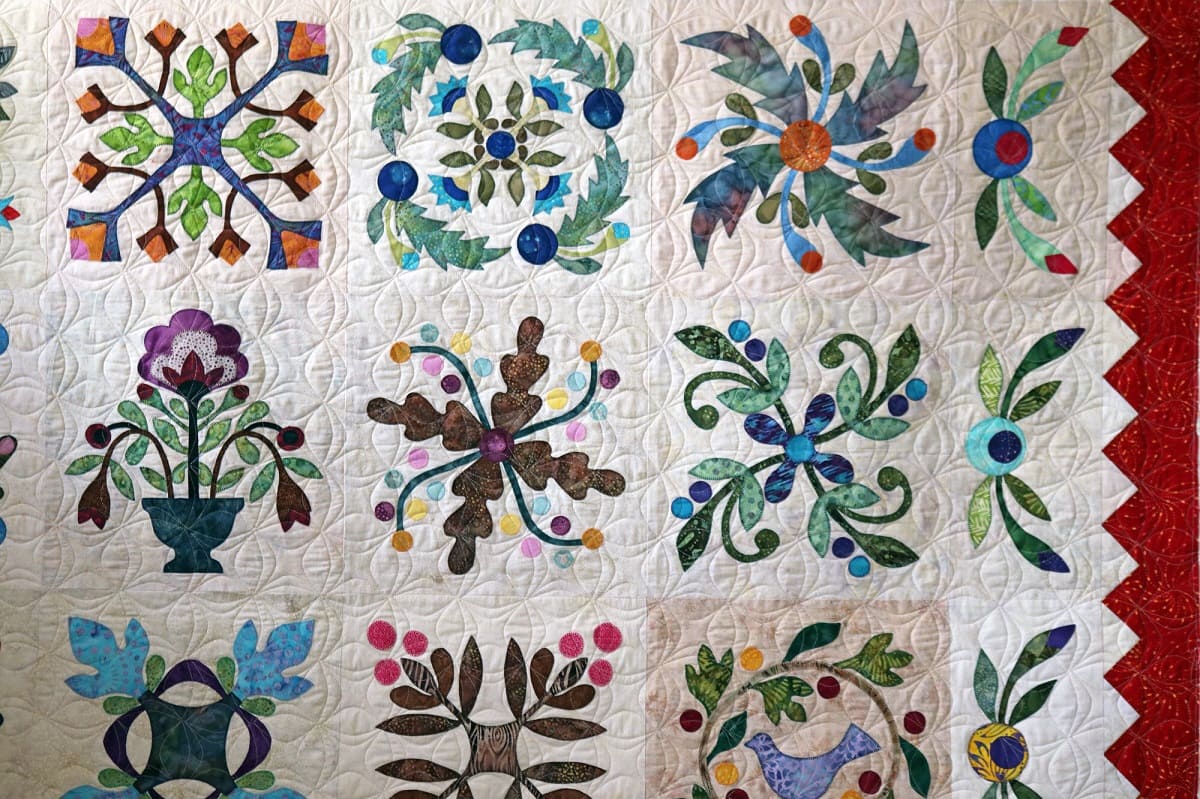
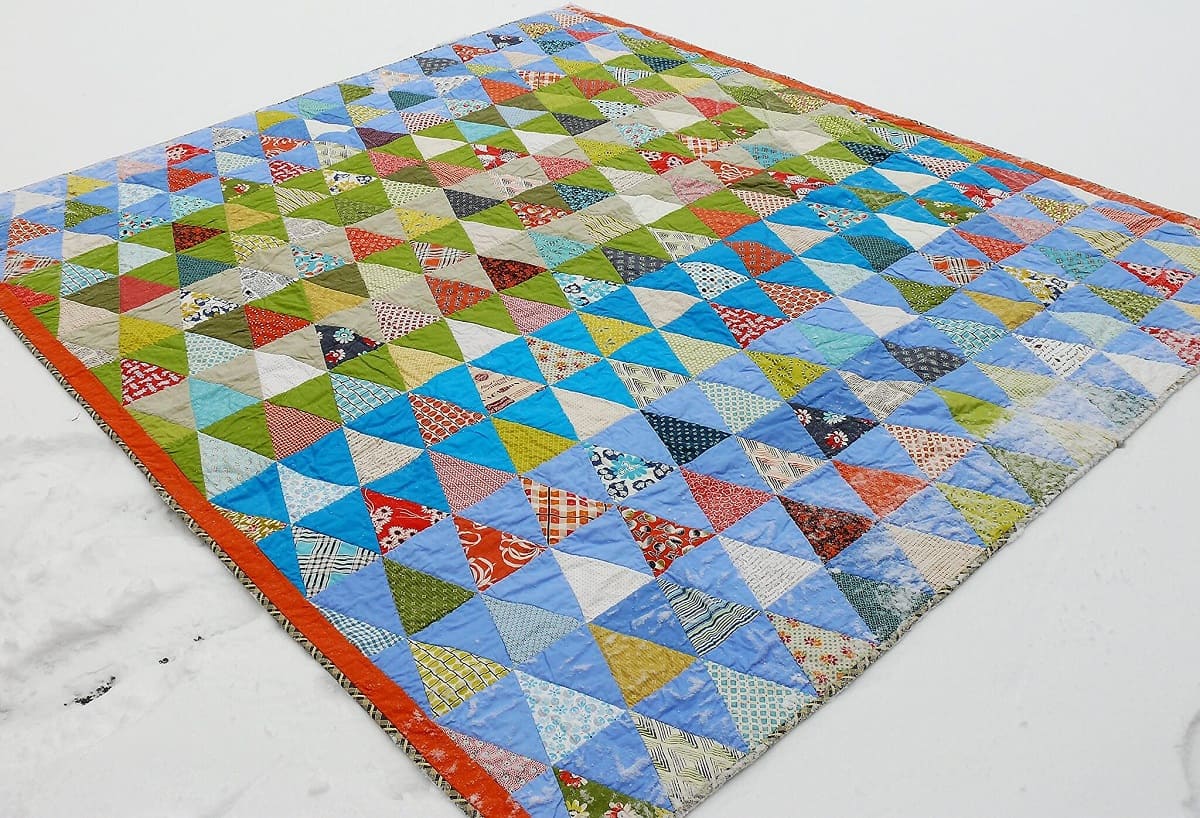
Choosing Applique Patterns
Choosing the right applique pattern is crucial as it sets the tone and style of your quilt. Here are some tips to help you find the perfect pattern:
- Consider the Quilt Design: Think about the overall design of your quilt and how the applique pattern will fit into it. For a more traditional look, choose classic floral or geometric patterns. For a modern or whimsical quilt, opt for abstract or playful designs.
- Scale and Size: Take into account the size of your quilt and the desired impact of the applique. If you’re working on a large quilt, you can choose intricate and detailed patterns. For smaller quilts, simpler and larger applique shapes might be more appropriate.
- Theme or Inspiration: Consider any specific theme or inspiration you have for your quilt. Are you creating a baby quilt? Look for patterns that incorporate cute animals or playful motifs. Want to make a nature-inspired quilt? Look for patterns with flowers, leaves, or wildlife.
- Complexity and Skill Level: Assess your skill level and the amount of time you’re willing to invest in the project. Some patterns may require more advanced techniques, such as curved or intricate shapes, while others are simpler and suitable for beginners.
Once you have a clear idea of the type of pattern you’re looking for, there are several resources you can explore to find applique patterns:
- Pattern Books: Quilting books often include applique patterns with step-by-step instructions. Visit your local library or bookstore for a wide selection of pattern books.
- Online Resources: The internet is a treasure trove of quilting patterns. Websites and blogs dedicated to quilting often offer free or paid applique patterns that you can download and print.
- Quilting Classes and Workshops: Consider taking a quilting class or workshop where instructors provide patterns and guidance for creating applique quilts. This is a great opportunity to learn new techniques and connect with other quilters.
Remember, there are no limits to creativity when it comes to choosing an applique pattern. Trust your instincts and pick a pattern that resonates with you and your quilting vision. Once you’ve found the perfect pattern, it’s time to transfer it onto the fabric.
Tracing the Patterns onto Fabric
Now that you have chosen your applique pattern, it’s time to transfer it onto your fabric. Here’s how you can do it:
- Create Templates: Use the template material to create templates of the applique shapes. Trace the shapes from the pattern onto the template material and cut them out. These templates will serve as a guide for cutting the fabric.
- Prepare the Fabric: Lay the base fabric right side up on a flat surface. If you are using different colors or patterns for the applique shapes, cut out the pieces and press them to remove any wrinkles.
- Position the Templates: Arrange the templates on the base fabric, following the design of the pattern. You can use straight pins to secure them in place.
- Trace the Shapes: Use fabric markers or chalk to trace around the templates onto the fabric. Make sure to trace accurately to ensure the shapes are well-defined.
Depending on the complexity of the pattern, you may have multiple applique shapes to trace onto the fabric. Take your time and double-check the positioning and tracing to ensure accuracy.
Once you have traced all the shapes onto the fabric, remove the templates and set them aside. You now have a clear guide for cutting out the applique shapes.
Next, we’ll move on to the cutting process to bring your applique shapes to life.
Cutting the Applique Shapes
Now that you have traced the appliqué shapes onto your fabric, it’s time to cut them out. Follow these steps for precise and clean cuts:
- Gather your fabric scissors and make sure they are sharp. Dull scissors can result in frayed edges or uneven cuts.
- Start by cutting just outside the traced line. This will give you some room for adjustments during the placement process.
- For curved or intricate shapes, you may need to make small snips along the seam allowance to help the fabric lay flat and prevent any puckering.
- Take your time and cut each shape with care, following the traced lines as closely as possible. Pay attention to the details and ensure clean edges.
As you cut out each appliqué shape, place them in a separate container or keep them organized on your work surface. This will help you stay organized and ensure that you have all the shapes you need for the appliqué design.
Once all the shapes are cut out, take a step back and assess the overall look of the shapes. Make any necessary adjustments, such as trimming or refining the edges, to achieve the desired appearance.
Cutting out the appliqué shapes is an essential step in the quilting process. Taking your time and paying attention to detail will result in beautifully cut shapes that are ready to be positioned on your quilt.
Next, we’ll explore how to position the appliqués on your quilt for optimal design and placement.
When quilting applique patterns, use a lightweight fusible web to adhere the applique shapes to the fabric before stitching. This will help keep the shapes in place and make the quilting process easier.
Read more: How To Quilt Diamond Pattern
Positioning the Appliques on the Quilt
Now that you have your appliqué shapes cut out, it’s time to position them on your quilt. This step requires careful planning and attention to detail. Here’s how you can effectively position your appliqués:
- Lay out your quilt: Start by laying out your quilt on a flat surface. This will give you a clear idea of the available space and allow you to visualize how the appliqués will fit into the overall design.
- Arrange the appliqués: Take the cut-out appliqué shapes and experiment with their placement on the quilt. Play around with different layouts and arrangements until you find the most visually pleasing arrangement.
- Consider color and balance: Pay attention to the color scheme of your quilt and ensure that the appliqués complement the overall look. Also, strive for balance and symmetry in the placement of the shapes.
- Use pins or adhesive: Once you are satisfied with the positioning, you can use straight pins to temporarily secure the appliqués in place. Alternatively, you can use adhesive products designed specifically for fabric to hold the shapes in place.
As you position the appliqués, step back and take a look from a distance to ensure you’re happy with the arrangement. Make any necessary adjustments before moving on to the next step.
By carefully positioning your appliqués, you can create a visually appealing design that adds depth and dimension to your quilt.
Now that your appliqués are positioned, it’s time to move on to the next crucial step: attaching the appliqués to the quilt.
Attaching the Appliques to the Quilt
Once you have positioned your appliqués on the quilt, it’s time to secure them in place. There are several methods you can use to attach the appliqués to your quilt:
- Hand Appliqué: Hand sewing is a traditional and popular method for attaching appliqués. Use a needle and thread to stitch the appliqué shapes onto the quilt. You can choose from different hand appliqué stitches such as the blanket stitch, whipstitch, or invisible stitch.
- Machine Appliqué: If you prefer a quicker and more secure method, you can use a sewing machine to attach the appliqués. Set your machine to a narrow zigzag or satin stitch and carefully sew around the edges of the appliqué shapes.
- Fusible Web: Fusible web is a type of adhesive material that can be ironed onto the back of the appliqués. Once heated, the webbing will adhere to the quilt fabric, securing the appliqué in place. Be sure to follow the manufacturer’s instructions for proper usage.
Choose the method that best suits your preference and the design of your quilt. It’s important to note that some appliqué designs may require a combination of hand and machine stitching for optimal results.
As you attach the appliqués, take care to sew or fuse them onto the quilt without creating pleats or puckers. Use small, even stitches or a steady machine speed to ensure a smooth and secure attachment.
Continue attaching the appliqués until all shapes are firmly secured to the quilt.
Now that the appliqués are attached, you’re one step closer to finishing your quilt. The next step involves giving your quilt a polished and professional look by finishing the quilt edges.
Finishing the Quilt Edges
With the appliqués securely attached to your quilt, it’s time to give your project a polished finish by addressing the quilt edges. Here are a few methods for finishing the edges:
- Bias Binding: Bias binding is a durable and attractive option for finishing quilt edges. Cut strips of fabric on the bias and sew them together to create a continuous binding. Then, fold and press the binding in half, and attach it to the quilt edges using a sewing machine or hand stitching.
- Turned Edge Binding: This method involves folding the quilt’s backing fabric over to the front, creating a clean and finished edge. You can hand stitch the folded edge in place or use a machine stitch for a secure finish.
- Piped Binding: For a decorative touch, consider adding piping to your quilt edges. Sew the piping onto the quilt front, aligning the raw edges, before attaching the binding. This creates a raised and stylish border around your quilt.
Once you have finished the edges, take the time to check for any loose threads or uneven stitching. Trim away any excess threads and carefully inspect your work for a neat and professional appearance.
Remember to press your quilt one final time to ensure it looks smooth and well-finished.
Finishing the quilt edges not only keeps your quilt secure but also adds an aesthetically pleasing touch to your finished project.
With your quilt edges finished, you have completed the main steps of quilting with appliqué patterns! To ensure a successful outcome, here are a few additional tips and tricks to keep in mind.
Tips and Tricks for Successful Applique Quilting
Quilting with appliqué patterns can be a rewarding and enjoyable experience. Here are some tips and tricks to help you achieve success:
- Practice Makes Perfect: If you’re new to appliqué quilting, consider practicing on scrap fabric before working on your actual quilt. This will help you become familiar with the techniques and build your confidence.
- Choose the Right Thread: Use a thread color that matches or blends well with your fabric. For hand appliqué, consider using a thin thread to achieve more delicate stitches. For machine appliqué, opt for a thread that provides good visibility and blends in nicely with your fabric.
- Secure the Shapes: If you’re using fusible web, be sure to iron the appliqué shapes onto your fabric according to the manufacturer’s instructions. This will ensure that they are firmly attached before sewing or stitching.
- Take Your Time: Appliqué quilting requires precision and attention to detail. Take your time with each step, from tracing the shapes to attaching them to the quilt. Rushing can lead to mistakes and uneven results.
- Experiment with Placement: Before finalizing the placement of your appliqués, try different layouts and arrangements to find the most pleasing design. Don’t be afraid to move shapes around and try different combinations until you achieve the desired look.
- Embrace Imperfections: Remember that hand-sewn appliqué is a handmade art form, and slight imperfections can add character to your quilt. Embrace the uniqueness of your stitches and enjoy the process of creating something special.
- Finishing Touches: Once your quilt is complete, consider adding additional embellishments such as embroidery, buttons, or beads to enhance the overall design. These finishing touches can elevate your quilt to a whole new level.
Remember, appliqué quilting is a creative journey that allows you to showcase your skills and express your personal style. Enjoy the process, learn from each project, and have fun with your quilting endeavors!
As you incorporate these tips and tricks into your applique quilting, you’ll be well on your way to creating stunning and unique quilts that will be cherished for years to come.
So, grab your fabric, templates, and thread, and let your creativity soar as you embark on your next appliqué quilting adventure!
Read more: How To Make A Strip Quilt Pattern
Conclusion
Quilting with appliqué patterns is a delightful and creative way to add unique designs to your quilts. Whether you’re a beginner or an experienced quilter, mastering the art of appliqué opens up a world of possibilities for creating beautiful and personalized projects. From choosing the right patterns to securing the appliqués and finishing the quilt edges, each step in the process requires attention to detail and a passion for the craft.
By preparing your materials, tracing and cutting out the appliqué shapes, and carefully positioning them on your quilt, you lay the foundation for a successful appliqué quilt. Mindfully attaching the appliqués using hand or machine stitching techniques further enhances the design, while finishing the quilt edges with bindings or other decorative touches gives your project a professional and polished look. Throughout the process, utilizing tips and tricks such as practicing, choosing the right thread, and embracing imperfections will help you achieve the best possible results.
Remember to approach your appliqué quilting projects with patience, creativity, and a sense of adventure. Enjoy the process, experiment with different layouts and designs, and let your individual style shine through. The joy and satisfaction of creating a quilt that is uniquely yours are truly rewarding.
So, whether you’re embellishing a quilt with small appliqué accents or creating an elaborate appliqué design that spans the entirety of your project, quilting with appliqué patterns allows you to infuse your quilts with personality and artistic expression. Let your imagination guide your needle and thread as you embark on your next appliqué quilting journey, and enjoy the pleasure of creating beautiful works of art with fabric and stitches.
Happy quilting!
Frequently Asked Questions about How To Quilt Applique Patterns?
Was this page helpful?
At Storables.com, we guarantee accurate and reliable information. Our content, validated by Expert Board Contributors, is crafted following stringent Editorial Policies. We're committed to providing you with well-researched, expert-backed insights for all your informational needs.


0 thoughts on “How To Quilt Applique Patterns?”