Home>Construction & Tools>Building Materials>How To Paint A Brick Pattern
Building Materials
How To Paint A Brick Pattern
Modified: October 29, 2024
Learn how to paint a brick pattern to enhance your building materials. Follow our step-by-step guide for a professional finish.
(Many of the links in this article redirect to a specific reviewed product. Your purchase of these products through affiliate links helps to generate commission for Storables.com, at no extra cost. Learn more)
Introduction
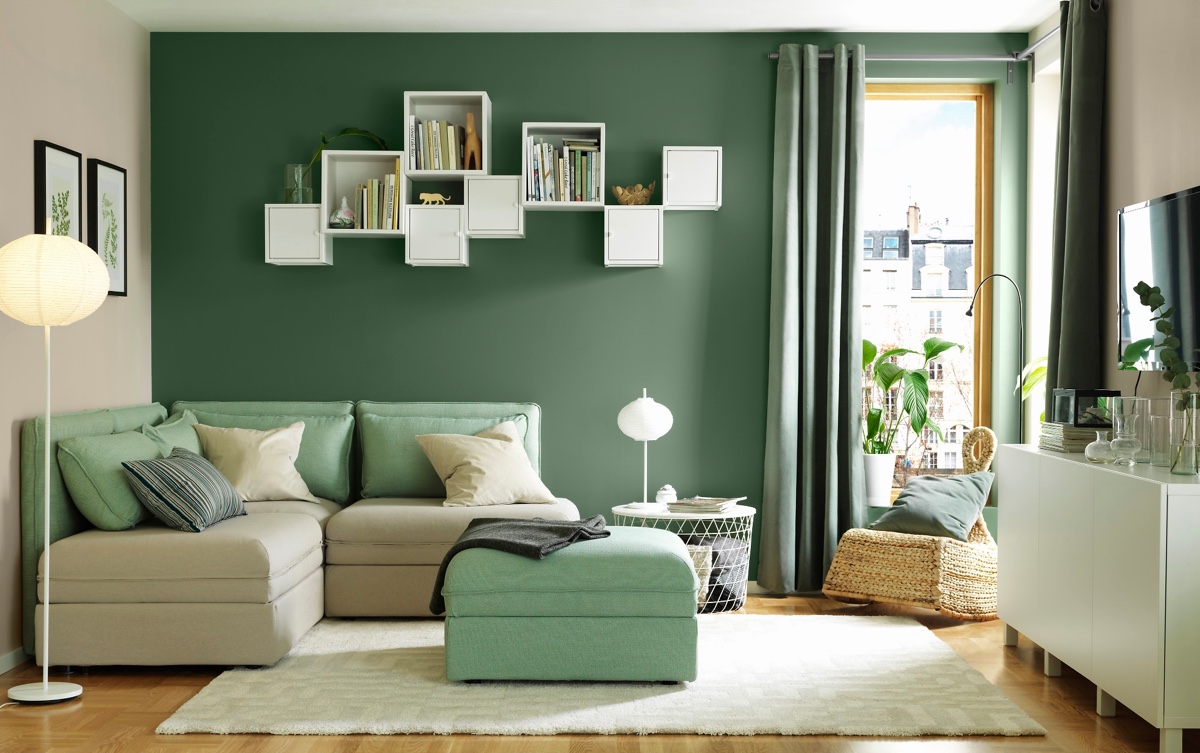
Welcome to the exciting world of creating a brick pattern with paint! Whether you're looking to add a rustic charm to your interior walls or give a fresh new look to your exterior surfaces, painting a brick pattern can be a fun and rewarding project. This technique allows you to achieve the classic appeal of exposed brick without the cost and labor of actual masonry work.
In this comprehensive guide, we'll walk you through the step-by-step process of painting a realistic and visually stunning brick pattern. From preparing the surface to selecting the right paint and mastering the art of creating lifelike brick textures, you'll gain valuable insights and expert tips to help you achieve professional-looking results.
So, roll up your sleeves, grab your paintbrushes, and get ready to unleash your creativity as we delve into the world of faux brick painting. Whether you're a seasoned DIY enthusiast or a complete novice, this guide is designed to equip you with the knowledge and skills needed to transform ordinary surfaces into eye-catching focal points. Let's embark on this exciting journey of artistic expression and home enhancement together!
Key Takeaways:
- Transform ordinary surfaces into eye-catching focal points by mastering the art of faux brick painting. From surface preparation to creating lifelike textures, this guide equips you with the skills to achieve professional-looking results.
- Selecting the right paints and finishes is crucial for creating a visually striking and authentic brick pattern. With attention to detail and patience, your faux brick masterpiece will exude the timeless charm of traditional brickwork.
Read more: How To Install Herringbone Brick Pattern
Materials Needed
Before diving into the process of painting a brick pattern, it’s essential to gather the necessary materials and tools. Here’s a comprehensive list of what you’ll need to embark on this creative endeavor:
- Surface Preparation: Depending on the surface you plan to paint, you may require sandpaper, a putty knife, and a cleaning solution to ensure a smooth and clean base for the paint.
- Painter’s Tape: This will be used to mask off areas that you want to keep paint-free, such as trim, ceilings, and adjacent walls.
- Base Coat Paint: Choose a high-quality latex or acrylic paint in a color that will serve as the base for your brick pattern.
- Brick Red Paint: Select a shade of red that closely resembles traditional brick color. Consider using a satin or semi-gloss finish for a realistic look.
- Dark Brown and Black Paint: These will be used for creating depth and texture in the brick pattern.
- Paint Trays and Brushes: Have a variety of brushes on hand, including small to medium-sized brushes for detail work and larger brushes for covering larger areas. Paint trays or disposable liners will also be necessary.
- Sea Sponge or Cloth: This will be used to create the mottled texture of the bricks.
- Clear Coat Sealer: Once the painting is complete, a clear coat sealer will protect the finish and add durability.
- Drop Cloths or Plastic Sheeting: To protect floors and furniture from paint spills and splatters.
- Paint Thinner or Water (if using oil-based paint): If you opt for oil-based paints, you’ll need the appropriate solvent for cleaning brushes and thinning the paint.
- Protective Gear: This includes gloves, safety goggles, and a mask to ensure safe handling of paints and solvents.
- Measuring Tape and Level: These tools will aid in creating precise and evenly spaced brick patterns.
By assembling these materials, you’ll be well-equipped to commence your faux brick painting project with confidence and efficiency. With the right supplies at your disposal, you’re ready to embark on the next phase of this creative journey.
Preparing the Surface
Before you begin painting, it’s crucial to ensure that the surface is properly prepared to achieve the best results. Whether you’re working on a wall, ceiling, or any other area, the following steps will help you create a suitable canvas for your faux brick masterpiece:
- Clean the Surface: Start by thoroughly cleaning the surface to remove dust, dirt, and any existing contaminants. Use a mild detergent solution and a sponge or cloth to wipe down the area, ensuring that it’s free from grime and grease. Allow the surface to dry completely before proceeding.
- Repair Imperfections: Inspect the surface for any cracks, holes, or uneven areas. Use a putty knife and spackling compound to fill in any imperfections, and then sand the patched areas once the compound has dried. This step is crucial for achieving a smooth and uniform finish.
- Apply Painter’s Tape: Use painter’s tape to mask off any areas that you want to protect from paint, such as trim, moldings, and adjacent walls. This will create clean, sharp lines and prevent accidental paint smudges.
- Prime the Surface: If the surface is unpainted or if you’re transitioning between different paint types (e.g., from oil-based to latex), applying a primer is recommended. A high-quality primer will enhance paint adhesion and ensure consistent color coverage.
- Mark the Brick Pattern: Using a measuring tape and level, lightly mark the vertical and horizontal lines to outline the brick pattern. This step is essential for achieving evenly spaced and aligned bricks.
By meticulously preparing the surface, you’ll create an ideal foundation for the faux brick painting process. These preparatory measures not only contribute to the visual appeal of the final result but also play a significant role in the longevity and durability of the painted surface. With the groundwork laid, you’re now ready to move on to the next phase of this creative endeavor.
Choosing the Right Paint
When it comes to painting a convincing brick pattern, selecting the appropriate paint is pivotal in achieving a realistic and durable finish. Here are the key considerations to keep in mind when choosing the paint for your faux brick project:
- Base Coat Paint: The base coat serves as the background color for your brick pattern. Opt for a high-quality latex or acrylic paint in a neutral or light shade that complements the desired brick color. This base coat will peek through the brick texture, adding depth and dimension to the overall appearance.
- Brick Red Paint: Look for a paint color that closely resembles traditional brick tones. Consider variations of red with subtle undertones of brown or orange for a natural look. Satin or semi-gloss finishes are ideal for mimicking the sheen of real bricks.
- Accent Colors: To create authentic depth and texture in the brick pattern, select darker shades such as deep brown and black. These accent colors will be used for shading and highlighting, adding realism and dimension to the faux bricks.
- Paint Finish: The choice of finish can significantly impact the authenticity of the faux brick. Opt for satin or semi-gloss finishes, as they mimic the subtle shine and texture of real bricks. Matte finishes may not capture the desired depth and richness of the brick pattern.
- Quality and Durability: Invest in high-quality, durable paints that are formulated for interior or exterior use, depending on the location of your project. Quality paints offer better coverage, adhesion, and resistance to wear and tear, ensuring long-lasting results.
- Water-Based vs. Oil-Based: Consider the advantages of water-based (latex or acrylic) paints, which offer easy cleanup, faster drying times, and low odor. However, if you prefer oil-based paints for their durability and smooth finish, ensure adequate ventilation during application.
By carefully selecting the right paints and finishes, you’ll lay the groundwork for a visually striking and authentic brick pattern. The interplay of base coat, brick red, and accent colors, combined with the appropriate finishes, will set the stage for creating a captivating faux brick surface. With the paint palette chosen, you’re now poised to embark on the artistic process of bringing your brick pattern to life.
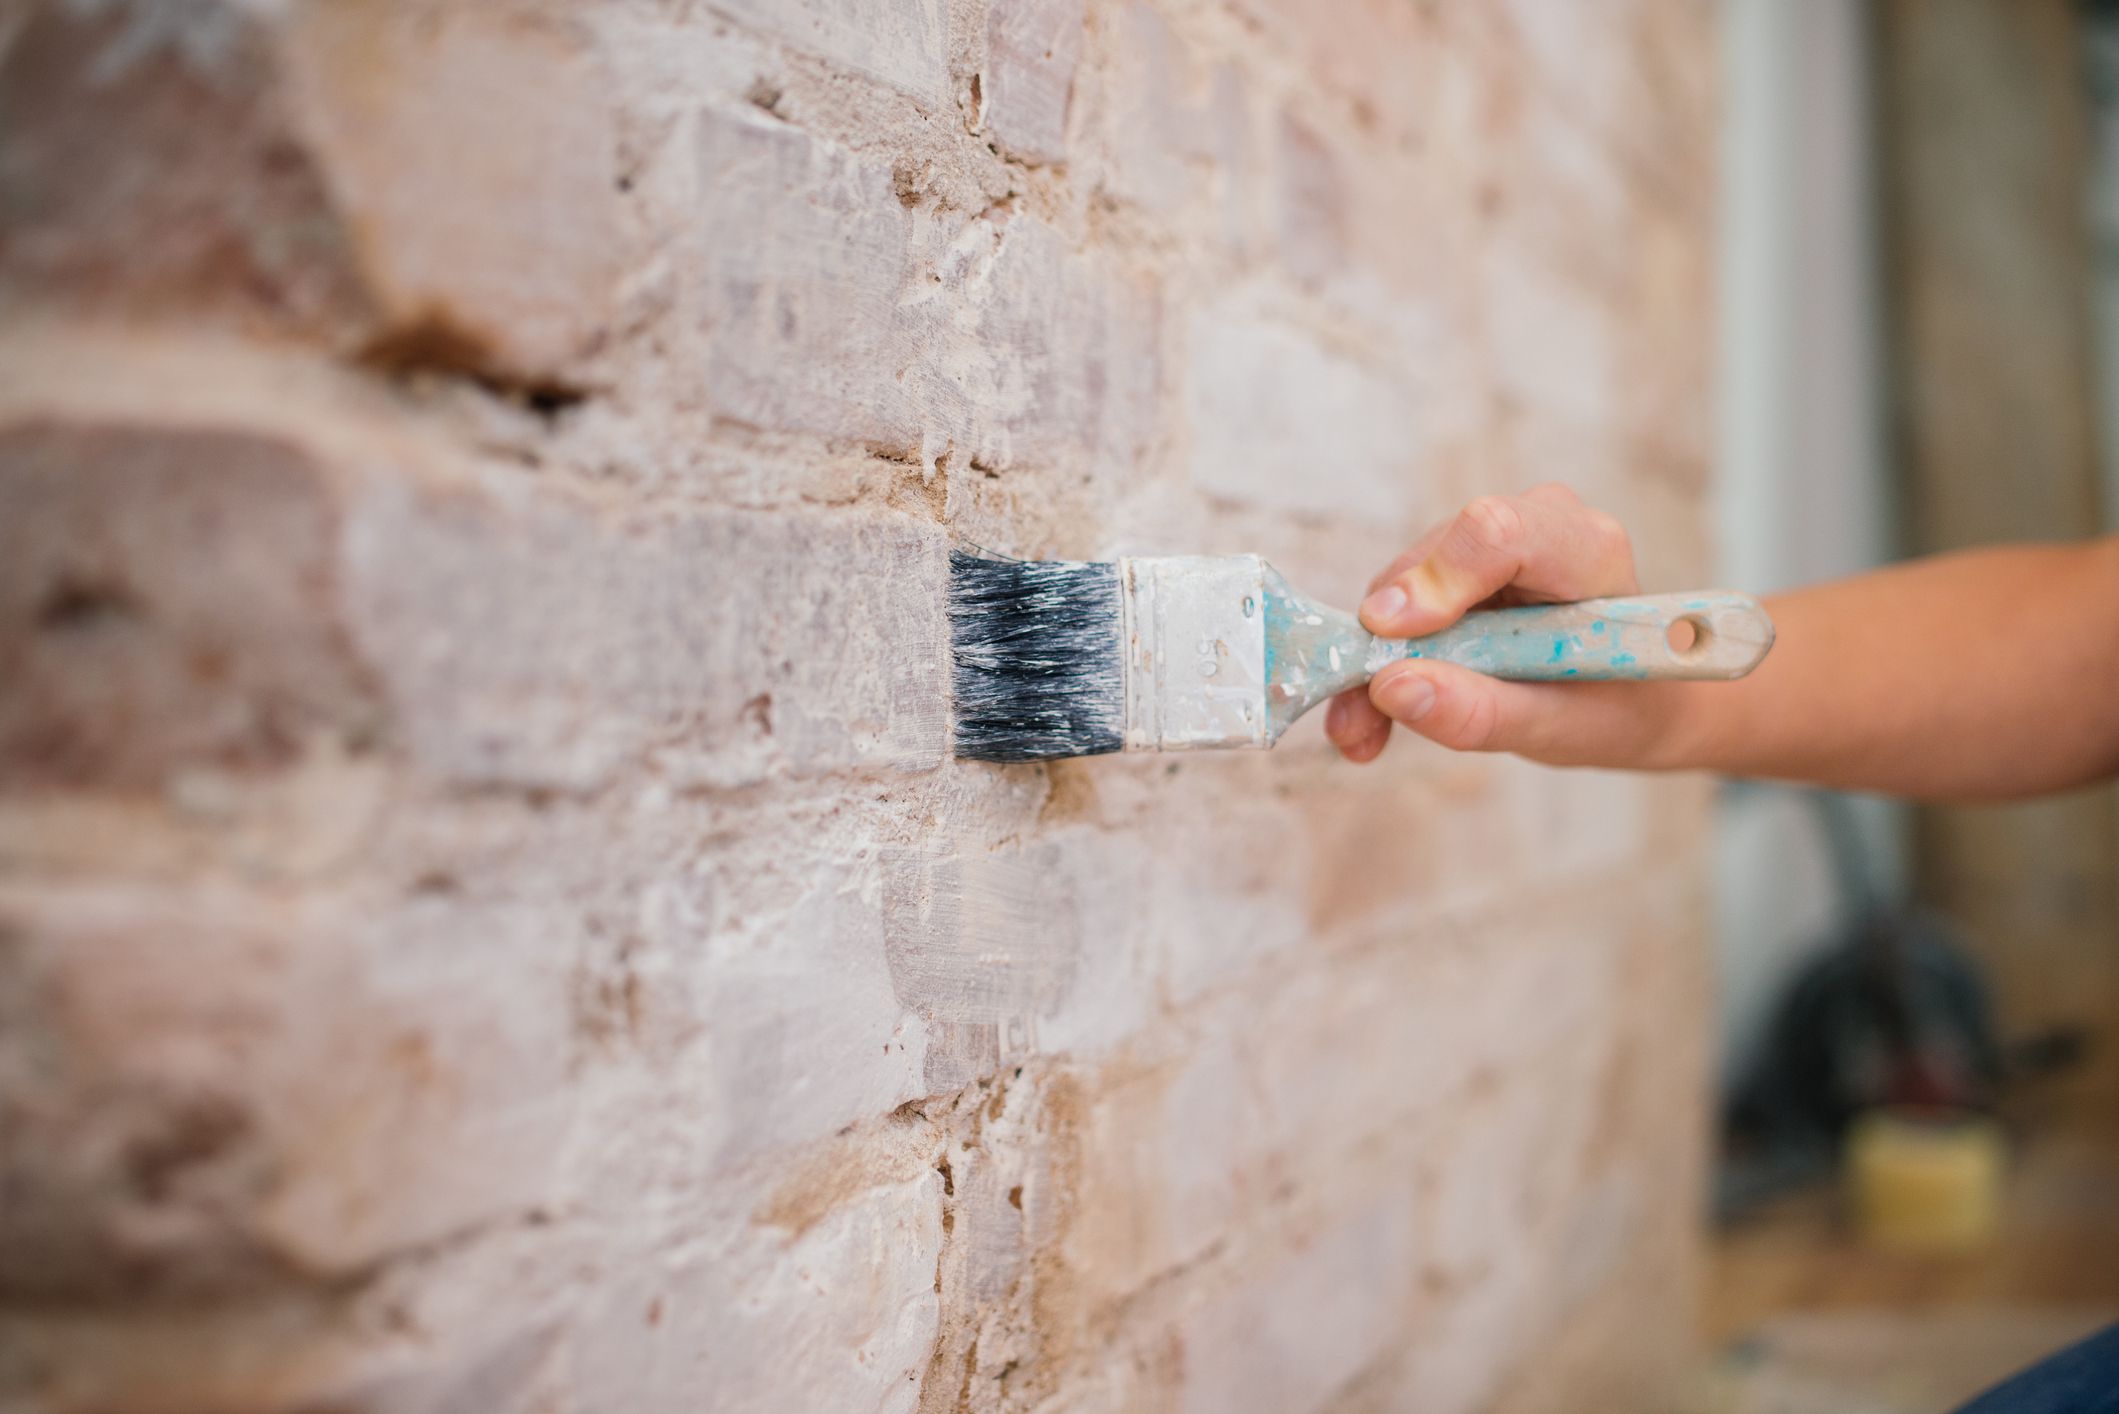
When painting a brick pattern, use a small, angled brush to create the brick shapes. Start with a base coat in the brick color, then add darker and lighter shades to create depth and texture. Finally, use a fine brush to add details like cracks and imperfections for a realistic look.
Creating the Brick Pattern
Now comes the exciting phase of bringing your faux brick pattern to life. The key to achieving a realistic and visually compelling result lies in mastering the art of creating lifelike brick textures. Here’s a step-by-step guide to help you craft a convincing brick pattern:
- Base Coat Application: Begin by applying the base coat paint to the prepared surface. Use a roller or brush to ensure even coverage, and allow the base coat to dry completely before proceeding to the next step.
- Marking the Mortar Lines: Using a ruler or straight edge, lightly mark vertical lines on the surface to represent the mortar joints between the bricks. These lines will guide the placement of the brick textures and contribute to the authentic appearance of the pattern.
- Brick Red Base Layer: With a medium-sized brush, apply the brick red paint over the base coat, following the marked mortar lines. Leave small gaps between the red strokes to simulate the mortar, allowing the base coat to show through. This initial layer sets the foundation for the textured brick surface.
- Texturing with a Sea Sponge: Dampen a sea sponge and lightly dip it into the accent colors (dark brown and black). Gently dab the sponge onto the red base layer, focusing on creating irregular and mottled patterns to mimic the natural variations in brick surfaces. Vary the pressure and angle of the sponge to achieve a nuanced texture.
- Blending and Shading: Use a dry brush or a clean sponge to blend the accent colors into the red base, creating subtle shading and depth. Pay attention to the edges and corners of the “bricks” to enhance the three-dimensional effect and add character to the pattern.
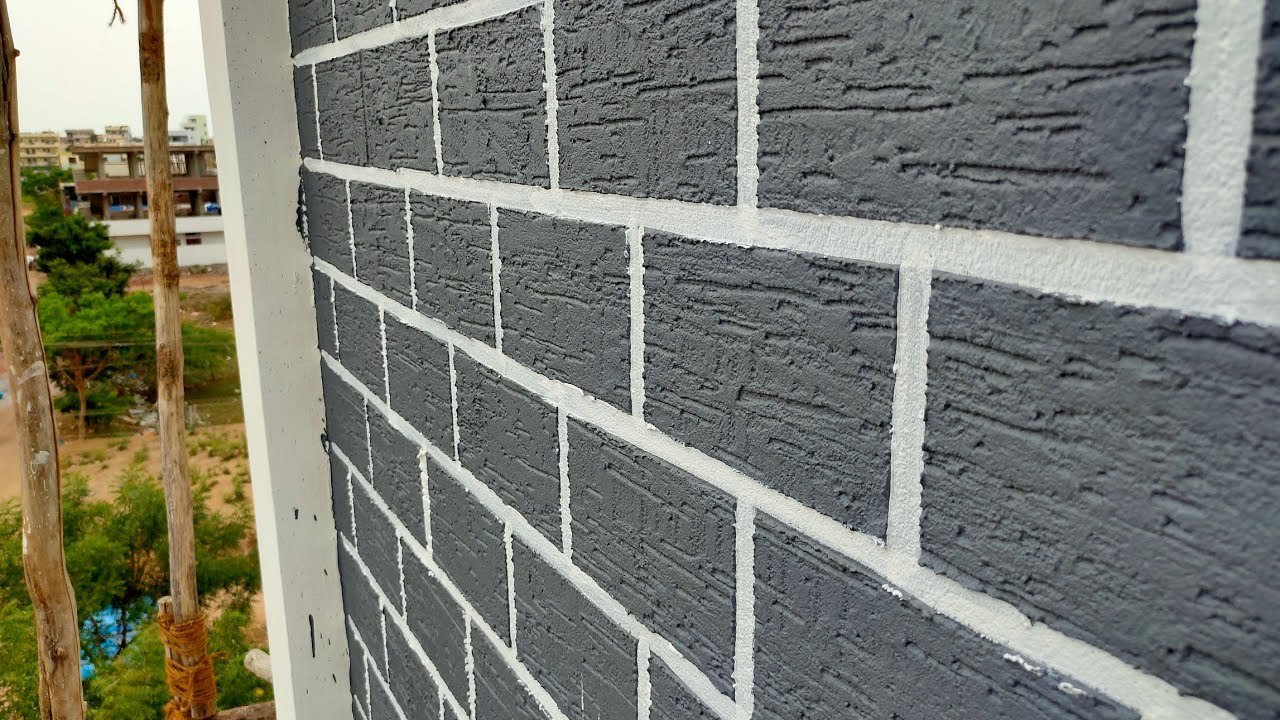
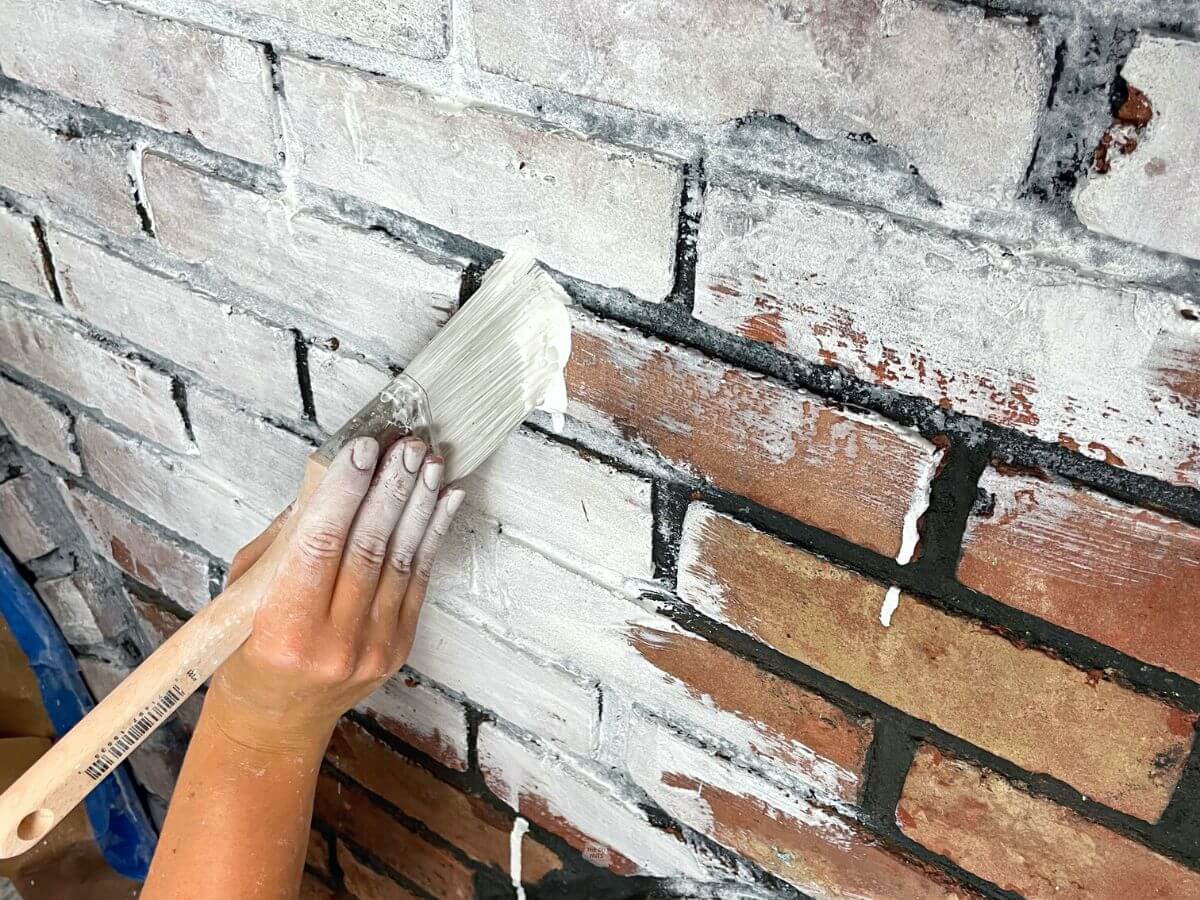
- Refining the Mortar Lines: Once the brick textures are in place, refine the mortar lines by carefully painting over the marked lines with a thin brush and a light gray or off-white paint. This step defines the individual bricks and gives the pattern a polished look.
By meticulously following these steps, you’ll gradually build up the intricate textures and nuances that define a convincing brick pattern. The interplay of base coat, brick red, accent colors, and carefully crafted mortar lines will culminate in a visually captivating and authentic representation of brickwork. With the brick pattern taking shape, you’re now ready to infuse your project with the vibrant colors and character of traditional brick surfaces.
Read more: How To Paint Brick Pavers
Painting the Bricks
As you transition from creating the initial textures to refining the intricate details, the process of painting the bricks requires precision, patience, and a keen eye for authenticity. Here’s a detailed guide to help you navigate the crucial phase of painting the faux bricks:
- Layering for Realism: Building upon the textured base, apply additional layers of brick red paint to deepen the color and enhance the richness of the bricks. Allow each layer to dry before adding the next, gradually intensifying the hue and texture.
- Highlighting and Shading: Use a small brush and the accent colors (dark brown and black) to add depth and dimension to the bricks. Focus on highlighting the raised areas of the texture with lighter hues and shading the recessed areas with darker tones, creating a dynamic and realistic effect.
- Emphasizing Individual Bricks: To impart a sense of authenticity, selectively vary the colors and shading on different bricks. This deliberate irregularity mirrors the natural variations found in genuine brickwork, adding character and visual interest to the pattern.
- Refining the Mortar: With a steady hand, refine the mortar lines by carefully touching up any areas where the paint may have bled or faded. Crisp and defined mortar lines contribute to the polished appearance of the brick pattern.
- Step Back and Assess: Periodically step back to evaluate the overall effect of the painted bricks from a distance. This vantage point allows you to gauge the coherence and realism of the pattern, making it easier to identify areas that may require adjustments or additional detailing.
- Consistency and Patience: Maintain a consistent approach to layering, highlighting, and shading, ensuring that each brick receives the same level of attention and craftsmanship. Exercise patience and precision, as these qualities are instrumental in achieving a professional and lifelike result.
By meticulously painting the bricks with attention to detail and subtlety, you’ll gradually unveil the captivating allure of a meticulously crafted faux brick pattern. The interplay of layering, shading, and individualized touches will bring depth, character, and a sense of history to the painted surface. With the bricks taking on their distinctive hues and textures, your project is poised to exude the timeless charm of authentic brickwork.
Finishing Touches
As your faux brick pattern nears completion, the final touches play a crucial role in refining the overall appearance and ensuring a professional, polished outcome. Here are the essential steps to add the finishing touches to your painted brick surface:
- Sealing the Surface: Once the paint has fully dried and cured, apply a clear coat sealer to protect the painted surface and enhance its durability. The sealer will safeguard the finish from wear, moisture, and UV exposure, ensuring that your faux brick pattern maintains its allure for years to come.
- Inspecting and Touching Up: Thoroughly inspect the painted surface for any imperfections, uneven areas, or missed details. Touch up any inconsistencies or blemishes, ensuring that the entire pattern exudes a cohesive and refined aesthetic.
- Removing Painter’s Tape: Carefully remove the painter’s tape from the masked areas, such as trim, moldings, and adjacent walls. This reveal will showcase clean, crisp edges and delineate the faux brick pattern with precision.
- Admiring Your Handiwork: Take a moment to step back and admire the transformation of the surface. Appreciate the artistry and craftsmanship that have brought the timeless allure of brickwork to life in a fresh and innovative manner.
- Celebrating the Achievement: Share your accomplishment with friends, family, or fellow DIY enthusiasts. Your faux brick painting project is a testament to your creativity and dedication, and it’s an achievement worth celebrating and showcasing.
By attending to these finishing touches, you’ll elevate the faux brick pattern to a level of refinement and sophistication. The protective sealant, meticulous touch-ups, and the unveiling of the completed pattern all contribute to a sense of accomplishment and pride in your artistic endeavor. With the finishing touches in place, your painted brick surface is ready to captivate and inspire all who behold it.
Conclusion
Congratulations on completing your journey through the art of painting a captivating brick pattern! By embarking on this creative endeavor, you’ve not only transformed ordinary surfaces into striking focal points but also infused your living spaces with the timeless charm of exposed brickwork. As you reflect on the process and the impressive results of your faux brick painting project, it’s essential to acknowledge the skills, patience, and artistry that have contributed to this achievement.
Throughout this guide, you’ve delved into the intricacies of preparing surfaces, selecting the right paints, and mastering the techniques of creating lifelike brick textures. From layering and shading to refining mortar lines and adding the finishing touches, each step has been a testament to your dedication and creativity. Your commitment to precision and attention to detail has culminated in a visually stunning and authentic representation of traditional brickwork.
As you admire the completed faux brick pattern, take pride in the fact that your artistic vision has breathed new life into your surroundings. Whether adorning interior walls, accentuating architectural features, or rejuvenating exterior facades, the faux brick surface stands as a testament to your ingenuity and craftsmanship.
As you continue to explore the realm of DIY projects and creative endeavors, carry the knowledge and skills gained from this experience forward. Your newfound expertise in faux brick painting can serve as a springboard for future artistic pursuits, inspiring you to embark on further transformations and decorative innovations.
Remember, the art of faux brick painting is not merely about recreating the appearance of brickwork; it’s about infusing spaces with character, warmth, and a touch of timeless elegance. Your painted brick surface is a testament to the power of creativity and the ability to reimagine traditional elements in a fresh and imaginative light.
As you revel in the beauty and impact of your faux brick creation, consider sharing your journey with others, inspiring them to embark on their own artistic ventures. Your experience and expertise can ignite the creative spark in fellow enthusiasts, fostering a community of passionate DIY artisans.
With your faux brick masterpiece adorning your surroundings, may it serve as a constant reminder of the transformative power of creativity and the boundless potential for artistic expression. Embrace the allure of faux brick painting, and let your creativity continue to flourish in every brushstroke and every innovative project that lies ahead.
Ready to take your DIY skills up a notch after mastering the brick pattern painting? If you're curious about other innovative ways to spruce up your space without hefty costs or complex installations, dive into our article on "faux brick." This guide offers insights into creating beautiful, realistic faux surfaces that can transform any area of your home. Whether you're updating a backsplash or adding character to a plain wall, faux brick techniques provide a creative, cost-effective solution. Don't miss out on this exciting decorating adventure!
Frequently Asked Questions about How To Paint A Brick Pattern
Was this page helpful?
At Storables.com, we guarantee accurate and reliable information. Our content, validated by Expert Board Contributors, is crafted following stringent Editorial Policies. We're committed to providing you with well-researched, expert-backed insights for all your informational needs.


0 thoughts on “How To Paint A Brick Pattern”