Articles
How To Make Cathedral Window Quilt Pattern
Modified: August 16, 2024
Learn how to create beautiful cathedral window quilt patterns with our informative articles. Discover expert tips and step-by-step instructions for mastering this classic quilting technique.
(Many of the links in this article redirect to a specific reviewed product. Your purchase of these products through affiliate links helps to generate commission for Storables.com, at no extra cost. Learn more)
Introduction
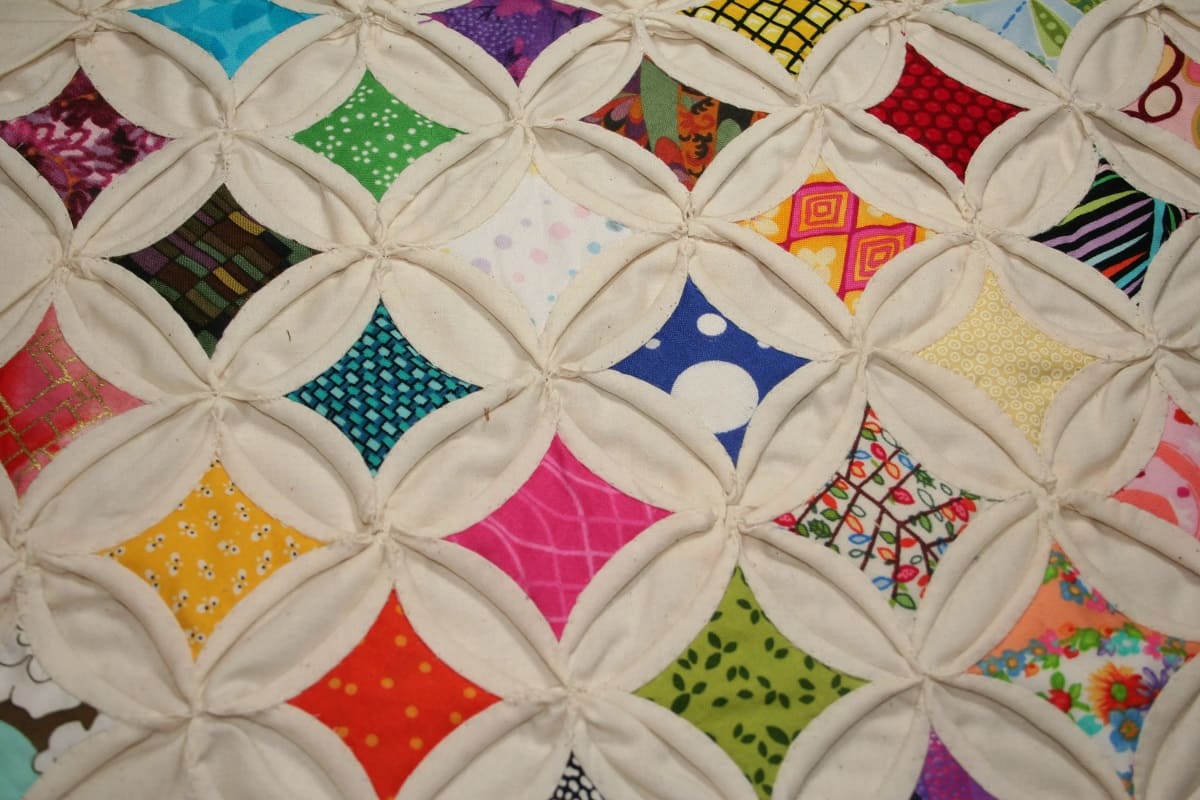
Quilting is a centuries-old crafting tradition that allows us to create beautiful and functional works of art from fabric. One popular quilting pattern that has stood the test of time is the Cathedral Window quilt pattern. This intricate design resembles the stained glass windows found in grand cathedrals, hence the name.
Creating a Cathedral Window quilt may seem daunting at first, but with the right materials, tools, and a step-by-step guide, you can successfully make your own masterpiece. In this article, we will walk you through the process of making a Cathedral Window quilt pattern, from cutting the fabric to binding the finished quilt.
Before we dive into the detailed steps, let’s gather the materials you’ll need:
- Fabric – a variety of colors and patterns for the quilt blocks, borders, and backing
- Scissors or rotary cutter and cutting mat
- Ruler
- Iron
- Sewing machine or needle and thread
- Pins
- Quilting needle
- Quilt batting
- Binding fabric
- Quilting pins or safety pins
- Quilting thread
Now that you have your materials ready, let’s jump into the first step: cutting the fabric.
Key Takeaways:
- Dive into the time-honored tradition of quilting by creating a stunning Cathedral Window quilt pattern. Follow the comprehensive step-by-step guide to infuse your personal touch and showcase your creativity.
- Embrace the intricate design and vibrant colors of the Cathedral Window quilt pattern. From cutting fabric to binding the quilt, each step contributes to a visually appealing and structurally sound masterpiece.
Read more: How To Make A Strip Quilt Pattern
Materials Needed
Before we start creating our Cathedral Window quilt, let’s gather all the necessary materials. Here’s a list of what you will need:
- Fabric: Choose a variety of colors and patterns to create the quilt blocks, borders, and backing. Make sure you have enough fabric to cover the desired size of your quilt.
- Scissors or Rotary Cutter and Cutting Mat: You’ll need a sharp pair of fabric scissors or a rotary cutter and cutting mat to accurately cut your fabric to the desired measurements.
- Ruler: A ruler is essential for measuring and guiding your fabric cuts. Choose a transparent ruler with clear measurements for precise cutting.
- Iron: Having an iron and ironing board nearby will help you achieve crisp and flat seams throughout the quilting process.
- Sewing Machine or Needle and Thread: You can either use a sewing machine or sew by hand with a needle and thread. The choice depends on your preference and sewing skills.
- Pins: Sewing pins are necessary to hold your fabric pieces together while stitching. Opt for sharp, sturdy pins to securely hold the layers in place.
- Quilting Needle: If you choose to hand sew your quilt, a quilting needle with a small eye and sharp point is recommended.
- Quilt Batting: Quilt batting is a layer of material placed between the quilt top and backing to provide insulation and thickness. Choose a batting that suits the desired warmth and loft of your quilt.
- Binding Fabric: The binding fabric is used to cover the raw edges of your quilt and give it a finished look. Select a fabric that complements the colors and patterns of your quilt.
- Quilting Pins or Safety Pins: These pins are used to temporarily hold the quilt layers in place during the quilting process. Quilting pins are designed for this purpose, but you can also use safety pins if they are more readily available.
- Quilting Thread: For machine quilting, choose strong quilting thread that matches or complements the colors of your quilt. If you’re hand quilting, select a thread specifically designed for hand stitching.
Now that you have all the materials ready, let’s move on to the first step: cutting the fabric.
Step 1: Cutting the Fabric
Now that you have gathered all the necessary materials, it’s time to start the first step of making your Cathedral Window quilt: cutting the fabric.
Start by determining the size of your quilt blocks. The standard size for Cathedral Window blocks is usually 8 inches, but you can adjust the size based on your preference. Once you have decided on the block size, cut squares of fabric that are 2 inches larger than your desired block size. For example, if you want 8-inch blocks, cut 10-inch squares.
Next, cut out the window shapes for each block. These shapes can be squares, rectangles, circles, or any other shape you desire. Remember to leave a seam allowance of at least 1/4 inch around each shape.
After cutting the block squares and window shapes, it’s time to cut the fabric for the borders. Measure the dimensions of your quilt top and cut strips of fabric to be sewn as borders around the edges. The width of the border is a matter of personal preference, but a common choice is 2 to 3 inches.
Lastly, cut the backing fabric and the quilt batting to the size of your quilt top. Make sure to add a few extra inches on all sides to accommodate for any fabric shifting during the quilting process.
Double-check your measurements and make sure all the fabric pieces are accurately cut before proceeding to the next step.
Now that you have all the fabric pieces ready, let’s move on to the next step: creating the Cathedral Window blocks.
Step 2: Creating the Cathedral Window Blocks
With your fabric pieces cut and ready, it’s time to move on to creating the Cathedral Window blocks. These blocks will be the foundation for your quilt’s intricate design.
To begin, take a fabric square that will serve as the base for your block. Place it on a flat surface with the wrong side facing up.
Next, choose a window shape that you cut earlier and position it on the center of the fabric square. Pin it in place, ensuring that it is centered and aligned.
Take the fabric edges around the window shape and fold them towards the back, creating a smooth edge around the window. Use your fingers or an iron to press the folds in place. Be careful not to leave any raw edges exposed.
Once the folds are secured, it’s time to create the cathedral effect. Fold the corners of the fabric square in towards the center, overlapping them in a triangular shape. Pin the corners together to hold them in place.
Now, take another fabric square and fold it in half diagonally to create a triangle. Place this triangle on top of the folded corners, aligning the raw edges. Pin them together.
Continue layering and folding fabric squares until you achieve the desired number of layers and the cathedral window effect is evident. This typically requires four to six layers of fabric.
Once you are satisfied with the layers, pin the edges securely to hold them in place. Use your sewing machine or needle and thread to stitch along the edges, ensuring that all layers are securely attached. Remove the pins as you sew.
Repeat this process for each of your Cathedral Window blocks, creating as many blocks as you need to cover the desired size of your quilt.
With the Cathedral Window blocks complete, you can now move on to assembling the quilt top. This will bring your intricate quilt pattern to life. Let’s proceed to the next step.
Step 3: Assembling the Quilt Top
Now that you have created your Cathedral Window blocks, it’s time to assemble the quilt top. This step involves arranging the blocks in a desired pattern and joining them together to create the main design of your quilt.
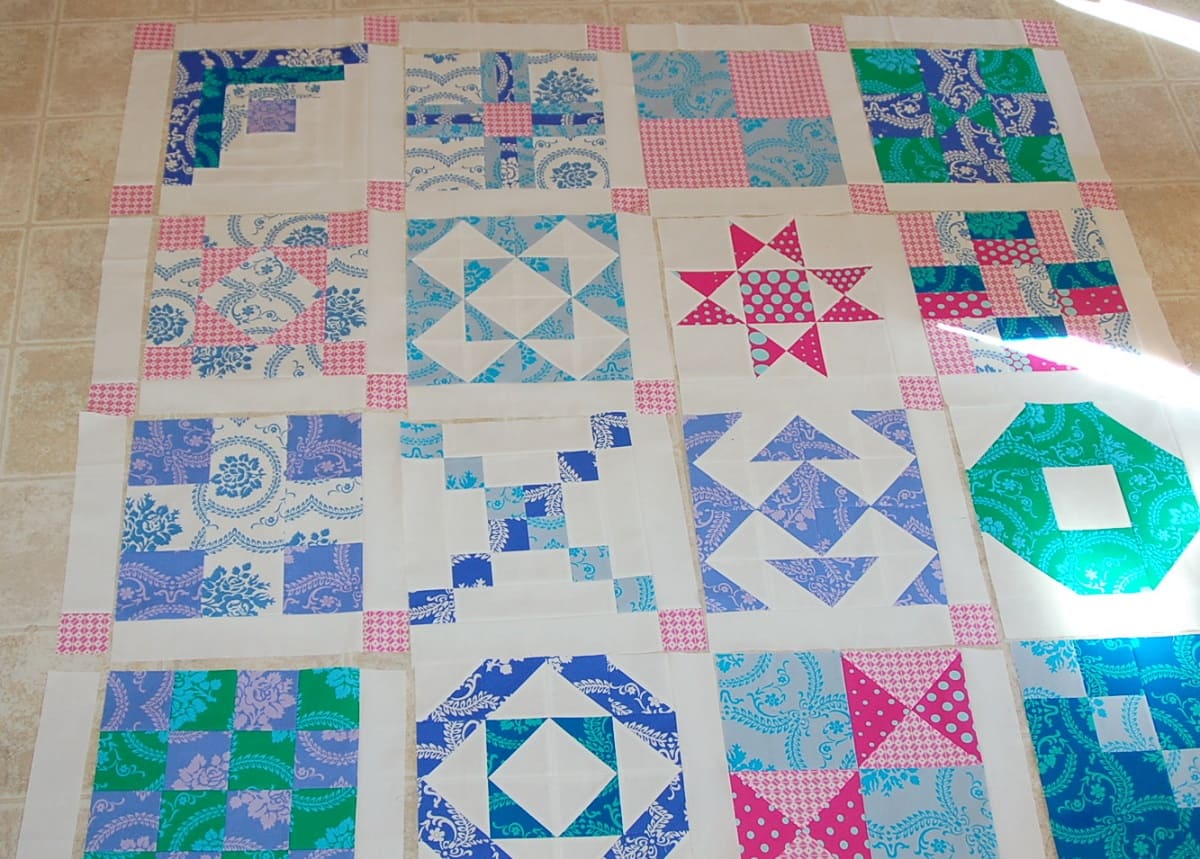
Start by laying out your Cathedral Window blocks on a flat surface. Take the time to experiment with different arrangements to find the perfect pattern that pleases your eye.
Once you are satisfied with the layout, it’s time to join the blocks together. Begin by taking the first two blocks that will be adjacent to each other. Place them right sides together, ensuring that the raw edges align.
Pin the blocks together along the edge that will be sewn. It’s important to match the seams and corners as accurately as possible to maintain a straight and uniform quilt top.
Now, sew along the pinned edge using a 1/4 inch seam allowance. Backstitch at the beginning and end of the seam to secure it. Repeat this process for all the adjacent blocks until you have sewn them together in rows.
Continue joining the rows together until all the Cathedral Window blocks are sewn together to form the quilt top. As you sew, press the seams flat with an iron to create a smooth and seamless finish.
Once the quilt top is fully assembled, take a moment to inspect it for any loose threads or uneven edges. Trim any excess fabric or threads to create a clean and neat appearance.
With the quilt top complete, it’s time to add borders to frame the design and enhance the overall look of your quilt. Let’s move on to the next step: adding borders.
When making a Cathedral Window quilt pattern, use a contrasting fabric for the “windows” to make the design pop. This will create a beautiful visual effect in your quilt.
Read more: How To Make A Quilt Pattern From A Picture
Step 4: Adding Borders
Adding borders to your Cathedral Window quilt will not only frame the design but also provide a polished and finished look to your quilt top. Borders can be made from the same fabric or a contrasting fabric for added visual interest.
To begin, measure the sides of your quilt top to determine the length of your borders. Cut fabric strips to the desired width of your borders, ensuring they are long enough to cover each side of the quilt top.
Place the first border strip right sides together along one side of the quilt top. Pin it in place, aligning the raw edges.
Using a 1/4 inch seam allowance, sew the border strip to the quilt top. Backstitch at the beginning and end of the seam to secure it. Repeat this process for the remaining sides of the quilt top, adding border strips as needed.
Once all the borders are sewn on, press the seams open or towards the borders with an iron. This will help the borders lie flat and prevent any puckering or distortion.
Inspect the quilt top to ensure that the borders are evenly attached and aligned with the quilt blocks. Trim any excess fabric or threads if necessary.
The addition of borders gives your Cathedral Window quilt a polished appearance and sets the stage for the next step: layering and quilting. Let’s proceed to the next step to bring your quilt to life.
Step 5: Layering and Quilting
Layering and quilting are essential steps in the construction of any quilt. This process involves sandwiching the quilt top, batting, and backing together and stitching them to create a secure and durable quilt.
Start by laying the quilt backing fabric on a flat surface with the wrong side facing up. Smooth out any wrinkles or folds to ensure a smooth base for your quilt.
Next, place the quilt batting on top of the backing fabric, evenly distributing it throughout the surface area. Smooth out any wrinkles or lumps in the batting for an even and consistent layer.
Now, carefully position the quilt top on top of the batting, ensuring that it is centered and aligned with the backing fabric. Smooth out any wrinkles or folds in the quilt top to create a flat and neat surface.
Once the layers are aligned, you can choose to secure them together using quilting safety pins or basting spray. Quilting safety pins are placed every few inches across the quilt top, holding the layers in place. Basting spray is a temporary adhesive that is sprayed on the batting to secure it to the backing and quilt top.
With the layers secured, it’s time to start quilting. This can be done using a sewing machine or by hand, depending on your preference and skill level.
If using a sewing machine, select a quilting design and adjust your machine settings accordingly. Quilt along the seams and around the cathedral window shapes, following the desired quilting pattern. Remove the safety pins as you quilt, being careful not to sew over them.
If hand quilting, use a quilting needle and quilting thread to stitch through all layers. Begin in the center of the quilt and work your way outwards, following the chosen quilting design. Take small, even stitches to ensure a secure and visually appealing quilt.
Quilting adds both decorative and functional elements to your Cathedral Window quilt. It not only enhances the design but also helps to secure the layers together for durability.
Once you have finished quilting, trim any excess batting and backing fabric, leaving a small border around the edges of the quilt top.
We’re nearing the end of our Cathedral Window quilt-making journey. The next and final step is binding the quilt. Let’s proceed to that step to complete your beautiful creation.
Step 6: Binding the Quilt
Binding is the final step in completing your Cathedral Window quilt. It is the fabric strip that wraps around the raw edges of the quilt, giving it a finished and professional look.
To begin, cut fabric strips for the binding. The width of the strips can vary, but a common choice is 2.5 inches. Calculate the total length needed by measuring the perimeter of your quilt and adding a few extra inches for overlapping and joining the ends.
Take one of the fabric strips and fold it in half lengthwise, wrong sides together, and press it with an iron to create a crease in the center. This will serve as a guide for attaching the binding to the quilt.
Starting from one side of the quilt, align the raw edge of the unfolded side of the binding strip with the raw edge of the quilt. Pin it in place, positioning the creased center line of the binding along the quilt’s raw edge.
Continue pinning the binding strip around the entire perimeter of the quilt, mitering the corners for a clean finish. When you reach the starting point, leave a few inches of excess binding strip.
Using a sewing machine or needle and thread, sew the binding strip to the quilt, following the creased center line as your guide. Backstitch at the beginning and end to secure the stitching.
Once the binding is securely attached to the quilt, fold it over to the backside of the quilt and pin it in place. Carefully hand-stitch the folded edge of the binding to the back of the quilt using small hidden stitches. Take your time to ensure neat and even stitching.
Continue folding and stitching the binding around the entire quilt, mitering the corners as needed. When you reach the starting point, fold the excess binding strip to create a clean and seamless finish. Trim any excess fabric if necessary.
Once you have finished stitching the binding, give your quilt a final press with an iron to set the stitches and create a crisp finish.
Congratulations! You have successfully completed the binding process, bringing your Cathedral Window quilt to completion.
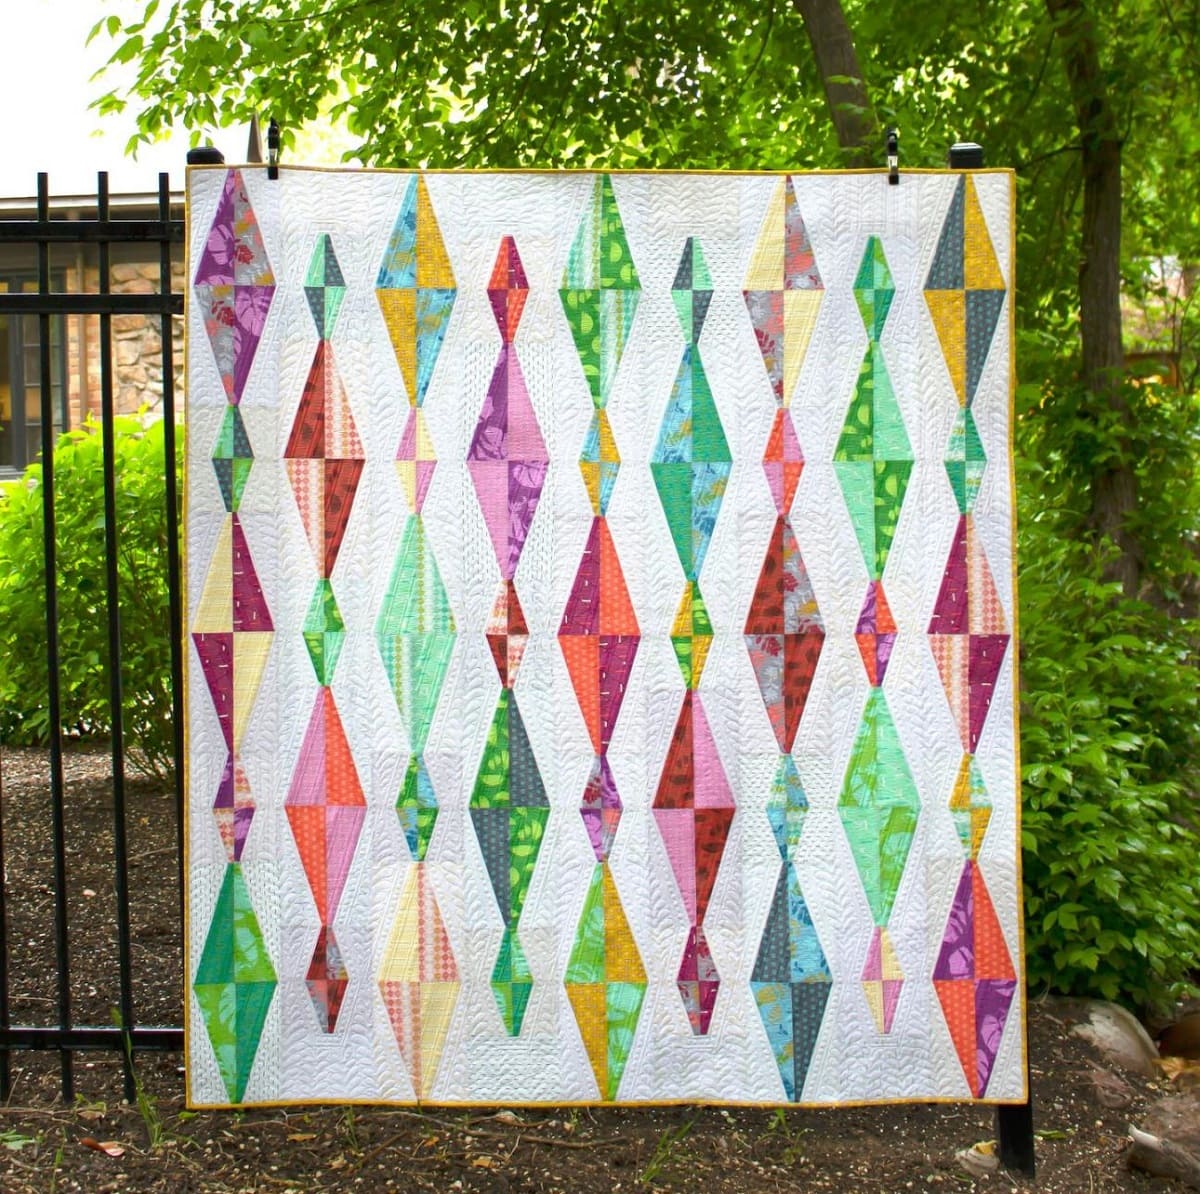
Take a moment to admire your hard work and enjoy the beauty of your finished Cathedral Window quilt. Whether you choose to display it as a wall hanging, drape it over a couch, or gift it to a loved one, your quilt is sure to be cherished for years to come.
We hope this step-by-step guide has helped you create a stunning Cathedral Window quilt. Happy quilting!
Conclusion
Creating a Cathedral Window quilt pattern is a rewarding and fulfilling journey that allows you to showcase your creativity and craftsmanship. From cutting the fabric to binding the quilt, each step in the process contributes to the final masterpiece.
Throughout this article, we have explored the materials needed and provided a comprehensive guide for each step, including cutting the fabric, creating the Cathedral Window blocks, assembling the quilt top, adding borders, layering and quilting, and finally, binding the quilt.
By following these steps and infusing your personal touch, you can create a unique and stunning Cathedral Window quilt that showcases your individual style and skill. The intricate design and vibrant colors of this quilt pattern are sure to captivate anyone who lays eyes on it.
Remember to embrace the creativity in quilt-making while also paying attention to precise measurements and seam allowances. The combination of technical skills and artistic vision will result in a quilt that is both visually appealing and structurally sound.
Quilting is a time-honored tradition that allows us to create cherished heirlooms and works of art. With each stitch, we add our personal touch and turn fabric into something meaningful and beautiful.
So, gather your materials, dive into the steps outlined here, and embark on your Cathedral Window quilt-making adventure. Let your imagination run wild, and enjoy the process of creating a quilt that reflects your unique style and passion.
Happy quilting!
Frequently Asked Questions about How To Make Cathedral Window Quilt Pattern
Was this page helpful?
At Storables.com, we guarantee accurate and reliable information. Our content, validated by Expert Board Contributors, is crafted following stringent Editorial Policies. We're committed to providing you with well-researched, expert-backed insights for all your informational needs.


0 thoughts on “How To Make Cathedral Window Quilt Pattern”