
Articles
How To Make A Braid Pattern Quilt Block
Modified: February 24, 2024
Learn how to create a stunning braid pattern quilt block with our step-by-step articles. Discover the secrets to perfecting this intricate quilting technique.
(Many of the links in this article redirect to a specific reviewed product. Your purchase of these products through affiliate links helps to generate commission for Storables.com, at no extra cost. Learn more)
Introduction
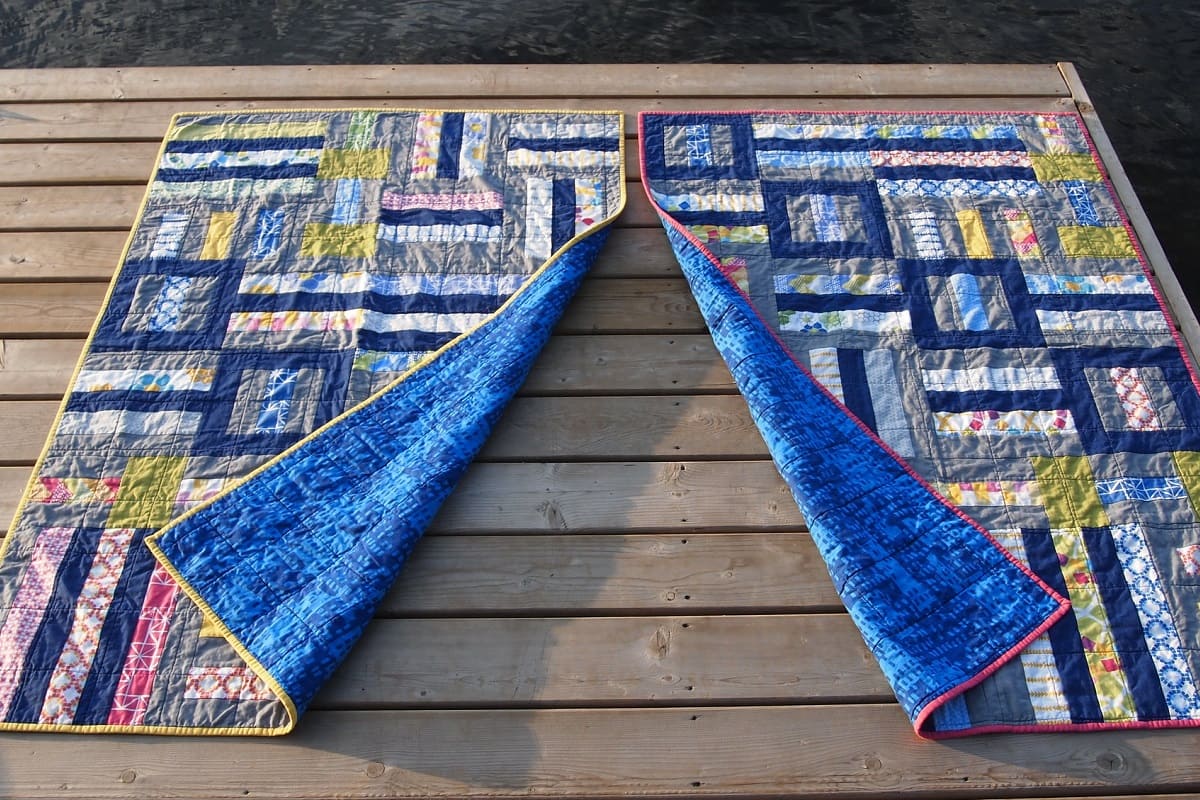
Welcome to the world of quilting! If you’re looking for a quilt block pattern that is both visually stunning and relatively easy to create, then the braid braid pattern is the perfect choice for you. This pattern creates the illusion of interwoven braids, making it a versatile design that can be adapted for any quilting project.
In this article, we will guide you through the step-by-step process of creating a braid braid pattern quilt block. Whether you’re a beginner or an experienced quilter, follow along with us as we explore the materials needed, cutting techniques, assembly process, and finishing touches.
Quilting is not only a great way to unleash your creativity, but it also allows you to create functional and beautiful pieces of art that can be cherished for years to come. So let’s dive into the world of braid braid pattern quilt blocks and bring your quilting aspirations to life!
Key Takeaways:
- Dive into the world of quilting with the visually stunning and versatile braid braid pattern quilt block, perfect for unleashing your creativity and creating beautiful, cherished pieces of art.
- Master the art of creating the braid braid pattern quilt block, from selecting fabrics to cutting, assembling, quilting, and adding finishing touches, and embark on a fulfilling quilting journey filled with creativity and inspiration.
Read more: How To Make Braided Quilted Table Runners
Materials Needed
Before you begin creating your braid braid pattern quilt block, gather the following materials:
- Fabric: Choose a variety of fabrics in complementary or contrasting colors. You will need strips of fabric in different widths and lengths.
- Scissors or rotary cutter: Use these tools to cut the fabric strips.
- Quilting ruler: A ruler with clear markings will help you achieve accurate measurements.
- Quilting mat: A self-healing mat is ideal for cutting fabric without damaging the surface below.
- Sewing machine: This is essential for stitching the fabric strips together.
- Thread: Select a thread color that complements your fabric choices.
- Iron and ironing board: These will be used to press the fabric strips and create crisp seams.
- Pins: Use straight pins to hold the fabric strips in place while sewing.
- Quilting ruler or template: You will need a ruler or template to cut the braid pattern segments.
- Backing fabric and batting: These materials are necessary for completing the quilt block.
- Binding fabric: Choose a coordinating fabric to add a border to the quilt block.
- Quilting pins or spray baste: These will be used to secure the layers of the quilt block before quilting.
- Quilting needles: Select a needle suitable for hand quilting, if desired.
Once you have gathered all the materials, you’re ready to dive into the process of creating your braid braid pattern quilt block. Let’s get started!
Step 1: Cutting the Fabric
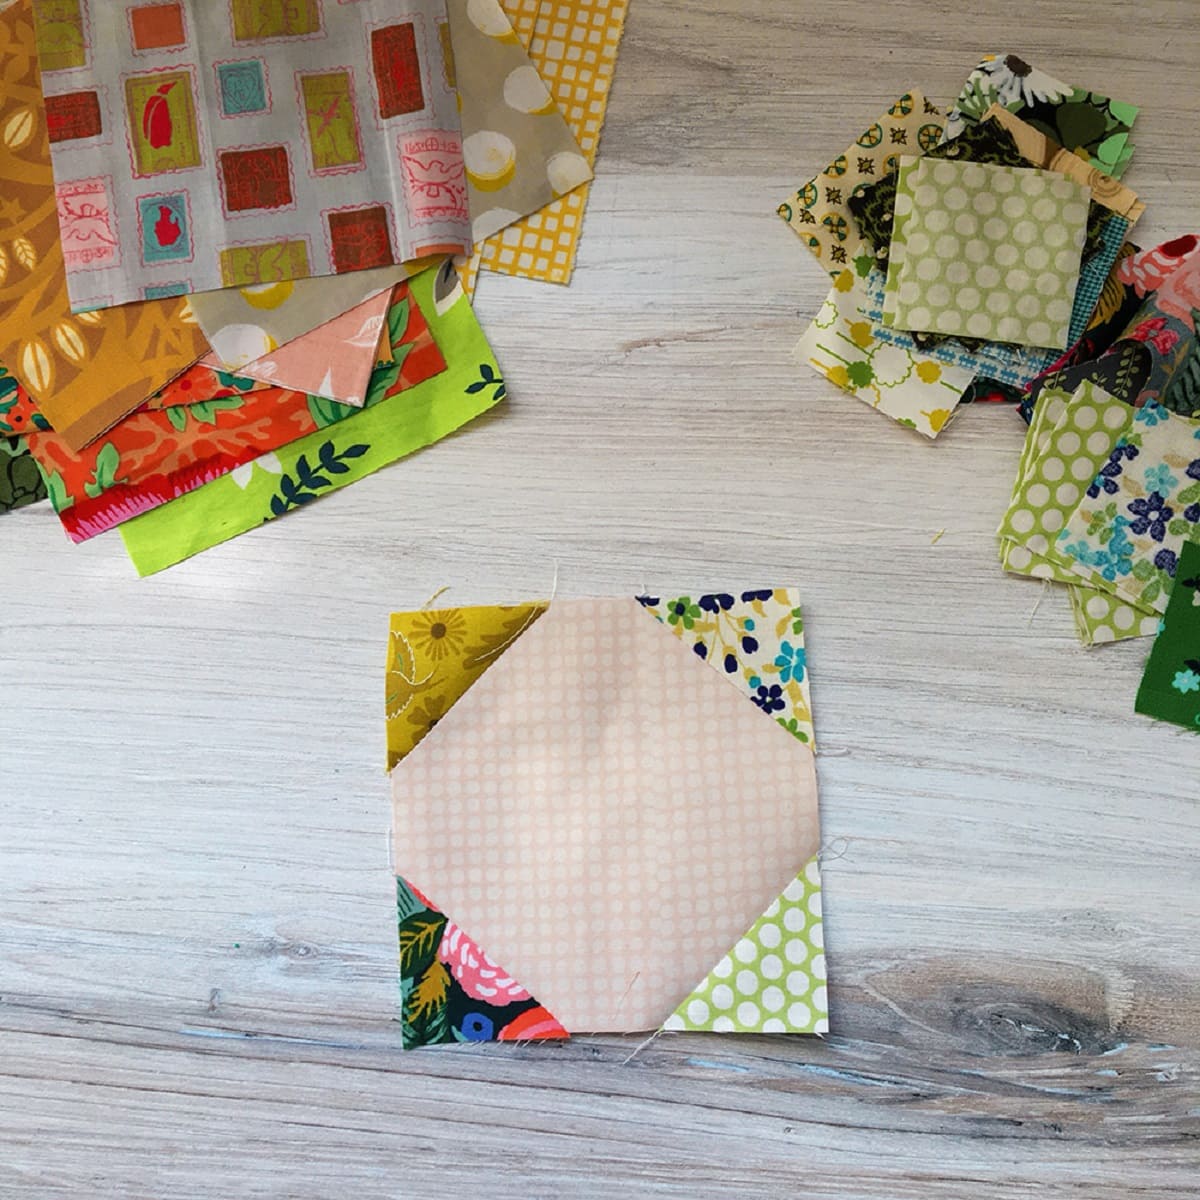
Begin by selecting the fabrics you will use for your braid braid pattern quilt block. Choose a variety of colors and patterns that complement each other and create the desired effect.
Using scissors or a rotary cutter, cut your fabrics into strips. The width of the strips will determine the thickness of your braids, so feel free to experiment with different widths to achieve the desired look. For example, you can cut strips ranging from 1 inch to 3 inches wide.
It’s important to ensure that the lengths of your fabric strips are consistent for each braid. This will help create a cohesive and visually appealing pattern. Measure and cut the strips to be at least twice the desired length of your quilt block’s finished braid. For instance, if you want your braid to be 10 inches long, cut the fabric strips to be at least 20 inches long.
Once you have cut your fabric strips, it’s time to organize them based on the color and pattern combinations you want to achieve in your braid braid pattern. Lay them out in the order you plan to stitch them together.
Remember to keep your work area neat and organized. Keep your fabric strips flat and untangled to make the sewing process smoother. A tidy workspace will also minimize any mistakes or misalignments when assembling your quilt block.
Now that you have your fabric strips ready, it’s time to move on to the next step: creating the braid pattern.
Step 2: Creating the Braid Strips
With your fabric strips organized, it’s time to start creating the braid pattern for your quilt block. The braid strips will give the illusion of interwoven braids, adding visual interest to your design.
Take the first three fabric strips you laid out in the previous step. Place them in the order you want them to appear in the braid pattern. Align the edges of the strips and pin them together to keep them in place.
Next, sew a ¼ inch seam along the pinned edges of the strips. Backstitch at the beginning and end of the seam to secure it. Press the seams open with an iron to create a crisp finish.
Repeat this process for the rest of the fabric strips, taking three at a time and sewing them together in the desired order. Continue until you have assembled all the fabric strips into braids.
As you create the braid strips, you can mix and match different colors and patterns to create unique combinations. This is where your creativity can shine, so feel free to experiment and have fun with it!
Once you have created all your braid strips, press them flat with an iron to ensure they lay smoothly. Trim any excess fabric from the edges of the strips to make them even.
With your braid strips ready, it’s time to move on to the next step: assembling the braid pattern quilt block.
When making a braid braid pattern quilt block, be sure to use a consistent seam allowance to ensure that all your strips line up properly and create a neat, uniform pattern.
Step 3: Assembling the Braid Pattern
Now that you have your braid strips ready, it’s time to assemble them into the braid pattern for your quilt block. This step will bring your design to life and create the illusion of interwoven braids.
Start by laying out your braid strips in the desired order. Place them side by side, with the seams facing downwards. This will help create a seamless and cohesive look for your braid pattern.
Take the first braid strip on the left and place it on top of the second braid strip. Align the edges and pin them together to keep them in place. Ensure that the seams of both braid strips are matching.
Next, sew a ¼ inch seam along the pinned edges to join the two strips together. Press the seam open with an iron to create a flat and neat finish.
Continue this process, taking the next braid strip and placing it on top of the previous one. Align the edges, pin them together, sew a ¼ inch seam, and press the seam open. Repeat until you have sewn all the braid strips together.
As you assemble the braid pattern, take care to align the edges and maintain an even seam allowance. This will ensure that your quilt block looks symmetrical and well-crafted.
Once you have sewn all the braid strips together, press the entire quilt block with an iron to flatten any wrinkles or folds. Take a moment to admire your creation and see how the braid pattern unfolds before your eyes.
With the braid pattern quilt block assembled, it’s time to move on to the next step: quilting the block.
Read more: How To Make A Block Quilt
Step 4: Quilting the Block
Quilting the block is the process of stitching together the layers of fabric to create a finished quilt. It adds both visual interest and durability to your braid braid pattern quilt block. Let’s dive into the steps involved in quilting your block.
Start by layering your braid braid pattern quilt block on top of the batting, with the backing fabric underneath. Make sure all three layers are smooth and wrinkle-free.
To hold the layers together while quilting, you can use quilting pins or spray baste. These will prevent the fabric from shifting during the sewing process.
Begin by quilting along the seam lines of the braid pattern. You can follow the existing seams as a guideline or choose a different quilting pattern if desired. The choice is yours.
Using a sewing machine, stitch along the seam lines with a straight or decorative stitch. You can use a matching or contrasting thread color, depending on the look you want to achieve.
If you prefer hand quilting, you can use a quilting needle and thread to sew along the seam lines. Hand quilting adds a charming and personal touch to your quilt block.
Continue quilting the block by stitching in the ditch, which means sewing along the seams where the braid strips are joined. This will further secure the layers together and enhance the braid pattern’s definition.
Feel free to explore different quilting designs and techniques to add texture and dimension to your braid braid pattern quilt block. You can quilt in straight lines, curves, or even create intricate patterns to make your block truly unique.
Once you have finished quilting the block, trim away any excess batting or backing fabric, leaving a small border around the edges.
Congratulations! You have successfully quilted your braid braid pattern quilt block. Now, it’s time for the final step: adding the finishing touches.
Step 5: Finishing Touches
To complete your braid braid pattern quilt block, add the finishing touches that will enhance its overall appearance and make it ready to be incorporated into your quilting project.
Start by trimming the edges of the quilt block to ensure they are straight and even. Use a quilting ruler or a straightedge to guide your cuts, creating a clean and professional finish.
Next, create a binding for your quilt block. Cut strips of fabric, about 2.5 inches wide, in a color that complements your braid braid pattern. Join the strips together at a 45-degree angle to create one continuous binding strip.
Attach the binding strip to the edges of the quilt block using a ¼ inch seam allowance. Fold the strip over to the back of the block and hand stitch or machine stitch it in place. This will create a neat and finished edge for your quilt block.
Once the binding is secure, give your quilt block a final press with an iron to flatten any wrinkles or folds that may have occurred during the sewing process.
Now, step back and admire your finished braid braid pattern quilt block. The interwoven braids and precise stitching create a captivating visual effect that is sure to impress.
You can use your quilt block as the foundation for a variety of quilting projects. Combine multiple blocks to create a larger quilt, or turn it into a centerpiece for a pillow, wall hanging, or even a table runner.
Remember, quilting is both an art and a craft, so let your creativity shine through as you incorporate the braid braid pattern into your projects. Experiment with different color combinations, fabric choices, and quilting techniques to make each piece uniquely yours.
Now that you’ve mastered the process of creating a braid braid pattern quilt block, it’s time to embark on your quilting journey and see where your creativity takes you.
Happy quilting!
Conclusion
Congratulations, you have successfully learned how to create a braid braid pattern quilt block! Through the process of cutting fabric, creating braid strips, assembling the braid pattern, quilting the block, and adding the finishing touches, you have transformed ordinary fabric strips into a visually stunning masterpiece.
The braid braid pattern offers endless possibilities for creativity and personalization. By selecting different fabrics, experimenting with color combinations, and exploring various quilting techniques, you can create truly unique and eye-catching quilt blocks.
Quilting is not only a delightful craft but also a therapeutic and fulfilling journey. It allows you to express your creativity, relax your mind, and create beautiful art that can be cherished for generations. The braid braid pattern is just one of the many quilt block designs you can explore on your quilting adventure.
Now that you have mastered the art of the braid braid pattern quilt block, don’t be afraid to take your newfound skills to new heights. Combine quilt blocks to create larger projects, experiment with different layouts and settings, and explore various quilt designs that incorporate the braid pattern.
Remember to enjoy the process, embrace your creativity, and have fun with your quilting projects. Whether you’re a beginner or an experienced quilter, the braid braid pattern quilt block is a versatile and visually captivating design that is sure to impress.
From selecting fabrics to cutting, assembling, quilting, and adding the finishing touches, the journey of creating a braid braid pattern quilt block is both rewarding and fulfilling. So, grab your fabric, thread your needle, and embark on a quilting adventure filled with creativity, inspiration, and the joy of bringing your vision to life.
Happy quilting, and may your braid braid pattern quilt block be a testament to your artistry and passion!
Frequently Asked Questions about How To Make A Braid Pattern Quilt Block
Was this page helpful?
At Storables.com, we guarantee accurate and reliable information. Our content, validated by Expert Board Contributors, is crafted following stringent Editorial Policies. We're committed to providing you with well-researched, expert-backed insights for all your informational needs.

0 thoughts on “How To Make A Braid Pattern Quilt Block”