
Articles
How To Remove Old Linoleum From Wood Floor
Modified: October 21, 2024
Learn the step-by-step process of removing old linoleum from a wood floor in this comprehensive article. Transform your space with these expert tips and tricks.
(Many of the links in this article redirect to a specific reviewed product. Your purchase of these products through affiliate links helps to generate commission for Storables.com, at no extra cost. Learn more)
Introduction
Removing old linoleum from a wood floor can be a challenging task, but with the right techniques and supplies, it is definitely doable. Whether you’re looking to restore the natural beauty of your wood floor or preparing for a new flooring installation, the process requires careful preparation and execution.
In this article, we will provide you with a step-by-step guide on how to remove linoleum from a wood floor. We will cover all the necessary supplies needed for the job and walk you through each stage of the process. By following these instructions, you can ensure a successful linoleum removal without causing damage to your wood floor.
Before we begin, it is important to note that the removal process may vary depending on the age and condition of the linoleum, as well as the type of adhesive used. Some linoleum may be easier to remove than others, so be prepared for potential challenges along the way.
Now, let’s gather the supplies needed and get started on removing that old linoleum!
Key Takeaways:
- Proper preparation, patience, and the right tools are essential for successfully removing old linoleum from a wood floor. From scoring and heating to adhesive removal and finishing, each step contributes to a beautifully restored wood floor.
- Safety is paramount when removing linoleum, especially if asbestos is present. Testing, proper ventilation, and professional assistance, if needed, are crucial for a successful and safe linoleum removal process.
Read more: How To Remove Old Paint From Wood Siding
Supplies Needed
Before you begin the process of removing linoleum from a wood floor, it is important to gather all the necessary supplies. Here is a list of items you will need:
- Protective Gear: To ensure your safety, wear protective gear such as gloves, safety goggles, and a dust mask. This will protect you from any potential hazards during the removal process.
- Heat Gun or Hair Dryer: A heat gun or hair dryer is essential for softening the linoleum and adhesive, making it easier to remove. Make sure to use the lowest heat setting to avoid damaging the wood floor.
- Utility Knife: A sharp utility knife will be used to score the linoleum, allowing for easier removal.
- Putty Knife or Scraper: A putty knife or scraper will be used to lift and scrape away the linoleum from the wood floor. Choose a sturdy tool that won’t damage the floor underneath.
- Chemical Adhesive Remover (optional): If the linoleum is stubborn and difficult to remove, you may need a chemical adhesive remover. Make sure to choose a product that is safe for use on wood surfaces and follow the instructions carefully.
- Floor Cleaner: After removing the linoleum, you will need a suitable floor cleaner to remove any adhesive residue and clean the wood floor. Look for a cleaner that is specifically designed for use on wood surfaces.
- Sponge or Cloth: A sponge or cloth will be used to apply the floor cleaner and wipe away any residue.
- Bucket: You will need a bucket to mix the floor cleaner with water and hold the necessary cleaning supplies.
- Floor Repair Kit: If there are any damages to the wood floor caused by the linoleum removal process, a floor repair kit can help you fix and restore the surface.
- New Finish (optional): If you wish to give your wood floor a fresh look, you may consider applying a new finish after the linoleum removal process. Choose a finish that is appropriate for your specific type of wood.
Having these supplies ready before you start will ensure a smoother and more efficient linoleum removal process. Now that you have everything you need, let’s move on to the step-by-step instructions on how to remove linoleum from a wood floor.
Step 1: Prepare the Work Area
Before you begin removing the linoleum from your wood floor, it is important to properly prepare the work area. This will help minimize any potential mess or damage during the removal process. Here are the steps to follow:
- Clear the Area: Remove any furniture, rugs, or other objects from the room. This will give you ample space to work and prevent any obstacles during the linoleum removal process.
- Protect the Surrounding Areas: Since you will be using heat and potentially applying chemicals, it is important to protect the surrounding areas. Cover nearby walls, cabinets, and fixtures with plastic sheets or drop cloths to prevent any damage or staining.
- Open Windows and Ventilate: The removal process may produce odors and fumes, especially if you are using chemical adhesive removers. To ensure proper ventilation, open windows and use fans to circulate fresh air throughout the room.
- Turn Off Electricity: Linoleum removal may involve using electrical tools such as heat guns. Before you start, ensure that you turn off any nearby electrical outlets or circuits to avoid any potential accidents.
- Inspect for Nails or Staples: Check the wood floor for any nails or staples that may be sticking out. These could cause damage to your tools or pose a safety risk. If you find any, hammer them down or remove them carefully.
- Clear the Floor: Make sure the entire surface of the wood floor is free from any debris, loose dirt, or dust. Sweep or vacuum the area to give yourself a clean and clear workspace.
By properly preparing the work area, you can ensure a smooth and safe linoleum removal process. Now that the area is ready, you can move on to the next step of removing the linoleum from the wood floor.
Step 2: Remove Baseboards (if needed)
Before you begin removing the linoleum from your wood floor, you may need to remove the baseboards that are attached to the walls. While this step is not always necessary, it can make the linoleum removal process easier and prevent any damage to the baseboards. Follow these steps to remove the baseboards:
- Gather the Necessary Tools: You will need a pry bar or a putty knife, a hammer, and a small block of wood.
- Protect the Wall: To prevent any damage to the walls, place a small piece of cardboard or a painter’s tape along the edge of the baseboards.
- Insert the Pry Bar or Putty Knife: Insert the pry bar or putty knife between the baseboard and the wall at one end. Use gentle pressure to loosen the baseboard.
- Pry the Baseboard Off: Once the pry bar or putty knife is inserted, use the small block of wood and tap it with a hammer to gently pry the baseboard away from the wall. Work your way along the length of the baseboard, slowly loosening it from the wall.
- Repeat the Process: If the baseboards are attached with nails, continue the process of prying and removing them until all the baseboards are free.
- Label and Store: As you remove each baseboard, label them accordingly so you know where each one belongs. Store them in a safe place to avoid any damage.
Removing the baseboards before removing the linoleum will give you easier access to the edges of the linoleum and prevent any potential damage to the baseboards during the removal process. However, if you plan to keep the baseboards, you can skip this step and proceed to the next stage, which is testing for asbestos if necessary.
Step 3: Test for Asbestos (if necessary)
Before proceeding with the linoleum removal process, it is important to determine whether your linoleum contains asbestos. Asbestos is a hazardous material that was commonly used in older linoleum products for its fire-resistant properties. If your linoleum was installed before the 1980s, it is possible that it contains asbestos. Here’s how to test for asbestos:
- Wear Protective Gear: Put on disposable gloves, a dust mask, and safety goggles to protect yourself from any potential asbestos fibers.
- Take a Sample: Carefully cut out a small sample of the linoleum using a utility knife. It is recommended to take the sample from a hidden or inconspicuous area.
- Wet the Sample: Moisten the sample with water or a mixture of water and a few drops of dish soap. This helps prevent the fibers from becoming airborne during the testing process.
- Place the Sample in a Sealed Bag: Seal the moistened sample inside a ziplock bag or airtight container to prevent any potential contamination.
- Contact an Asbestos Testing Service: Contact a certified asbestos testing service or laboratory to have the sample analyzed. Follow their instructions on how to safely deliver the sample for testing.
- Wait for Results: Once you have sent the sample for testing, wait for the results. If the test comes back positive for asbestos, it is highly recommended to consult with professionals or an asbestos removal specialist for safe removal.
Testing for asbestos is a crucial step to ensure your safety and the safety of those around you. If your linoleum does contain asbestos, proper precautions and professional assistance should be taken during the removal process to prevent the release of asbestos fibers into the air. If the test comes back negative, you can proceed with the linoleum removal process with peace of mind.
Read more: How To Fix Linoleum Floor
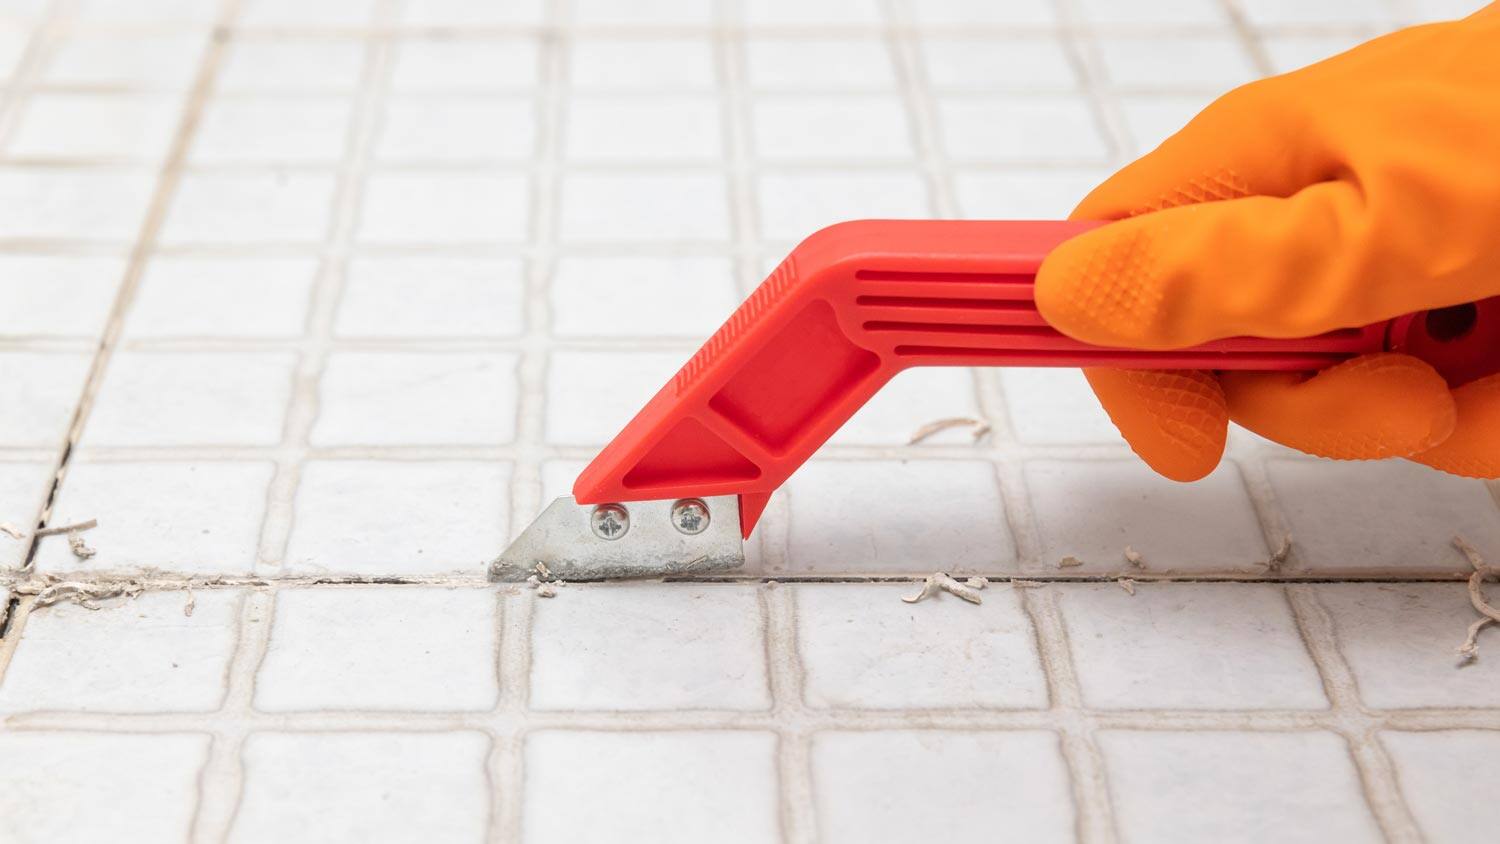
Step 4: Score the Linoleum
Scoring the linoleum is an important step in the removal process as it helps weaken the adhesive and allows for easier removal. Here’s how you can score the linoleum:
- Start at a Corner: Begin by identifying a corner of the linoleum that you will start scoring. This corner will serve as a starting point for lifting and peeling the linoleum.
- Use a Utility Knife: Take a sharp utility knife and carefully make shallow cuts across the surface of the linoleum. The cuts should be about 6-8 inches apart from each other.
- Apply Light Pressure: When scoring the linoleum, apply light pressure to avoid cutting through the linoleum and into the wood floor underneath. The goal is to only score the surface of the linoleum.
- Vary Direction of Cuts: As you score the linoleum, vary the direction of your cuts. This will help create a grid-like pattern, making it easier to lift and remove the linoleum later.
- Continue Scoring the Remaining Area: Move systematically across the entire surface of the linoleum, scoring each section until the entire area is covered.
- Pay Extra Attention to Edges and Corners: When scoring, pay extra attention to the edges and corners of the linoleum. These areas are usually more securely attached, and scoring them thoroughly will facilitate later removal.
Scoring the linoleum weakens the adhesive bond, making it easier to remove. Take your time and be thorough when scoring, ensuring that you cover the entire surface. Once you have successfully scored the linoleum, you can move on to the next step: applying heat to the linoleum.
Step 5: Apply Heat to the Linoleum
Applying heat to the linoleum is a crucial step in the removal process as it helps loosen the adhesive and makes the linoleum more pliable for easier removal. Here’s how you can apply heat to the linoleum:
- Choose a Heat Source: You can use either a heat gun or a hair dryer as a source of heat. Set the heat gun or hair dryer to the lowest heat setting to avoid damaging the wood floor underneath.
- Start in a Corner: Begin at one corner of the linoleum, focusing on a small section at a time.
- Hold the Heat Source Over the Linoleum: Use the heat gun or hair dryer to blow hot air directly onto the linoleum. Hold it at a distance of 3-6 inches away from the surface and continuously move it back and forth to evenly distribute the heat.
- Heat the Linoleum for a Few Minutes: Keep heating the linoleum for a few minutes until you notice the linoleum becoming soft and pliable. This indicates that the adhesive underneath is loosening.
- Test the Linoleum: To check if the linoleum is heated enough, try lifting a corner or an edge using a putty knife or scraper. If the linoleum easily lifts off the wood floor, it is ready for removal.
- Work in Sections: Once a section of the linoleum is heated and ready for removal, move on to the next section and repeat the process until the entire floor is covered.
- Reapply Heat as Needed: If the linoleum becomes cool and difficult to remove, reapply heat to the section until it becomes pliable again.
Remember to work methodically and gradually as you apply heat to the linoleum. Take your time and ensure that each section is properly heated before attempting to remove the linoleum. Applying heat makes the removal process much easier and reduces the chances of damaging the wood floor. Once the linoleum is adequately heated, it’s time to move on to the next step: scraping away the linoleum.
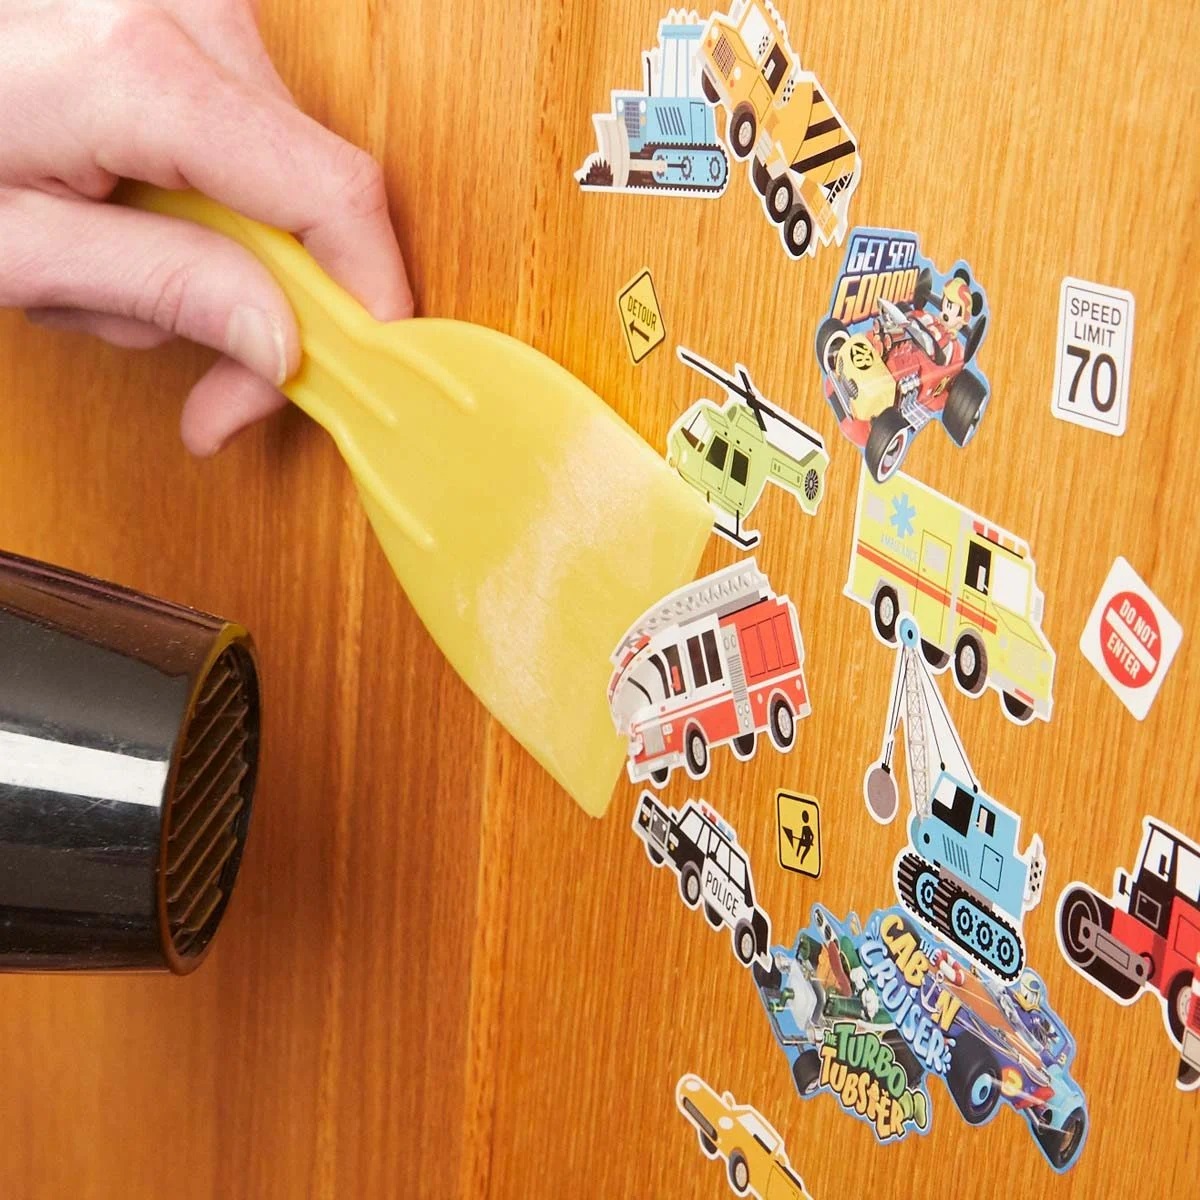
Use a heat gun or hairdryer to soften the adhesive, then carefully scrape off the linoleum with a putty knife. Be sure to ventilate the area and wear a mask to avoid inhaling fumes.
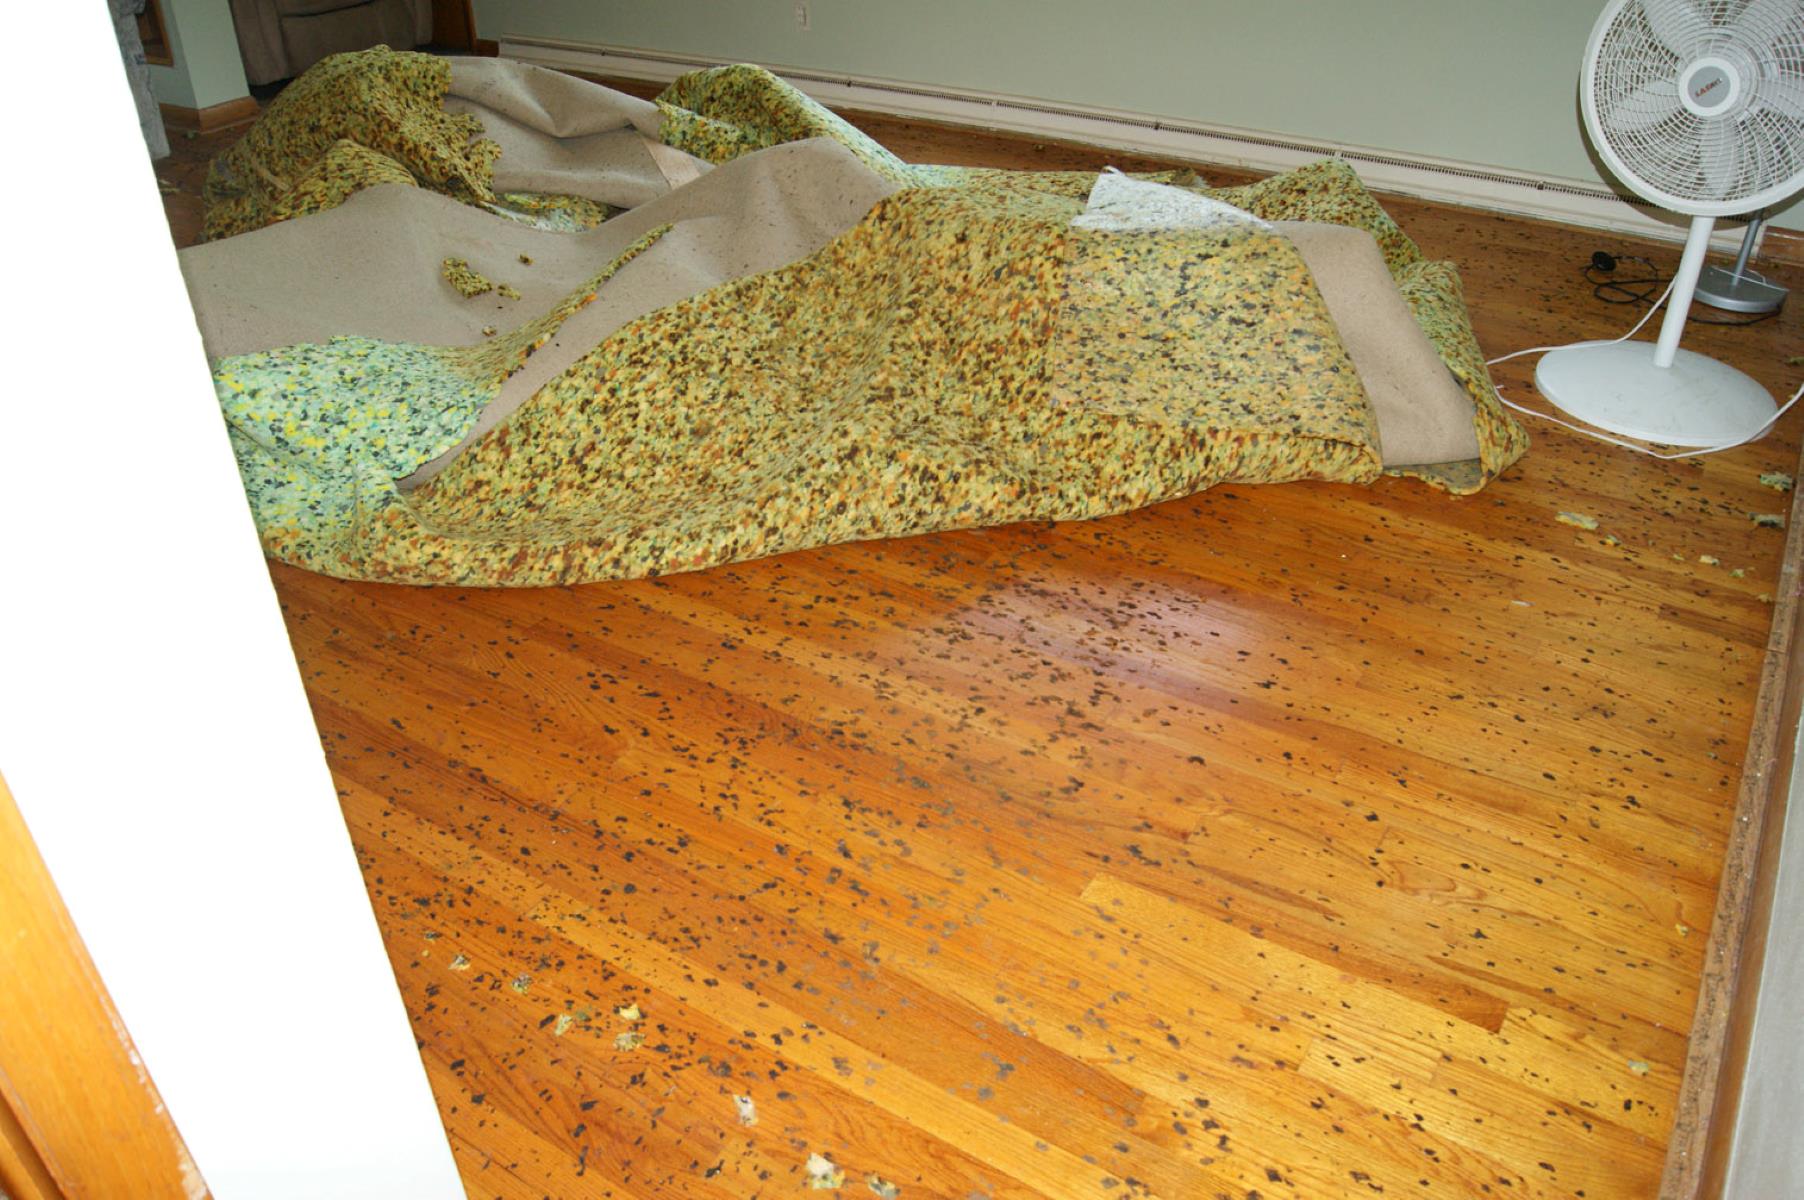
Step 6: Scrape Away the Linoleum
Now that you’ve applied heat to the linoleum and loosened the adhesive, it’s time to start the process of scraping away the linoleum. Here’s how you can effectively remove the linoleum from the wood floor:
- Start at a Corner: Begin at one corner or edge of the heated linoleum. This will serve as your starting point for lifting and peeling away the linoleum.
- Use a Putty Knife or Scraper: Take a putty knife or scraper and slide it under the edge of the linoleum. Gently lift and peel the linoleum away from the wood floor.
- Apply Even Pressure: As you scrape away the linoleum, apply even pressure to avoid damaging the wood floor. If you encounter resistance, reapply heat to the area to soften the adhesive further.
- Work in Small Sections: Focus on removing the linoleum in small sections. Start with a manageable area, lifting and peeling off the linoleum gradually.
- Move in a Smooth Motion: Use a smooth, sweeping motion with the putty knife or scraper to lift and remove the linoleum. Avoid using excessive force that may cause damage to the wood floor.
- Continue Scrape and Peel: Once you’ve removed one section of the linoleum, move on to the next section and repeat the scraping and peeling process. Take your time and work systematically.
- Discard the Linoleum: As you remove the linoleum, discard it into a garbage bag or container. Be mindful of any asbestos precautions if your linoleum tested positive for asbestos.
Scraping away the linoleum can be a labor-intensive process, especially if the adhesive is stubborn. Take breaks as needed and reapply heat when necessary to make the process easier. Work methodically and patiently, ensuring that the linoleum is lifted evenly without causing damage to the wood floor underneath.
Once you have successfully removed the linoleum, it’s time to move on to the next step: removing any residual adhesive from the wood floor.
Step 7: Remove Residual Adhesive
After removing the linoleum, you may find that there is still residual adhesive left on the wood floor. It’s important to remove this adhesive to ensure a smooth and clean surface. Here’s how you can effectively remove residual adhesive:
- Assess the Adhesive: Take a close look at the remaining adhesive to determine its type and condition. This will help you choose the most appropriate method for removal.
- Use a Commercial Adhesive Remover: If the adhesive is stubborn and difficult to remove, you can try using a commercial adhesive remover. Choose a product that is specifically designed for use on wood surfaces and follow the manufacturer’s instructions.
- Apply the Adhesive Remover: Apply the adhesive remover to the affected areas, following the instructions provided. Allow the remover to penetrate the adhesive and break it down.
- Scrub the Adhesive: Once the adhesive has been loosened by the remover, use a scrub brush or a nylon scouring pad to gently scrub away the adhesive. Work in small sections, applying moderate pressure to remove the adhesive effectively.
- Wipe Away the Residue: Use a damp sponge or cloth to wipe away the residue and clean the wood floor. Rinse and wring out the sponge or cloth frequently to avoid spreading the adhesive residue.
- Repeat if Necessary: For stubborn adhesive or larger areas of residue, you may need to repeat the adhesive removal process. Follow the instructions provided by the adhesive remover manufacturer.
- Inspect the Surface: Once you have removed the adhesive, inspect the wood floor to ensure all residue has been removed. If any areas still have adhesive residue, repeat the removal process until the surface is clean.
Removing residual adhesive can be a time-consuming process, but it’s essential for achieving a smooth and pristine wood floor. Take your time and be thorough in your approach to ensure that all adhesive residue is successfully removed. Once the adhesive is gone, you can move on to the next step: cleaning the wood floor.
Read more: How To Clean A Linoleum Floor
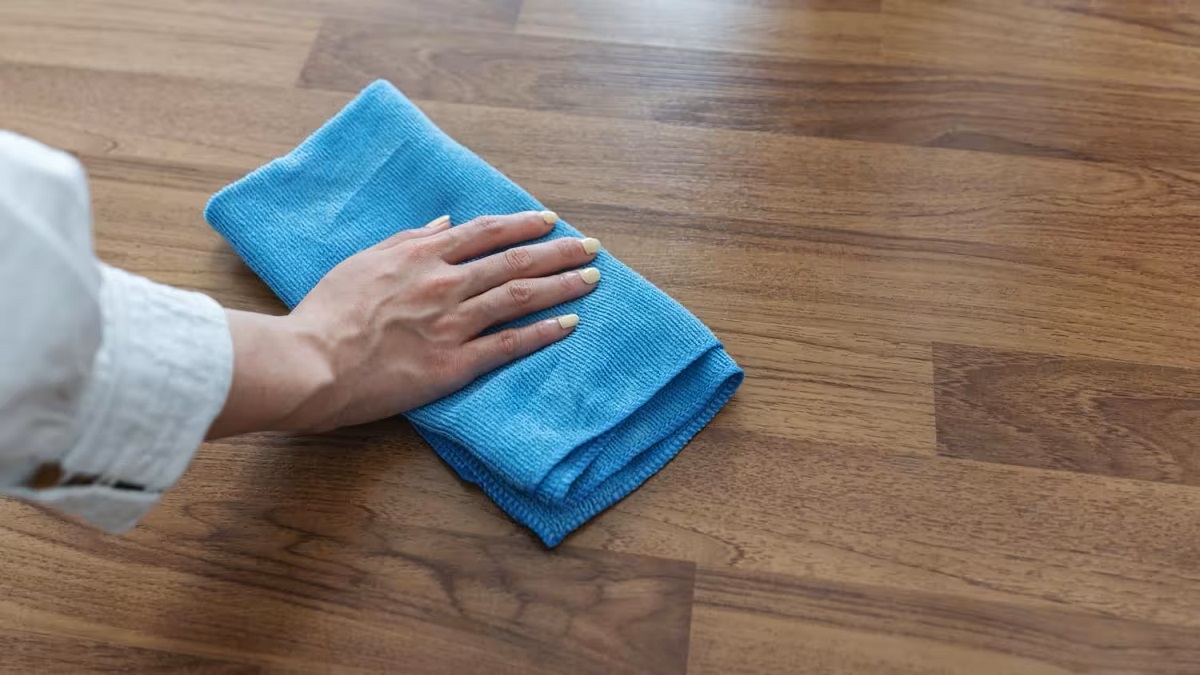
Step 8: Clean the Wood Floor
After removing the linoleum and any residual adhesive, it’s important to clean the wood floor thoroughly to remove any remaining dirt, dust, or cleaning residue. Here’s how you can effectively clean the wood floor:
- Vacuum or Sweep: Start by vacuuming or sweeping the entire wood floor to remove loose dirt, dust, and debris. Pay special attention to corners, edges, and hard-to-reach areas.
- Mix a Cleaning Solution: Prepare a cleaning solution by mixing a mild wood floor cleaner with warm water in a bucket. Follow the instructions on the cleaner for the appropriate dilution ratio.
- Dampen a Mop or Cloth: Dampen a mop or cloth in the cleaning solution. Be sure to wring out excess water to avoid saturating the wood floor.
- Wipe the Floor: Wipe the wood floor with the damp mop or cloth, moving in the direction of the wood grain. Work in small sections, ensuring that each section is adequately cleaned before moving on.
- Pay Attention to Stubborn Stains: For stubborn stains or marks, you can use a more concentrated solution or a specific stain remover recommended for use on wood surfaces. Follow the instructions provided by the manufacturer.
- Dry the Floor: After cleaning, use a dry mop or cloth to remove any excess moisture from the wood floor. Ensure that the floor is completely dry before proceeding.
- Inspect the Floor: Take a close look at the wood floor to make sure it is clean and free from any remaining dirt, stains, or cleaning residue. If necessary, repeat the cleaning process in specific areas until the floor is spotless.
Cleaning the wood floor after removing the linoleum is essential to restore its natural beauty and prepare it for any future treatments, such as refinishing or applying a new finish. By following these steps, you can ensure that your wood floor is clean and ready for the next phase of restoration or installation.
Now that your wood floor is clean, it’s time to move on to step 9: repairing any damage that may have occurred during the removal process.
Step 9: Repair any Damage
During the linoleum removal process, it’s possible that your wood floor may have sustained some damage, such as scratches, gouges, or holes. Step 9 involves repairing any such damage to ensure a smooth and uniform surface. Here’s how you can effectively repair the damage:
- Assess the Damage: Inspect the wood floor carefully to identify any scratches, gouges, or holes that need repair. Take note of the size and depth of each damaged area.
- Fill Small Scratches or Gouges: For small scratches or gouges, you can use a wood filler or putty. Choose a color that matches the wood floor or select a neutral color that can be stained later to match the surrounding area.
- Apply Wood Filler: Using a putty knife or a small spatula, apply the wood filler to the damaged area. Smooth it out and make sure it is level with the surrounding wood floor. Follow the manufacturer’s instructions for drying time.
- Sand the Repaired Area: Once the wood filler has dried, use fine-grit sandpaper to gently sand the repaired area. Be careful not to damage the surrounding wood floor, and aim for a smooth, seamless transition with the rest of the flooring.
- Fill Larger Holes or Deep Gouges: For larger holes or deep gouges, you may need to use wood shims or filler strips. Measure and cut the shim or strip to fit the damaged area, ensuring it is flush with the surrounding surface.
- Apply Adhesive: Apply wood adhesive to the damaged area, and press the wood shim or filler strip into place. Wipe away any excess adhesive and allow it to dry completely.
- Sand and Refinish the Area (if necessary): After the filled areas have dried, sand them gently to ensure a smooth finish. If needed, you may choose to apply a new finish to the repaired area to match the rest of the floor.
By repairing any damage to your wood floor, you can restore its appearance and maintain its structural integrity. Take your time with this step, ensuring that each repair is done carefully and accurately. Once you have completed the necessary repairs, your wood floor will be ready for its final touches.
Now, you can proceed to step 10, which is applying a new finish to your wood floor if desired.
Step 10: Apply a New Finish (optional)
If you wish to give your wood floor a fresh look or enhance its protection, Step 10 involves applying a new finish. Applying a new finish not only adds beauty to the wood but also helps to seal and protect it from daily wear and tear. Here’s how you can apply a new finish to your wood floor:
- Clean the Floor: Ensure that the wood floor is clean and free from any dust or debris. Use a vacuum or a broom to remove any loose particles.
- Sand the Floor (if necessary): If you’re working with an existing finish, you may need to lightly sand the floor to create a smooth surface for the new finish. Use a floor sander or sandpaper to remove any imperfections.
- Select a Finish: Choose a suitable finish for your wood floor, such as polyurethane, varnish, or oil. Consider factors like durability, sheen level, and the desired aesthetic for your space.
- Apply the Finish: Follow the instructions provided by the manufacturer to apply the finish. Use a brush, roller, or lambswool applicator, depending on the recommended application method for your chosen finish.
- Work in Sections: Divide the floor into manageable sections and apply the finish evenly. Start from one corner and work your way across the floor, maintaining a wet edge to avoid visible lines or overlapping marks.
- Allow Drying Time: Allow the finish to dry completely as per the manufacturer’s instructions. Avoid walking on the floor or placing any furniture or rugs until it has properly cured.
- Apply Additional Coats (if desired): Depending on the desired sheen and protection level, you may choose to apply additional coats of the finish. Follow the recommended drying time between coats.
- Final Inspection: Once the finish has dried and cured, inspect the floor for any imperfections. Touch up any uneven areas or address any visible issues in the finish for a flawless result.
By applying a new finish, you can revive the beauty of your wood floor and provide extra protection for years to come. The new finish will bring out the natural characteristics of the wood, enhancing its appearance and durability.
Remember, applying a new finish is optional, so you can choose to skip this step if you prefer to leave your wood floor with a natural, uncoated look. Whatever you decide, enjoy the renewed beauty of your wood floor!
With Step 10 complete, you have successfully completed the process of removing old linoleum from your wood floor and, if desired, applying a new finish. Congratulations on a job well done!
Now, sit back, relax, and enjoy your gorgeous wood floor!
Conclusion
Removing old linoleum from a wood floor can be a challenging task, but with the right techniques and supplies, it is definitely achievable. We hope that this comprehensive guide has provided you with the knowledge and confidence to successfully remove linoleum from your wood floor.
Throughout the process, we emphasized the importance of proper preparation, using the right tools and techniques, and taking the necessary safety precautions. By following the step-by-step instructions, you can minimize potential damage to the wood floor and ensure a smooth linoleum removal.
We covered essential steps such as preparing the work area, removing baseboards if necessary, testing for asbestos, scoring the linoleum, applying heat, scraping away the linoleum, removing residual adhesive, cleaning the wood floor, repairing any damage, and applying a new finish (if desired).
Remember that each wood floor and linoleum removal project is unique, and challenges may arise along the way. Be patient, take breaks when needed, and adapt your approach as necessary to achieve the best results.
Whether you plan to restore your wood floor to its natural beauty or prepare it for a new flooring installation, the effort and care you put into removing the old linoleum will be well worth it in the end. A clean and well-maintained wood floor adds elegance and warmth to any space.
Lastly, we encourage you to seek professional assistance when needed, especially if you encounter any challenges or if your linoleum contains asbestos. Safety should always be a priority throughout the linoleum removal process.
We hope you have found this guide helpful and wish you success in your linoleum removal project. Enjoy the beauty of your revived wood floor for years to come!
Frequently Asked Questions about How To Remove Old Linoleum From Wood Floor
Was this page helpful?
At Storables.com, we guarantee accurate and reliable information. Our content, validated by Expert Board Contributors, is crafted following stringent Editorial Policies. We're committed to providing you with well-researched, expert-backed insights for all your informational needs.


0 thoughts on “How To Remove Old Linoleum From Wood Floor”