Articles
How To Restring Horizontal Blinds
Modified: January 6, 2024
Learn how to restring horizontal blinds with simple step-by-step instructions. Our informative articles will guide you through the process, ensuring your blinds are functioning perfectly in no time.
(Many of the links in this article redirect to a specific reviewed product. Your purchase of these products through affiliate links helps to generate commission for Storables.com, at no extra cost. Learn more)
Introduction
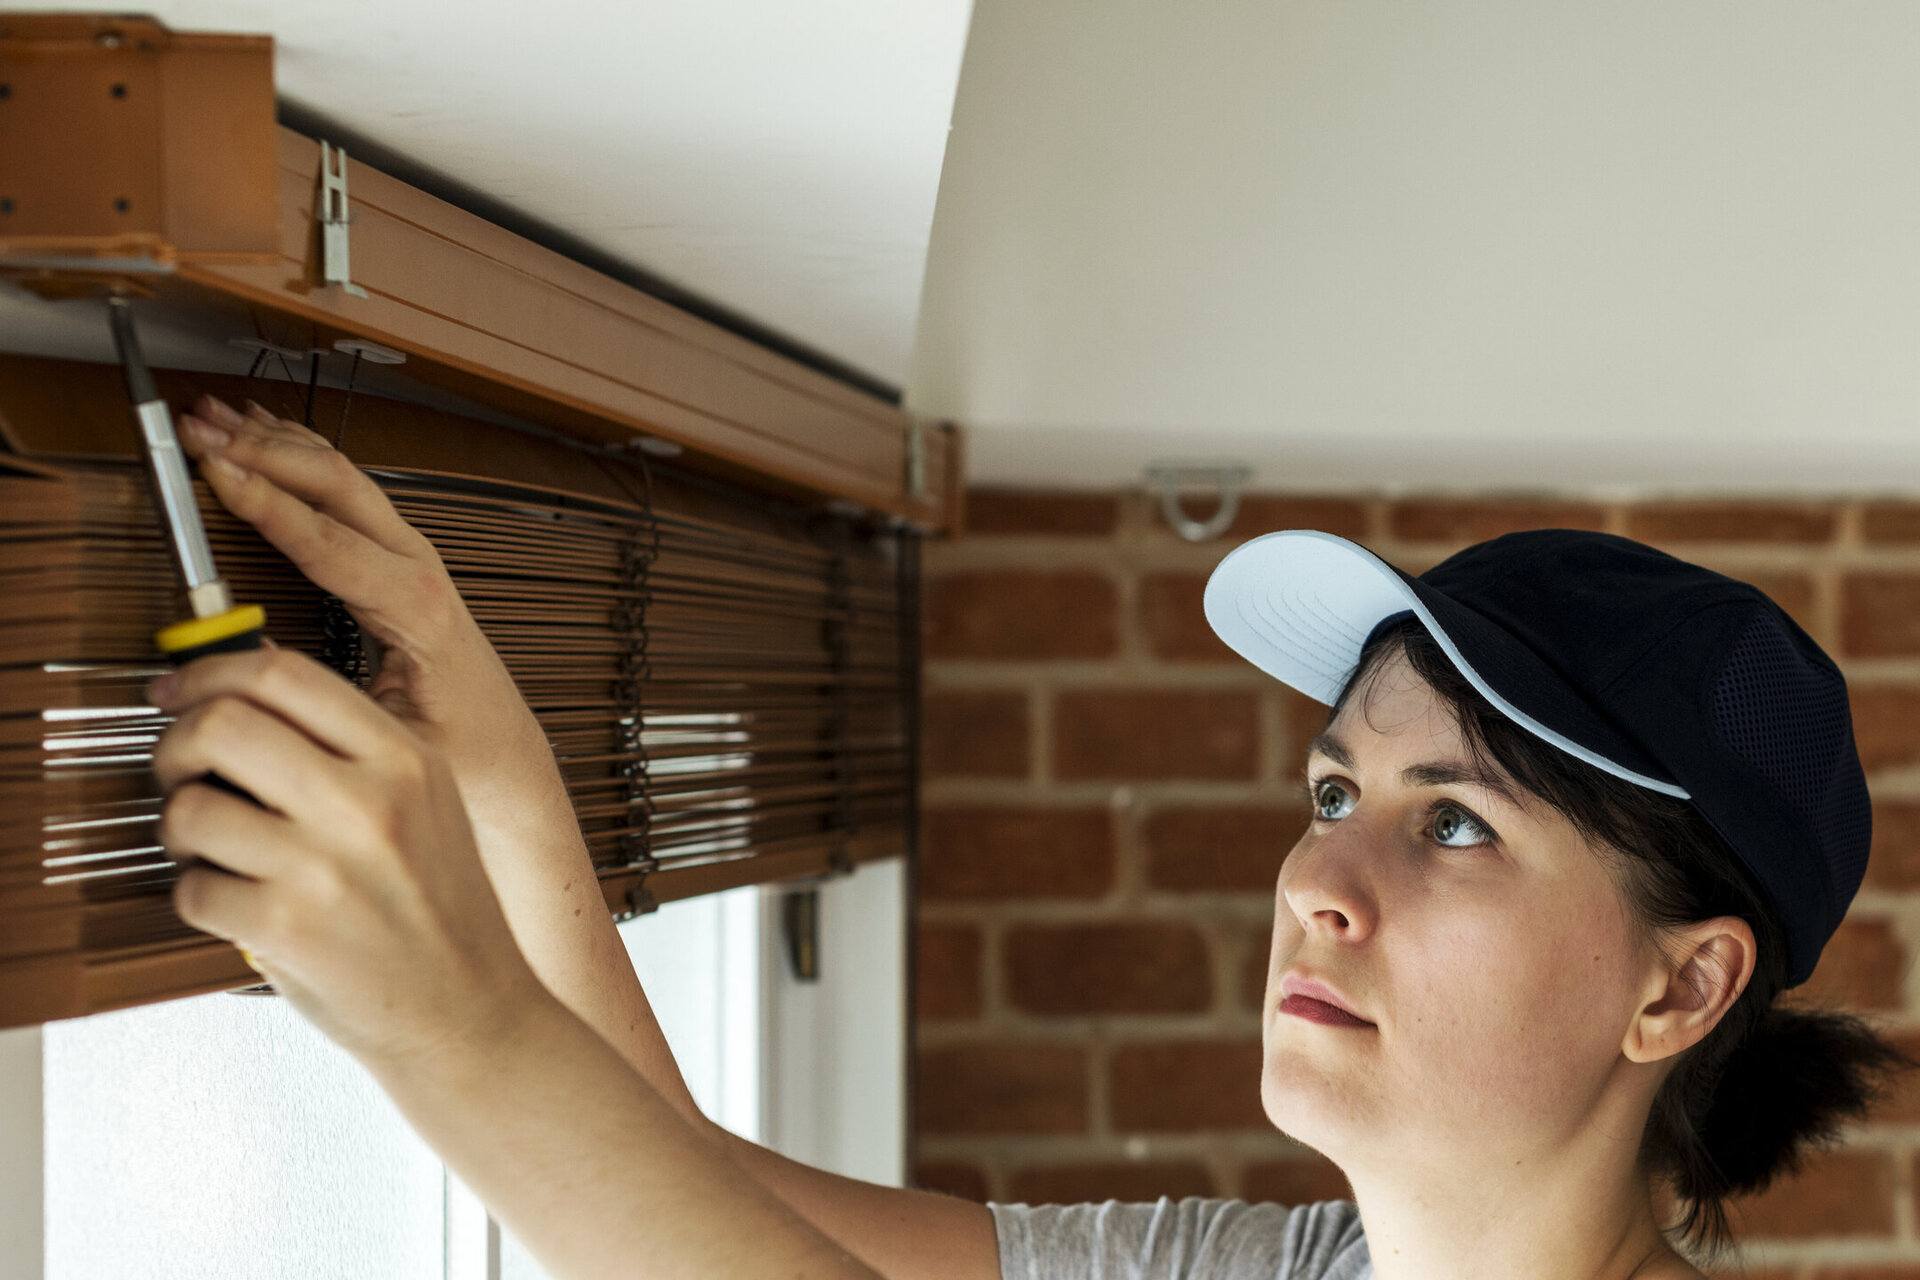
Horizontal blinds are a popular window treatment option due to their versatility and functionality. Over time, however, the strings that hold the slats in place may become worn out or break, causing the blinds to lose their functionality. Fortunately, restringing horizontal blinds is a relatively simple process that can be done at home with the right tools and a little patience.
In this article, we will guide you through the step-by-step process of restringing horizontal blinds. Whether you have just one or a whole set of blinds that need restringing, following these instructions will help you restore their functionality and extend their lifespan.
Before we get started, it’s important to gather the necessary supplies. This includes a screwdriver, scissors, replacement cords, cord lock, cord tilt mechanism, and a new tilt wand. Once you have these items handy, you can begin the restringing process.
Remember, safety should always be a priority. Make sure to disconnect the blinds from the window before beginning the restringing process to avoid any accidents or injuries.
Now, let’s move on to the first step: removing the old strings.
Key Takeaways:
- Restringing horizontal blinds is a DIY project that can extend the lifespan of your window treatments. With the right tools and patience, you can restore functionality and control over light and privacy in your space.
- Prioritize safety and take your time to ensure each step is completed accurately. Threading the new strings and adjusting the cord length are crucial for smooth and effective operation of your restringed horizontal blinds.
Read more: How To Restring Cellular Blinds
Supplies Needed
Before you begin restringing your horizontal blinds, it’s important to gather all the necessary supplies. Having everything you need readily available will ensure a smoother and more efficient process. Here are the supplies you will need:
- Screwdriver: You will need a screwdriver to remove any screws or brackets that are holding the blinds in place.
- Scissors: A good pair of scissors will be essential for cutting the new cords to the appropriate length.
- Replacement cords: You will need new cords to replace the old ones. Be sure to choose cords that are of the same thickness and material as the original ones for optimal performance.
- Cord lock: The cord lock holds the blinds in place once they are adjusted to the desired height. If your current cord lock is damaged or worn out, it’s a good idea to replace it during the restringing process.
- Cord tilt mechanism: The cord tilt mechanism allows you to adjust the angle of the slats. If your current mechanism is not functioning properly, it’s recommended to replace it with a new one.
- New tilt wand: The tilt wand is used to control the tilt mechanism. If your current tilt wand is damaged, you will need to replace it with a new one.
These supplies are readily available at most hardware stores or online retailers specializing in window treatment parts. Make sure to double-check the specifications of the cords, cord lock, and cord tilt mechanism to ensure they are compatible with your specific blinds.
Now that you have gathered all the necessary supplies, you can proceed to the next step: removing the old strings.
Step 1: Remove the Old Strings
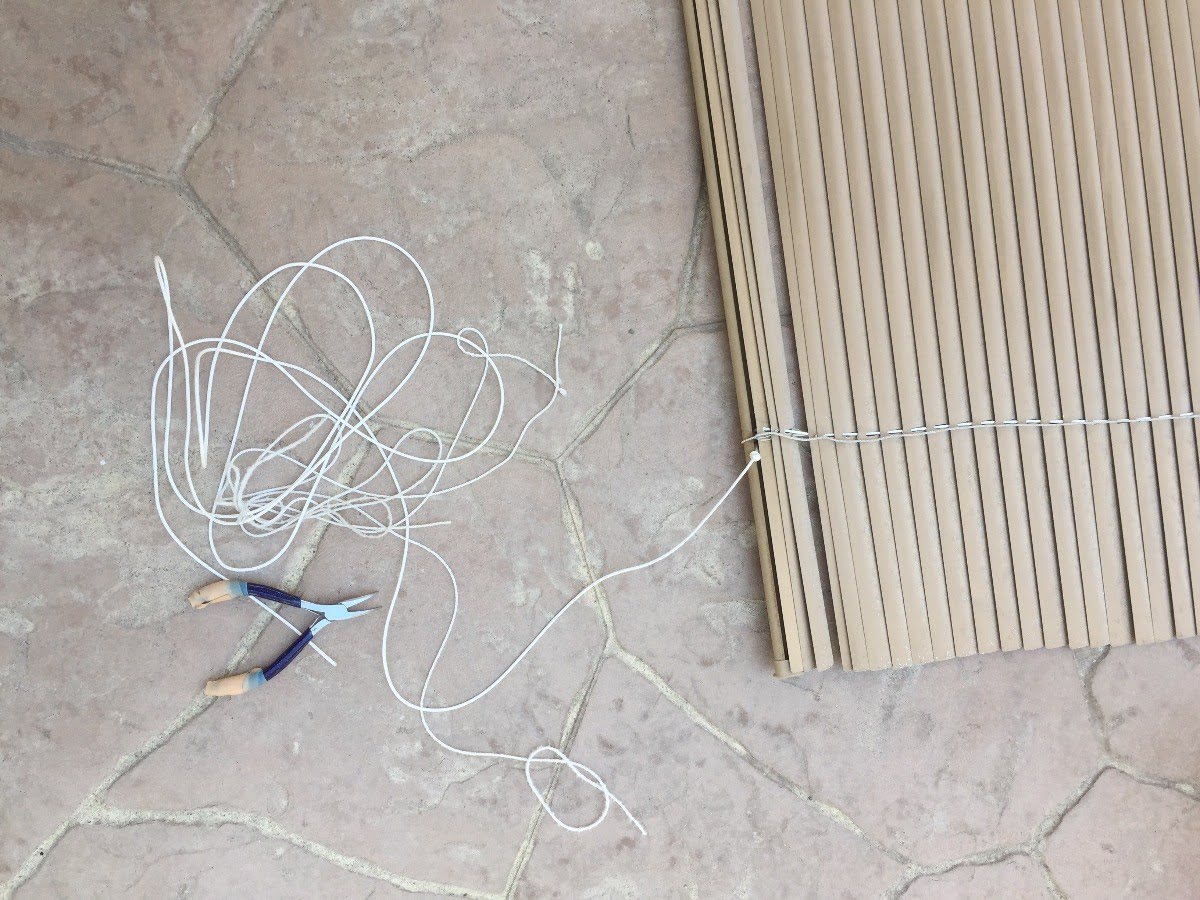
Before you can restring your horizontal blinds, you need to remove the old strings. This step is crucial because it allows you to start with a clean slate and ensures optimal performance for the new strings. Follow these steps to remove the old strings:
- Start by fully lowering the blinds to the bottom position.
- Use a screwdriver to remove any screws or brackets that are holding the bottom rail in place.
- Once the bottom rail is detached, carefully remove the slats one by one by unhooking them from the ladder strings or by sliding them out of the cloth tape.
- As you remove the slats, you will notice the ladder strings that run through the holes on each slat. These are the old strings that need to be replaced.
- Locate the knots that are holding the ladder strings in place. Untie these knots and remove the strings from the blinds.
- Repeat this process for all the ladder strings until all the old strings are completely removed.
Once you have removed all the old strings, you can move on to the next step: purchasing the correct new string for your horizontal blinds.
By removing the old strings carefully, you can avoid any damage to the slats or other components of your blinds. Take your time and ensure that all the old strings are completely detached before proceeding.
Step 2: Purchase the Correct New String
Once you have removed the old strings from your horizontal blinds, it’s time to purchase the correct new string for your restringing project. It’s important to choose the right type and size of string to ensure optimal performance and a seamless restringing process. Follow these steps to purchase the correct new string:
- Measure the length of the ladder strings that you removed from your blinds. This will give you an accurate measurement of how much new string you’ll need.
- Consider the material of the new string. Nylon and polyester are commonly used for horizontal blinds due to their durability and strength. Select a string that matches the material of the original strings for the best results.
- Check the thickness or diameter of the original strings. This information is usually printed on the packaging of the blinds or can be obtained by contacting the manufacturer. It’s crucial to choose a new string that has the same thickness as the old ones to ensure a proper fit.
- Visit your local hardware store or search online retailers specializing in window treatment parts. Provide them with the measurements and specifications you gathered to find the appropriate new string for your blinds.
- Alternatively, if you are unable to find the exact match for the new string, consider purchasing a restringing kit that includes various sizes and types of strings. This will allow you to find the best fit for your blinds.
By taking the time to purchase the correct new string for your horizontal blinds, you ensure a successful restringing process and the longevity of your blinds. Once you have obtained the new string, you can proceed to the next step: threading the new string through the blinds.
Step 3: Thread the New String
After purchasing the correct new string for your horizontal blinds, it’s time to thread the new string through the blinds. This step is crucial as it ensures that the blinds will function properly once they are reassembled. Follow these steps to thread the new string:
- Start by cutting the new string to the appropriate length. Measure the length of the ladder strings that you removed from the blinds and add a few extra inches to each side to allow for tying knots.
- Take one end of the new string and tie a small knot at one end. This will prevent the string from slipping through the holes in the slats.
- Begin threading the new string through the holes in the slats, starting from the bottom and working your way up. Ensure that the string goes through each hole in a zigzag pattern. This will keep the slats properly aligned and prevent them from becoming crooked.
- Continue threading the string through each slat until you have reached the top.
- Tie a small knot at the end of the string to secure it in place.
- Repeat this process for each ladder string, ensuring that all the new strings are threaded correctly.
As you thread the new string through the blinds, be careful not to pull too tightly as this can cause the slats to become misaligned. Take your time and ensure that the string is threaded smoothly through each hole.
Once you have successfully threaded the new string through the blinds, you can move on to the next step: attaching the new strings to the bottom rail.
Threading the new string may require some patience and precision, but it’s an essential step in the restringing process. Take your time and ensure that each string is threaded correctly for optimal performance.
Read also: 14 Superior Horizontal Blinds for 2025
Step 4: Attach the New Strings to the Bottom Rail
Now that you have threaded the new strings through the slats of your horizontal blinds, it’s time to attach them to the bottom rail. This step is important as it ensures that the new strings are securely connected to the blinds and will function properly once the blinds are reassembled. Follow these steps to attach the new strings to the bottom rail:
- Start by identifying the end of each string that is connected to the bottom slat of the blinds. This is usually the side of the string that is tied in a knot.
- Take one end of the string and insert it through the hole on the bottom rail that corresponds to its position in the ladder of the blinds.
- Using a pair of pliers, carefully crimp or clamp the cord end connector onto the end of the string that protrudes through the hole in the bottom rail. This will secure the string to the bottom rail.
- Repeat this process for each string, ensuring that each one is securely attached to the bottom rail.
Attaching the new strings to the bottom rail ensures that the blinds will function properly and maintain their position when adjusted. It’s important to take your time and ensure that each string is properly crimped or clamped onto the bottom rail.
Once you have successfully attached the new strings to the bottom rail, you can move on to the next step: reattaching the bottom rail to the blinds.
By correctly attaching the new strings to the bottom rail, you ensure the stability and functionality of your horizontal blinds. Take care to securely connect each string to the bottom rail for optimal performance.
When restringing horizontal blinds, make sure to measure the length of the old cord before cutting the new one. This will ensure the new cord is the correct length for your blinds.
Step 5: Reattach the Bottom Rail
Now that you have attached the new strings to the bottom rail of your horizontal blinds, it’s time to reattach the bottom rail to the blinds. This step is important as it secures the slats in place and ensures that the blinds will operate smoothly once reassembled. Follow these steps to reattach the bottom rail:
- Hold the bottom rail up to the ladder strings, ensuring that the strings are aligned with the holes on the bottom rail.
- Insert each ladder string through the corresponding hole on the bottom rail, starting from one end and working your way to the other.
- Once all the ladder strings are inserted through the bottom rail, make sure that the strings are evenly spaced and not tangled.
- Gently push the bottom rail up to the desired height, making sure that the strings are correctly positioned in the cord lock or cord tilt mechanism.
- If necessary, adjust the length of the strings by pulling them through the bottom rail until the blinds are at the desired height.
- Hold the bottom rail in place and secure it by reinserting any screws or brackets that were removed earlier.
Reattaching the bottom rail is a crucial step in the restringing process as it ensures the stability and functionality of your horizontal blinds. Take your time to align the ladder strings correctly and adjust the length of the strings if needed.
Once you have successfully reattached the bottom rail, you can move on to the next step: threading the new strings through the bottom rail.
By securely reattaching the bottom rail, you ensure that your horizontal blinds will operate smoothly and remain in the desired position. Take care to align the strings correctly and adjust the length as needed for optimal performance.
Step 6: Thread the New Strings through the Bottom Rail
After reattaching the bottom rail to your horizontal blinds, the next step is to thread the new strings through the bottom rail. This step is crucial as it enables the blinds to be raised and lowered smoothly and securely. Follow these steps to thread the new strings through the bottom rail:
- Start by locating the openings or slots on the bottom rail where the ladder strings will be threaded through.
- Take one end of a ladder string and insert it through the opening or slot on the bottom rail, starting from the back.
- Thread the ladder string through the opening or slot, ensuring that it comes out from the front side of the bottom rail.
- Repeat this process for each ladder string, threading them through their corresponding openings or slots on the bottom rail.
- Once all the ladder strings are threaded through the bottom rail, ensure that they are evenly spaced and not tangled.
- Ensure that the ladder strings are correctly positioned in the cord lock or cord tilt mechanism.
- If necessary, adjust the length of the ladder strings by pulling them through the bottom rail until the blinds are at the desired height.
Threading the new strings through the bottom rail is essential to ensure that your horizontal blinds operate smoothly and function properly. Take your time to thread the ladder strings through the corresponding openings or slots, ensuring that they are arranged neatly.
Once you have successfully threaded the new strings through the bottom rail, you can move on to the next step: replacing the tilt wand.
By accurately threading the new ladder strings through the bottom rail, you ensure the functionality and stability of your horizontal blinds. Take care to arrange the strings neatly and adjust their length if necessary for optimal performance.
Step 7: Replace the Tilt Wand
After threading the new strings through the bottom rail of your horizontal blinds, it’s time to replace the tilt wand. The tilt wand controls the angle of the slats, allowing you to adjust the amount of light and privacy in the room. Follow these steps to replace the tilt wand:
- Start by removing the old tilt wand from its holder. This is typically done by twisting it counterclockwise and sliding it out of the holder.
- Take the new tilt wand and align it with the holder, making sure that the gearing mechanism is in the correct position.
- Insert the new tilt wand into the holder and twist it clockwise to secure it in place.
- Test the new tilt wand by rotating it back and forth to ensure smooth operation.
Replacing the tilt wand is a simple step in the restringing process, but it plays a crucial role in controlling the slats of your horizontal blinds. Ensure that the new tilt wand is securely attached and that it operates smoothly without any resistance.
Once you have successfully replaced the tilt wand, you can move on to the next step: adjusting the cord length.
By correctly replacing the tilt wand, you ensure that you have full control over the angle of the slats, allowing you to enjoy the desired amount of light and privacy in your space. Take care to insert the new tilt wand securely and test its functionality before proceeding.
Read more: How To Restring A Ryobi Expand-It
Step 8: Adjust the Cord Length
After replacing the tilt wand on your horizontal blinds, the next step is to adjust the cord length. Properly adjusting the cord length is essential for the smooth operation and functionality of your blinds. Follow these steps to adjust the cord length:
- Start by raising the blinds to their full height.
- Look for the excess cord length hanging below the bottom rail.
- Decide on the desired length for the cords. It’s common to leave a few inches of excess cord for easier operation.
- Hold the cords together at the desired length and tie a knot to secure them.
- Carefully trim off any excess cord beyond the knot, ensuring not to cut the knot itself.
- Test the blinds by raising and lowering them to ensure that the cord length is adjusted effectively. The blinds should move smoothly and stay in the desired position.
Adjusting the cord length is important for both the appearance and functionality of your horizontal blinds. Ensuring that the cords are not excessively long minimizes the risk of tangling or getting caught on objects. It also allows for smoother and easier operation of your blinds.
Once you have successfully adjusted the cord length, you can move on to the final step: testing the restringing process.
By properly adjusting the cord length, you ensure that your horizontal blinds operate smoothly and remain in the desired position. Take care to trim any excess cord carefully and test the functionality of the blinds after adjustment.
Step 9: Test the Restringing
After completing the restringing process for your horizontal blinds, it’s important to thoroughly test their functionality to ensure that everything is working as it should. Testing the restringing allows you to identify any issues or adjustments that may need to be made before you use the blinds on a regular basis. Follow these steps to test the restringing:
- Start by lowering the blinds to their fully closed position.
- Safely disconnect the blinds from any supports or brackets to ensure they can move freely during testing.
- Attempt to raise and lower the blinds multiple times, checking for smooth and even movement.
- Observe the tilt wand and verify that it controls the angle of the slats effectively.
- Test the cord lock to ensure that it securely holds the blinds at different positions.
- Adjust the blinds to various heights and positions to ensure that the cords are properly tensioned and maintain their position.
- Check for any tangles or snags in the cords or slats as you operate the blinds.
- If you encounter any issues or irregularities, go back to the corresponding step in the restringing process and check for any mistakes or adjustments that need to be made.
Testing the restringing process is important as it allows you to confirm that the blinds are functioning properly and ready for regular use. Identifying any issues or irregularities during the testing phase ensures that you can address them promptly and avoid any future problems.
Once you have completed the testing phase and are satisfied with the functionality of your restringed horizontal blinds, you can consider the restringing process successfully completed!
By thoroughly testing the restringing, you ensure that your horizontal blinds operate smoothly and function as intended. Take the time to test all aspects of the blinds’ functionality, making any necessary adjustments along the way.
Conclusion
Congratulations! You have successfully restringed your horizontal blinds and restored their functionality. By following the step-by-step instructions outlined in this guide, you were able to remove the old strings, purchase the correct new string, thread the new strings through the blinds, attach them to the bottom rail, reattach the bottom rail, thread the strings through the bottom rail, replace the tilt wand, adjust the cord length, and test the restringing. Your blinds are now ready to be enjoyed for years to come.
Restringing horizontal blinds is a relatively simple process that can be done at home with the right tools and a little patience. Not only does restringing your blinds extend their lifespan, but it also allows you to maintain control over the amount of light and privacy in your space.
Throughout the restringing process, it’s important to prioritize safety. Always disconnect the blinds from the window before starting the restringing process, and handle any tools or sharp objects with caution.
Remember, if you encounter any difficulties or uncertainties during the restringing process, don’t hesitate to consult the manufacturer’s instructions or seek professional assistance. Ensuring that the restringing is done correctly will guarantee the optimal functionality and performance of your horizontal blinds.
Now that you have completed the restringing process, take a moment to appreciate your newly restored blinds. Sit back, relax, and enjoy the benefits of having properly functioning window treatments that enhance the look and feel of your space.
Thank you for using this guide, and we hope it has been helpful in your restringing journey. Happy blinds restringing!
Frequently Asked Questions about How To Restring Horizontal Blinds
Was this page helpful?
At Storables.com, we guarantee accurate and reliable information. Our content, validated by Expert Board Contributors, is crafted following stringent Editorial Policies. We're committed to providing you with well-researched, expert-backed insights for all your informational needs.