Home>Furniture>Outdoor Furniture>How To Restring A Cloth Hammock

Outdoor Furniture
How To Restring A Cloth Hammock
Modified: August 23, 2024
Learn how to restring a cloth hammock with our outdoor furniture guide. Restringing your hammock is easy and will have you relaxing outdoors in no time.
(Many of the links in this article redirect to a specific reviewed product. Your purchase of these products through affiliate links helps to generate commission for Storables.com, at no extra cost. Learn more)
Introduction
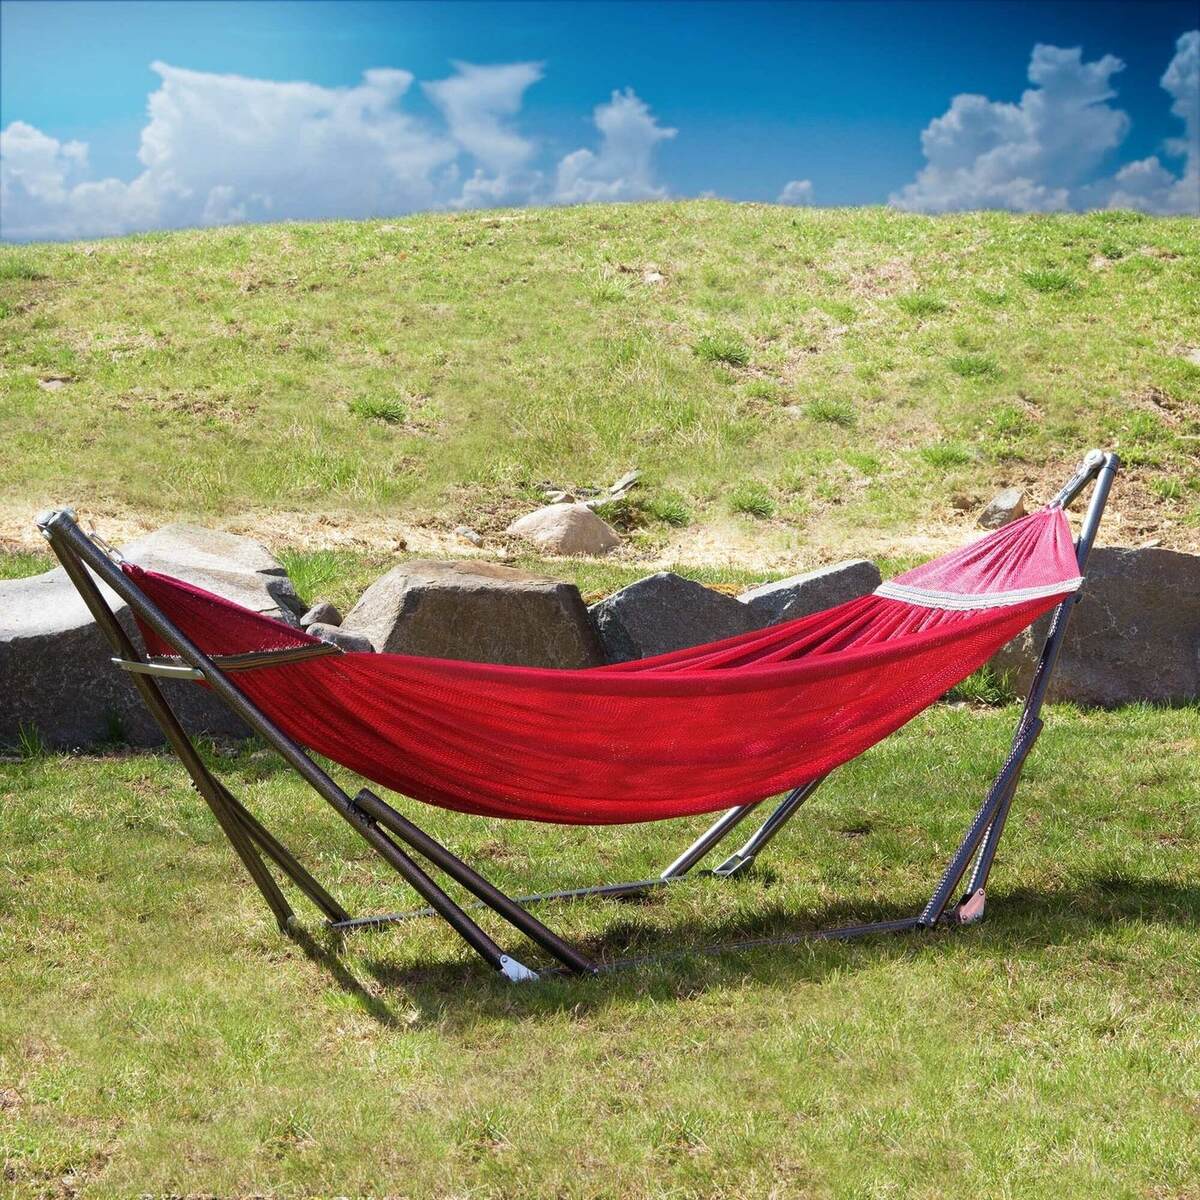
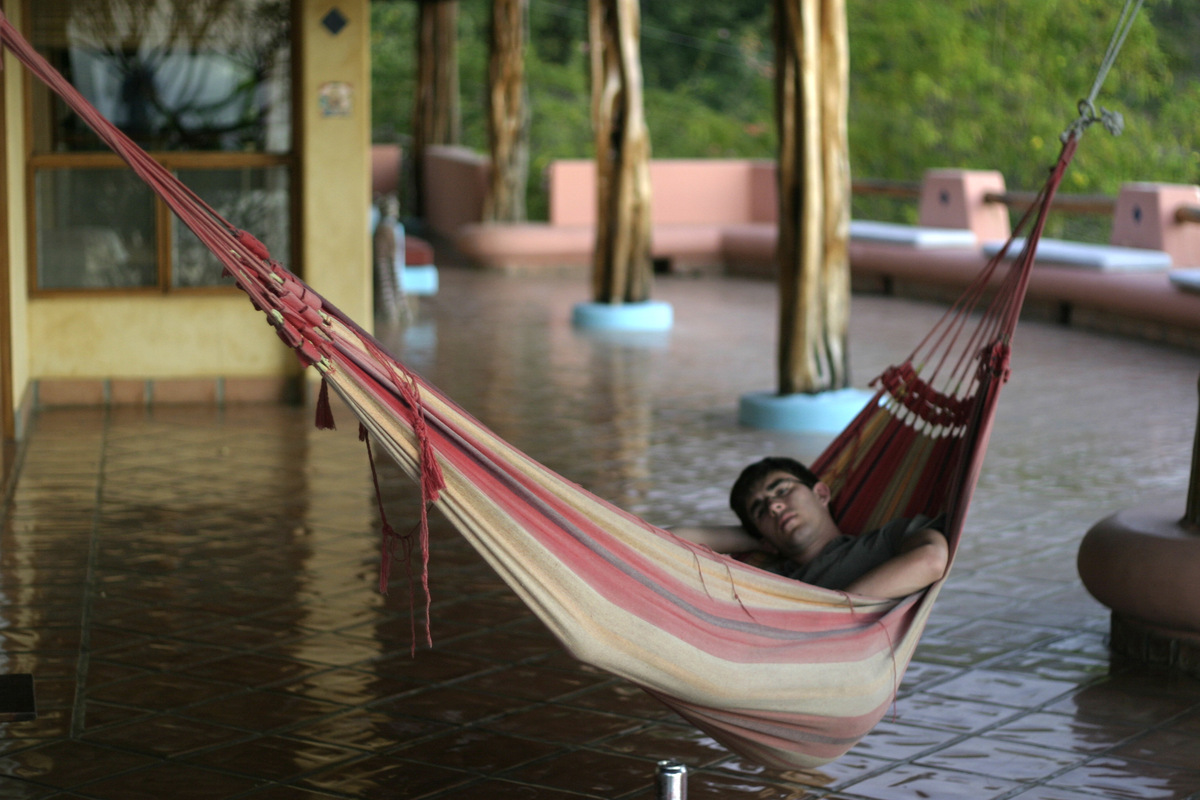
Welcome to our comprehensive guide on how to restring a cloth hammock. Whether you have an old hammock that needs some TLC or you simply want to replace the worn-out ropes, restringing a cloth hammock is a simple and rewarding task that can breathe new life into your outdoor relaxation space. Hammocks are beloved for their comfort and the feeling of being cradled as you sway gently in the breeze. However, over time, the ropes that support the hammock can become frayed, damaged, or weakened, making it necessary to restring them to ensure optimal safety and comfort.
In this guide, we will walk you through the step-by-step process of restringing a cloth hammock, including the materials you’ll need and the techniques to ensure a secure and durable restringing job. So gather your tools and let’s get started on giving your hammock a much-needed makeover!
Key Takeaways:
- Restringing a cloth hammock is a simple DIY project that can breathe new life into your outdoor relaxation space. With the right materials and step-by-step guidance, you can enjoy a secure and comfortable hammock for years to come.
- Choosing high-quality replacement rope and ensuring proper tension are key to a successful hammock restringing. Take your time, infuse your personal touch, and enjoy the blissful comfort of your newly revived outdoor oasis.
Read more: How To Restring A Ryobi Expand-It
Materials Needed
To restring a cloth hammock, you will need the following materials:
- A cloth hammock
- Replacement rope or cord
- Scissors or a utility knife
- Tape measure or ruler
- Lighter or matches
- Duct tape or electrical tape (optional)
When selecting the replacement rope or cord, it’s essential to choose a material that is strong, durable, and weather-resistant. Popular options include nylon, polyester, or polypropylene ropes. These materials are known for their strength and ability to withstand the elements, ensuring your restringed hammock will last for many seasons to come.
The scissors or utility knife will be used to cut the old ropes and trim the new ones to the desired length. A tape measure or ruler will come in handy to ensure you cut the ropes to the appropriate length for your hammock’s dimensions. Additionally, a lighter or matches will be used to melt the ends of the new ropes to prevent fraying.
Finally, while not necessary, duct tape or electrical tape can be useful for securing the cut ends of the ropes and providing extra reinforcement. This step is optional and depends on personal preference.
With these materials at hand, you’re ready to embark on the journey of restringing your cloth hammock. Let’s move on to the step-by-step instructions!
Step 1: Remove the Old Rope
The first step in restringing a cloth hammock is to remove the old, worn-out rope. This process can be done by following these simple steps:
- Lay the hammock flat on a clean and spacious surface. This will provide you with enough room to work comfortably.
- Locate the knots or attachments that secure the old rope to the hammock’s rings or loops. Depending on the design of your hammock, there may be a series of knots or attachments along the length of the hammock.
- Using a pair of scissors or a utility knife, carefully cut and remove the old rope from each knot or attachment point. Take your time to avoid damaging the fabric of the hammock.
- Once all the old rope has been removed, inspect the hammock for any remaining fragments or frayed ends. It’s essential to clear away any leftover debris to ensure a clean and smooth restringing process.
By removing the old rope, you’re clearing the way for the installation of fresh, sturdy ropes that will support your weight securely. This step also gives you the opportunity to inspect the hammock fabric for any signs of wear or damage and make any necessary repairs before proceeding.
Now that the old rope has been removed, it’s time to move on to the next step: preparing the new rope for installation. Let’s continue our restringing journey!
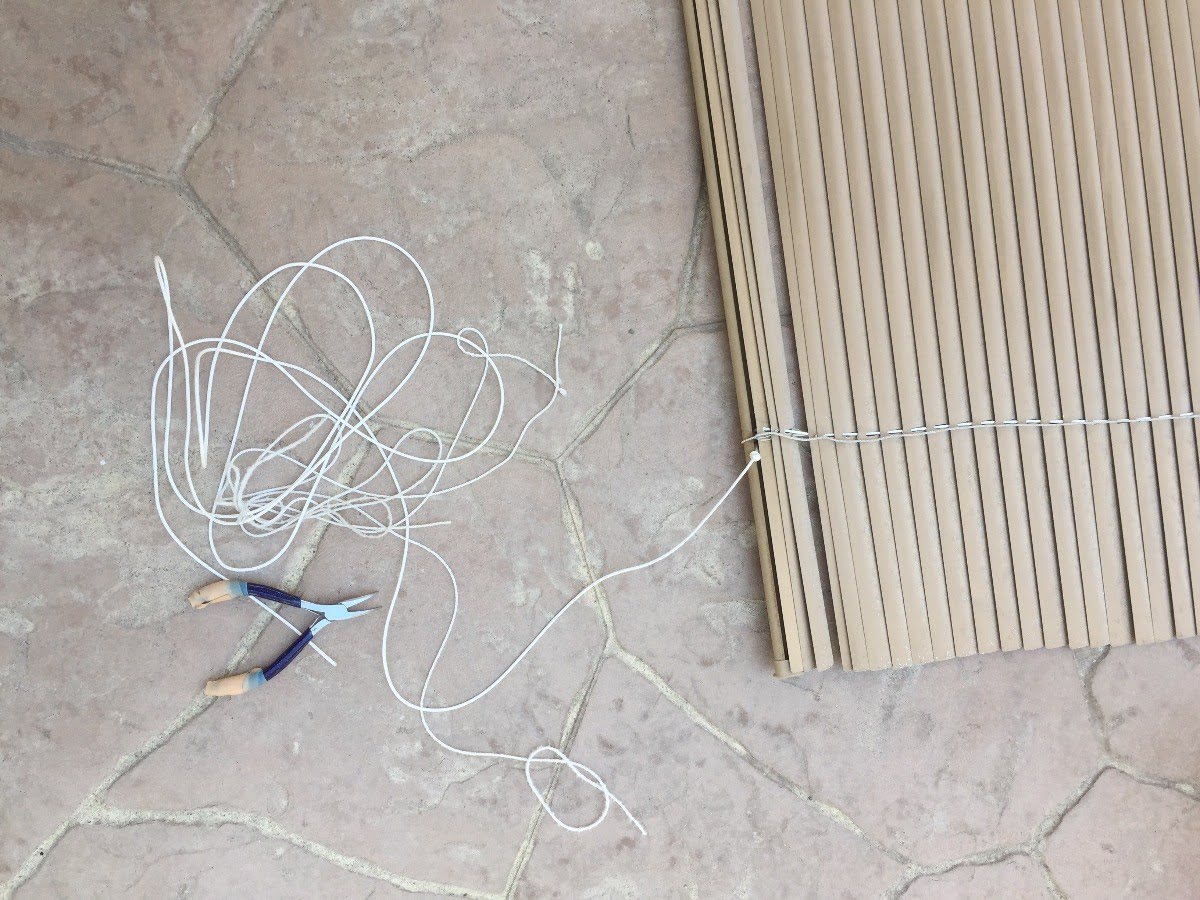
Step 2: Prepare the New Rope
Now that you have removed the old rope from your cloth hammock, it’s time to prepare the new rope for installation. Follow these steps to ensure the new rope is ready for restringing:
- Measure the length of the old rope that you removed from the hammock. This will give you an idea of the amount of new rope you will need. Add a few extra inches to account for any adjustments or modifications.
- Using a tape measure or ruler, mark the desired length on the new rope. Ensure your markings are accurate and even to maintain balance and proper tension once the hammock is restrung.
- Once you have marked the desired length, use a pair of sharp scissors or a utility knife to cut the rope at the marked point. Take care to cut straight and avoid fraying the ends.
- To prevent the ends of the new rope from fraying over time, use a lighter or matches to carefully melt the cut ends. Hold the flame near the end of the rope until the fibers slightly melt and fuse together. Be cautious of the flame and do this in a well-ventilated area.
- If desired, you can wrap the melted ends with duct tape or electrical tape for additional reinforcement. This step is optional but can help prevent fraying and prolong the lifespan of the rope.
By preparing the new rope before installation, you are ensuring that it is the correct length and that the ends are properly sealed to prevent fraying. Taking these precautions will result in a more secure and durable restringing job.
Now that the new rope is prepared, we can move on to the exciting part: threading the rope through the hammock rings or loops! Let’s proceed to the next step.
Step 3: Thread the Rope through the Hammock Rings
Now that you have prepared the new rope, it’s time to proceed with threading it through the hammock rings or loops. Follow these steps to ensure a smooth and secure installation:
- Begin by finding one end of the new rope. This will be the starting point for threading.
- Locate the first hammock ring or loop. Insert the end of the rope through the ring from the backside towards the front, pulling it all the way through until a small loop is formed.
- Take the other end of the rope and pass it through the loop created in the previous step. This will create a slipknot around the ring or loop.
- Pull the slipknot tight, ensuring that the rope is securely held in place by the ring or loop. Check that the tension is comfortable but not too loose or too tight. Adjust if necessary.
- Continue this process of threading the rope through each hammock ring or loop, one at a time, until you reach the opposite end.
By threading the rope through the hammock rings or loops, you are ensuring that it is properly secured and able to support the weight and tension of the hammock. Take your time during this step to ensure accuracy and avoid any twists or tangles in the rope.
Now that you have threaded the rope through the hammock rings, it’s time to move on to the next step: securing the rope with knots. Let’s continue with the restringing process!
When restringing a cloth hammock, make sure to use strong and durable rope or cord that can support the weight of the hammock and its occupants. Double check the knots and connections to ensure they are secure before use.
Read more: How To Restring Cellular Blinds
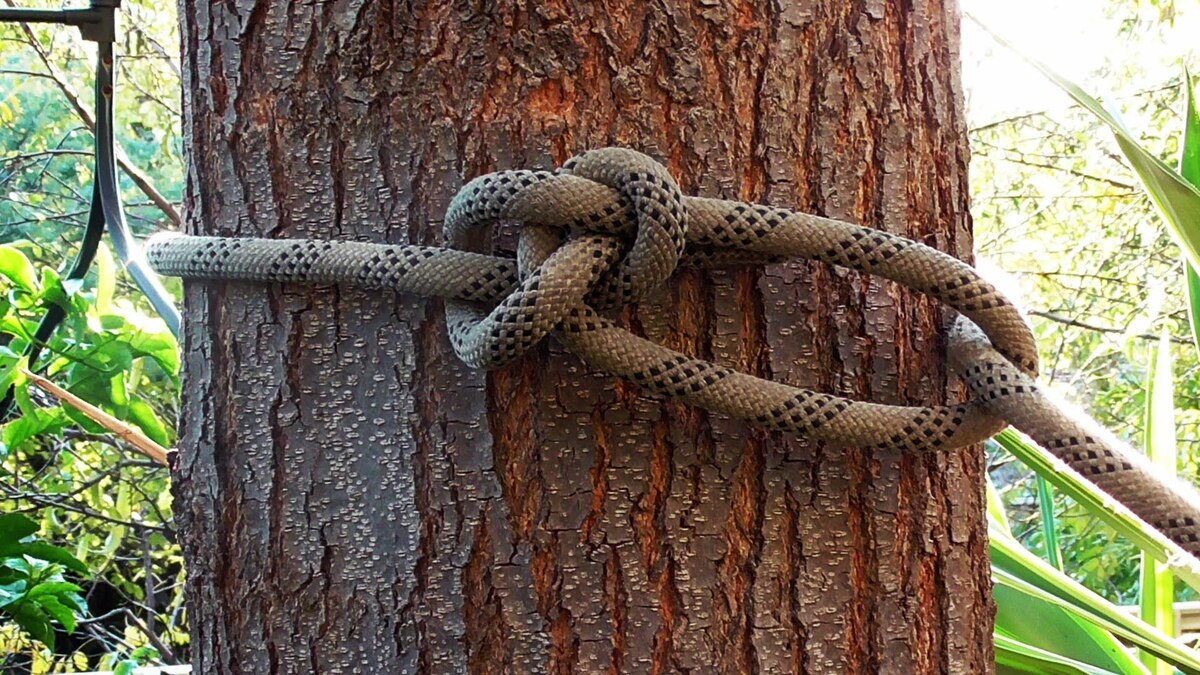
Step 4: Secure the Rope with Knots
Now that you have threaded the new rope through the hammock rings or loops, it’s time to secure the rope with knots to ensure stability and strength. Follow these steps to properly secure the rope:
- Starting at one end of the hammock, separate the two lengths of rope that are coming out of the last ring or loop.
- Create a loop by bringing one length of the rope over the other, forming a “U” shape. Leave a small tail of rope at the bottom of the loop.
- Take the tail of the rope and wrap it around the two lengths of rope, going through the loop and coming out the other side.
- Pull the tail of the rope firmly to tighten the knot. Ensure that the loop remains intact and that the knot is secure.
- Repeat this knotting process at regular intervals along the length of the hammock. The exact spacing will depend on the dimensions and design of your hammock, but a general guideline is to have a knot every 12 to 18 inches.
- Once you reach the other end of the hammock, securely tie a final knot to prevent any unraveling or loosening of the rope.
By securing the rope with knots, you are ensuring that the hammock remains stable and safe during use. The knots provide added reinforcement and prevent the rope from slipping or becoming loose over time.
With the rope now securely knotted, we can proceed to the next step: repeating the process for the other side of the hammock. Let’s continue with the restringing process!
Step 5: Repeat the Process for the Other Side
Now that you have secured the rope with knots on one side of the hammock, it’s time to repeat the process for the other side. Follow these steps to ensure both sides are properly restrung:
- Starting at the opposite end of the hammock, separate the two lengths of rope that are coming out of the last ring or loop.
- Repeat the knotting process described in Step 4, creating loops and securely wrapping the rope around the two lengths.
- Continue this knotting process at regular intervals along the length of the hammock, mirroring the knots created on the other side.
- Once you reach the other end of the hammock, securely tie a final knot to prevent any unraveling or loosening of the rope.
By repeating the process for the other side, you are ensuring that the hammock is balanced and evenly supported. This step is crucial for maintaining stability and proper weight distribution while using the hammock.
Now that both sides of the hammock are properly restrung, let’s move on to the next step: checking for proper tension.
Step 6: Check for Proper Tension
After restringing both sides of the hammock, it’s important to check for proper tension to ensure your hammock is comfortable and safe to use. Follow these steps to assess the tension of the ropes:
- Stand back and visually inspect the hammock. The ropes should hang evenly, with no noticeable sagging or excessive tightness.
- Sit or lie down in the hammock and test the tension with your body weight. The hammock should provide a comfortable and supportive cradle without feeling too taut or loose.
- If the tension feels too loose, you can adjust it by untying and retying the knots, or by adding an extra knot in the desired location to increase the tension.
- If the tension feels too tight, you can loosen it by untwisting the rope at the knots or by retying the knots closer to the rings or loops.
The ideal tension for a cloth hammock is subjective and can vary based on personal preference and the specific design of your hammock. The goal is to achieve a balance between comfort and stability.
Once you are satisfied with the tension of the ropes, congratulations! You have successfully restringed your cloth hammock. It’s now ready for you to enjoy those moments of relaxation and tranquility.
Before we conclude, here’s a quick recap of the steps involved in restringing a cloth hammock:
- Remove the old rope.
- Prepare the new rope.
- Thread the rope through the hammock rings.
- Secure the rope with knots.
- Repeat the process for the other side.
- Check for proper tension.
By following these steps, you can maintain the longevity and comfort of your cloth hammock for years to come.
Enjoy your newly restringed hammock and embrace the joy of lounging in the great outdoors!
Conclusion
Restringing a cloth hammock is a rewarding and straightforward task that can breathe new life into your outdoor relaxation space. By following the step-by-step process outlined in this guide, you can ensure that your hammock is secure, comfortable, and ready to provide hours of peaceful serenity.
We began by introducing the importance of restringing a cloth hammock and the materials needed for the job. We then walked you through each step, from removing the old rope and preparing the new rope, to threading it through the hammock rings and securing it with knots. Lastly, we discussed the importance of checking for proper tension to ensure a comfortable and safe experience.
Throughout the process, it’s crucial to balance functionality with creativity. By infusing your restringing project with your own personal touch, you can create a unique outdoor oasis that reflects your style and personality.
Remember to choose high-quality replacement rope that is durable and weather-resistant. Take your time to make accurate measurements and ensure secure knots. Checking for proper tension and making adjustments as needed will help you achieve the perfect balance of comfort and stability.
Now that you have completed the restringing process, it’s time to sit back, relax, and enjoy the blissful comfort of your newly revived cloth hammock. Soak in the gentle sway, breathe in the fresh air, and let your body and mind unwind as you indulge in moments of tranquility.
With proper maintenance and care, your restringed hammock will continue to be a cherished outdoor furniture piece that provides years of relaxation and rejuvenation. So, go ahead and invite friends and family to share in the joy of hammock lounging, or simply take some quiet time for yourself to unwind and recharge.
Thank you for joining us on this restringing journey. Happy hammock lounging!
Frequently Asked Questions about How To Restring A Cloth Hammock
Was this page helpful?
At Storables.com, we guarantee accurate and reliable information. Our content, validated by Expert Board Contributors, is crafted following stringent Editorial Policies. We're committed to providing you with well-researched, expert-backed insights for all your informational needs.


0 thoughts on “How To Restring A Cloth Hammock”