Articles
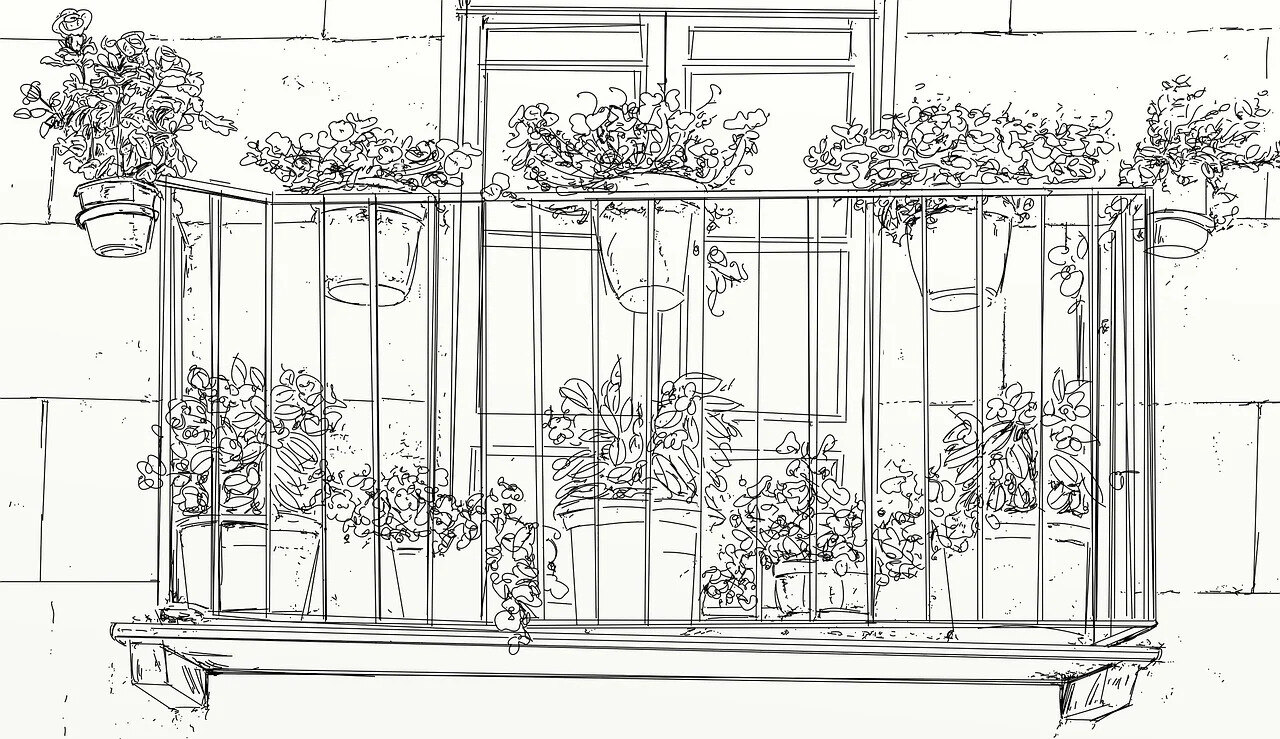
How To Screen In An Apartment Balcony
Modified: August 17, 2024
Learn how to screen in an apartment balcony with our informative articles. Create a comfortable and private outdoor space in just a few simple steps.
(Many of the links in this article redirect to a specific reviewed product. Your purchase of these products through affiliate links helps to generate commission for Storables.com, at no extra cost. Learn more)
Introduction
Welcome to this comprehensive guide on how to screen in an apartment balcony. If you’re looking to create a comfortable and bug-free outdoor space, screening in your balcony is a fantastic solution. Whether you want to enjoy a morning cup of coffee, host small gatherings, or simply relax outdoors, a screened-in balcony provides the perfect setting.
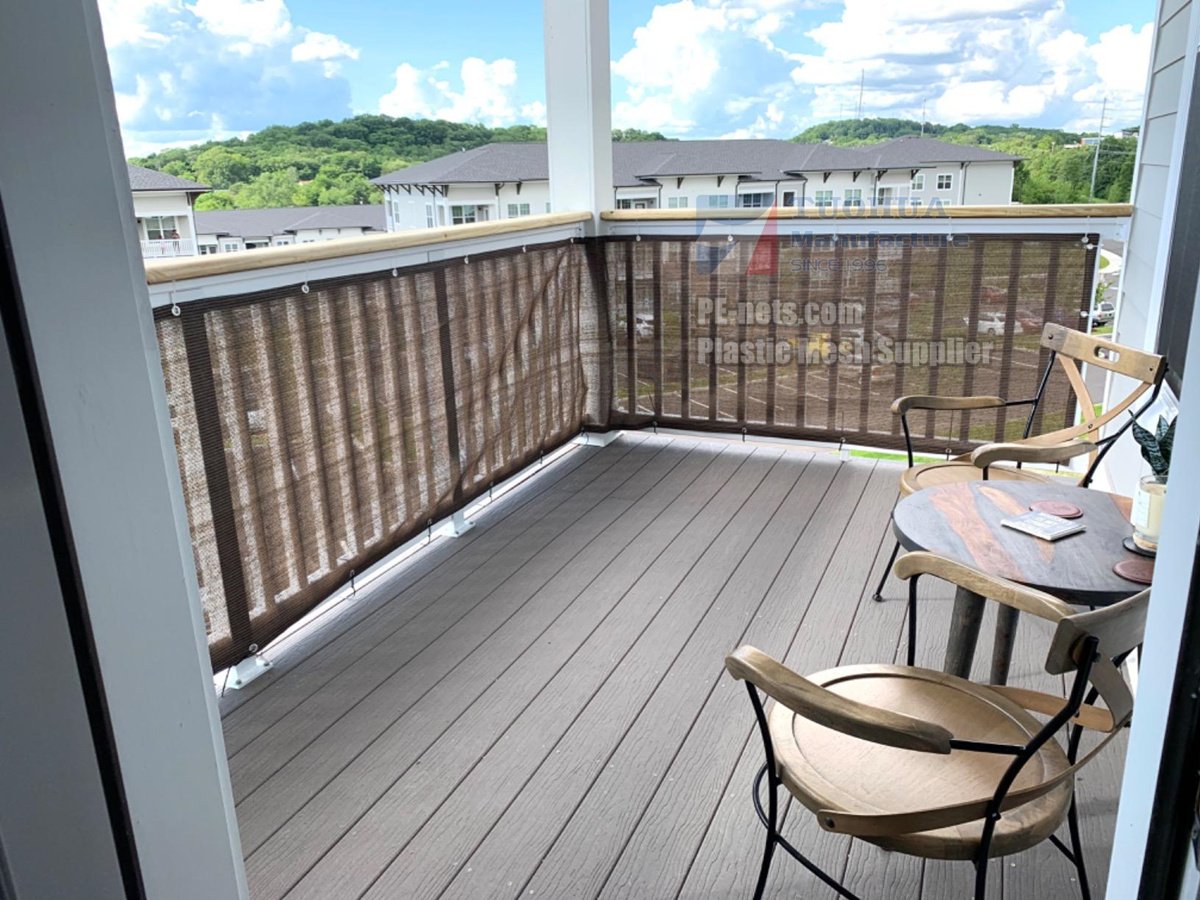
Screening in an apartment balcony offers several benefits, making it an appealing option for many residents. First and foremost, it helps to keep pesky insects, such as mosquitoes and flies, at bay. This means you can enjoy the fresh air and outdoor views without the annoyance of constant buzzing or bites. Additionally, a screened-in balcony provides an extra layer of privacy, allowing you to relax and unwind without worrying about prying eyes from neighboring buildings. It can also help to reduce noise pollution, creating a serene oasis in the midst of a bustling city.
Another advantage of screening in your balcony is that it extends your living space. Apartments often have limited square footage, and a screened-in balcony can effectively create an additional outdoor room. This provides you with more options for entertaining guests or simply enjoying some alone time in a peaceful setting.
Choosing the right screening material is crucial to ensure the durability and effectiveness of your balcony screen. There are various options available, including fiberglass, aluminum, and pet-resistant screens. Consider factors such as your climate, the level of privacy desired, and the presence of pets or children when selecting the most suitable material.
Before embarking on the project, it is essential to gather all the necessary tools and materials. This includes a tape measure, screen frame kit, screen material, screws, a screwdriver, and a utility knife. Having everything readily available will streamline the installation process and prevent any unnecessary delays.
In the following sections, we will guide you through the step-by-step process of measuring and preparing your balcony area, installing the screen frame, attaching the screen material, and adding finishing touches. Additionally, we will address some additional considerations to help you make the most of your screened-in balcony.
Now that you understand the benefits and have an overview of the process, let’s dive into the details of how to effectively screen in an apartment balcony. Get ready to transform your outdoor space into a cozy, insect-free retreat!
Key Takeaways:
- Create a bug-free oasis: Screening in your apartment balcony offers protection from insects, privacy, and extended living space, providing a cozy retreat for relaxation and entertainment.
- Transform your outdoor space: By choosing the right screening material, gathering necessary tools, and following step-by-step installation, you can create a comfortable, insect-free balcony sanctuary for year-round enjoyment.
Read more: How To Clean Apartment Balcony
Benefits of Screening in an Apartment Balcony
Screening in your apartment balcony provides numerous benefits that enhance your outdoor living experience. Let’s explore some of the key advantages:
- Protection from insects: One of the primary reasons to screen in your balcony is to keep annoying insects at bay. Mosquitoes, flies, and other pests can quickly ruin a peaceful outdoor retreat. By installing screens, you create a barrier that prevents these pests from entering your space, allowing you to enjoy the fresh air without the hassle of bug bites or constant buzzing.
- Privacy: Apartments often lack the privacy that comes with a traditional backyard. Screening in your balcony creates an enclosed area that shields you from prying eyes. It helps to create a sense of seclusion, allowing you to relax and enjoy your outdoor space without feeling exposed to neighbors or passersby.
- Noise reduction: Urban living can come with a lot of noise. By screening in your balcony, you can create a buffer that helps to reduce noise pollution from the surrounding area. Whether it’s the sounds of traffic, construction, or rowdy neighbors, a screened-in balcony offers a quieter and more serene environment.
- Extended living space: Apartments often have limited square footage, and a balcony can provide valuable additional space. By screening it in, you effectively create an outdoor room that can be utilized for various purposes. Whether you want to set up a cozy reading nook, a mini garden, or a place to entertain guests, a screened-in balcony expands your living area and offers versatile options.
- Enhanced comfort: A balcony screen also provides added comfort. It acts as a shield against strong winds, dust, and debris, allowing you to enjoy your outdoor space even on breezy days. Additionally, screens can help to reduce direct sunlight, providing shade and making your balcony more comfortable during hot summer months.
By screening in your apartment balcony, you create a private, insect-free oasis that extends your living space and enhances your overall quality of life. It offers the convenience of outdoor living without the drawbacks associated with living in close proximity to neighbors. Whether you’re looking for a quiet retreat or a space to entertain, screening in your balcony is a practical and worthwhile investment.
Choosing the Right Screening Material
When it comes to screening in your apartment balcony, selecting the right screening material is crucial for both durability and functionality. There are various options available, each with its own advantages and considerations. Here are some popular screening materials to consider:
- Fiberglass Screens: Fiberglass screens are a popular choice due to their affordability and versatility. They are lightweight, easy to install, and resistant to corrosion, making them suitable for various weather conditions. Fiberglass screens also offer good visibility and airflow while effectively keeping out insects. However, they are prone to damage from pets or sharp objects, so they may not be the best option if you have active pets or young children.
- Aluminum Screens: Aluminum screens offer excellent durability and strength. They are resistant to rust and can withstand harsh weather conditions without losing their shape or structural integrity. Aluminum screens also provide good visibility and airflow. However, they are more expensive than fiberglass screens and may dent if subjected to heavy impact.
- Pet-Resistant Screens: If you have pets that are prone to scratching or damaging screens, consider pet-resistant screens. These screens are typically made from vinyl-coated polyester or other sturdy materials that can withstand pet-related wear and tear. They are more durable than standard screens and offer the same protection against insects while ensuring your pets can’t damage them easily.
- Solar Screens: If you live in a hot climate or your balcony gets direct sunlight for a significant part of the day, solar screens can be a great choice. These screens are designed to block a portion of the sun’s rays, reducing heat and glare while still allowing for good airflow and visibility. Solar screens can help to keep your balcony cooler and more comfortable during hot summer months.
When choosing a screening material, consider factors such as your climate, the level of privacy desired, and the presence of pets or children. It’s also important to ensure that the screening material matches the existing aesthetics of your balcony and complements your overall design scheme.
Before making a final decision, it’s advisable to consult with a professional or visit a local home improvement store to see and feel the different screening materials firsthand. They can provide expert advice based on your specific needs and help you choose the best option for your apartment balcony.
By selecting the right screening material, you can ensure that your balcony screen is not only functional and durable but also aesthetically pleasing. This will allow you to enjoy your screened-in balcony to the fullest and make the most of your outdoor living space.
Gathering the Necessary Tools and Materials
Before you embark on the project of screening in your apartment balcony, it’s essential to gather all the necessary tools and materials. Having everything you need readily available will make the installation process smoother and more efficient. Here are the key items you will need:
- Tape Measure: A tape measure is essential for accurately measuring the dimensions of your balcony. This will ensure that you purchase the correct size of screen frame kit and screen material.
- Screen Frame Kit: A screen frame kit typically includes aluminum frame pieces, corner connectors, and spline (the rubber material that secures the screen to the frame). Choose a kit that matches the measurements of your balcony and the screen material you have selected.
- Screen Material: The screen material is what will keep insects out while allowing airflow and visibility. Choose a material that suits your needs, such as fiberglass, aluminum, or pet-resistant screen material.
- Screws: Depending on the specific screen frame kit you choose, you may need screws to attach the frame to your balcony structure. Check the instructions provided with the kit to determine the appropriate screws required.
- Screwdriver: A screwdriver will be required to drive the screws into place. Ensure you have the appropriate size and type of screwdriver for the screws you are using.
- Utility Knife: A utility knife will come in handy for cutting the screen material to the correct size. Ensure the blade is sharp for clean and precise cuts.
- Mallet or Rubber Mallet: A mallet or rubber mallet can be used to secure the spline and screen material into the frame, ensuring a snug and secure fit.
- Safety Equipment: Don’t forget to prioritize safety. Depending on the specific tools and materials you will be using, consider wearing safety goggles, gloves, and a dust mask to protect yourself from any potential hazards.
It’s recommended to gather all the tools and materials before starting the project. This will save you time and frustration by ensuring that you have everything you need within reach. It’s also a good idea to have extra screen material and spline on hand in case of any mistakes or mishaps during the installation process.
By being well-prepared with the necessary tools and materials, you can smoothly proceed to the next steps of measuring and preparing your balcony area for screening. It’s time to transform your balcony into a comfortable and bug-free outdoor space!
Measuring and Preparing the Balcony Area
Before you begin installing the screen frame and material, it’s crucial to properly measure and prepare your apartment balcony. This step ensures that the screen fits securely and functions effectively. Here are the steps to follow:
- Measure the dimensions: Use a tape measure to measure the width and height of your balcony opening. Take accurate measurements from the inside of the frame or the opening where the screen will be installed. Note down these measurements as they will be required when selecting the appropriate screen frame kit.
- Clear the area: Remove any furniture, plants, or other items from the balcony that could obstruct the installation process. Clearing the area will give you ample space to work and prevent any damage to your belongings during the installation process.
- Clean the balcony: Thoroughly clean the balcony area, including the door or window frame where the screen will be attached. Remove any dirt, dust, or debris that may interfere with the installation or affect the adhesion of the screen frame.
- Inspect the balcony structure: Take a close look at the condition of your balcony structure. Ensure that it is sturdy and in good condition. Check for any loose or damaged parts that may need to be repaired before proceeding with the installation of the screen frame. It’s important to have a solid foundation for attaching the frame.
- Consider any additional features: If you have other elements on your balcony, such as a railing or awning, take them into consideration when measuring and installing the screen. You may need to modify the screen frame or make adjustments to accommodate these features.
- Take note of any electrical outlets or fixtures: If there are any electrical outlets, light fixtures, or other fixtures on the balcony walls or ceiling, make sure to consider them when measuring and installing the screen. You may need to cut openings in the screen material or make adjustments to ensure these fixtures remain accessible.
By accurately measuring and preparing your balcony area, you lay the foundation for a successful installation of the screen frame and material. Taking the time to clean and inspect the area will ensure that the screen fits properly and functions optimally, providing a comfortable and bug-free outdoor space.
Now that the balcony is ready, let’s move on to the next steps of installing the screen frame and attaching the screen material. Get ready to bring your screened-in balcony vision to life!
When screening in an apartment balcony, make sure to check with your landlord or building management for any restrictions or guidelines before starting the project.
Read more: How To Soundproof A Balcony
Installing the Screen Frame
Now that you have measured and prepared your apartment balcony, it’s time to install the screen frame. The screen frame provides the structure and support for the screen material, ensuring a secure and functional screening solution. Here’s a step-by-step guide to installing the screen frame:
- Assemble the frame kit: Follow the instructions provided with the screen frame kit to assemble the frame pieces. Typically, the kit will include aluminum frame pieces and corner connectors. Connect the pieces together according to the specific design and dimensions of your balcony opening.
- Place the frame in position: Position the assembled frame in the opening of your balcony, ensuring that it fits securely and aligns properly with the surrounding structure. Use a level to confirm that the frame is straight and level. Make any necessary adjustments before proceeding.
- Secure the frame: Once the frame is in the correct position, use screws and a screwdriver to secure it to the balcony structure. Depending on the specific frame kit, you may need to attach the frame using screws provided or other recommended fasteners. Be sure to follow the manufacturer’s guidelines for securing the frame.
- Check for stability: After securing the frame, test its stability by gently pushing and pulling on it. Ensure that it is firmly attached to the balcony structure and does not move or wobble. If necessary, tighten the screws or make any additional adjustments to achieve a stable and secure frame.
- Apply weather stripping: To further enhance the seal and prevent drafts, consider applying weather stripping around the perimeter of the frame. This will help to create a tight seal between the frame and the balcony opening, keeping insects and outside elements from entering.
- Inspect and make final adjustments: Take a final look at the installed screen frame to ensure that it is level, secure, and properly aligned. Make any necessary adjustments or tighten any loose screws before moving on to the next step of attaching the screen material.
By following these steps, you can successfully install the screen frame and lay the foundation for a functional screened-in balcony. Take your time during the installation process and ensure that the frame is securely attached and aligned properly. A solid and stable frame is essential for a successful screen installation.
Now that the screen frame is in place, it’s time to move on to the next step of attaching the screen material. Get ready to see your screened-in balcony come to life!
Attaching the Screen Material
With the screen frame securely installed, it’s time to move on to the next step: attaching the screen material. Properly attaching the screen material ensures that your balcony is effectively protected from insects while still allowing airflow and visibility. Here’s a step-by-step guide to attaching the screen material:
- Measure and cut the screen material: Measure the dimensions of the screen frame and cut the screen material to fit. Use a tape measure and a sharp utility knife for precise measurements and clean cuts. Ensure that the screen material has a slight overlap on all sides to securely attach it to the frame.
- Secure one corner of the screen material: Begin by attaching one corner of the screen material to the frame. Start with the top left or top right corner and secure it using the corner connector or spline channel provided in the screen frame kit. Insert the screen material into the channel or use spline and a mallet to hold it in place. Be sure to pull the screen material taut as you secure it to avoid sagging.
- Secure the opposite corner: Move to the opposite corner of the screen frame and repeat the process, pulling the screen material taut and securing it in place. This will ensure that the screen material is evenly stretched across the frame.
- Attach the remaining sides: After securing the two opposing corners, continue attaching the screen material to the remaining sides of the frame. Work your way along each side, pulling the screen material taut and securing it with spline and a mallet or by inserting it into the frame’s channel. Trim any excess screen material as needed.
- Check for wrinkles or sagging: Once the screen material is attached to all sides of the frame, check for any wrinkles, creases, or sagging. Gently pull and adjust the screen material as necessary to ensure a smooth and even surface.
- Trim excess material: Finally, trim any excess screen material using a utility knife, taking care not to cut too close to the frame. Leave a small margin for any adjustments that may be needed in the future.
By following these steps, you can successfully attach the screen material to your balcony’s frame, creating a functional and insect-free outdoor space. Taking the time to ensure that the screen material is properly stretched and secured will result in a professional-looking finish.
With the screen material now attached, your screened-in balcony is nearing completion. But before you enjoy your new bug-free oasis, there are a few finishing touches and additional considerations to address. Let’s explore those in the next sections!
Finishing Touches and Additional Considerations
With the screen material securely attached to the frame, you’re almost done creating your perfect screened-in balcony. However, there are a few finishing touches and additional considerations to keep in mind to ensure the best possible experience:
- Trim and tidy up: Take a moment to trim any excess screen material or stray threads using a utility knife or scissors. This will give your screen a neat and polished appearance.
- Secure the screen edges: To ensure that the screen material remains securely attached, use a spline roller or a small wooden dowel to press the spline firmly into the groove or channel around the entire perimeter of the screen frame. This will provide a tight seal and prevent the screen material from coming loose.
- Consider adding a door: If your balcony has a large opening or if you want easier access to the screened-in area, consider installing a screen door. Screen doors can be purchased separately and are available in various sizes to match your frame. They often come with a pre-installed screen and a latch for easy entry and exit.
- Install blinds or shades: To further enhance privacy and control the amount of sunlight entering your screened-in balcony, you may want to consider installing blinds or shades. These can be attached to the frame or mounted directly to the balcony structure, allowing you to adjust the level of light and visibility to your liking.
- Maintain and clean regularly: To ensure the longevity and effectiveness of your screened-in balcony, schedule regular maintenance and cleaning. Remove any debris or dust that accumulates on the screen and the frame. Additionally, inspect the screen material periodically for damage and replace it if necessary to maintain its functional and aesthetic qualities.
- Verify balcony regulations: Before beginning any modifications to your apartment balcony, check with your building management or landlord to ensure that screening in your balcony is allowed. Some apartment complexes may have specific rules or restrictions regarding balcony modifications. Compliance will help avoid any unnecessary conflicts or issues.
By paying attention to these finishing touches and additional considerations, you can ensure that your screened-in balcony is both functional and visually appealing. Regular maintenance and proper care will help extend the lifespan of your screen and enhance your overall outdoor living experience.
Congratulations! You have successfully transformed your apartment balcony into a cozy and insect-free retreat. Now it’s time to sit back, relax, and enjoy your newly created outdoor sanctuary.
Conclusion
Congratulations on completing the process of screening in your apartment balcony! By following the steps outlined in this guide, you have successfully created a comfortable and bug-free outdoor space that will enhance your living experience. Here’s a recap of what we covered:
We started by discussing the benefits of screening in an apartment balcony. We explored how screening provides protection from insects, adds privacy, reduces noise, extends your living space, and enhances comfort. These benefits make screening an attractive option for apartment dwellers looking to make the most of their outdoor areas.
We then delved into the process of choosing the right screening material. We discussed options such as fiberglass, aluminum, pet-resistant, and solar screens, and highlighted factors to consider when making this decision, such as climate, privacy requirements, and the presence of pets or children.
Next, we emphasized the importance of gathering all the necessary tools and materials before starting the project. Having everything readily available, including a tape measure, screen frame kit, screen material, screws, screwdriver, utility knife, and mallet, ensures a smooth and efficient installation process.
We then covered the crucial steps of measuring and preparing the balcony area. Proper measurement, clearing the area, cleaning the balcony, inspecting the structure, considering additional features, and taking note of electrical fixtures are essential to ensure a successful installation.
Following that, we provided a step-by-step guide to installing the screen frame. We covered the assembly of the frame kit, positioning it securely in place, securing it to the balcony structure, applying weather stripping, and making final adjustments for stability.
Afterward, we discussed the process of attaching the screen material. We went through measuring and cutting the material, securing the corners and sides, checking for wrinkles or sagging, and ultimately trimming the excess material for a clean finish.
We concluded by addressing the finishing touches and additional considerations. These included tidying up, securing the screen edges, considering the addition of a screen door or blinds for added convenience and functionality, regular maintenance and cleaning, and verifying balcony regulations to ensure compliance.
Now, you can enjoy the benefits of your new screened-in apartment balcony. Whether you plan to relax, entertain, or simply soak up the fresh air, your bug-free oasis awaits you. Make the most of your outdoor living space and enjoy the tranquility and privacy it provides.
Remember to regularly maintain and clean your screen for optimal performance and longevity. If you ever need to replace or update the screen material, now you have the knowledge and experience to do so.
Thank you for joining us on this comprehensive journey of screening in an apartment balcony. We hope you find this guide valuable and wish you many enjoyable moments in your newly transformed outdoor space!
Frequently Asked Questions about How To Screen In An Apartment Balcony
Was this page helpful?
At Storables.com, we guarantee accurate and reliable information. Our content, validated by Expert Board Contributors, is crafted following stringent Editorial Policies. We're committed to providing you with well-researched, expert-backed insights for all your informational needs.


0 thoughts on “How To Screen In An Apartment Balcony”