Articles
How To Seal Chimney Cap
Modified: May 6, 2024
Learn how to effectively seal your chimney cap with these informative articles. Protect your home from unwanted drafts and pests.
(Many of the links in this article redirect to a specific reviewed product. Your purchase of these products through affiliate links helps to generate commission for Storables.com, at no extra cost. Learn more)
Introduction
Welcome to our comprehensive guide on how to seal a chimney cap. Chimneys are an essential component of any home, providing ventilation and allowing smoke and gases to escape safely. And at the top of the chimney, we have the chimney cap.
The chimney cap serves several important purposes. Firstly, it acts as a protective cover, preventing animals, debris, and rain from entering the chimney. Secondly, it helps to enhance the draft by creating a pressurized airflow. Lastly, a well-sealed chimney cap can improve the overall energy efficiency of your home, preventing cold drafts from entering through the chimney.
In this guide, we will walk you through the step-by-step process of sealing a chimney cap and ensuring that it functions optimally. By following these instructions, not only will you be able to protect your chimney from damage, but you’ll also help maintain a safe and efficient fireplace or stove.
Before we get started, it’s important to note that sealing a chimney cap is a relatively straightforward DIY task. However, if you feel uncomfortable working at heights or if your chimney cap is located on a steep roof, it is highly recommended to hire a professional chimney sweep or contractor.
Now, let’s dive into the details of how to seal a chimney cap properly and effectively.
Key Takeaways:
- Protect your chimney from water damage, animal intrusion, and improve energy efficiency by properly sealing the chimney cap. Follow the step-by-step guide for a safe and efficient fireplace experience.
- Regular maintenance and inspections are crucial for maintaining the integrity of the sealed chimney cap. Enjoy a cozy fireplace while ensuring the safety and comfort of your home.
Read more: How To Install A Chimney Cap
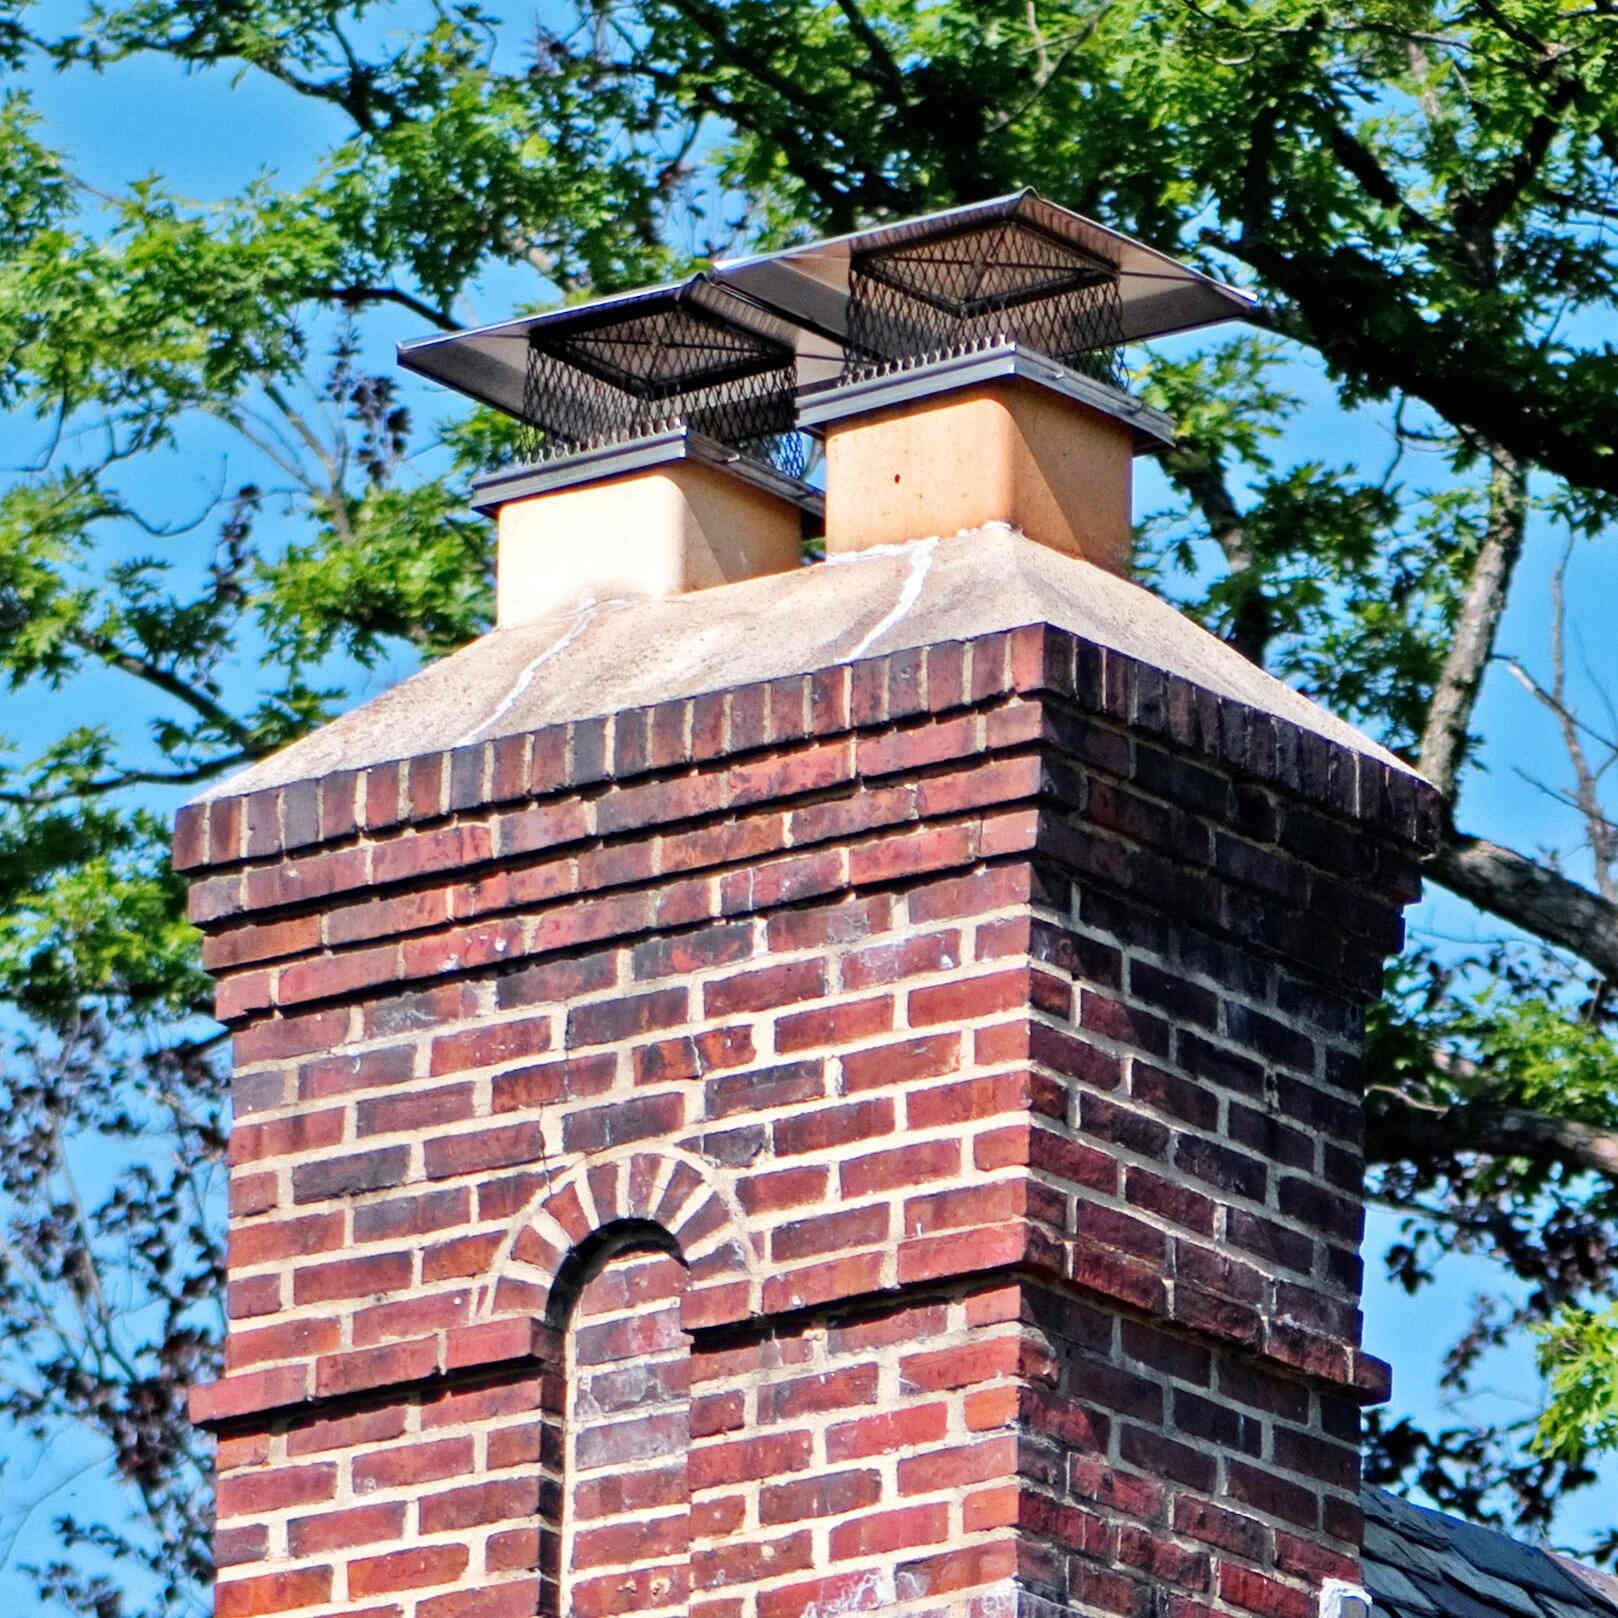
Understanding the Chimney Cap
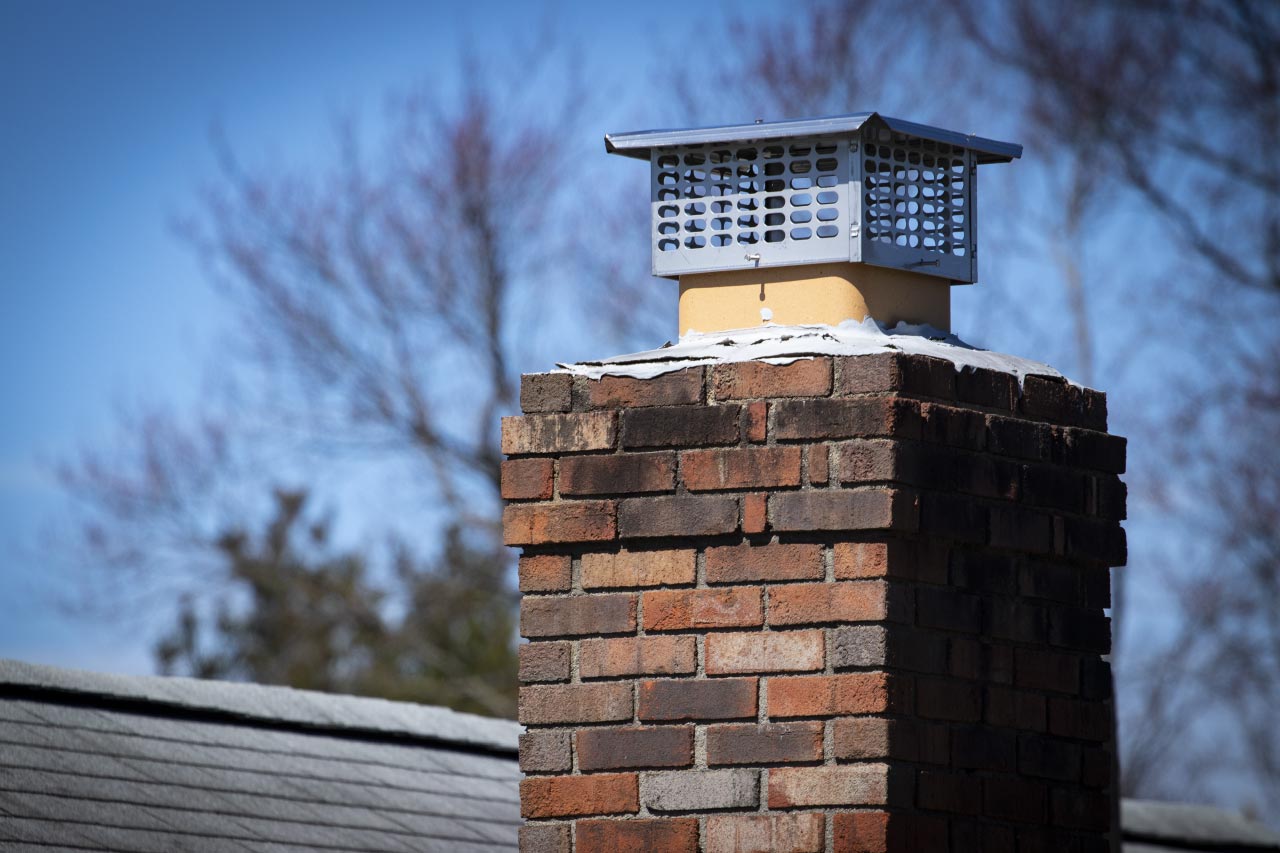
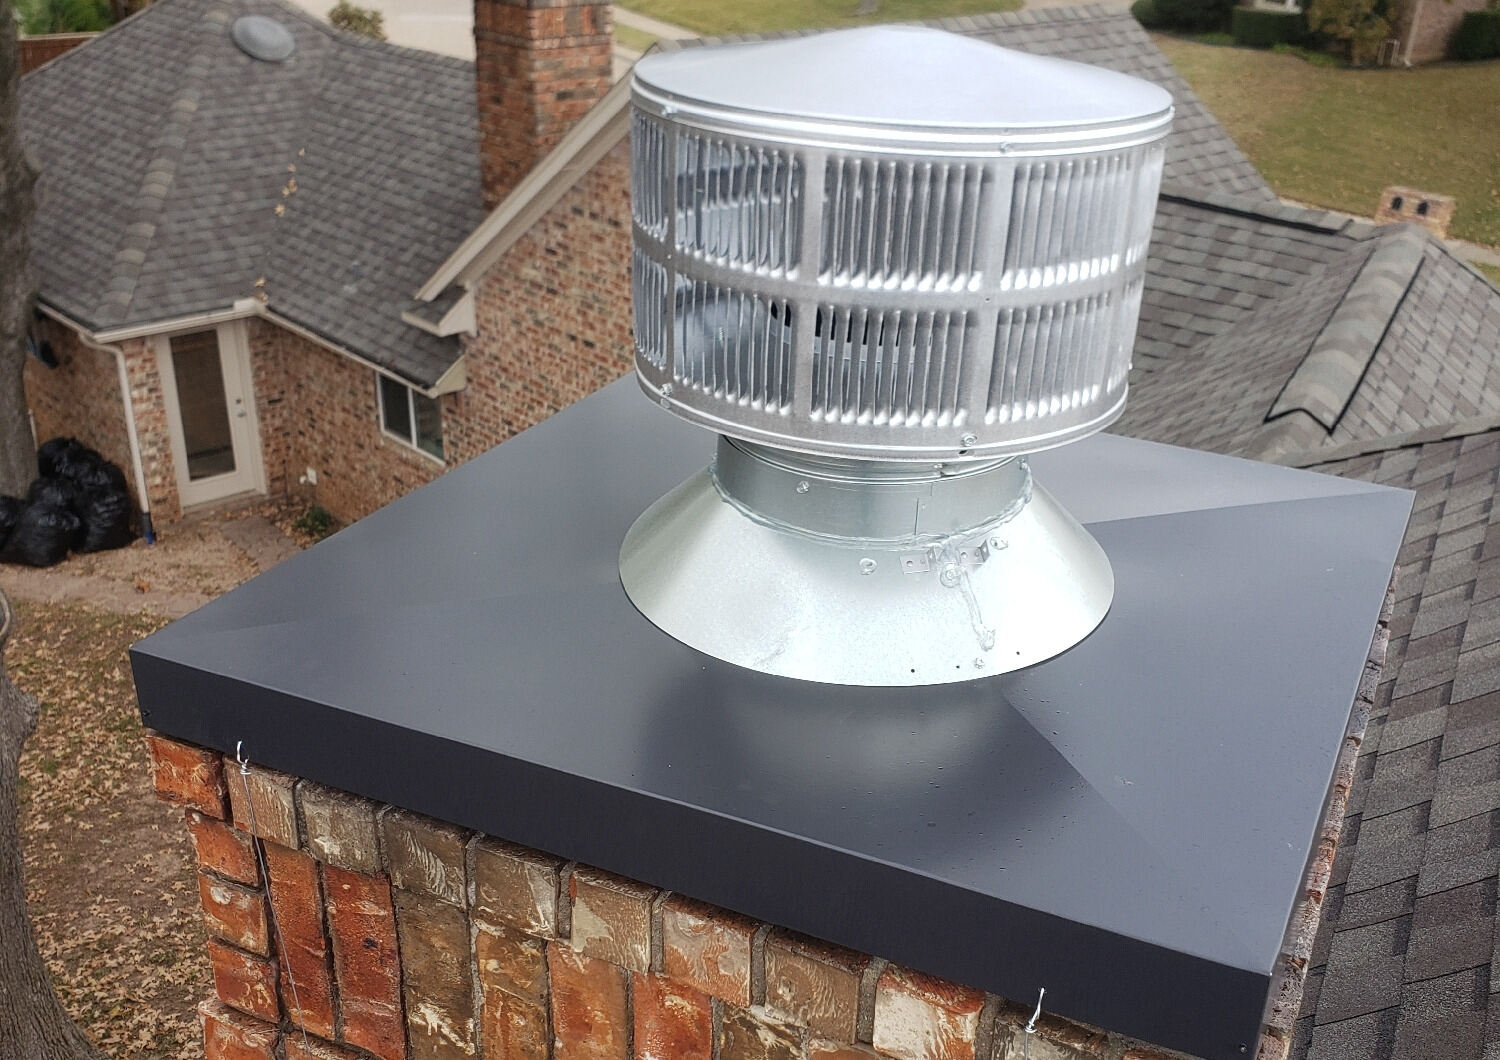
Before we proceed with sealing the chimney cap, it is crucial to have a good understanding of what it is and how it works. A chimney cap is a covering that sits on top of the chimney opening, typically made of metal such as stainless steel or copper. It is designed to protect the chimney and fireplace system from various elements, including rain, snow, animals, debris, and even sparks.
Chimney caps come in various shapes and sizes, but the most common design features a metal mesh or wire cage that allows for proper airflow while keeping out unwanted intruders. Some chimney caps may also have additional features like spark arrestors, which reduce the risk of fire by preventing sparks from escaping the chimney.
In addition to protecting your chimney, a well-designed chimney cap can also improve the overall efficiency of your heating system. By creating a barrier at the top of the chimney, it helps prevent downdrafts and wind gusts from disrupting the airflow, ultimately improving the draft and preventing smoke from entering your home.
Furthermore, a properly installed and sealed chimney cap can also help to minimize moisture damage. Rainwater can be a significant issue for chimneys, as it can lead to deterioration of the masonry and corrosion of the flue lining. By preventing water from entering the chimney, a chimney cap plays a vital role in preserving the structural integrity of the entire chimney system.
Now that we have a clear understanding of what a chimney cap is and why it is important, let’s move on to reasons why you might need to seal your chimney cap.
Reasons to Seal the Chimney Cap
Sealing the chimney cap is an essential step in ensuring its proper functionality and longevity. Here are a few reasons why you may need to seal your chimney cap:
- Preventing Water Damage: One of the primary reasons for sealing the chimney cap is to prevent water from seeping into the chimney. When rain, snow, or even condensation enters the chimney, it can cause damage to the masonry, flue lining, and other components of the fireplace system. By properly sealing the chimney cap, you can create a barrier that effectively keeps out moisture, protecting your chimney from potential water damage.
- Preventing Animal Intrusion: Chimney caps are designed to keep animals out of your chimney. However, over time, the sealant on the chimney cap may deteriorate, creating gaps or openings that allow animals to enter. By sealing the chimney cap, you can ensure that it remains securely in place, preventing any unwanted critters from making their way into your chimney, nesting, or causing obstructions.
- Improving Energy Efficiency: A properly sealed chimney cap can also help improve the energy efficiency of your home. When the chimney cap is sealed, it prevents drafts from entering the chimney, which can occur when there are gaps or cracks in the seal. By sealing the chimney cap, you can eliminate these drafts, resulting in better insulation, reduced heat loss, and improved overall energy efficiency.
- Enhancing Fireplace Safety: Safety is paramount when it comes to using your fireplace. Sealing the chimney cap can help minimize the risk of sparks or embers escaping the chimney and potentially igniting nearby combustible materials. Additionally, a sealed chimney cap reduces the chances of downdrafts, which can cause smoke to spill back into your home, creating a potentially hazardous situation.
By sealing the chimney cap, you not only protect your chimney from damage but also ensure that your home remains safe, energy-efficient, and secure. Now that we understand the importance of sealing the chimney cap let’s move on to the tools and materials you will need for this project.
Tools and Materials Required
Before you can start sealing your chimney cap, it’s important to gather all the necessary tools and materials. Here’s a list of what you’ll need:
- Ladder: Depending on the location and height of your chimney, you may need a ladder to access the chimney cap safely. Make sure to use a sturdy ladder and follow proper ladder safety guidelines.
- Gloves: It’s always a good idea to wear protective gloves when working with sealants or other chemicals. Gloves will not only protect your hands but also help you maintain a good grip on tools and materials.
- Eye Protection: Safety goggles or glasses are essential to protect your eyes from any debris or splashes during the sealing process.
- Cleaning Brush: A stiff-bristled brush will be needed to clean the chimney cap thoroughly before applying the sealant. This will remove any dirt, debris, or loose particles that could interfere with the sealant’s adhesion.
- Wire Brush: If your chimney cap is made of metal, a wire brush can be helpful in removing rust or corrosion before sealing. This will ensure that the sealant adheres properly to the surface.
- Sealant: Choosing the right sealant is crucial for a successful chimney cap seal. Look for a high-quality sealant that is specifically formulated for exterior use, capable of withstanding varying temperatures, moisture, and UV exposure. Silicone-based or polyurethane sealants are recommended for their durability and weather resistance.
- Caulk Gun: A caulk gun is necessary for applying the sealant evenly and efficiently. Make sure to have a caulk gun that fits the size of the sealant tube you’ll be using.
- Protective Tarp or Dropcloth: To protect the surrounding area and prevent any debris or sealant from staining or damaging surfaces, lay down a tarp or dropcloth before starting the sealing process.
- Paintbrush or Foam Brush: You’ll need a brush, either a paintbrush or foam brush, to apply the sealant onto the chimney cap. Choose a brush that is appropriate for the type of sealant you are using.
By gathering these tools and materials beforehand, you’ll be well-prepared for the chimney cap sealing process. Now that you’re ready, let’s move on to the step-by-step instructions on how to seal your chimney cap properly.
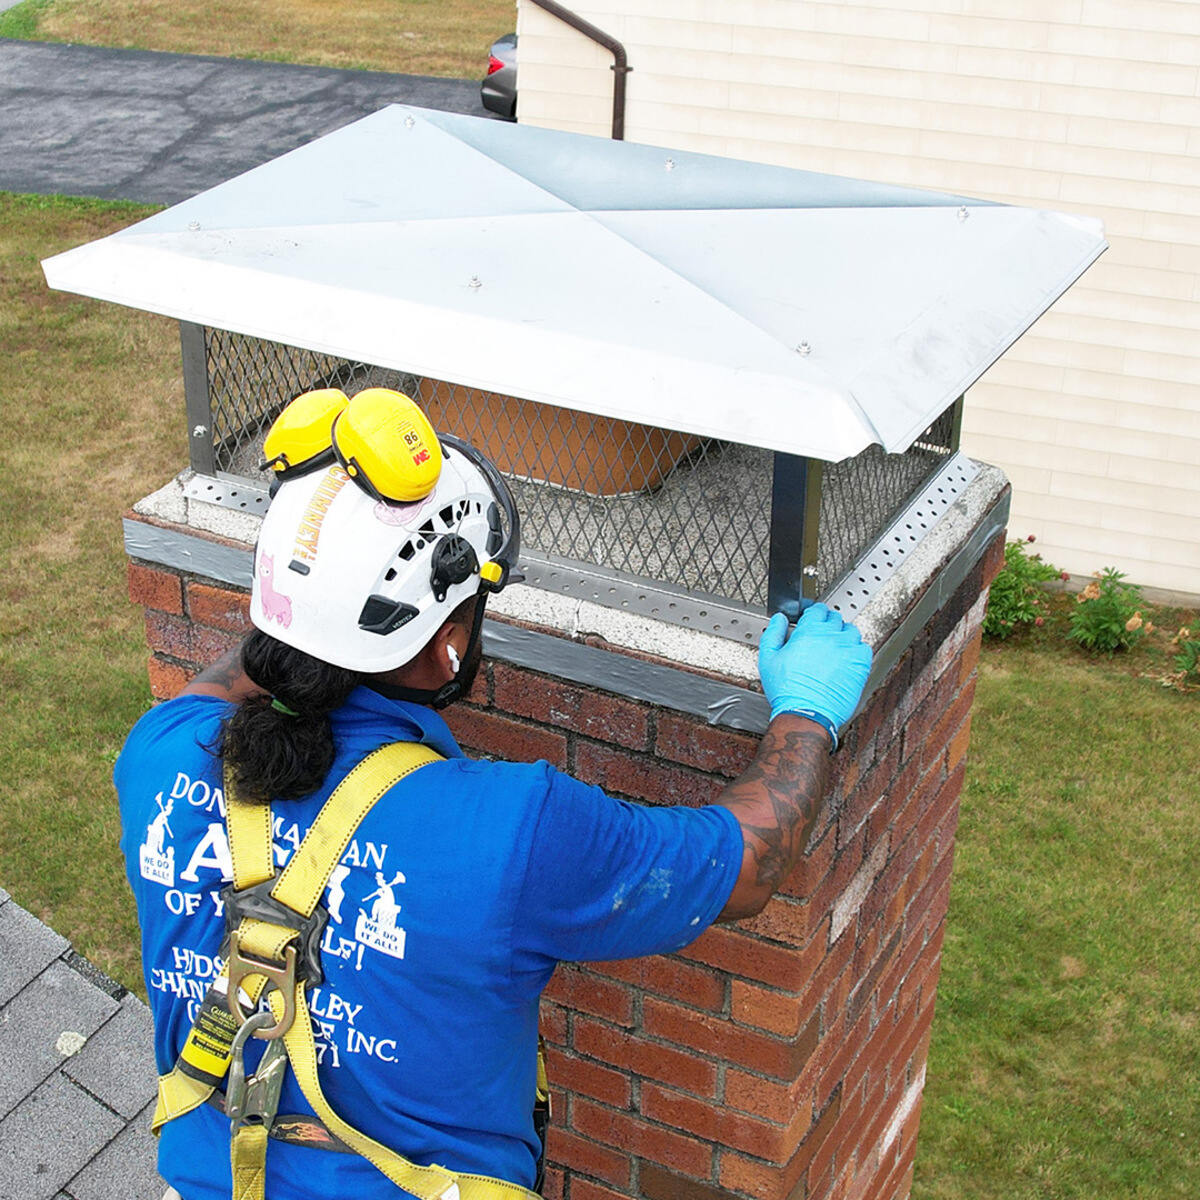
Step 1: Clean the Chimney Cap
Before you can start sealing the chimney cap, it’s important to ensure that the surface is clean and free from any debris. Here’s how to clean the chimney cap:
- Put on Protective Gear: Begin by putting on your gloves and eye protection to protect yourself from any dirt or debris.
- Position the Ladder: Position a sturdy ladder near the chimney, making sure it is stable and secure. Climb up the ladder carefully to reach the chimney cap.
- Inspect the Chimney Cap: Take a close look at the chimney cap and assess its condition. Look for any signs of damage, such as cracks, rust, or loose parts. If you notice substantial damage, it may be necessary to repair or replace the chimney cap before proceeding with the sealing process.
- Remove Loose Debris: Using a stiff-bristled brush, carefully remove any loose debris, dirt, or leaves from the chimney cap. Pay special attention to the joints and corners of the cap, as these areas tend to collect debris.
- Clean the Surface: Once the loose debris is removed, clean the chimney cap more thoroughly. Use a mixture of warm water and mild dish soap to scrub the surface of the cap, removing any built-up grime or residue. Rinse with clean water and allow the chimney cap to dry completely before proceeding.
- Remove Rust or Corrosion (if applicable): If your chimney cap is made of metal and shows signs of rust or corrosion, use a wire brush to gently remove the rusted areas. This will help create a smooth surface for the sealant to adhere to.
- Inspect for Remaining Debris: Once the chimney cap is dry, inspect it again to ensure there are no remaining debris or loose particles that could interfere with the sealant application.
By starting with a clean and debris-free chimney cap surface, you’ll ensure that the sealant adheres properly and effectively. With the chimney cap clean and ready, let’s move on to the next step – inspecting for any damage that needs to be addressed.
Read more: How To Measure A Chimney Cap
Step 2: Inspect for Damage
Once you have cleaned the chimney cap, it’s time to inspect it for any signs of damage that may require repair or replacement. Here’s how to inspect the chimney cap:
- Examine the Chimney Cap: Carefully inspect the chimney cap for any visible signs of damage, such as cracks, dents, or missing parts. Pay attention to the joints, seams, and edges of the cap, as these areas are prone to wear and tear.
- Check the Mesh or Wire Cage: If your chimney cap has a mesh or wire cage, check for any tears, holes, or loose wires. Ensure that the mesh is intact and securely attached to the chimney cap.
- Look for Rust or Corrosion: If the chimney cap is made of metal, check for any signs of rust or corrosion. Rust can weaken the structure of the cap and compromise its effectiveness.
- Inspect the Chimney Crown or Flue: While inspecting the chimney cap, also take a moment to examine the chimney crown or flue for any visible damage. Look for cracks, crumbling mortar, or other signs of deterioration that may require attention.
- Document the Damage: If you notice any significant damage during inspection, take note of it or capture clear photos. This information can be helpful when discussing repairs or replacements with a professional or when purchasing replacement parts.
If you discover minor damage, such as small cracks or minor rust spots, you may be able to address these issues with proper sealing and maintenance. However, if you find extensive damage or if the chimney cap is severely compromised, it may be necessary to consult a professional chimney sweep or contractor for appropriate repairs or a replacement.
Once you have completed the inspection and documented any damage, you can move on to the next step – removing any loose or damaged parts from the chimney cap.
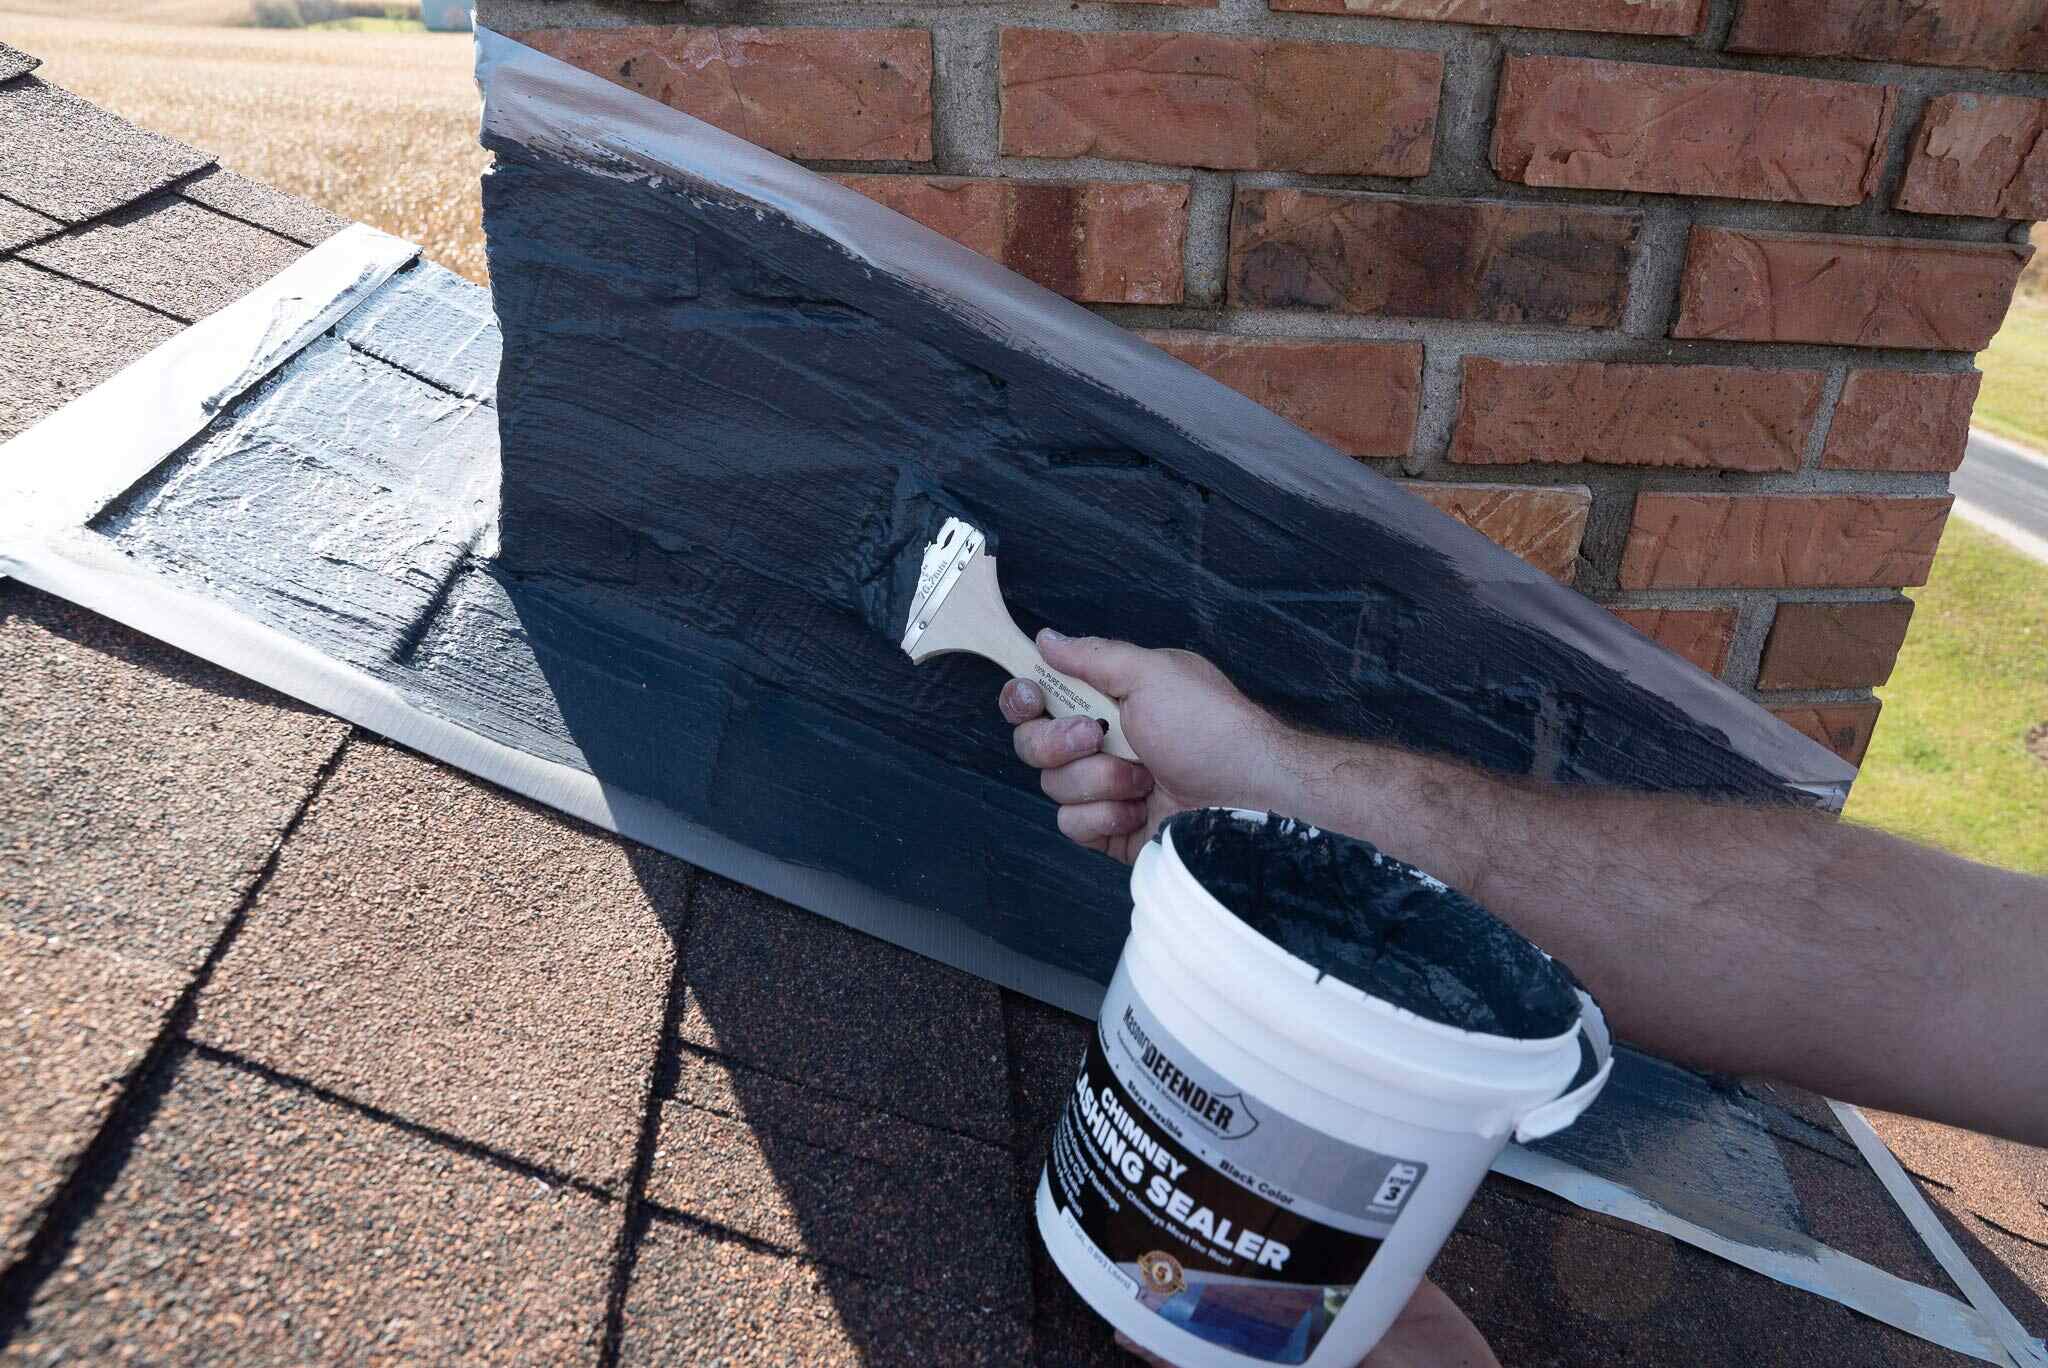
When sealing a chimney cap, use a high-temperature silicone caulk to create a watertight seal. Make sure to clean the surface thoroughly before applying the caulk for better adhesion.
Step 3: Remove Loose or Damaged Parts
After inspecting the chimney cap and identifying any loose or damaged parts, it’s time to remove them before proceeding with the sealing process. Here’s how to remove loose or damaged parts from the chimney cap:
- Gather the Necessary Tools: Before you begin, make sure you have the appropriate tools for the job. This may include a screwdriver, pliers, or any other tools specific to your chimney cap.
- Secure the Chimney Cap: If the chimney cap is loosely attached, gently secure it with a screwdriver or the necessary hardware. This will prevent any further damage or movement during the removal process.
- Identify Loose or Damaged Parts: Carefully examine the chimney cap to identify any loose or damaged parts that need to be removed. This may include screws, bolts, brackets, or any other components that are no longer securely attached or in good condition.
- Remove Screws or Bolts: Use a screwdriver or appropriate tool to carefully remove any screws or bolts holding the loose or damaged parts in place. Be sure to keep them in a safe place for potential replacement later.
- Detach Damaged Components: If there are any damaged components that cannot be salvaged or repaired, gently detach them from the chimney cap. This may involve unscrewing or unfastening brackets, wires, or other attachments.
- Inspect Remaining Parts: After removing the loose or damaged components, thoroughly inspect the remaining parts of the chimney cap. Ensure that they are intact, securely attached, and in good condition.
- Clean the Area: Once all the loose or damaged parts have been removed, take the opportunity to clean the area. Remove any debris, dust, or rust particles to prepare the surface for the sealing process.
By removing any loose or damaged parts from the chimney cap, you’ll ensure that the remaining components are stable and ready for the sealing process. Now that the chimney cap is prepped, let’s move on to the next step – preparing the surface for the application of sealant.
Step 4: Prepare the Surface
Before applying the sealant, it’s important to properly prepare the surface of the chimney cap for optimal adhesion. Here are the steps to prepare the surface:
- Ensure a Clean Surface: Make sure the chimney cap is clean and free from any loose debris, dirt, or rust. Use a brush or vacuum to remove any remaining particles, ensuring a smooth and even surface.
- Remove Rust or Corrosion: If there are any areas of rust or corrosion on the chimney cap, use a wire brush to remove them. Gently scrub the affected areas, removing any loose rust or flaking paint. This will help create a clean surface with good adhesion for the sealant.
- Check for Moisture: Before applying the sealant, ensure that the chimney cap is dry. Moisture can interfere with the effectiveness of the sealant and compromise its adhesion. If necessary, wait for a dry day before proceeding with the sealing process.
- Mask Off Surrounding Areas: If desired, use masking tape or painter’s tape to protect any surrounding areas that you want to keep clean and free from sealant. This can include nearby bricks, shingles, or other surfaces that you want to avoid accidentally getting sealant on.
- Inspect the Sealant Tube: Before opening the sealant tube, inspect it for any damage or clogging. Check the expiration date to ensure the sealant is still within its recommended use period. If there are any issues, replace the tube with a new one to ensure optimal performance.
- Read and Follow the Sealant Instructions: Each sealant may have slightly different application instructions and recommended curing times. Take the time to read the manufacturer’s instructions carefully and follow them accordingly. This will help ensure a successful sealing process.
- Prepare the Sealant: Depending on the type of sealant you are using, you may need to prepare it before application. This could involve cutting the nozzle of the sealant tube to the desired size or using a caulk gun to load the sealant for application.
By properly preparing the surface of the chimney cap, you’ll create an optimal environment for the sealant to adhere effectively. Now that the surface is ready, let’s move on to the next step – applying the sealant to the chimney cap.
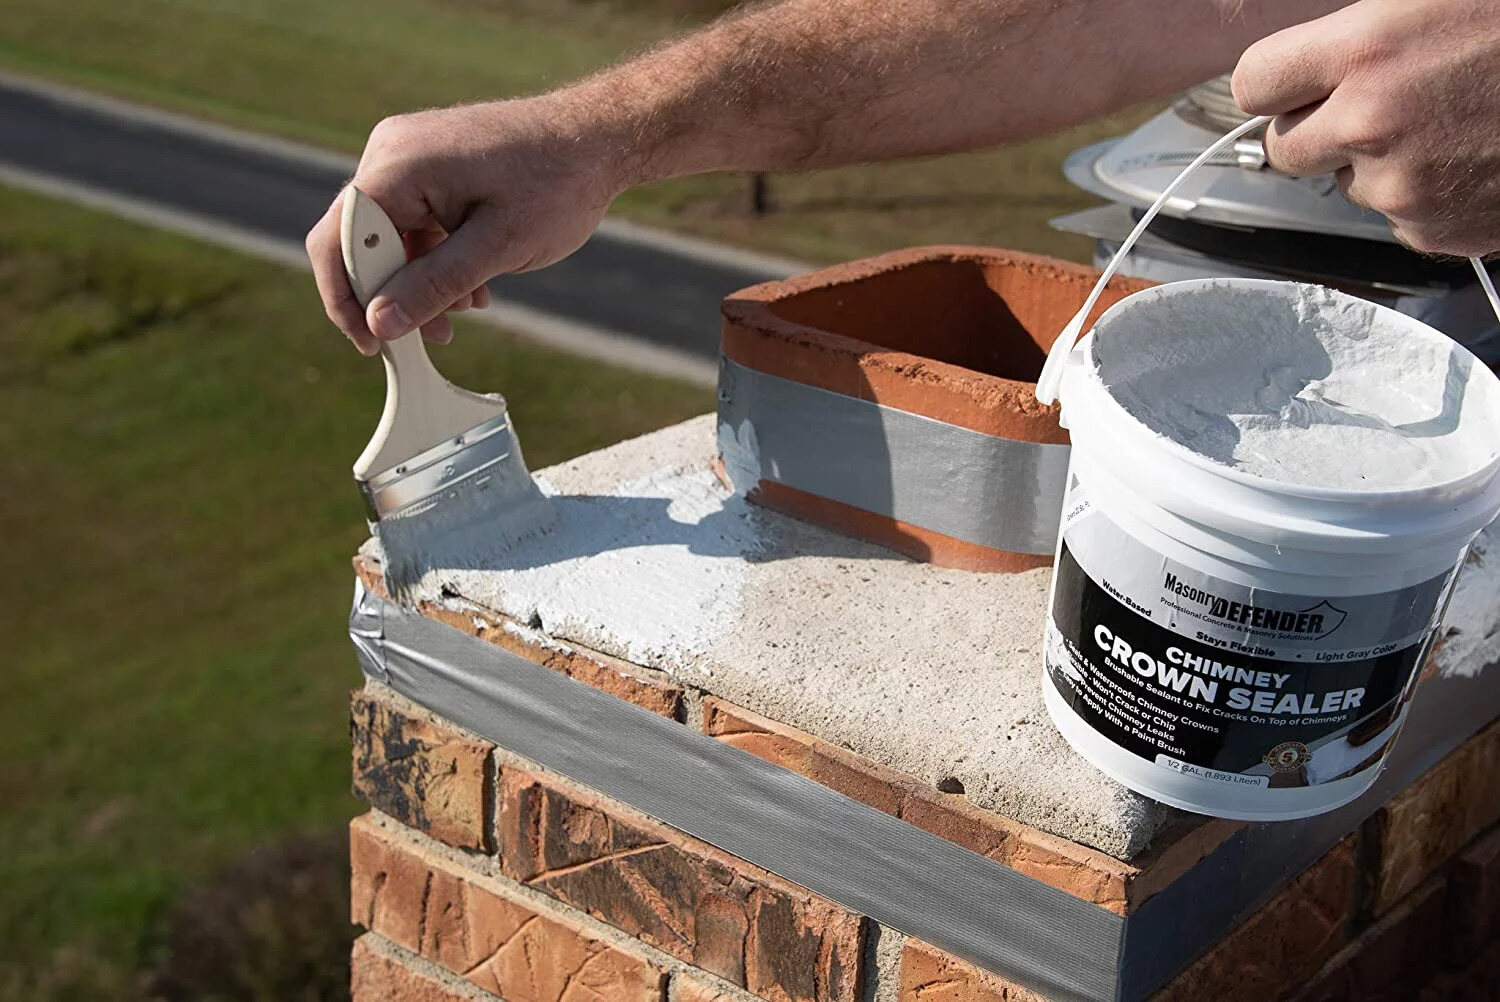
Step 5: Apply Sealant to the Chimney Cap
Now that the surface of the chimney cap is prepared, it’s time to apply the sealant. Follow these steps to ensure proper application:
- Load the Sealant: If you’re using a sealant in a tube, cut the nozzle tip to the desired size according to the manufacturer’s instructions. Insert the tube into a caulking gun, ensuring that it is securely in place.
- Apply the Sealant: Starting from one end of the chimney cap, apply a thin, even line of sealant along the seams, joints, and any areas that require sealing. Use a smooth and consistent motion to ensure proper coverage. Work your way around the entire perimeter of the chimney cap, making sure to cover all necessary areas.
- Fill in Gaps or Cracks: If there are any visible gaps, cracks, or holes in the chimney cap, use the sealant to fill them in. Press the sealant into the gaps with a steady and firm force, ensuring that it fills the void completely.
- Avoid Excess Sealant: Be careful not to apply too much sealant, as it can create a messy appearance and may not adhere properly. Aim for a thin, uniform layer that fully covers the intended areas without excess buildup.
- Smooth the Sealant: Use a small brush or your finger (wearing gloves) to smooth out the sealant and create a neat finish. This will help ensure that the sealant adheres well and creates a tight seal.
- Follow the Curing Time: Allow the sealant to fully cure according to the manufacturer’s instructions. The curing time can vary depending on the type of sealant used. Avoid disturbing or touching the sealant during this time to ensure it sets properly.
By following these steps, you’ll be able to apply the sealant evenly and effectively onto the chimney cap, creating a tight seal that will protect against moisture, animals, and other potential intrusions. Now that the sealant is applied, let’s move on to the next step – allowing it to dry and cure.
Read more: How To Cap Off Chimney
Step 6: Allow the Sealant to Dry
After applying the sealant to the chimney cap, it’s important to allow it sufficient time to dry and cure. Follow these steps to ensure the sealant dries properly:
- Read the instructions: Refer to the manufacturer’s instructions on the sealant tube for the recommended drying and curing time. Different types of sealants may have different drying times, so it’s important to follow the specific instructions provided.
- Avoid disturbing the sealant: Once the sealant is applied, avoid touching, disturbing, or placing any objects on the chimney cap. This can disrupt the drying process and affect the integrity of the seal.
- Consider weather conditions: Take into account the weather conditions in your area when allowing the sealant to dry. Extreme heat or cold, humidity, and rain can all impact the drying time. If the weather is unfavorable, consider covering the chimney cap with a protective tarp or plastic to shield it from the elements.
- Monitor the drying progress: Check the chimney cap periodically to ensure the sealant is drying properly. Look for any signs of tackiness or wetness. If the sealant still appears wet or tacky after the recommended drying time, allow it more time to dry before proceeding.
- Be patient: Depending on the sealant and environmental conditions, the drying time may range from a few hours to several days. Be patient and give the sealant ample time to dry completely before moving on to the next step.
Properly allowing the sealant to dry is crucial for its effectiveness and longevity. By following these steps, you’ll ensure that the sealant cures properly and forms a strong, watertight barrier on the chimney cap. Now that the sealant is drying, let’s move on to the next step – testing the sealed chimney cap.
Step 7: Test the Sealed Chimney Cap
Once the sealant has dried and cured, it’s important to test the sealed chimney cap to ensure its effectiveness. Here’s how to test the seal:
- Visually inspect the chimney cap: Begin by visually inspecting the chimney cap to ensure that the sealant has formed a complete and even barrier. Look for any areas where the seal may have thinned or gaps may have been missed during the application process.
- Check for any signs of moisture: After a rainfall or by using a hose, spray water onto the chimney cap and observe if any water seeps through or around the sealed areas. Look for any signs of moisture inside the chimney or any water dripping into the fireplace. If there are any leaks, you may need to re-apply sealant to those areas to ensure a watertight seal.
- Observe for proper airflow: Light a small piece of newspaper or a smoke-emitting device near the fireplace and observe the chimney cap. Ensure that the smoke is being properly vented upward and away from the chimney without any signs of backdraft or blockage. If you notice any issues with the airflow, it may indicate a problem with the seal or other chimney components.
- Double-check for any animal intrusion: Inspect the chimney cap and its surrounding area to ensure that there are no signs of animal intrusion. Look for any nesting materials, droppings, or damage that may indicate pests attempting to enter the chimney. If you notice any problems, it’s important to address them promptly to prevent further issues.
- Monitor over time: After testing the sealed chimney cap, continue to monitor it over the next few weeks and months. Check for any signs of wear, damage, or deterioration to the sealant. Address any issues promptly to maintain the integrity of the seal and ensure the long-term protection of your chimney cap.
By thoroughly testing the sealed chimney cap, you can be confident that it is effectively protecting your chimney from water, animal intrusions, and other potential issues. Regular maintenance and inspections will help maintain the integrity of the seal and ensure the optimal performance of your chimney cap. Congratulations, you have successfully sealed your chimney cap!
Now that you have completed all the necessary steps, it’s important to perform regular inspections and maintenance to keep your chimney cap in optimal condition. By doing so, you’ll enjoy a safe, efficient, and long-lasting chimney system for years to come.
If you encounter any issues or feel uncomfortable performing these steps, don’t hesitate to seek professional assistance from a chimney sweep or contractor. They are experienced in chimney maintenance and can provide expert guidance.
We hope this guide has been helpful in guiding you through the process of sealing your chimney cap. Happy fireplace adventures!
Conclusion
Sealing your chimney cap is an essential step in maintaining the functionality, safety, and efficiency of your fireplace or stove. By following the step-by-step instructions outlined in this guide, you can ensure that your chimney cap is effectively sealed, protecting your chimney from water damage, preventing animal intrusions, improving energy efficiency, and enhancing fireplace safety.
Throughout this guide, we covered the importance of understanding the chimney cap and its role in the chimney system. We discussed the reasons to seal the chimney cap, including preventing water damage, animal intrusion, and enhancing energy efficiency.
We provided you with a comprehensive list of tools and materials required for the sealing process, ensuring that you have everything you need to successfully complete the task. From ladders to sealants, each item plays a vital role in achieving a solid and watertight seal.
We guided you through each step of the sealing process, from cleaning the chimney cap and inspecting for damage to removing loose or damaged parts and preparing the surface. We emphasized the importance of applying the sealant properly and allowing it sufficient time to dry and cure.
Lastly, we discussed the importance of testing the sealed chimney cap for effectiveness and provided guidance on what to look for during the testing process. By following these steps, you can ensure that your chimney cap is functioning optimally and providing the necessary protection for your chimney and home.
Remember, regular maintenance and inspections are essential to keep your chimney cap in top condition. Keep an eye out for any signs of wear, damage, or leaks, and address them promptly to maintain the integrity of the seal and ensure the long-term protection of your chimney cap.
If you are unsure or uncomfortable performing these tasks yourself, it’s always recommended to seek professional assistance from a chimney sweep or contractor. They have the expertise and knowledge to handle the job safely and effectively.
Sealing your chimney cap is a worthwhile investment in the longevity and efficiency of your chimney system. By taking the time to properly seal your chimney cap, you can enjoy a cozy fireplace or stove while ensuring the safety and comfort of your home for years to come.
Now that you've mastered sealing your chimney cap, why not ensure the entire chimney system is up to snuff? Our next guide on chimney safety walks you through essential checks to confirm your chimney isn't just sealed but also safe and sound. Regular inspections can prevent potential hazards, offering peace of mind and a safer home environment. Don't miss out on these critical insights!
Frequently Asked Questions about How To Seal Chimney Cap
Was this page helpful?
At Storables.com, we guarantee accurate and reliable information. Our content, validated by Expert Board Contributors, is crafted following stringent Editorial Policies. We're committed to providing you with well-researched, expert-backed insights for all your informational needs.

0 thoughts on “How To Seal Chimney Cap”