Articles
How To Set Alarm Clock On Macbook
Modified: February 29, 2024
Learn how to set an alarm clock on your MacBook with easy step-by-step instructions. Explore our articles for helpful guides and tips to optimize your alarm clock experience on Mac.
(Many of the links in this article redirect to a specific reviewed product. Your purchase of these products through affiliate links helps to generate commission for Storables.com, at no extra cost. Learn more)
Introduction
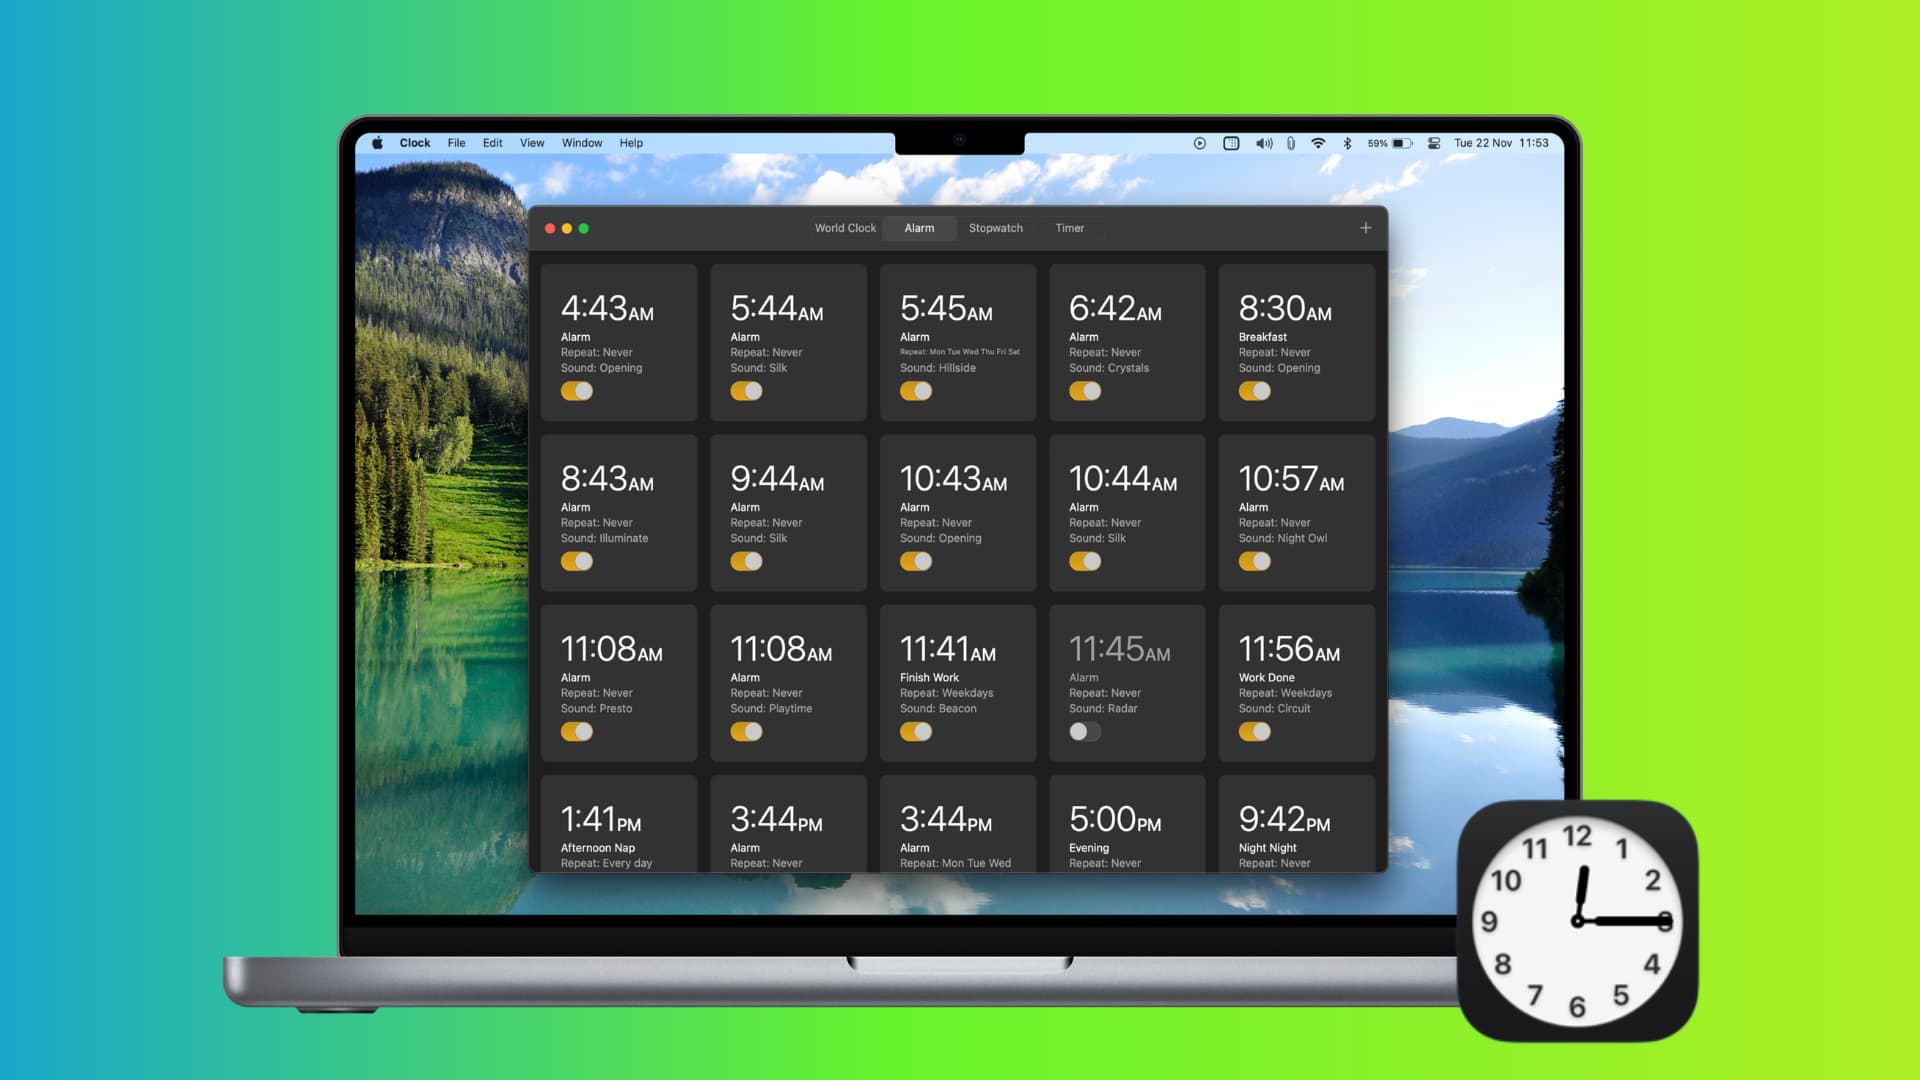
Setting an alarm clock is a vital aspect of our daily routine, ensuring we wake up on time and start our day off right. If you own a MacBook, you’ll be happy to know that it comes equipped with a built-in clock app that allows you to set alarms effortlessly. Whether you have a busy schedule or simply need a reminder for an important event, the alarm clock feature on your MacBook can be a valuable tool.
In this article, we will walk you through the step-by-step process of setting an alarm clock on your MacBook. From opening the clock app to customizing alarm options, we will cover everything you need to know to make the most of this useful feature. So, without further ado, let’s dive in and learn how to set alarm clocks on your MacBook.
Key Takeaways:
- Easily set and customize alarms on your MacBook using the built-in Clock app, ensuring you wake up on time and stay organized with intuitive features like alarm sound selection and snooze options.
- Take full control of your alarm clock with step-by-step guidance, from adding and customizing alarms to choosing alarm sounds and managing your alarms, making it a valuable tool for your daily routine.
Read more: Where Was The Alarm Clock Invented
Step 1: Opening the Clock App
The first step in setting an alarm clock on your MacBook is to open the Clock app. The Clock app is a default application that comes pre-installed on your MacBook, so you don’t need to download anything extra. Here’s how you can access it:
- Locate the Launchpad icon on your MacBook. The Launchpad icon is usually located in the Dock, which is the bar at the bottom of your screen.
- Click on the Launchpad icon to open it. This will display all the applications installed on your MacBook.
- Scroll through the applications until you find the Clock app. It is represented by an icon that looks like a clock face.
- Click on the Clock app icon to open it. This will launch the Clock app and display the main interface.
Once you have successfully opened the Clock app, you are ready to proceed to the next step and start adding a new alarm. Keep in mind that the specific steps may vary slightly depending on the macOS version you are using, but the overall process remains the same.
Step 2: Adding a New Alarm
Now that you have successfully opened the Clock app on your MacBook, it’s time to add a new alarm. Follow these steps to add a new alarm:
- Once you’re in the Clock app, you’ll see a plus (+) icon at the bottom left corner of the screen. Click on this icon.
- A new alarm window will appear, allowing you to customize your alarm settings.
- Start by setting the desired time for your alarm. You can use the scroll wheels or manually enter the hours and minutes.
- Next, choose whether you want the alarm to repeat on specific days or only on certain dates.
- Toggle the “AM” or “PM” option to select the appropriate time of day for your alarm.
- Furthermore, you can label your alarm to make it easier to identify. This step is optional but can be helpful if you have multiple alarms set.
- Once you’ve adjusted the settings to your preference, click on the “Save” button to add the alarm to your list of alarms.
Congratulations! You have successfully added a new alarm on your MacBook. The alarm will now appear in the Clock app’s main interface, indicating the set time and any other customizations you’ve made. Feel free to repeat this step to add multiple alarms as per your requirements.
Step 3: Setting the Alarm Time
Now that you have added a new alarm on your MacBook, it’s time to set the specific time for the alarm to go off. Follow these steps to set the alarm time:
- Open the Clock app on your MacBook.
- In the list of alarms, locate and select the alarm for which you want to set the time.
- Once you’ve selected the alarm, you’ll see the alarm details panel on the right-hand side of the screen.
- In the alarm details panel, you’ll find the option to adjust the alarm time. You can use the scroll wheels or manually enter the hours and minutes.
- As you make changes to the alarm time, you’ll notice that the preview time on the alarm changes accordingly.
- Continue adjusting the alarm time until it reflects the desired time you want the alarm to go off.
- Once you’re satisfied with the alarm time, the changes will be automatically saved, and your alarm will be set for the designated time.
That’s it! You have successfully set the alarm time for your MacBook alarm. Make sure to double-check the time to ensure it aligns with your intended wake-up time or event reminder.
To set an alarm on your MacBook, open the Clock app, go to the Alarm tab, and click the “+” button to add a new alarm. Set the time, choose the sound, and click “Save.”
Step 4: Customizing Alarm Options
Setting the time for your alarm is just the beginning. The Clock app on your MacBook offers various customization options to tailor your alarm to your specific needs. Follow these steps to customize the alarm options:
- Open the Clock app on your MacBook.
- In the list of alarms, select the alarm for which you want to customize the options.
- Once you’ve selected the alarm, you’ll see the alarm details panel on the right-hand side of the screen.
- In the alarm details panel, you’ll find several customization options to choose from.
- Toggle the “Snooze” option to enable or disable the snooze feature. Enabling it allows you to delay the alarm by a set interval of time.
- If you want the alarm to vibrate when it goes off, toggle the “Vibration” option.
- Furthermore, you can choose to have a “Fade In” effect for your alarm. This gradually increases the volume of the alarm tone, creating a gentler waking experience.
- Some alarms also offer the “Bedtime” feature, which helps you maintain a consistent sleep schedule by setting reminders to go to bed and wake up at the same time each day.
- Make the desired adjustments to the alarm options based on your preferences.
- After customizing the options, the changes will be automatically saved.
Great job! You have successfully customized the options for your MacBook alarm. Take advantage of these options to create an alarm that suits your preferences and lifestyle.
Read more: How To Set Hetyre Alarm Clock
Step 5: Choosing Alarm Sound
One of the fun aspects of setting an alarm on your MacBook is the ability to choose your preferred alarm sound. The Clock app offers a range of built-in alarm sounds for you to select from. Follow these steps to choose an alarm sound:
- Open the Clock app on your MacBook.
- In the list of alarms, select the alarm for which you want to choose the alarm sound.
- Once you’ve selected the alarm, you’ll see the alarm details panel on the right-hand side of the screen.
- In the alarm details panel, you’ll find the “Sound” section, which allows you to select the alarm sound.
- Click on the “Sound” section to open the list of available alarm sounds.
- Browse through the list and click on the sound you want to use as your alarm tone. You can click on the play button next to each sound to listen to a preview.
- If you prefer to use a song or audio file from your MacBook as the alarm sound, click on the “Choose…” button and select the desired file from your music library.
- Once you have chosen the alarm sound, it will be automatically applied to your selected alarm.
Well done! You have successfully chosen the alarm sound for your MacBook alarm. Customize the sound to your liking and ensure it’s something that will wake you up or grab your attention.
Step 6: Editing or Deleting Alarms
Managing your alarms is essential to ensure they are updated and relevant to your schedule. The Clock app on your MacBook allows you to easily edit or delete alarms as needed. Follow these steps to edit or delete alarms:
- Open the Clock app on your MacBook.
- In the list of alarms, locate the alarm that you want to edit or delete.
- Once you’ve found the alarm, you have two options:
- To edit the alarm, click on it and make the desired changes in the alarm details panel. You can adjust the time, customize the options, choose a different alarm sound, or make any other necessary modifications.
- To delete the alarm, swipe left on the alarm or right-click on it and select the “Delete” option. Confirm the deletion if prompted.
- Repeat these steps for any other alarms you want to edit or delete.
Excellent work! You now have the knowledge and skills to easily edit or delete alarms on your MacBook. Regularly reviewing and updating your alarms will help you stay organized and ensure they are aligned with your daily routine.
Conclusion
Setting an alarm clock on your MacBook is a simple and convenient way to ensure you wake up on time or receive timely reminders for important events. With the Clock app’s intuitive interface and various customization options, you have full control over your alarms to suit your specific needs and preferences.
In this article, we walked through a step-by-step guide on how to set alarm clocks on your MacBook. From opening the Clock app to customizing alarm options, choosing alarm sounds, and managing alarms, you now have a comprehensive understanding of how to make the most of this useful feature.
Remember to regularly review and update your alarms to reflect your changing schedule and priorities. With the ability to edit or delete alarms with ease, you can keep your alarm clock organized and ensure it aligns with your daily routine.
So, whether you need to wake up for work, attend an important meeting, or simply need a helpful reminder, the alarm clock feature on your MacBook is there to help you stay on track.
Start implementing what you’ve learned in this article and enjoy the peace of mind that comes with having a reliable alarm clock on your MacBook.
Frequently Asked Questions about How To Set Alarm Clock On Macbook
Was this page helpful?
At Storables.com, we guarantee accurate and reliable information. Our content, validated by Expert Board Contributors, is crafted following stringent Editorial Policies. We're committed to providing you with well-researched, expert-backed insights for all your informational needs.


0 thoughts on “How To Set Alarm Clock On Macbook”