Articles
How To Shape Metal With Hand Tools
Modified: December 7, 2023
Learn the art of shaping metal with hand tools with our comprehensive articles. Discover tips, techniques, and step-by-step guides to create stunning metal masterpieces.
(Many of the links in this article redirect to a specific reviewed product. Your purchase of these products through affiliate links helps to generate commission for Storables.com, at no extra cost. Learn more)
Introduction
Shaping metal with hand tools is a fascinating and rewarding craft that has been around for centuries. Whether you’re a professional metalworker or a hobbyist, learning how to shape metal using basic hand tools is a valuable skill. Not only does it allow you to create unique and customized metal pieces, but it also gives you a deeper appreciation for the art of metalworking.
It’s important to note that working with metal can be dangerous, especially when using hand tools. Therefore, understanding and practicing safety precautions is crucial to avoid any potential accidents or injuries. By following proper procedures and wearing the necessary protective gear, you can ensure a safe and enjoyable metal shaping experience.
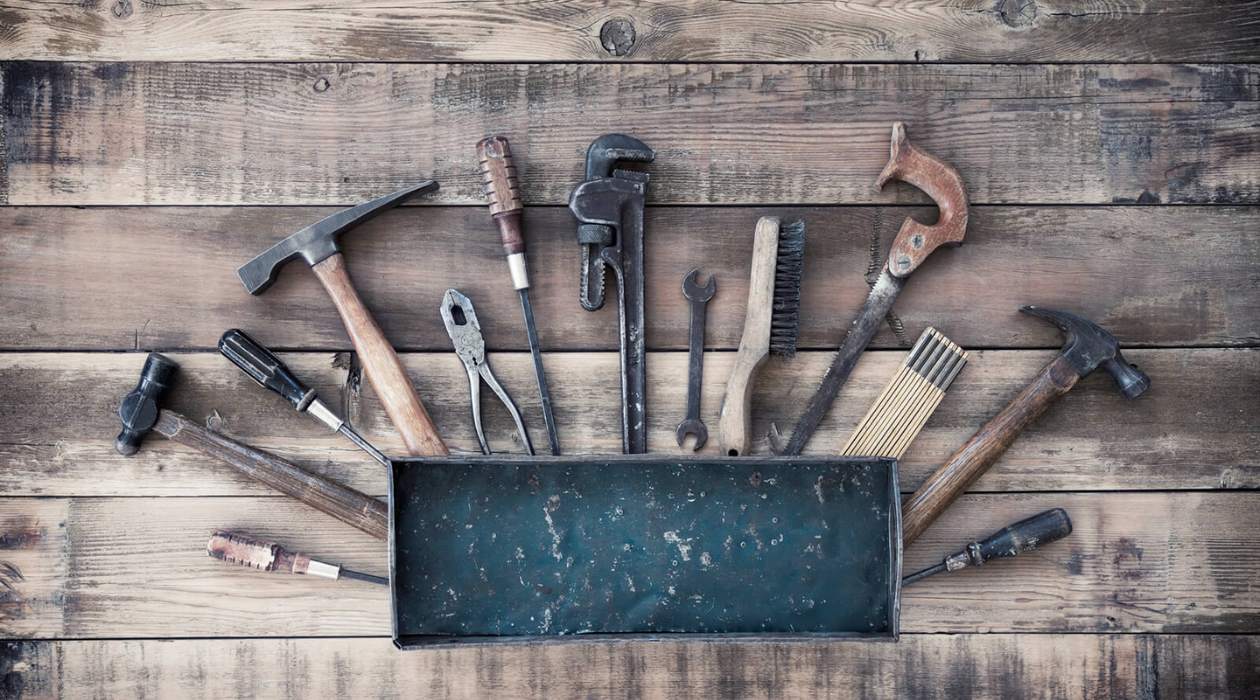
There are various types of hand tools that can be used for metal shaping, each serving a specific purpose. From hammers and mallets to pliers and shears, having a well-rounded collection of tools will enable you to tackle different metal shaping tasks with ease.
In this article, we’ll explore the basic techniques for shaping metal with hand tools. We’ll cover hammering and forming metal, bending and folding metal, cutting and trimming metal, filing and sanding metal, joining metal pieces, and finishing and polishing metal. By understanding these techniques and mastering the use of relevant hand tools, you’ll soon be able to create your own metal masterpieces.
Key Takeaways:
- Unleash your creativity and craftsmanship by mastering the art of shaping metal with hand tools. From hammering to finishing, each technique offers endless possibilities for creating unique and personalized metal pieces.
- Prioritize safety, embrace passion, and let your imagination soar as you embark on the captivating journey of metal shaping. With practice and dedication, you can transform raw metal into stunning works of art.
Read more: How To Shape Brass With Hand Tools
Safety Precautions
When working with metal and hand tools, it’s essential to prioritize safety to avoid any accidents or injuries. Here are some important safety precautions to keep in mind:
- Wear protective gear: Before starting any metal shaping project, make sure to wear safety goggles, gloves, and a dust mask. These will help protect your eyes, hands, and lungs from any flying debris or metal particles.
- Secure your work area: Ensure that your work area is clean, well-lit, and free from any clutter. This will minimize the risk of accidents and provide you with ample space to maneuver your tools.
- Use the correct tools: Always use the appropriate hand tools for the specific metal shaping task at hand. Using the wrong tool can be ineffective and dangerous.
- Handle tools properly: Familiarize yourself with the proper handling and grip techniques for each tool. This will ensure better control and reduce the chances of slipping or injuring yourself.
- Work in a ventilated area: If you are working with metal shavings or using chemicals for cleaning or finishing, make sure you have proper ventilation in your workspace to prevent the inhalation of harmful fumes.
- Avoid distractions: When working with hand tools, it’s crucial to focus and be fully present. Avoid distractions or working under the influence of alcohol or drugs, as this can impair your judgment and lead to accidents.
- Keep tools in good condition: Regularly inspect your hand tools for any signs of wear or damage. Replace worn-out or broken tools to ensure their effectiveness and your safety.
- Store tools properly: After each use, store your hand tools in a designated area where they are protected from damage and out of reach of children or unauthorized individuals.
- Take breaks: Metal shaping can be physically demanding. Remember to take regular breaks to rest and stay hydrated to maintain your focus and energy levels.
- Seek professional guidance if needed: If you are new to metal shaping or unsure about a particular technique, it’s always advisable to seek guidance from an experienced metalworker or take a hands-on workshop to learn the proper techniques and safety precautions.
By following these safety precautions, you can minimize the risks associated with shaping metal using hand tools and create a safer working environment for yourself.
Types of Hand Tools for Metal Shaping
There are several types of hand tools that are commonly used in metal shaping. Each tool has a specific purpose and is designed to perform different tasks. Here are some of the essential hand tools for metal shaping:
- Hammer: A hammer is one of the most versatile tools in metal shaping. It comes in various sizes and weights, each suitable for specific tasks. Ball-peen hammers are commonly used for shaping and forming metal.
- Mallet: A mallet is a rubber or wooden hammer used for delicate shaping tasks. It provides controlled impacts without damaging the metal.
- Pliers: Pliers are used for gripping, bending, and twisting metal. They come in different types such as flat-nose pliers, round-nose pliers, and locking pliers, each serving a specific purpose.
- Shears: Metal shears are used for cutting and trimming thin sheets of metal. There are different types of shears, including aviation snips, tin snips, and compound snips.
- Files: Files are used for shaping, smoothing, and refining metal surfaces. They come in various shapes and sizes, such as flat files, round files, and half-round files.
- Sanders: Sanders, including sanding blocks and sandpaper, are used for smoothing and refining metal surfaces. They are especially useful for removing rough edges and imperfections.
- Chisels: Chisels are used for cutting and carving metal. They come in different sizes and shapes, such as cold chisels and wood chisels.
- Vices: A vice is a tool that holds metal pieces securely in place during shaping. It provides stability and allows for precise work.
- Ball peen hammer: A ball peen hammer is a type of hammer with a flat striking surface on one end and a rounded ball-shaped striking surface on the other. It is used for shaping metal and creating rounded contours.
- Wrenches: Wrenches are used for tightening or loosening nuts and bolts. They come in various sizes and types such as adjustable wrenches and socket wrenches.
These are just a few examples of the hand tools commonly used in metal shaping. Depending on the specific project or metal shaping technique, additional tools such as punches, anvils, and bending tools may also be required.
By having a well-rounded collection of hand tools, you’ll be equipped to handle a variety of metal shaping tasks and achieve the desired results.
Basic Metal Shaping Techniques
When it comes to shaping metal with hand tools, there are several basic techniques that every metalworker should be familiar with. These techniques form the foundation for more advanced metal shaping projects. Here are some of the key basic metal shaping techniques:
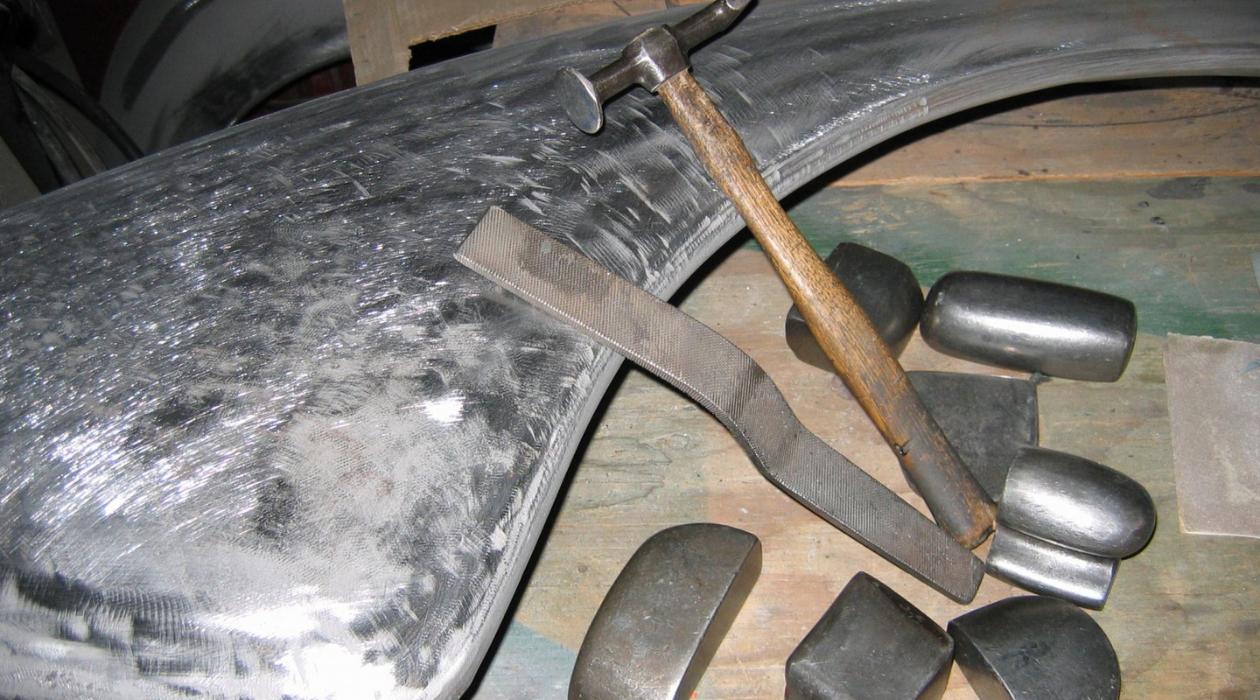
- Hammering and Forming: Hammering and forming is a fundamental technique in metal shaping. It involves using hammers and mallets to shape metal pieces by applying controlled strikes. This technique is commonly used to create curves, bends, and textured surfaces.
- Bending and Folding: Bending and folding metal involves using pliers, bending tools, or even vices to create sharp or gradual bends in the metal sheet. This technique is often used in projects that require curved or angled parts.
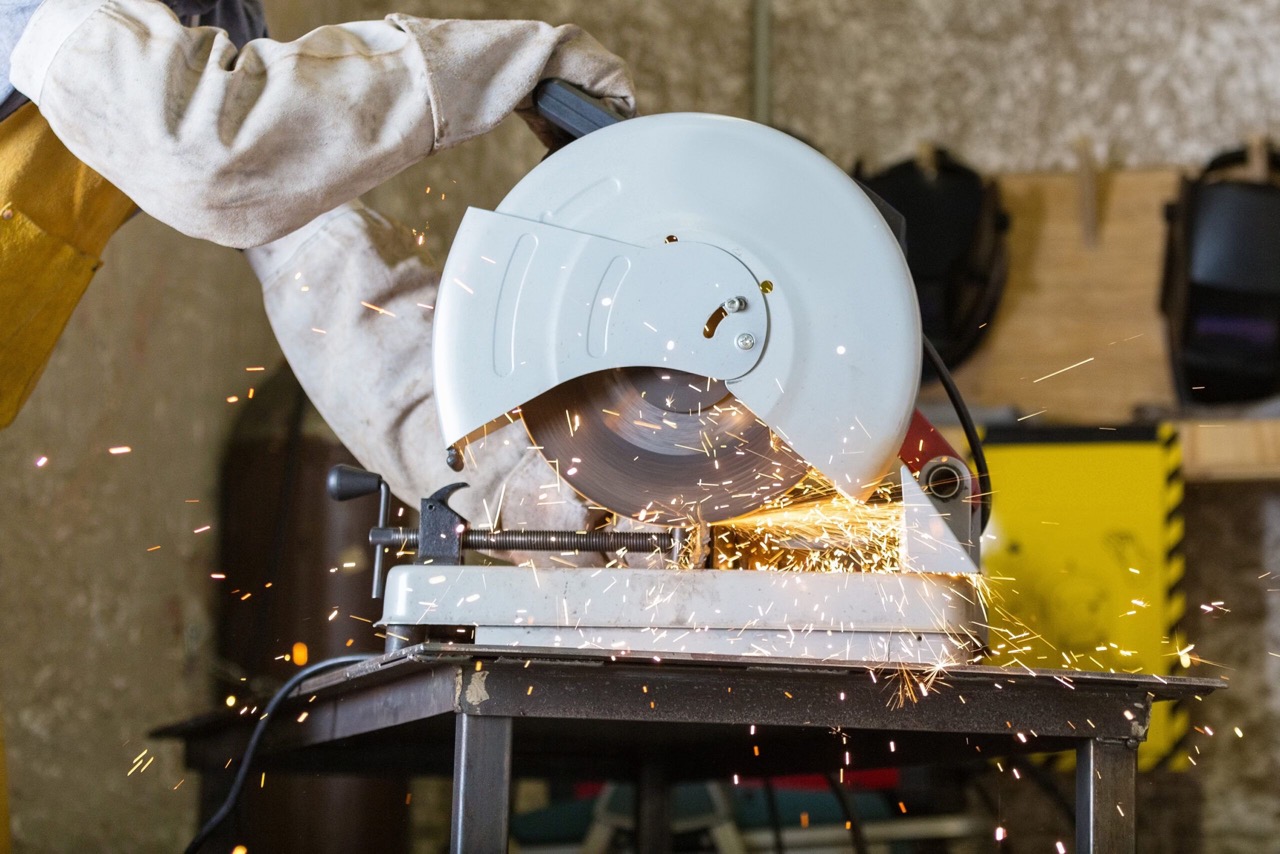
- Cutting and Trimming: Cutting and trimming metal involves using shears or cutting tools to remove excess material or create precise shapes. Metal shears are particularly useful for cutting thin sheets of metal, while cutting tools like chisels or snips can be used for more intricate cuts.
- Filing and Sanding: Filing and sanding are essential techniques for refining metal surfaces, removing rough edges, and achieving a smooth finish. Files and sandpaper are used to shape, smooth, and remove imperfections from the metal.
- Joining Metal Pieces: Joining metal pieces is a crucial technique in metalworking. Depending on the project, you may use techniques such as soldering, welding, riveting, or even using adhesives to securely join metal parts together.
- Finishing and Polishing: Once the metal shaping is complete, finishing and polishing techniques can be applied to enhance the appearance of the metal surface. This can include using polishing compounds, buffing wheels, or even chemical treatments to achieve a desired finish.
These basic metal shaping techniques provide a solid foundation for a wide range of metalworking projects. By mastering these techniques and combining them creatively, you can bring your metal designs to life and create unique and stunning pieces.
Remember, practice makes perfect when it comes to metal shaping. Don’t be afraid to experiment, try different techniques, and refine your skills over time. With patience and dedication, you’ll become proficient in shaping metal with hand tools and unlock endless possibilities in your metalworking journey.
Hammering and Forming Metal
Hammering and forming metal is a fundamental technique in metal shaping that involves using hammers and mallets to shape and manipulate metal pieces. This technique allows you to create curves, bends, and textured surfaces, giving your metalwork a unique and personalized touch. Here’s a closer look at the process:
1. Select the appropriate hammer: Different hammers have different shapes and weights, each suited for specific tasks. For example, a ball-peen hammer is commonly used for shaping and forming metal. Choose a hammer that is comfortable to hold and fits the scale of your project.
2. Prepare your workpiece: Start by securing your metal piece in a vice or holding it firmly with one hand. This will provide stability and prevent it from moving while you shape it.
3. Plan your strikes: Visualize the desired shape or contour you want to achieve. Consider the direction and force of your strikes to gradually shape the metal. Start with lighter strikes and gradually increase the intensity until you achieve the desired effect.
4. Shape the metal: Use the hammer or mallet to strike the metal with controlled blows. You can use different parts of the hammer’s striking surface to create various effects. For example, the rounded end of a ball-peen hammer can create gentle curves, while the flat side can be used to flatten or shape the metal more broadly.
5. Use forming tools: In addition to hammers, you can also use various forming tools such as shaping stakes or anvils. These tools have different shapes and contours, allowing for more precise shaping. Place the metal on the appropriate forming tool and use the hammer to strike and shape the metal against it.
6. Texture the surface: To add texture to your metalwork, you can use hammers with textured surfaces or specialized texturing tools. These tools create unique patterns and designs on the metal surface, giving it a distinctive appearance.
Remember, practice and experimentation are key to mastering hammering and forming techniques. Start with simpler projects and gradually work your way up to more complex designs. Additionally, always ensure that you’re working in a well-ventilated area and wearing appropriate safety gear to protect yourself from flying debris.
Hammering and forming metal allows you to unleash your creativity and bring your metalwork to life. With each strike of the hammer, you’ll shape the metal into a work of art that reflects your skills and imagination.
Read more: How To Shape A Knife Blade With Hand Tools
Bending and Folding Metal
Bending and folding metal is a crucial technique in metal shaping that allows you to create sharp or gradual curves and angles in metal sheets. Whether you’re making a box, a decorative element, or a structural component, mastering the art of bending and folding metal will greatly expand your possibilities as a metalworker. Here’s a step-by-step guide on how to bend and fold metal:
1. Choose the appropriate tool: Depending on the thickness of the metal and the degree of precision required, you can use various tools for bending and folding. Pliers, bending tools, or even a vice can be utilized.
2. Prepare your metal: Mark the areas where you want to bend or fold the metal, using a straight edge or a scribe. This will serve as a guide for accurate bending.
3. Bend the metal: If you’re working with smaller pieces, you can use pliers to grip the metal along the marked line and apply gentle pressure to create the bend. For larger pieces, a bending tool or a vice may be necessary. Place the metal securely in the bending tool or vice and apply pressure to achieve the desired angle.
4. Create sharp angles: To create sharp corners or angles in the metal, you can use a combination of bending and folding techniques. Make a cut along the marked line, then use pliers or a vice to fold the metal inward, creating a crisp bend.
5. Fold the metal: Folding metal involves bending it at a 90-degree angle, bringing two sides of the metal sheet together. This is commonly done to create boxes, trays, or other three-dimensional shapes. Use a bending tool or a vice to hold the metal securely while folding it along the marked lines.
6. Use a hammer or mallet: For more complex bends or folds, you can use a hammer or mallet to shape the metal against a solid surface. This can help you achieve tighter bends or sharper angles.
7. Test and adjust: After each bend or fold, check the alignment and fit of the metal pieces. Make any necessary adjustments to ensure they meet your desired specifications.
Remember, practice and patience are necessary to master the art of bending and folding metal. Start with simpler projects and gradually progress to more complex designs. Work slowly and make small adjustments as needed, ensuring that you don’t overbend or damage the metal.
Bending and folding metal opens up a world of possibilities in metalworking. With these techniques, you can create aesthetically pleasing and structurally sound metal pieces that meet your specific design requirements. As you gain more experience, you’ll discover new ways to push the boundaries of metal shaping and bring your creative visions to life.
When shaping metal with hand tools, always wear safety goggles to protect your eyes from any flying debris. This is especially important when using hammers, chisels, or files.
Cutting and Trimming Metal
Cutting and trimming metal is a fundamental technique in metal shaping that allows you to remove excess material, create precise shapes, and achieve clean edges in your metalwork. Whether you’re working with thin sheets or thicker metal pieces, mastering the art of cutting and trimming is essential for creating accurate and intricate designs. Here’s a step-by-step guide on how to cut and trim metal:
1. Choose the appropriate cutting tool: Depending on the thickness and type of metal you’re working with, you can use various cutting tools such as shears, snips, or chisels. Select a tool that is specifically designed for cutting metal.
2. Mark the cutting line: Use a scribe or a permanent marker to mark the precise cutting line on the metal sheet or piece. This will serve as a guide for accurate cutting.
3. Position the metal for cutting: Secure the metal firmly in a vice or use clamps to hold it in place. Ensure that the cutting line is visible and easily accessible during the cutting process.
4. Make the cut: If you’re working with thin sheets of metal, shears or snips are effective tools for cutting. Place the metal between the blades of the shears or snips, ensuring that the marked cutting line aligns with the cutting edge. Apply steady pressure and move the tool along the cutting line to create a clean cut.
5. Use chisels for thicker metal pieces: For thicker or more substantial metal pieces, you may need to use chisels. Use a scribe to mark the cutting line, then position the chisel at the edge of the marked line. Tap the chisel with a hammer or mallet to create a groove, gradually working along the cutting line until you’ve made a complete cut.
6. Trim and refine the edges: Once the initial cut is made, you may need to trim and refine the edges. Use files or sandpaper to smoothen any rough edges, ensuring that the cut surface is clean and even.
7. Safety precautions: When cutting and trimming metal, always wear safety goggles, gloves, and other protective gear to protect yourself from flying debris or sharp edges. Additionally, make sure to work in a well-ventilated area to minimize exposure to metal dust.
Practice is key when it comes to cutting and trimming metal. Start with simpler projects and gradually work your way up to more intricate cuts. With time and experience, you’ll develop the skills and techniques needed to create precise, clean, and professional-looking cuts in metal.
By mastering the art of cutting and trimming metal, you’ll be able to create precise shapes and designs, turning rough metal into refined works of art.
Filing and Sanding Metal
Filing and sanding are essential techniques in metal shaping that allow you to refine the surface of the metal, remove rough edges, and achieve a smooth and polished finish. Whether you’re working with intricate details or larger metal pieces, mastering the art of filing and sanding will greatly enhance the quality and appearance of your metalwork. Here’s a step-by-step guide on how to file and sand metal:
1. Choose the appropriate filing tool: There are various types of files available, each designed for specific purposes. Flat, round, and half-round files are commonly used in metal shaping. Select a file based on the shape and size of the metal surface you’re working on.
2. Mark the areas to be filed or sanded: Take a scribe or a permanent marker and mark the areas on the metal that need to be filed or sanded. This will serve as a guide and help ensure consistent and even results.
3. Position the metal securely: Hold the metal securely in a vice or use clamps to prevent it from shifting during the filing or sanding process. This will provide stability and allow for more precise work.
4. File the metal: Holding the file at a slight angle to the metal surface, apply firm and even pressure as you move the file back and forth along the marked area. Use long, smooth strokes to remove excess material and shape the metal. Avoid applying excessive force, as it can damage the file or create uneven surfaces.
5. Sand the metal: After filing, switch to sanding to refine the surface further. Start with a coarse grit sandpaper and progressively move to finer grits. Use circular or back-and-forth motions to smooth out rough areas and create a uniform surface. Continue sanding until the desired level of smoothness is achieved.
6. Clean the metal: Once the filing and sanding are complete, use a clean cloth or brush to remove any metal filings or dust from the surface. This will help ensure a clean and polished finish.
7. Check for smoothness: Inspect the metal surface to ensure it is smooth and free from any rough edges or imperfections. If necessary, repeat the filing and sanding process to achieve the desired result.
Remember to work in a well-ventilated area and wear safety goggles, gloves, and a dust mask to protect yourself from metal particles and dust. Additionally, take breaks if needed to prevent fatigue and strain.
With practice and attention to detail, you’ll be able to master the art of filing and sanding metal. These techniques will enable you to create smooth and refined surfaces, enhancing the overall quality and aesthetics of your metalwork.
Joining Metal Pieces
Joining metal pieces is a crucial technique in metalworking that allows you to securely connect different parts and create complex structures or functional objects. There are several methods available for joining metal, each with its own benefits and considerations. Here are a few common techniques for joining metal pieces:
1. Soldering: Soldering is a process that involves melting a filler metal, known as solder, to join two metal pieces together. A soldering iron or torch is used to heat the solder, which flows into the joint and creates a strong bond when it cools. Soldering is commonly used for joining electrical components or delicate metalwork.
2. Welding: Welding is a technique that involves melting the base metal and adding a filler material to create a strong bond. It requires a welding machine or torch, as well as appropriate safety equipment. Welding is commonly used for joining thick metal pieces or creating structural connections.
3. Riveting: Riveting involves using a rivet, a metal pin with a head, to connect two or more metal pieces together. A hole is drilled through the metal pieces, and the rivet is inserted and secured by hammering or using a rivet gun. Riveting provides a strong and permanent connection and is often used in metal construction or decorative applications.
4. Adhesive bonding: Adhesive bonding involves using specialized metal adhesives to join metal pieces together. The adhesive is applied to the surfaces of the metal, which are then pressed together and left to cure. This method is often used when other joining techniques are not possible or practical.
5. Mechanical fastening: Mechanical fastening refers to using screws, bolts, nuts, or other fasteners to hold metal pieces together. This method provides a secure connection that can be easily disassembled if needed. It is commonly used in woodworking or when joining metal and other materials.
When selecting a joining method, consider factors such as the strength and durability required, the type and thickness of the metal, and the application of the finished piece. Each joining technique has its own advantages and limitations, so choose the method that best suits your project’s needs.
It’s also important to prepare the metal surfaces before joining. Ensure that they are clean, free from rust or corrosion, and properly aligned. Properly clamping or holding the metal pieces during the joining process is crucial to achieve a strong and accurate connection.
Remember to follow safety guidelines and use appropriate safety equipment when working with heat, chemicals, or heavy-duty tools for joining metal. Each technique requires specific skills and practice, so don’t hesitate to seek guidance or practice on scrap pieces before working on your actual project.
By mastering different joining techniques, you’ll have the flexibility to bring your metal pieces together, whether it’s for functional structures or decorative creations.
Read more: How To Use Hand Tools To Shape Hard Wood
Finishing and Polishing Metal
Finishing and polishing metal is the final touch in the metal shaping process, elevating the appearance and enhancing the overall quality of your metalwork. This step involves removing any imperfections, refining the surface, and achieving the desired finish. Here’s a step-by-step guide on how to finish and polish metal:
1. Remove rough edges: Start by using a file or sandpaper to smooth out any rough edges or sharp corners. Be careful not to remove too much material, but rather focus on creating a clean and even surface.
2. Choose the appropriate abrasive: There are several abrasives you can use to polish metal, such as sandpaper, emery cloth, or abrasive wheels. The type and grit will depend on the level of finish you want to achieve and the type of metal you’re working with. Coarser grits are used for initial shaping, while finer grits are used for final polishing.
3. Start with coarse abrasives: If the metal surface has rough imperfections or scratches, begin with a coarse abrasive, such as sandpaper with a low grit, to remove the deeper flaws. Move the abrasive in circular or back-and-forth motions, applying even pressure across the surface.
4. Progress to finer abrasives: As the surface becomes smoother, gradually switch to finer grits of abrasive. This will help refine the finish and remove any remaining scratches or marks from the coarser abrasives.
5. Use polishing compounds: In addition to abrasives, polishing compounds can be used to achieve a higher level of shine and luster. Apply the polish directly onto a soft cloth or a buffing wheel and gently rub it onto the metal surface in a circular motion. This will help remove any remaining imperfections and bring out the natural shine of the metal.
6. Finishing touches: After polishing, inspect the metal surface for any blemishes or missed areas. Make any necessary touch-ups with the appropriate abrasive or polishing compound. For a final touch, wipe down the metal with a clean cloth to remove any residue or excess polishing compound.
7. Protect the finish: To maintain the polished finish, consider applying a protective coating or sealer suitable for the specific type of metal. This will help prevent tarnishing or corrosion and keep the metal looking its best over time.
Remember to work in a well-ventilated area, wear safety goggles and gloves, and take necessary precautions when working with abrasive materials or polishing compounds.
Finishing and polishing metal is a rewarding process that brings out the beauty and professionalism of your metalwork. With attention to detail and practice, you’ll be able to achieve stunning finishes that truly showcase your craftsmanship.
Conclusion
Shaping metal with hand tools is a captivating craft that offers endless possibilities for creativity and self-expression. By learning and mastering the techniques of hammering, bending, cutting, filing, joining, and finishing metal, you can transform raw metal into beautiful and functional pieces of art.
Throughout this article, we have explored the essential hand tools and techniques involved in metal shaping. From the careful selection of hammers, pliers, and shears, to the precise execution of hammering, bending, cutting, and trimming, each step plays a crucial role in achieving the desired outcome.
Moreover, we emphasized the importance of safety precautions, such as wearing protective gear, organizing your workspace, and using tools properly, to ensure a secure and accident-free metal shaping experience.
By understanding the fundamentals of metal shaping, you can embark on a journey of exploration and creativity. With practice, you’ll refine your skills, allowing you to undertake more complex projects and create intricate and visually stunning metalwork.
Remember, metal shaping is not just about functionality; it’s about the passion and dedication that you pour into your work. Each piece you shape with hand tools carries a part of you, showcasing your artistry and craftsmanship.
So, whether you’re a seasoned metalworker or a beginner exploring the realm of metal shaping, let your imagination soar, challenge yourself, and embrace the joy of shaping metal with your own two hands.
As you continue to refine your skills and gain experience, don’t forget to share your knowledge and inspire others to join the world of metal shaping. Together, we can preserve and carry forward the tradition of creating masterpieces from metal.
Frequently Asked Questions about How To Shape Metal With Hand Tools
Was this page helpful?
At Storables.com, we guarantee accurate and reliable information. Our content, validated by Expert Board Contributors, is crafted following stringent Editorial Policies. We're committed to providing you with well-researched, expert-backed insights for all your informational needs.


0 thoughts on “How To Shape Metal With Hand Tools”