Home>Gardening & Outdoor>Outdoor Structures>How To Seal A Metal Tool Shed Roof
Outdoor Structures
How To Seal A Metal Tool Shed Roof
Published: December 21, 2023
Learn how to effectively seal the metal roof of your outdoor structure with our expert tips and techniques. Protect your tool shed from the elements and ensure long-lasting durability.
(Many of the links in this article redirect to a specific reviewed product. Your purchase of these products through affiliate links helps to generate commission for Storables.com, at no extra cost. Learn more)
Introduction
When it comes to safeguarding your metal tool shed from the elements, ensuring that the roof is adequately sealed is of paramount importance. A well-sealed roof not only protects your tools and equipment from moisture and rust but also prolongs the lifespan of the shed itself. In this comprehensive guide, we will walk you through the step-by-step process of sealing the roof of your metal tool shed, equipping you with the knowledge and confidence to tackle this essential maintenance task.
A properly sealed metal tool shed roof not only enhances its durability but also contributes to the overall aesthetic appeal of your outdoor space. By following the expert advice and practical tips outlined in this article, you will be able to execute the roof sealing process with precision, ensuring that your valuable tools and equipment remain protected from the ravages of weather and time.
Join us as we delve into the intricacies of cleaning the roof surface, repairing any damaged areas, applying primer, and effectively sealing the roof with the appropriate sealant. We will also guide you through the crucial steps of allowing sufficient time for drying, inspecting the sealed roof, and touching up any areas that may require additional attention. By the end of this guide, you will be well-versed in the art of sealing a metal tool shed roof, empowering you to uphold the integrity of your outdoor storage space for years to come.
Key Takeaways:
- Properly sealing a metal tool shed roof involves cleaning, repairing, applying primer, and sealant. This protects tools from rust and moisture, ensuring long-lasting durability and resilience against the elements.
- By meticulously following the steps outlined in this guide, you can fortify your metal tool shed roof, safeguarding your valuable tools and equipment for years to come.
Read more: How To Seal Metal Roof
Step 1: Clean the Roof Surface
The first and arguably most crucial step in sealing a metal tool shed roof is to thoroughly clean the surface. Over time, dirt, debris, and other contaminants can accumulate on the roof, hindering the adhesion of the sealant and compromising the overall effectiveness of the sealing process. To begin, equip yourself with a sturdy ladder, safety goggles, a broom, and a high-quality roof cleaner. Before ascending the ladder, ensure that the weather conditions are conducive to this task, and always prioritize safety.
Start by removing any loose debris such as leaves, twigs, and dirt from the roof surface using a broom or a leaf blower. Once the visible debris has been cleared, it’s time to address any stubborn stains or embedded grime. Utilize a roof cleaner specifically designed for metal surfaces, following the manufacturer’s instructions diligently. This may involve diluting the cleaner, applying it to the roof surface, and allowing it to sit for the recommended duration to effectively loosen and dissolve any accumulated dirt and grime.
After the cleaner has had ample time to work its magic, use a soft-bristled brush or a low-pressure washer to gently scrub the roof surface, ensuring that all residual dirt and contaminants are thoroughly removed. Take care to work systematically, moving from one section of the roof to the next, and paying special attention to areas prone to heavy buildup, such as near vents or beneath overhanging trees.
Once the entire roof surface has been cleaned and rinsed, allow it to dry completely before proceeding to the next step. A clean and dry surface is essential for the subsequent stages of the roof sealing process, as it sets the foundation for optimal adhesion and long-lasting protection against the elements.
By meticulously cleaning the roof surface, you are laying the groundwork for a successful roof sealing endeavor, ensuring that the sealant can bond effectively and provide robust protection for your valuable tools and equipment.
Step 2: Repair Any Damaged Areas
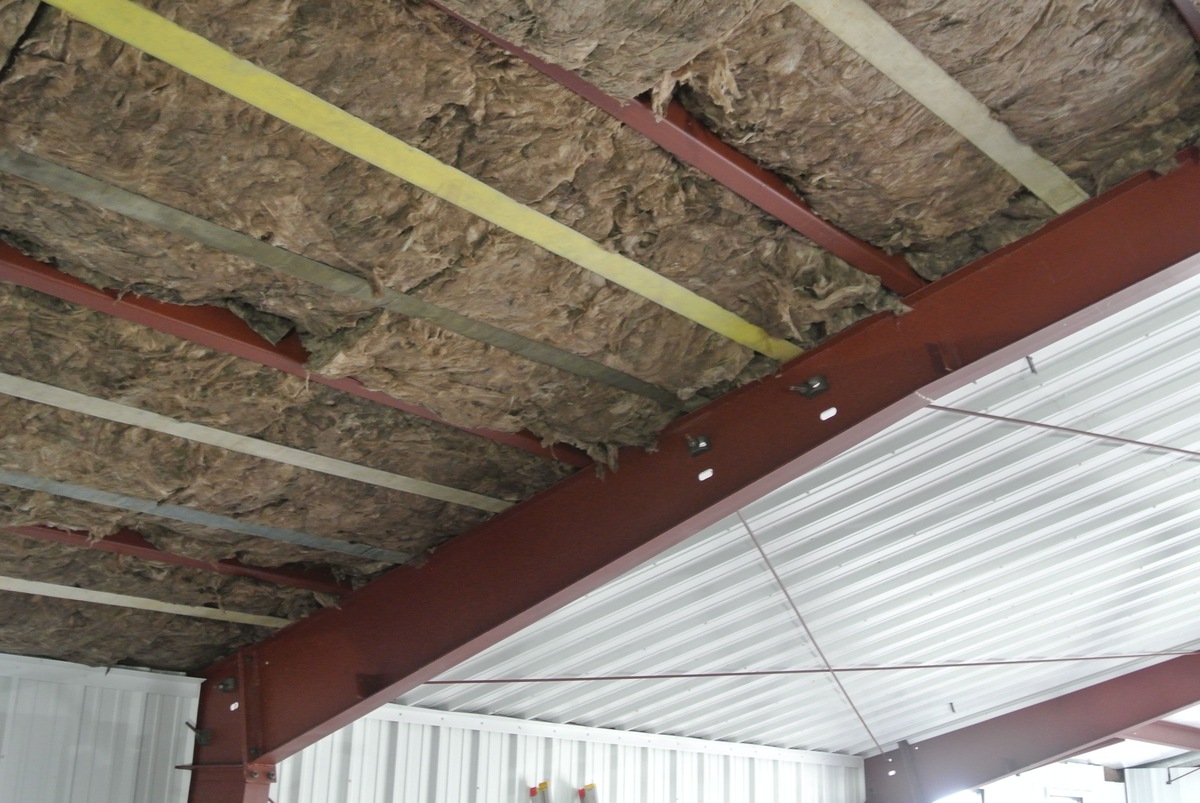
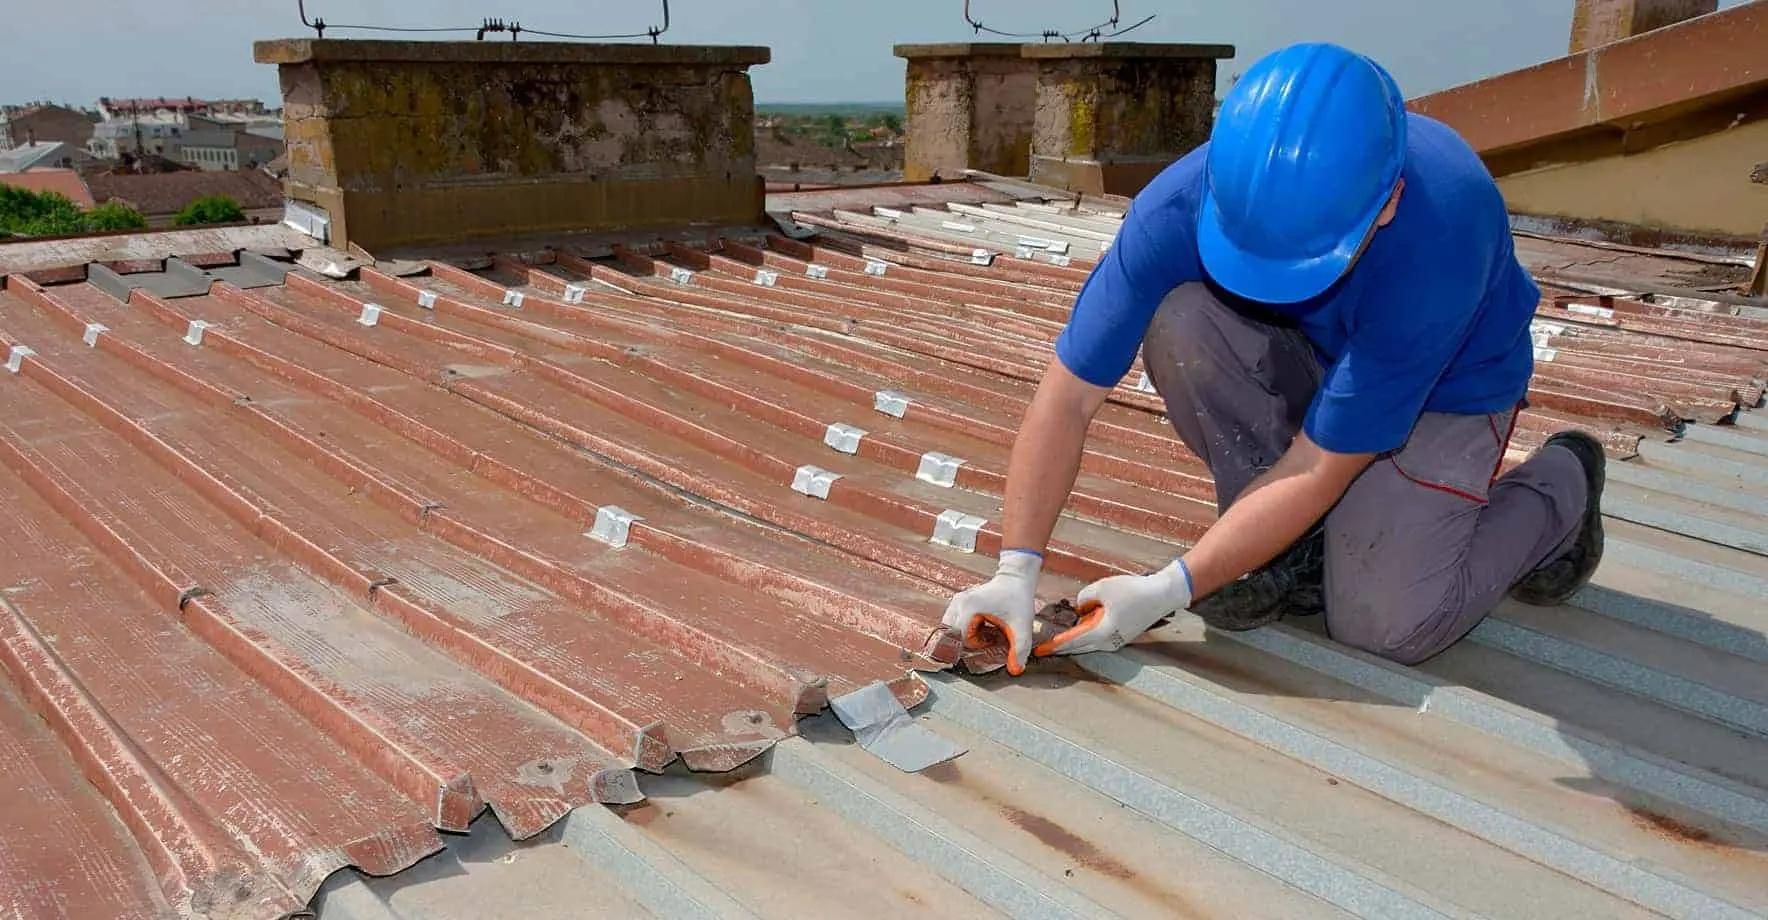
Before proceeding with the sealing process, it is imperative to carefully inspect the metal tool shed roof for any signs of damage or wear. Exposure to the elements, fluctuating temperatures, and the passage of time can result in a variety of issues, including rust, corrosion, dents, or loose fasteners. Identifying and addressing these issues at the outset is crucial to fortifying the structural integrity of the roof and ensuring the efficacy of the sealing process.
Begin by conducting a thorough visual examination of the entire roof surface. Look for areas where the metal may be corroded or rusted, as well as any dents or dings that may have compromised the integrity of the roof. Additionally, inspect the fasteners, such as screws or nails, to ensure that they are securely in place and free from corrosion or damage. Any loose or deteriorated fasteners should be promptly replaced to uphold the stability of the roof.
For rusted or corroded areas, use a wire brush or sandpaper to gently remove the affected material, taking care not to exacerbate the damage. Once the rust or corrosion has been addressed, apply a rust-inhibiting primer to the treated areas to prevent further degradation and promote adhesion of the sealant. This proactive approach not only safeguards the structural soundness of the roof but also mitigates the risk of future deterioration.
In the case of dents or dings, consider employing a suitable metal filler or sealant to smooth out and reinforce the affected areas. Follow the product’s instructions meticulously, ensuring that the repair material is applied evenly and allowed to cure thoroughly before proceeding to the next stage of the sealing process.
By diligently attending to any damaged areas on the metal tool shed roof, you are fortifying its resilience and ensuring that the subsequent sealing efforts yield optimal results. This proactive approach not only extends the longevity of the roof but also safeguards the contents of the shed from potential water ingress and other detrimental effects of a compromised roof.
Step 3: Apply Primer
Once the roof surface has been meticulously cleaned and any damaged areas have been addressed, the next crucial step in the sealing process is the application of a high-quality primer. The primer serves as a foundational layer, promoting adhesion and enhancing the overall effectiveness of the sealant that will be applied subsequently. Additionally, the primer acts as a protective barrier, further fortifying the roof against corrosion and ensuring long-lasting durability.
Before applying the primer, carefully read and follow the manufacturer’s instructions to ensure proper application and optimal results. Select a primer specifically formulated for metal surfaces, taking into account the environmental conditions in your area to choose a primer with appropriate weather resistance and corrosion protection properties.
Begin by preparing the primer as per the manufacturer’s guidelines, ensuring that it is thoroughly mixed and ready for application. Using a high-quality paintbrush or a roller designed for smooth surfaces, apply the primer evenly across the entire roof surface, working methodically from one section to the next. Take care to achieve comprehensive coverage, ensuring that the primer reaches all areas, including seams, edges, and any intricate details on the roof.
Allow the primer to dry completely as per the recommended duration specified by the manufacturer. This crucial waiting period ensures that the primer forms a solid and uniform base, optimizing the adhesion and performance of the subsequent sealant application. During this time, monitor the weather conditions to prevent the primer from being compromised by rain or excessive moisture.
By applying a high-quality primer to the metal tool shed roof, you are fortifying its resilience and creating an ideal substrate for the sealant, ensuring that it adheres effectively and delivers robust, long-term protection against the elements. This proactive step is instrumental in enhancing the durability and structural integrity of the roof, safeguarding your valuable tools and equipment for years to come.
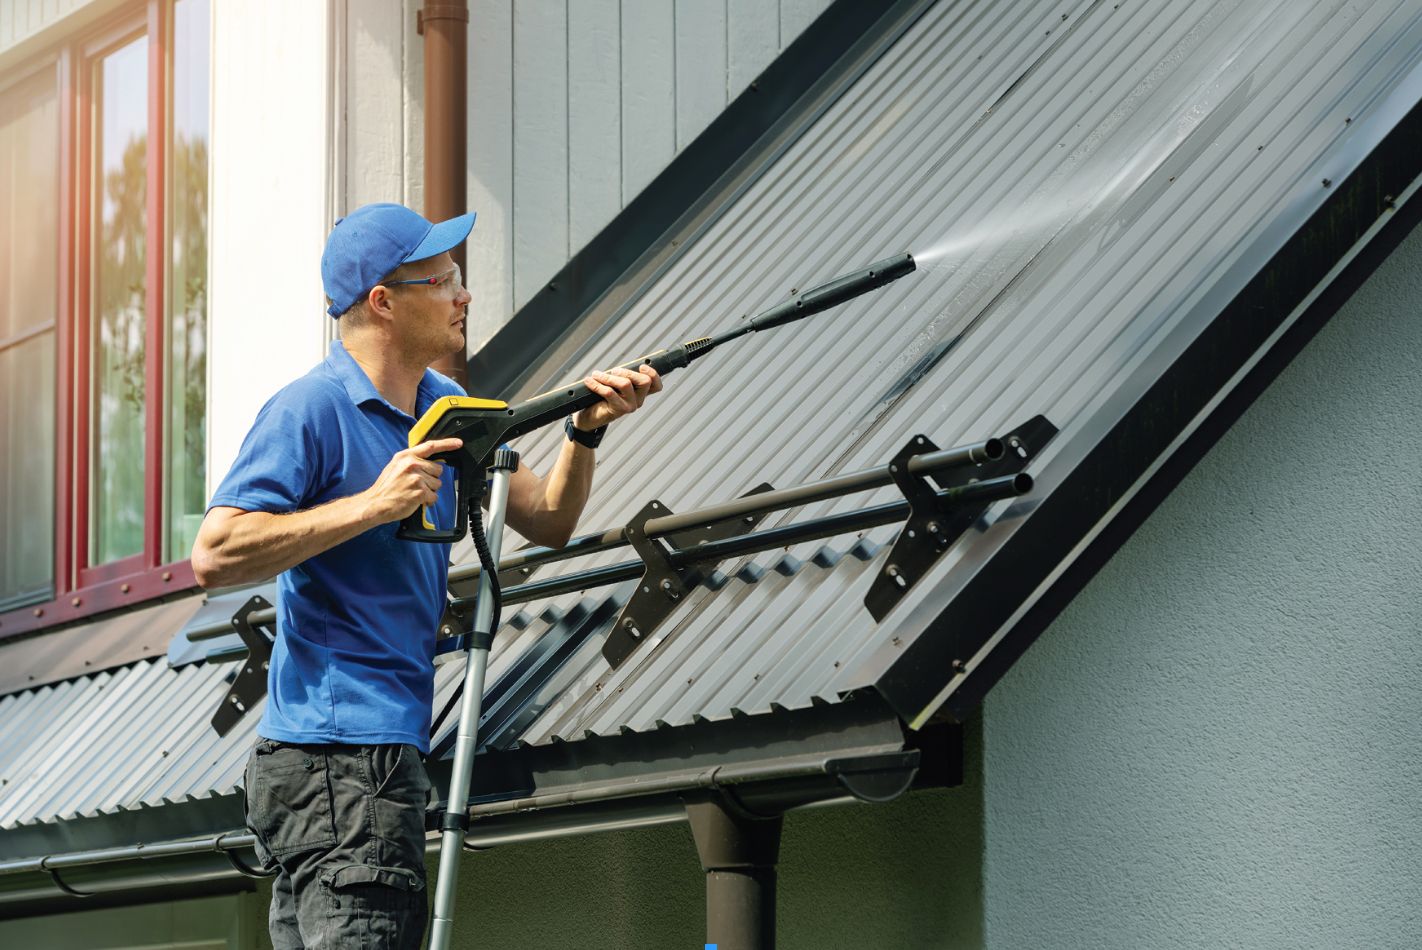
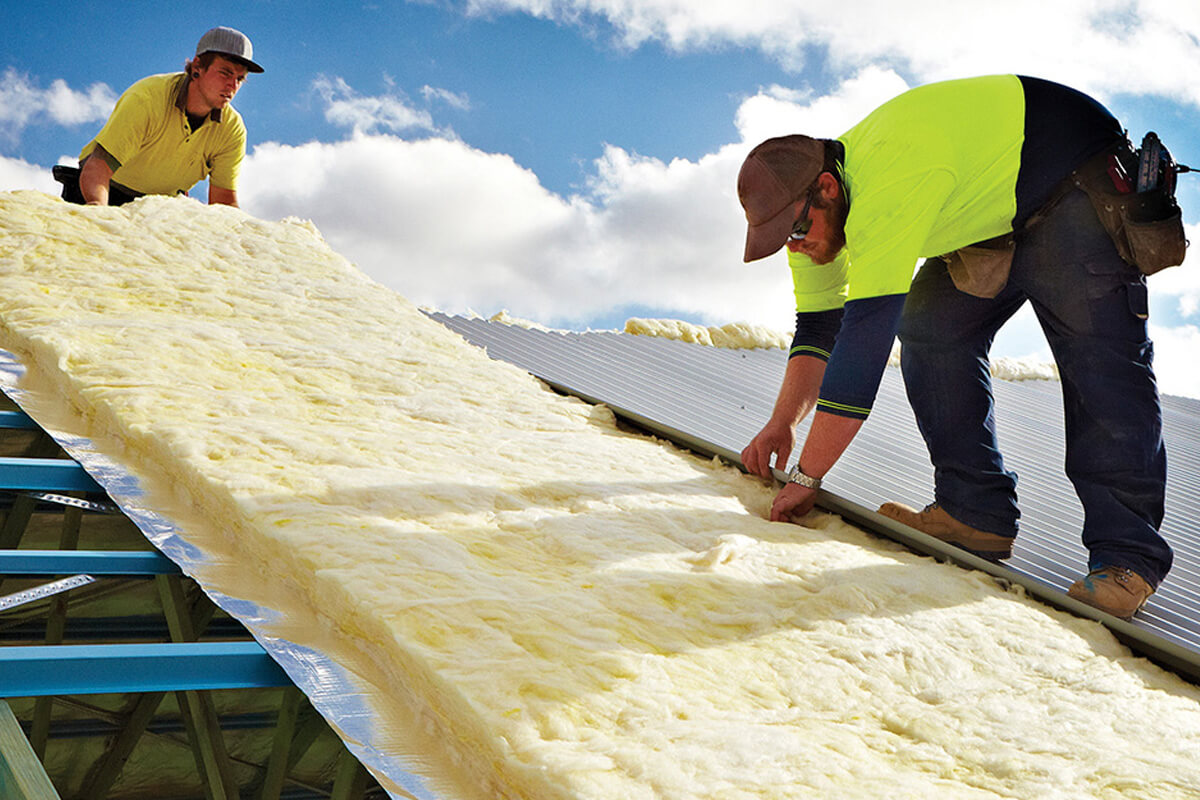
Apply a metal roof sealant with a paintbrush or roller, ensuring full coverage. Start at the highest point and work your way down. Check for any rust or damage before sealing.
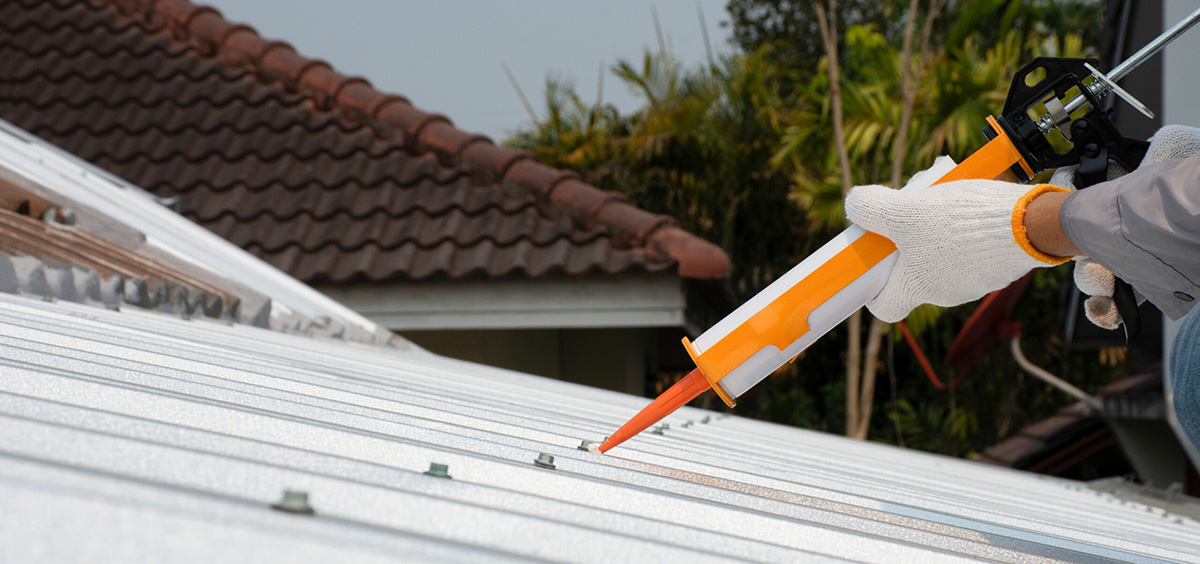
Step 4: Apply Sealant
With the roof surface meticulously cleaned, any damaged areas repaired, and a high-quality primer applied, the time has come to apply the sealant, the cornerstone of the roof sealing process. The sealant not only serves as a protective barrier against moisture, UV rays, and environmental contaminants but also reinforces the structural integrity of the roof, ensuring its longevity and resilience in the face of diverse weather conditions.
Before proceeding with the application of the sealant, carefully select a product specifically designed for metal roofs, taking into consideration factors such as weather resistance, flexibility, and longevity. It is advisable to opt for a sealant that offers superior adhesion and durability, tailored to withstand the climatic challenges prevalent in your region.
Prepare the sealant as per the manufacturer’s instructions, ensuring that it is thoroughly mixed and ready for application. Depending on the type of sealant, you may use a caulking gun or a specialized applicator to dispense and spread the sealant evenly across the roof surface. Work methodically, starting from one end of the roof and progressing systematically to ensure comprehensive coverage.
Pay special attention to seams, edges, and any areas with intricate details, ensuring that the sealant penetrates and effectively seals all vulnerable points on the roof. This meticulous approach is instrumental in fortifying the roof against potential water ingress and corrosion, safeguarding the contents of the shed and prolonging the lifespan of the entire structure.
As you apply the sealant, strive for a consistent and uniform coating, taking care to avoid excess buildup or uneven application. This ensures that the sealant forms a seamless and robust protective layer, capable of withstanding the rigors of the elements and providing enduring protection for your valuable tools and equipment.
By applying a high-quality sealant to the metal tool shed roof, you are not only enhancing its weather resistance and durability but also investing in the long-term preservation of your outdoor storage space. The sealant serves as a formidable shield, fortifying the roof against moisture, UV radiation, and other environmental stressors, ensuring that your tools remain secure and well-protected for years to come.
Read more: How To Seal A Shed Roof
Step 5: Allow Time to Dry
After the application of the sealant, it is imperative to allow sufficient time for the roof to dry thoroughly before subjecting it to the elements. The drying period is a critical phase in the sealing process, as it allows the sealant to cure and form a resilient protective barrier, ensuring long-lasting durability and weather resistance.
Once the sealant has been applied, refer to the manufacturer’s guidelines to ascertain the recommended drying duration. Factors such as temperature, humidity, and air circulation can influence the drying time, so it is essential to consider these variables when planning the subsequent steps of the sealing process.
During the drying period, it is advisable to monitor the weather forecast, ensuring that the roof is shielded from rain, excessive moisture, or other adverse weather conditions that could compromise the integrity of the sealant. If inclement weather is anticipated, take proactive measures to protect the freshly sealed roof, such as covering it with a tarpaulin or utilizing temporary sheltering solutions.
Ensuring adequate ventilation during the drying process accelerates the curing of the sealant and promotes the formation of a robust, uniform protective layer. If feasible, open windows, doors, or vents to facilitate air circulation, expediting the drying process and enhancing the overall efficacy of the sealant.
Throughout the drying period, refrain from walking on the roof or engaging in any activities that may disturb the freshly applied sealant. This precautionary measure minimizes the risk of damage to the sealant and ensures that it can cure undisturbed, optimizing its protective properties and longevity.
By allowing the necessary time for the sealant to dry thoroughly, you are fortifying the roof against the elements and investing in the long-term resilience of your metal tool shed. This patient and meticulous approach ensures that the sealant can achieve its full protective potential, safeguarding your valuable tools and equipment from the detrimental effects of moisture, UV radiation, and other environmental stressors.
Step 6: Inspect and Touch Up
Following the drying period, it is essential to conduct a comprehensive inspection of the sealed roof to ensure that the sealant has been applied effectively and that the entire surface is fortified against potential vulnerabilities. This meticulous scrutiny allows you to identify any areas that may require additional attention or touch-ups, enabling you to fortify the roof against the elements with unwavering thoroughness.
Commence the inspection by carefully examining the entire roof surface, paying close attention to seams, edges, and any intricate details where the sealant has been applied. Look for signs of uneven coverage, thin spots, or areas where the sealant may have been compromised during the drying process. Additionally, evaluate the overall adhesion and integrity of the sealant, ensuring that it forms a seamless and resilient protective layer.
If any areas are identified as requiring touch-ups, promptly address them by applying a supplementary coat of sealant to reinforce the protective barrier. Utilize a high-quality applicator to ensure precise and uniform coverage, paying particular attention to the targeted areas to fortify them against potential water ingress and corrosion.
As you touch up the identified areas, strive for a consistent and even application, ensuring that the supplementary sealant seamlessly integrates with the existing coating to form a cohesive and robust protective layer. This proactive approach not only rectifies any potential vulnerabilities but also reinforces the overall efficacy of the sealant, ensuring enduring protection for your metal tool shed roof.
Following the touch-up process, allow the supplementary sealant to dry completely as per the manufacturer’s recommendations, ensuring that it cures to form a resilient and uniform protective barrier. Monitor the weather conditions during this period to prevent any compromise to the freshly applied sealant, safeguarding its integrity and effectiveness.
By conducting a meticulous inspection and promptly addressing any areas that require touch-ups, you are ensuring that the sealed roof of your metal tool shed is fortified with unwavering thoroughness, capable of withstanding the diverse challenges posed by the elements. This proactive approach not only enhances the durability and weather resistance of the roof but also safeguards the contents of the shed, ensuring their long-term protection and security.
Conclusion
Congratulations on successfully completing the comprehensive process of sealing the roof of your metal tool shed. By meticulously following the expert guidance and practical steps outlined in this guide, you have fortified your outdoor storage space against the detrimental effects of moisture, UV radiation, and environmental contaminants, ensuring the enduring protection of your valuable tools and equipment.
Through the diligent cleaning of the roof surface, meticulous repair of any damaged areas, application of a high-quality primer, and the precise application of a robust sealant, you have fortified the structural integrity of the roof, enhancing its durability and weather resistance. By allowing sufficient time for the sealant to dry thoroughly and conducting a thorough inspection to identify and address any areas requiring touch-ups, you have demonstrated a commitment to the long-term preservation of your metal tool shed.
It is important to recognize that the sealing process is not merely a maintenance task; it is an investment in the longevity and resilience of your outdoor storage space. By proactively fortifying the roof against the elements, you are safeguarding your tools and equipment, ensuring that they remain secure and well-protected for years to come.
As you admire the newly sealed roof of your metal tool shed, take pride in the proactive measures you have taken to fortify its resilience and longevity. Your meticulous attention to detail and unwavering commitment to quality maintenance have yielded a robust and enduring protective barrier, ensuring that your outdoor storage space remains a reliable and secure haven for your valuable tools and equipment.
Armed with the knowledge and expertise acquired through this comprehensive guide, you are well-prepared to tackle future maintenance tasks and uphold the integrity of your metal tool shed. By nurturing a proactive approach to maintenance and preservation, you are not only enhancing the longevity of your outdoor structures but also cultivating a space that embodies security, reliability, and enduring functionality.
Embrace the satisfaction of a job well done, knowing that your metal tool shed roof stands fortified against the elements, a testament to your dedication to quality maintenance and the enduring protection of your valuable tools and equipment.
Frequently Asked Questions about How To Seal A Metal Tool Shed Roof
Was this page helpful?
At Storables.com, we guarantee accurate and reliable information. Our content, validated by Expert Board Contributors, is crafted following stringent Editorial Policies. We're committed to providing you with well-researched, expert-backed insights for all your informational needs.


0 thoughts on “How To Seal A Metal Tool Shed Roof”