Articles
How To Stain Wood Countertops
Modified: December 7, 2023
Learn how to stain wood countertops effectively with our informative articles. Enhance the beauty and durability of your countertops with these expert tips and techniques.
(Many of the links in this article redirect to a specific reviewed product. Your purchase of these products through affiliate links helps to generate commission for Storables.com, at no extra cost. Learn more)
Introduction
Welcome to the world of DIY home improvement! If you’re looking to add a touch of elegance and warmth to your kitchen, staining your wood countertops is a fantastic option. Not only does it bring out the natural beauty of the wood, but it also provides protection against daily wear and tear. In this article, we will guide you through the step-by-step process of staining your wood countertops, from preparation to final sealing.
Staining wood countertops is a popular choice among homeowners who appreciate the rich, inviting look it lends to their kitchen. However, before you embark on this project, it’s important to understand that it requires careful planning and execution. The key to achieving a successful outcome lies in proper preparation, choosing the right stain, and following the correct application techniques.
By the end of this article, you’ll be equipped with the knowledge and confidence to transform your plain wood countertops into stunning focal points in your kitchen. So let’s get started!
Key Takeaways:
- Transform your kitchen with DIY elegance by staining wood countertops. Proper preparation, stain selection, and sealing are key to achieving stunning, durable results.
- Regular maintenance and care will preserve the beauty and functionality of your stained wood countertop for years to come. Enjoy the satisfaction of a DIY upgrade!
Read more: How Much Are Wood Countertops
Step 1: Preparing the Wood Countertop
Before diving into the staining process, it’s crucial to ensure that your wood countertop is properly prepared. This step sets the foundation for a flawless finish and ensures that the stain adheres evenly.
- Clean the countertop: Start by removing any dust, dirt, or debris from the surface of the wood countertop. Use a soft cloth or brush to gently wipe away any particles. For tougher stains or residue, you can use a mild soap and water solution.
- Sand the countertop: Next, it’s time to sand the wood countertop to create a smooth and even surface. Begin with a coarse-grit sandpaper and gradually work your way up to a finer grit. This helps remove any imperfections, such as scratches, stains, or blemishes. Make sure to sand in the direction of the wood grain for the best results.
- Fill any gaps or holes: If you notice any gaps or holes in the wood surface, now is the time to fill them. You can use wood filler or putty that matches the color of the wood. Apply the filler using a putty knife, ensuring that it is level with the countertop surface. Allow it to dry completely before moving on.
- Smooth the surface: Once the filler has dried, lightly sand the countertop again to ensure a smooth and uniform surface. This step will help the stain penetrate evenly and provide a consistent color throughout.
- Protect the surrounding areas: Lastly, it’s important to protect the surrounding areas from the stain. Cover any adjacent surfaces, cabinets, or appliances with drop cloths or painter’s tape to avoid any unintended staining.
By taking the time to properly prepare your wood countertop, you’re setting yourself up for a successful staining process. The result will be a beautifully finished countertop that enhances the overall aesthetic of your kitchen.
Step 2: Choosing the Right Stain
When it comes to staining wood countertops, choosing the right stain is essential to achieving the desired aesthetic and long-lasting finish. There are various types of stains available, each offering different colors, finishes, and levels of protection. Here are some factors to consider when selecting the perfect stain for your wood countertop:
- Color: Determine the color you want to achieve for your wood countertop. Stains come in a range of shades, from light to dark, allowing you to enhance the natural beauty of the wood or create a bold contrast with your kitchen decor.
- Transparency: Consider the level of transparency you desire. Some stains are transparent, allowing the wood grain to show through, while others offer more opacity for a solid-colored finish. Decide on the level of visibility you prefer.
- Wood species: Take note of the type of wood your countertop is made of. Different wood species absorb stains differently, resulting in variations in color and intensity. Consider how the stain will interact with the natural characteristics of the wood you’re working with.
- Protection: Evaluate the level of protection offered by the stain. Look for a stain that provides both color enhancement and durability. Consider stains with built-in sealants or ones that require a separate sealing coat to ensure longevity and resistance to moisture, heat, and scratches.
- Test samples: Before committing to a specific stain, it’s important to test samples on a small, inconspicuous area of your wood countertop or on a scrap piece of wood from the same species. This will give you a better idea of how the stain will look on your specific wood and help you make an informed decision.
By considering these factors and thoroughly researching different stain options, you can choose a stain that aligns with your vision and meets your needs. Remember, the right stain can transform your wood countertop from ordinary to extraordinary, elevating the overall appeal of your kitchen.
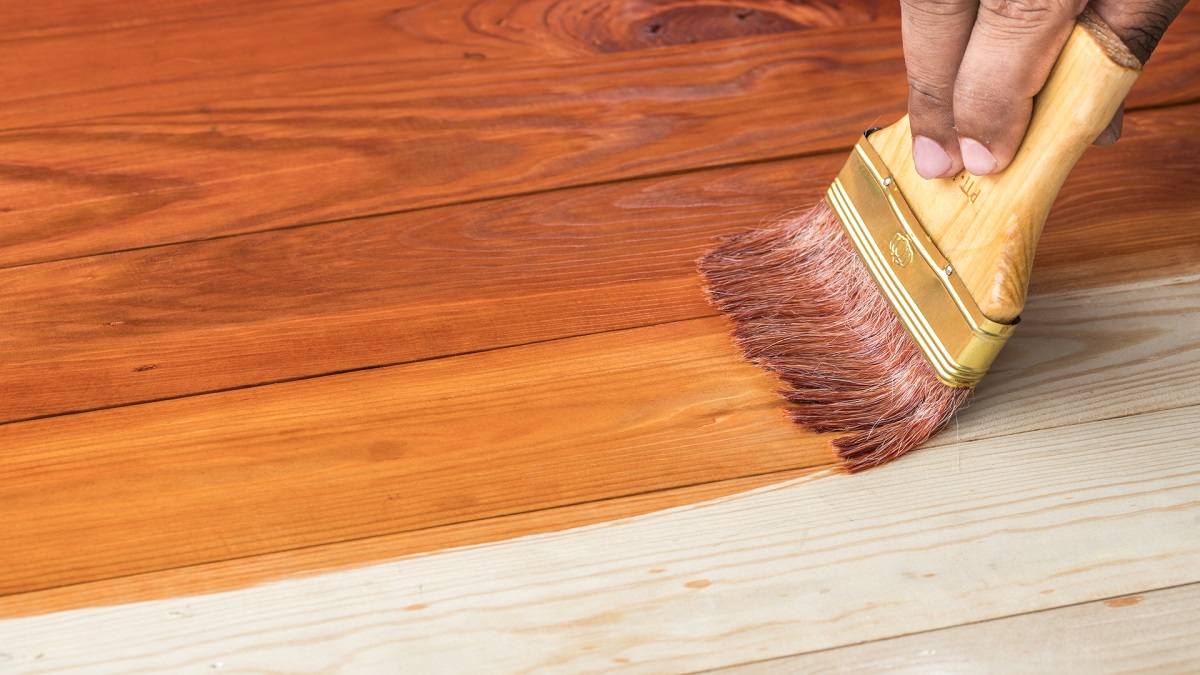
Step 3: Applying the Stain
Now that you have selected the perfect stain for your wood countertop, it’s time to start the application process. Applying the stain requires patience and attention to detail to achieve an even and professional-looking finish. Follow these steps to ensure the best results:
- Prepare the work area: Start by placing a drop cloth or plastic sheeting to protect the floor and surrounding surfaces from any accidental drips or spills. Open windows or ensure proper ventilation to facilitate airflow during the staining process.
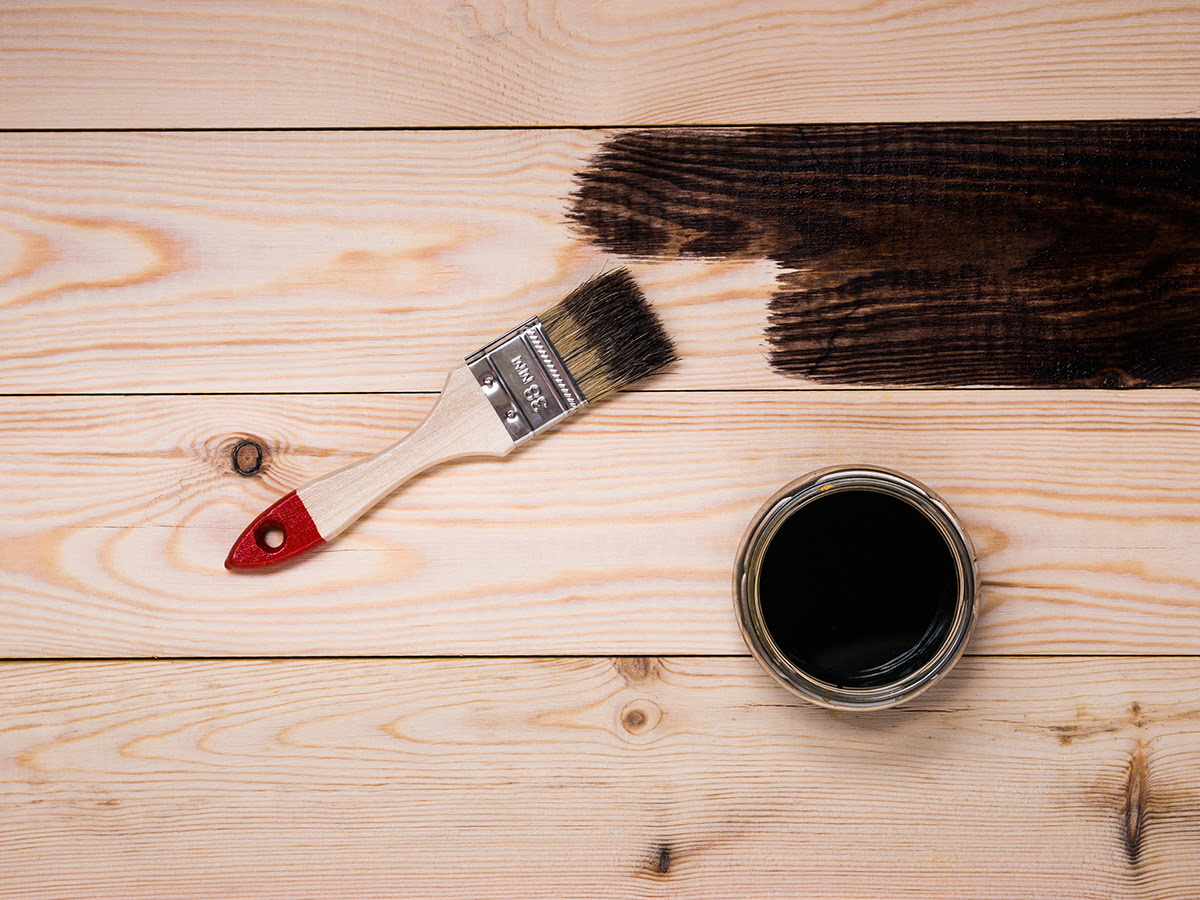
- Stir the stain: Before beginning, thoroughly stir the stain to ensure an even consistency. Use a stir stick or a paint stirrer and mix it gently but thoroughly, making sure to incorporate any settled pigments at the bottom of the container.
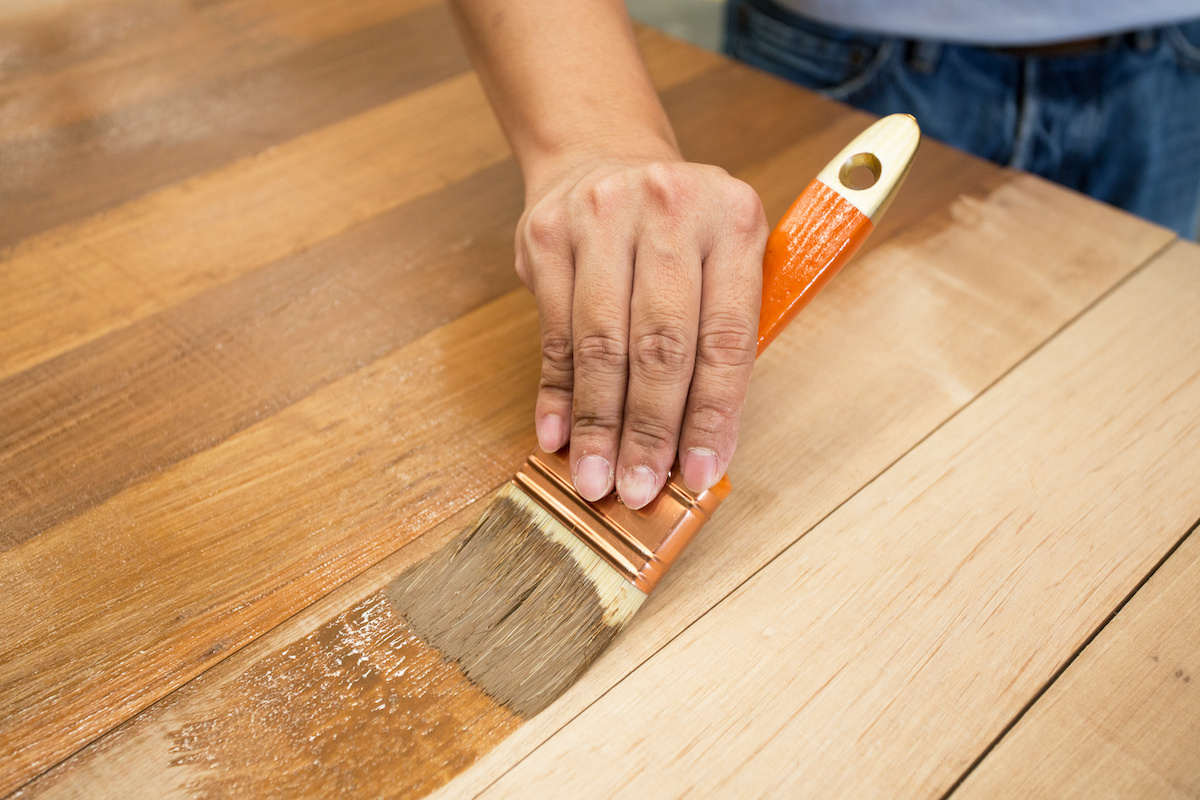
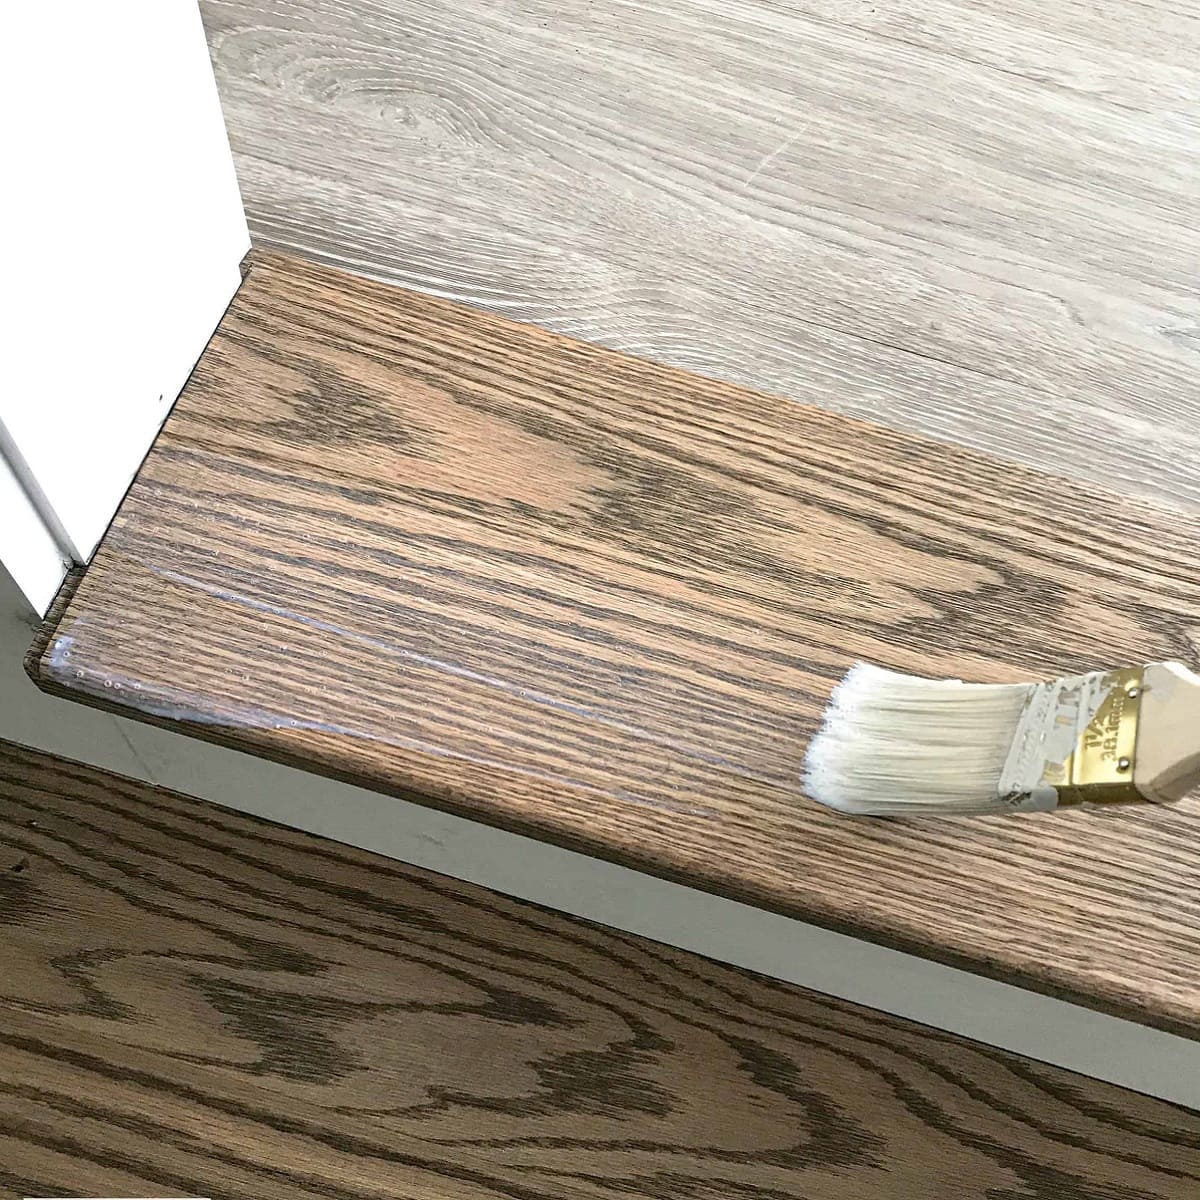
- Apply a thin coat: Using a clean, lint-free cloth or foam brush, apply a thin and even coat of stain to the wood countertop. Work in small sections, applying the stain in the direction of the wood grain. Avoid applying too much stain at once, as it may result in an uneven or blotchy appearance.
- Wait for absorption: Allow the stain to penetrate the wood surface for the recommended amount of time specified by the manufacturer. This typically ranges from a few minutes to up to 15 minutes. The longer you leave the stain, the deeper the color will be. Keep in mind that different stains may have varying absorption times.
- Remove excess stain: After the absorption time, use a clean cloth to gently wipe off any excess stain from the wood surface. Wipe in the direction of the wood grain to maintain a consistent appearance. This step helps prevent streaks or build-up of excess stain.
- Inspect and repeat if necessary: Assess the color and coverage after the first coat of stain. If you desire a darker or more intense color, you can apply a second coat following the same process as before. Repeat the application and absorption process until you achieve the desired color.
- Allow for drying time: After the final coat, allow the stained wood countertop to dry completely according to the manufacturer’s instructions. This typically takes around 24 hours, but it can vary based on environmental conditions.
Remember to follow the instructions provided by the stain manufacturer for the best results. Take your time during the application process to ensure that each coat is applied evenly, resulting in a beautiful and consistent finish on your wood countertop.
When staining wood countertops, always sand the surface thoroughly to ensure the stain adheres evenly. Use a pre-stain wood conditioner to prevent blotchiness and apply the stain in the direction of the wood grain for a smooth finish.
Step 4: Removing Excess Stain
After applying the stain to your wood countertop, it’s crucial to remove any excess stain to achieve a clean and polished look. Removing excess stain ensures that the color is evenly distributed and prevents any blotches or streaks from forming. Follow these steps to effectively remove excess stain:
- Use a clean cloth: Take a clean, lint-free cloth and lightly dampen it with the recommended cleaning agent or mineral spirits. This will help break down and remove the excess stain from the wood surface.
- Wipe with the grain: Gently wipe the countertop with the cloth, moving in the direction of the wood grain. This motion helps prevent any smearing or streaking of the stain and ensures an even removal of the excess product.
- Monitor the cloth: As you wipe, pay close attention to the cloth. If it becomes saturated with stain, replace it with a fresh one. Using a soiled cloth can result in redistributing the excess stain back onto the countertop.
- Be thorough: Take your time and cover the entire stained surface to remove all excess stain. Make sure to check corners, edges, and crevices where stain may accumulate. Thoroughly wiping off the excess stain helps achieve a uniform and professional finish.
- Inspect for blotches or streaks: Once you’ve removed the excess stain, inspect the countertop for any remaining blotches or streaks. If you notice any uneven color, you may need to reapply the stain in those areas and repeat the removal process until the desired result is achieved.
Removing excess stain is a crucial step in the staining process to ensure a flawless and even finish. By following these steps and taking your time to carefully remove any excess product, you’ll be one step closer to a beautifully stained wood countertop.
Read more: How To Finish Wood Countertops
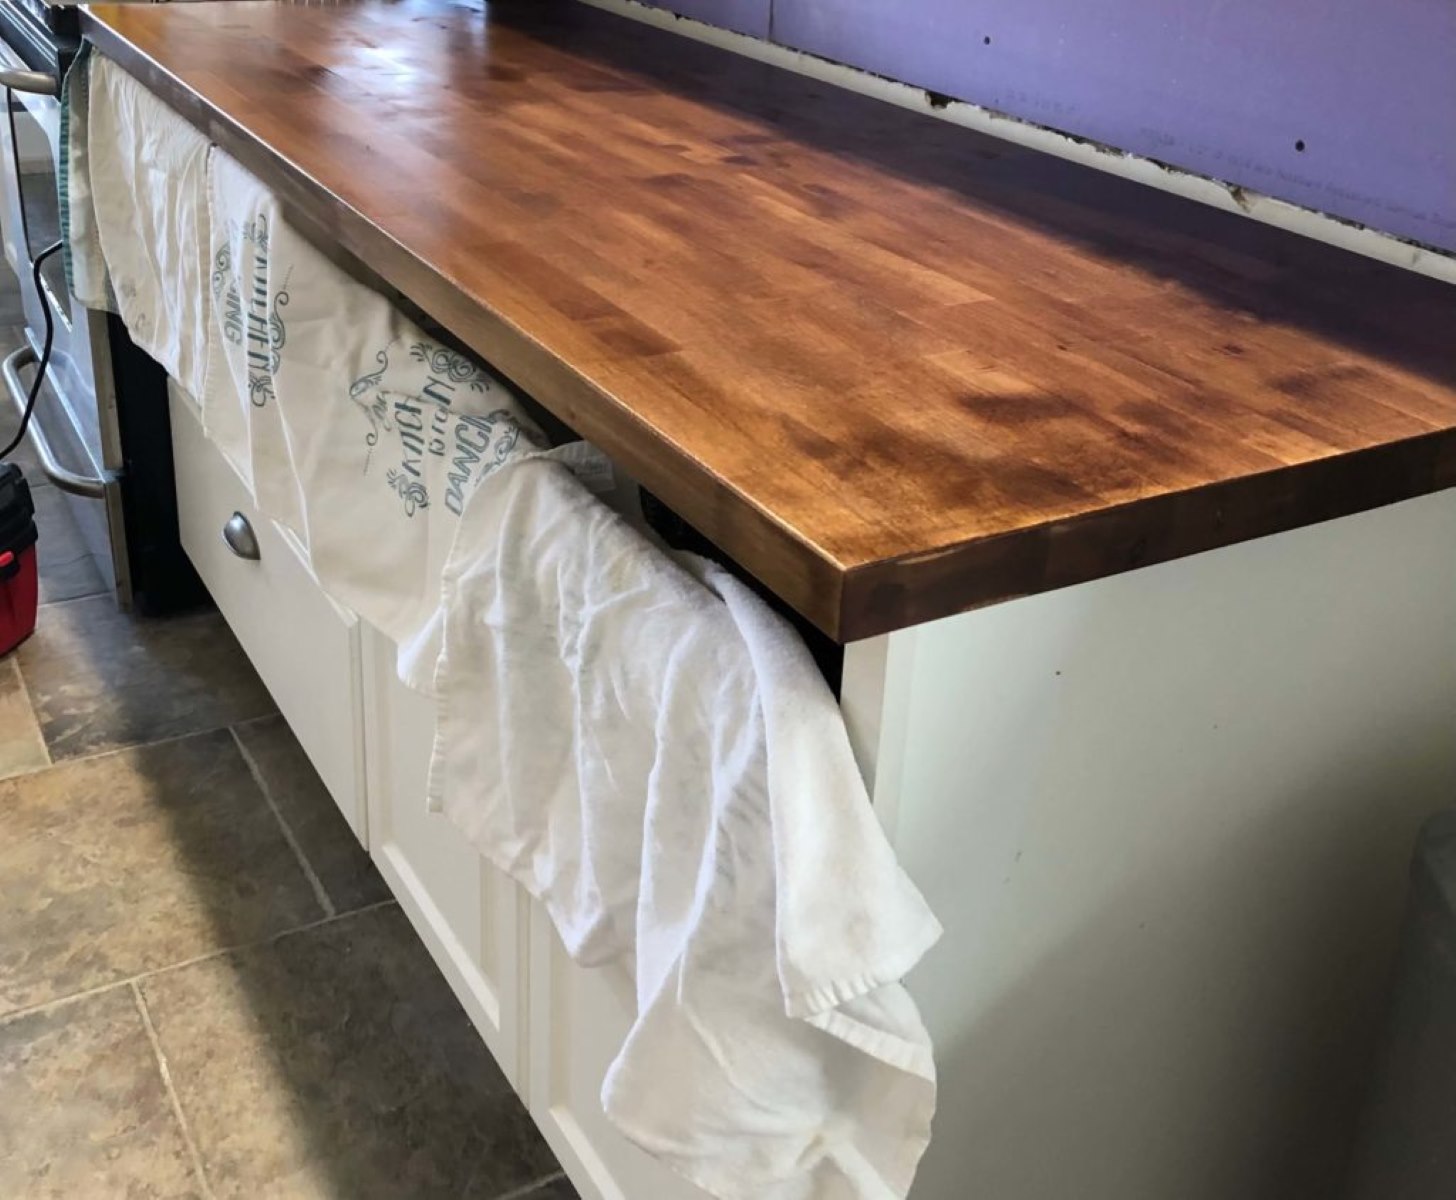
Step 5: Sealing the Stained Countertop
Sealing your stained wood countertop is an essential final step that not only enhances its beauty but also provides protection against everyday use. The sealant acts as a barrier, preventing moisture, stains, and damage from penetrating the wood surface. Here’s how to seal your stained countertop effectively:
- Choose the right sealant: There are several sealant options available, including polyurethane, lacquer, and varnish. Consider factors such as durability, ease of application, and the desired finish. Read the manufacturer’s instructions carefully to select the appropriate sealant for your specific stained countertop.
- Prepare the countertop: Ensure that your stained wood countertop is clean and completely dry before applying the sealant. Remove any dust or debris using a soft cloth or brush. If needed, lightly sand the surface to smooth out any imperfections, ensuring a uniform appearance.
- Apply the sealant: Using a clean brush or roller, apply the sealant evenly on the stained wood surface. Start at one end of the countertop and work your way toward the other end, following the wood grain. Be careful to avoid leaving any brush strokes or puddles of sealant.
- Allow for drying and curing: Follow the drying and curing time specified by the sealant manufacturer. This typically ranges from a few hours to a full day or more. During this time, ensure proper ventilation in the area to promote adequate air circulation and help with the drying process.
- Apply additional coats (if necessary): Depending on the type of sealant and the level of protection desired, you may need to apply multiple coats. Follow the manufacturer’s instructions on the recommended number of coats and the time interval between each application. Lightly sand the countertop between coats to promote adhesion and achieve a smooth finish.
- Inspect and maintain: Once the sealant has fully dried and cured, inspect your sealed countertop for any imperfections. If necessary, lightly sand any rough areas and apply another coat of sealant. Regularly maintain your sealed countertop by cleaning with mild soap and water and avoiding harsh chemicals or abrasive cleaners.
Sealing your stained wood countertop provides long-lasting protection and enhances its durability and beauty. Follow these steps and recommendations to ensure a successful sealing process, creating a stunning kitchen centerpiece.
Step 6: Caring for Your Stained Wood Countertop
Once your stained wood countertop is sealed and beautifully finished, it’s important to establish a regular care routine to keep it looking its best for years to come. Proper maintenance will help preserve the stain, protect the wood, and maintain its overall condition. Here are some tips on how to care for your stained wood countertop:
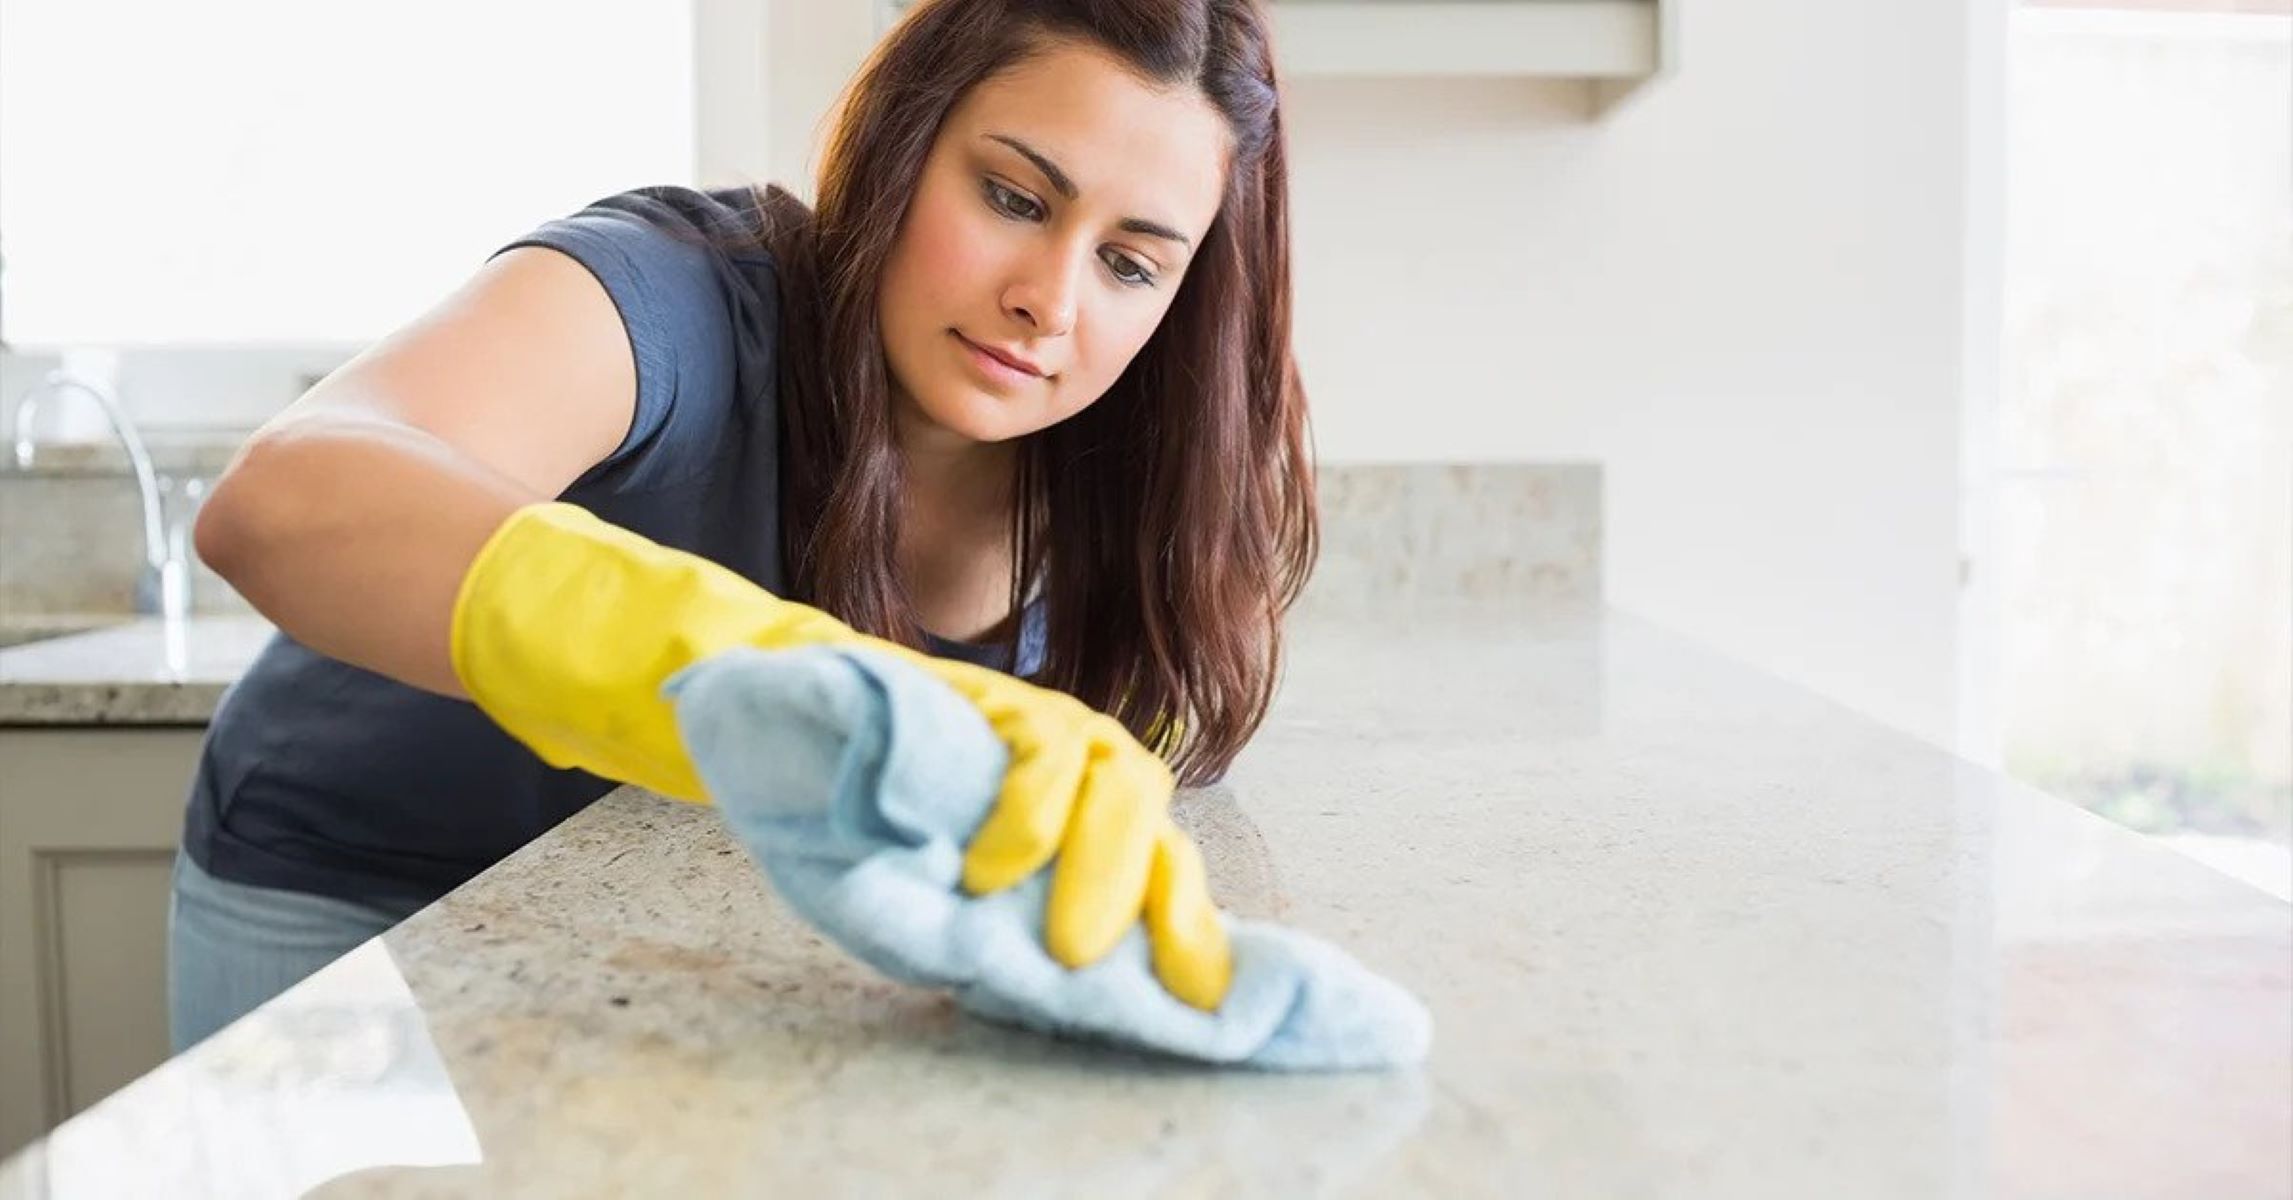
- Regular cleaning: Clean your stained wood countertop regularly using a mild soap or wood cleaner and warm water. Avoid using harsh chemicals or abrasive cleaners, as they can damage the stain or wood surface. Wipe up spills immediately to prevent staining.
- Use cutting boards and trivets: To protect your wood countertop from scratches and heat damage, always use cutting boards and trivets when placing hot pans or dishes. Avoid directly cutting or placing hot items on the countertop surface.
- Avoid prolonged exposure to water: Water can damage wood over time, so it’s important to wipe up spills promptly and avoid leaving wet items or standing water on the countertop. Dry the surface thoroughly after cleaning.
- Reapply sealant when needed: Over time, the sealant on your stained wood countertop may wear off or become compromised. Monitor the surface for signs of wear and reapply a fresh coat of sealant as needed to maintain protection.
- Handle with care: Although wood is durable, it can still be susceptible to dents and scratches. Use coasters or mats under heavy or sharp objects. Avoid dragging heavy items across the countertop surface.
- Regular inspections: Periodically inspect your stained wood countertop for any signs of damage, such as cracks, chips, or discoloration. Promptly address any issues to prevent further damage and maintain the integrity of the surface.
- Re-staining when desired: Over time, the color of your stained wood countertop may fade or become dull. If you wish to refresh the appearance, you can re-stain the surface following the same steps outlined in this guide.
By following these care tips, you can enjoy the beauty and functionality of your stained wood countertop for many years. Remember that regular maintenance and proper handling are key to preserving its appearance and ensuring its longevity.
Conclusion
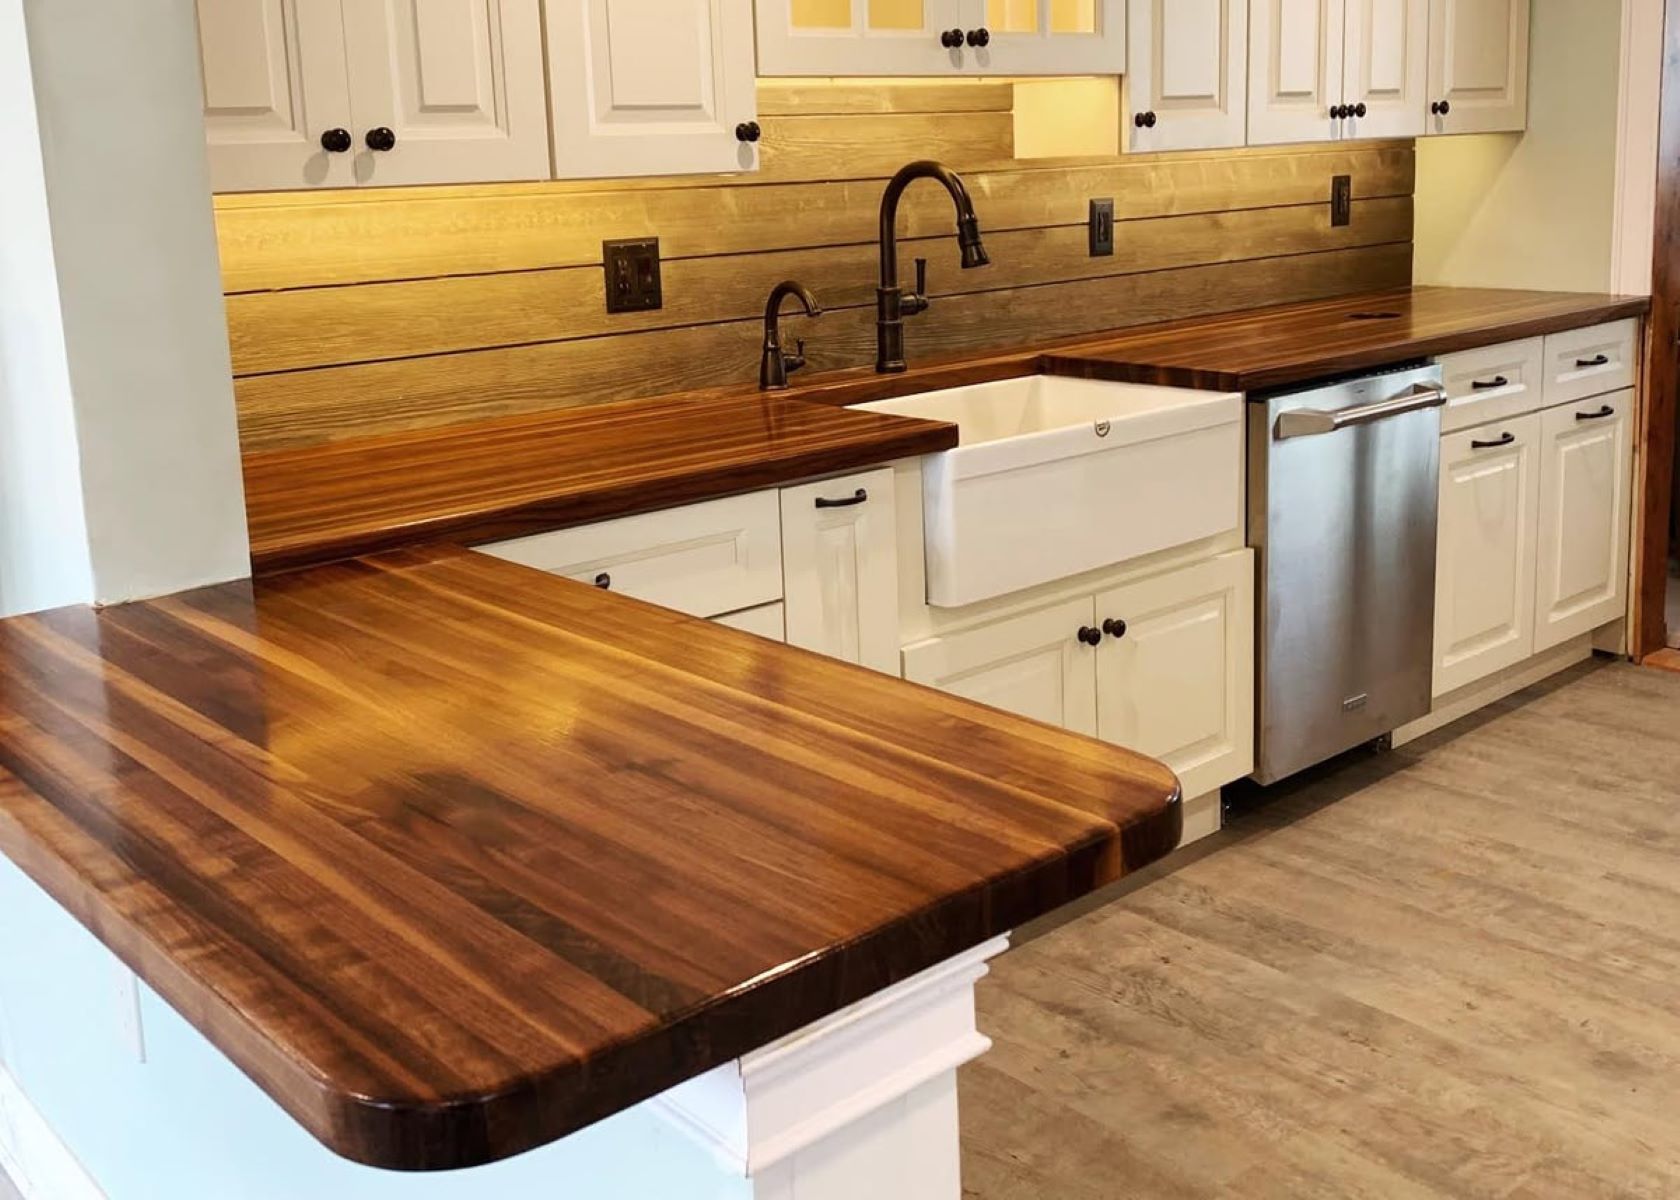
Staining your wood countertops is a rewarding DIY project that can transform the look and feel of your kitchen. With the right preparation, stain selection, and application techniques, you can achieve a stunning and durable finish that adds warmth and elegance to your space.
Throughout this article, we’ve covered the step-by-step process of staining wood countertops, from preparing the surface to sealing the stain. By following these guidelines and taking your time, you can achieve professional-looking results that will impress family and friends.
Remember to choose a stain that complements your kitchen’s aesthetic, and consider the level of protection you desire. Take the time to properly prepare the wood surface, ensuring it is clean and smooth before applying the stain. Remove any excess stain to achieve an even finish, and seal the stained countertop to enhance its durability.
Once your stained wood countertop is complete, caring for it is essential to maintain its beauty. Regular cleaning, using cutting boards and trivets, and reapplying sealant when necessary will help prolong the life and appearance of your countertop.
Now that you have the knowledge and confidence to undertake this project, it’s time to unleash your creativity and transform your wood countertops into stunning focal points in your kitchen. Enjoy the process and the satisfaction of knowing you accomplished this beautiful upgrade with your own hands!
Frequently Asked Questions about How To Stain Wood Countertops
Was this page helpful?
At Storables.com, we guarantee accurate and reliable information. Our content, validated by Expert Board Contributors, is crafted following stringent Editorial Policies. We're committed to providing you with well-researched, expert-backed insights for all your informational needs.


0 thoughts on “How To Stain Wood Countertops”