
Articles
How To Stain A Wood Ceiling
Modified: May 6, 2024
Learn the step-by-step process of staining a wood ceiling with our informative articles. Discover expert tips and techniques to achieve a beautiful and long-lasting finish.
(Many of the links in this article redirect to a specific reviewed product. Your purchase of these products through affiliate links helps to generate commission for Storables.com, at no extra cost. Learn more)
Introduction
Welcome to the world of wood ceilings! If you’re looking to add a touch of warmth, elegance, and natural beauty to your space, staining a wood ceiling can be a fantastic option. A stained wood ceiling can transform a plain and ordinary room into a cozy and inviting space. Whether you’re renovating your home or sprucing up your office, staining a wood ceiling is a great DIY project that can yield stunning results.
In this article, we will guide you through the process of staining a wood ceiling, from choosing the right stain to applying and finishing it. We’ll also share some tips and techniques to ensure a smooth and professional-looking finish. So, grab your tools and let’s get started on this exciting journey!
Before we dive into the nitty-gritty, let’s take a moment to discuss why staining a wood ceiling is an excellent choice. Wood ceilings have been a popular architectural feature for centuries, and for good reason. They add a touch of natural beauty and character to any room, creating a warm and inviting atmosphere. By staining the wood, you can enhance its texture and bring out its unique patterns and tones.
Staining a wood ceiling also offers practical benefits. It helps protect the wood from moisture, UV rays, and general wear and tear. The right stain can even make the wood more resistant to mold and insect damage. Additionally, staining allows you to customize the appearance of the wood to match your aesthetic preferences and complement your existing decor.
Now that we understand the many benefits of staining a wood ceiling, let’s move on to the first step: choosing the right stain. By selecting the right stain color and type, you can achieve the desired look and create a beautiful, long-lasting finish.
Next, we’ll explore the process of choosing the right stain for your wood ceiling.
Key Takeaways:
- Transform any space with warmth and elegance by staining a wood ceiling. Choose the right stain, prepare the wood, and apply a protective finish for stunning, long-lasting results.
- Embrace the rewarding DIY journey of staining a wood ceiling. From selecting the perfect stain to cleaning up, create a cozy and inviting atmosphere with a touch of natural beauty.
Read more: How To Stain Wood Furniture
Choosing the Right Stain
When it comes to staining a wood ceiling, choosing the right stain is crucial to achieve the desired outcome. The stain color and type will determine the overall look and feel of the room. Here are some factors to consider when selecting a stain for your wood ceiling:
- Wood Type: Different wood types will react differently to stains. Some woods, like oak and mahogany, have a more open grain and absorb stains more easily. On the other hand, woods like pine and maple have a tighter grain and may require a pre-stain conditioner to ensure even absorption. Consider the characteristics of your wood ceiling when choosing a stain.
- Color Palette: Think about the color scheme and ambiance you want to create in the room. Do you prefer a lighter, more natural look, or do you want a rich and darker tone? Consider the existing decor and furniture in the space, as well as the overall mood you want to evoke.
- Test Samples: It’s always a good idea to test stain samples on a small, inconspicuous area of the wood ceiling before committing to a particular color. This will give you a better idea of how the stain will look on your specific wood type and help you make an informed decision.
- Stain Type: There are two main types of wood stains: oil-based and water-based. Oil-based stains offer a deeper penetration and richer color, while water-based stains dry faster and have less odor. Consider the pros and cons of each type and choose the one that suits your preferences and the project requirements.
- Finish Options: Stains come in different finishes, such as matte, satin, semi-gloss, and glossy. Think about the level of sheen you want on your wood ceiling. Matte finishes provide a more subtle and natural look, while glossy finishes offer a bold and dramatic appearance. Consider the lighting in the room and the overall aesthetic you’re aiming for.
Once you’ve considered these factors, it’s time to visit a local home improvement store or consult with a professional to explore the stain options available. Take your time to browse through different stain colors and types, and don’t hesitate to ask for recommendations or advice.
Now that you’ve chosen the right stain for your wood ceiling, it’s time to prepare the wood and ensure a smooth application. Let’s move on to the next step: preparing the wood ceiling.
Preparing the Wood Ceiling
Before you start applying the stain to your wood ceiling, it’s essential to properly prepare the surface to ensure optimal results. Preparing the wood ceiling involves cleaning, sanding, and ensuring that the surface is free from any imperfections. Here’s a step-by-step guide on how to prepare your wood ceiling:
- Clean the surface: Begin by thoroughly cleaning the wood ceiling. Remove any dust, dirt, or debris using a soft brush or vacuum cleaner. Wipe the surface with a damp cloth to remove any remaining residue. Clean wood allows the stain to penetrate evenly.
- Inspect for imperfections: Carefully inspect the wood ceiling for any cracks, dents, or blemishes. Use wood filler or putty to fill in any imperfections and ensure a smooth and even surface. Follow the manufacturer’s instructions for applying and drying the filler.
- Sand the wood: Use a sanding block or medium-grit sandpaper to gently sand the wood ceiling. Sanding helps to remove any rough spots, splinters, or surface inconsistencies. Sand in the direction of the wood grain to avoid creating scratches or marks. Keep sanding until the surface feels smooth and ready for staining.
- Remove sanding residue: After sanding, use a clean, damp cloth to wipe away any sanding residue or dust. Ensure that the surface is dry before moving on to the next step. A clean surface will allow the stain to adhere properly.
- Protect surrounding areas: Cover the floors, walls, and any furniture or fixtures near the wood ceiling with drop cloths or plastic sheets. This will protect them from accidental spills or drips during the staining process.
- Ventilation and safety: Staining can release strong fumes, so it’s important to work in a well-ventilated space. Open windows and doors or use fans to promote air circulation. Additionally, wear protective gloves, goggles, and a mask to safeguard yourself from any potential hazards.
By following these steps, you’ll ensure that your wood ceiling is clean, smooth, and ready to absorb the stain. Proper preparation is the key to achieving a professional and flawless finish. Take your time and pay attention to detail during this stage to lay the groundwork for a successful staining process.
Now that you’ve prepared the wood ceiling, it’s time to move on to the exciting part: applying the stain!
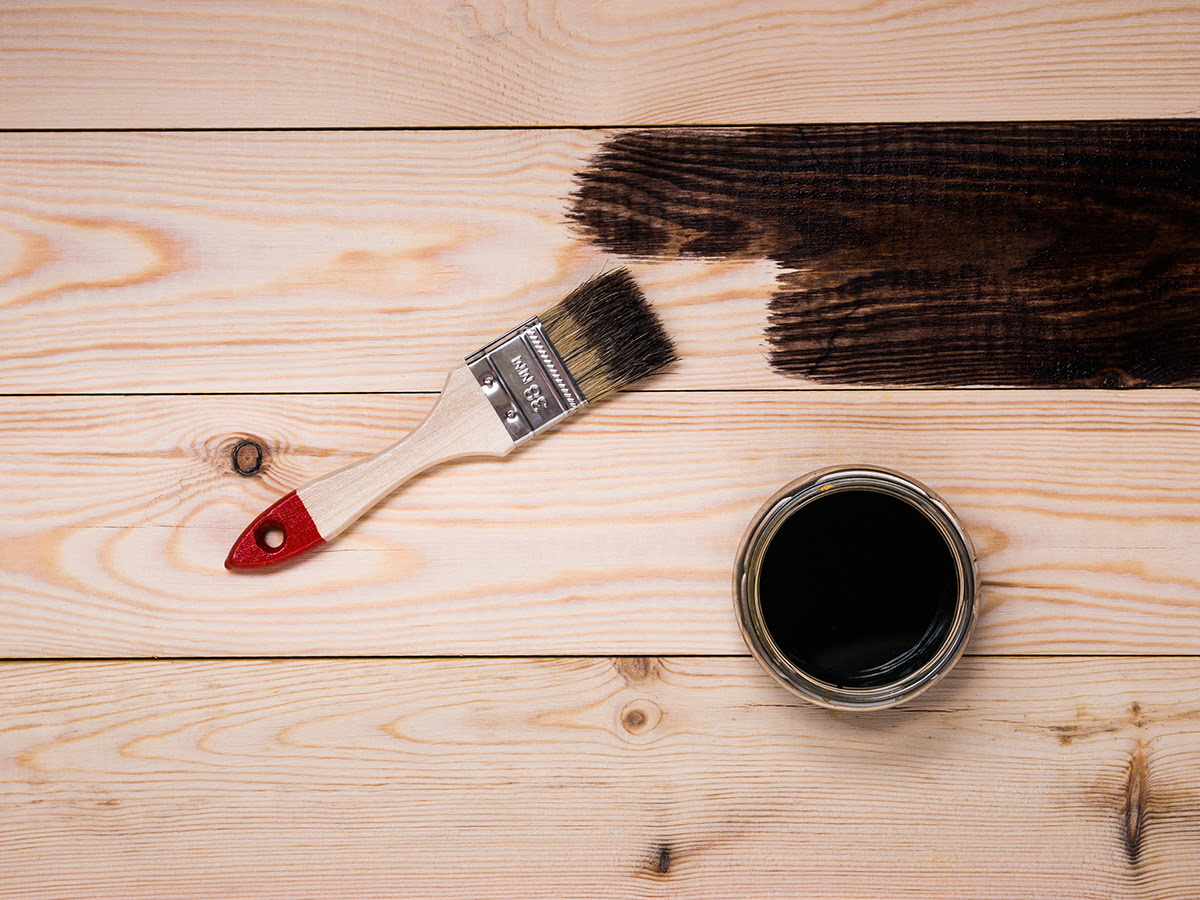
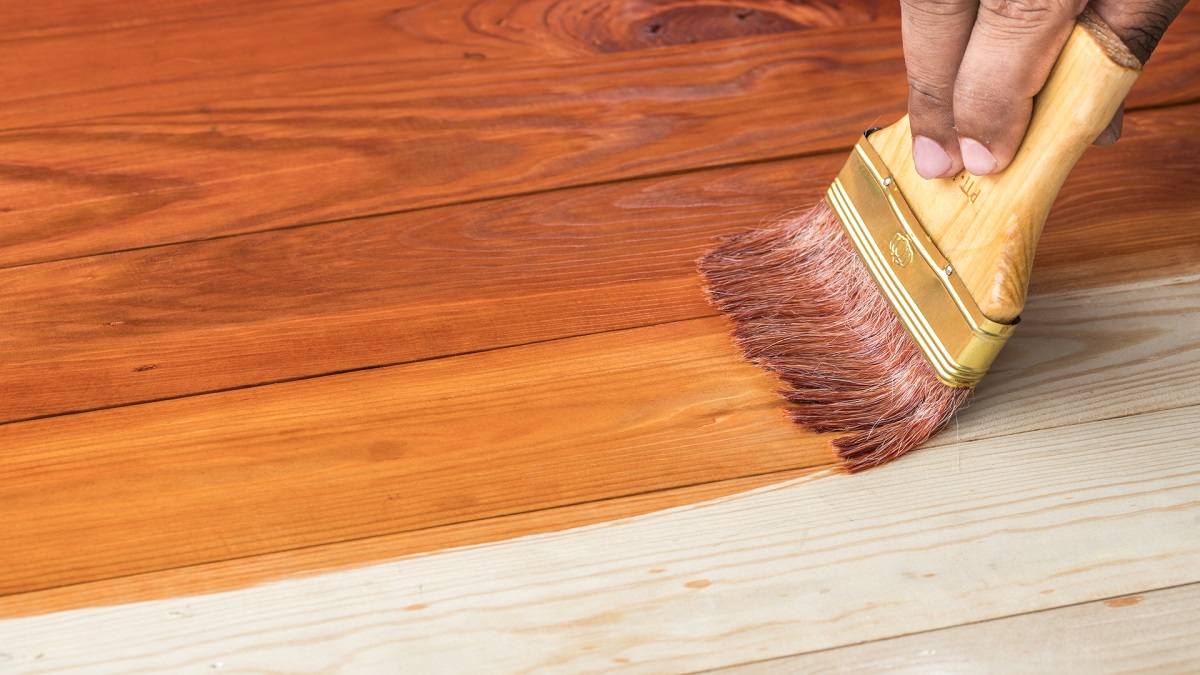
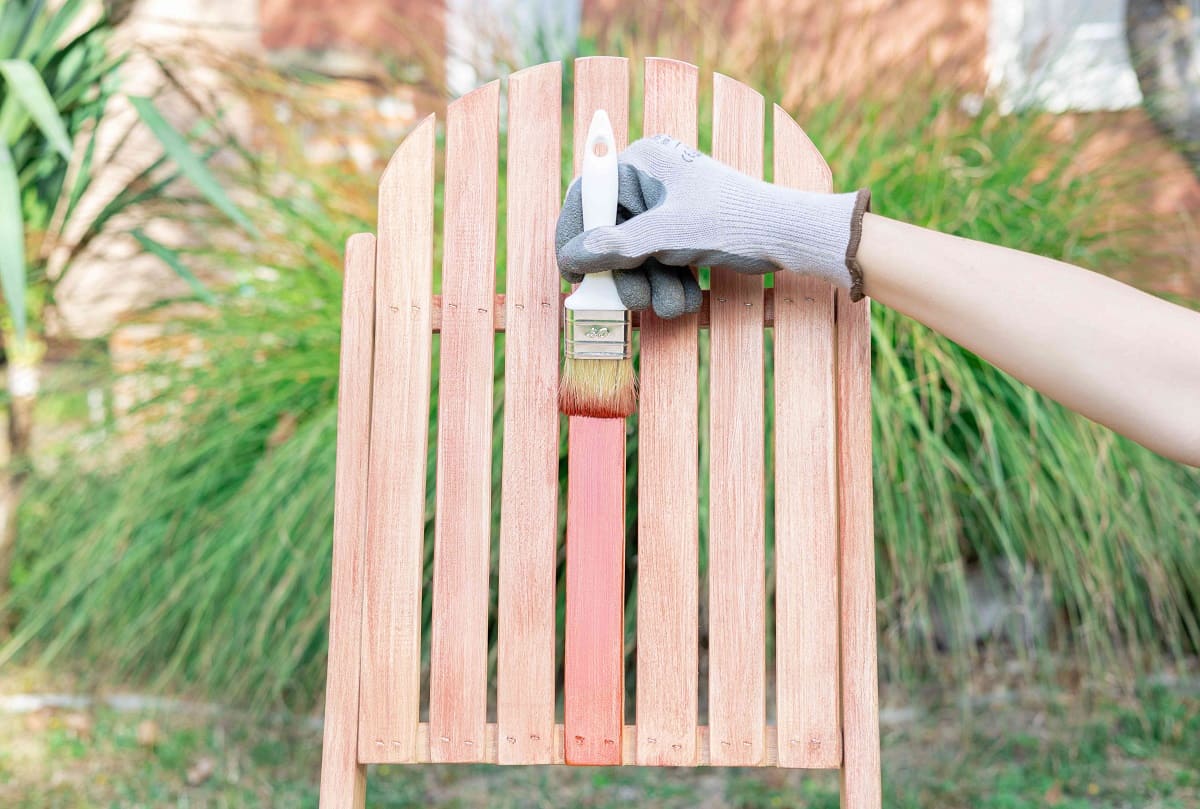
Applying the Stain
Now that you have chosen the perfect stain and prepared your wood ceiling, it’s time to apply the stain. Applying the stain requires attention to detail and a methodical approach to ensure an even and beautiful finish. Here’s a step-by-step guide on how to apply the stain to your wood ceiling:
- Stir the stain: Before starting, give the stain a good stir to ensure that the pigments are well mixed. This will help achieve a consistent color throughout the staining process.
- Use a brush or roller: Depending on the size and texture of your wood ceiling, you can choose between a brush or a roller to apply the stain. A brush allows for more control and precision, while a roller is efficient for larger areas and can provide a smooth finish.
- Apply the stain: Start at one end of the wood ceiling and work your way across, following the wood’s grain. Dip the brush or roller into the stain and apply it evenly and generously to the wood surface. Make sure to work in manageable sections to maintain control over the application.
- Apply multiple coats: Depending on the desired depth of color, you may need to apply multiple coats of stain. Allow each coat to dry completely before applying the next one. Follow the manufacturer’s instructions on the recommended drying time between coats.
- Blend and feather: To achieve a seamless finish, blend the edges of each section as you work to avoid visible lines or overlapping marks. Feather the stain using gentle brush strokes or a clean cloth to create a smooth transition.
- Check for drips: While applying the stain, check for any drips or excess that may have accumulated. Use a clean cloth or brush to remove any drips immediately to prevent uneven drying or pooling of the stain.
- Keep a wet edge: To ensure a uniform color, always maintain a “wet edge” while working. This means overlapping each stroke of stain slightly with the previous one to create a seamless blend.
Remember, consistency is key when applying the stain. Take your time, work in a systematic manner, and be mindful of achieving an even application. Once you have applied the stain to the entire wood ceiling, allow it to fully dry according to the manufacturer’s recommendations before proceeding to the next step.
Now that the stain is applied, it’s time to wipe off any excess and prepare the wood ceiling for the final finishing touch.
Before staining a wood ceiling, make sure to thoroughly clean and sand the surface to ensure the stain adheres evenly. Use a pre-stain wood conditioner to help prevent blotchiness and achieve a more uniform finish.
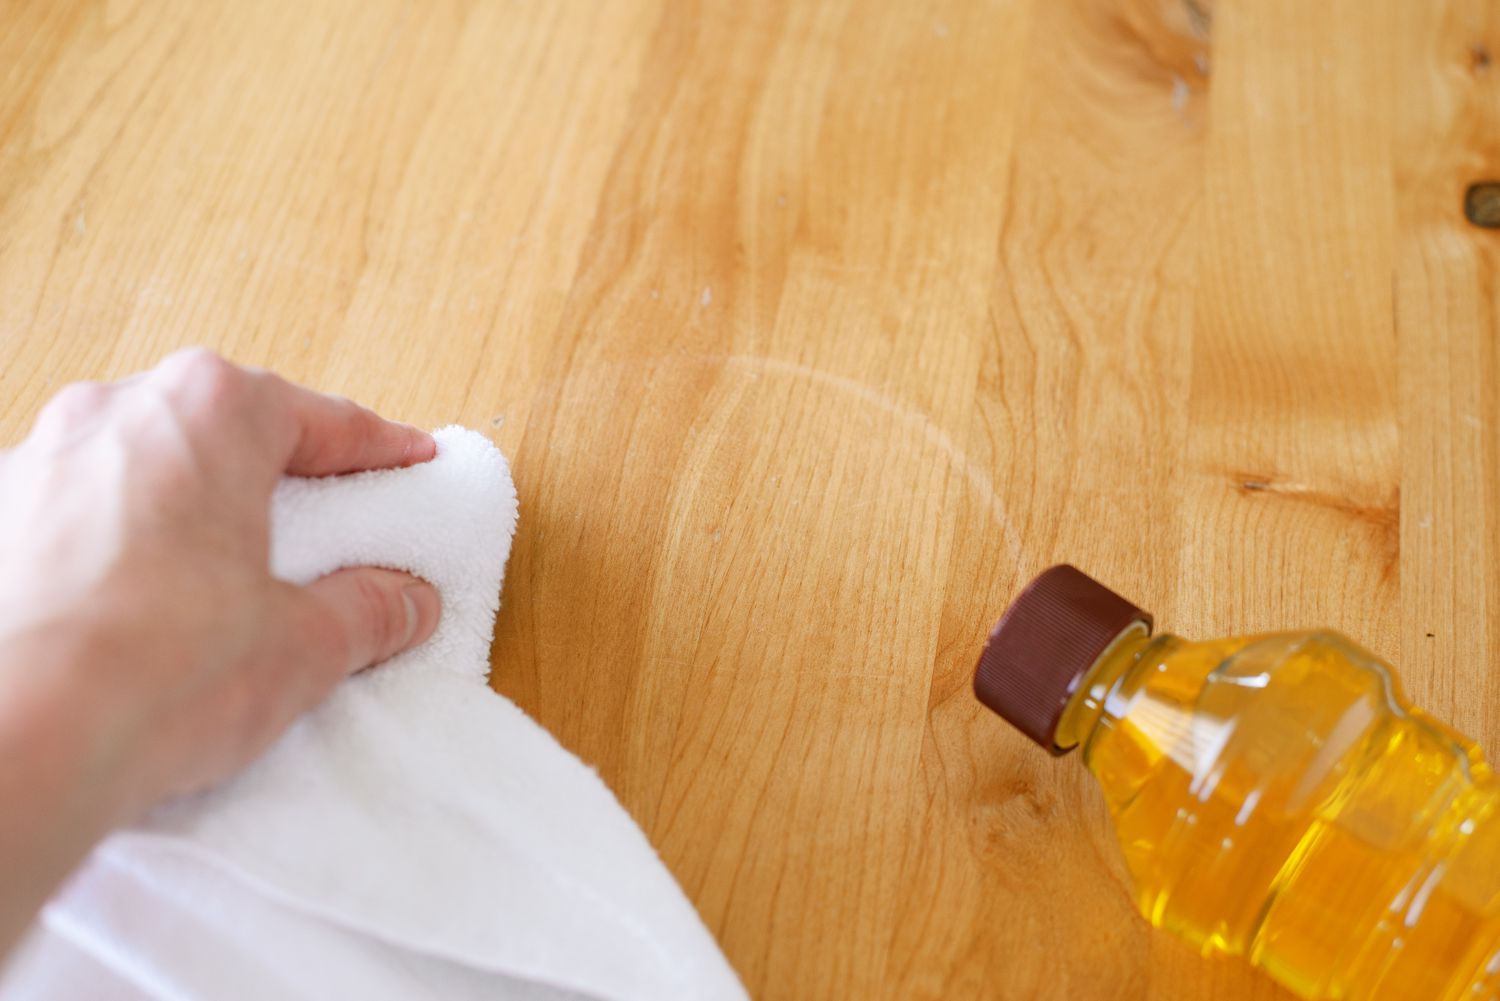
Wiping off Excess Stain
After applying the stain to your wood ceiling, it’s important to remove any excess stain to achieve a clean and evenly finished surface. Wiping off excess stain helps to prevent blotching, streaking, or an uneven color distribution. Here are the steps to effectively wipe off excess stain:
- Wait for the right time: Refer to the manufacturer’s instructions for the recommended drying time before wiping off the excess stain. This typically ranges from a few minutes to half an hour, depending on the type of stain you’re using.
- Use a clean cloth or rag: Grab a clean, lint-free cloth or rag to wipe off the excess stain. Choose a soft cotton or microfiber cloth that won’t leave behind fibers or lint on the wood surface.
- Gently wipe in the direction of the grain: Start wiping off the excess stain by gently moving the cloth in the direction of the wood grain. Apply mild pressure to ensure effective removal, but avoid scrubbing or rubbing too vigorously, as this may disturb the stain you want to keep.
- Check for missed spots or uneven areas: As you’re wiping off the excess stain, pay attention to any missed spots or areas that appear darker or lighter than the rest. Use a corner or edge of the cloth to carefully blend and blend any inconsistencies for a more uniform finish.
- Keep a clean cloth: As you continue wiping off the excess stain, fold or refold the cloth to work with a clean section. This will prevent any transferred stain or streaks from affecting the areas you’ve already wiped.
- Avoid over-wiping: While it’s essential to remove excess stain, be cautious not to over-wipe and remove too much of the stain. This can lead to a lighter or patchy appearance. If you’re unsure, it’s better to be conservative and remove the excess gradually.
Take your time during this process to ensure that you achieve the desired level of stain removal. Keep in mind that the final color will develop further as the stain fully dries and cures. Once you’re satisfied with the stain removal, allow the wood ceiling to dry completely before moving on to the next step.
Now that you’ve wiped off the excess stain, it’s time to apply the finishing touches and seal the wood ceiling for long-lasting protection.
Read more: How To Stain Wood Stairs
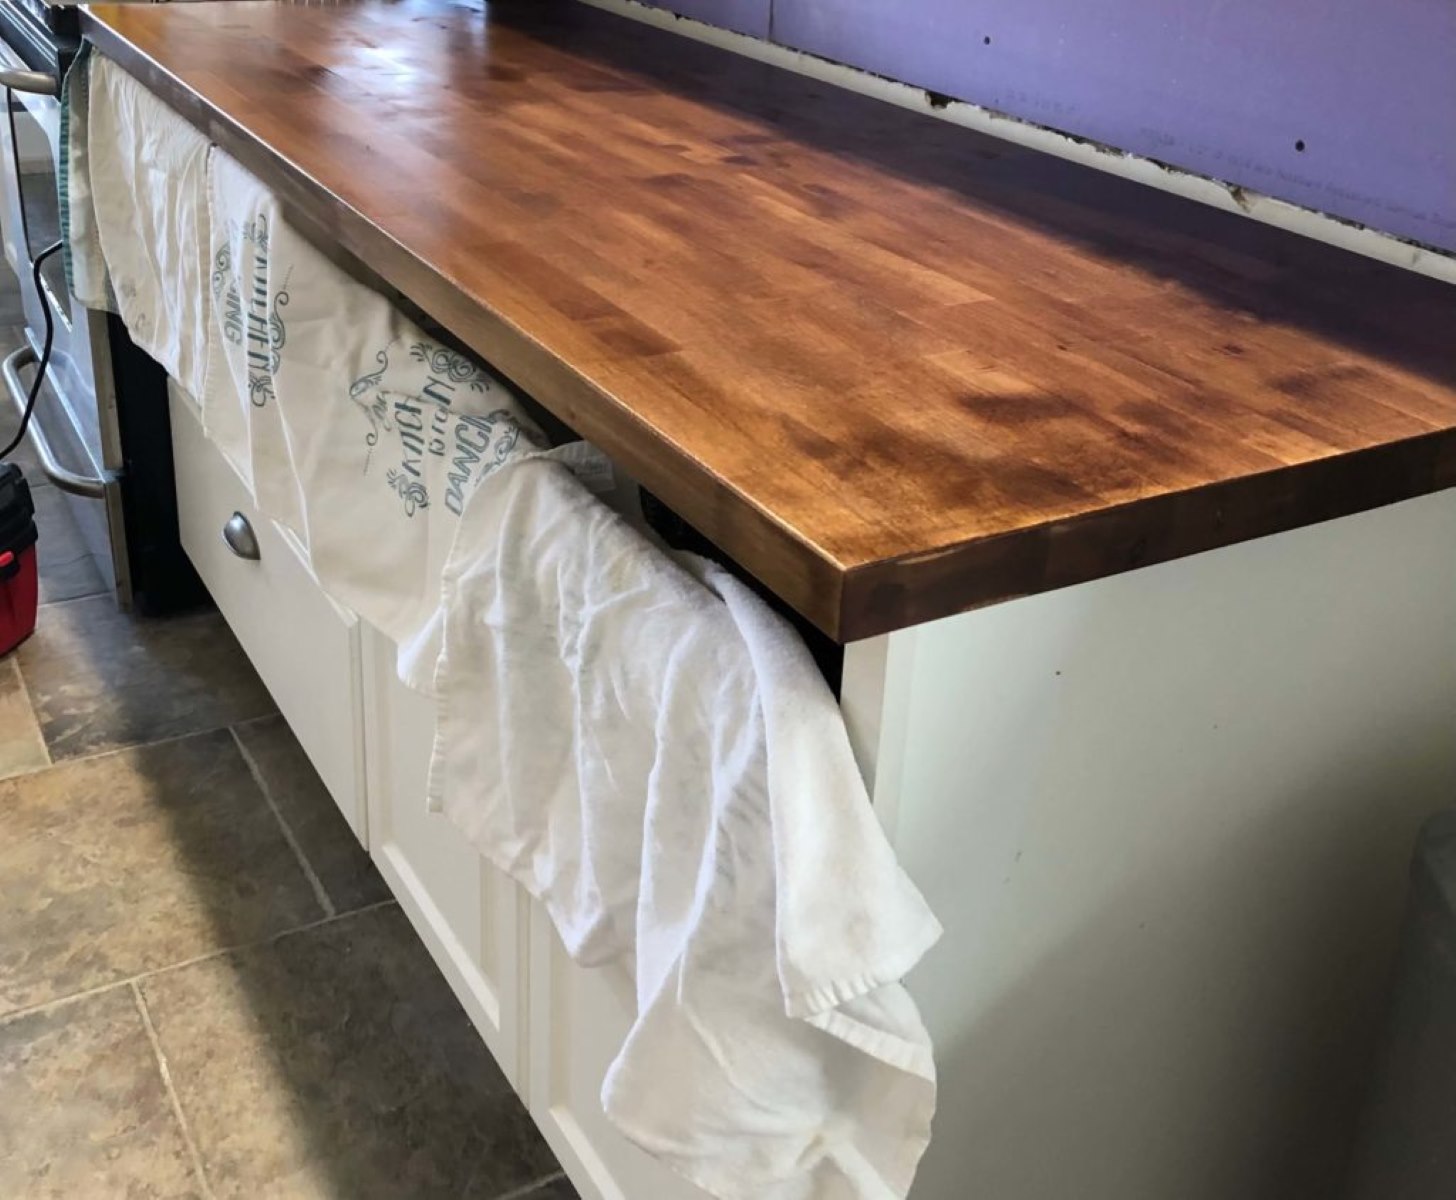
Finishing and Sealing the Wood Ceiling
Once you have applied the stain and wiped off the excess, it’s time to give your wood ceiling a beautiful and protective finish. This step involves sealing the wood to enhance its durability, protect it from damage, and bring out the natural beauty of the stain. Follow these steps to finish and seal your wood ceiling:
- Choose the right finish: There are various options for finishing wood ceilings, such as polyurethane, varnish, or wax. Consider the level of shine, ease of application, and the level of protection each finish provides. For a wood ceiling, it’s commonly recommended to use a clear finish to allow the natural beauty of the wood and stain to shine through.
- Prepare the finish: If you’re using a liquid finish, make sure to stir it thoroughly before application. Ensure that the finish is free from any lumps or sediment that may affect the final result.
- Apply the finish: Use a high-quality brush or roller to apply a thin and even coat of the finish to the wood ceiling. Work in manageable sections, following the grain pattern, to ensure a smooth and consistent application. Avoid excessive brush strokes to minimize the risk of visible brush marks.
- Allow drying time: Follow the manufacturer’s instructions for the recommended drying time between coats. Depending on the type of finish you’re using, you may need to apply multiple coats for optimal coverage and protection.
- Lightly sand between coats: If you choose to apply multiple coats, lightly sand the wood ceiling between coats using fine-grit sandpaper. This helps to create a smooth surface and promote better adhesion between the layers of finish.
- Remove dust: After sanding, use a clean cloth or vacuum to remove any sanding dust or debris from the wood ceiling. It’s crucial to have a clean surface before applying subsequent coats of finish.
- Apply additional coats: Repeat the process of applying the finish, allowing drying time, and sanding between coats as necessary. The number of coats will depend on your personal preference and the level of protection you desire.
- Final inspection: Once you’re satisfied with the number of coats and the overall finish of the wood ceiling, take a step back and inspect it from different angles and lighting conditions. Look for any uneven spots, streaks, or imperfections and address them accordingly.
By properly finishing and sealing your wood ceiling, you will protect it against moisture, stains, and general wear and tear. Additionally, the finish will enhance the color and depth of the stain, while providing a smooth and polished appearance.
Now that you have finished and sealed your wood ceiling, it’s time to clean up and admire the stunning transformation you’ve achieved.
Cleaning up
After completing the staining, wiping off excess stain, and applying the finish to your wood ceiling, it’s time to clean up the workspace and ensure everything is tidy. Here are some steps to follow for a thorough and efficient cleanup:
- Dispose of used materials: Properly dispose of any leftover stain, brushes, rags, or other materials used during the staining process. Check your local regulations for guidelines on disposing of hazardous materials.
- Clean your brushes and tools: If you plan to reuse your brushes and tools, clean them promptly to prevent the stain from hardening and ruining the brushes. Follow the manufacturer’s instructions for the proper cleaning method based on the type of stain used.
- Wipe down surfaces: Use a damp cloth or sponge to wipe down any surfaces that may have come into contact with stain or finish, such as countertops, floors, or nearby furniture. This will prevent any accidental transfer of stain or damage to these surfaces.
- Remove covering: Carefully remove the drop cloths or plastic sheets that were used to protect the surrounding areas during the staining process. Shake them off outside or fold them carefully to contain any dust or debris.
- Ventilate the space: Open windows and doors to allow fresh air to circulate and help dissipate any lingering fumes from the stain and finish. Ensure proper ventilation for several hours or as recommended by the manufacturer.
It’s important to note that some stain and finish cleanup materials may require special disposal methods due to their potential hazardous nature. Make sure to read the labels and instructions provided on the product packaging for specific disposal recommendations.
With the space clean and tidy, step back and take a moment to appreciate the transformation you’ve achieved. Your wood ceiling now boasts a beautiful and durable finish, enhancing the overall aesthetics of the room.
Now that you’ve completed the cleanup, it’s time to sit back, relax, and enjoy your newly stained and finished wood ceiling!
Conclusion
Congratulations! You have successfully stained and finished your wood ceiling, enhancing its natural beauty and creating a warm and inviting space. By following the steps outlined in this article, you’ve learned how to choose the right stain, prepare the wood, apply the stain, wipe off excess, and seal the wood for long-lasting protection.
Staining a wood ceiling is a rewarding DIY project that can transform any room. The right stain color and finish can bring out the unique characteristics and patterns of the wood, creating a stunning focal point. Additionally, the protective finish will ensure that your wood ceiling remains beautiful and durable for years to come.
Remember to take your time during each step of the process, paying attention to detail and maintaining a consistent and even application. Test samples, consult professionals or store experts, and gather inspiration to find the perfect stain color and finish for your specific wood type and desired aesthetic.
Lastly, don’t forget to clean up after completing the project. Properly dispose of any used materials and clean your brushes and tools, ensuring that everything is put away neatly. By following these cleanup steps, you’ll maintain an organized and tidy workspace.
Now, take a moment to step back and admire your work. Your stained wood ceiling adds character, warmth, and a touch of elegance to the room. It serves as a testament to your creativity and craftsmanship.
So go ahead – relax, enjoy, and bask in the beauty of your newly stained and finished wood ceiling!
Ready to tackle more creative home projects? Staining your wood ceiling surely adds charm, but why stop there? Dive into our feature on why DIY projects hold such appeal. You’ll find practical advice, inspiring ideas, and real-life examples that make every project exciting. Whether you’re a seasoned DIYer or just starting out, this article offers insights that refine skills and inspire new ones. Don’t just take our word for it; see for yourself how rewarding these endeavors can be!
Frequently Asked Questions about How To Stain A Wood Ceiling
Was this page helpful?
At Storables.com, we guarantee accurate and reliable information. Our content, validated by Expert Board Contributors, is crafted following stringent Editorial Policies. We're committed to providing you with well-researched, expert-backed insights for all your informational needs.


0 thoughts on “How To Stain A Wood Ceiling”