Home>Kitchen & Cooking>Kitchen Furniture & Decor>How To Build A Bar Cart From Scratch
Kitchen Furniture & Decor
How To Build A Bar Cart From Scratch
Modified: October 20, 2024
Learn how to create a stylish and functional bar cart for your kitchen with our step-by-step guide. Elevate your kitchen furniture and decor with this DIY project.
(Many of the links in this article redirect to a specific reviewed product. Your purchase of these products through affiliate links helps to generate commission for Storables.com, at no extra cost. Learn more)
Introduction
Welcome to the world of DIY bar carts! Building your own bar cart from scratch can be a rewarding and enjoyable project that adds a personal touch to your home decor. Whether you're a seasoned woodworker or a novice DIY enthusiast, creating a custom bar cart allows you to showcase your creativity and craftsmanship while adding a functional and stylish piece to your living space.
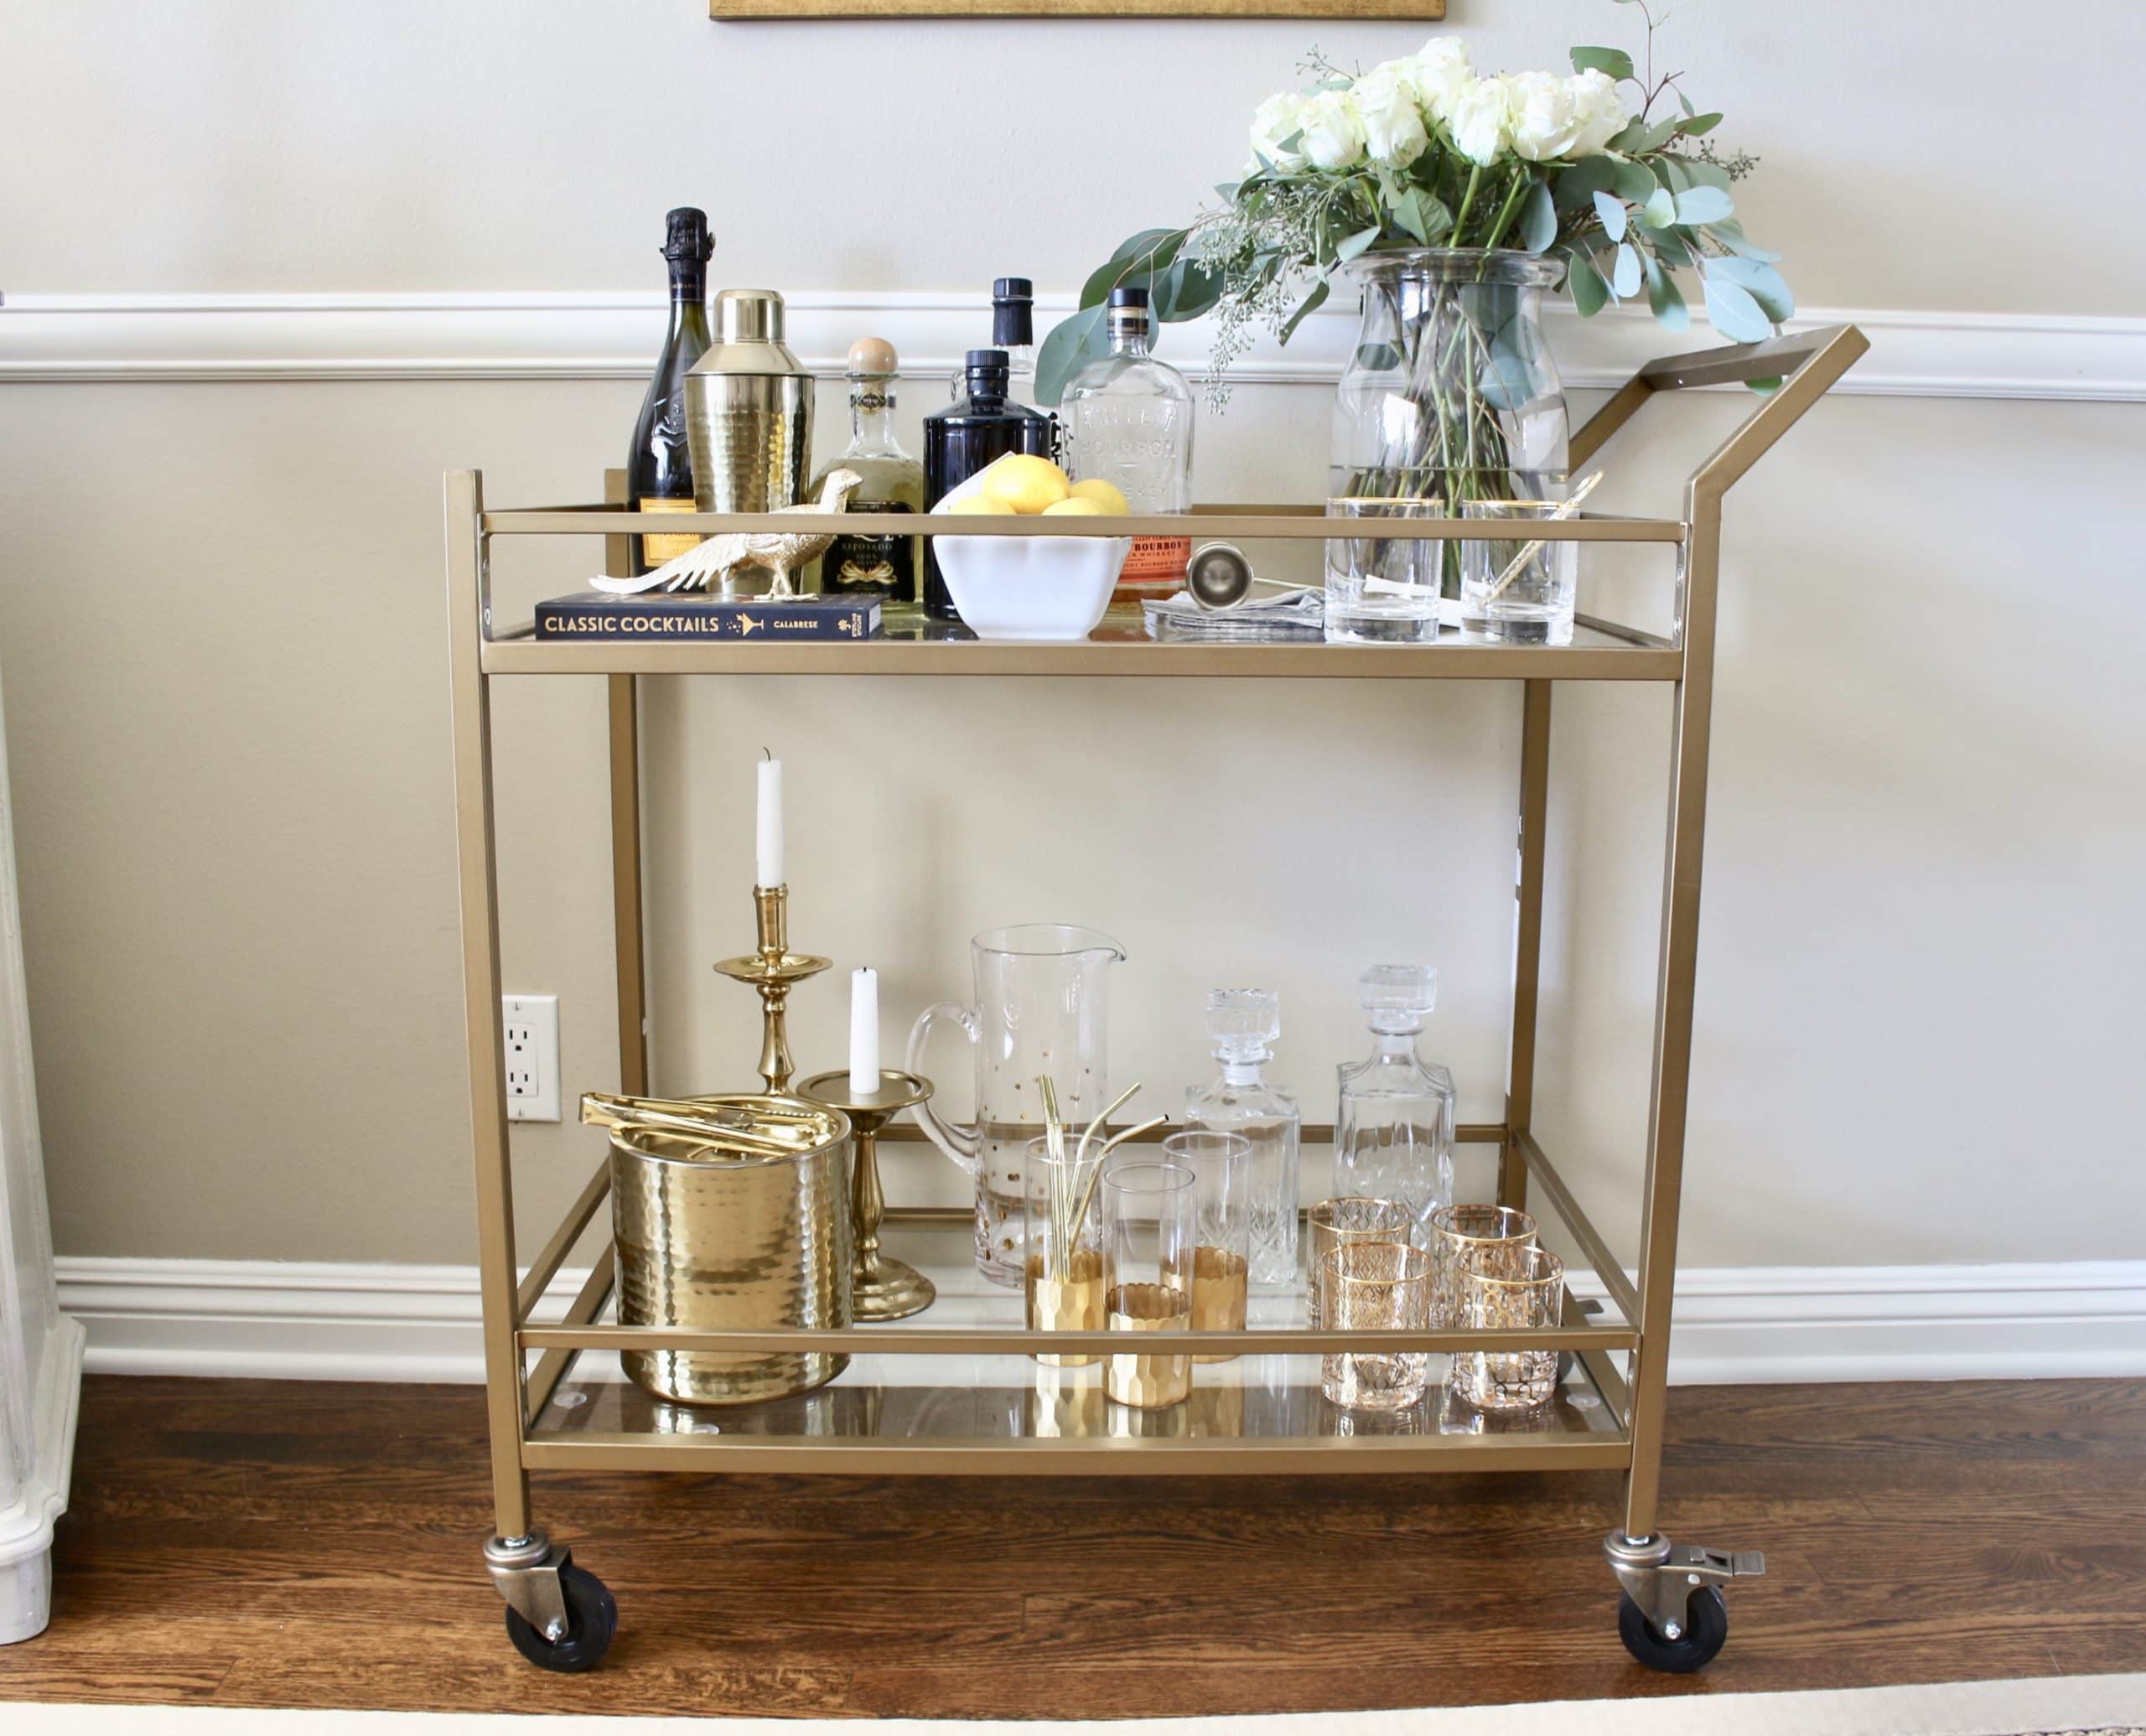
A bar cart is not just a piece of furniture; it's a versatile and practical addition to any home. It provides a designated space for storing and displaying your favorite spirits, glassware, and cocktail accessories, making it a convenient and stylish solution for entertaining guests or simply enjoying a relaxing evening at home. By crafting your own bar cart, you have the freedom to tailor its design to suit your specific preferences, ensuring that it complements your existing decor and reflects your individual style.
In this comprehensive guide, we will walk you through the step-by-step process of building a bar cart from scratch. From gathering the necessary materials and tools to adding personalized touches and decorative elements, you'll learn how to create a stunning and functional bar cart that suits your needs and preferences. Whether you prefer a rustic, industrial-inspired cart or a sleek, modern design, the possibilities are endless when you embark on this DIY project.
So, roll up your sleeves, unleash your creativity, and get ready to embark on an exciting journey of crafting your very own bar cart. Whether you're looking to add a touch of elegance to your living room, create a designated cocktail station in your kitchen, or simply indulge in a fulfilling DIY project, building a bar cart from scratch is a gratifying endeavor that allows you to showcase your skills and elevate your home decor. Let's dive into the process and bring your vision of the perfect bar cart to life!
Key Takeaways:
- Building a bar cart from scratch is a fun and rewarding DIY project that allows you to showcase your creativity and craftsmanship while adding a stylish and functional piece to your home decor.
- By following the step-by-step process, you can create a personalized and visually stunning bar cart that reflects your individual style and enhances your living space.
Read more: How To Build A Gold Bar Cart
Step 1: Gather Materials and Tools
Before diving into the construction of your DIY bar cart, it's essential to gather all the necessary materials and tools. This step sets the foundation for a successful and efficient building process. Here's a comprehensive list of items you'll need to bring your bar cart to life:
Materials:
- Wood: Select high-quality wood that aligns with your desired aesthetic and fits the dimensions of your bar cart. Common options include pine, oak, or reclaimed wood for a rustic look.
- Metal Hardware: Choose sturdy metal brackets, screws, and corner braces to ensure the structural integrity of your bar cart.
- Casters or Legs: Depending on your preference, opt for heavy-duty casters for mobility or sleek legs for a stationary cart.
- Wood Glue: A reliable wood adhesive is essential for securing joints and ensuring the durability of your bar cart.
- Finishing Materials: Whether you prefer paint, stain, or varnish, select the appropriate finishing materials to protect and enhance the appearance of the wood.
Tools:
- Measuring Tape: Accurate measurements are crucial for ensuring precise cuts and a well-proportioned bar cart.
- Saw: Depending on the type of wood you choose, a circular saw, miter saw, or hand saw will be necessary for cutting the wood to the desired dimensions.
- Drill and Bits: A power drill and a variety of drill bits will be used for creating holes, attaching hardware, and assembling the cart.
- Screwdriver: Both manual and electric screwdrivers will be essential for securing screws and fastening hardware.
- Sander: To achieve a smooth and polished finish, a sander or sandpaper of varying grits will be required for smoothing rough edges and surfaces.
- Paintbrushes or Stain Applicators: Depending on your chosen finish, ensure you have the necessary tools for applying paint, stain, or varnish evenly.
By gathering these materials and tools, you'll be well-prepared to embark on the construction of your DIY bar cart. With everything at your fingertips, you can proceed to the next step with confidence, knowing that you have everything you need to bring your vision to life.
Step 2: Measure and Cut the Wood
Once you have gathered all the necessary materials and tools, the next crucial step in building your DIY bar cart is to measure and cut the wood. This step requires precision and attention to detail to ensure that the components of your bar cart fit together seamlessly and create a sturdy and visually appealing structure.
Begin by carefully measuring the dimensions for the various components of the bar cart, including the top and bottom panels, side panels, and any additional shelves or compartments you plan to incorporate. Use a measuring tape to obtain accurate measurements, and double-check your calculations to avoid errors that could compromise the overall design.
With the measurements in hand, transfer the dimensions onto the selected wood using a pencil or marking tool. Take into account the thickness of the wood when marking the cutting lines to ensure that the pieces fit together as intended. If you are incorporating shelves or compartments, mark the locations for any necessary cuts or cutouts to accommodate these features.
Next, it's time to cut the wood according to the marked dimensions. Depending on the thickness and type of wood you are using, a circular saw, miter saw, or hand saw may be employed to make precise cuts. Take your time and exercise caution when cutting the wood to achieve clean and accurate edges.
As you progress through the cutting process, organize the cut pieces according to their designated components to maintain clarity and organization. Labeling the pieces with corresponding markings can help prevent confusion during the assembly phase.
It's important to note that the accuracy of your cuts directly impacts the overall quality and structural integrity of the bar cart. Therefore, patience and precision are key during this phase of the construction process.
By meticulously measuring and cutting the wood, you are laying the foundation for a well-crafted and visually appealing bar cart. This step sets the stage for the subsequent assembly and finishing processes, bringing you one step closer to completing your personalized DIY bar cart.
Read more: How To Build A Bar Cart With Crates
Step 3: Assemble the Frame
With the wood pieces cut to the precise dimensions, it's time to embark on the pivotal phase of assembling the frame of your DIY bar cart. This step brings the individual components together, laying the groundwork for the cart's structural integrity and functionality.
Begin by arranging the cut wood pieces according to their designated positions in the frame. Whether you opt for a simple two-tiered design or a more elaborate multi-level cart, ensure that the pieces align accurately to form the desired shape and structure. This initial arrangement allows you to visualize the assembly and make any necessary adjustments before securing the components in place.
Once the pieces are positioned correctly, it's time to employ wood glue and screws to join the components and create a sturdy frame. Apply a generous amount of wood glue along the edges of the joints to ensure a strong bond between the wood pieces. As you bring the components together, use screws to reinforce the connections and provide additional stability to the frame. Pre-drilling pilot holes for the screws can prevent the wood from splitting and facilitate a secure attachment.
As the frame begins to take shape, it's essential to periodically check for squareness and alignment to guarantee that the cart maintains a level and balanced structure. Utilize a carpenter's square or measuring tape to verify that the corners are at right angles and that the overall frame is symmetrical.
Depending on the design of your bar cart, you may also need to attach additional support elements, such as cross braces or corner brackets, to enhance the overall stability and weight-bearing capacity of the frame. These reinforcements contribute to the longevity and durability of the cart, ensuring that it can safely accommodate the weight of glassware, bottles, and other bar essentials.
By meticulously assembling the frame of your DIY bar cart, you are laying the groundwork for a robust and visually appealing structure that forms the foundation for the cart's functionality. This phase sets the stage for the subsequent steps of adding shelves, attaching wheels or legs, and applying the finishing touches, bringing you one step closer to completing your personalized and functional bar cart.
Step 4: Add Shelves and Supports
With the frame of the bar cart assembled, the next crucial step is to add shelves and supports, enhancing both the functionality and aesthetic appeal of the cart. This phase allows you to customize the cart to suit your specific storage needs and design preferences, creating a versatile and practical piece of furniture.
Begin by determining the placement of the shelves within the frame, taking into account the height and spacing that best accommodate the items you intend to store on the cart. Whether you opt for a single large shelf or multiple tiers, ensure that the dimensions align with the interior space of the frame and provide ample room for storing bottles, glassware, and other bar essentials.
Once the shelf positions are established, proceed to attach the shelves to the frame using wood glue and screws. Apply a layer of wood glue along the edges of the frame where the shelves will rest, ensuring a secure bond between the wood surfaces. With the shelves in place, use screws to fasten them to the frame, providing additional reinforcement and stability.
To further strengthen the shelves and prevent sagging over time, consider adding support elements such as wooden dowels or metal brackets underneath the shelves. These supports distribute the weight evenly and bolster the structural integrity of the shelves, ensuring that they can withstand the load of barware and beverages without compromising the cart's stability.
Incorporating additional supports or cross braces between the shelves can further enhance the overall stability and weight-bearing capacity of the cart, especially if you plan to store heavier items such as liquor bottles or cocktail shakers. These reinforcements contribute to the longevity and durability of the cart, ensuring that it remains reliable and functional for years to come.
By adding shelves and supports to your DIY bar cart, you are customizing the cart to suit your specific storage needs and design preferences, creating a versatile and practical piece of furniture. This phase brings you one step closer to completing a personalized and functional bar cart that seamlessly integrates into your home decor while providing a designated space for your favorite spirits and bar accessories.
Step 5: Attach Wheels or Legs
Once the frame and shelves of your DIY bar cart are in place, the next step is to attach the wheels or legs, adding mobility or stability to the cart based on your preference and intended use. This phase not only enhances the functionality of the bar cart but also contributes to its overall aesthetic appeal, allowing you to customize its design to suit your specific needs and style.
Option 1: Wheels
If you envision your bar cart as a versatile and mobile serving station, opting for heavy-duty casters is the ideal choice. When selecting wheels, consider factors such as load-bearing capacity, swivel capability, and locking mechanisms to ensure that they meet the requirements of your intended use. Once you have chosen the appropriate casters, proceed to attach them to the base of the cart using screws and a drill. Ensure that the casters are securely fastened to the frame, providing smooth mobility and stability when the cart is in motion. With the wheels in place, your bar cart becomes effortlessly portable, allowing you to transport it from room to room with ease, whether you're serving cocktails at a gathering or simply repositioning it within your living space.
Read more: How To Build A Shed From Scratch
Option 2: Legs
Alternatively, if you prefer a stationary bar cart that serves as a permanent fixture in your home, attaching sleek and sturdy legs is the ideal choice. Select legs that complement the overall design of the cart and provide the desired height and stability. Once you have chosen the legs, proceed to attach them to the base of the cart using screws and a drill, ensuring that they are securely fastened to the frame. With the legs in place, your bar cart gains a stable and stylish foundation, making it an elegant and functional addition to your home decor. Whether you opt for tapered mid-century modern legs or industrial-inspired hairpin legs, the choice of legs can significantly influence the visual impact of the bar cart, adding a touch of sophistication and character to the overall design.
By attaching wheels or legs to your DIY bar cart, you are customizing its functionality and appearance to align with your specific preferences and intended use. Whether you prioritize mobility for effortless serving or seek a stationary yet stylish storage solution, this phase brings you one step closer to completing a personalized and functional bar cart that seamlessly integrates into your living space.
Step 6: Sand and Finish
With the structural components of your DIY bar cart assembled, it's time to focus on refining its visual appeal and ensuring a smooth, polished finish. The sanding and finishing phase plays a crucial role in enhancing the overall aesthetics of the cart while providing protection and durability to the wood surfaces.
Begin by carefully sanding the entire surface of the bar cart using a fine-grit sandpaper. This process helps to smooth out any rough edges, imperfections, or uneven surfaces, creating a uniform and tactilely pleasing finish. Pay close attention to the corners and edges, as these areas often require extra care to achieve a seamless and professional appearance.
After the initial sanding, progress to a finer-grit sandpaper to further refine the wood surfaces and achieve a silky-smooth texture. This step contributes to the overall visual appeal of the cart, creating a refined and elegant finish that showcases the natural beauty of the wood.
Once the sanding process is complete, it's time to apply the chosen finish to the bar cart. Whether you opt for a rich stain, vibrant paint, or clear varnish, the finishing stage allows you to personalize the appearance of the cart while providing essential protection against moisture, wear, and tear.
If you prefer a natural and organic look, a clear varnish or wood sealant can be applied to enhance the wood's natural grain and color while providing a protective layer against spills and stains. Alternatively, if you seek to introduce a pop of color or complement your existing decor, consider applying a coat of high-quality paint or a rich wood stain to achieve the desired aesthetic.
When applying the finish, ensure that the surfaces are clean and free of dust to achieve a flawless result. Depending on the type of finish chosen, multiple coats may be required to achieve the desired depth and luster. Take your time during this phase to ensure that the finish is applied evenly and consistently across all surfaces of the cart.
By meticulously sanding and finishing your DIY bar cart, you are elevating its visual appeal and ensuring the longevity of the wood surfaces. This phase adds a professional and polished touch to the cart, bringing you one step closer to completing a personalized and visually stunning bar cart that seamlessly integrates into your home decor.
Step 7: Personalize and Decorate
With the structural and functional aspects of your DIY bar cart in place, the final step involves infusing it with your personal style and adding decorative elements that elevate its visual appeal. This phase allows you to transform your bar cart from a practical furniture piece into a captivating and personalized accent that complements your home decor.
Personalization:
Consider personalizing your bar cart by incorporating elements that reflect your individual taste and lifestyle. This could involve adding decorative hardware such as stylish drawer pulls or knobs that resonate with your preferred aesthetic. Additionally, consider integrating personalized touches such as monogrammed initials, stenciled designs, or custom decals that imbue the cart with a unique and distinctive flair.
Decorative Accents:
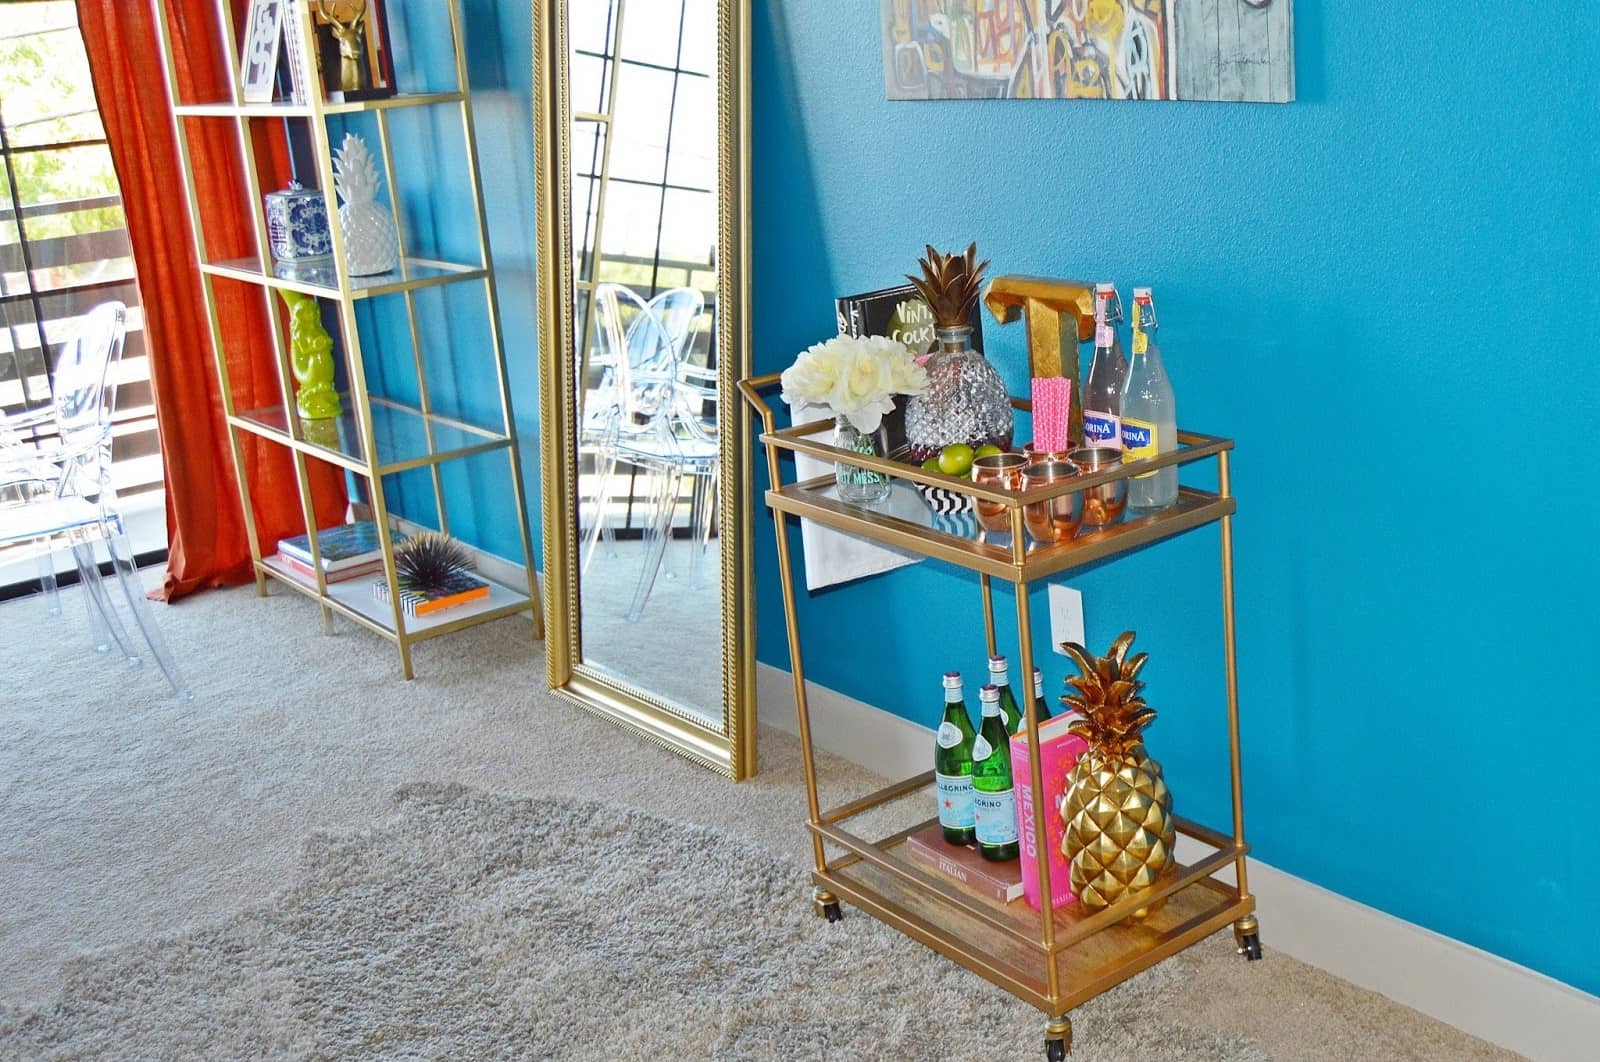
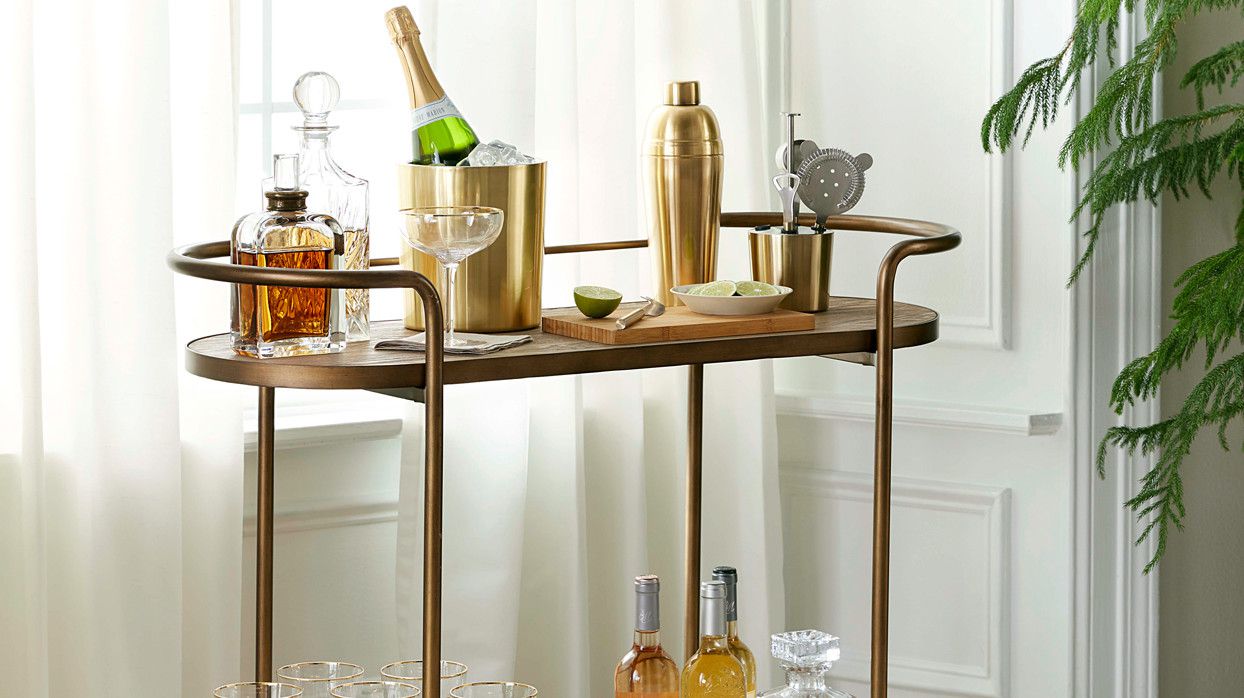
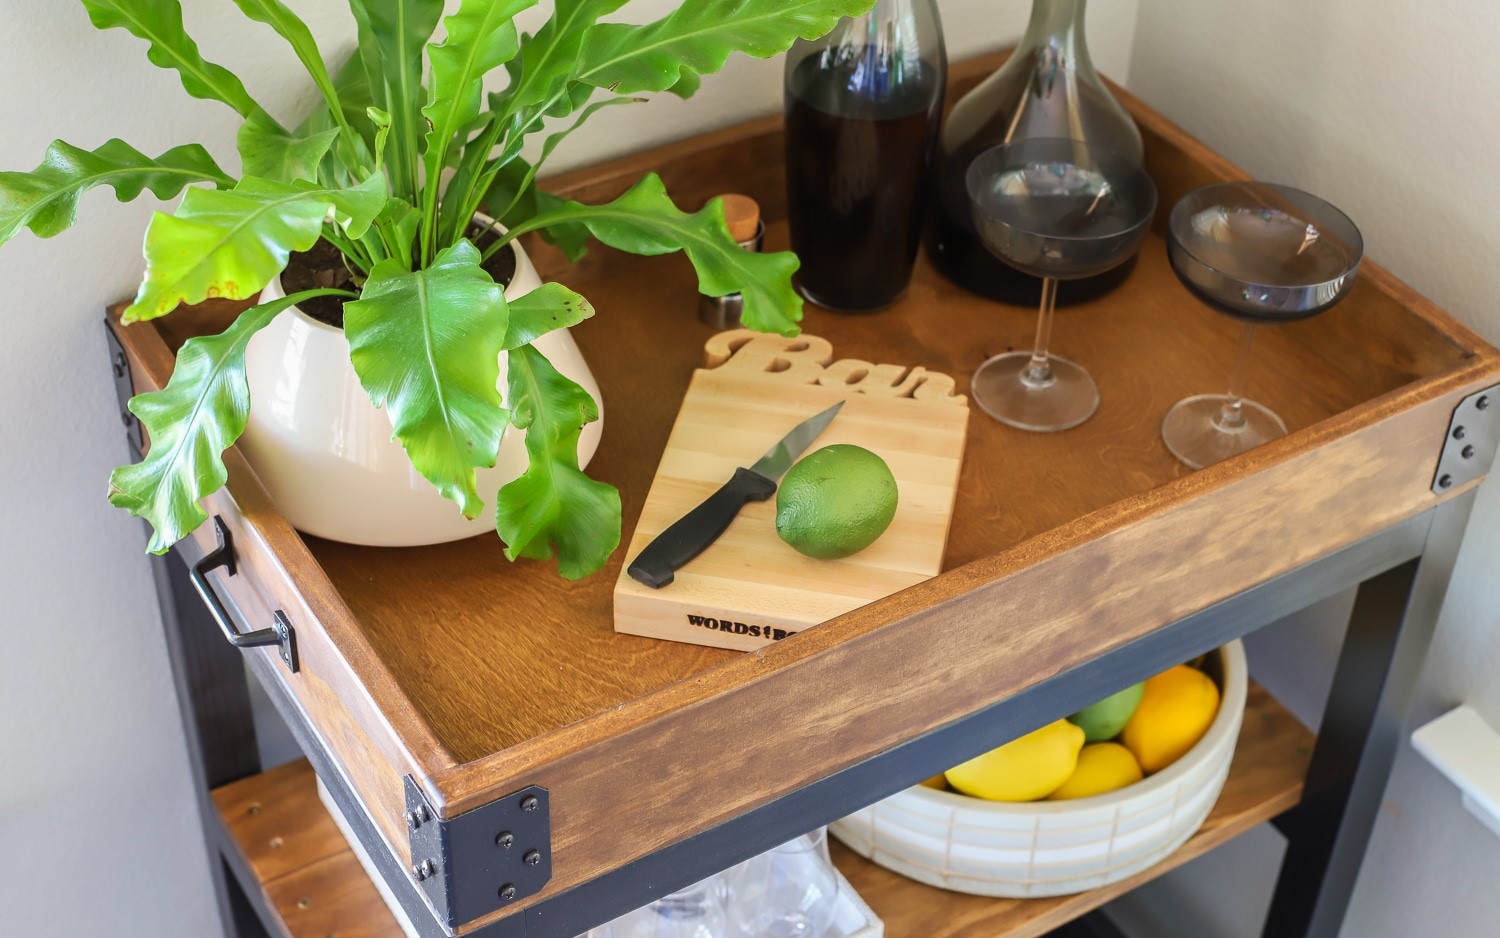
Enhance the visual allure of your bar cart by adorning it with decorative accents that reflect your personality and elevate its overall charm. Consider incorporating potted plants, vibrant succulents, or fresh flowers to infuse a touch of natural beauty and freshness. Additionally, decorative trays, elegant glassware, and ornamental accessories such as cocktail shakers, vintage bar tools, or artful coasters can add a layer of sophistication and visual interest to the cart.
Stylish Storage Solutions:
Explore creative storage solutions that not only organize your bar essentials but also contribute to the cart's decorative appeal. Utilize stylish baskets, woven bins, or fabric-lined crates to neatly store bottles, mixers, and bar accessories while adding a touch of texture and visual intrigue. Incorporating decorative storage containers not only enhances the functionality of the cart but also introduces an element of curated elegance to its overall presentation.
Artful Display:
Curate an artful display on your bar cart by arranging bottles, glassware, and decorative accents in a visually appealing manner. Consider varying the heights and textures of displayed items to create an engaging and dynamic composition. Artfully arranging items such as cocktail recipe books, vintage decanters, or ornate serving trays can transform the bar cart into a captivating focal point that exudes style and sophistication.
Seasonal Flourishes:
Embrace the changing seasons by incorporating seasonal flourishes that infuse the bar cart with festive charm and thematic appeal. Consider adorning the cart with seasonal decor such as holiday-themed ornaments, seasonal foliage, or themed cocktail napkins to celebrate special occasions and create a dynamic and ever-evolving display.
By personalizing and decorating your DIY bar cart, you are infusing it with your unique style and creating a visually captivating accent that seamlessly integrates into your home decor. This final phase allows you to showcase your creativity and attention to detail, resulting in a personalized and visually stunning bar cart that reflects your individuality and enhances your living space.
Read more: How To Build A Pizza Oven From Scratch
Conclusion
In conclusion, the journey of building a bar cart from scratch is a fulfilling and rewarding endeavor that allows you to unleash your creativity, showcase your craftsmanship, and personalize a functional piece of furniture that seamlessly integrates into your living space. From the initial gathering of materials and tools to the final touches of personalization and decoration, each step in the construction process contributes to the creation of a unique and visually stunning bar cart that reflects your individual style and enhances your home decor.
By embarking on this DIY project, you have not only crafted a practical and versatile furniture piece but also imbued it with your personal touch, transforming it into a captivating accent that adds character and charm to your living space. The process of measuring and cutting the wood, assembling the frame, adding shelves and supports, attaching wheels or legs, and meticulously sanding and finishing the cart has culminated in the creation of a functional and visually appealing bar cart that meets your specific needs and preferences.
Furthermore, the final phase of personalization and decoration has allowed you to infuse the bar cart with elements that resonate with your lifestyle, from personalized hardware and decorative accents to stylish storage solutions and artful displays. This phase has elevated the bar cart from a mere furniture piece to a curated and expressive accent that not only serves a practical purpose but also serves as a reflection of your personality and taste.
As you admire the completed bar cart, take pride in the craftsmanship and attention to detail that have gone into its creation. Whether it stands as a stylish serving station for entertaining guests, a designated cocktail corner in your home, or a versatile storage solution, your DIY bar cart is a testament to your creativity and dedication to enhancing your living space.
In essence, the process of building a bar cart from scratch transcends the mere construction of furniture; it is a journey of self-expression, creativity, and craftsmanship. The personalized and visually stunning bar cart that now graces your home is a testament to your ability to transform raw materials into a functional and captivating piece of decor. Embrace the sense of accomplishment that comes with completing this DIY project, and revel in the joy of having created a bar cart that is not only practical but also a reflection of your unique style and personality.
Frequently Asked Questions about How To Build A Bar Cart From Scratch
Was this page helpful?
At Storables.com, we guarantee accurate and reliable information. Our content, validated by Expert Board Contributors, is crafted following stringent Editorial Policies. We're committed to providing you with well-researched, expert-backed insights for all your informational needs.


0 thoughts on “How To Build A Bar Cart From Scratch”