Home>Kitchen & Cooking>Kitchen Furniture & Decor>How To Turn A Iron Microwave Cart Into A Bar Cart
Kitchen Furniture & Decor
How To Turn A Iron Microwave Cart Into A Bar Cart
Modified: March 19, 2024
Transform your kitchen with a stylish bar cart made from an iron microwave cart. Elevate your kitchen furniture and decor with this DIY project.
(Many of the links in this article redirect to a specific reviewed product. Your purchase of these products through affiliate links helps to generate commission for Storables.com, at no extra cost. Learn more)
Introduction
Are you looking to add a touch of elegance and functionality to your home? Transforming an iron microwave cart into a stylish and versatile bar cart is a fantastic way to achieve just that. With a few simple steps and a dash of creativity, you can breathe new life into an underutilized piece of furniture, creating a stunning focal point for entertaining guests and showcasing your favorite beverages.
By repurposing an iron microwave cart into a bar cart, you can infuse your living space with a sense of sophistication and charm. This DIY project allows you to unleash your inner designer, as you customize the cart to suit your personal style and the aesthetic of your home. Whether you prefer a modern, minimalist look or a vintage, rustic vibe, the possibilities are endless when it comes to transforming this humble cart into a chic and functional bar area.
In the following steps, we will guide you through the process of revamping an iron microwave cart into a stylish bar cart that will undoubtedly become the centerpiece of your home. From gathering the necessary materials to adding personalized touches, each step will bring you closer to creating a one-of-a-kind piece that reflects your unique taste and flair for design. So, roll up your sleeves, unleash your creativity, and let's embark on this exciting journey of transforming a simple cart into a stunning bar cart that will elevate your home decor and impress your guests.
Key Takeaways:
- Transforming an iron microwave cart into a bar cart is a fun DIY project that adds style and functionality to your home. With some creativity and basic materials, you can create a unique and impressive centerpiece for entertaining guests.
- By repurposing an iron microwave cart into a bar cart, you can unleash your inner designer and customize a stylish and functional piece of furniture. With the right materials and a little effort, you can elevate your home decor and impress your guests.
Read more: How To Stock A Bar Cart
Step 1: Gather Materials
Before embarking on the transformation of your iron microwave cart into a stylish bar cart, it's essential to gather all the necessary materials. This step sets the foundation for the entire project, ensuring that you have everything you need to bring your vision to life. Here's a comprehensive list of materials to get you started:
-
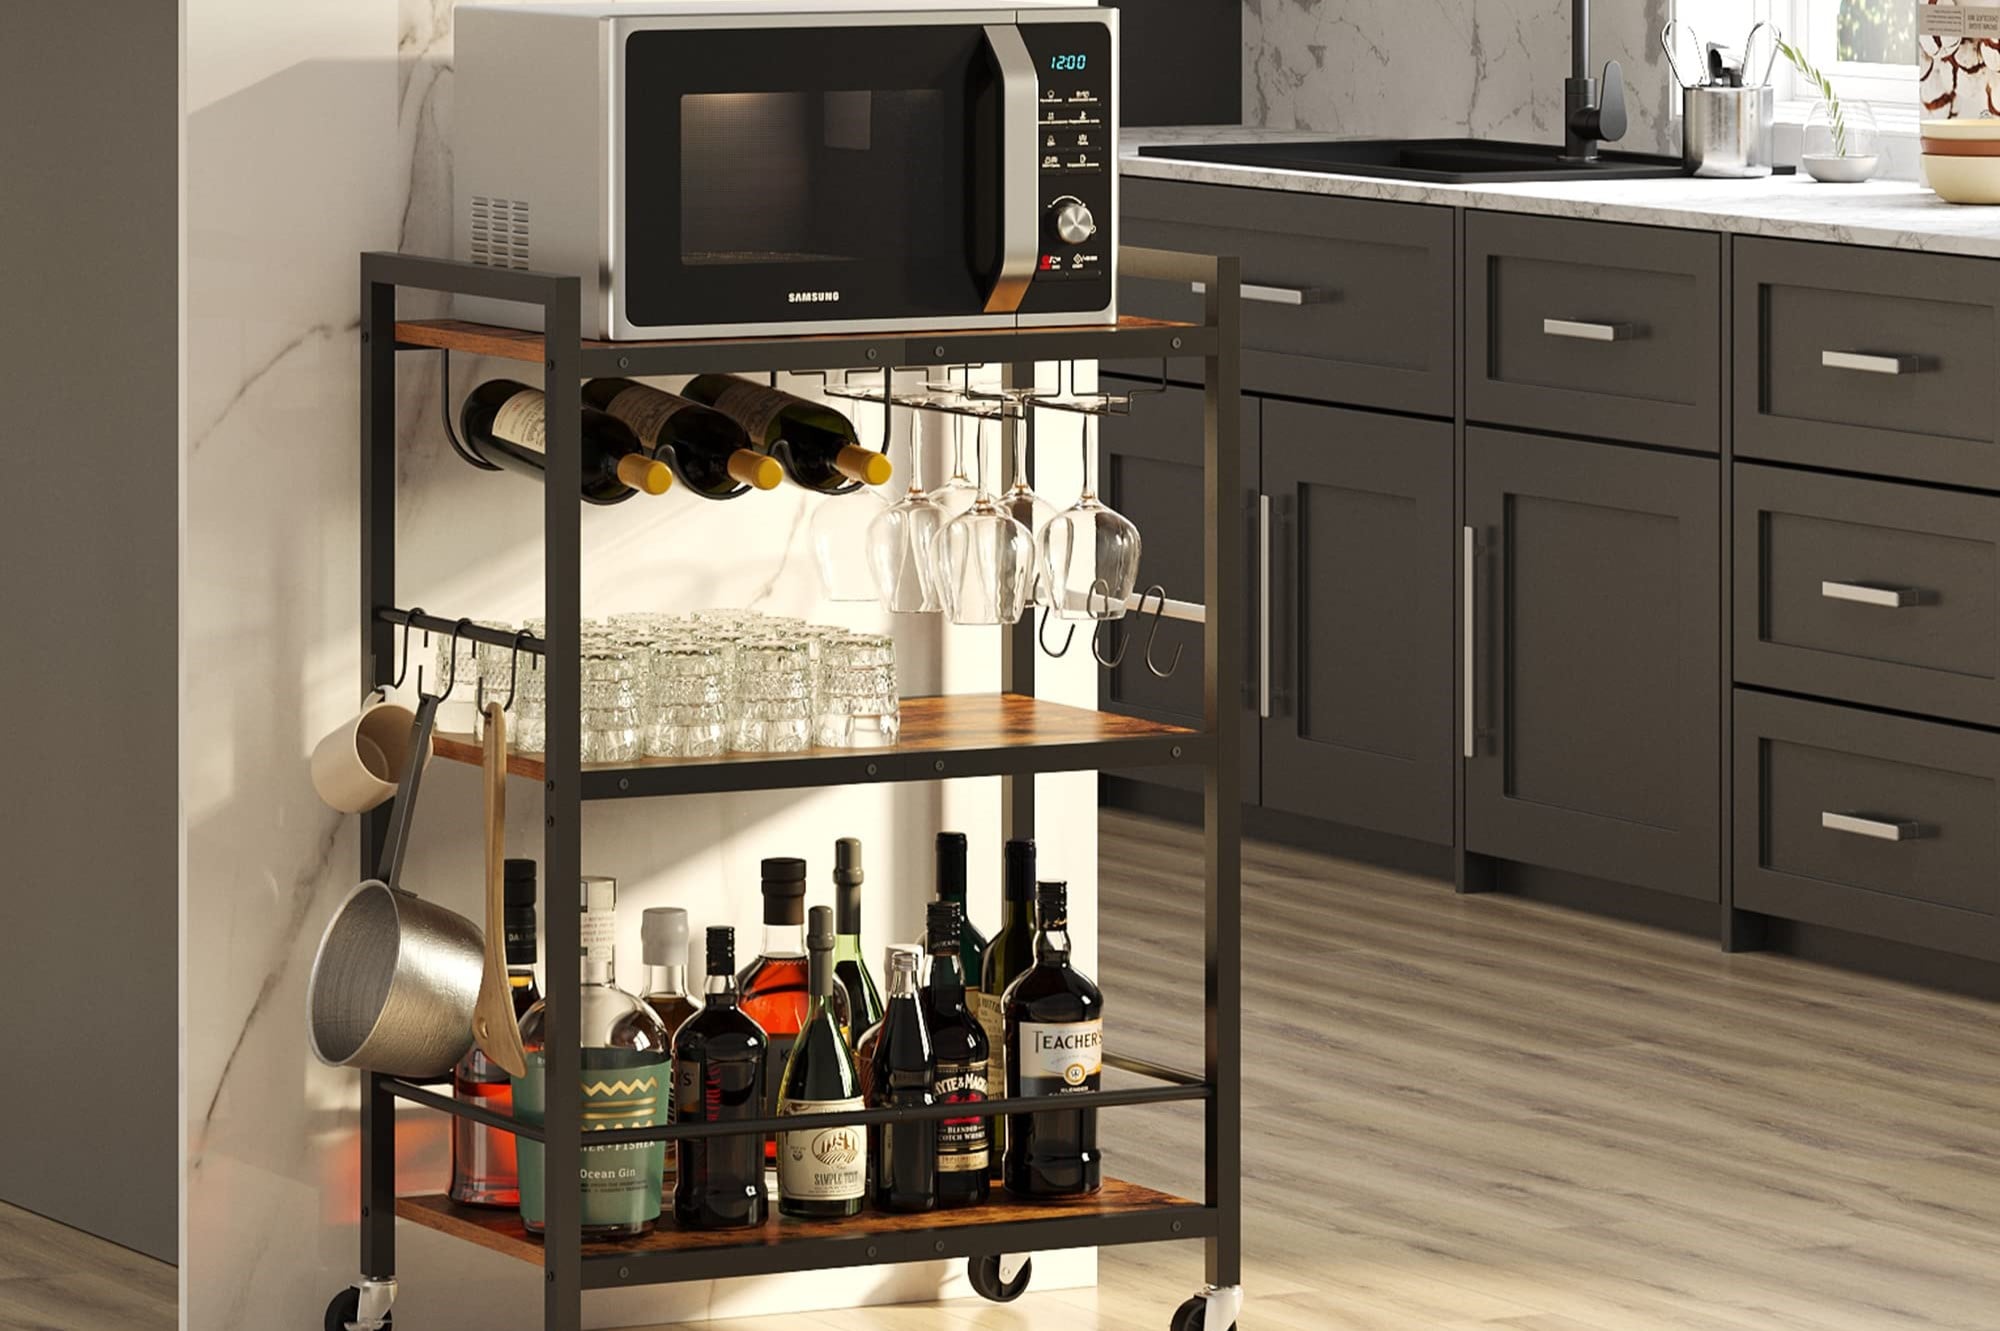
Iron Microwave Cart: The centerpiece of this project is, of course, the iron microwave cart. Look for a sturdy and well-constructed cart that will serve as the base for your bar cart. Whether you already have one at home or plan to purchase a new or second-hand cart, ensure that it is in good condition and has the potential for customization.
-
Wooden Shelves or Trays: To enhance the functionality of your bar cart, consider adding wooden shelves or trays. These will provide ample space for displaying and organizing your bar essentials, such as glassware, bottles, and cocktail accessories. Opt for shelves or trays that complement the size and style of your cart.
-
Decorative Handles or Knobs: Adding decorative handles or knobs can instantly elevate the aesthetic appeal of your bar cart. Choose handles that resonate with your personal style and the overall theme of your home decor. Whether you prefer sleek and modern handles or vintage-inspired knobs, this small detail can make a significant impact.
-
Caster Wheels: For mobility and convenience, caster wheels are a must-have for your bar cart. Look for sturdy and smooth-rolling wheels that can support the weight of the cart and its contents. Depending on your preference, you can opt for traditional wheels or modern, locking casters for added stability.
-
Paint or Stain (Optional): If you wish to customize the color of your cart, consider purchasing paint or wood stain in your preferred shade. This allows you to match the bar cart to your existing decor or create a striking contrast for a bold statement piece.
-
Decorative Accents: To add a personal touch to your bar cart, gather decorative accents such as faux plants, framed artwork, or stylish coasters. These accents will inject personality and charm into the final design, making your bar cart a true reflection of your unique style.
By gathering these materials, you are well-equipped to begin the transformation of your iron microwave cart into a stunning bar cart that will undoubtedly become a focal point in your home. With the materials in hand, you are ready to move on to the next step and bring your vision to life.
Step 2: Prepare the Cart
Before diving into the exciting process of customizing your iron microwave cart into a stylish bar cart, it's crucial to prepare the cart for the upcoming transformations. This step involves assessing the current state of the cart, making any necessary repairs, and creating a clean canvas for the subsequent enhancements.
Assessment and Cleaning
Begin by thoroughly examining the iron microwave cart to identify any signs of wear, rust, or damage. If the cart shows signs of rust, gently sand the affected areas to remove the rust and create a smooth surface. Once the cart is free from rust and any loose particles, wipe it down with a damp cloth to remove dust and debris. This initial cleaning step sets the stage for the cart's revitalization, ensuring that the subsequent modifications are applied to a clean and well-prepared surface.
Surface Preparation
If you plan to paint or stain the cart to match your desired aesthetic, this is the ideal time to prepare the surface for the application of new finishes. Use painter's tape to protect any areas you do not wish to paint, such as the wheels or handles. Additionally, lightly sanding the entire surface of the cart will promote better adhesion for the new finish, creating a smooth and uniform base for the upcoming customization.
Read more: How To Build A Gold Bar Cart
Repair and Reinforcement
Inspect the structural integrity of the cart, paying close attention to the joints, welds, and overall stability. If any parts are loose or wobbly, take the time to reinforce them with appropriate hardware or adhesive. Ensuring that the cart is structurally sound is essential for its long-term functionality and durability as a bar cart.
By meticulously preparing the cart in this manner, you are laying the groundwork for a successful transformation. This step sets the stage for the subsequent enhancements, ensuring that the cart is in optimal condition to undergo the exciting changes that will elevate it into a stunning and functional bar cart. With the cart now prepared, you are ready to move on to the next step and bring your vision to life.
Step 3: Add Shelves and Storage
With the iron microwave cart prepared and ready for its transformation into a stylish bar cart, the next step is to focus on enhancing its functionality by adding shelves and storage solutions. This crucial step will not only maximize the cart's organizational capabilities but also create designated spaces for displaying and storing an array of bar essentials.
Installing Wooden Shelves or Trays
To begin, consider the layout and dimensions of the cart to determine the most suitable placement for the shelves or trays. Measure the interior space of the cart to ensure a precise fit for the shelves. Opt for wooden shelves or trays that complement the overall aesthetic of the cart and align with your personal style. Whether you choose sleek, modern shelves or rustic, distressed trays, the goal is to enhance both the visual appeal and practicality of the bar cart.
Once you have selected the shelves or trays, carefully install them within the cart, ensuring a secure and level fit. Utilize appropriate hardware, such as brackets or screws, to affix the shelves in place, taking care to maintain equal spacing and alignment. These shelves will serve as designated platforms for arranging glassware, bottles, and other bar accessories, allowing for an organized and visually appealing presentation.
Incorporating Additional Storage Solutions
In addition to the primary shelves, consider incorporating additional storage solutions to further optimize the cart's functionality. This may include attaching hooks or racks to the sides of the cart for hanging bar tools, such as bottle openers, corkscrews, or cocktail shakers. By utilizing the vertical space of the cart, you can efficiently store these essential tools within easy reach, enhancing the cart's practicality and convenience.
Furthermore, explore the possibility of integrating small baskets or containers onto the shelves to corral smaller items, such as drink stirrers, napkins, or garnishes. These storage containers not only contribute to the organization of the bar cart but also add a decorative element, infusing personality and charm into the overall design.
By adding shelves and storage solutions to the iron microwave cart, you are elevating its functionality and transforming it into a purposeful and visually captivating bar cart. This step not only enhances the cart's organizational capabilities but also provides a platform for showcasing your favorite barware and accessories, setting the stage for the subsequent enhancements in the transformation process. With the shelves and storage in place, the bar cart is poised to become a stunning and practical centerpiece in your home.
Read more: How To Stage An Outdoor Bar Cart
Step 4: Add Wheels
The addition of wheels is a pivotal step in the transformation of an iron microwave cart into a fully functional and versatile bar cart. By incorporating caster wheels, you not only enhance the mobility of the cart but also imbue it with a sense of elegance and sophistication. The ability to effortlessly move the bar cart from one space to another makes it an ideal companion for entertaining guests and serving beverages with style.
When selecting caster wheels for your bar cart, consider both functionality and aesthetics. Opt for sturdy wheels that can support the weight of the cart and its contents while ensuring smooth and seamless movement across various floor surfaces. Additionally, if you envision the bar cart being frequently relocated, consider choosing wheels with locking mechanisms to secure the cart in place when desired.
To begin the process of adding wheels to the cart, carefully measure and mark the positions where the wheels will be attached. Ensure that the placement allows for balanced weight distribution and stability. Once the positions are determined, use appropriate hardware, such as screws or bolts, to securely affix the wheels to the base of the cart. Take care to align the wheels evenly and tighten them to prevent wobbling or uneven movement.
The addition of wheels not only enhances the practicality of the bar cart but also contributes to its overall aesthetic appeal. The gleaming metal or sleek black finish of the wheels can complement the cart's design, adding a touch of sophistication and charm. Furthermore, the mobility provided by the wheels allows you to effortlessly reposition the bar cart to suit various occasions and spaces within your home.
By adding wheels to the iron microwave cart, you are elevating its functionality and transforming it into a stylish and versatile bar cart that seamlessly integrates into your living space. This step marks a significant advancement in the transformation process, bringing you closer to the realization of a stunning and practical centerpiece that will undoubtedly impress and delight your guests.
Step 5: Customize the Look
Customizing the look of your iron microwave cart-turned-bar cart is where your creativity truly shines. This step allows you to infuse the cart with your personal style, ensuring that it seamlessly integrates with your home decor while making a striking visual statement. From choosing the perfect finish to adding decorative accents, the customization process is an opportunity to transform the cart into a reflection of your unique taste and aesthetic preferences.
Choose a Finish
Selecting the right finish for your bar cart is a pivotal decision that significantly impacts its overall appearance. Whether you opt for a sleek metallic finish to exude modern elegance or a distressed, vintage-inspired look for a touch of rustic charm, the chosen finish sets the tone for the entire cart. If you decide to paint the cart, consider hues that complement your existing decor, creating a cohesive and harmonious ambiance within your living space.
Personalize with Decorative Accents
Incorporating decorative accents is a delightful way to infuse personality into your bar cart. Consider adorning the cart with stylish handles or knobs that resonate with your design sensibilities. Additionally, embellish the cart with tasteful accessories such as faux plants, framed artwork, or elegant coasters to add a touch of sophistication and charm. These accents not only enhance the visual appeal of the cart but also create a cohesive and inviting atmosphere within your home.
Read more: How To Build A Bar Cart With Crates
Embrace Versatility with Removable Decals
For a playful and versatile customization option, consider using removable decals to adorn the sides or shelves of the bar cart. Whether you opt for whimsical patterns, inspirational quotes, or artistic designs, removable decals offer a temporary yet impactful way to personalize the cart. This approach allows you to experiment with different styles and themes, effortlessly updating the cart's look to suit various occasions or seasonal decor changes.
Incorporate Ambient Lighting
To elevate the ambiance of your bar cart, consider incorporating ambient lighting elements. LED strip lights or battery-operated candles can be strategically placed within the cart to create a warm and inviting glow. Not only does this customization add a touch of allure to the cart, but it also enhances the overall atmosphere of your entertaining space, making it an inviting focal point for social gatherings.
By customizing the look of your iron microwave cart, you are infusing it with character and style, transforming it into a captivating and functional bar cart that seamlessly integrates into your home. This step allows you to unleash your creativity, resulting in a one-of-a-kind piece that reflects your unique design sensibilities and enhances the overall aesthetic of your living space.
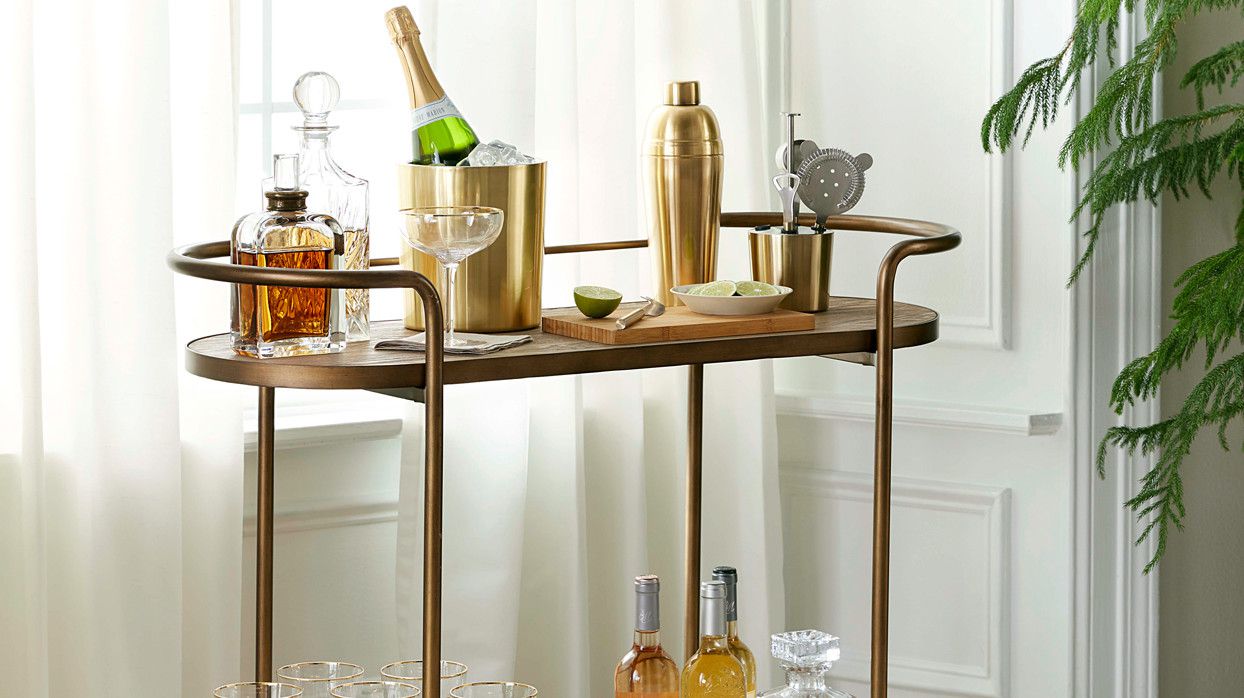
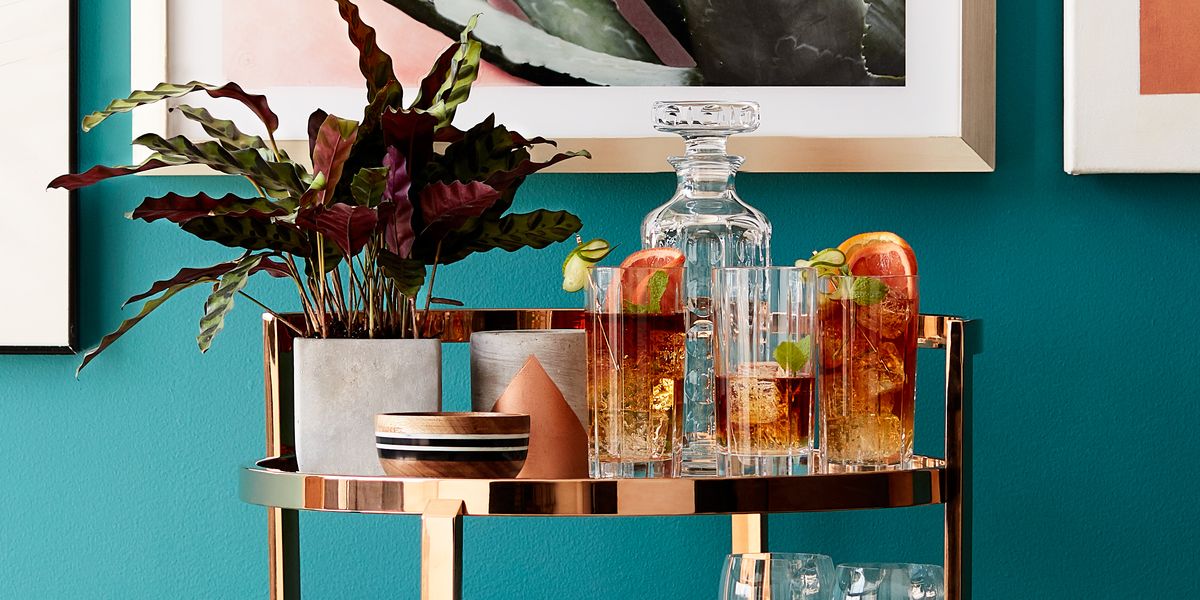
Step 6: Stock the Bar Cart
With the iron microwave cart now transformed into a stunning and functional bar cart, the final step is to stock it with an array of essential and decorative items, transforming it into a fully equipped and visually captivating centerpiece for your home. Stocking the bar cart not only ensures that you are prepared to entertain guests with style and sophistication but also allows you to curate a selection of beverages and accessories that cater to your personal preferences and tastes.
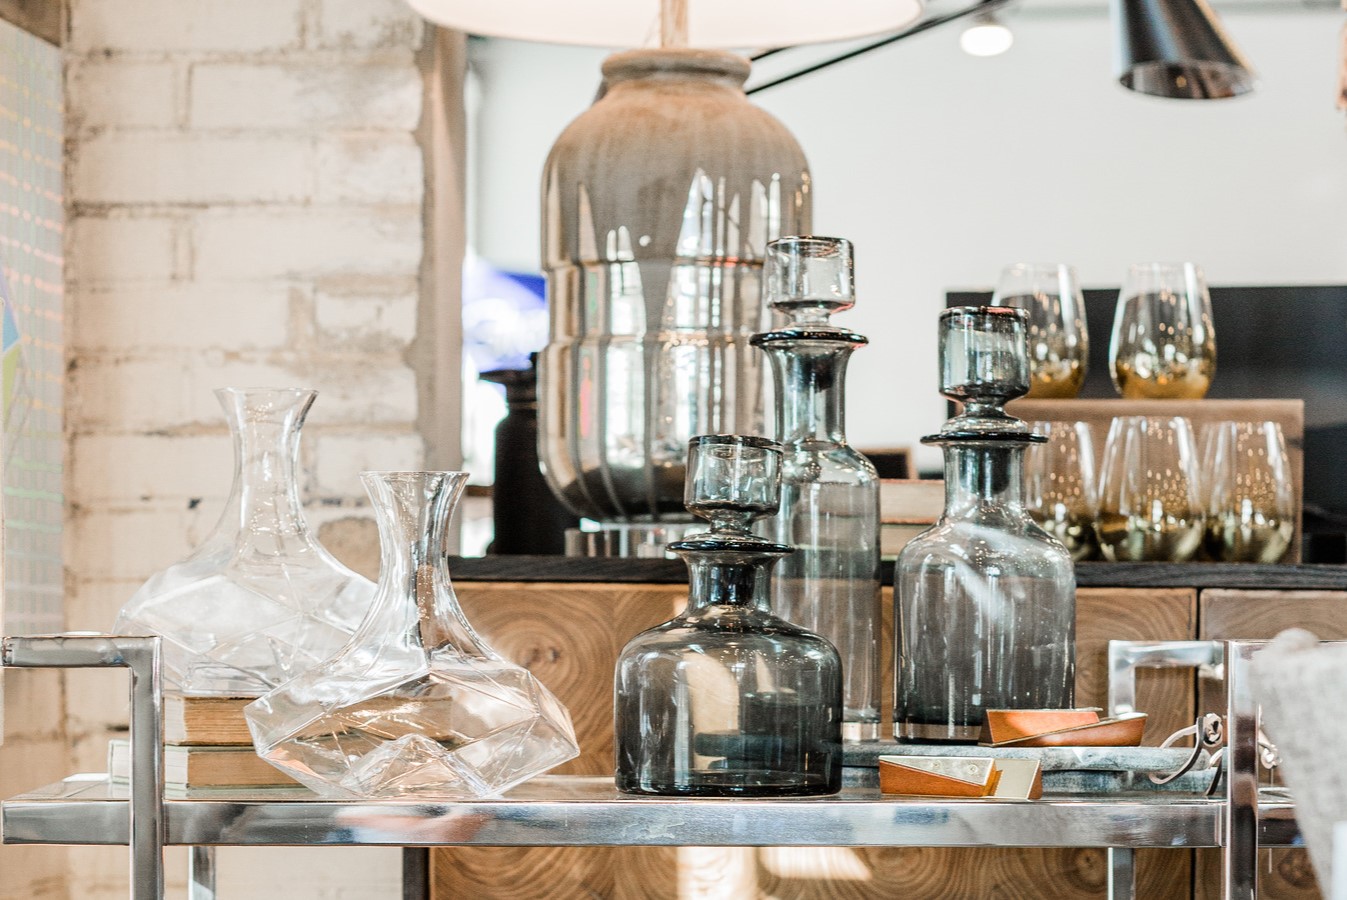
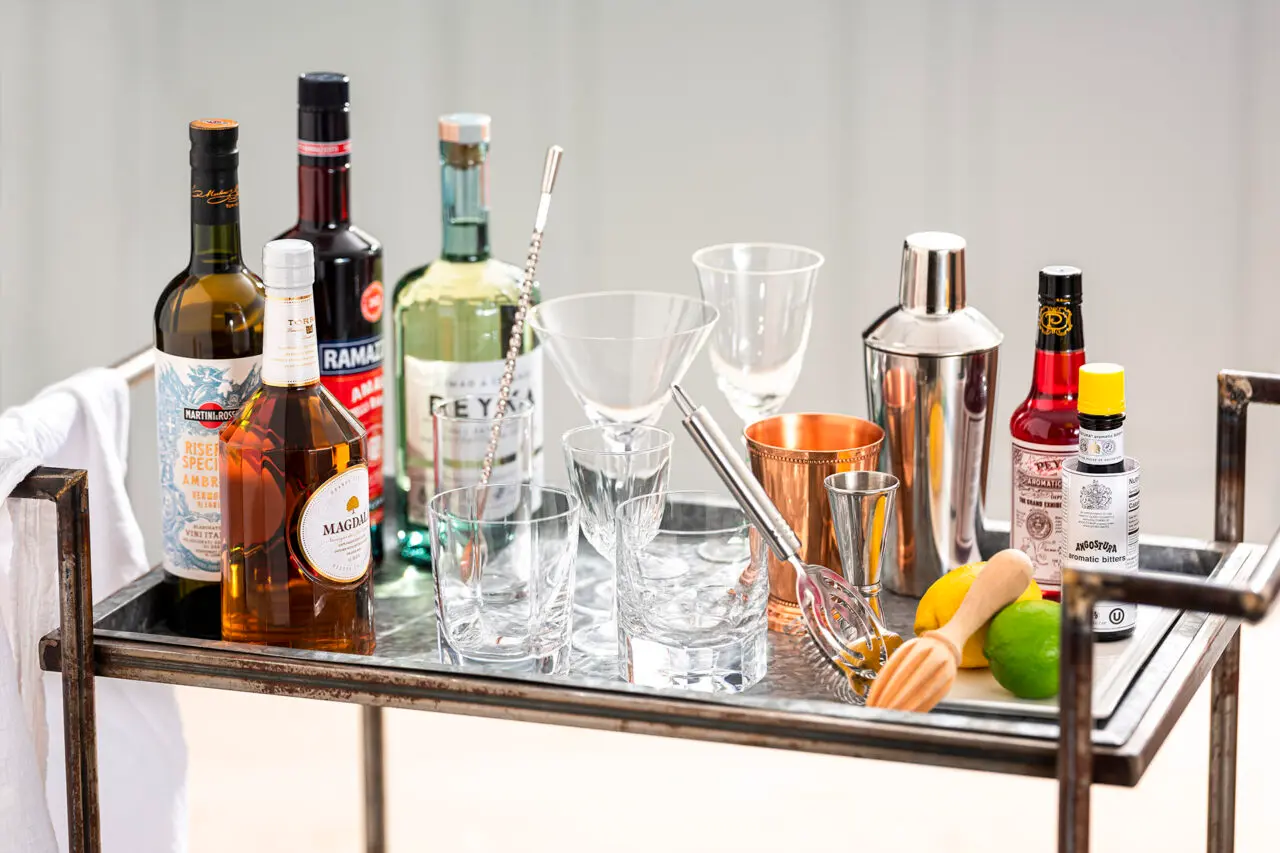
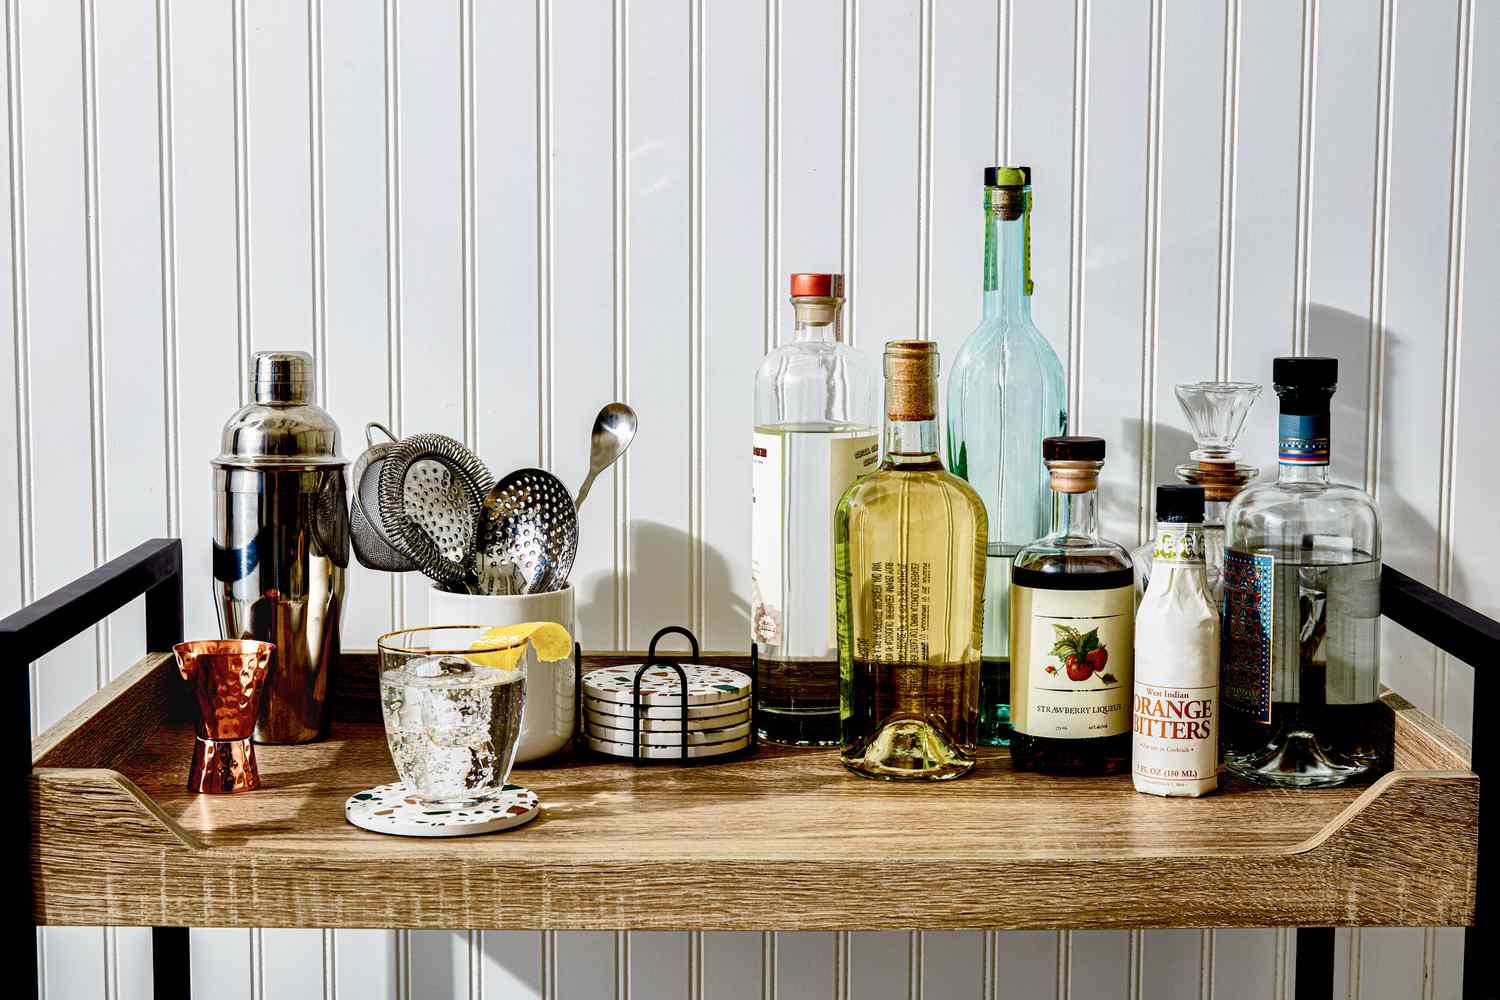
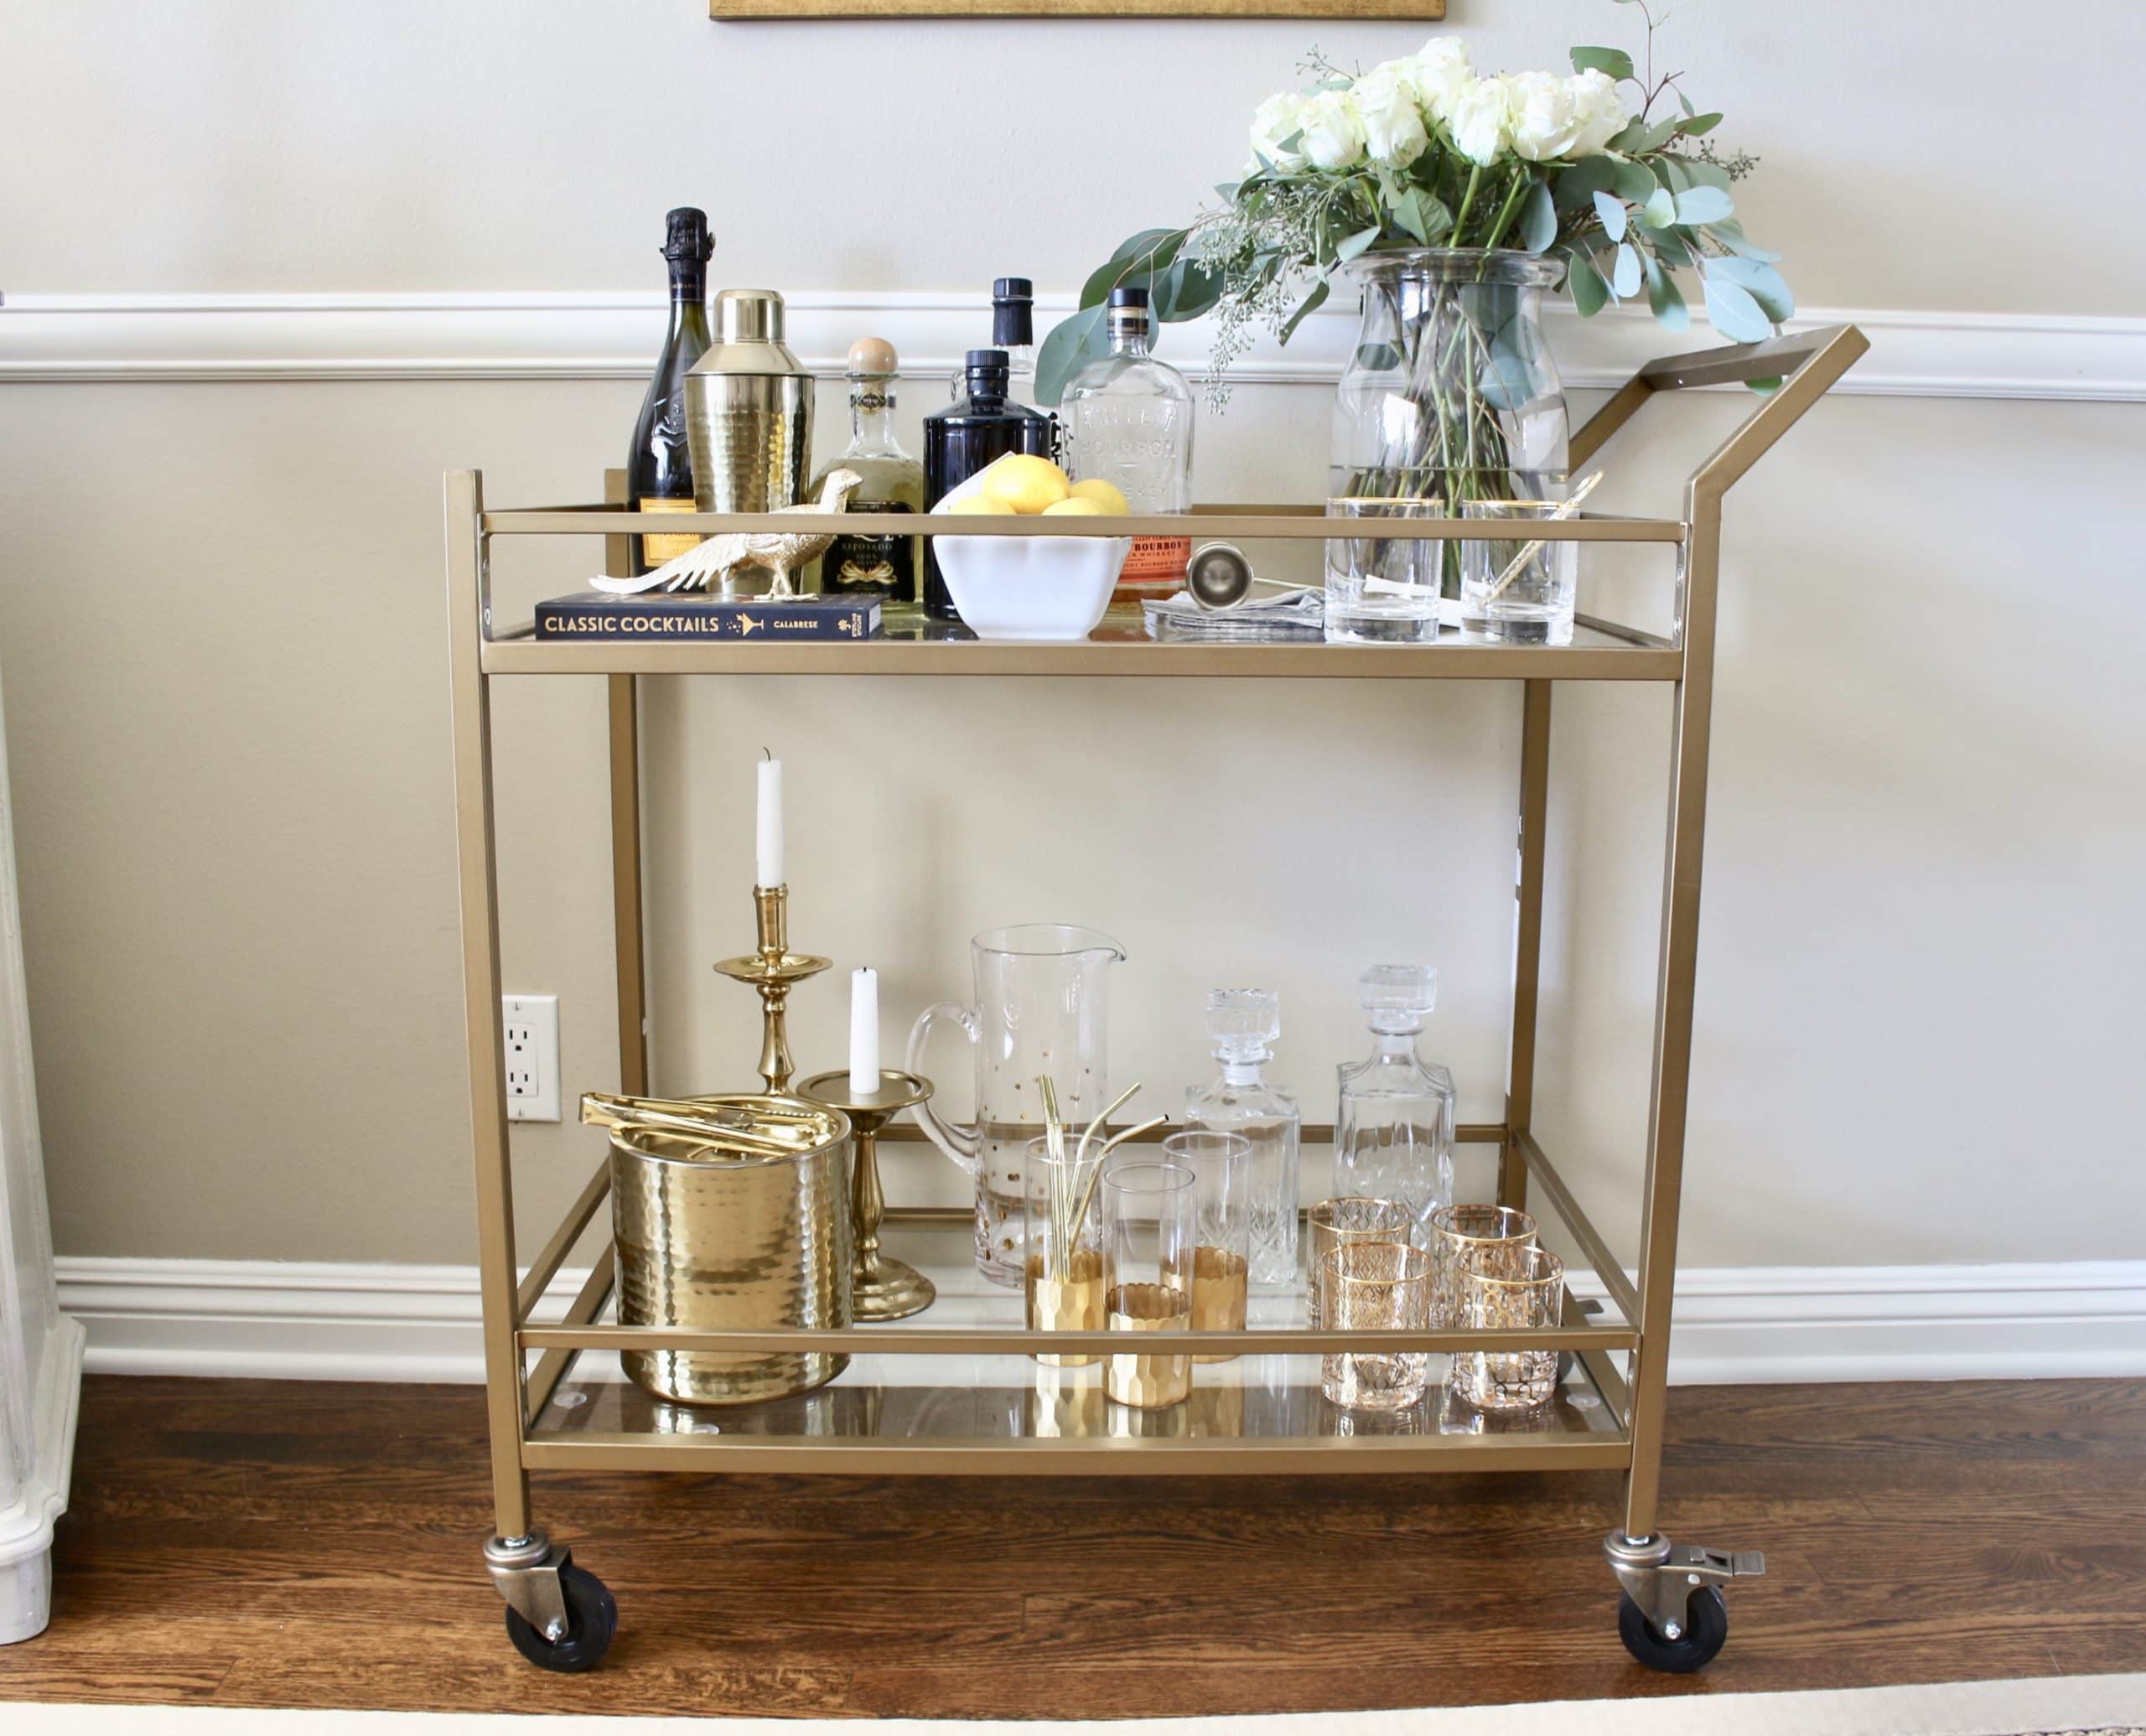
Essential Barware
Begin by arranging essential barware on the shelves of the cart, including a variety of glassware such as highball glasses, wine glasses, and cocktail coupes. Displaying these glasses not only adds a touch of elegance to the cart but also ensures that you are ready to serve a diverse range of beverages to your guests. Additionally, include a selection of shakers, strainers, and bar spoons to facilitate the preparation of cocktails and mixed drinks.
Read more: How Tall Should A Bar Cart Be
Beverage Selection
Curate a selection of your favorite spirits, liquors, and mixers to stock the bar cart, ensuring that you have a versatile assortment of beverages to cater to different preferences. Whether you prefer classic spirits such as whiskey and vodka or enjoy experimenting with artisanal liqueurs and bitters, the bar cart provides a stylish platform for showcasing your beverage collection. Additionally, include a variety of mixers, such as tonic water, soda, and flavored syrups, to complement the spirits and create a diverse range of cocktails.
Garnishes and Accessories
Enhance the visual appeal of the bar cart by incorporating an assortment of garnishes and accessories, such as citrus fruits, cocktail olives, and maraschino cherries. These colorful and aromatic garnishes not only add a decorative touch to the cart but also serve as essential ingredients for crafting visually stunning and flavorful cocktails. Additionally, include a selection of cocktail napkins, stirrers, and straws to provide the finishing touches to each beverage presentation.
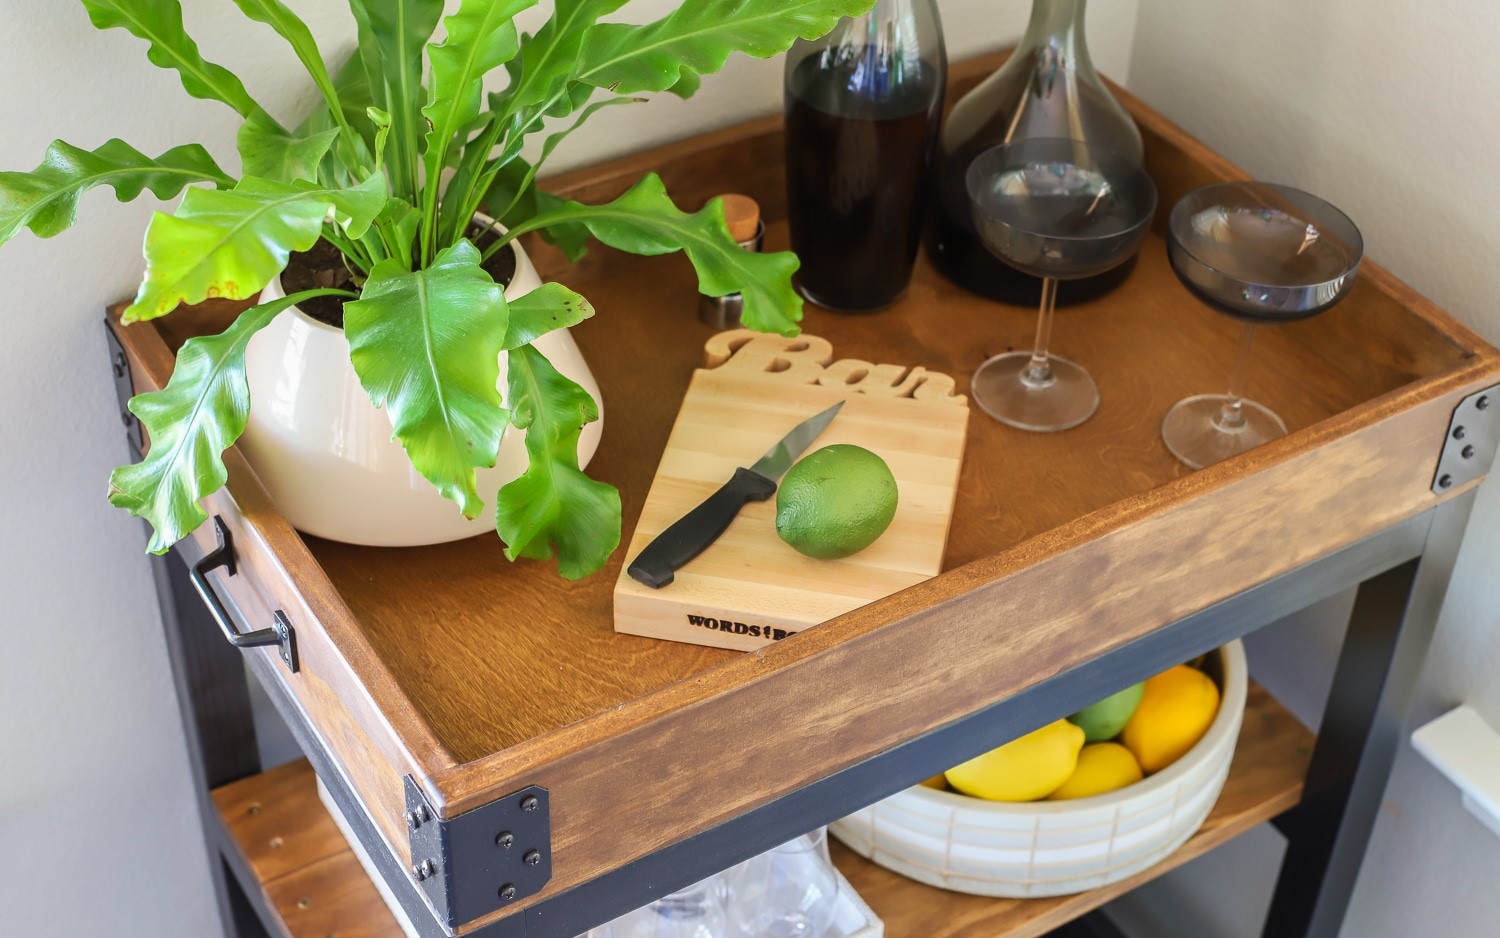
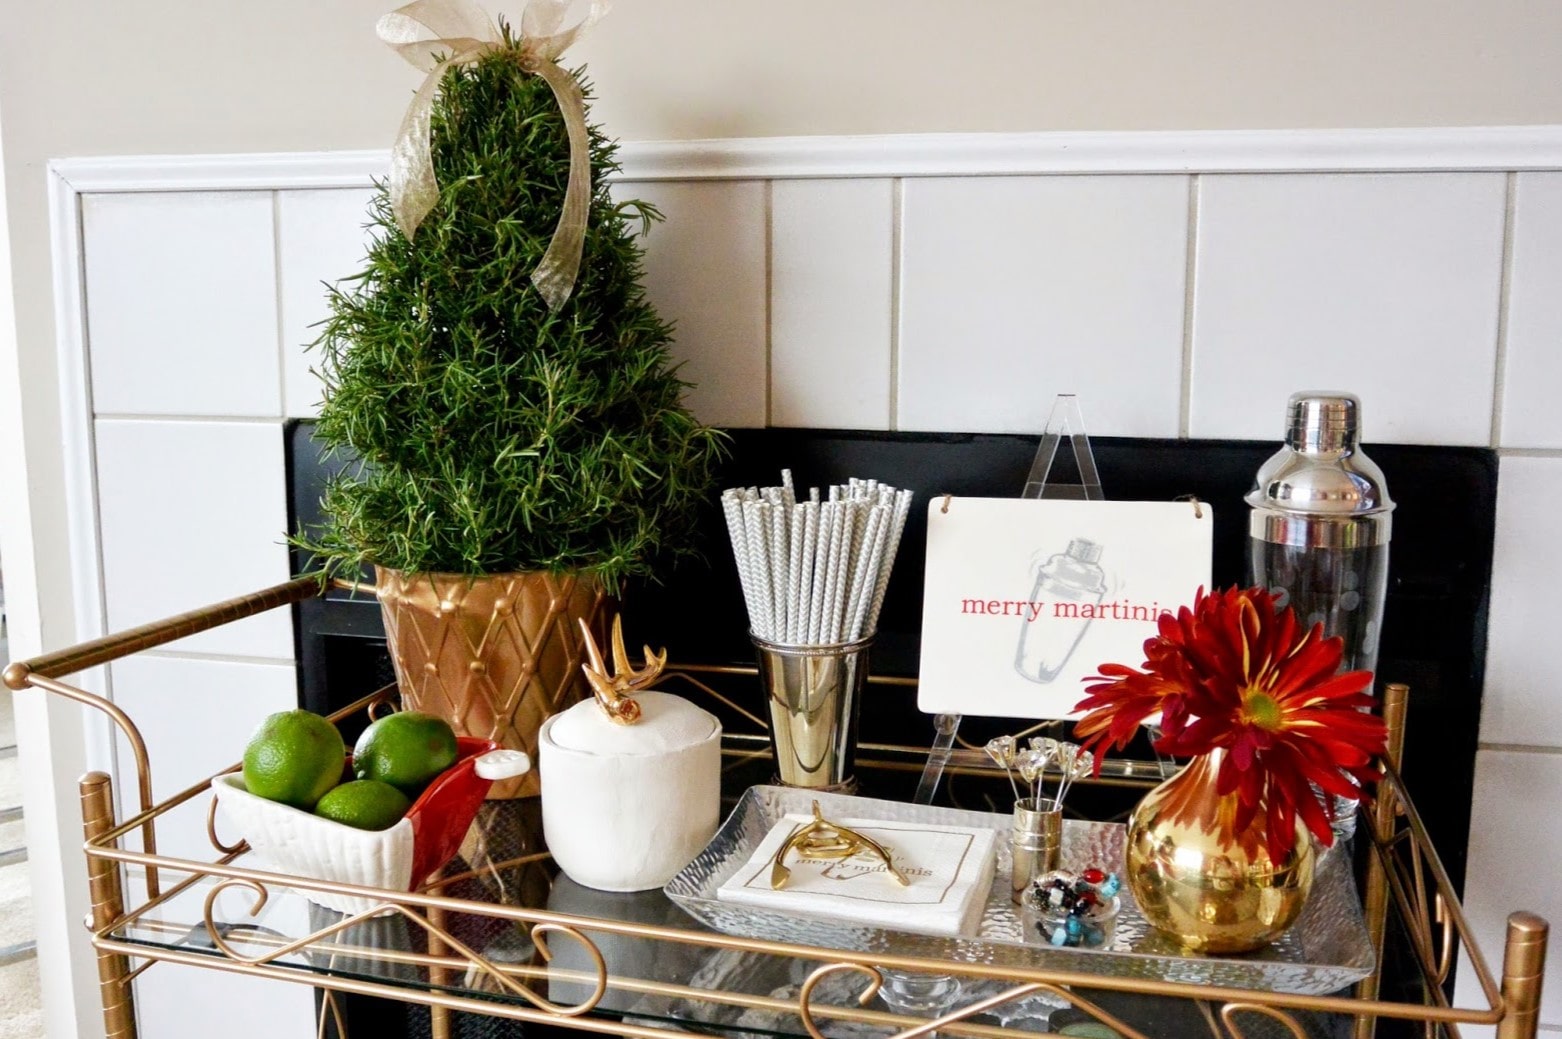
Personal Touches
Infuse the bar cart with personal touches that reflect your individual style and preferences. Consider displaying a favorite bottle of wine or a unique spirit that holds sentimental value. Incorporate decorative elements such as small potted plants, framed artwork, or elegant coasters to add a touch of personality and charm to the cart, creating a warm and inviting ambiance that resonates with your personal aesthetic.
By stocking the bar cart with these essential items and personal touches, you are not only prepared to entertain with flair and sophistication but also have created a visually captivating and functional focal point within your home. The curated selection of beverages, barware, and decorative accents transforms the bar cart into a dynamic and inviting space, ready to impress and delight your guests at any gathering.
Conclusion
In conclusion, the transformation of an iron microwave cart into a stylish and functional bar cart is a rewarding endeavor that elevates both the aesthetic appeal and practicality of your living space. By following the comprehensive steps outlined in this guide, you have embarked on a creative journey that has empowered you to breathe new life into a humble piece of furniture, resulting in a stunning centerpiece that reflects your unique style and enhances your home decor.
Throughout the process, you have gathered the necessary materials, prepared the cart, added shelves and storage solutions, incorporated caster wheels for mobility, and customized the look of the cart to align with your personal aesthetic. Each step has been an opportunity to infuse the project with your creativity and design sensibilities, resulting in a one-of-a-kind bar cart that is as functional as it is visually captivating.
The culmination of this transformation is the stocking of the bar cart with essential barware, a curated selection of beverages, and personalized decorative touches. This final step not only prepares you to entertain guests with style and sophistication but also imbues the bar cart with a warm and inviting ambiance that reflects your hospitality and attention to detail.
As you stand back and admire the completed bar cart, you can take pride in the fact that you have not only repurposed a piece of furniture but have also created a versatile and elegant addition to your home. The bar cart serves as a testament to your ingenuity and design prowess, showcasing your ability to transform everyday items into extraordinary focal points that enrich your living space.
Whether you envision using the bar cart for intimate gatherings, festive celebrations, or simply as a stylish display of your favorite beverages and accessories, its presence will undoubtedly elevate the atmosphere of your home. With its mobility, functionality, and personalized aesthetic, the bar cart stands as a testament to your creativity and adds a touch of sophistication to your living space.
In essence, the transformation of an iron microwave cart into a bar cart is not just a DIY project; it is a testament to your ability to reimagine and revitalize everyday objects, infusing them with new purpose and beauty. As you enjoy the convenience and elegance of your newly transformed bar cart, may it serve as a reminder of the transformative power of creativity and the joy of breathing new life into the spaces we inhabit.
Frequently Asked Questions about How To Turn A Iron Microwave Cart Into A Bar Cart
Was this page helpful?
At Storables.com, we guarantee accurate and reliable information. Our content, validated by Expert Board Contributors, is crafted following stringent Editorial Policies. We're committed to providing you with well-researched, expert-backed insights for all your informational needs.


0 thoughts on “How To Turn A Iron Microwave Cart Into A Bar Cart”