Articles
How To Store Cannas Over Winter
Modified: October 29, 2024
Learn the best methods for storing cannas over the winter in this informative article. Step-by-step instructions and tips for keeping your plants healthy until spring.
(Many of the links in this article redirect to a specific reviewed product. Your purchase of these products through affiliate links helps to generate commission for Storables.com, at no extra cost. Learn more)
Introduction
Are you a fan of cannas and wish to enjoy their stunning blooms year after year? Storing cannas over winter is an essential practice to ensure their survival and thriving in the following growing season. In this article, we will guide you through the process of storing cannas, ensuring their health and vitality during the colder months.
Cannas, often referred to as Canna lilies, are not true lilies but rather tropical flowering plants native to Central and South America. Known for their vibrant foliage and striking blooms in hues of red, yellow, orange, and pink, cannas are a popular choice for gardeners looking to add a splash of tropical flair to their landscapes.
While cannas are hardy in USDA zones 7 to 10, gardeners outside of these regions may need to take extra measures to protect them from freezing temperatures, which can cause damage or kill the plants. Storing cannas over winter allows you to preserve their rhizomes, the underground storage structures that produce new shoots and roots each year.
By properly storing cannas, you can ensure that they remain healthy and disease-free, ready to be replanted and bloom magnificently in the coming spring. Let’s dig deeper into the steps involved in storing cannas over winter.
Key Takeaways:
- Ensure the health and vitality of your cannas by storing them over winter. Follow proper preparation, choose the right storage method, and check on them regularly to enjoy stunning blooms year after year.
- Replant your cannas in the spring for a vibrant and colorful garden. With the right care and attention, your cannas will thrive and reward you with magnificent blooms throughout the growing season.
Read more: How To Store Geraniums Over Winter
Choosing the Right Time
Timing plays a crucial role in successfully storing cannas for the winter. It is important to wait until after the first frost or when the foliage begins to turn yellow or brown before digging up the plants. This allows the cannas to naturally go into dormancy and prepare for the winter months.
Waiting too long to dig up your cannas can result in frost damage to the rhizomes, while digging them up too early can disturb their growth and prevent them from storing enough energy.
Typically, the best time to dig up cannas for winter storage is in late fall, just before the first hard frost is expected. Keep an eye on the weather forecast and plan accordingly. If you are uncertain, it is better to err on the side of caution and wait until the foliage starts to die back.
By choosing the right time to dig up your cannas, you can ensure that they enter the storage period in the best possible condition, ready to withstand the winter and bloom beautifully in the next growing season.
Next, let’s move on to the important steps involved in preparing cannas for winter storage.
Preparing Cannas for Winter Storage
Before storing your cannas for the winter, it is crucial to prepare them properly. This involves a series of steps to ensure the health and vitality of the rhizomes during their period of dormancy. Here’s how you can prepare cannas for winter storage:
- Trimming: Start by cutting back the foliage of the cannas to about 6 inches above the ground. This helps to minimize the risk of rot and disease during storage.
- Dividing: If your cannas have become crowded and need dividing, now is the perfect time to do it. Gently separate the rhizomes using a clean, sharp knife, making sure each division has at least one shoot and a portion of the rhizome attached.
- Cleaning: Carefully remove excess soil from the rhizomes by lightly brushing or shaking them. It’s important to handle them gently to avoid damaging the delicate roots.
- Drying: Allow the rhizomes to dry for a few days in a well-ventilated area. This helps to prevent mold or fungal growth during storage.
By following these steps, you can ensure that your cannas are in the best possible condition for winter storage. Next, let’s move on to the process of digging up the cannas.
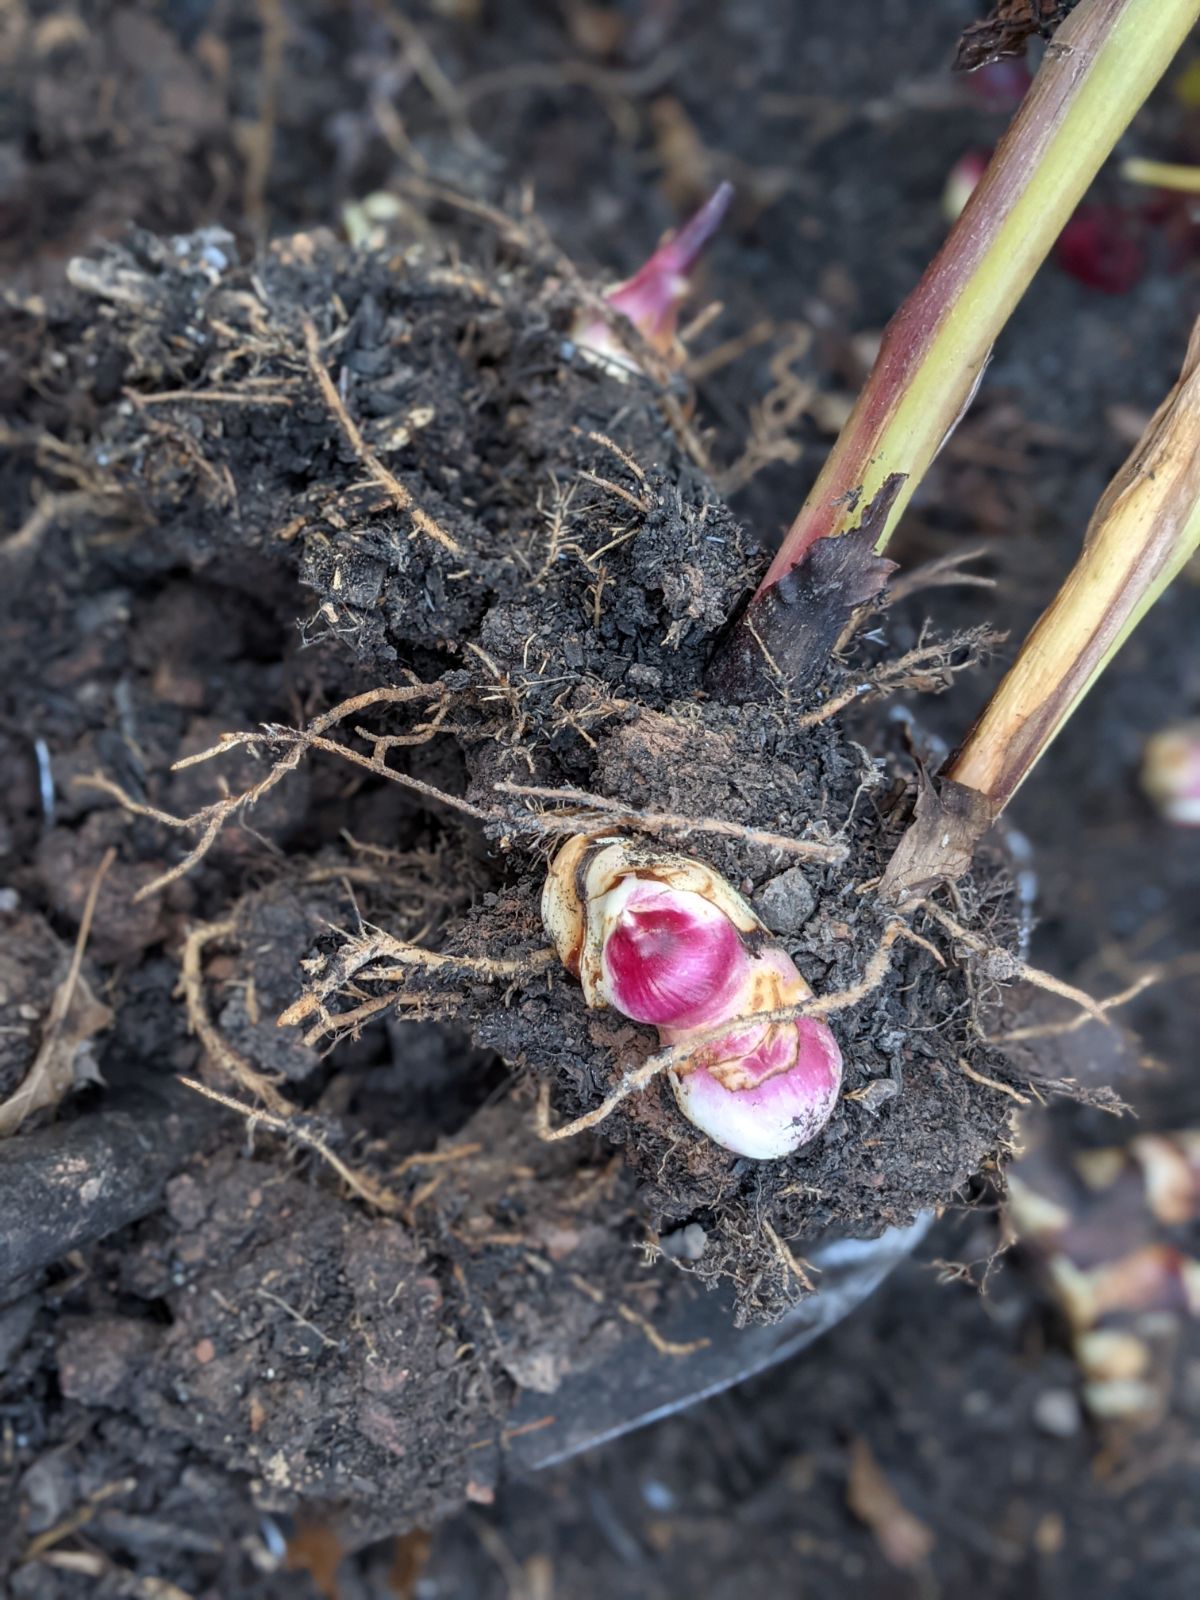
Digging Up the Cannas
Once you have prepared your cannas for winter storage, it’s time to dig them up from the ground. Follow these steps to safely remove the cannas without causing damage to the rhizomes:
- Loosen the soil: Use a garden fork or spade to gently loosen the soil around the base of the cannas. Be careful not to damage the rhizomes in the process.
- Lift the rhizomes: Insert the fork or spade under the cannas, taking care to pry them out of the ground. Apply gentle pressure to lift the rhizomes without breaking them.
- Remove excess soil: Once the cannas are lifted, gently shake off any excess soil attached to the rhizomes. Avoid washing them, as this can introduce moisture that may lead to rot during storage.
As you dig up the cannas, keep an eye out for any damaged or diseased rhizomes. These should be discarded to prevent the spread of disease to healthy rhizomes during storage.
Once you have successfully dug up your cannas, it’s time to move on to the next step: cleaning and trimming them for storage.
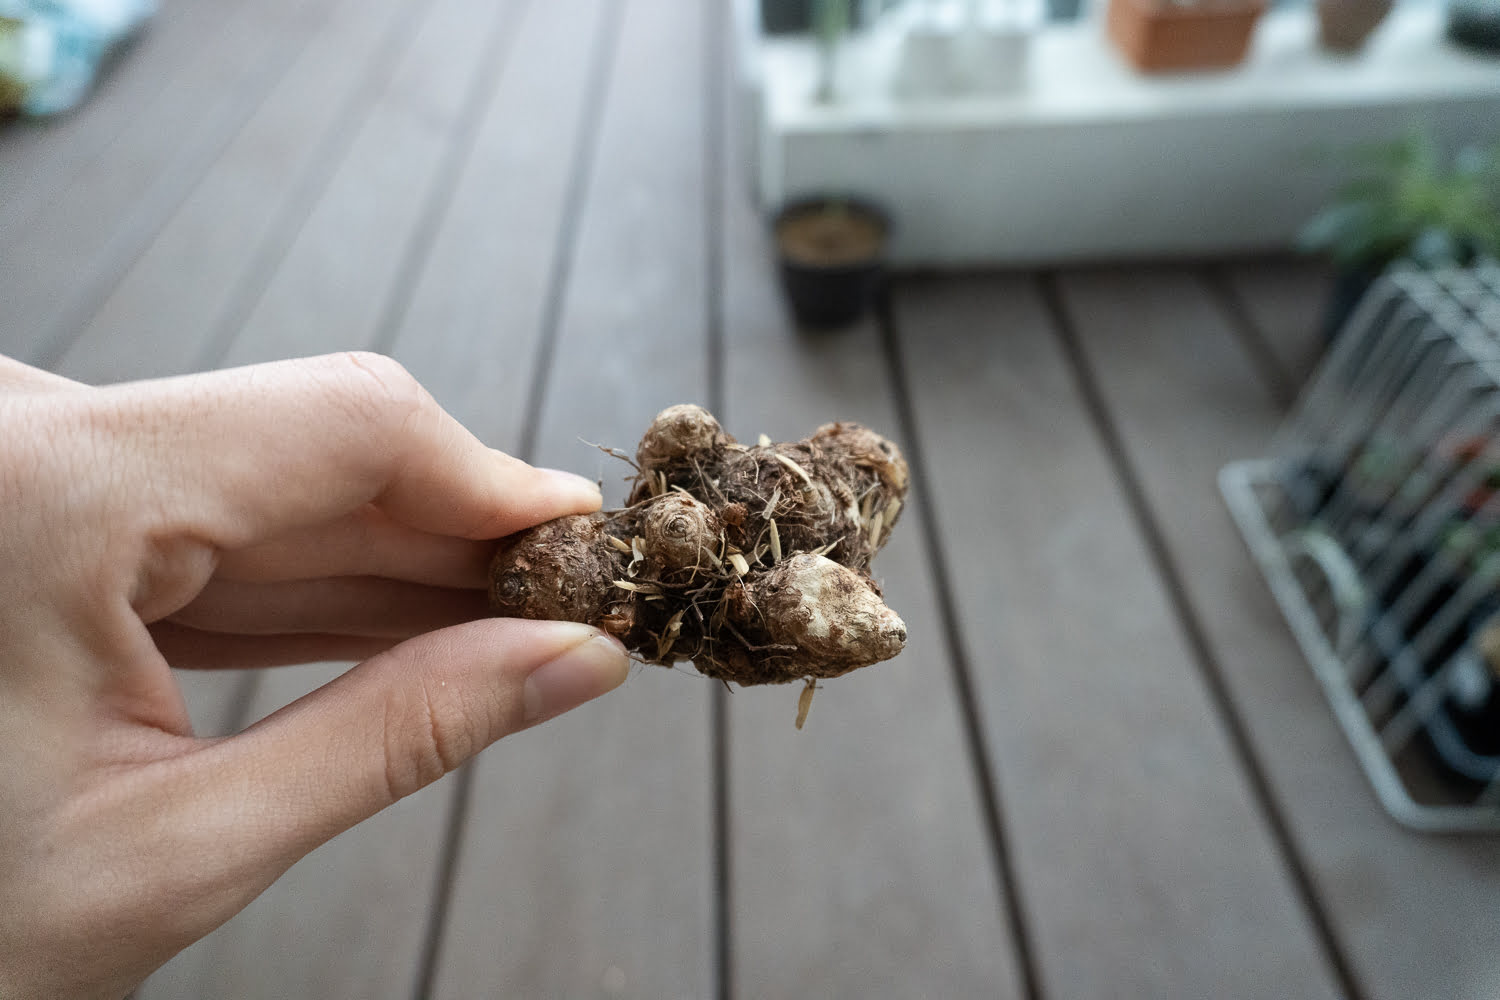
Cleaning and Trimming Cannas
After digging up your cannas, it is important to clean and trim them before storing them for the winter. This helps to prevent the spread of disease and ensures that the rhizomes remain healthy during their dormant period. Follow these steps to clean and trim your cannas:
- Remove dead foliage: Trim off any remaining dead or yellowed foliage from the rhizomes. Cut the stems close to the rhizome, leaving about an inch of stem attached.
- Inspect for damage or disease: Examine the rhizomes carefully for any signs of damage, rot, or disease. Dispose of any affected rhizomes to prevent spreading the issue to healthy ones.
- Trim the roots: If necessary, trim any excessively long or damaged roots. Aim to have roots that are about 2 to 3 inches long.
- Disinfect: To further prevent the spread of diseases or pests, you can choose to disinfect the rhizomes. You can soak them in a solution of 10% bleach and 90% water for about 10-15 minutes. This helps kill any potential pathogens and pests.
By cleaning and trimming your cannas, you are ensuring that only healthy and robust rhizomes are stored for the winter. This will help reduce the risk of rot, disease, and pest infestations during the storage period.
Now that your cannas are clean and trimmed, you are ready to move on to the next step: curing the rhizomes before storage.
Read more: How To Store EGO Battery Over The Winter
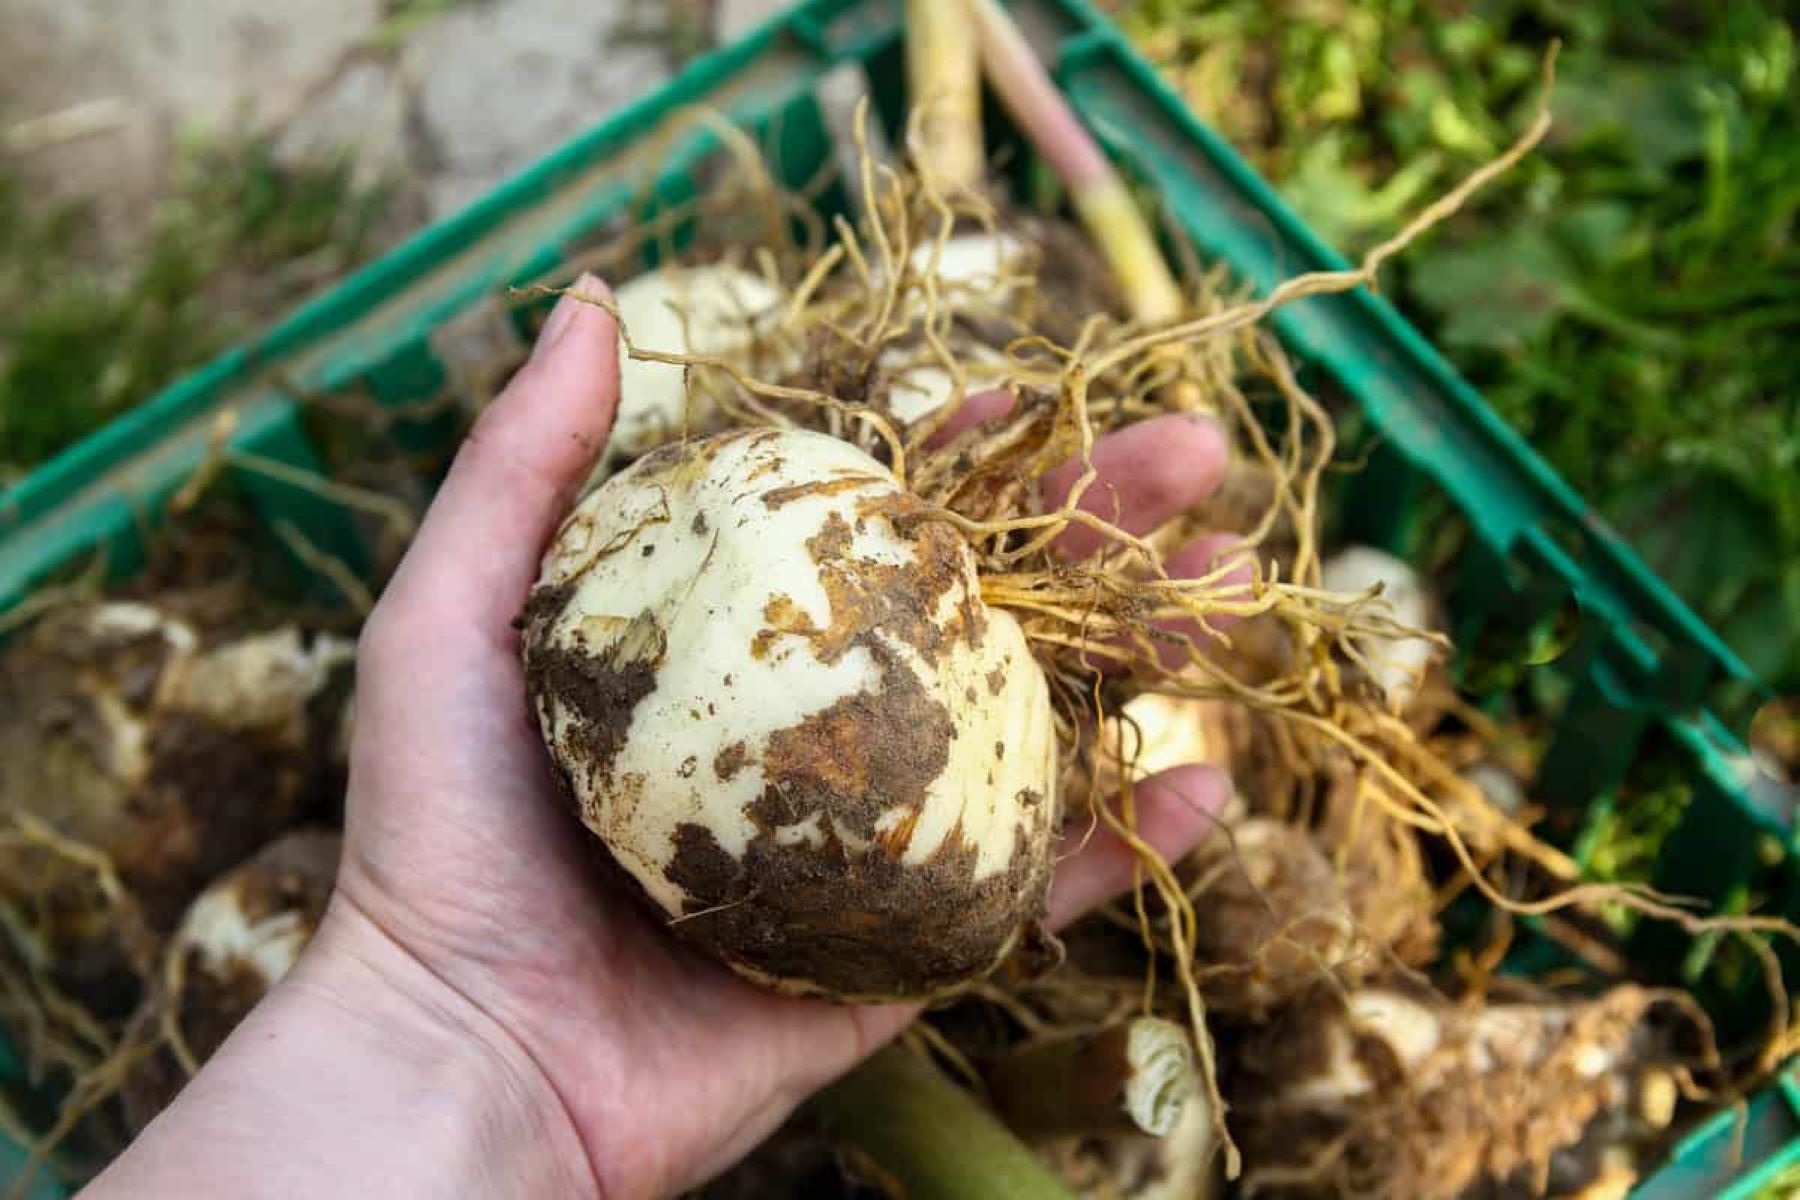
Curing the Cannas
Before storing your cannas, it is important to cure them. Curing involves allowing the rhizomes to dry and heal any wounds or cuts made during the cleaning and trimming process. This step is crucial for the long-term storage and health of the cannas. Follow these steps to properly cure your cannas:
- Place the cannas in a well-ventilated area: Find a cool, dry location such as a garage or basement where the cannas can be spread out in a single layer. Ensure that the area has good air circulation to aid in the drying process.
- Leave the cannas undisturbed: Allow the cannas to cure for approximately one to two weeks. During this time, the rhizomes will dry out and form a protective layer to help prevent rot or fungal growth during storage.
- Rotate or inspect the cannas: Every few days, you can gently rotate the cannas or inspect them for any signs of rot or damage. Remove any rhizomes that show signs of decay to prevent it from spreading to healthy ones.
It is important to note that curing times may vary depending on the humidity of your location. You can gauge the readiness of the cannas by gently squeezing the rhizomes; they should feel firm and dry to the touch.
Once your cannas have been properly cured, you can proceed to choose a storage method that suits your needs. Next, we will explore various options for storing cannas over winter.
Storage Options for Cannas
When it comes to storing cannas over winter, there are several options available to ensure their survival and keep them in good condition. Here are some storage methods you can consider:
- Storing Cannas in Peat Moss: One popular method is to store the cannas in peat moss. Place the cured and dried rhizomes in a container filled with slightly moistened peat moss. Make sure the rhizomes are completely covered and store the container in a cool, dark location.
- Storing Cannas in Sawdust: Another option is to store the cannas in sawdust. Similar to the peat moss method, place the rhizomes in a container filled with sawdust, ensuring they are completely covered. Store the container in a cool, dry area.
- Storing Cannas in Vermiculite: Vermiculite is a lightweight, sterile substrate that can be used to store cannas. Place the rhizomes in a container and cover them with vermiculite, ensuring they are well-insulated. Store the container in a cool, dry location.
- Storing Cannas in Paper Bags: If you prefer a simpler approach, you can store the rhizomes in paper bags. Place the cured cannas in individual paper bags, label them, and store them in a cool, dry place.
- Storing Cannas in a Cool, Dry Location: If you have limited storage options, you can also store the cannas in a cool, dry location such as a basement or cellar. Place the cured rhizomes in shallow crates or containers filled with peat moss or sawdust to help maintain moisture levels.
Regardless of the storage method chosen, it is important to ensure that the rhizomes are kept in a dark, cool, and well-ventilated environment. This will help prevent them from drying out or succumbing to moisture-related issues.
Now that you have selected your preferred storage method, it’s important to periodically check on the cannas during their storage period. We’ll cover this in the next section.
Storing Cannas in Peat Moss
Storing cannas in peat moss is a popular and effective method to keep the rhizomes in optimal condition during winter. Peat moss provides insulation, retains moisture, and helps prevent the rhizomes from drying out. Here’s how you can store your cannas using this method:
- Prepare the peat moss: Moisten the peat moss slightly by adding water and mixing it until it feels slightly damp. Avoid making it too wet, as excessive moisture can promote rot.
- Choose a storage container: Select a container with ventilation holes or use a breathable bag, such as a burlap sack or a mesh bag, to allow for proper air circulation.
- Layer the peat moss and cannas: Begin by placing a layer of moistened peat moss at the bottom of the container. Then, arrange the cannas on top of the peat moss, ensuring they are not touching each other.
- Cover the cannas with peat moss: Gently cover the cannas with another layer of moistened peat moss, making sure they are completely surrounded and covered by the peat moss. This helps provide insulation and maintain moisture levels.
- Label and store the container: Seal the container or tie the breathable bag securely. Label it with the variety and date of storage for easy identification. Store the container in a cool, dark location away from extreme temperatures.
It’s important to periodically check on the cannas during their storage period. Every few weeks, carefully open the container and inspect the rhizomes for any signs of rot, decay, or excessive drying. If any rhizomes show signs of damage, remove them to prevent the spread of disease.
By storing cannas in peat moss, you are providing them with a protective and moisture-retaining environment, ensuring their health throughout the winter. When spring arrives, you can retrieve the rhizomes and look forward to breathtaking blooms once again.
After the first frost, dig up the canna rhizomes and let them dry for a few days. Store them in a cool, dark place in peat moss or vermiculite to prevent them from drying out. Check on them periodically to ensure they are not rotting.
Storing Cannas in Sawdust
If you’re looking for an alternative option to store your cannas over winter, storing them in sawdust can be an effective method. Sawdust provides insulation, absorbs excess moisture, and helps maintain a stable environment for the rhizomes. Here’s a step-by-step guide on how to store your cannas using this method:
- Choose high-quality sawdust: Select clean, untreated sawdust without any additives or chemicals. Hardwood sawdust is preferred, as it is more resistant to decay.
- Prepare the sawdust: Ensure the sawdust is slightly damp but not wet. Add water and mix it well until it has a moist consistency without being soggy.
- Select a storage container: Opt for a well-ventilated container, such as a plastic storage bin or a breathable bag, that allows air to circulate around the rhizomes.
- Layer the sawdust and cannas: Spread a layer of moistened sawdust at the bottom of the container. Place the cannas on top, making sure they are not touching each other.
- Cover with sawdust: Gently cover the cannas with a layer of moistened sawdust, completely burying them. Ensure that the rhizomes are well-insulated and there are no gaps in the coverage.
- Seal and store the container: Close the container securely or tie the breathable bag tightly to prevent excessive moisture loss. Store the container in a cool and dry location, away from extreme temperatures.
Throughout the storage period, it is important to periodically check on the cannas. Every few weeks, open the container and inspect the rhizomes for any signs of rot, mold, or excessive drying. If any rhizomes appear damaged or diseased, remove them to prevent the spread to the healthy ones.
By storing your cannas in sawdust, you are providing them with a protective and moisture-absorbing environment, ensuring their well-being during the winter months. When spring arrives, you can retrieve the rhizomes and look forward to the beauty of their vibrant blooms once again.
Read more: How To Store Grass Seed Over Winter
Storing Cannas in Vermiculite
If you’re looking for an effective and lightweight method to store your cannas over winter, storing them in vermiculte can be a great option. Vermiculite provides insulation, retains moisture, and helps create a stable environment for the rhizomes. Here’s a step-by-step guide on how to store your cannas using this method:
- Choose high-quality vermiculite: Select clean and sterile vermiculite without any additives or contaminants. Make sure it is suitable for horticultural use.
- Prepare the vermiculite: Moisten the vermiculite slightly by adding water and mixing until it has a damp consistency. Avoid saturating it with water as excess moisture can lead to rot.
- Select a storage container: Opt for a container that provides good air circulation, such as a plastic storage bin or a breathable bag.
- Layer the vermiculite and cannas: Spread a layer of moistened vermiculite at the bottom of the container. Place the cannas on top, ensuring they are not touching each other.
- Cover with vermiculite: Gently cover the cannas with a layer of moistened vermiculite, completely surrounding and covering them. Make sure the rhizomes are well-insulated and there are no gaps in coverage.
- Seal and store the container: Securely close the container or tie the breathable bag tightly to maintain a stable environment. Store the container in a cool, dry place away from extreme temperatures.
Throughout the storage period, it is important to periodically check your cannas. Every few weeks, open the container and inspect the rhizomes for any signs of rot, mold, or excessive drying. If any rhizomes show signs of damage or decay, remove them promptly to prevent the spread of disease.
Storing cannas in vermiculte provides them with a moisture-retaining and insulating environment, ensuring their well-being during the winter. When spring arrives, you can retrieve the rhizomes and anticipate the glorious blooms that will adorn your garden once again.
Storing Cannas in Paper Bags
If you’re looking for a simple and convenient method to store your cannas over winter, using paper bags can be an effective option. Storing cannas in paper bags allows for good air circulation, helps prevent excess moisture buildup, and keeps the rhizomes protected. Here’s a step-by-step guide on how to store your cannas using this method:
- Select sturdy paper bags: Choose strong paper bags that can withstand the weight of the rhizomes and provide adequate protection.
- Prepare the bags: Open up the paper bags and fold down the top to keep them open and easily accessible.
- Place the cannas in individual bags: Gently place each cured rhizome in its own paper bag, ensuring they are not touching. This helps prevent any potential disease or rot from spreading between the rhizomes.
- Label the bags: Label each bag with the variety of cannas or any important information you’d like to remember for the next growing season.
- Store the bags in a cool, dry place: Find a cool, dark, and dry location to store the paper bags. Basements, cellars, or garages are often suitable options.
- Check on the cannas periodically: Every few weeks, inspect the bags to ensure the rhizomes are in good condition. Remove any rhizomes that show signs of damage, decay, or mold to prevent further spread.
Storing cannas in paper bags offers a convenient and breathable storage solution. It allows for airflow while providing enough protection to keep the rhizomes safe throughout the winter. When spring arrives, you can retrieve the paper bags, plant the cannas back in the garden, and enjoy their vibrant blooms once again.
Storing Cannas in a Cool, Dry Location
If you’re looking for a straightforward and fuss-free method to store your cannas over winter, storing them in a cool, dry location is a reliable option. This method is suitable for gardeners who may not have access to specific storage materials like peat moss or vermiculite. Here’s how you can store your cannas in a cool, dry location:
- Prepare the cannas for storage: After cleaning and trimming the cannas, ensure that they are completely dry before storing them. This helps prevent moisture-related issues during their storage period.
- Choose a storage container: Select a shallow crate, cardboard box, or even a breathable bag to store the cannas. The container should be clean and free of moisture to avoid any potential rot or disease.
- Add a protective layer: Place a layer of peat moss or sawdust at the bottom of the container to help retain moisture and provide insulation for the rhizomes. This step is optional but can further enhance the storage conditions.
- Arrange the cannas: Place the cleaned and dried cannas in a single layer on top of the protective layer in the container. Avoid stacking them on top of each other to prevent damage or smothering.
- Store in a cool, dry location: Find a cool and dry area in your home, such as a basement, cellar, or garage, where the temperature remains stable. Avoid areas prone to extreme temperature fluctuations or high humidity.
- Check periodically during storage: Regularly inspect the cannas every few weeks to ensure they are in good condition. Remove any rhizomes that show signs of damage, decay, or disease to prevent further spread.
Storing cannas in a cool, dry location provides a simple and effective means of preservation. The stable environment helps protect the rhizomes from extreme temperatures, excess moisture, and potential rot. When spring arrives, you can retrieve the cannas and replant them, eagerly awaiting their splendid blooms.
Checking on Cannas During Storage
While storing cannas over winter, it is important to regularly check on them to ensure their health and well-being. Regular inspections help identify any issues such as rot, mold, or dehydration early on, allowing you to take necessary steps to prevent further damage. Here’s a guide on how to check on your cannas during their storage period:
- Inspect for signs of rot: Carefully examine the stored rhizomes for any soft spots, discoloration, or foul odors. These can be signs of rotting. If you notice any affected rhizomes, remove them immediately to prevent the spread of disease.
- Look for excessive drying: Check the rhizomes for any signs of shriveling or excessive drying. If the storage environment is particularly dry, lightly mist the rhizomes with water to restore moisture levels.
- Monitor for mold or fungus: Keep an eye out for any signs of mold, fungus, or mildew on the rhizomes or in the storage container. If detected, remove the affected rhizomes and ensure the storage area is well-ventilated to reduce moisture levels.
- Check for pest infestations: Inspect the rhizomes for any signs of pests, such as insects or rodents. If necessary, take appropriate measures to control and eliminate the pests to protect your cannas.
- Ensure proper insulation: Check that the storage medium, whether it’s peat moss, sawdust, vermiculite, or paper bags, is still providing adequate insulation for the rhizomes. Replace or replenish the medium if needed.
Regularly checking on your cannas during their storage period allows you to catch any issues early on and take necessary action. This proactive approach helps maintain the health and vitality of your cannas, ensuring they are ready for replanting when spring arrives.
By staying vigilant and addressing any concerns promptly, you can safeguard your cannas from potential threats and ensure a successful growing season ahead.
Read more: How To Store Banana Trees Over Winter
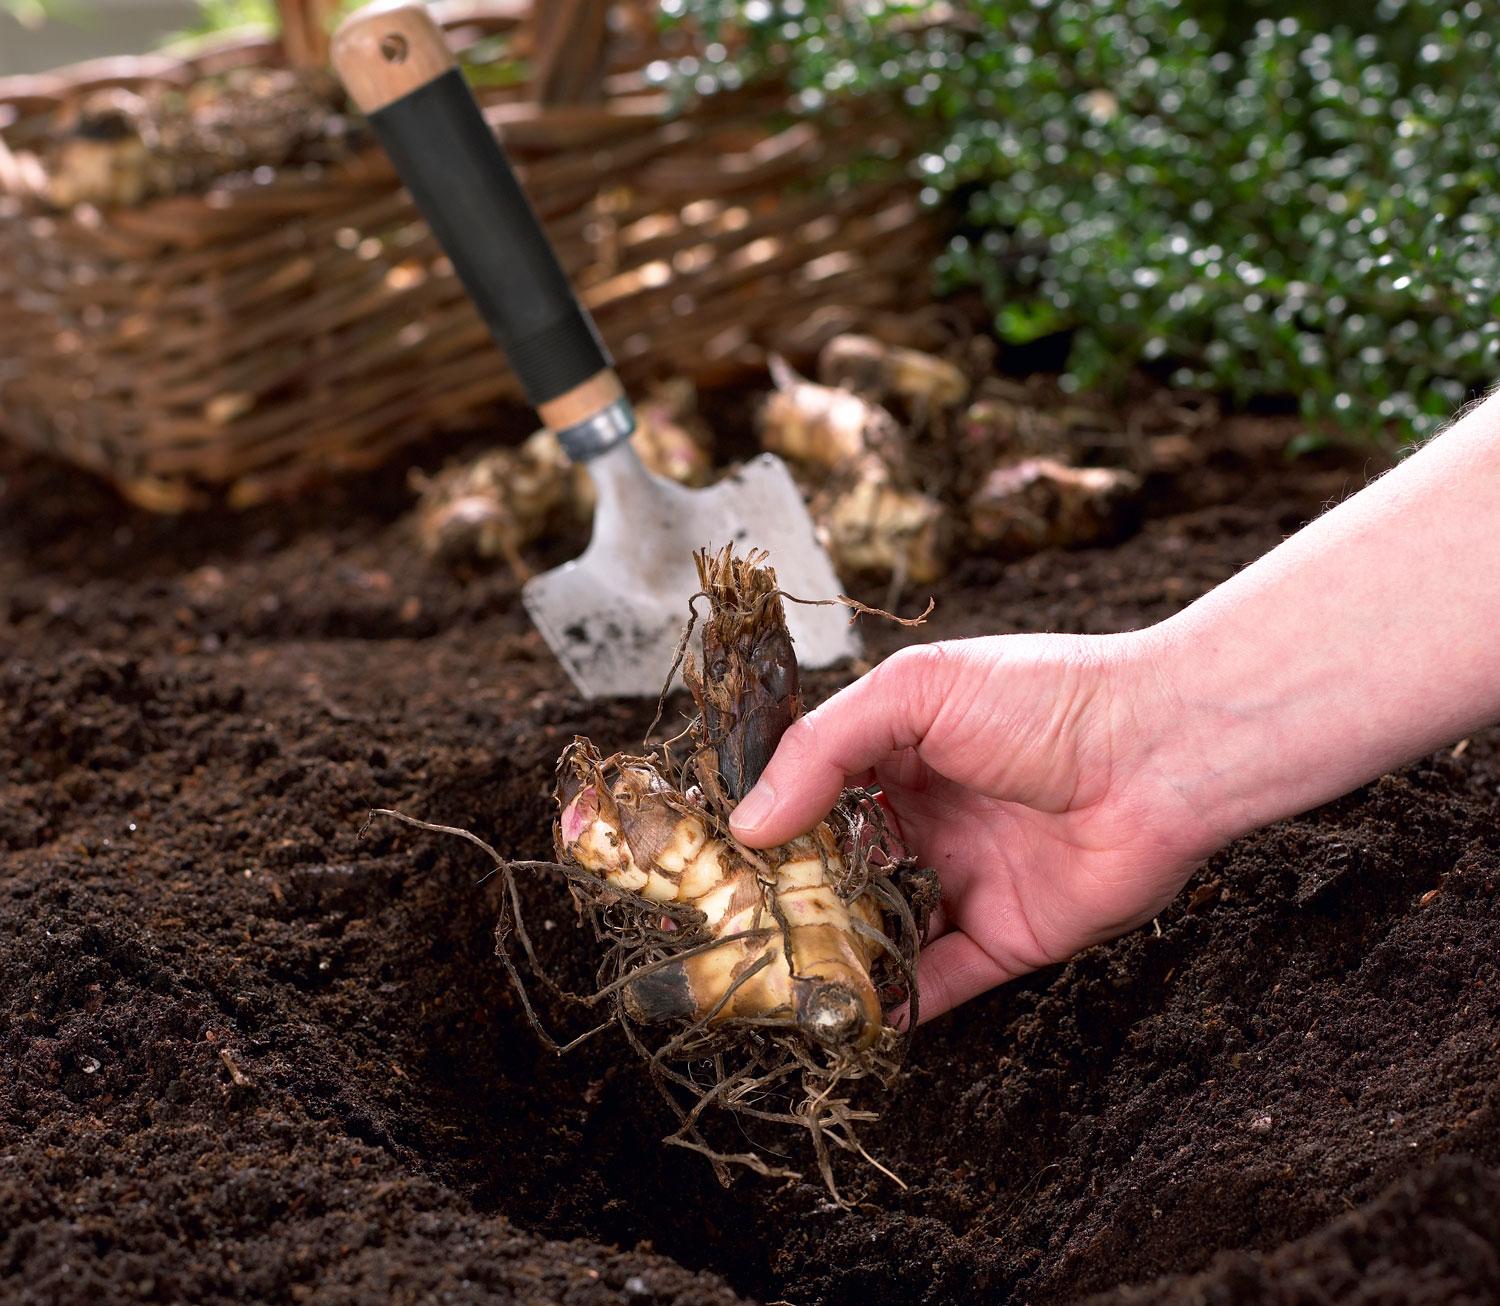
Replanting Cannas in Spring
After a period of winter storage, it’s time to bring your cannas out and prepare them for a new growing season. Replanting cannas in the spring ensures they have the best chance to thrive and produce stunning blooms. Here’s a step-by-step guide on how to successfully replant your cannas:
- Choose the right timing: Wait until the last frost has passed and the soil temperature has warmed up before replanting your cannas. This typically occurs in the late spring.
- Select a suitable location: Choose a sunny spot in your garden that offers well-draining soil. Cannas prefer full sun but can tolerate some partial shade.
- Prepare the soil: Loosen the soil in the planting area and amend it with organic matter, such as compost, to improve drainage and nutrient availability.
- Plant at the right depth: Dig a hole large enough to accommodate the rhizome. Place the rhizome horizontally, with any eye buds facing up, and cover it with soil, leaving about an inch or two of soil above the rhizome.
- Provide proper spacing: Space your cannas about 12 to 18 inches apart to allow for their growth and the spread of their foliage.
- Water thoroughly: After planting, water the cannas deeply to settle the soil and provide moisture for the newly planted rhizomes.
- Maintain watering and care: Throughout the growing season, water your cannas regularly, ensuring the soil remains evenly moist. Apply a balanced fertilizer every few weeks to promote healthy growth and vibrant blooms.
- Protect from extreme conditions: If your region experiences hot summer temperatures or heavy rainfall, provide some shade or use mulch around the base of the plants to protect the rhizomes.
- Remove spent blooms: To encourage continuous blooming, remove faded or spent flowers regularly. This helps divert energy back into the plant and promotes new growth.
With proper care and maintenance, your cannas will reward you with a vibrant display of colorful blooms throughout the summer and into the fall.
Remember to lift and store your cannas again before the arrival of the next winter, following the same steps outlined earlier in this article. This ensures their protection and sets the stage for another season of spectacular growth and blossoms.
By replanting your cannas in the spring and nurturing them with the right conditions, you can enjoy their beauty and elegance in your garden year after year.
Conclusion
Storing cannas over winter is an essential practice for ensuring the continued health and vitality of these stunning flowering plants. By following the proper steps and utilizing the appropriate storage methods, you can successfully protect your cannas from the harsh winter conditions and enjoy their magnificent blooms in the following growing season.
Throughout this article, we discussed various aspects of storing cannas, starting from choosing the right time to dig them up, preparing them for storage, and exploring different storage options such as peat moss, sawdust, vermiculite, paper bags, or simply a cool, dry location. Each storage method offers unique advantages in preserving the rhizomes and protecting them from moisture, rot, and other potential issues.
We also emphasized the importance of checking on your cannas during the storage period, ensuring their well-being and promptly addressing any signs of damage, rot, mold, or infestations. Regular inspections help maintain the health of the rhizomes, increasing their chances of successful growth when replanted in the spring.
Speaking of spring, we provided a step-by-step guide on replanting your cannas, guiding you through selecting the right timing, preparing the soil, planting at the correct depth, and providing adequate care and maintenance throughout the growing season. With the proper care and attention, your cannas will reward you with their vibrant blossoms, adding beauty and elegance to your garden.
As each growing season comes to a close, don’t forget to repeat the process of storing your cannas over winter, ensuring their protection and setting the stage for another year of spectacular growth and blooms.
In conclusion, by following the guidelines outlined in this article, you can successfully store your cannas, protect them from the harsh winter elements, and reintroduce them to your garden for another season of breathtaking beauty. Enjoy the rewards of your efforts and savor the vibrant colors and graceful blooms that cannas bring year after year.
Frequently Asked Questions about How To Store Cannas Over Winter
Was this page helpful?
At Storables.com, we guarantee accurate and reliable information. Our content, validated by Expert Board Contributors, is crafted following stringent Editorial Policies. We're committed to providing you with well-researched, expert-backed insights for all your informational needs.


0 thoughts on “How To Store Cannas Over Winter”