Articles
How To Store Caladium Bulbs Over Winter
Modified: May 6, 2024
Learn how to store caladium bulbs over winter with our informative articles. Keep your caladiums safe and ensure a beautiful garden next year.
(Many of the links in this article redirect to a specific reviewed product. Your purchase of these products through affiliate links helps to generate commission for Storables.com, at no extra cost. Learn more)
Introduction
Caladiums are beautiful tropical plants known for their vibrant and colorful foliage. These plants are typically grown as annuals in areas with cooler climates, but if you want to enjoy your caladiums year after year, you’ll need to store the bulbs during the winter months. Storing caladium bulbs over winter not only protects them from cold temperatures but also allows them to rejuvenate and thrive in the following growing season.
In this article, we’ll guide you through the process of storing caladium bulbs over winter, from choosing the right time to dig them up to replanting them in the spring. By following these steps, you can ensure that your caladium bulbs remain healthy and ready to flourish when the warmer weather returns.
Before we dive into the details, it’s important to note that the specific techniques and timing for storing caladium bulbs can vary slightly depending on your location and climate. It’s always best to consult with local gardening resources or experienced gardeners in your area for personalized advice. With that said, let’s get started!
Key Takeaways:
- Properly storing caladium bulbs over winter involves digging them up at the right time, preparing them for storage, and selecting an optimal storage location to ensure their health and viability for the next growing season.
- Monitoring and maintaining caladium bulbs during winter storage is essential for preventing rot, diseases, and pest infestations. Replanting them in the spring with proper care and maintenance will reward you with vibrant and beautiful foliage.
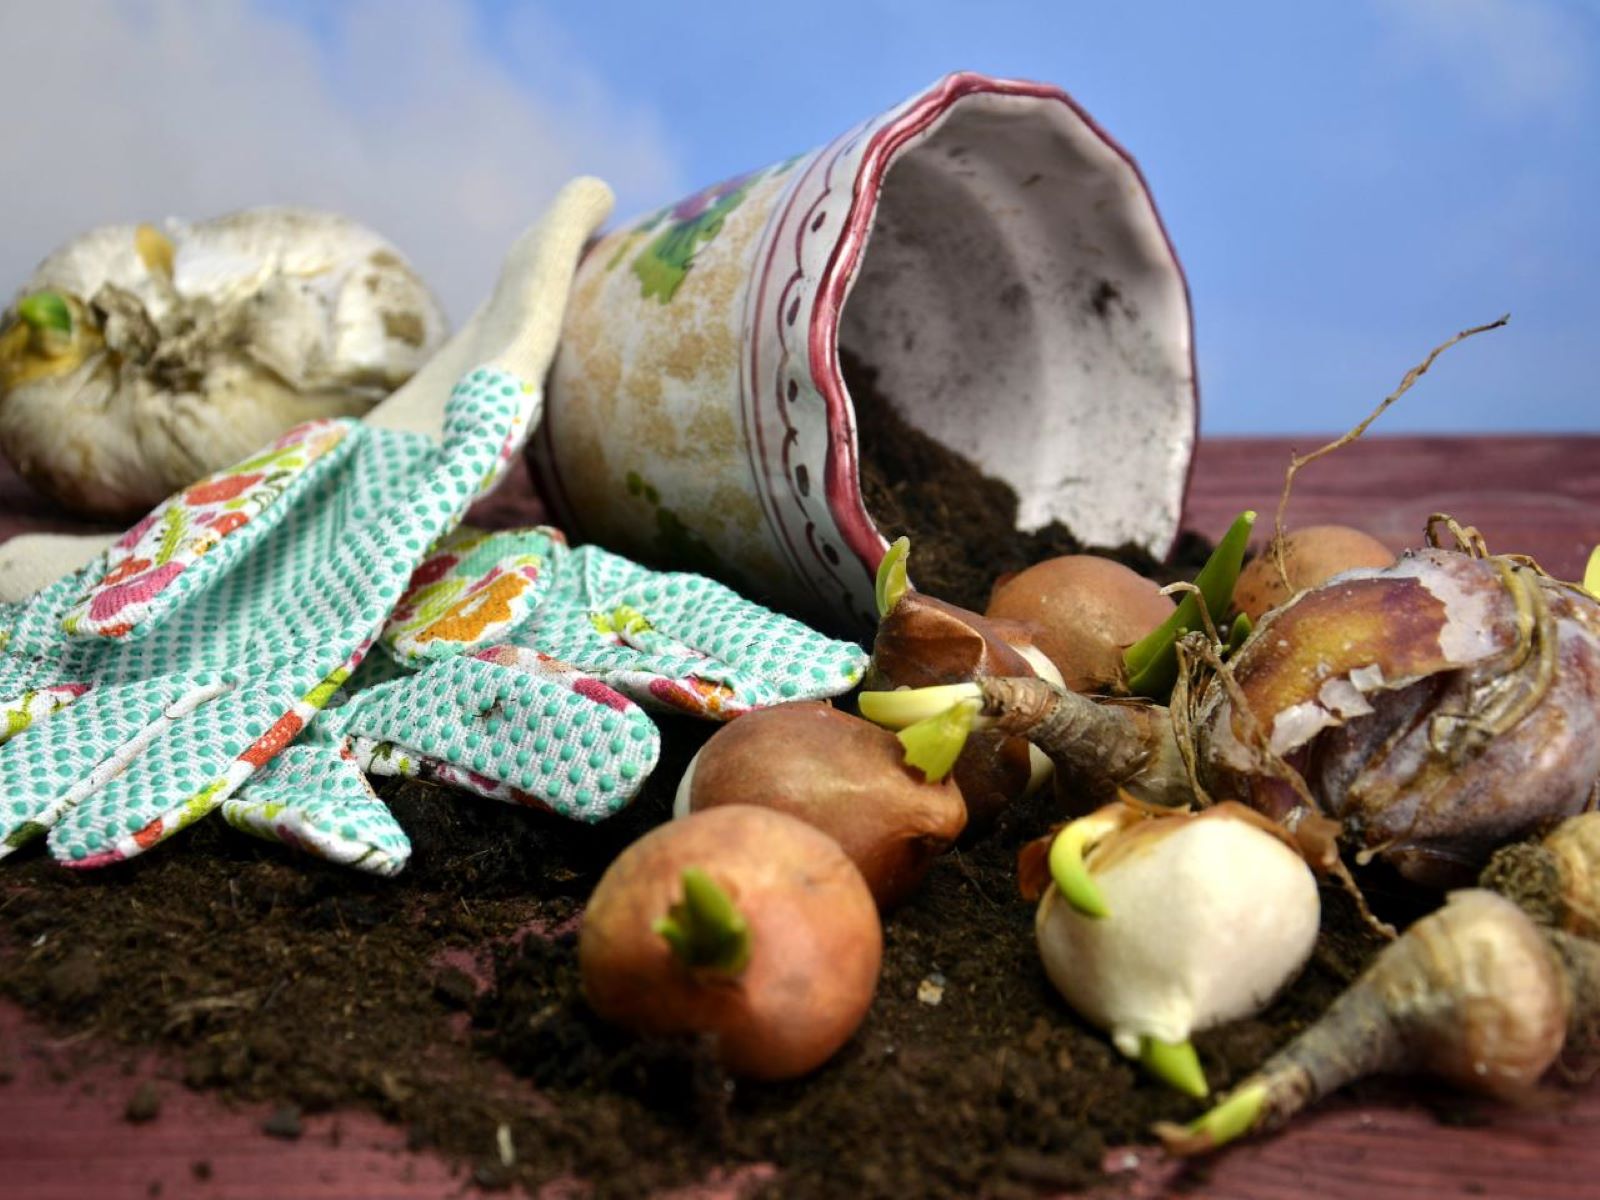
Read more: How To Store Tulip Bulbs Over Winter
Choosing the Right Time to Dig Up Caladium Bulbs
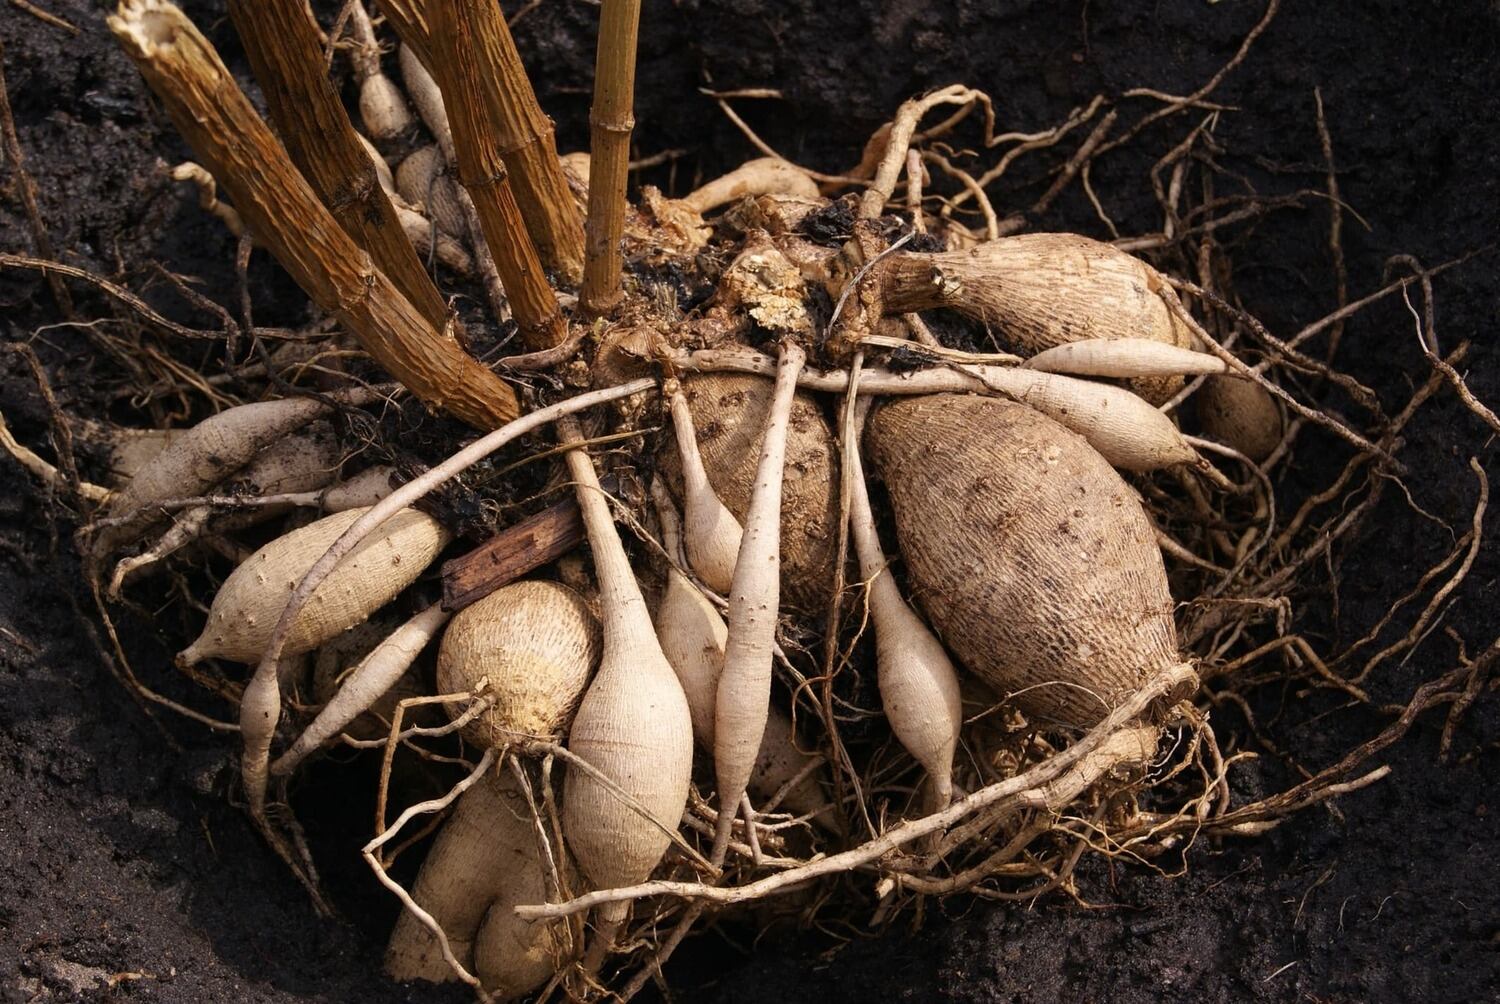
The first step in successfully storing caladium bulbs over winter is to determine the right time to dig them up. Caladium plants are typically frost-sensitive, so it’s important to wait until after the first frost has occurred or when the foliage starts to yellow and die back naturally. This indicates that the plant has entered its dormant phase and is ready to be dug up.
In most regions, late fall is the ideal time to dig up caladium bulbs. However, if you live in a colder climate, you may want to wait until the foliage has completely died back before digging up the bulbs. This ensures that the plant has fully entered dormancy and will be better prepared for winter storage.
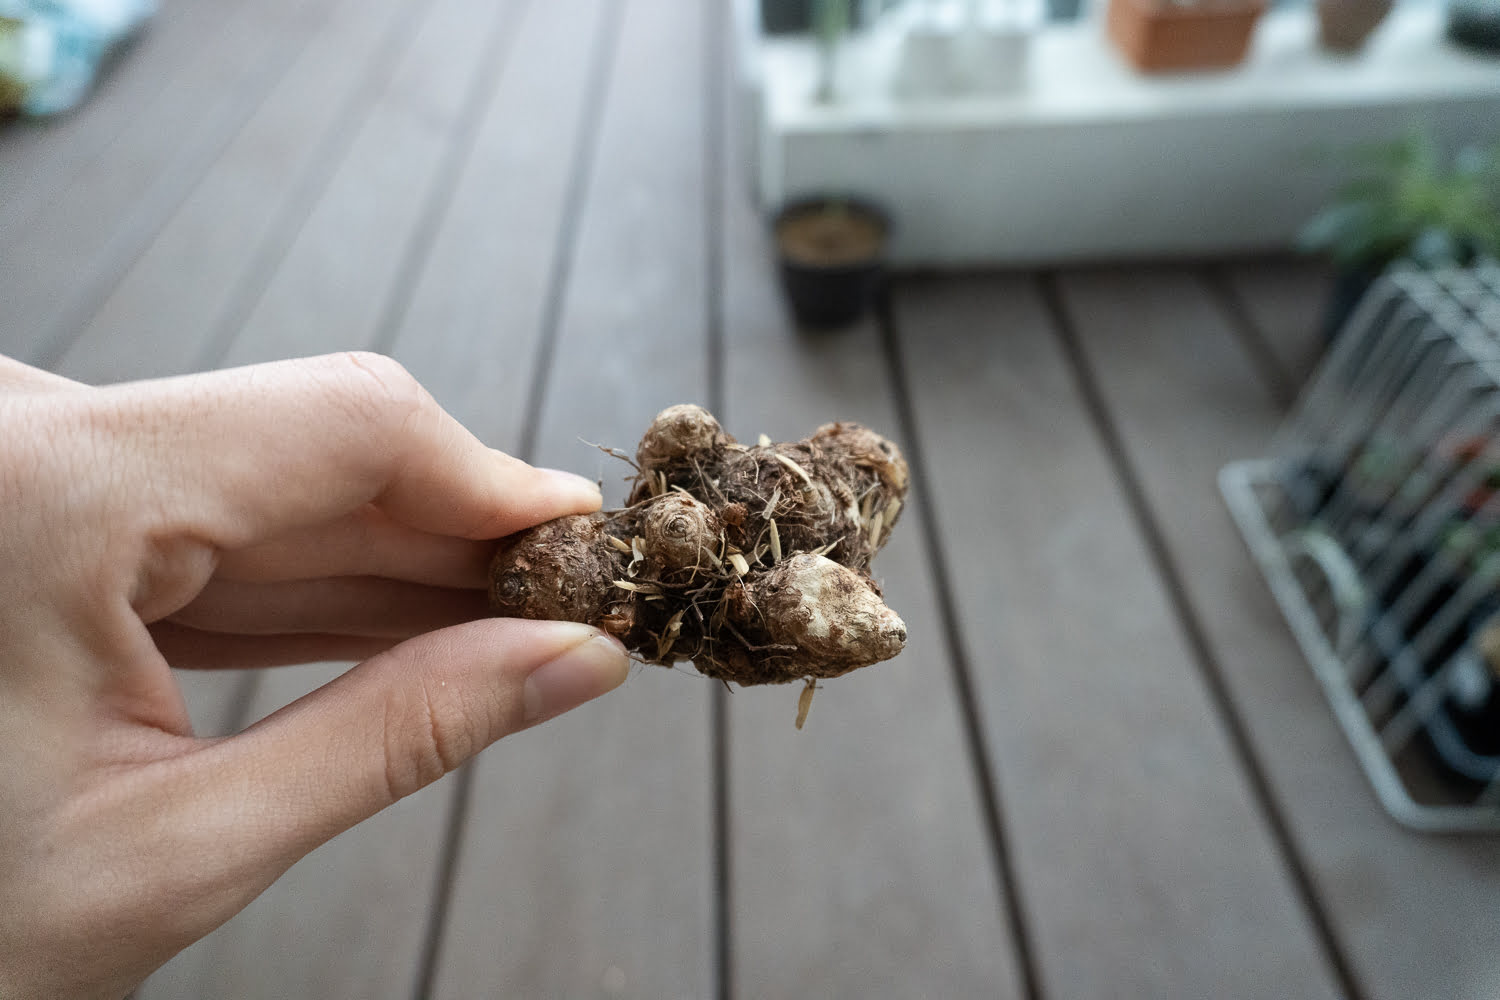
When digging up caladium bulbs, be careful not to damage them. Gently dig around the base of the plant, loosening the soil and roots. Gradually lift the bulbs out of the ground, taking care to preserve as much of the attached roots and soil as possible.
Once the bulbs are out of the ground, remove any excess soil clinging to them. It’s important to handle the bulbs carefully as they can be delicate. Avoid cutting or bruising the bulbs, as this can increase the risk of rot during the storage period.
Now that you’ve successfully dug up your caladium bulbs, it’s time to prepare them for winter storage. In the next section, we’ll guide you through the necessary steps to ensure your bulbs remain healthy and dormant until spring.
Preparing Caladium Bulbs for Storage
Properly preparing caladium bulbs for storage is crucial to ensure their health and survival during the winter months. By following these steps, you can help prevent rot and maintain the bulbs’ vigor for the next growing season.
The first step in preparing caladium bulbs for storage is to trim off the foliage. Using clean and sharp pruning shears, cut the foliage back to about 2 inches above the bulb. This helps reduce moisture loss and prevents the leaves from rotting during storage.
Next, inspect the bulbs for any signs of damage or disease. Discard any bulbs that appear soft, mushy, or discolored, as these are likely to be infected or rotting. It’s important to only store healthy bulbs to prevent the spread of diseases to other bulbs.
After inspecting the bulbs, you can choose to dust them with a fungicide powder. This can help prevent fungal diseases and rot during storage. Simply dust the bulbs lightly with the fungicide, ensuring all sides of the bulbs are covered. Follow the instructions on the fungicide packaging for proper application and safety precautions.
Once you’ve trimmed the foliage and inspected the bulbs, it’s time to let them dry out. Place the bulbs in a warm and well-ventilated area for a few days to allow them to air dry. This step is crucial as it reduces moisture, which can lead to rot during storage.
During the drying process, it’s important to avoid direct sunlight or excessively humid areas, as these can hinder drying and increase the risk of mold or fungal growth. Rotate the bulbs occasionally to ensure even drying and remove any remaining moisture.
After the bulbs have dried, it’s time to select an appropriate storage location. We’ll discuss the different options for storing caladium bulbs in the next section.
Cleaning and Drying Caladium Bulbs
Cleaning and drying caladium bulbs before storage is an essential step to prevent rot and ensure their longevity. Follow these simple steps to properly clean and dry your caladium bulbs.
Start by gently removing any excess soil clinging to the bulbs. You can use your fingers or a soft brush to carefully brush off the soil without damaging the bulbs. Avoid washing the bulbs with water, as this can introduce moisture and increase the risk of rot.
Inspect the bulbs for any signs of damage, disease, or pests. Discard any bulbs that appear damaged, soft, or infested with pests, as they can potentially infect or harm other bulbs during storage.
Once the bulbs are clean, it’s time to dry them. Place the bulbs in a single layer on a clean and dry surface, such as a tray or a wire rack. Ensure that the bulbs are not touching each other to promote proper airflow and prevent the spread of rot.
Choose a well-ventilated area with good air circulation, away from direct sunlight and excessive humidity. The drying process typically takes around one to two weeks, depending on the humidity levels in your area.
Check the bulbs periodically during the drying process. If you notice any signs of moisture or mold, carefully wipe the affected areas with a clean cloth and allow the bulbs to dry for an additional period.
Once the bulbs are thoroughly dry, they are ready for storage. Properly cleaned and dried bulbs have a higher chance of remaining healthy during the winter storage period, ensuring that they will be ready to thrive when spring arrives.
In the next section, we’ll explore different options for selecting the right storage location for your caladium bulbs.
Selecting the Right Storage Location
Choosing the right storage location for your caladium bulbs is crucial to ensure their survival and health during the winter months. The storage area should provide optimal conditions for maintaining the bulbs in a dormant state until it’s time to plant them again in the spring. Here are a few factors to consider when selecting the storage location:
Temperature: Caladium bulbs are sensitive to cold temperatures and can be damaged if exposed to freezing conditions. Ideally, the storage area should maintain a temperature between 50°F (10°C) and 65°F (18°C). Avoid storing the bulbs in areas that experience extreme temperature fluctuations or are prone to freezing, such as unheated garages or basements.
Humidity: Caladium bulbs prefer a moderate level of humidity during storage. The storage location should have a humidity level of around 50% to prevent the bulbs from drying out or becoming too moist. If the storage area is excessively dry, you can place a tray or dish with water nearby to increase humidity. On the other hand, if the storage area is too humid, it can lead to fungal growth and rot.
Light: Caladium bulbs need to be stored in a dark environment to prevent sprouting prematurely. Exposure to light can trigger the bulbs to break dormancy and start growing. Choose a storage area that is free from any direct light sources, such as windows or artificial lights.
Air Circulation: Good air circulation is essential to prevent the buildup of moisture, which can lead to rot. Ensure that the storage location has adequate ventilation, allowing fresh air to circulate around the bulbs. This can be achieved by placing the bulbs on a wire rack or using perforated containers for storage.
Pest Control: The storage area should be free from pests, as they can cause damage to the bulbs. Inspect the storage location for any signs of insects or rodents and take necessary measures to prevent infestation.
Once you have identified the perfect storage location, ensure that it is clean and free from any debris or potential hazards. Properly preparing the storage area will help create an optimal environment for storing your caladium bulbs over winter.
In the next sections, we’ll explore different methods for storing caladium bulbs, including containers and peat moss.
Store caladium bulbs over winter by digging them up before the first frost, removing excess soil, and allowing them to dry for a few days. Then, place them in a paper bag or ventilated container filled with peat moss or vermiculite, and store in a cool, dry place until spring.
Read more: How To Store Geraniums Over Winter
Storing Caladium Bulbs in Containers
Storing caladium bulbs in containers is a popular and effective method, especially if you have limited space or prefer a more organized storage approach. Here’s how you can store your caladium bulbs in containers:
Container Selection: Choose a container that is clean, sturdy, and has drainage holes at the bottom. Plastic or wooden containers work well for storing bulbs. Ensure that the container is large enough to accommodate the bulbs without crowding them.
Storage Medium: Fill the container with a suitable storage medium, such as peat moss, vermiculite, or a mixture of equal parts peat moss and perlite. The storage medium helps maintain the right level of moisture around the bulbs and provides insulation during storage.
Arranging the Bulbs: Place the caladium bulbs in the storage container, making sure they are not touching each other. You can position them vertically or horizontally, depending on the size and shape of your container. Avoid overcrowding, as it can increase the risk of rot.
Labeling: It’s a good practice to label the containers with the variety or color of the caladium bulbs stored inside. This will help you easily identify and differentiate the bulbs when it’s time to replant them in the spring.
Moisture Level: Before placing the bulbs in the storage container, moisten the storage medium slightly. Aim for a slightly moist, but not soggy, consistency. The storage medium should be moist enough to provide some hydration to the bulbs but not excessively wet, as it can lead to rot.
Storage: Once the bulbs are arranged in the container and the moisture level is appropriate, cover the container loosely with a lid or plastic wrap. This helps retain moisture and creates a sealed environment. Store the container in a cool, dry, and dark location with consistent temperature and humidity.
Monitoring: Regularly check on the bulbs during the storage period. Inspect the bulbs for any signs of rot or disease. If any bulbs appear soft or show signs of rot, remove them immediately to prevent the spread of infection to other bulbs.
Storing caladium bulbs in containers provides a convenient way to store and organize your bulbs during the winter months. In the next section, we will explore another method of storing caladium bulbs using peat moss.
Storing Caladium Bulbs in Peat Moss
Storing caladium bulbs in peat moss is a traditional and effective method that helps maintain the bulbs’ moisture levels and provides insulation during storage. Follow these steps to store your caladium bulbs in peat moss:
Preparing the Peat Moss: Start by moistening the peat moss, ensuring it is well-hydrated but not overly wet. Place the peat moss in a container or bucket and gradually add water, mixing it until the peat moss reaches a damp consistency.
Arranging the Bulbs: Carefully place the caladium bulbs in the damp peat moss, with enough space between each bulb to prevent them from touching. Gently press the bulbs into the peat moss, ensuring they are partially submerged but not completely buried.
Layering: For larger quantities of bulbs, you can create multiple layers of bulbs and peat moss. Separate each layer with a thin layer of peat moss, ensuring that the bulbs do not touch each other within the same layer. This ensures proper airflow and prevents the spread of rot.
Storage Container: Once the bulbs are arranged in the peat moss, transfer them to a clean and sturdy storage container. It can be a plastic container with a lid or a breathable cloth bag. The container should provide proper ventilation while retaining moisture.
Moisture Monitoring: Throughout the storage period, monitor the moisture levels of the peat moss. If the peat moss starts to dry out, mist it lightly with water to maintain the dampness. Avoid oversaturating the peat moss, as excessive moisture can lead to bulb rot.
Storage Location: Place the container of caladium bulbs in a cool, dark, and well-ventilated area. The storage location should maintain a relatively consistent temperature and humidity level, avoiding extreme fluctuations that can negatively impact the bulbs.
Periodic Inspection: Regularly check on the bulbs during the storage period. Inspect them for any signs of rot, disease, or pests. Remove any bulbs that show signs of damage to prevent the spread of infection or infestation.
Storing caladium bulbs in peat moss helps create an optimal environment for maintaining their moisture and providing insulation. This method is widely used and has been proven effective for preserving the bulbs during the winter months. In the next section, we’ll discuss how to monitor and maintain the bulbs during the storage period.
Monitoring and Maintaining Caladium Bulbs During Winter Storage
Properly monitoring and maintaining your caladium bulbs during winter storage is essential for their continued health and survival. Here are some important tips to help you ensure that your bulbs remain in optimal condition:
Regular Inspection: Throughout the storage period, it’s important to regularly inspect your caladium bulbs. Check for any signs of rot, disease, or pests. If you notice any bulbs that are soft, discolored, or showing signs of decay, remove them immediately to prevent the spread of infection to other bulbs.
Moisture Levels: Monitor the moisture levels within the storage containers or peat moss. The storage medium should be slightly damp, but not overly wet. If the peat moss or storage medium becomes dry, you can lightly mist it with water to maintain the right level of moisture. Be cautious not to overwater, as excessive moisture can cause rot.
Temperature and Humidity: Maintain a consistent temperature and humidity level in the storage area. Extreme fluctuations in temperature or humidity can negatively impact the stored bulbs. Aim for a storage temperature between 50°F (10°C) and 65°F (18°C). Avoid areas with excess humidity or dryness, as they can both lead to bulb damage.
Pest Control: Keep an eye out for any signs of pests in the storage area. Rodents, insects, and other pests can damage or destroy your stored caladium bulbs. Take necessary measures to prevent infestation, such as keeping the storage area clean, sealing any entry points, and using pest traps or repellents if necessary.
Air Circulation: Ensure proper air circulation around the stored bulbs. Good ventilation helps prevent the buildup of excess moisture, which can lead to rot. If you’re using containers for storage, ensure that they have adequate ventilation. For peat moss storage, you can periodically fluff or turn the peat moss to allow fresh air to reach the bulbs.
Periodic Rejuvenation: To maintain the viability of stored caladium bulbs, you can gently mist or lightly moisten them every few weeks. This helps prevent the bulbs from drying out completely during the storage period. However, be careful not to overwater and saturate the storage medium.
Record Keeping: It’s helpful to keep a record of the storage conditions and any observations you make during the storage period. This can include the dates of inspection, any issues noticed with specific bulbs, or changes in temperature or humidity. This information can guide your future storage practices and help troubleshoot any potential problems.
By following these monitoring and maintenance guidelines, you can ensure the optimal health and viability of your caladium bulbs during winter storage. When spring arrives, you’ll be ready to replant your bulbs with confidence and enjoy their beautiful foliage once again.
In the final section, we’ll discuss the process of replanting caladium bulbs in the spring.
Replanting Caladium Bulbs in the Spring
After a period of winter storage, it’s time to replant your caladium bulbs in the spring to enjoy their vibrant foliage throughout the growing season. Follow these steps to successfully replant your caladium bulbs:
Choosing the Right Time: Wait until all danger of frost has passed and the soil has warmed up before replanting your caladium bulbs. In most regions, this is typically in late spring or early summer. Check with local gardening resources or experienced gardeners in your area for specific planting time recommendations.
Prepping the Planting Location: Select a planting location that receives partial shade to full shade, as caladiums prefer indirect sunlight. Prepare the soil by loosening it and removing any weeds or debris. Incorporate compost or well-rotted organic matter to enrich the soil and improve drainage.
Planting Depth and Spacing: Plant the caladium bulbs with the top (rounded side) facing up. The ideal planting depth is approximately 1 to 2 inches deep. Space the bulbs at least 12 to 18 inches apart to allow room for their foliage to grow and expand.
Watering: After planting, water the area thoroughly to settle the soil and provide moisture for the bulbs. Keep the soil consistently moist but not waterlogged throughout the growing season. Caladiums prefer slightly moist conditions but can be sensitive to overwatering, leading to root rot.
Maintenance and Care: As your caladium plants grow, it’s important to provide regular care and maintenance. This includes watering when necessary, fertilizing approximately once a month with a balanced fertilizer, and removing any yellow or brown leaves as they appear. Mulching around the plants can help conserve moisture and suppress weeds.
Protecting Against Pests and Diseases: Keep an eye out for common pests that can affect caladiums, such as aphids or spider mites. Use organic or chemical pest control methods as needed to protect your plants. Additionally, monitor for any signs of diseases such as leaf spots or fungal infections, and take appropriate measures to prevent their spread.
Enjoying the Foliage: Your caladiums will reward your efforts by producing lush and colorful foliage throughout the growing season. Depending on the specific variety, the foliage can range from shades of green to beautiful combinations of red, pink, white, and burgundy. Sit back, relax, and enjoy the stunning display they provide in your garden or containers.
By following these replanting steps and providing proper care, your caladium bulbs will thrive and bring beauty to your outdoor spaces. Remember to dig up and store the bulbs again in the fall as the weather turns cooler, ensuring their continued health and longevity.
With this knowledge in hand, you’re now equipped to successfully store and replant your caladium bulbs, allowing you to enjoy their striking foliage year after year.
Happy gardening!
Read more: How To Store Cannas Over Winter
Conclusion
Storing caladium bulbs over winter is crucial for their survival and to ensure they thrive year after year. By following the steps outlined in this article, you can successfully store and replant your caladium bulbs, enjoying their vibrant foliage season after season.
Choosing the right time to dig up the bulbs, preparing them for storage, and selecting the appropriate storage location are key considerations. Whether you opt for storing them in containers or peat moss, maintaining the proper temperature, humidity, and ventilation is crucial for their health.
Regularly monitoring and maintaining the bulbs during storage helps prevent rot, diseases, and pest infestations. Inspecting the bulbs for any signs of damage and adjusting the moisture levels as needed will ensure their viability come springtime.
When it’s time to replant the caladium bulbs, prepare the planting area adequately and provide appropriate care and maintenance throughout the growing season. Protecting against pests and diseases, watering appropriately, and enjoying the stunning foliage will reward your efforts with a vibrant and beautiful display.
Remember to have patience and be adaptable in your approach, as different regions and climates may require slight adjustments to the process. Consulting with local gardening resources or experienced gardeners in your area can provide valuable insights and guidance tailored to your specific location.
In conclusion, by following the steps outlined in this article and combining them with your love for gardening, you can successfully store and replant your caladium bulbs, bringing joy and beauty to your outdoor spaces for years to come.
Happy gardening!
Now that you've mastered storing caladium bulbs, consider extending your protective efforts to other seasonal storage challenges. For instance, if you're stashing away a camper for the cold months, learning how to keep mice out of camper during winter storage is crucial. Safeguarding your mobile retreat from these pesky intruders ensures it remains clean and intact, ready for spring adventures.
Frequently Asked Questions about How To Store Caladium Bulbs Over Winter
Was this page helpful?
At Storables.com, we guarantee accurate and reliable information. Our content, validated by Expert Board Contributors, is crafted following stringent Editorial Policies. We're committed to providing you with well-researched, expert-backed insights for all your informational needs.


0 thoughts on “How To Store Caladium Bulbs Over Winter”