Articles
How To Store Clip In Extensions
Modified: March 19, 2024
Discover the best way to store clip in extensions with these helpful articles. Keep your extensions looking flawless and ready to wear!
(Many of the links in this article redirect to a specific reviewed product. Your purchase of these products through affiliate links helps to generate commission for Storables.com, at no extra cost. Learn more)
Introduction
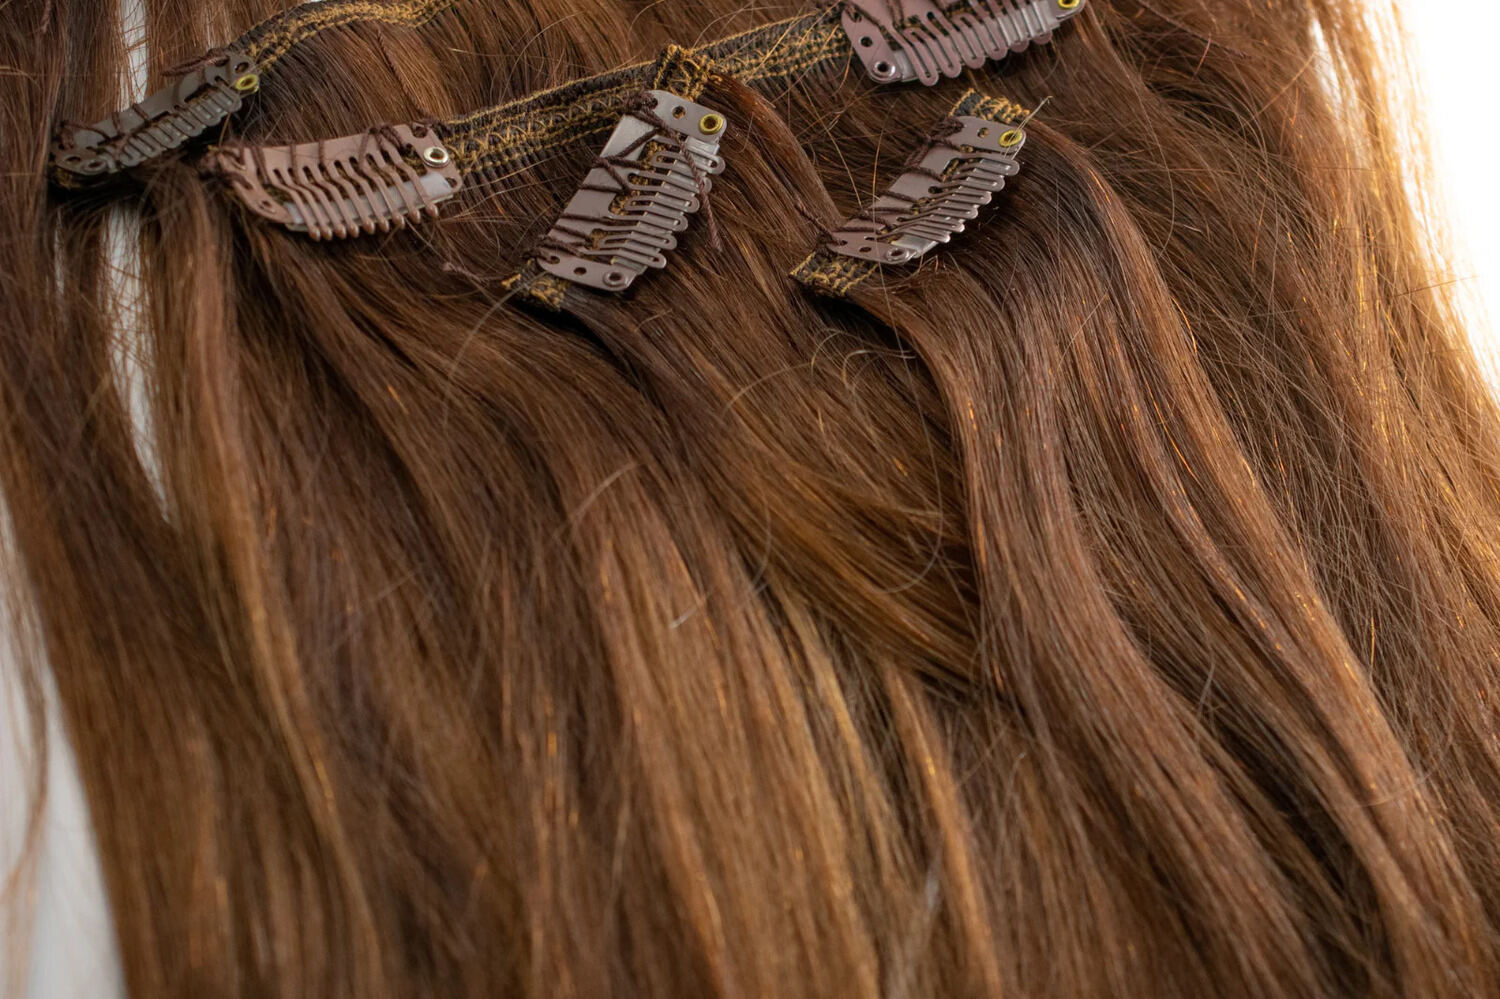
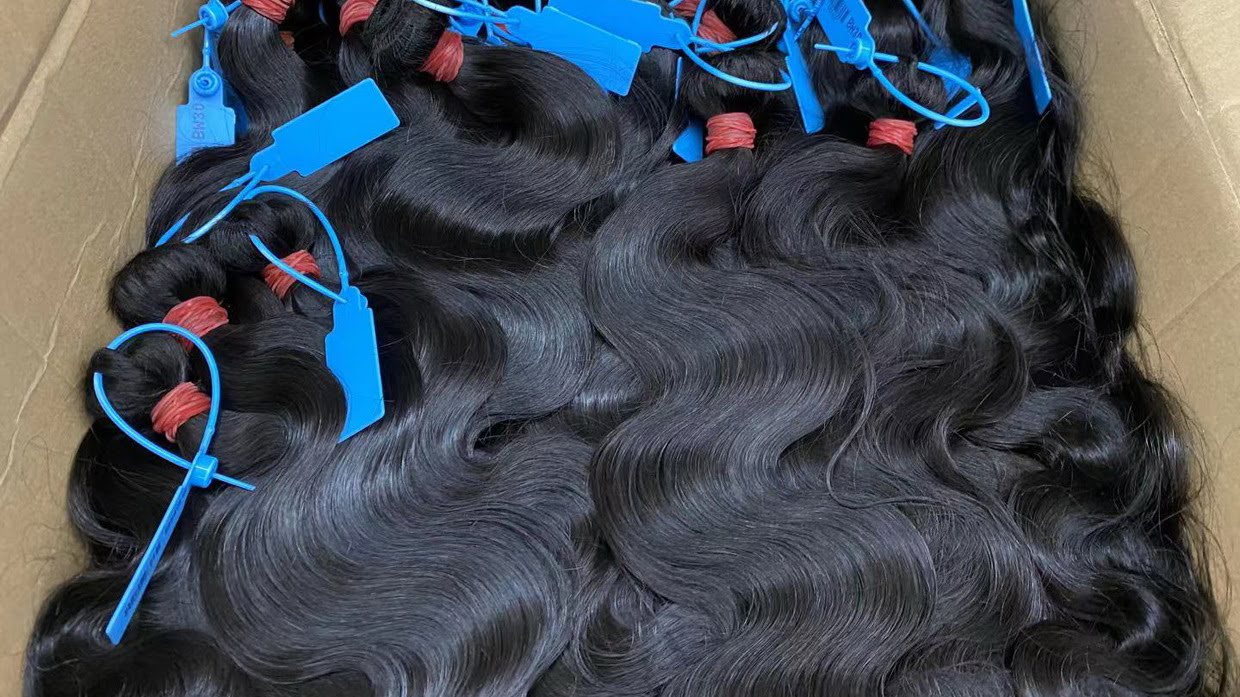
Clip-in extensions are a fantastic way to add length and volume to your hair within minutes. Whether you’re using them for a special occasion or for everyday wear, it’s important to properly store your clip-in extensions to maintain their quality and extend their lifespan.
By following the right storage methods and practicing good maintenance habits, you can keep your clip-in extensions looking fresh and ready to use whenever you need them. In this article, we will explore different storage options and provide tips on how to correctly care for your clip-in extensions.
Choosing the right storage method for your clip-in extensions largely depends on your personal preferences and available space. Some people prefer a more organized approach, while others may prioritize convenience. Ultimately, the goal is to keep the extensions protected, tangle-free, and in optimal condition.
In the next sections, we will discuss various storage options for your clip-in extensions and the steps you need to take to prepare them before storing.
Key Takeaways:
- Proper storage and maintenance are crucial for preserving clip-in extensions. Choose the right storage method, detangle, clean, and dry the extensions before storing to ensure they remain fresh and ready for use.
- Practicing gentle handling, minimal heat styling, and protecting extensions from sunlight and chlorine will help maintain their quality and longevity. Regular maintenance appointments with a hairstylist can further ensure optimal shape and blending with natural hair.
Read more: How To Store Binder Clips
Choosing the Right Storage Method
When it comes to storing clip-in extensions, there are several options to choose from. The ideal storage method will depend on factors such as space availability, ease of access, and personal preference. Here are some popular storage options to consider:
- Hanging Storage: Hanging your clip-in extensions is a great option if you have enough space in your closet or on a clothing rack. You can use a hanger with clips or even a dedicated hair extension hanger. This method helps to prevent tangling and allows for easy access when you need to use them. Just make sure to hang them in a clean, dry place away from direct sunlight.
- Storage Bag: A storage bag specifically designed for hair extensions is another popular choice. These bags usually have compartments to keep the extensions separated and organized. Look for a bag made of a breathable fabric that allows air circulation and helps prevent moisture accumulation. It’s crucial to ensure the extensions are completely dry before storing them in a bag to avoid mold or mildew.
- Shoe Organizer: If you’re looking for a budget-friendly storage solution, a clear plastic shoe organizer can be a great option. Hang the shoe organizer on your closet door or wall and use the individual pockets to store your clip-in extensions. It offers easy visibility and keeps the extensions neatly organized and protected from dust and tangling.
- Velvet Pouch: For a more luxurious storage option, you can consider using a velvet pouch. These soft and elegant pouches are designed to protect delicate items, like jewelry and hair extensions. They are usually lined with silk or satin to prevent tangling and maintain the smoothness of the hair. Velvet pouches are compact and travel-friendly, making them ideal for on-the-go storage.
- DIY Storage Solution: If you’re feeling creative, you can make your own storage solution using items you already have at home. For example, you can repurpose a shoebox or a small plastic container with dividers to keep the extensions organized. Just make sure to create a clean and dry environment within the container to prevent damage.
Consider your storage needs and preferences when choosing the right storage method for your clip-in extensions. Remember, the goal is to protect the extensions from tangling, moisture, and dust, while also ensuring easy access and convenience.
Preparing Clip-in Extensions for Storage
Before you store your clip-in extensions, you need to ensure they are clean, dry, and free from any product buildup. Here are the steps to prepare your extensions for storage:
- Detangle: Using a wide-tooth comb or a brush specifically designed for extensions, carefully comb through your clip-in extensions to remove any tangles or knots. Start from the ends and work your way up to the roots. Take your time to prevent any damage to the hair.
- Wash: If your extensions are showing signs of dirt or product buildup, it’s recommended to give them a gentle wash before storing. Fill a sink or basin with lukewarm water and add a small amount of sulfate-free shampoo. Submerge the extensions in the water and gently swish them around for a few minutes. Rinse with clean water and squeeze out the excess moisture using a towel.
- Condition: After washing, apply a small amount of conditioner to the extensions, focusing on the mid-lengths to ends. Leave the conditioner on for a few minutes, then rinse thoroughly. Conditioning helps to keep the hair hydrated and prevent dryness or frizz.
- Dry: Lay the extensions flat on a clean towel and gently pat them to remove excess water. Avoid rubbing or wringing the hair, as this can cause tangling or damage. Allow the extensions to air dry completely before storing. Avoid using heat styling tools or blow dryers, as excessive heat can damage the hair fibers.
- Protect: To keep the extensions in the best condition possible, consider applying a small amount of leave-in conditioner or hair oil to the ends. This helps to nourish and protect the hair while in storage.
Once your clip-in extensions are detangled, clean, and dry, they are ready to be stored. Choose a storage method that suits your needs and follow the steps outlined in the next sections to ensure proper storage and maintenance of your extensions.
Option 1: Hanging Storage
Hanging your clip-in extensions is a convenient and space-saving storage option. Here’s how you can store your extensions using the hanging method:
- Find a Suitable Hanger: Look for a hanger with clips or a dedicated hair extension hanger. The clips should be sturdy enough to hold the weight of the extensions without slipping or causing damage. If you don’t have a specific hair extension hanger, a regular clothes hanger with clips can suffice.
- Detangle and Arrange: Before hanging, gently comb through your clip-in extensions to remove any tangles or knots. Lay them flat on a clean surface and arrange them neatly so that they are ready to be clipped onto the hanger.
- Clip onto the Hanger: Take one weft of the clip-in extension and attach it to the clip on the hanger. Make sure the clip is securely fastened to avoid the extensions slipping off. Repeat this step for each weft of the extension set until all the pieces are securely hung.
- Keep in a Safe Place: Hang the hanger in a clean, dry area away from direct sunlight. Avoid placing the extensions near sources of heat or humidity, as this can cause damage to the hair fibers.
- Protect with a Cover: Consider using a breathable cover or garment bag to protect the extensions from dust or potential damage. This adds an extra layer of protection and keeps the extensions clean and safe while stored.
Hanging storage helps to maintain the shape and quality of the clip-in extensions, preventing tangling and ensuring easy access whenever you want to use them. It also helps to preserve the natural flow and body of the hair, as they are stored in a hanging position.
Make sure to periodically check on your hanging extensions to ensure they are still securely clipped and in good condition. With proper hanging storage, your clip-in extensions will stay beautifully maintained and ready to wear for your next occasion.
Option 2: Storage Bag
A storage bag specifically designed for clip-in extensions is a popular and effective way to keep your extensions organized and protected. Here’s how you can store your clip-in extensions using a storage bag:
- Select the Right Bag: Choose a storage bag specifically designed for hair extensions. Look for a bag made of a breathable fabric, such as nylon or mesh, that allows air circulation and prevents moisture build-up. The bag should be large enough to accommodate the length of your extensions without squishing them.
- Prepare the Extensions: Before storing, make sure your clip-in extensions are clean and completely dry. Gently comb through them to remove any tangles or knots. If necessary, apply a small amount of leave-in conditioner or hair oil to the ends for added protection.
- Divide the Extensions: If your extension set comes with multiple wefts, separate them and divide them into individual sections to keep them organized. This will make it easier for you to find the specific weft you need when you want to wear them.
- Place in the Bag: Carefully place each weft into the storage bag, ensuring they are spaced out to prevent tangling. If the bag has compartments or pockets, use them to keep each weft separate. Avoid overcrowding the bag, as this can lead to tangling and damage.
- Secure and Store: Once all the wefts are placed in the bag, securely close the bag using the provided zipper or fastening mechanism. Store the bag in a cool, dry place away from direct sunlight and excessive heat, as these can damage the extensions.
- Periodic Maintenance: It is a good practice to periodically check on your stored extensions to ensure they are still in good condition. Take them out of the bag, gently comb through them, and inspect for any signs of tangling or damage. If necessary, give them a gentle wash and conditioning before returning them to the storage bag.
Using a storage bag not only keeps your clip-in extensions organized but also protects them from dust, tangling, and potential damage. It provides a safe and secure environment for the extensions, ensuring they remain in optimal condition for future use.
Remember to handle the storage bag with care, avoiding any rough handling or excessive squeezing. With proper storage in a dedicated hair extension bag, your clip-in extensions will stay protected and ready to enhance your hairstyle whenever you desire.
Store clip-in extensions in a cool, dry place away from direct sunlight to prevent fading and damage. Use a hanger or storage bag to keep them tangle-free and in good condition.
Read more: How To Store Hair Clips
Option 3: Shoe Organizer
A shoe organizer can serve as a practical and budget-friendly storage solution for clip-in extensions. Here’s how you can use a shoe organizer to store your extensions:
- Select a Shoe Organizer: Look for a clear plastic shoe organizer with pockets or compartments. The pockets should be spacious enough to accommodate the length and width of your clip-in extensions.
- Prepare the Extensions: Before storing, make sure your clip-in extensions are clean and completely dry. Gently comb through them to remove any tangles or knots. If needed, apply a small amount of leave-in conditioner or hair oil to the ends for added protection.
- Divide the Extensions: If your extension set comes with multiple wefts, separate them and divide them into individual sections. This will help keep the extensions organized and easily accessible when you need to wear them.
- Place in the Pockets: Carefully place each weft of the clip-in extensions into separate pockets of the shoe organizer. Make sure to arrange them neatly and avoid overcrowding the pockets to prevent tangling.
- Hang or Store: Hang the shoe organizer on a closet door or wall using the designated hooks or suspend it from a hook in your closet. Alternatively, you can fold the shoe organizer and store it in a drawer or on a shelf, depending on your available space.
- Protect from Dust: Consider covering the shoe organizer with a breathable cloth or fabric to protect the extensions from dust and potential damage. This additional layer of protection helps to keep the extensions clean and in good condition while stored.
A shoe organizer allows you to see and access your clip-in extensions easily. It helps to keep them separate, preventing tangling and allowing you to find the specific weft you need quickly. Additionally, the clear plastic material of the organizer ensures that the extensions remain visible.
Remember to periodically check on your stored extensions to ensure they are still in good condition and free from tangling. Take them out, gently comb through them, and neatly return them to the shoe organizer. This way, your clip-in extensions will be well-maintained and ready to enhance your hairstyle whenever you want.
Option 4: Velvet Pouch
If you’re looking for a more luxurious and protective storage option for your clip-in extensions, a velvet pouch is a fantastic choice. Here’s how you can use a velvet pouch to store your extensions:
- Choose a Velvet Pouch: Look for a velvet pouch specifically designed for storing hair extensions. These pouches are often lined with silk or satin to provide extra protection and prevent tangling. Select a pouch that is large enough to comfortably accommodate the length of your extensions.
- Prepare the Extensions: Before storage, make sure your clip-in extensions are clean, dry, and free from any tangles. Gently comb through them to remove any knots, starting from the ends and working your way up to the roots. If desired, apply a small amount of leave-in conditioner or hair oil to the ends for added nourishment.
- Fold and Place: Fold the wefts of the clip-in extensions neatly, making sure there are no twists or bends. Carefully place the folded extensions into the velvet pouch, ensuring they are well-separated to prevent tangling. Avoid overcrowding the pouch, as this can lead to damage.
- Secure and Protect: Once the extensions are inside the pouch, securely close it using the drawstring or zipper. This ensures that the extensions are kept protected from dust, friction, and potential damage. Consider placing the pouch inside a larger bag or box for added protection when storing.
- Safe Storage: Store the velvet pouch in a cool, dry place away from direct sunlight and excessive heat. Avoid placing any heavy objects on top of the pouch, as this can cause unnecessary pressure and potential distortion to the extensions.
- Travel-Friendly Option: The velvet pouch is also a convenient option for when you’re traveling with your clip-in extensions. Its soft material and compact size allow for easy transport, keeping your extensions secure and well-protected during your journey.
A velvet pouch not only provides a stylish and elegant storage solution but also ensures that your clip-in extensions remain in optimal condition. The soft material helps to prevent tangling and maintain the smoothness of the hair, allowing you to enjoy beautiful extensions whenever you choose to wear them.
Remember to periodically check on your stored extensions to ensure there are no signs of tangling or damage. Gently comb through them if necessary and neatly return them to the velvet pouch. With proper storage in a velvet pouch, your clip-in extensions will be well-maintained and ready for use whenever you desire.
Option 5: DIY Storage Solution
If you’re feeling creative and want to save some money, you can create your own DIY storage solution for your clip-in extensions. Here are some ideas to help you get started:
- Shoebox with Dividers: Repurpose a shoebox by adding dividers to keep your clip-in extensions organized. You can use cardboard or foam board cut to fit inside the box as separators. Make sure the dividers are tall enough to prevent the extensions from getting tangled with each other.
- Homemade Hanging Method: Create your own hanging storage by using a clothes hanger and hair clips. Attach the hair clips to the bottom of the hanger and clip each weft of the clip-in extensions onto the hair clips. This allows the extensions to hang freely and prevents tangling.
- Ice Cube Tray: Use a clean ice cube tray with compartments to store small hair extensions or individual clips. This is especially useful if you have smaller pieces or accessories that you want to keep separate and organized.
- Ziplock Bags: Place each weft or set of clip-in extensions into separate ziplock bags. Make sure to remove as much air as possible before sealing the bags. This helps to keep the extensions compact and prevents tangling.
- Decorative Box: Find a decorative box or small storage container and line it with soft fabric or tissue paper. Place your clip-in extensions inside the box, making sure they are arranged neatly. You can even add a sachet of lavender or a moisture-absorbing packet to keep the extensions fresh.
When creating your own DIY storage solution, consider the specific needs of your clip-in extensions. Make sure to clean and detangle them before storing and choose a method that keeps the extensions protected, prevents tangling, and allows for easy access when you need them.
Be creative and resourceful when designing your DIY storage solution. It’s a fun and cost-effective way to keep your clip-in extensions organized and in good condition. Plus, you’ll have a storage solution that is unique and personalized to your style.
Remember to periodically check on your stored extensions, regardless of the storage method you choose. This ensures they remain in good condition and are ready to enhance your hairstyle whenever you want.
Tips for Proper Maintenance
In addition to choosing the right storage method for your clip-in extensions, proper maintenance is key to preserving their quality and prolonging their lifespan. Here are some essential tips to keep in mind:
- Handle with Care: Treat your clip-in extensions gently, just like you would with your natural hair. Avoid tugging or pulling on them when brushing or styling to prevent damage or breakage.
- Detangle Before and After Use: Before wearing your clip-in extensions, gently comb through them to remove any tangles. After use, carefully detangle them again to prevent knots and keep the hair smooth for the next wear.
- Wash with Care: If your extensions require cleaning, follow the manufacturer’s instructions carefully. Use a sulfate-free shampoo and conditioner and avoid harsh chemicals that can dry out or damage the hair fibers. It’s recommended to wash clip-in extensions sparingly to maintain their quality.
- Avoid Heat Styling: Excessive heat styling can damage the hair fibers of your clip-in extensions. Minimize the use of heat tools such as flat irons, curling irons, and blow dryers. If you must use heat, apply a heat protectant spray and use a lower heat setting.
- Store Clean and Dry: Always store your clip-in extensions when they are clean and completely dry. Moisture can lead to mold or mildew growth, causing damage to the extensions. Allow them to air dry thoroughly before storing them away.
- Avoid Sleeping with Extensions: It is generally recommended to remove your clip-in extensions before going to bed. This reduces the risk of tangles and hair breakage that can occur while sleeping. Proper storage overnight will help maintain the extensions’ shape and quality.
- Protect from Sunlight: Prolonged exposure to direct sunlight can fade or discolor the hair extensions. When wearing the extensions outdoors, consider using a hat or scarf to provide shade and protect them from harmful UV rays.
- Avoid Swimming: Chlorine and saltwater can be damaging to hair extensions. If you plan to swim, it’s best to remove your clip-in extensions to prevent them from becoming tangled or damaged. Alternatively, you can wear a swim cap to protect the extensions while swimming.
- Schedule Regular Maintenance: Depending on your usage and the condition of your clip-in extensions, it’s advisable to schedule regular maintenance appointments with a professional hairstylist. They can trim the ends to prevent split ends and ensure the extensions blend seamlessly with your natural hair.
By following these maintenance tips, you can keep your clip-in extensions looking beautiful and extend their lifespan. Proper handling, regular detangling, gentle washing, and safe storage will contribute to the longevity and overall quality of your extensions.
Remember that each set of clip-in extensions may have specific care instructions, so always refer to the manufacturer’s guidelines for the best maintenance practices. Taking good care of your extensions will ensure they remain a versatile and stunning addition to your hairstyle for a long time.
Read more: How To Store Claw Clips
Conclusion
Proper storage and maintenance of clip-in extensions are paramount to keeping them in optimal condition and extending their lifespan. Whether you choose to hang them, use a storage bag, utilize a shoe organizer, opt for a velvet pouch, or create a DIY storage solution, the goal is to protect the extensions from tangling, moisture, and damage.
By detangling, cleaning, and thoroughly drying your clip-in extensions before storage, you ensure that they remain fresh and free from dirt or product buildup. Choosing the right storage method that suits your space and preferences is essential, whether it’s hanging storage for easy access, a storage bag for added protection, a shoe organizer for visibility and organization, a velvet pouch for a touch of luxury, or a DIY solution that reflects your creativity.
Additionally, practicing proper maintenance habits such as gentle handling, regular detangling, minimal heat styling, and protecting the extensions from sunlight and chlorine will help preserve their quality and longevity. Scheduling regular maintenance appointments with a hairstylist can further ensure that your clip-in extensions remain in optimal shape, blending seamlessly with your natural hair.
Remember, each set of clip-in extensions may have specific care instructions, so always refer to the manufacturer’s guidelines for the best practices. By following these tips and incorporating them into your routine, you can enjoy your clip-in extensions for multiple wears, keeping them looking beautiful and enhancing your hairstyle with ease.
Investing a little time and effort into proper storage and maintenance will go a long way in keeping your clip-in extensions ready for use whenever you desire, ensuring that they continue to enhance your hair and give you the confidence to rock any style.
Frequently Asked Questions about How To Store Clip In Extensions
Was this page helpful?
At Storables.com, we guarantee accurate and reliable information. Our content, validated by Expert Board Contributors, is crafted following stringent Editorial Policies. We're committed to providing you with well-researched, expert-backed insights for all your informational needs.


0 thoughts on “How To Store Clip In Extensions”