Articles
How To Install Sink Clips
Modified: October 28, 2024
Learn how to properly install sink clips with our informative articles. Find step-by-step instructions and expert tips to ensure a secure and long-lasting installation.
(Many of the links in this article redirect to a specific reviewed product. Your purchase of these products through affiliate links helps to generate commission for Storables.com, at no extra cost. Learn more)
Introduction
Installing sink clips is an essential part of securing a sink to a countertop. Whether you’re replacing an old sink or installing a new one, properly installed sink clips provide stability and prevent the sink from shifting or falling. In this article, we will guide you through the process of installing sink clips to ensure a secure and durable sink installation.
Having the right tools and following the correct steps are crucial for a successful installation. By following this step-by-step guide, you can easily install sink clips and have peace of mind knowing that your sink is securely attached to the countertop.
Before we dive into the installation process, let’s take a look at the tools you’ll need to gather:
- Power drill
- Drill bits
- Screwdriver
- Tape measure
- Pencil or marker
- Sink clips (check the sink manufacturer’s recommendations for the specific type and number of clips needed)
With these tools in hand, you’re ready to move on to the next step, which is preparing the sink and countertop for installation.
Key Takeaways:
- Properly installed sink clips provide stability and prevent shifting or falling, ensuring a secure and durable sink installation. Follow the step-by-step guide for peace of mind knowing your sink is securely attached.
- Thoroughly testing the sink for stability after installation helps identify and address potential issues, ensuring a secure and stable sink for years to come. Enjoy the convenience and functionality of a reliable sink installation.
Read more: How To Install A Sink Faucet
Step 1: Gather the Necessary Tools
Before you begin the sink clip installation process, it is important to gather all the necessary tools to ensure a smooth and efficient installation. Here are the tools you’ll need:
- Power drill: A power drill is essential for drilling holes in the countertop to attach the sink clips. Make sure you have a drill that is compatible with the drill bits you will be using.
- Drill bits: You’ll need appropriate drill bits for the type of material your countertop is made of. For example, if you have a laminate countertop, you will need a drill bit specifically designed for drilling through laminate.
- Screwdriver: A screwdriver will be used to drive the screws into the sink clips and secure them to the countertop. Make sure you have both a Phillips-head and a flat-head screwdriver, as different sink clip designs may require different types of screws.
- Tape measure: Accurate measurements are crucial for positioning the sink clips correctly. A tape measure will help you ensure that the clips are evenly spaced and aligned.
- Pencil or marker: You’ll need a pencil or marker to mark the drilling locations on the countertop. This will guide you when drilling the holes for the sink clips.
- Sink clips: Depending on the sink manufacturer’s recommendations, you’ll need a specific number and type of sink clips. These clips are designed to securely hold the sink in place on the countertop.
Having all of these tools ready before you start the installation process will save you time and help prevent any delays or interruptions. Once you have gathered all the necessary tools, it’s time to move on to the next step: preparing the sink and countertop.
Step 2: Prepare the Sink and Countertop
Before installing the sink clips, it is important to properly prepare both the sink and the countertop. This step ensures that the surface is clean and ready for the installation process. Follow these guidelines to prepare the sink and countertop:
- Clean the Sink: Thoroughly clean the sink with warm water and mild detergent. Remove any debris or leftover adhesive from the previous installation if you are replacing an old sink. Ensure that the sink surface is free of any dirt or grime that could affect the adhesion of the sink clips.
- Position the Sink: Place the sink onto the countertop and align it correctly. Ensure that the sink is centered and flush with the edges of the countertop. Use a tape measure to verify the accuracy of the positioning.
- Mark the Clip Locations: Once the sink is positioned correctly, use a pencil or marker to mark the locations where the sink clips will be installed. Typically, sink clips are spaced evenly around the perimeter of the sink, with additional clips placed in the center for larger sinks.
- Double-Check the Alignment: Before proceeding, double-check the alignment and position of the sink. Make any necessary adjustments to ensure that the sink is level and properly centered.
By following these preparation steps, you’ll have a clean and accurately positioned sink and countertop, ready for the installation of sink clips. Now, you’re ready to move on to the next step: positioning the sink clips.
Step 3: Position the Sink Clips
Once the sink and countertop are properly prepared, it’s time to position the sink clips. These clips will provide the necessary support and stability to hold the sink securely in place. Follow these steps to position the sink clips:
- Refer to the Manufacturer’s Instructions: Check the sink manufacturer’s instructions or guidelines to determine the recommended number and placement of sink clips for your specific sink model. This information will ensure that you position the clips correctly for optimal support.
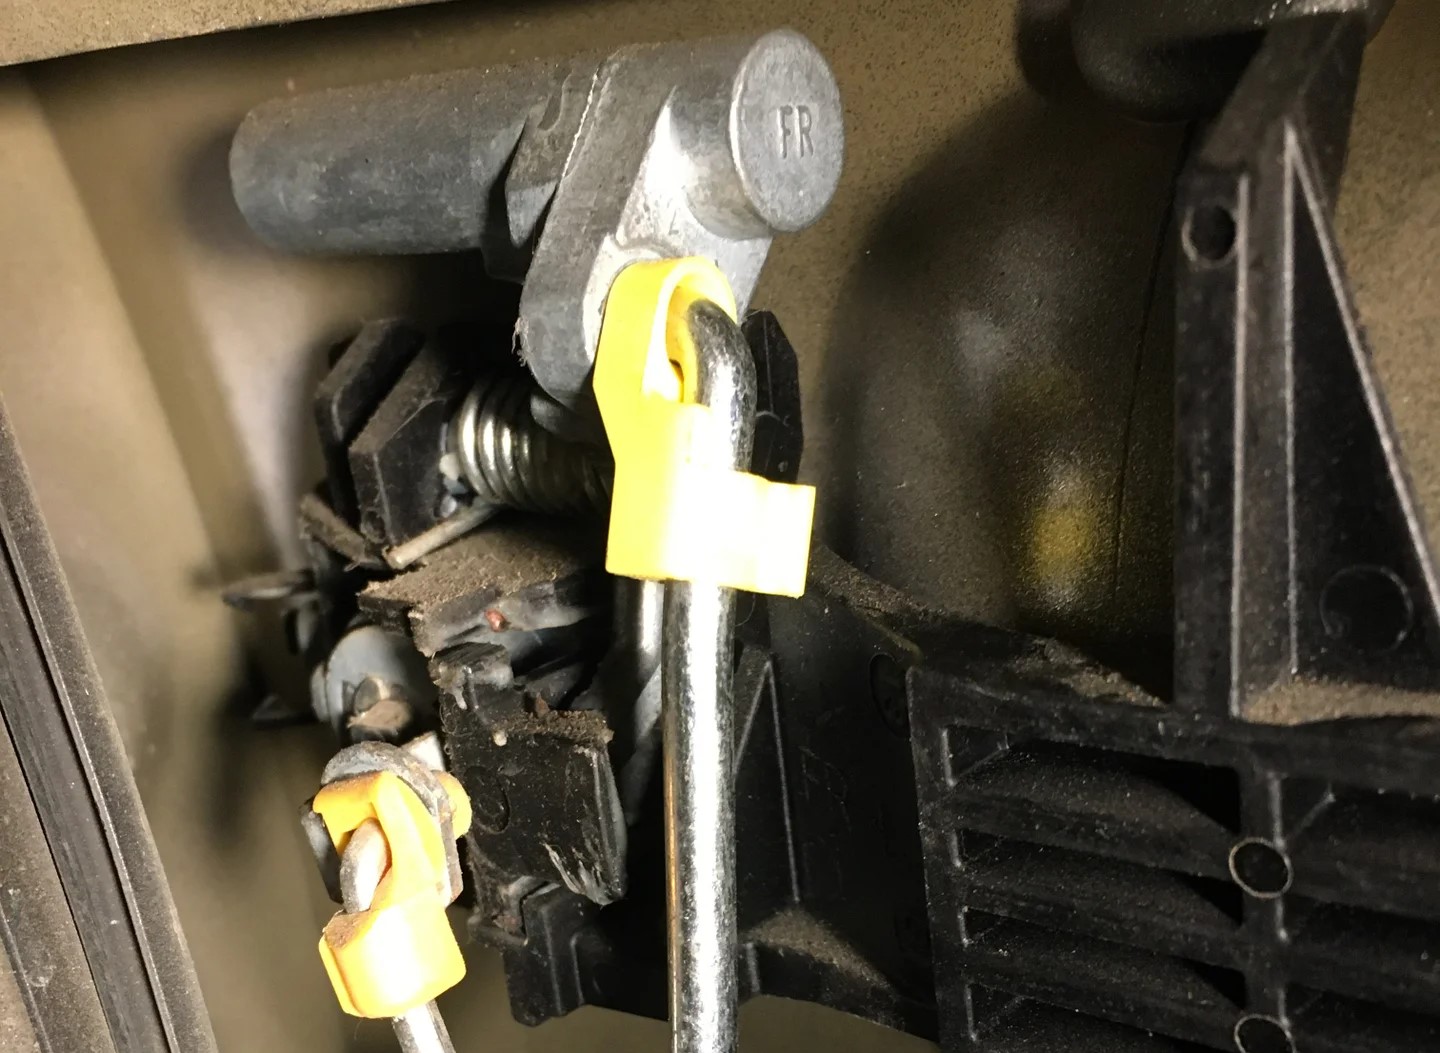
- Place the Sink Clips: Begin by placing the sink clips at the marked locations along the rim of the sink. Ensure that the clips are evenly spaced and aligned. Typically, sink clips are inserted between the sink and the countertop, with the hooks or brackets securely holding onto the rim of the sink.
- Consider the Sink Material: Take into account the material of your sink when positioning the clips. Different sink materials, such as stainless steel or porcelain, may require different positioning to provide maximum support.
- Check the Clip Position: Ensure that the sink clips are positioned in a way that allows them to secure the sink tightly to the countertop. Verify that the clips are evenly spaced and will distribute the weight of the sink evenly.
By following these steps, you will accurately position the sink clips for a secure and stable sink installation. Once the clips are in place, you’re ready to move on to the next step: attaching the sink clips to the countertop.
When installing sink clips, make sure to use a silicone adhesive to secure the clips to the underside of the sink. This will provide a strong and durable bond to keep the sink in place.
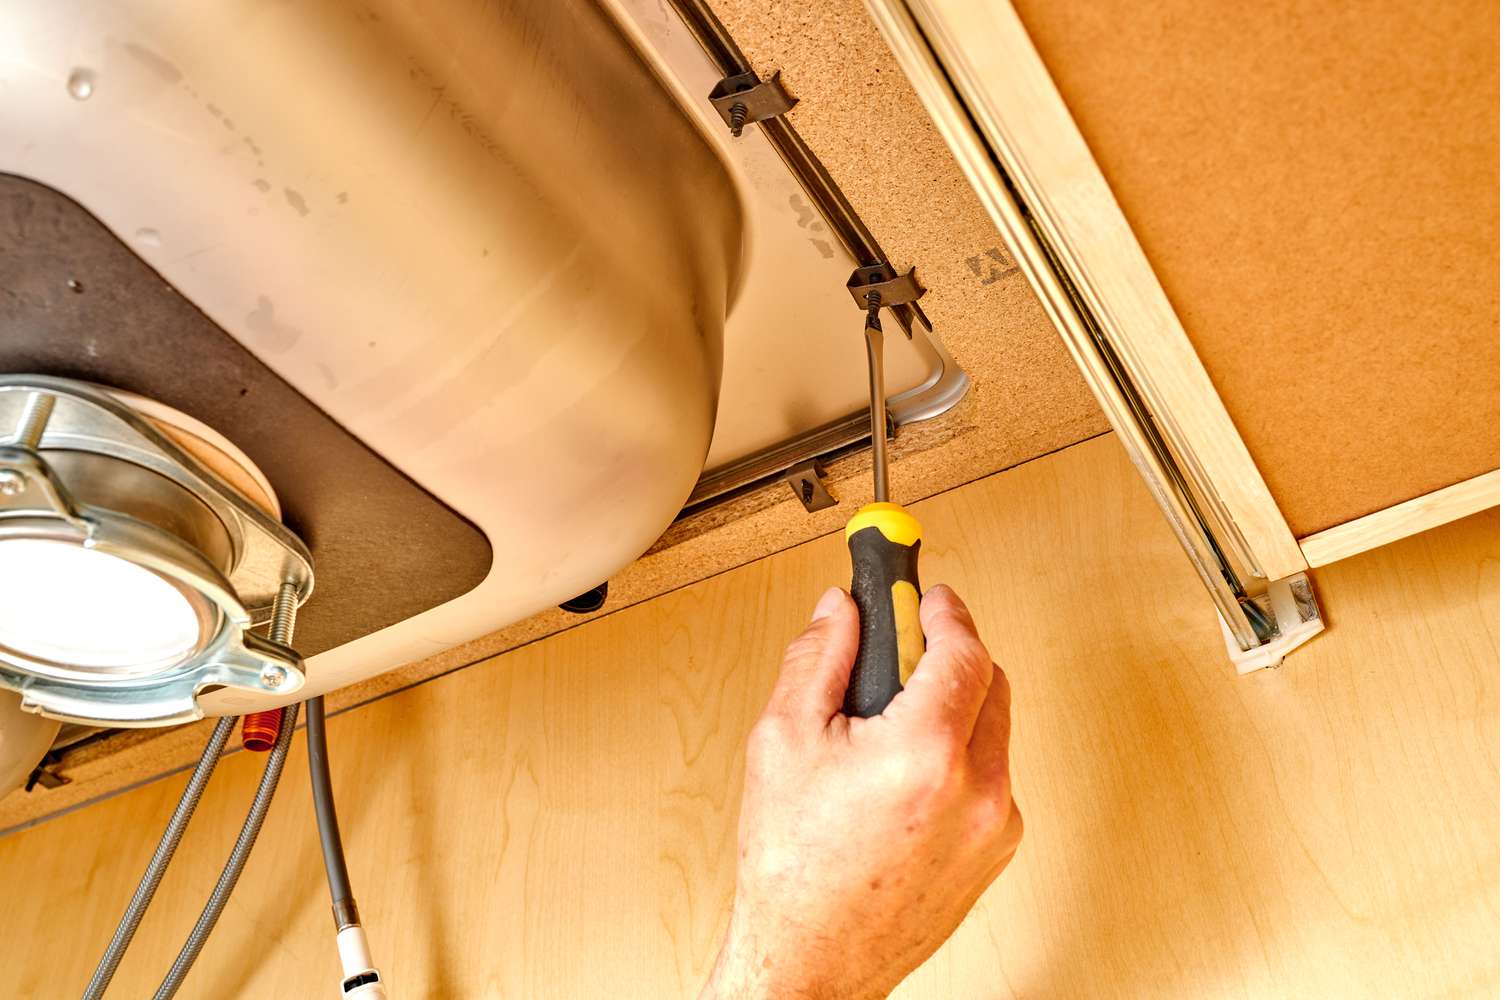
Step 4: Attach the Sink Clips to the Countertop
With the sink clips properly positioned, the next step is to attach them securely to the countertop. This ensures that the sink remains stable and does not shift or wobble. Follow these steps to attach the sink clips to the countertop:
- Pre-drill Holes: Use a power drill with the appropriate size drill bit to pre-drill holes in the marked locations on the countertop. The size of the drill bit should match the size of the screws provided with the sink clips. Pre-drilling prevents the countertop from splitting or cracking when the screws are inserted.
- Position the Clips: Place the sink clips over the pre-drilled holes, aligning them with the markings on the countertop. Ensure that the hooks or brackets of the clips are aligned with the edge of the sink.
- Secure the Clips: Insert the screws provided with the sink clips into the pre-drilled holes and tighten them using a screwdriver. Be careful not to overtighten, as this can damage the sink or countertop. Tighten the screws until the clips are firmly attached to the countertop and provide a snug fit for the sink.
It’s important to note that some sink clips may have a different installation method, such as using adhesive or brackets. Refer to the manufacturer’s instructions for the specific installation method recommended for your sink clips. Once all the sink clips are securely attached to the countertop, you’re ready to move on to the next step: securing the sink to the countertop.
Read more: How To Install A Sink Disposal
Step 5: Secure the Sink to the Countertop
After attaching the sink clips to the countertop, it’s time to secure the sink to the countertop. This step completes the installation process and ensures that the sink is firmly held in place. Follow these steps to secure the sink to the countertop:
- Apply Silicone Sealant: Before placing the sink onto the countertop, apply a bead of silicone sealant around the edge of the sink cutout on the countertop. This creates a watertight seal and helps prevent water from seeping into the gap between the sink and the countertop.
- Place the Sink: Carefully lower the sink into the sink cutout, making sure it is properly aligned. Gently press the sink down to ensure the silicone sealant adheres to both the sink and the countertop.
- Apply Pressure: Apply gentle pressure to the sink to help the silicone sealant bond with the countertop. Wipe away any excess sealant that may have squeezed out from the edges.
- Double-Check Alignment: Once the sink is secured, double-check its alignment and ensure that it is level and centered. Make any necessary adjustments before proceeding.
Securing the sink to the countertop is an important step in ensuring its stability and preventing any future issues. The silicone sealant creates a strong bond and helps keep the sink in place, even with regular use and cleaning.
Once the sink is securely attached, you can move on to the final step: testing the sink for stability.
Step 6: Test the Sink for Stability
After completing the installation of the sink clips and securing the sink to the countertop, it is essential to test the sink for stability. This step ensures that the sink is securely installed and will not move or shift with regular use. Follow these guidelines to test the sink for stability:
- Apply Pressure: Apply gentle pressure to different areas of the sink, such as the edges and the center. Press down and check for any movement or shifting. A stable sink should not move or feel loose.
- Check for Unevenness: Use a level to check if the sink is perfectly level. Place the level on different areas of the sink, including the front, back, and sides. A properly installed sink should be level in all directions.
- Test with Water: Fill the sink with water and observe for any signs of leakage or movement. Run the water and check if the sink remains stable. If there are any issues, you may need to tighten the sink clips or adjust the silicone sealant.
- Inspect the Clips: Examine the sink clips to ensure they are securely attached and not loose. Tighten any loose screws if necessary to enhance the stability of the sink.
By thoroughly testing the sink for stability, you can identify and address any potential issues before they become more significant problems. If you notice any concerns during the stability test, it may be necessary to reevaluate the installation and make any necessary adjustments to ensure a secure and stable sink.
With the sink successfully installed and tested for stability, you have completed the process of installing sink clips and can now enjoy your securely attached sink for years to come.
Conclusion
Installing sink clips is a critical step in ensuring the stability and longevity of your sink. By following the step-by-step process outlined in this article, you can confidently install sink clips and have peace of mind knowing that your sink is securely attached to the countertop.
From gathering the necessary tools to preparing the sink and countertop, positioning the sink clips, attaching them to the countertop, securing the sink, and testing for stability, each step plays a vital role in a successful installation. Taking the time to properly install the sink clips ensures that your sink will remain in place, resisting any shifting or movement during everyday use.
Remember to refer to the manufacturer’s instructions for your specific sink model, as they may provide additional guidelines or recommendations for the installation process. Additionally, always prioritize safety by following proper tool usage and handling, and take necessary precautions to protect yourself and your countertops during the installation process.
By completing each step with care and attention to detail, you can enjoy a reliable and stable sink that withstands the test of time. So go ahead, install those sink clips with confidence, and enjoy the convenience and functionality they bring to your kitchen or bathroom.
Now that you've mastered installing sink clips, why stop there? Take your DIY skills up a notch with our guide on installing a sink faucet. This guide simplifies each step, ensuring you can tackle this task with confidence and ease. Don't let plumbing projects intimidate you—our clear instructions will help you get the job done right.
Frequently Asked Questions about How To Install Sink Clips
Was this page helpful?
At Storables.com, we guarantee accurate and reliable information. Our content, validated by Expert Board Contributors, is crafted following stringent Editorial Policies. We're committed to providing you with well-researched, expert-backed insights for all your informational needs.


0 thoughts on “How To Install Sink Clips”