Articles
How To Store Crinkle Cookies
Modified: December 7, 2023
Discover the best methods for storing crinkle cookies with our helpful articles. Keep your cookies fresh and delicious for longer with our expert tips and tricks.
(Many of the links in this article redirect to a specific reviewed product. Your purchase of these products through affiliate links helps to generate commission for Storables.com, at no extra cost. Learn more)
Introduction
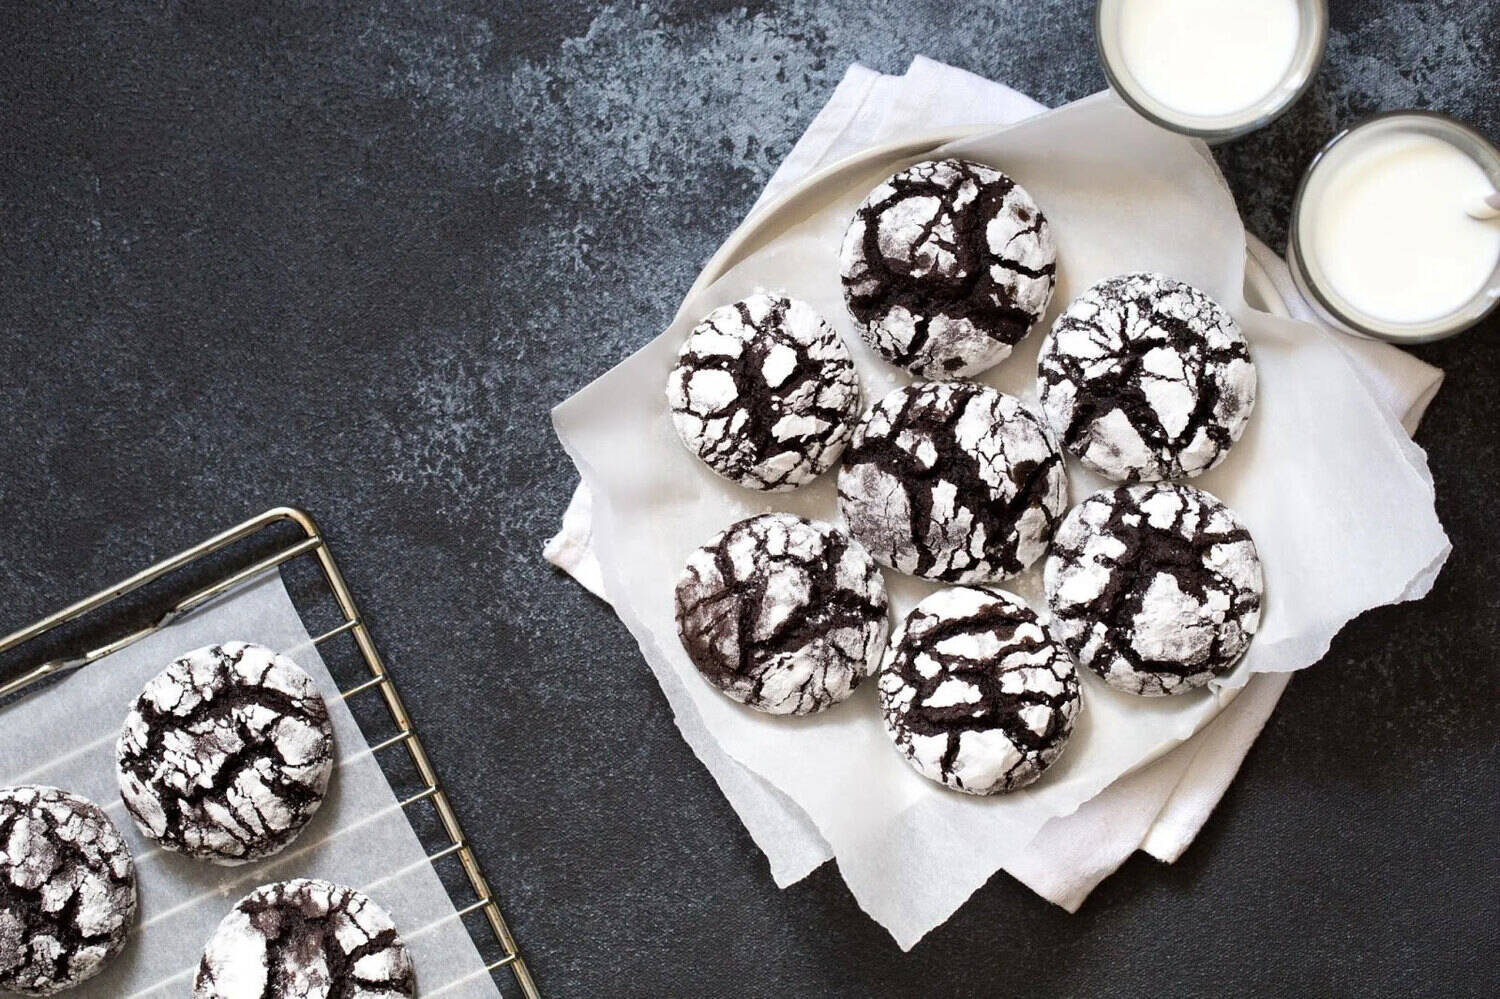
Welcome to the wonderful world of crinkle cookies! These delightful treats are known for their crinkled, cracked surface that gives them a unique appearance. But it’s not just their looks that make them special – crinkle cookies are also incredibly delicious and perfect for any occasion. Whether you’re a seasoned baker or just starting out, this article will guide you through the process of making and storing crinkle cookies.
Crinkle cookies are typically made with a rich chocolate dough that is rolled in powdered sugar before being baked. As the cookies spread and bake, the powdered sugar on the outside creates a beautiful crinkled effect, making them a visually stunning addition to any dessert spread.
The ingredients for crinkle cookies are relatively simple and can usually be found in your pantry. You will need all-purpose flour, cocoa powder, baking powder, salt, butter, granulated sugar, eggs, and vanilla extract. Some recipes may call for additional ingredients like chocolate chips or nuts, but the basic recipe remains the same.
Now, let’s dive into the step-by-step process of making crinkle cookies. Don’t worry, it’s easier than it looks!
Key Takeaways:
- Crinkle cookies are a delightful treat with a unique appearance and rich chocolate flavor. Follow the simple steps to make and store them for a delicious and visually stunning addition to any dessert spread.
- Master the art of making crinkle cookies and experiment with different variations to create unique flavors. Share the joy of baking by treating yourself and your loved ones to these decadent homemade treats.
Read more: How To Store Cookie Cutters
Ingredients
Before we get started, make sure you have the following ingredients on hand:
- 2 cups all-purpose flour
- 1/2 cup cocoa powder
- 2 teaspoons baking powder
- 1/2 teaspoon salt
- 1/2 cup unsalted butter, softened
- 1 1/2 cups granulated sugar
- 2 large eggs
- 2 teaspoons vanilla extract
- 1/2 cup powdered sugar, for coating
Feel free to add in any additional ingredients like chocolate chips, nuts, or even a touch of peppermint extract for a unique twist. However, these additional ingredients are optional, and the classic chocolate crinkle cookies are delightful on their own.
Now that we have our ingredients ready, let’s move on to the step-by-step process of making these delicious crinkle cookies!
Step 1: Preparing the Cookie Dough
To start, preheat your oven to 350°F (175°C). This will ensure that it’s ready when we’re done preparing the cookie dough.
In a medium-sized bowl, whisk together the all-purpose flour, cocoa powder, baking powder, and salt. This will help to evenly distribute the dry ingredients and prevent any lumps in the dough.
In a separate large bowl, cream together the softened butter and granulated sugar until light and fluffy. You can use an electric mixer or do this by hand if you prefer. The creaming process incorporates air into the butter and sugar, creating a lighter texture for the finished cookies.
Once the butter and sugar are well combined, add the eggs, one at a time, mixing well after each addition. This will ensure that the eggs are fully incorporated into the dough.
Next, add the vanilla extract and mix until it is evenly distributed throughout the dough. The vanilla adds a lovely flavor to the cookies and enhances the overall taste.
Gradually add the dry ingredients to the wet ingredients and mix until just combined. Be careful not to overmix, as this can result in tough cookies. Stop mixing as soon as the flour is fully incorporated into the dough.
Now that our cookie dough is ready, it’s time to move on to the next step – shaping the crinkle cookies!
Step 2: Shaping the Crinkle Cookies
Shaping the crinkle cookies is a fun part of the process and gives them their signature look. Here’s how you can do it:
- Take about a tablespoon-sized portion of the dough and roll it into a ball between the palms of your hands. You can adjust the size of the cookies depending on your preference.
- Place the powdered sugar in a shallow dish or bowl. Roll each ball of dough in the powdered sugar, ensuring that it’s fully coated. The powdered sugar will create the crinkled effect on the cookies’ surface as they bake.
- Once coated, place the dough balls on a parchment-lined baking sheet, spacing them at least 2 inches apart. This allows room for the cookies to spread as they bake.
Continue shaping and coating the remaining dough until all the cookies are prepared and arranged on the baking sheet. If you find that the dough is becoming too soft to shape, you can chill it in the refrigerator for about 15 minutes to firm it up.
Now that our crinkle cookies are shaped and ready to go, let’s move on to the next step – chilling the cookie dough.
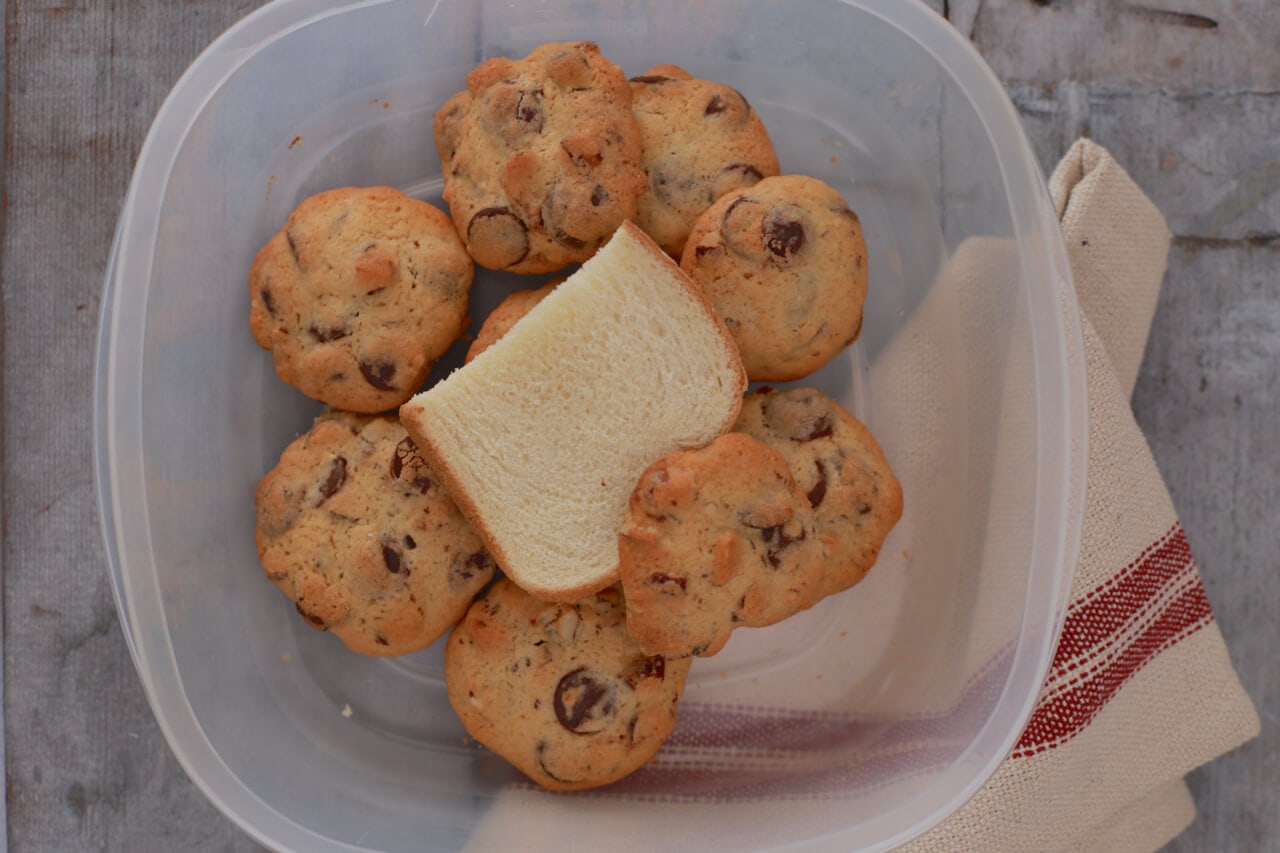
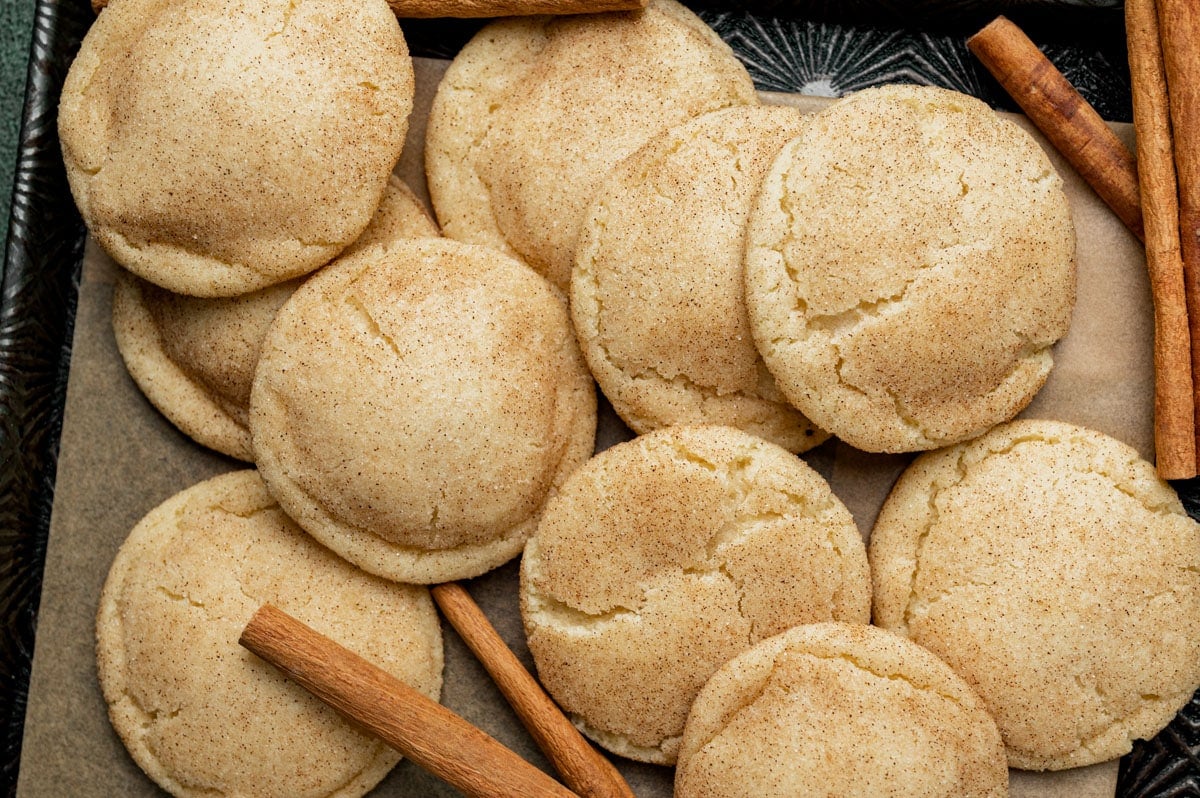
Store crinkle cookies in an airtight container at room temperature for up to 5 days. Place a piece of bread in the container to help keep the cookies soft and fresh.
Step 3: Chilling the Cookie Dough
Chilling the cookie dough is an important step in the process that helps the cookies retain their shape and texture while baking. Here’s what you need to do:
- Cover the baking sheet with the shaped cookie dough balls using plastic wrap or a clean kitchen towel.
- Place the baking sheet in the refrigerator and let the dough chill for at least 1 hour, or up to overnight. Chilling the dough allows the fats to solidify, resulting in cookies that spread less and hold their shape better during baking.
While the dough is chilling, you can use this time to clean up your workspace or prepare any garnishes or decorations you may want to add to the cookies later.
Once the dough has been thoroughly chilled, it’s time to move on to the next step – baking the crinkle cookies.
Read more: How To Store Rosette Cookies
Step 4: Baking the Crinkle Cookies
Now that the dough has been sufficiently chilled, it’s time to bake those delicious crinkle cookies! Follow these steps for perfect results:
- Preheat your oven to 350°F (175°C) if you haven’t already done so.
- Remove the chilled cookie dough from the refrigerator and place the baking sheet in the preheated oven.
- Bake the cookies for approximately 10-12 minutes or until the edges are set and the tops have cracked. The centers may still be slightly soft, but they will firm up as the cookies cool.
- Rotate the baking sheet halfway through the baking time to ensure even browning.
Keep a close eye on the cookies as they bake, as the exact baking time may vary depending on your oven and the size of the cookies. You don’t want to over-bake them, as they will become dry and lose their soft and chewy texture.
Once the cookies are done, carefully remove the baking sheet from the oven and let them cool for a few minutes directly on the baking sheet. This will allow them to firm up slightly before transferring them to a wire rack to cool completely.
Now that the crinkle cookies are baked and cooling, it’s time for the final step – storing them to maintain their freshness and flavor.
Step 5: Cooling and Storing the Crinkle Cookies
The final step in the process is to properly cool and store the freshly baked crinkle cookies to ensure they stay fresh and delicious. Here’s what you need to do:
- Allow the baked cookies to cool completely on a wire rack. This will help them firm up and prevent them from becoming too soft or crumbling when handled.
- Once the cookies are completely cooled, you can enjoy them right away or store them for later. If you’re not planning to eat them immediately, it’s important to store them properly to maintain their texture and flavor.
- Store the cooled crinkle cookies in an airtight container at room temperature. You can layer them between sheets of parchment or wax paper to prevent them from sticking together.
- For longer storage, you can also freeze the crinkle cookies in an airtight container or freezer bag for up to 3 months. Just make sure to let them thaw at room temperature before enjoying.
Properly stored, crinkle cookies can stay fresh for several days, but let’s be honest – they’re usually devoured much faster than that!
Now that you know how to make and store crinkle cookies, it’s time to get baking! Enjoy the delightful combination of rich chocolate flavor and the striking crinkled appearance of these delicious treats. Whether you’re making them for yourself, family, or friends, crinkle cookies are sure to bring joy and satisfy any sweet tooth.
Happy baking, and enjoy your homemade crinkle cookies!
Conclusion
Congratulations! You have successfully learned how to make and store scrumptious crinkle cookies. These delectable treats are not only visually stunning with their crinkled exterior, but they also offer a rich and indulgent chocolate flavor that is hard to resist. Whether you’re an experienced baker or just starting out, the step-by-step instructions provided in this article have guided you through the process with ease.
By following the simple steps of preparing the cookie dough, shaping the cookies, chilling the dough, and baking them to perfection, you have created a batch of delightful crinkle cookies that are sure to be a hit with family and friends. The cooling and storing tips ensure that your cookies remain fresh and delicious for an extended period.
Crinkle cookies are a versatile treat that can be enjoyed on their own, paired with a glass of milk, or served alongside a scoop of ice cream for a delightful dessert. They are also a great option for gifting or bringing to potlucks and parties.
Now that you’ve mastered the art of making crinkle cookies, feel free to experiment with different variations and add your personal touch to create unique flavors. Consider adding chocolate chips, nuts, or even a pinch of cinnamon for a delicious twist. Just remember to balance the flavors and textures to maintain the signature crinkle cookie qualities.
So, go ahead and treat yourself and your loved ones to a batch of homemade crinkle cookies. Enjoy the process of baking and savor each decadent bite. And remember, don’t hesitate to share the joy by sharing your freshly baked cookies with others.
Thank you for joining us on this crinkle cookie adventure. Happy baking!
Frequently Asked Questions about How To Store Crinkle Cookies
Was this page helpful?
At Storables.com, we guarantee accurate and reliable information. Our content, validated by Expert Board Contributors, is crafted following stringent Editorial Policies. We're committed to providing you with well-researched, expert-backed insights for all your informational needs.


0 thoughts on “How To Store Crinkle Cookies”