Articles
How To Store Earrings DIY
Modified: January 9, 2024
Learn how to store earrings with these easy DIY articles. Keep your earrings organized and prevent them from getting tangled or lost.
(Many of the links in this article redirect to a specific reviewed product. Your purchase of these products through affiliate links helps to generate commission for Storables.com, at no extra cost. Learn more)
Introduction
Welcome to our guide on how to store earrings DIY! If you’re an earring enthusiast like many of us, you probably have a growing collection of beautiful earrings. However, keeping them organized and easily accessible can be a challenge. The last thing you want is to spend precious time searching for a matching pair or finding them tangled up in a drawer.
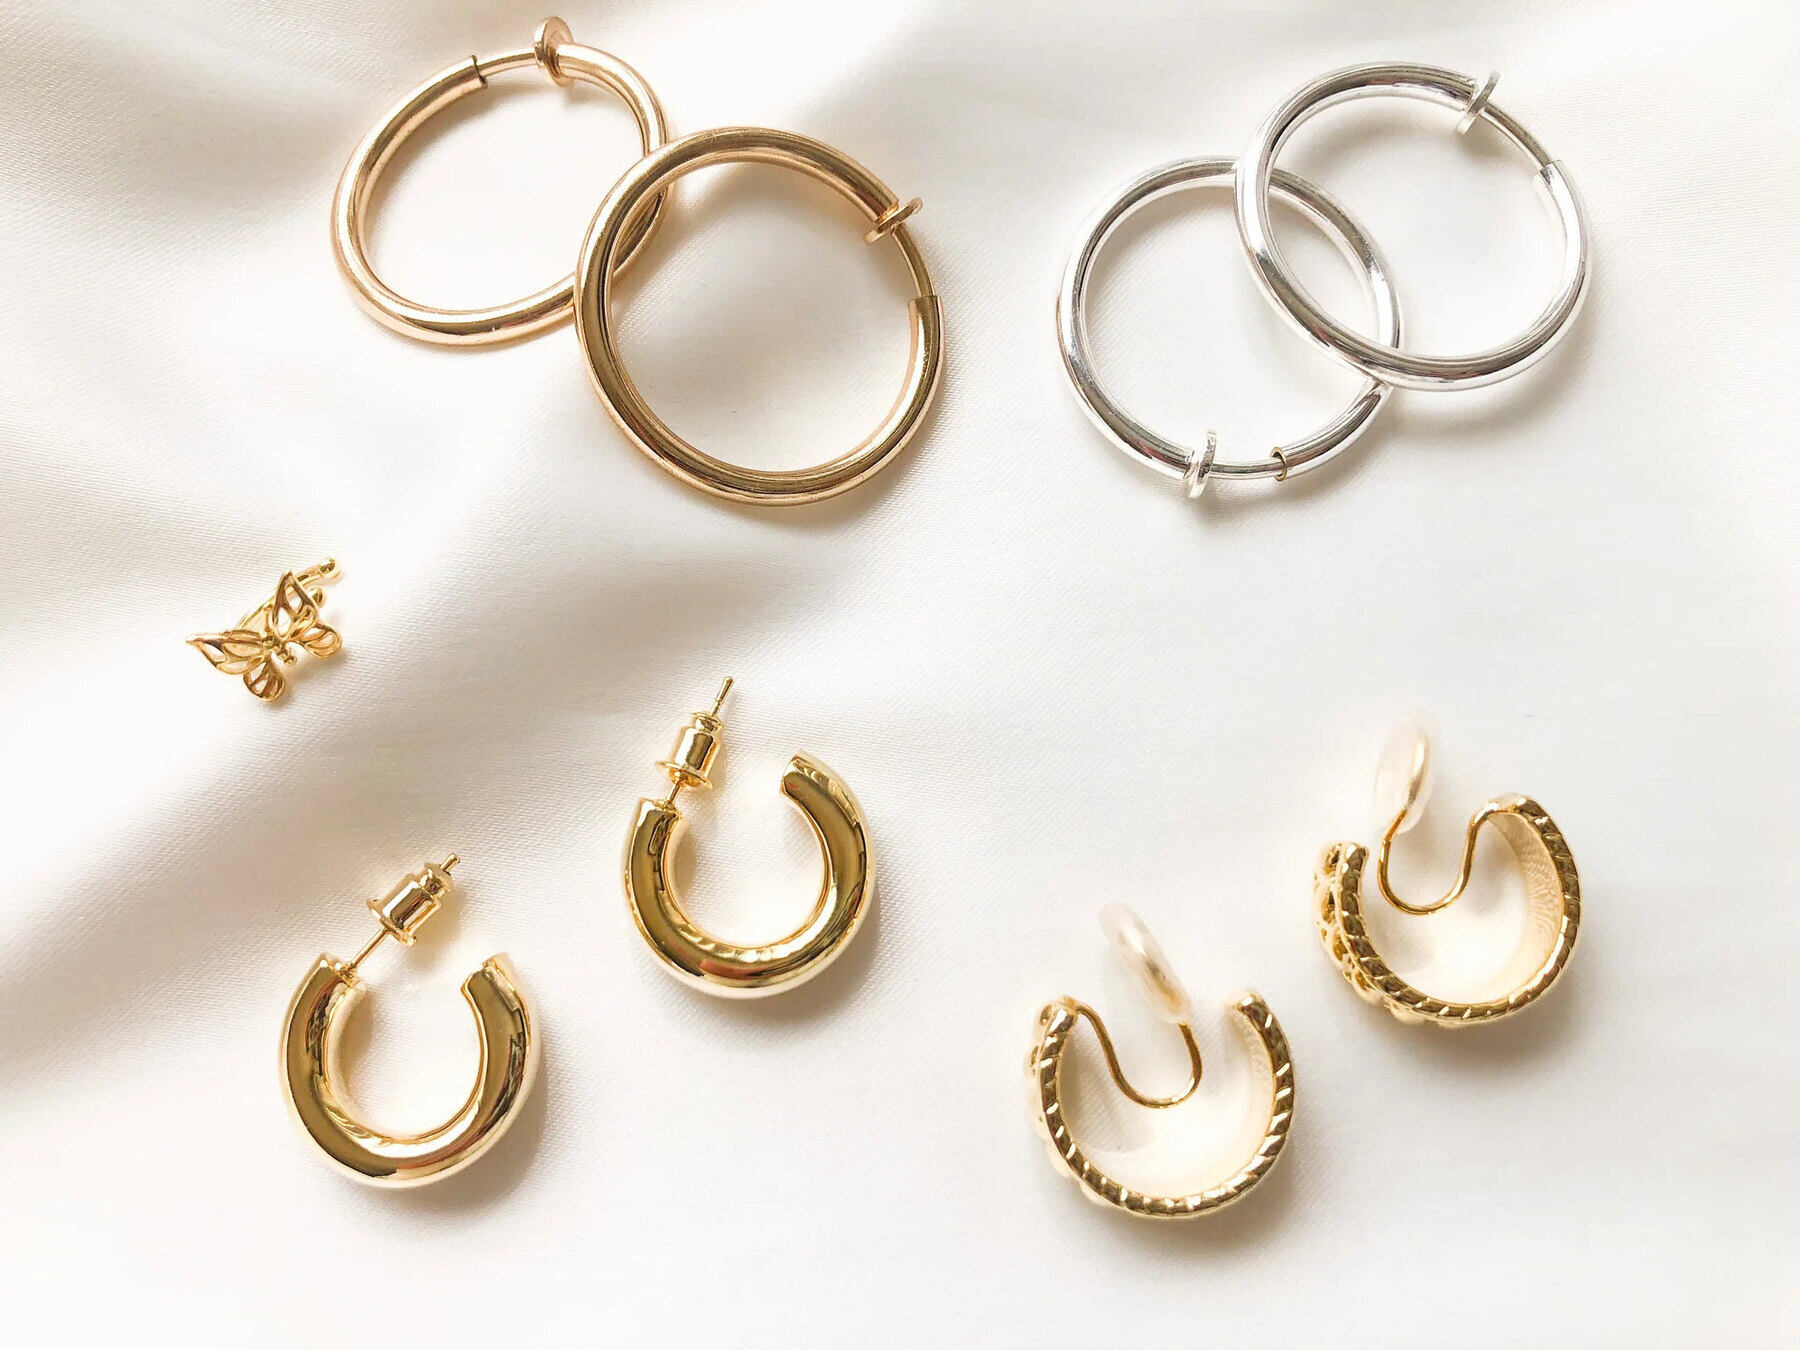
Fortunately, there are plenty of creative and cost-effective solutions for storing your earrings at home. In this article, we will explore various DIY options that will help you keep your earrings safe, organized, and ready to wear. Whether you have studs, hoops, dangles, or a mix of styles, there’s a storage solution that suits your needs.
By implementing these DIY storage ideas, you’ll not only save time and frustration but also protect your earrings from damage, tarnishing, or getting lost. So, let’s dive into the materials you’ll need and the creative ways you can store your earrings at home.
Key Takeaways:
- Get creative with DIY earring storage! From repurposing ice cube trays to crafting stylish wall-mounted displays, there are numerous budget-friendly and visually appealing options to keep your earrings organized and easily accessible.
- Choosing the right storage method for your earrings is essential for organization, protection, and aesthetics. Whether you have a small or large collection, there’s a DIY solution that suits your needs and adds a touch of flair to your space.
Read more: How To Store Earrings
Materials Needed
Before we begin exploring the DIY storage options for your earrings, let’s gather the materials you’ll need for these projects:
1. Jewelry Organizer: This can be a small tray, dish, or box with compartments to separate and display your earrings.
2. Ice Cube Tray: A simple and affordable option, an ice cube tray can effectively store small earrings and prevent them from getting tangled.
3. Picture Frame with Wire Mesh: You’ll need a picture frame, wire mesh or chicken wire, pliers, and some hooks to create a stylish and functional earring display.
4. Egg Carton: A recycled egg carton can be repurposed to store your earrings. It offers individual compartments for each pair, keeping them organized and protected.
5. Pill Organizer: A pill organizer with small compartments can serve as an excellent storage solution for small earrings.
6. Corkboard with Pins: A corkboard paired with decorative pins allows you to easily hang and display your earrings while adding a touch of flair to your space.
7. Travel Pill Box: If you often take your earrings on the go, a travel pill box with multiple compartments is a convenient and compact option for storage.
8. Wall-Mounted Jewelry Display: You’ll need a small mirror, hooks, and some decorative accents to create an elegant wall-mounted jewelry display for your earrings.
9. Hanging Shoe Organizer: This option is perfect if you have a large earring collection. A hanging shoe organizer with clear pockets provides ample storage space and allows you to see all your earrings at a glance.
10. Earring Stand: You’ll need a foam cone or wide-based stand to create a stylish and accessible display for your earrings.
Now that you have the necessary materials, let’s explore these DIY storage options in detail!
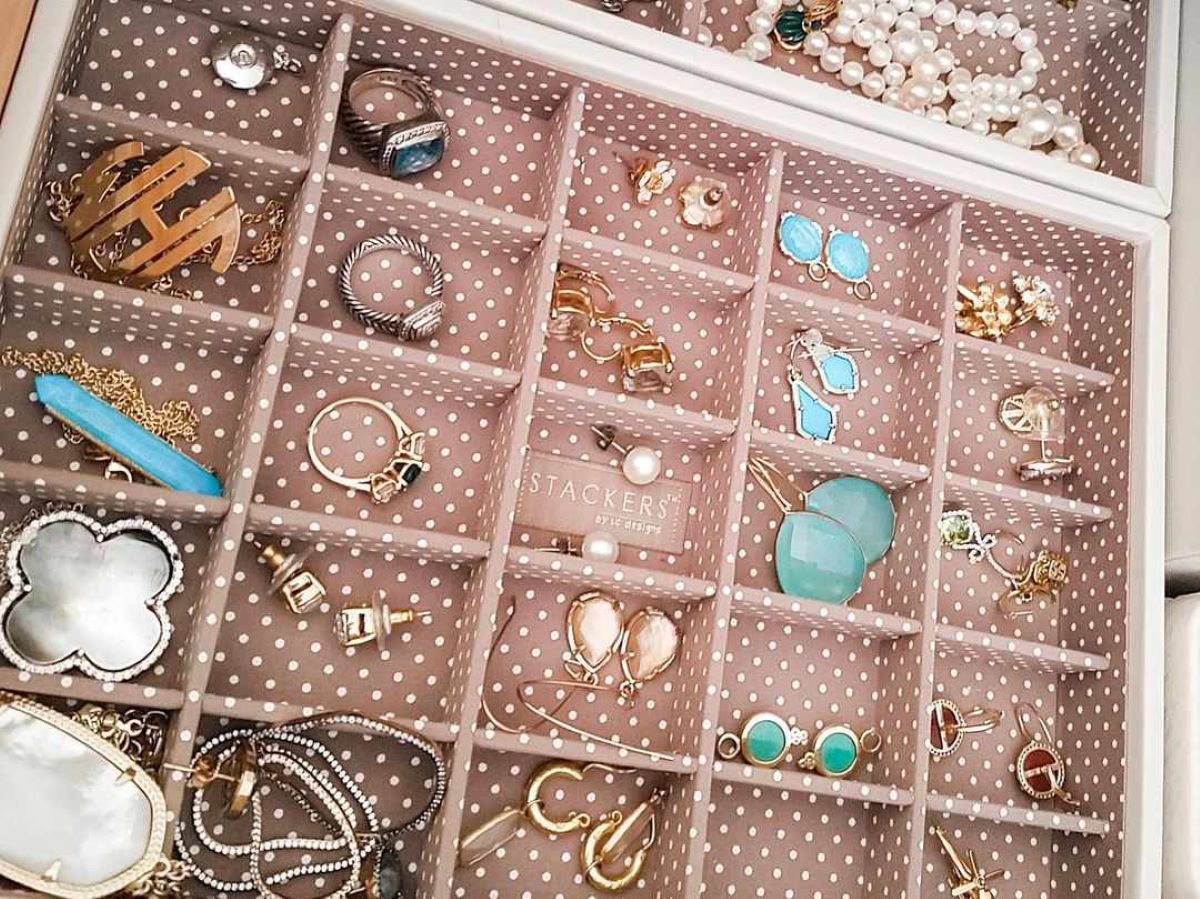
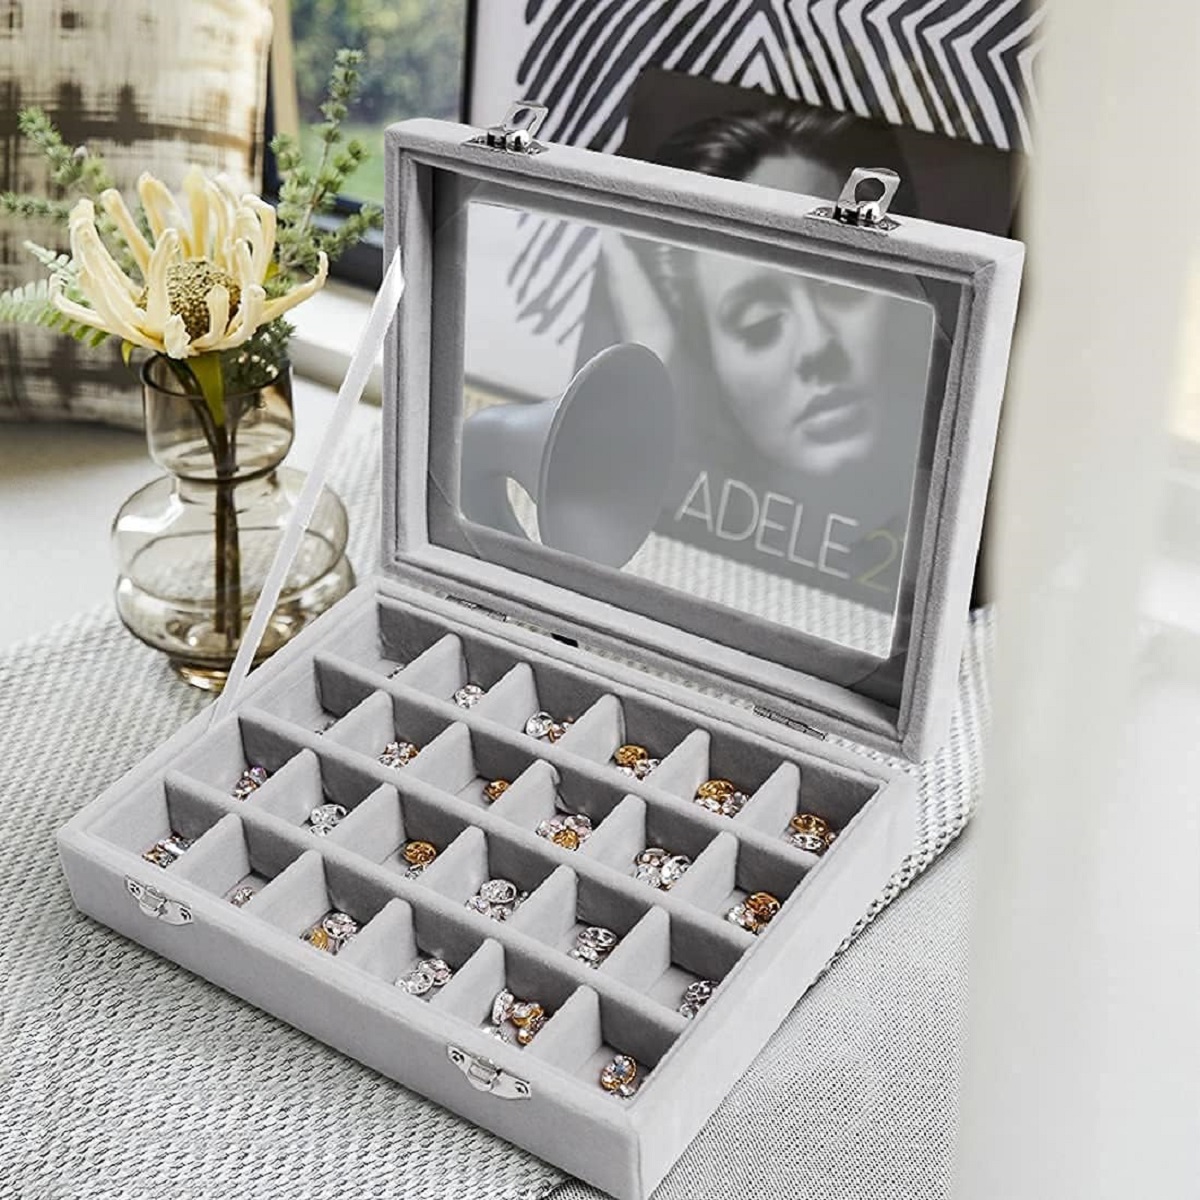
Option 1: Jewelry Organizer
A jewelry organizer is a classic and effective way to store your earrings. You can find pre-made jewelry organizers with compartments, hooks, and slots designed specifically for earrings, or you can create your own using a tray, dish, or box.
If you prefer a ready-made solution, look for organizers with removable dividers or adjustable compartments. This way, you can customize the size of each compartment to accommodate different earring styles, sizes, and shapes. Some organizers even come with a lid or cover to keep your earrings dust-free and protected.
For a DIY approach, find a shallow tray, dish, or box that suits your style and preference. Consider materials like acrylic, wood, or metal for a durable and aesthetically pleasing option. You can then use small containers, like pillboxes or mini jars, to further organize your earrings within the larger container.
Arrange your earrings in the compartments or containers based on style, color, or frequency of use. This will help you quickly locate the pair you want to wear without sifting through a jumble of earrings. You can also attach earring backs to the organizers to keep pairs together and prevent them from getting lost.
If you want to take your organization a step further, consider using a jewelry organizer with a built-in mirror. This allows you to see how your earrings look when worn and makes it easier to select the perfect pair for your outfit.
Remember to clean and polish your earrings regularly to keep them looking their best. You can use a soft cloth or a mild jewelry cleaner specifically designed for the material of your earrings, such as silver, gold, or gemstones.
With a jewelry organizer, you’ll have a dedicated space for your earrings, keeping them neatly arranged, protected, and easily accessible. Say goodbye to tangled and misplaced earrings!
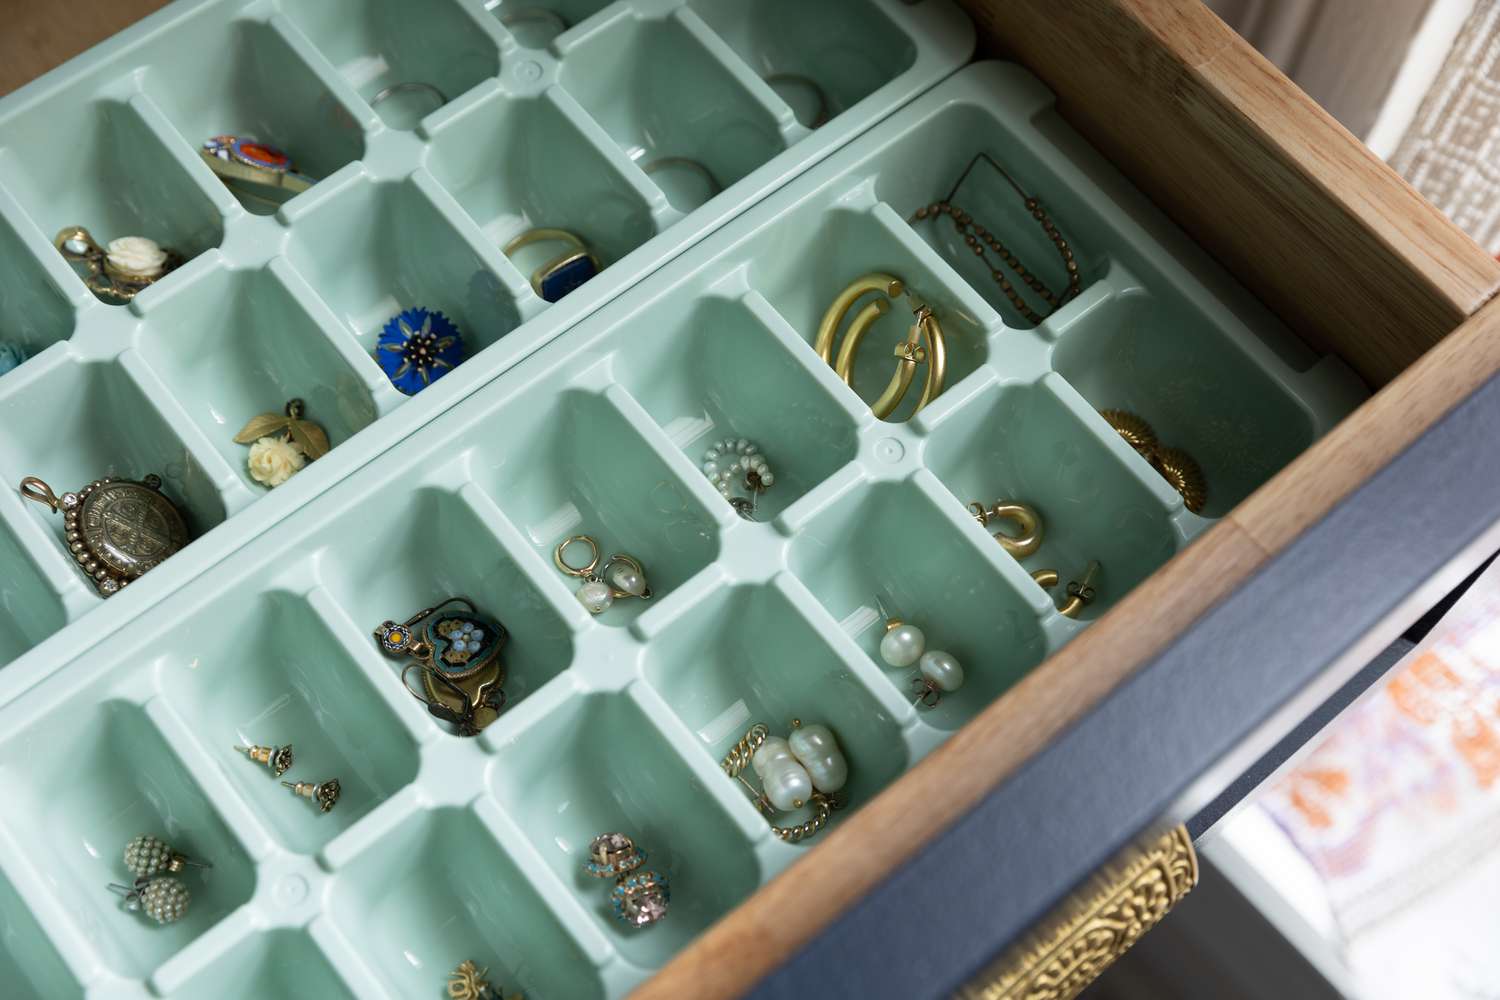
Option 2: Ice Cube Tray
If you’re looking for a simple and budget-friendly solution to store your earrings, an ice cube tray can be a surprisingly effective option. Ice cube trays have individual compartments that are just the right size to hold small earrings like studs or even small hoop earrings.
To use an ice cube tray for earring storage, start by selecting a tray with compartments that are deep enough to hold your earrings securely. Silicone ice cube trays are a good choice as they are flexible and allow for easy removal of your earrings.
Begin by sorting your earrings by style, color, or any other preferred criteria. This will make it easier to find the pair you want to wear later. Then, carefully place each pair into a separate compartment of the ice cube tray.
If you have fragile or delicate earrings, consider placing a small piece of soft fabric or a cotton ball in each compartment before adding your earrings. This will help protect them from scratching or damage.
Once all your earrings are in place, you can stack multiple ice cube trays on top of each other or place them in a drawer or on a shelf. The compartments will keep your earrings separate and prevent them from tangling or getting lost.
This storage solution is not only practical but also allows you to easily see and access your earrings. You can quickly identify the pair you want to wear and grab it before heading out.
Additionally, ice cube trays are easy to clean. Simply remove the earrings, rinse the tray with water, and let it dry before using it again. It’s a low-maintenance option for storing your earrings.
So, if you’re looking for a quick and inexpensive way to organize your earrings, give the ice cube tray method a try. It’s a simple and efficient solution that will keep your earrings tidy and prevent them from becoming a tangled mess.
Option 3: Picture Frame with Wire Mesh
If you want a stylish and creative way to display and organize your earrings, repurposing a picture frame with wire mesh is a fantastic option. Not only does it provide a functional storage solution, but it also serves as a decorative piece for your space.
To create your earring display frame, start by choosing a picture frame that suits your style and matches your décor. You can opt for a vintage frame, a modern design, or even a rustic wooden frame. Consider the size of your earring collection when selecting the frame.
Next, remove the glass and backing from the frame. Measure the dimensions of the frame and purchase a piece of wire mesh or chicken wire that fits securely inside. You can find wire mesh or chicken wire at most hardware stores or online.
Using pliers, carefully cut the wire mesh to fit the frame, making sure it is slightly smaller than the frame to allow for a secure fit. Once you have the wire mesh ready, attach it to the back of the frame using staples, glue, or small nails. Ensure that the wire mesh is taut and securely fastened.
Now, your frame with wire mesh is ready to hold your earrings. Simply hang your earrings on the wire mesh, using the openings in the mesh to secure the earring hooks or posts. You can arrange your earrings by color, style, or any other preference to create a visually appealing display.
If the frame originally had a kickstand or easel back, you can choose to remove it or keep it intact to display the frame on a tabletop or dresser. Alternatively, you can hang the frame on a wall using picture hanging hooks or adhesive strips.
Not only does the picture frame with wire mesh provide an organized storage solution, but it also allows you to showcase your earrings as a decorative piece of artwork. It adds a personal touch to your space and makes it easy to see and select the perfect pair of earrings to complement your outfit.
With this DIY option, you can transform an ordinary picture frame into a functional and stylish earring display. It’s a creative way to store and exhibit your earrings while adding a unique touch to your decor.
Read more: How To Store Stud Earrings
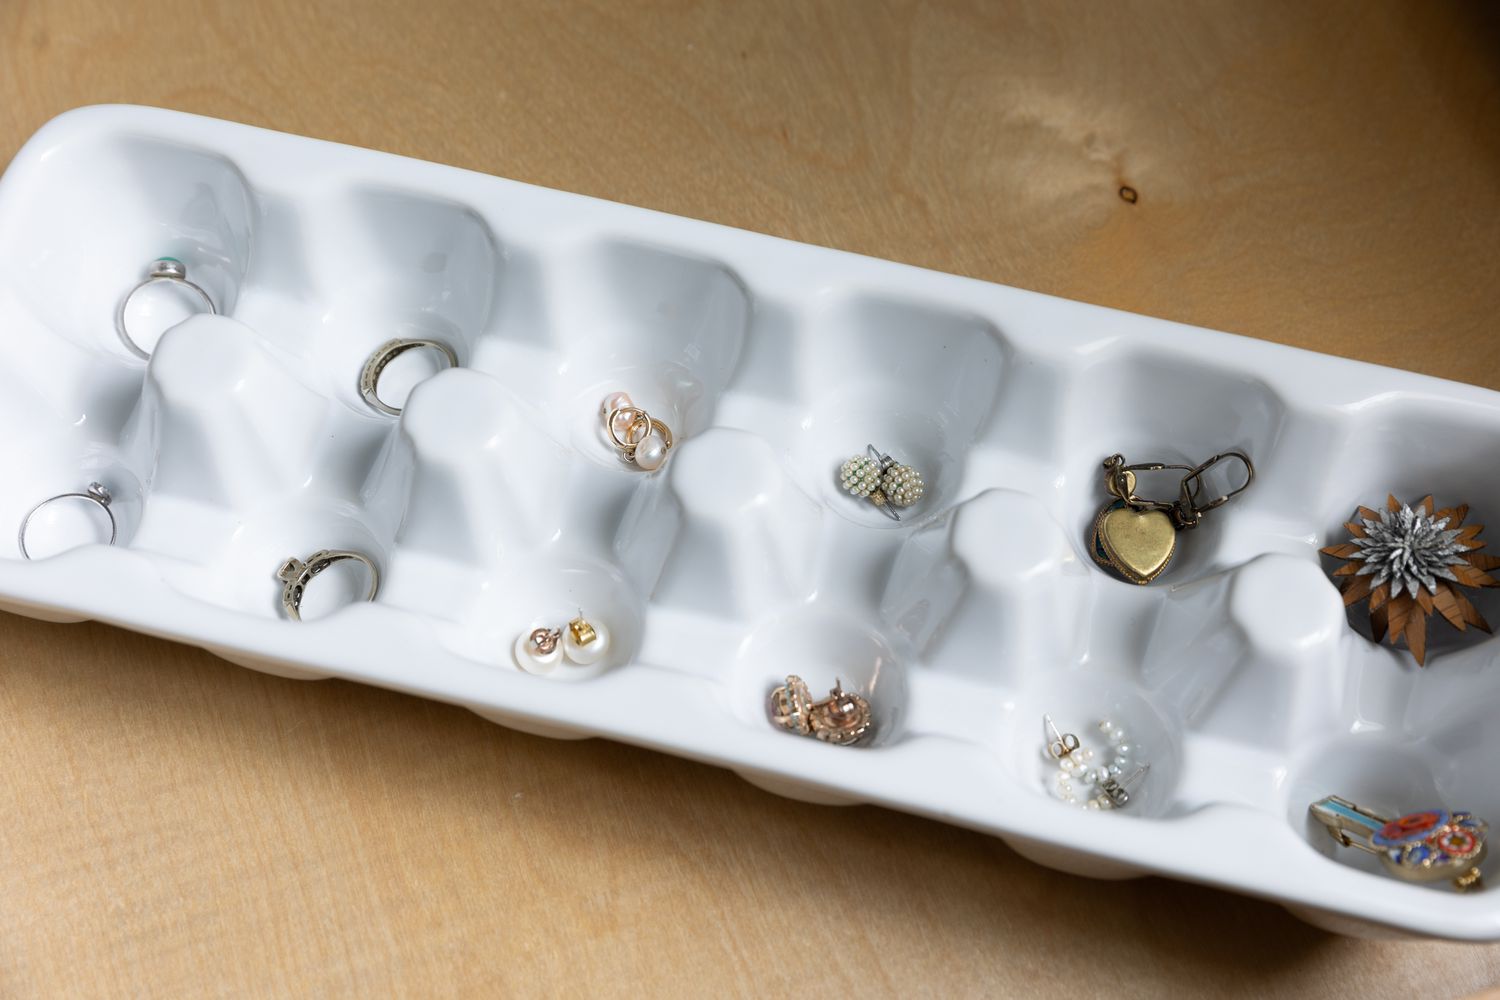
Option 4: Egg Carton
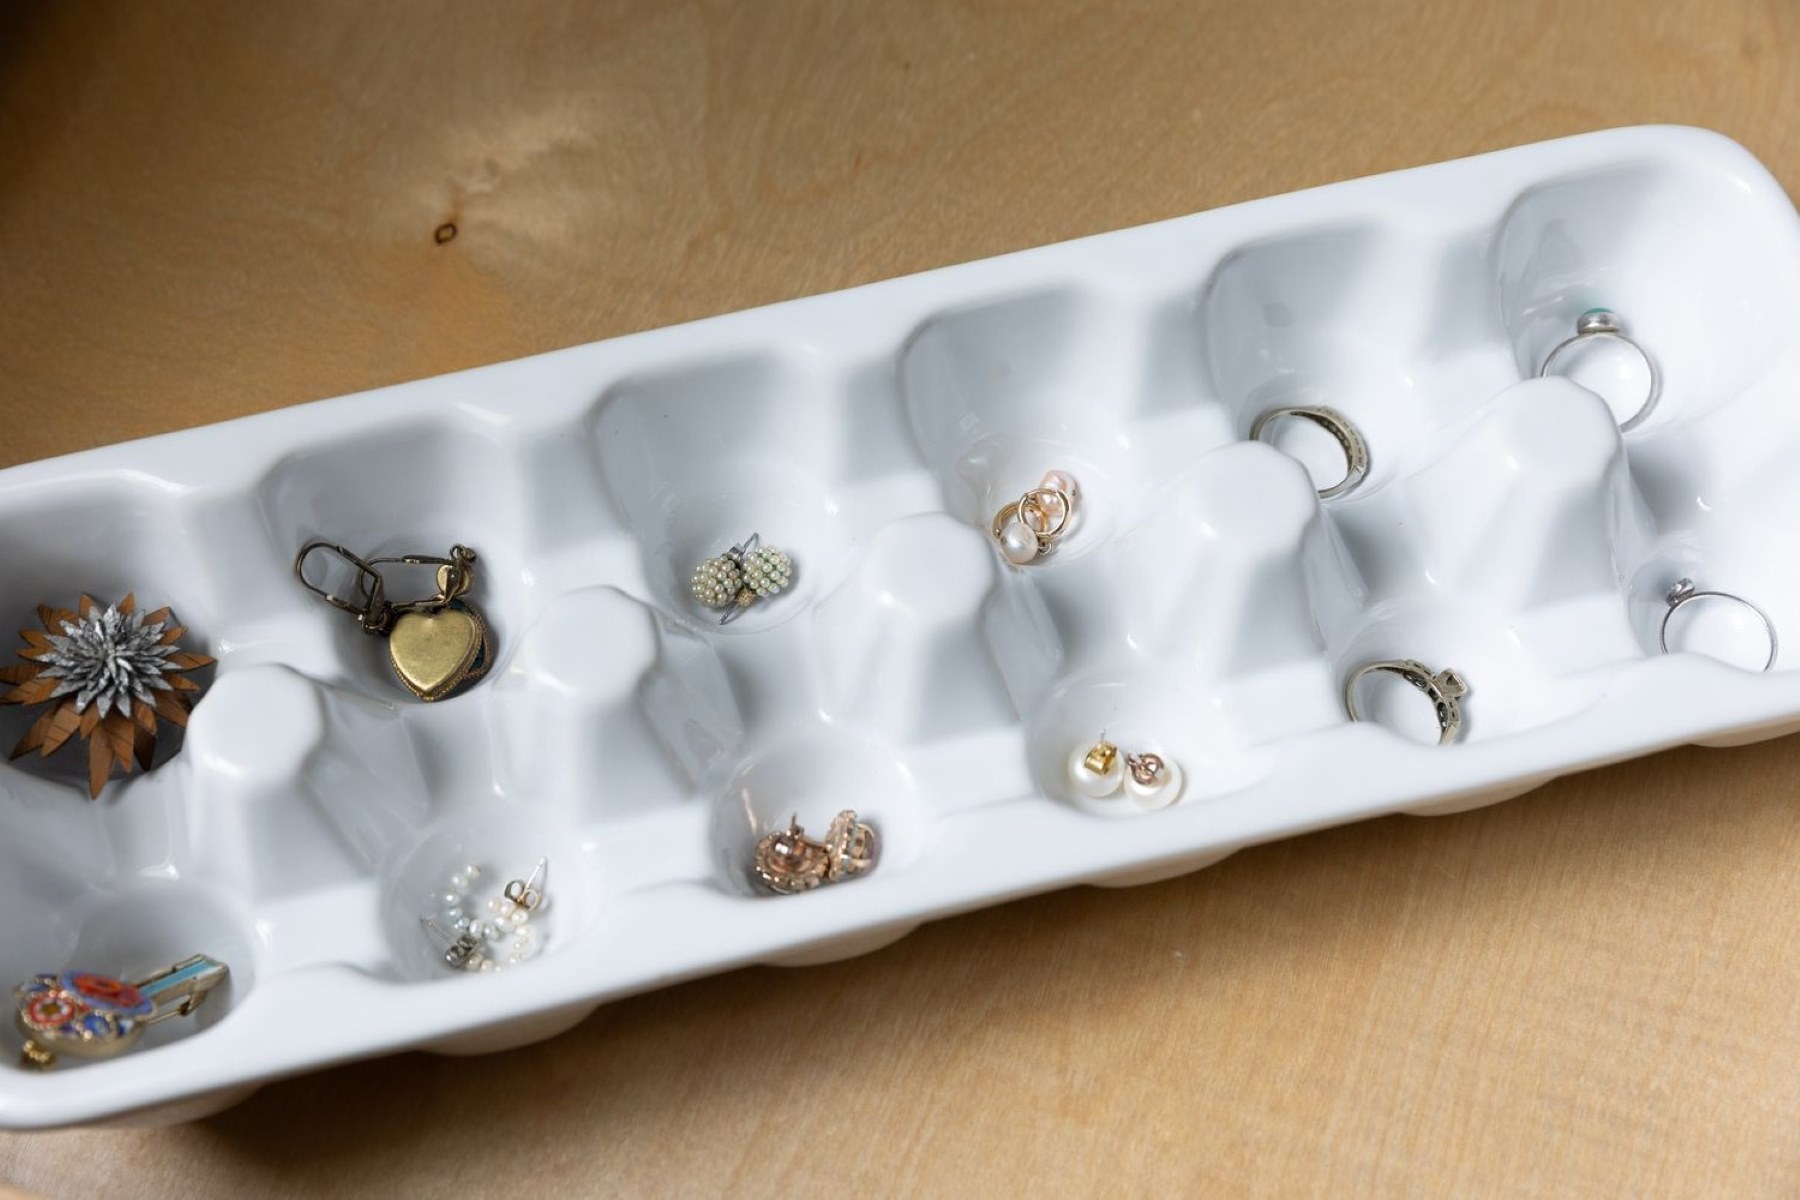
An egg carton may seem like an unconventional choice for earring storage, but it can be a surprisingly effective and practical solution. Its individual compartments provide a convenient way to keep your earrings organized and protected.
To use an egg carton for earring storage, start by selecting a cardboard or plastic egg carton that is clean and in good condition. Choose one with individual cups that are intact and large enough to hold your earrings.
If the cups in the egg carton are too shallow for your earrings, you can line them with small pieces of soft fabric or foam. This will provide cushioning and prevent your earrings from scratching or tangling with each other.
Sort your earrings by style, color, or any other preferred criteria. This will make it easier to find the pair you want to wear. Then, place each pair of earrings in a separate cup of the egg carton. If you have larger earrings or hoops, you can simply place them in adjacent cups without worrying about them getting tangled.
Remember to secure your earrings by attaching earring backs to them. This will prevent them from slipping out of the carton and getting lost.
Once all your earrings are in place, you can close the lid of the egg carton (if it has one) or stack multiple egg cartons on top of each other. They can be stored in a drawer or placed on a shelf, ensuring your earrings stay organized and easily accessible.
Using an egg carton for earring storage has additional benefits beyond organization. It is a cost-effective solution, as you can repurpose something you might already have at home. It also keeps your earrings protected from dust and potential damage.
If you prefer a more aesthetically pleasing option, you can decorate the egg carton with paint, wrapping paper, or adhesive paper to add a personal touch. This way, your earring storage can be both functional and visually appealing.
So, don’t overlook the potential of an egg carton for storing your earrings. It’s a simple and practical solution that ensures your earrings stay organized and in good condition.
Option 5: Pill Organizer
If you’re looking for a compact and portable storage solution for your earrings, a pill organizer can be an excellent choice. These handy organizers are designed to hold small items securely and come with multiple compartments, making them perfect to store and organize your earrings.
When selecting a pill organizer for earring storage, opt for one with individual compartments of suitable size to accommodate your earrings. Look for a pill organizer with compartments that are deep enough to prevent your earrings from slipping out.
Sort your earrings based on style, color, or any other preferred criteria. This will help you easily locate the pair you want to wear later. Then, place each pair of earrings in a separate compartment of the pill organizer.
If you have delicate or dangly earrings, you can use small plastic bags or jewelry pouches to keep them protected within the compartments. This will help prevent them from getting tangled or scratched.
Another advantage of using a pill organizer is its portability. You can easily carry it in your purse, travel bag, or even in your pocket, ensuring your earrings are always within reach. This is especially handy if you’re on the go or frequently travel.
Pill organizers also provide a visual overview of your earring collection, allowing you to see all your options at a glance. This can be particularly helpful when you’re getting ready in a hurry or planning your outfits in advance.
Additionally, pill organizers are usually made of durable materials such as plastic or metal, which helps protect your earrings from damage and keeps them securely in place. They are also easy to clean – simply remove the earrings, wash with soap and water, and allow it to dry before using it again.
Whether you’re organizing your earrings at home or need a compact solution for traveling, a pill organizer can help you keep your earrings organized, protected, and easily accessible. It’s a versatile and convenient option for earring storage!
Use a pill organizer to store and organize your earrings. Each compartment can hold a pair, keeping them tangle-free and easy to find.
Option 6: Corkboard with Pins
A corkboard with pins is not only a practical option for organizing your earrings but also serves as a stylish and decorative display. This method allows you to showcase your earrings while keeping them easily accessible.
To create a corkboard earring display, start by selecting a corkboard of a suitable size for your earrings. You can find corkboards in various shapes, sizes, and thicknesses at office supply stores or online.
Next, gather a set of decorative push pins or earring holders. These can be plain pins, colorful ones, or even decorative earring cards with attached pins. Choose pins that complement your style and match the overall aesthetic you want to achieve.
Place the corkboard in a location that works for you, whether it’s on the wall in your bedroom or bathroom or on top of a dresser or vanity. Ensure it’s easily accessible and visually appealing.
Before attaching your earrings to the corkboard, organize them by style, color, or any other preferred method. This will make it easier to find the perfect pair when you’re getting ready.
Simply use the pins to attach your earrings to the corkboard. If you have delicate or dangling earrings, consider using earring cards or foam sheets to protect them and prevent tangling.
You can arrange your earrings in any pattern or design that appeals to you. Create a visually pleasing display by alternating earring styles or arranging them by color gradient.
The benefit of using a corkboard with pins is that it allows you to see your earring collection at a glance. It’s easy to swap out or rearrange earrings depending on your mood or outfit, making it a versatile option.
Additionally, a corkboard with pins serves as a decorative element in your space. You can add touches of personalization by framing the corkboard, painting the frame, or adding decorative accents like fairy lights or ribbons.
Remember to regularly clean your earrings and wipe down the corkboard to keep everything looking neat and fresh.
Using a corkboard with pins as a storage and display solution not only keeps your earrings organized but also turns them into a visual focal point in your room. It’s a creative and functional option that showcases your earring collection while adding a touch of charm to your space.
Option 7: Travel Pill Box
If you’re someone who likes to take your earrings on the go or frequently travels, a travel pill box can be a perfect solution for storing and organizing your earrings. These portable organizers are compact and provide individual compartments to keep your earrings secure and protected.
When selecting a travel pill box for earring storage, look for one with multiple compartments labeled for different days of the week or with removable dividers. This will allow you to organize your earrings based on style, color, or any other preferred criteria.
Sort your earrings and place each pair in a separate compartment of the travel pill box. This will prevent your earrings from tangling or scratching each other while on the move.
Travel pill boxes are designed to be sturdy and durable, ensuring your earrings stay protected during transit. They are typically made of plastic or metal, which helps prevent damage and keeps your earrings securely in place.
One advantage of using a travel pill box is its portability. These organizers are designed to be compact and lightweight, making them easy to carry in your purse, backpack, or toiletry bag. You can have your earrings with you wherever you go, ensuring you always have the perfect accessory on hand.
Another benefit of a travel pill box is that it provides a visual overview of your earring options. You can easily see all the pairs available to you at a glance, which is particularly useful when you’re getting ready in a hurry or want to plan your outfits in advance.
Travel pill boxes are also easy to clean. Simply remove the earrings, wash the compartments with soap and water, and let it dry before using it again.
Whether you’re going on a weekend getaway or need a compact storage solution for everyday use, a travel pill box allows you to keep your earrings organized, protected, and readily accessible. It’s a convenient and efficient option for earring storage while on the move.
Read more: How To Store Dangle Earrings
Option 8: Wall-Mounted Jewelry Display
If you’re looking for a stylish and space-saving way to store and showcase your earrings, a wall-mounted jewelry display is an excellent option. Not only does it keep your earrings organized and easily accessible, but it also adds a decorative element to your space.
To create a wall-mounted jewelry display, start by selecting a small mirror or a decorative frame that suits your style and complements your existing decor. This will serve as the centerpiece of your display.
Next, attach small hooks, pegs, or earring holders to the frame or around the edges of the mirror. Make sure there is enough space between the hooks to accommodate your earrings. You can find various types of hooks designed specifically for earrings or use adhesive hooks if you prefer not to drill into the wall.
To hang your earrings, simply hook the earring posts, wires, or hoops onto the individual hooks. You can arrange them based on style, color, or any other preferred criteria. For a visually appealing display, consider creating patterns or alternating earring styles.
If you have delicate or dangling earrings, you can attach earring cards or foam sheets to the hooks. This will help protect them and prevent tangling.
Decide on the placement of your wall-mounted jewelry display. Choose a wall that is easily accessible and visible, such as a bedroom or bathroom wall, or even near your vanity area. Ensure the display is at eye level or at a height that makes it easy for you to admire and access your earrings.
One of the advantages of a wall-mounted jewelry display is that it not only keeps your earrings organized but also doubles as a decorative piece. You can enhance its visual appeal by adding decorative accents like fairy lights or miniature plants around the frame or mirrors.
The wall-mounted jewelry display offers a convenient way to see and select your earrings, making it easy to choose the perfect pair for any occasion. It also serves as a beautiful focal point in your room, showcasing your earring collection and adding a touch of charm to your space.
Remember to regularly clean your earrings and wipe down the display to keep everything looking neat and fresh.
With a wall-mounted jewelry display, you can cleverly organize and display your earrings while adding a decorative flair to your space. It’s a functional and visually pleasing option for earring storage that allows you to show off your collection in style.
Option 9: Hanging Shoe Organizer
If you have a large earring collection and limited space, a hanging shoe organizer can be a practical and efficient option for storing and organizing your earrings. These organizers provide multiple pockets that can accommodate different types of earrings, keeping them easily accessible and neatly organized.
To use a hanging shoe organizer for earring storage, choose a shoe organizer with clear pockets. This will allow you to see all your earrings at a glance, making it easier to choose the perfect pair for any occasion.
Start by sorting your earrings by style, color, or any other preferred criteria. This will help you group them together and keep your collection organized.
Place each pair of earrings in a separate pocket of the shoe organizer. If you have larger earrings or hoops, you can place them in adjacent pockets without worrying about them getting tangled.
You can arrange your earrings based on your preference – by color, style, or occasion. This will make it easy for you to find the pair you want to wear without searching through a drawer or box.
One advantage of using a hanging shoe organizer is its space-saving design. You can hang it on the back of a closet door, on a wall hook, or inside a wardrobe. It keeps your earrings tucked away and out of sight, while still being easily accessible.
The clear pockets of the shoe organizer also protect your earrings from dust and potential damage. Your earrings will remain in good condition and ready to wear whenever you need them.
If you don’t have a large earring collection, you can repurpose smaller shoe organizers or even jewelry-specific hanging organizers with smaller pockets. These options still provide ample storage and organization for your earrings.
Remember to periodically clean your earrings and wipe down the hanging shoe organizer to keep everything looking tidy and fresh.
A hanging shoe organizer is a practical and efficient option for storing and organizing your earrings, particularly if you have limited space. It keeps your earrings neatly organized and easily accessible while maximizing your storage capacity.
Option 10: Earring Stand
If you’re looking for a stylish and visually appealing way to store and display your earrings, an earring stand is an excellent option. This vertical storage solution allows you to showcase your earrings while keeping them organized and easily accessible.
To create an earring stand, you can either purchase a pre-made stand or make one yourself using a foam cone or a wide-based stand.
If you prefer a pre-made stand, you can find various designs and materials to choose from, such as metal stands, acrylic stands, or wooden stands. Look for one that suits your style and provides enough space to accommodate your earring collection.
If you opt for a DIY approach, start by obtaining a foam cone or a wide-based stand. You can find these at craft stores or online. The foam cone is ideal for stud earrings, while the wide-based stand is more suitable for dangle earrings or hoops.
To use the foam cone, simply insert the earring posts or wires directly into the foam, securing them in place. You can arrange your earrings in rows or organize them by style or color, depending on your preference.
If you’re using a wide-based stand, you can attach earring cards to the stand using sticky putty or small clips. Hang your earrings on the earring cards and position them on the stand as desired.
An earring stand not only keeps your earrings organized but also serves as a decorative piece for your room or vanity. You can choose stands with intricate designs, bold colors, or even ones that have additional features like mirrors or built-in trays for other jewelry pieces.
The advantage of an earring stand is that it makes it easy to see and select your earrings. You can quickly browse your collection and effortlessly choose the perfect pair to complement your outfit.
Additionally, an earring stand protects your earrings from tangling or scratching. It keeps them in an upright position, reducing the chances of damage or distortion.
Remember to periodically clean your earrings and wipe down the earring stand to keep everything looking tidy and fresh.
An earring stand is a stylish and practical option for storing and displaying your earrings. It adds a decorative element to your space while keeping your earrings organized and easily accessible for everyday wear.
Conclusion
Storing and organizing your earrings is essential to keep them safe, accessible, and in good condition. With the wide range of DIY options available, you can find the perfect storage solution to suit your style and needs.
In this article, we have explored ten creative and practical options for storing earrings DIY. From jewelry organizers to ice cube trays, picture frames with wire mesh to pill organizers, and corkboards to travel pill boxes, each option offers its own unique advantages and features.
A jewelry organizer provides a classic and organized way to keep your earrings in one place. Ice cube trays offer a budget-friendly option that prevents tangling. Picture frames with wire mesh transform your earrings into an attractive wall display. Egg cartons offer a simple, recycled solution. Pill organizers are portable and perfect for on-the-go. Corkboards with pins add a decorative element while showing off your earrings.
Travel pill boxes provide compact and protective storage, and wall-mounted jewelry displays become a stunning focal point. Hanging shoe organizers maximize space while keeping your earrings visible, and earring stands offer a stylish and vertical display solution.
It’s important to consider factors such as organization, protection, accessibility, and aesthetics when choosing the best storage method for your earrings. Whether you have a small collection or a large assortment, there’s a DIY storage solution that suits your needs.
By implementing these DIY options, you’ll not only keep your earrings organized but also extend their lifespan and prevent damage. Remember to regularly clean and maintain your earrings to keep them looking their best.
So, say goodbye to tangled and misplaced earrings and hello to a well-organized and easily accessible collection. Choose the storage option that resonates with you and enjoy the convenience and beauty of having your earrings neatly stored and ready to wear!
Frequently Asked Questions about How To Store Earrings DIY
Was this page helpful?
At Storables.com, we guarantee accurate and reliable information. Our content, validated by Expert Board Contributors, is crafted following stringent Editorial Policies. We're committed to providing you with well-researched, expert-backed insights for all your informational needs.

0 thoughts on “How To Store Earrings DIY”