Articles
How To Build A Window Seat
Modified: February 24, 2024
Discover step-by-step articles on how to build a cozy and functional window seat for your home. Turn your space into a relaxing retreat with our expert guides.
(Many of the links in this article redirect to a specific reviewed product. Your purchase of these products through affiliate links helps to generate commission for Storables.com, at no extra cost. Learn more)
Introduction
A window seat can be a charming and functional addition to any home. It not only creates a cozy nook where you can relax or enjoy the view, but it also adds extra seating and storage space. Whether you want a quiet spot to read a book, a place to gaze out at the picturesque scenery, or simply a stylish element to enhance your interior design, building a window seat is a rewarding DIY project.
Building a window seat may seem like a daunting task, but with the right tools, materials, and a bit of knowledge, it can be a straightforward and enjoyable project. In this article, we will guide you through the step-by-step process of building a window seat from scratch.
Before diving into the construction process, it’s important to have a clear vision of what you want to achieve with your window seat. Consider the style, size, and location of the window seat to ensure it complements your existing decor and meets your needs.
Next, gather all the necessary materials and tools. This will typically include:
- Wood boards for the base, front panel, and sides
- Screws or nails
- Support brackets
- Seat cushion foam
- Fabric or upholstery material
- Paint or stain, if desired
Additionally, you’ll need a measuring tape, saw, drill, sander, and other basic carpentry tools. If you’re not confident in your woodworking skills, consider enlisting the help of a friend or hiring a professional carpenter.
With everything in hand, let’s proceed to the first step: measuring and planning. It’s essential to take accurate measurements of the available space to ensure your window seat fits perfectly.
In the next section, we’ll dive into the detailed instructions for each step, guiding you through the construction process of your window seat.
Key Takeaways:
- Building a window seat is a rewarding DIY project that adds both charm and functionality to your home. From gathering materials to adding finishing touches, this comprehensive guide provides the knowledge and inspiration needed for a successful construction journey.
- Infuse your creativity and personal style into each step of building a window seat, creating a unique and inviting space tailored to your preferences. Whether modern, rustic, or classic, the possibilities are endless for a cozy and enjoyable seating area.
Read more: Which Seat Is The Window Seat In Flight
Step 1: Gather Materials and Tools
Before you start building your window seat, you’ll need to gather all the necessary materials and tools. Here’s a breakdown of what you’ll need:
Materials:
- Wood boards: Choose a sturdy and durable wood material, such as plywood or solid hardwood, for the base, front panel, and sides of your window seat. The quantity will depend on the dimensions of your window seat.
- Screws or nails: Opt for screws or nails that are appropriate for the type and thickness of the wood you’re using. Make sure you have enough of them to secure the components together.
- Support brackets: These are essential for providing additional stability and support to your window seat. Select brackets that are strong and durable enough to withstand the weight and regular use of the seat.
- Seat cushion foam: For a comfortable seating experience, choose high-density foam that is thick enough to provide adequate cushioning.
- Fabric or upholstery material: Select a fabric that complements your interior design and is suitable for upholstery. Consider durability, ease of cleaning, and color/style options.
- Paint or stain (optional): If you prefer a finished look, choose a paint or stain color that matches your aesthetic preferences. Make sure to use a product suitable for wood surfaces.
Tools:
- Measuring tape: An accurate measurement is crucial for a precise fit. Use a measuring tape to measure the dimensions of your window seat area.
- Saw: A circular saw or a miter saw will be required to cut the wood boards to the desired dimensions.
- Drill: You’ll need a drill to create holes for screws or nails and to attach the support brackets.
- Sander: A sander will come in handy to smooth out rough edges and surfaces, ensuring a polished finish.
- Tape measure: This tool is essential for precise measurements when marking and cutting the wood boards.
- Pencil or marker: Use a pencil or marker to mark the dimensions and cut lines on the wood boards.
- Safety equipment: Don’t forget to wear safety goggles, gloves, and a dust mask to protect yourself during the construction process.
Gather all the necessary materials and ensure you have the proper tools on hand before you start building your window seat. This will make the construction process smoother and more efficient.
In the next step, we’ll guide you through the process of measuring and planning your window seat to ensure it fits perfectly in your space.
Step 2: Measure and Plan
Once you have all your materials and tools ready, it’s time to measure and plan your window seat. This step is crucial to ensure a proper fit and a visually appealing result.
Start by measuring the dimensions of your available space. Use a measuring tape to measure the length, width, and height of the area where you want to build your window seat. Take note of any obstacles or obstructions that may affect the design or placement of the seat.
With the measurements in hand, you can now create a detailed plan for your window seat. Consider the following factors:
- Seat height: Determine how high you want your window seat to be. Consider the comfort level for sitting and the overall aesthetic of your space.
- Seat depth: Decide on the depth of the seat to ensure it provides enough space for comfortable seating.
- Front panel: Measure the length and height of the front panel, which will be the main visible element of your window seat.
- Sides: Measure the length, width, and height of the side panels. These will provide structure and support to your window seat.
- Clearance: Ensure that your window seat leaves enough space for easy access to windows, outlets, or any other nearby features.
Once you have your measurements and a clear idea of the dimensions, you can create a detailed plan or sketch. Use a pencil or marker to draw out the design, including the dimensions and any additional features you want to incorporate, such as built-in shelves or storage compartments.
Remember to consider any existing architectural features, such as baseboards or window trims, and incorporate them into your plan. This will ensure a seamless integration of your window seat with the surrounding elements.
Take your time during the planning phase to double-check your measurements and make any necessary adjustments. It’s always better to catch any design flaws or measurement errors before you start the construction process.
With your measurements and plan finalized, you’re now ready to move on to the next step: building the base of your window seat.
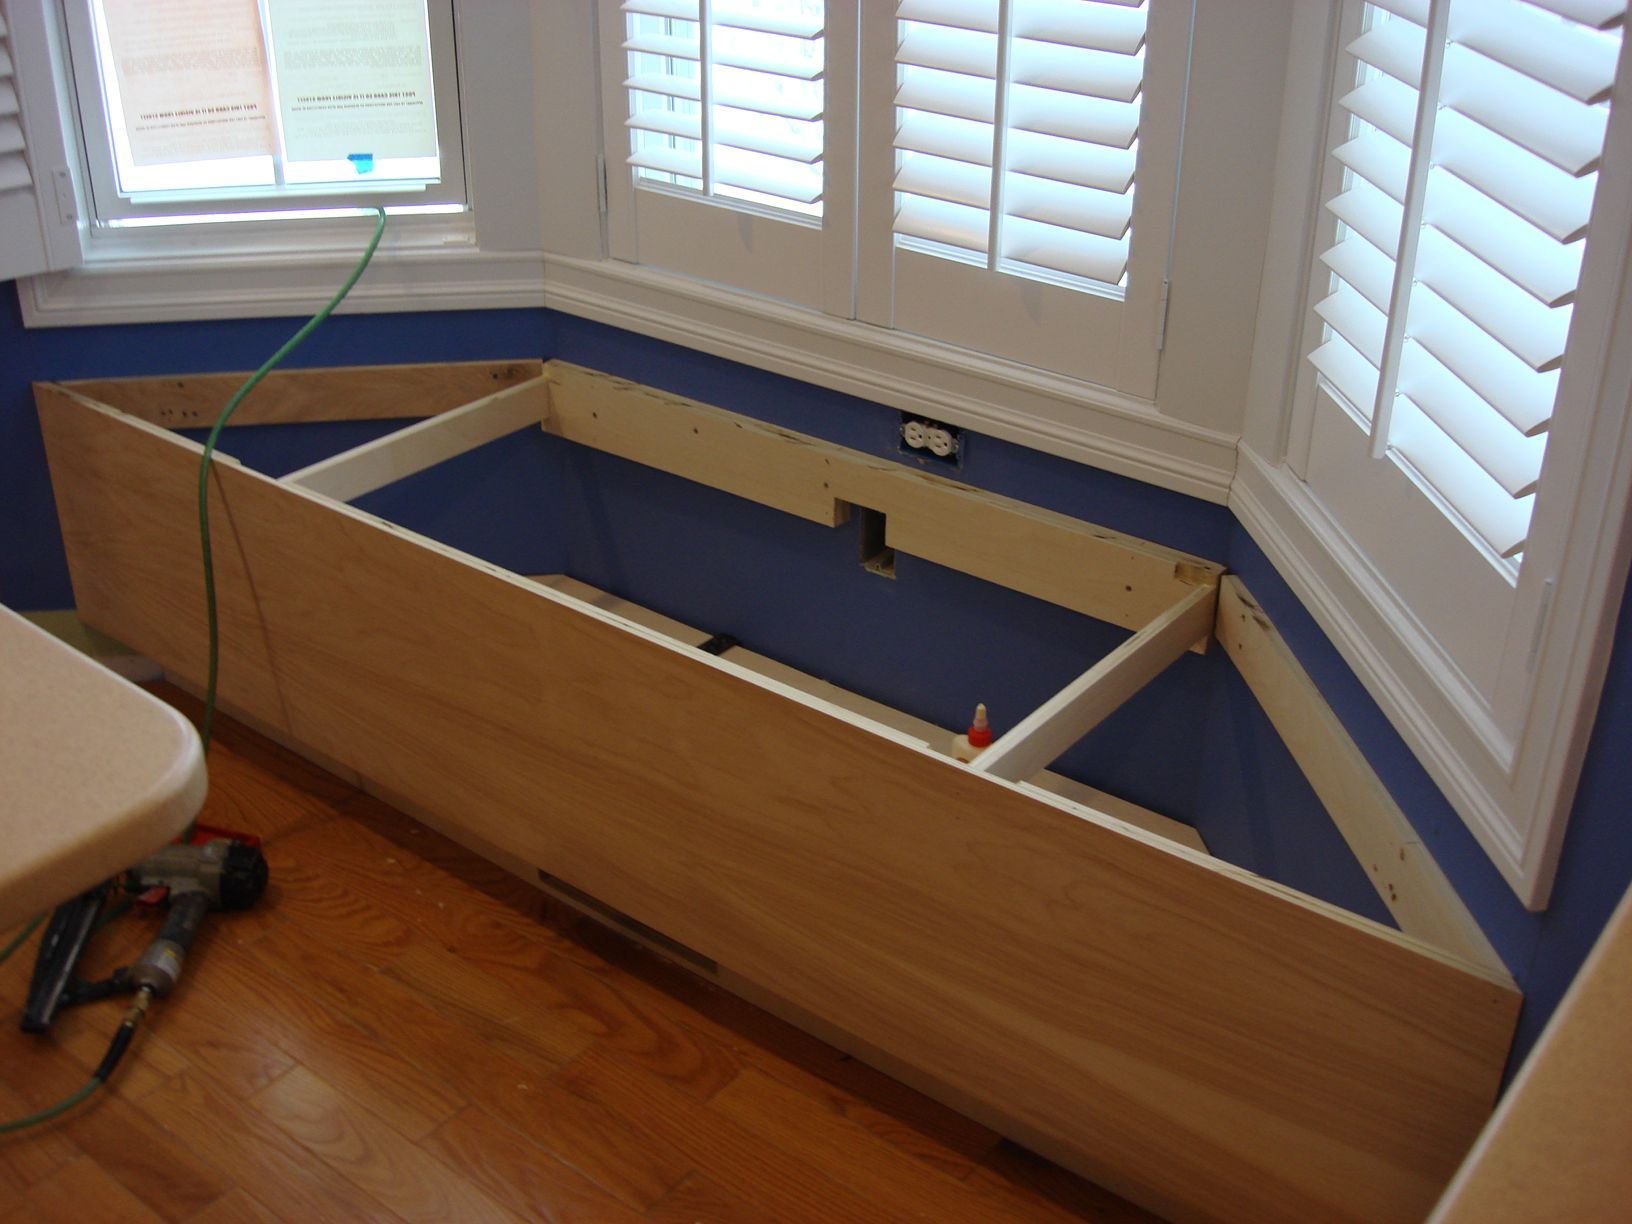
Step 3: Build the Base
With your measurements and plan in hand, it’s time to start building the base of your window seat. The base will provide the foundation and support for your seat, so it’s important to construct it with care and precision.
Here’s a step-by-step guide on how to build the base:
- Measure and cut the plywood or wood boards according to the dimensions of your plan. The length and width of the base should match the desired size of your window seat.
- Place the cut plywood or wood boards on the floor, ensuring they are aligned properly.
- Use a drill and screws or nails to attach the boards together. Place the screws or nails about every 6-8 inches along the seams to create a sturdy and secure base.
- Check that the base is level and square by using a carpenter’s square or a level tool.
- If needed, trim off any excess material or sand any rough edges for a smooth finish.
Once you’ve completed these steps, you’ll have a solid and even base for your window seat. It’s essential to double-check the measurements, alignment, and stability of the base before proceeding to the next steps.
Building the base sets the foundation for the rest of the window seat construction. It’s important to take your time and ensure that this step is done accurately to guarantee the stability and durability of the final product.
Now that the base is built, you can move on to the next step: installing support brackets to enhance the strength and stability of your window seat.
Step 4: Install Support Brackets
Support brackets are crucial for providing additional stability and strength to your window seat. They help distribute the weight evenly, ensuring that your seat can safely support the weight of people sitting on it. Installing support brackets is an important step in the construction process.
Here’s a step-by-step guide on how to install support brackets:
- With your base in place, measure and mark the desired locations for the support brackets. The number of brackets needed will depend on the length and width of your window seat, but a general rule of thumb is to place one bracket for every 2-3 feet of seat length to achieve optimal support.
- Use a drill to create pilot holes at the marked locations. The pilot holes should be slightly smaller than the size of your screws to ensure a snug fit.
- Attach the support brackets to the base using screws. Make sure the brackets are aligned with your markings and securely attached.
- Check the stability of the brackets by applying pressure or gently shaking the base. Ensure that they are firmly attached and provide the necessary support.
When choosing support brackets, opt for ones that are strong and durable, capable of withstanding the weight and regular use of the window seat. Brackets can come in various sizes, styles, and materials, such as metal or heavy-duty plastic. Choose the ones that best suit your needs and aesthetic preferences.
Installing support brackets will significantly enhance the stability and longevity of your window seat. It’s an essential step to ensure that your seat can bear the weight and provide a safe and secure seating experience.
With the support brackets securely in place, you’re ready to move on to the next step: building and attaching the front panel of your window seat.
Read more: How To Decorate A Window Seat
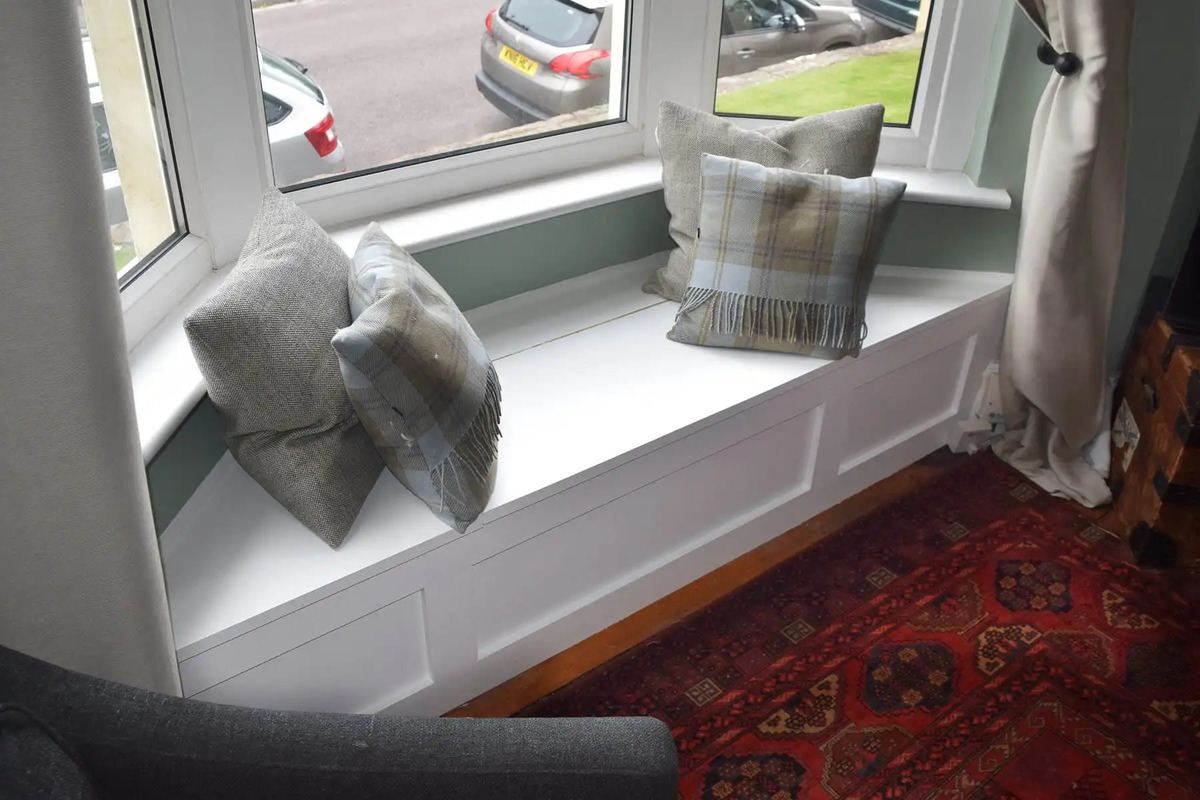
Step 5: Build and Attach the Front Panel
The front panel of your window seat serves as the main visible element and contributes to the overall aesthetic appeal of the seat. Building and attaching the front panel is a crucial step in creating a polished and finished look.
Here’s a step-by-step guide on how to build and attach the front panel:
- Measure and cut the wood boards for the front panel according to the dimensions of your plan.
- Place the cut boards on the front edge of the base, aligning them properly.
- Use a drill and screws or nails to attach the front panel boards to the base. Drive the screws or nails through the front panel boards and into the base, ensuring a secure connection.
- If desired, add decorative trim or molding to enhance the visual appeal of the front panel.
- Carefully check the alignment and stability of the front panel, adjusting as necessary. Ensure that it is level and flush with the base.
Building and attaching the front panel not only provides a finished look to your window seat but also helps to conceal and secure the base structure. Make sure to take accurate measurements and double-check the alignment before attaching the front panel.
Consider adding decorative elements, such as trim or molding, to give your window seat a customized and refined appearance. These extra touches can elevate the overall design and make your window seat a standout feature in your home.
With the front panel securely attached, you’re moving closer to completing your window seat. In the next step, we’ll go through the process of building and attaching the sides.
When building a window seat, make sure to measure the space accurately and choose a comfortable cushion that fits the dimensions. This will ensure a snug and cozy seating area.
Step 6: Build and Attach the Sides
The sides of your window seat provide structure and support, as well as contribute to the overall design and functionality of the seat. Building and attaching the sides is an important step in completing your window seat construction.
Follow these steps to build and attach the sides:
- Measure and cut the wood boards for the sides according to the dimensions of your plan. The length, width, and height of the side panels should match your desired specifications.
- Place the cut side panels against the base and align them properly. They should be positioned perpendicular to the base, forming the sides of the window seat.
- Use a drill and screws or nails to attach the side panels to both the base and the front panel. Drive the screws or nails through the side panels and into the base and front panel, ensuring a secure and stable connection.
- If desired, add additional support by attaching brackets or braces at the corners or along the sides of the window seat. This will provide extra stability and reinforce the structure.
- Check the alignment and stability of the side panels, adjusting as necessary. Ensure that they are level and securely attached to the base and front panel.
Building and attaching the sides of your window seat is an essential step to create a solid and structurally sound piece of furniture. It’s important to take accurate measurements and ensure a secure connection to optimize the strength and durability of the seat.
Consider the design and style of your window seat when selecting the wood boards for the sides. Choose a wood species and finish that complements your interior decor and personal preferences.
With the sides securely in place, you’re almost finished with the construction process. In the next step, we’ll guide you through the installation of the seat cushion for added comfort.
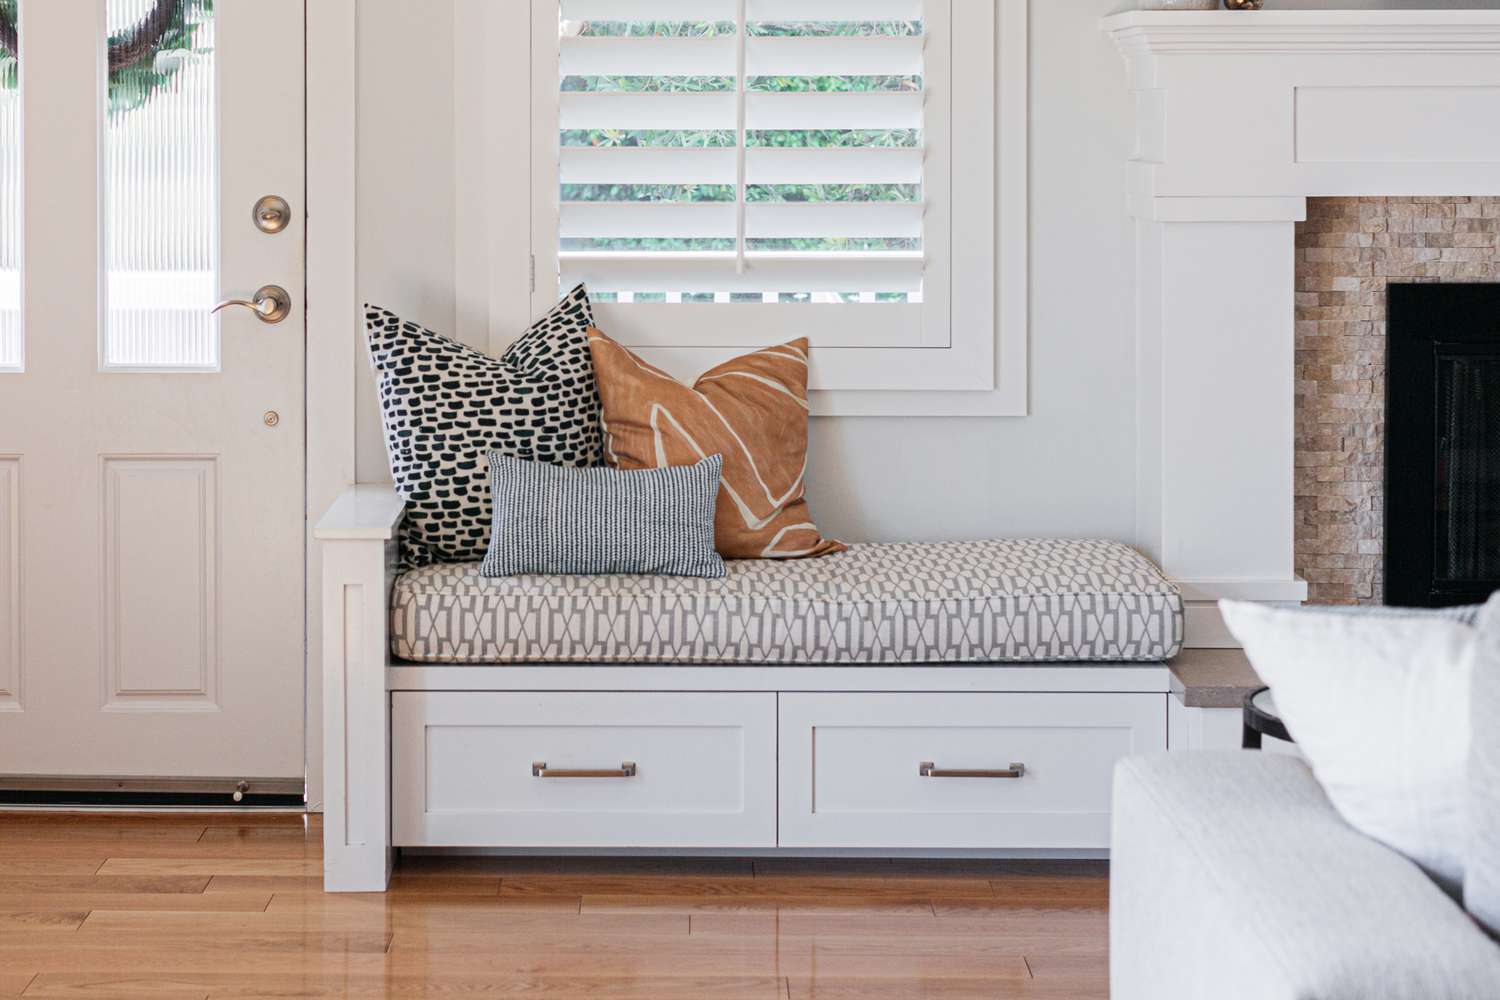
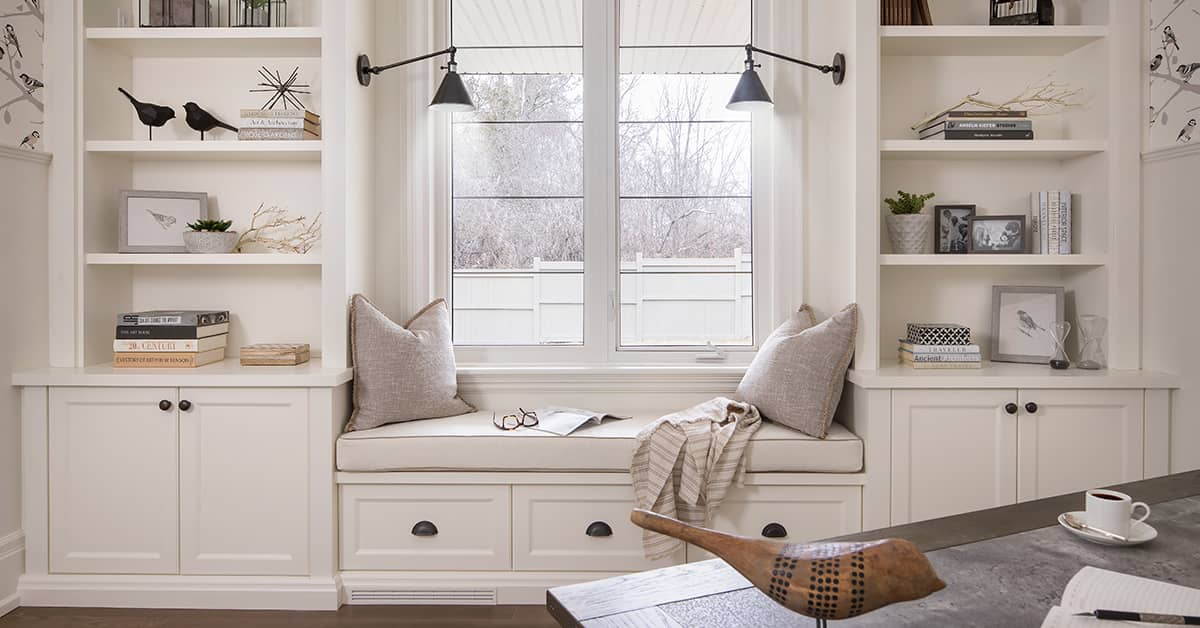
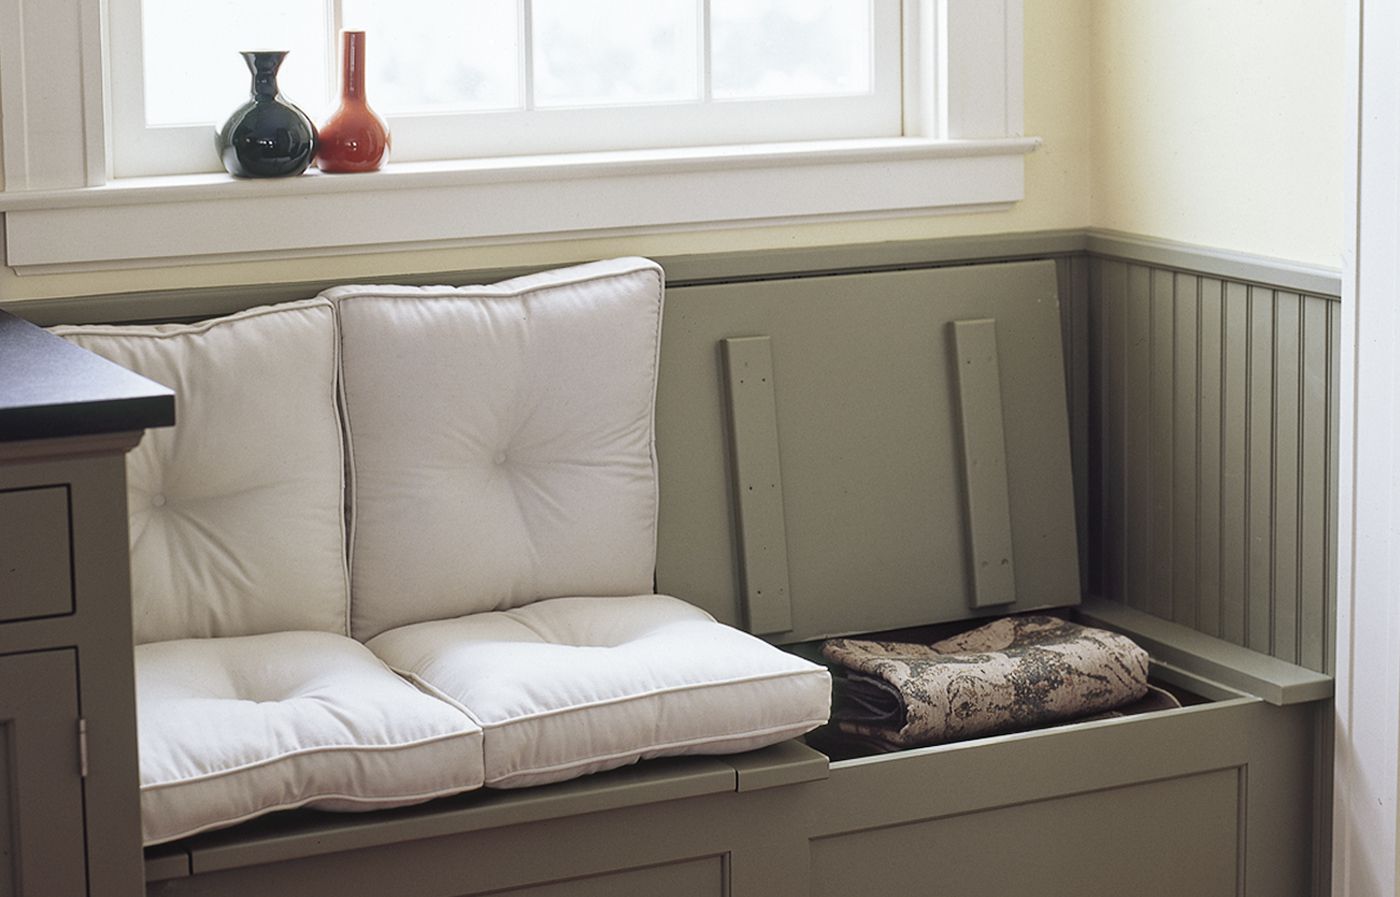
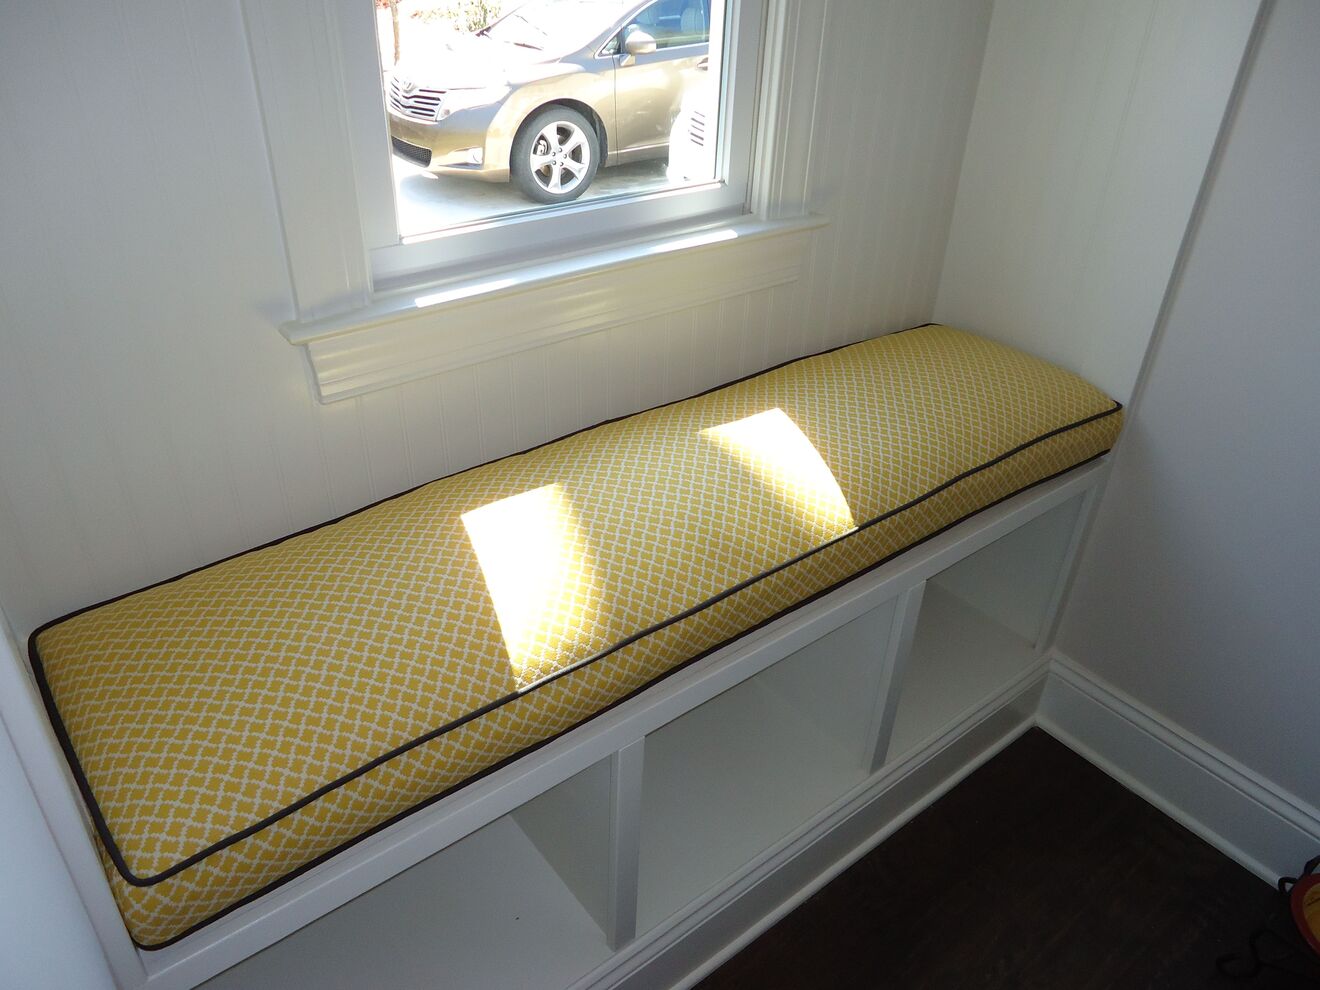
Step 7: Install the Seat Cushion
Adding a well-cushioned seat is the final touch that transforms your window seat from a structure into a comfortable and inviting space. Installing a seat cushion creates a cozy spot for relaxation and enjoyment.
Follow these steps to install the seat cushion:
- Measure the dimensions of the seating area on top of your window seat. Take into account any overhang or lip on the front panel and sides.
- Using those measurements, cut a piece of high-density foam to fit the seat area. Ensure the foam is the appropriate thickness for comfortable seating.
- Next, cut a piece of fabric or upholstery material slightly larger than the foam, allowing for enough material to wrap around the edges.
- Place the foam padding on top of the seat area, ensuring it is centered and aligned properly.
- Take the fabric or upholstery material and lay it over the foam and seat area, making sure it covers the entire seating surface.
- Starting on one side, pull the fabric tight and use a staple gun to attach it to the underside of the window seat. Continue this process on the remaining sides, pulling the fabric taut and securing it in place with staples.
- Trim off any excess fabric, leaving a clean and neat edge.
Installing the seat cushion not only adds comfort to your window seat but also allows you to personalize the look by choosing a fabric that complements your decor. Consider factors such as durability, color, and texture when selecting the fabric or upholstery material.
Ensure the seat cushion is securely attached, and the fabric is pulled tightly for a smooth and uniform appearance. Wrinkles or loose fabric can be uncomfortable and detract from the overall aesthetic of the window seat.
With the seat cushion installed, your window seat is now ready to be enjoyed. However, before you do that, there are a few more steps to complete for a polished finish. In the next step, we’ll cover painting or staining your window seat if desired.
Step 8: Paint or Stain
Adding a coat of paint or stain can enhance the appearance of your window seat, giving it a finished and polished look. This step allows you to customize the color and style to match your interior design and personal preferences.
Follow these steps to paint or stain your window seat:
- Prepare the surface of the window seat by sanding it down lightly. This will help the paint or stain adhere better.
- If you choose to paint, apply a coat of primer to the window seat. This will create a smooth and even surface for the paint.
- Once the primer is dry, apply the paint or stain of your choice. Use a brush or roller to ensure an even application. Follow the product instructions for drying times and additional coats, if necessary.
- If desired, add a protective clear coat to the painted or stained surface. This will help protect the finish from wear and tear.
- Allow the paint or stain to fully dry according to the manufacturer’s recommendations before using the window seat.
When choosing a paint color or stain, consider the overall aesthetic of your space and the desired style. Opt for a color that complements your existing decor or adds a pop of contrast, depending on your preference.
Ensure proper ventilation when painting or staining, and follow all safety precautions outlined on the product labels.
Painting or staining your window seat is an opportunity to add a personal touch and elevate the overall look of the piece. Take your time during this step to achieve a smooth and professional finish.
Now that your window seat is beautifully painted or stained, we’re ready for the final step: adding those finishing touches that complete the project.
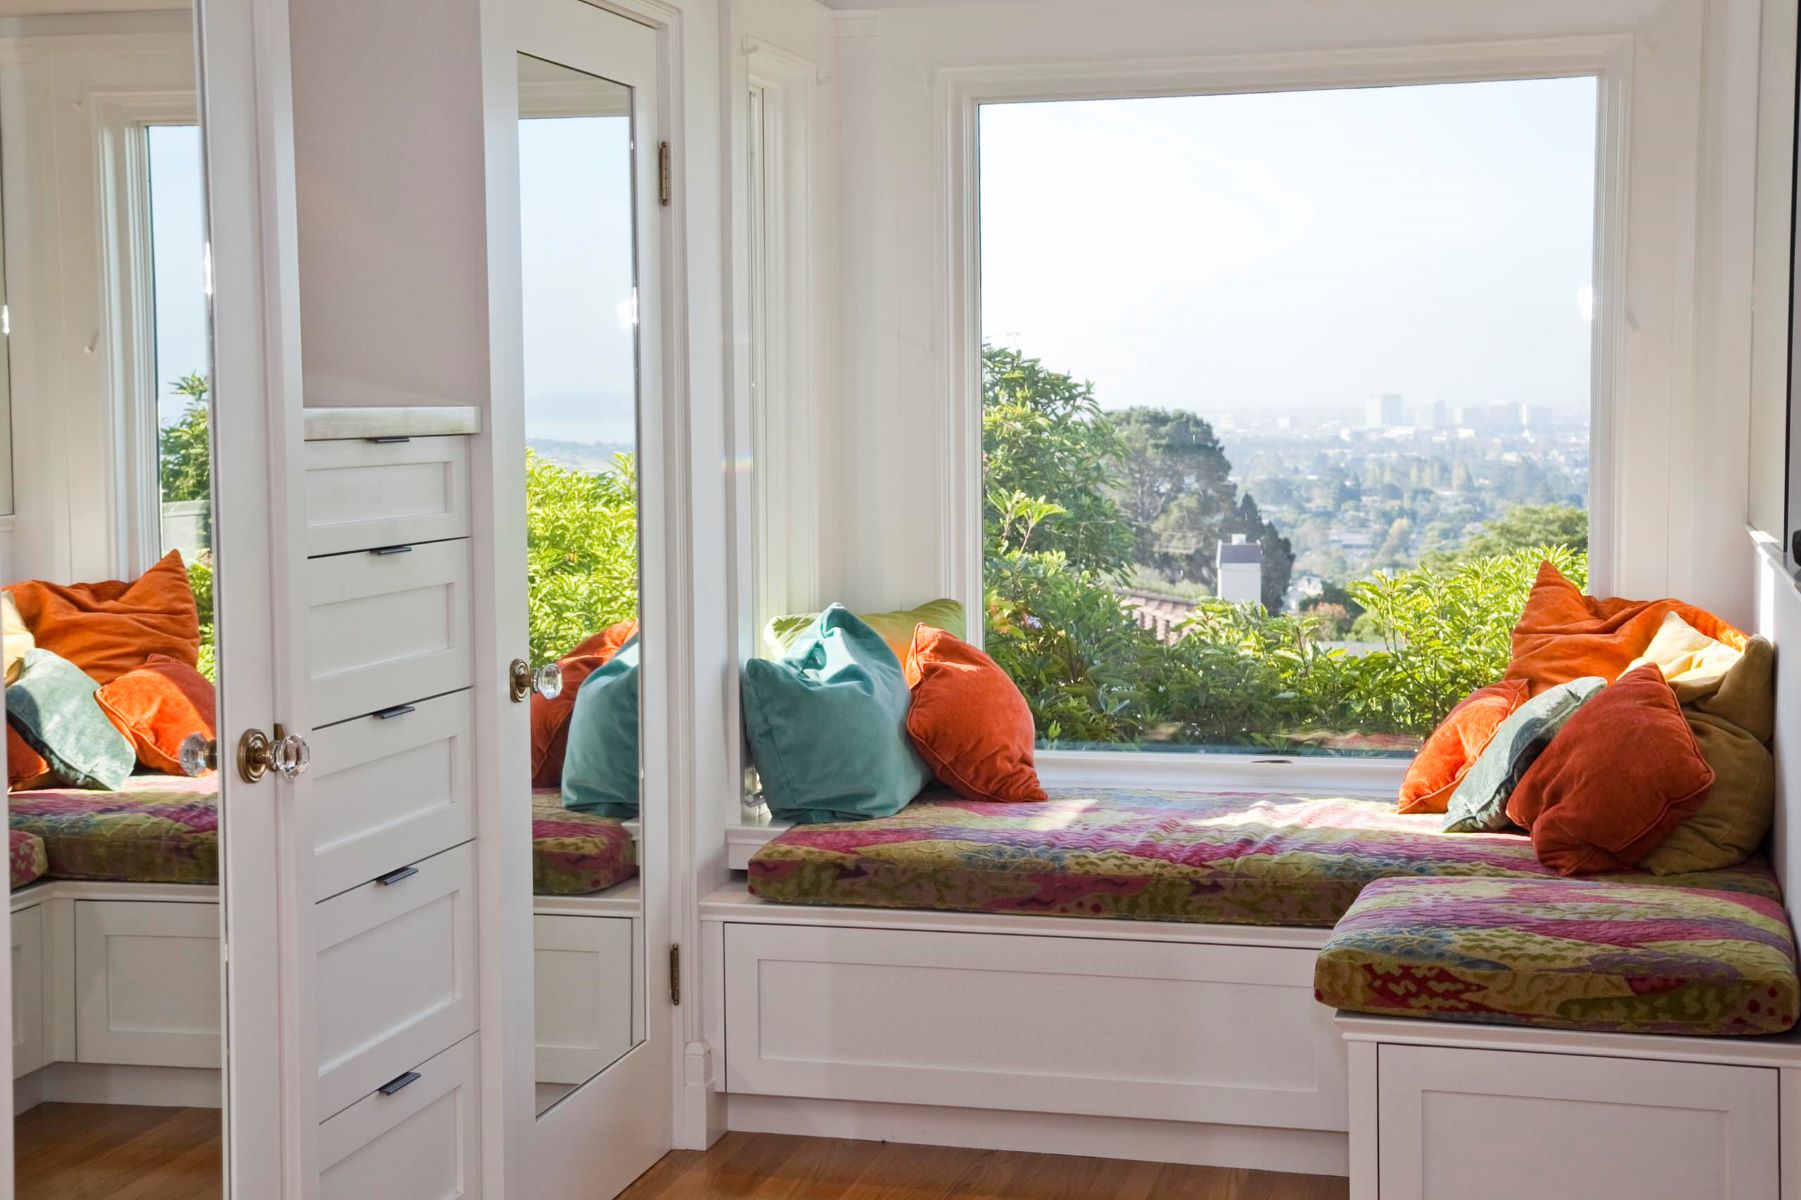
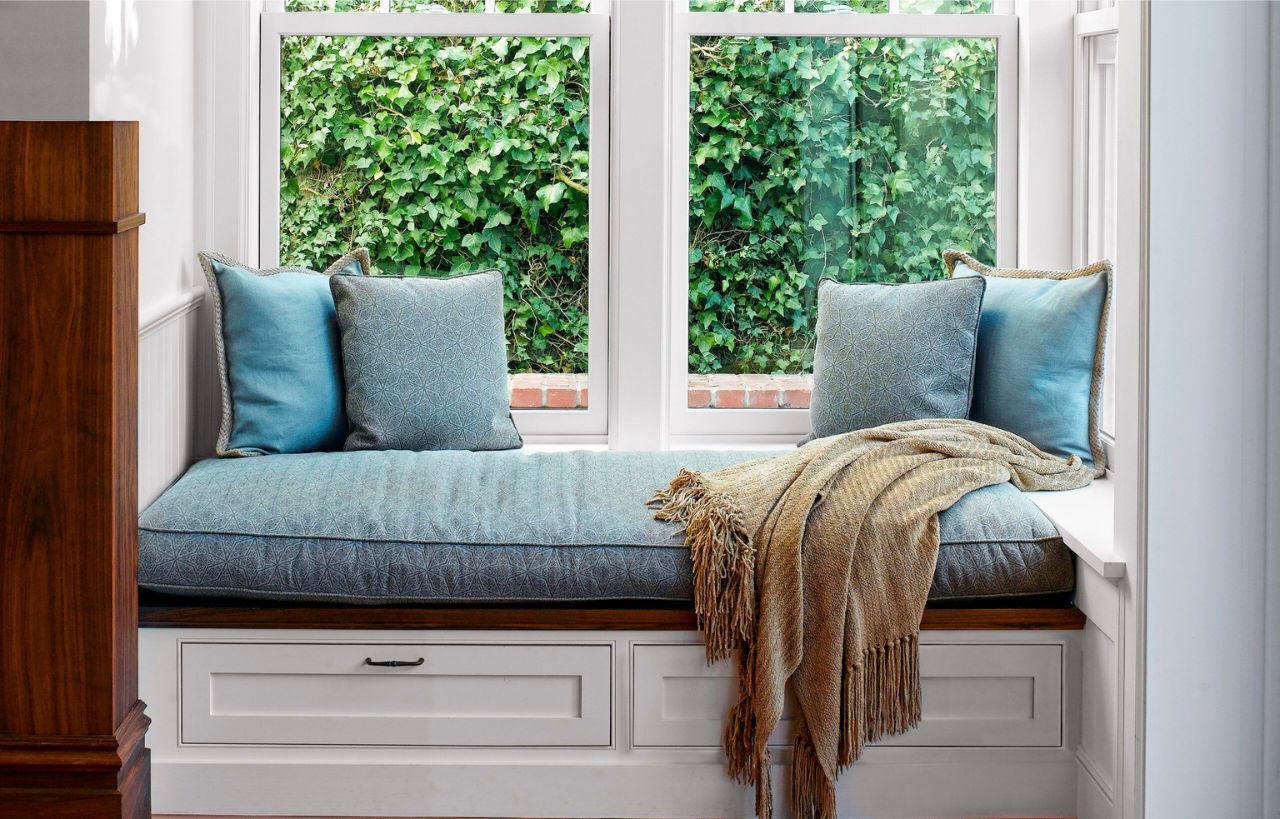
Step 9: Add Finishing Touches
The finishing touches are the final details that make your window seat feel complete and tailored to your style and preferences. These small additions can greatly enhance the overall look and functionality of your DIY project.
Here are some finishing touches you can consider adding:
- Pillows and cushions: Add decorative pillows or cushions to enhance comfort and create a cozy atmosphere. Choose fabrics and patterns that complement your interior design.
- Throw blankets: Drape a soft throw blanket over the seat to add warmth and coziness to your window seat. Select a blanket that adds a pop of color or texture.
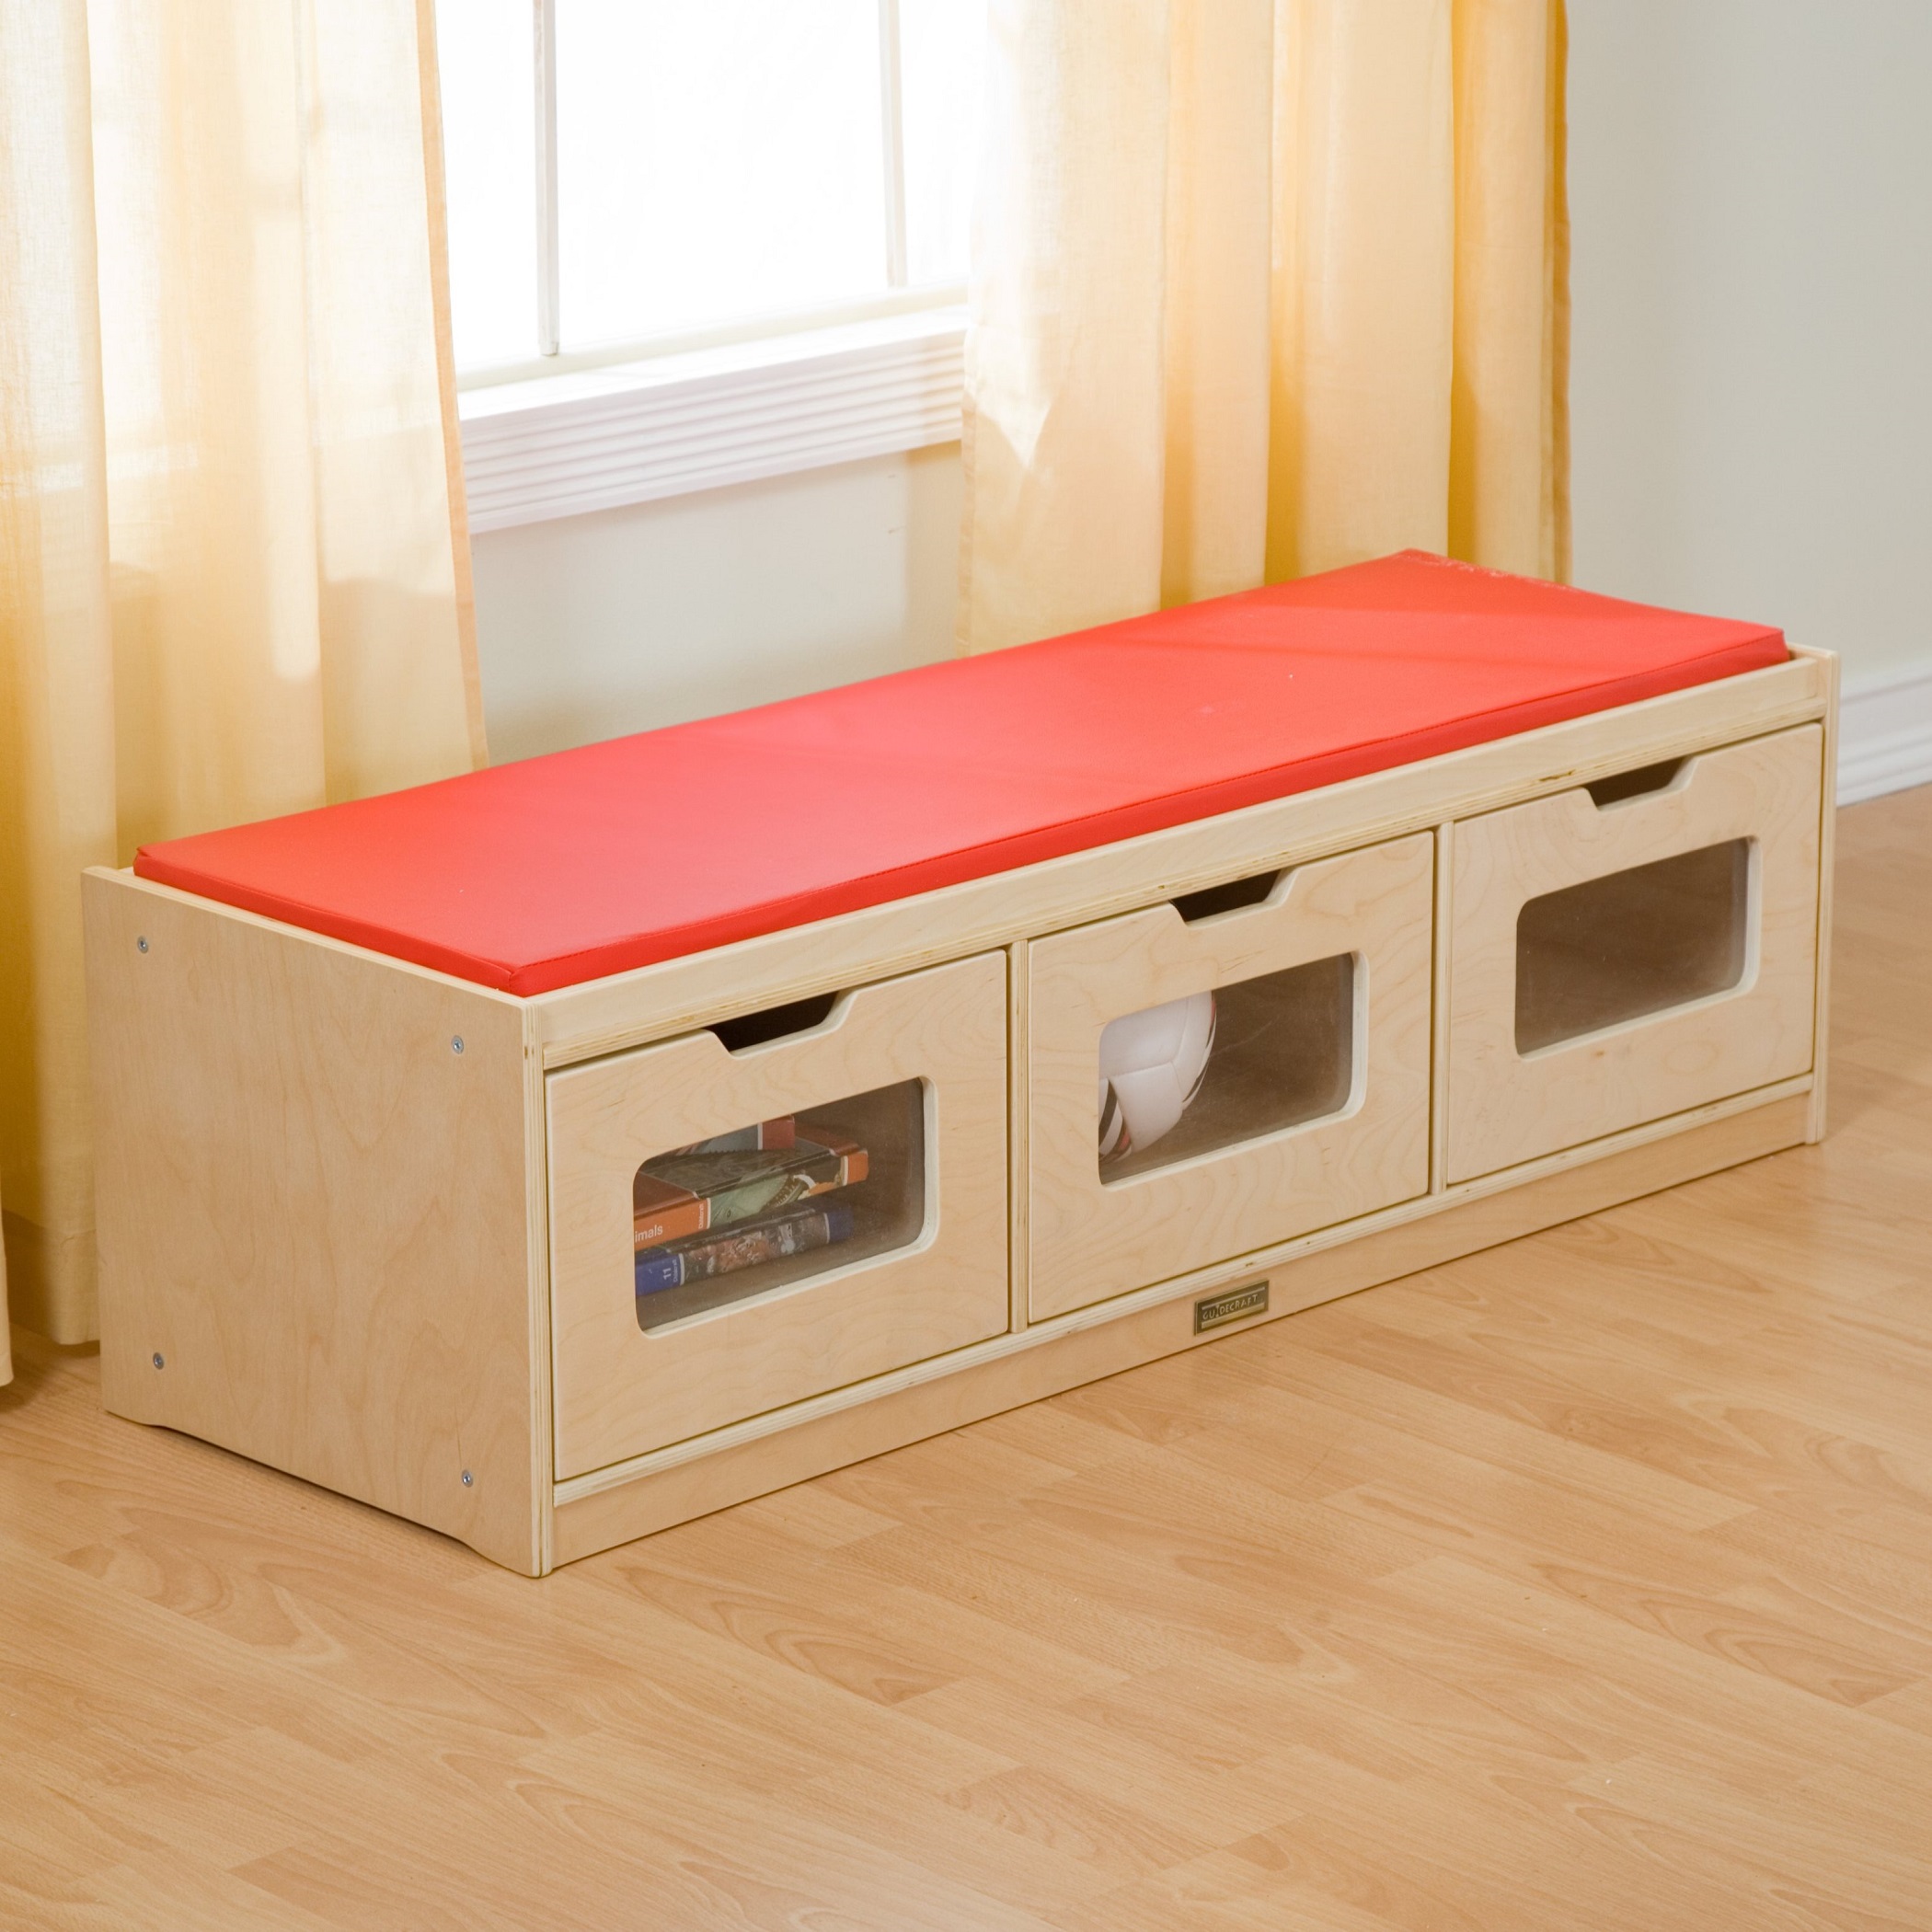
- Storage baskets or bins: Incorporate storage solutions by adding woven baskets or fabric bins underneath the window seat. This provides a convenient place to store blankets, books, or other items.
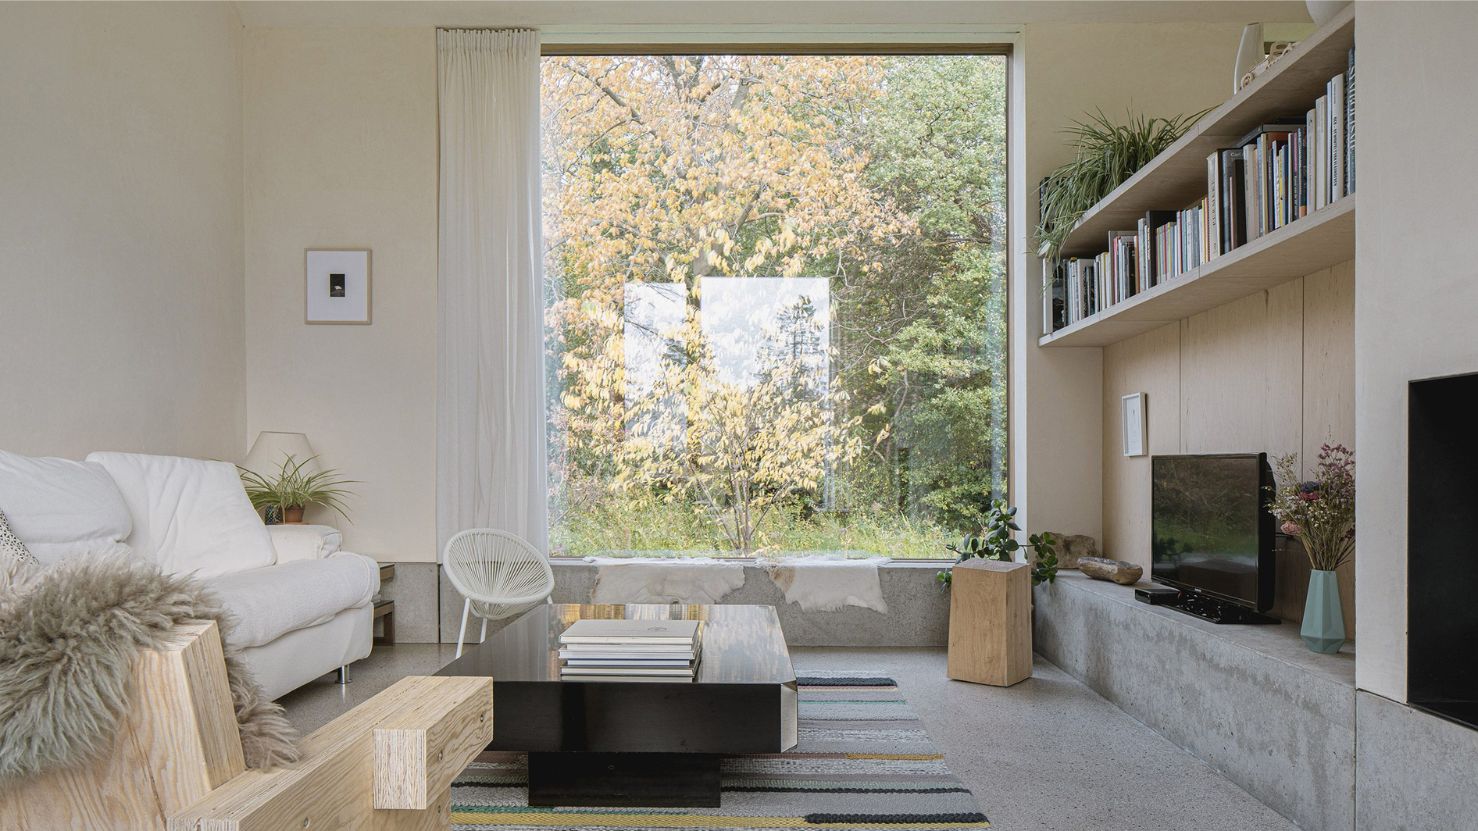
- Window treatments: Consider installing curtains or blinds that coordinate with your window seat. This will tie the whole area together and create a cohesive look.
- Decorative elements: Personalize your window seat with decorative elements such as artwork, potted plants, or small sculptures. These accents can add personality and reflect your style.
When adding finishing touches, consider the overall function and purpose of your window seat. Tailor these details to suit your specific needs, whether you’re creating a cozy reading nook or a seating area for relaxation and socializing.
Don’t be afraid to get creative and inject your personal style into the finishing touches. It’s these small details that truly make your window seat feel like a unique and inviting space in your home.
With the finishing touches in place, take a step back and admire your completed window seat project. You’ve successfully built a beautiful and functional seating area that’s sure to be enjoyed for years to come.
Congratulations on completing your window seat construction project! Enjoy the fruits of your labor and relish in the comfort and style it brings to your home.
Did you find this guide helpful? We hope it has provided you with the knowledge and inspiration to successfully build your own window seat. Happy seating!
Conclusion
Building a window seat can be a fulfilling and rewarding DIY project that adds both aesthetic appeal and functional seating to your home. By following the step-by-step guide outlined in this article, you can create a cozy and inviting space to relax, read, or simply enjoy the view.
Throughout the construction process, we’ve covered the essential steps, from gathering materials and tools to planning, building the base, installing support brackets, attaching the front panel and sides, adding the seat cushion, and applying paint or stain. We’ve also discussed the importance of measuring accurately and adding finishing touches to complete your window seat project.
Remember to infuse your own creativity and personal style into each step, making the window seat a reflection of your unique tastes and preferences. Whether you choose a modern, rustic, or classic design, the possibilities are endless.
Building a window seat may require some carpentry skills and tools, so don’t hesitate to seek help if needed. Working with a friend or consulting a professional carpenter can ensure the construction process goes smoothly and safely.
Once your window seat is complete, make it even more inviting with decorative pillows, cozy blankets, and storage solutions. Lastly, sit back, relax, and enjoy the cozy nook you’ve created for yourself.
We hope this comprehensive guide has provided you with the knowledge and inspiration to embark on your window seat building journey. May it bring joy and comfort to your home for years to come!
Frequently Asked Questions about How To Build A Window Seat
Was this page helpful?
At Storables.com, we guarantee accurate and reliable information. Our content, validated by Expert Board Contributors, is crafted following stringent Editorial Policies. We're committed to providing you with well-researched, expert-backed insights for all your informational needs.


0 thoughts on “How To Build A Window Seat”