Home>Renovation & DIY>DIY Projects & Ideas>How To Cut Shirts For DIY Projects
DIY Projects & Ideas
How To Cut Shirts For DIY Projects
Modified: January 4, 2024
Learn how to cut shirts for DIY projects and get creative DIY project ideas. Transform your old shirts into something new and stylish with our step-by-step guide.
(Many of the links in this article redirect to a specific reviewed product. Your purchase of these products through affiliate links helps to generate commission for Storables.com, at no extra cost. Learn more)
Introduction
Welcome to the exciting world of DIY shirt cutting! Whether you're a seasoned crafter or just dipping your toes into the DIY universe, transforming plain shirts into trendy, custom-designed pieces can be incredibly satisfying. By learning the art of shirt cutting, you can breathe new life into your wardrobe, express your creativity, and unleash your inner fashion designer—all while saving money and reducing textile waste.
In this comprehensive guide, we'll explore various shirt cutting techniques and innovative DIY projects that will inspire you to revamp your old shirts into stylish, one-of-a-kind creations. From simple snips and strategic slashes to intricate designs and embellishments, the possibilities are endless when it comes to repurposing and upcycling your shirts.
So, grab your scissors, unleash your imagination, and get ready to embark on a journey of self-expression and creativity. Whether you're aiming to elevate your style, personalize your clothing, or simply enjoy a fun and fulfilling crafting experience, this guide will equip you with the knowledge and inspiration you need to embark on your shirt cutting adventure. Let's dive in and discover the endless possibilities of DIY shirt cutting!
Key Takeaways:
- Transform old shirts into trendy, personalized creations by mastering basic cutting techniques and exploring innovative DIY projects. Embrace imperfections and share your unique designs to inspire others in the DIY universe.
- Repurpose cut shirts into stylish accessories and home decor items, reducing textile waste and contributing to sustainable practices. Embrace experimentation, share your creations, and let your creativity guide you on a fulfilling DIY journey.
Read more: DIY Projects: How To Charge A Battery
Materials Needed
Before diving into the world of shirt cutting and DIY projects, it’s essential to gather the necessary materials to ensure a smooth and enjoyable crafting experience. Here’s a list of basic supplies you’ll need to get started:
1. Shirts:
- Old or plain t-shirts or tank tops that you're willing to repurpose
- Consider using shirts made of cotton or jersey fabric for easier cutting and a comfortable fit
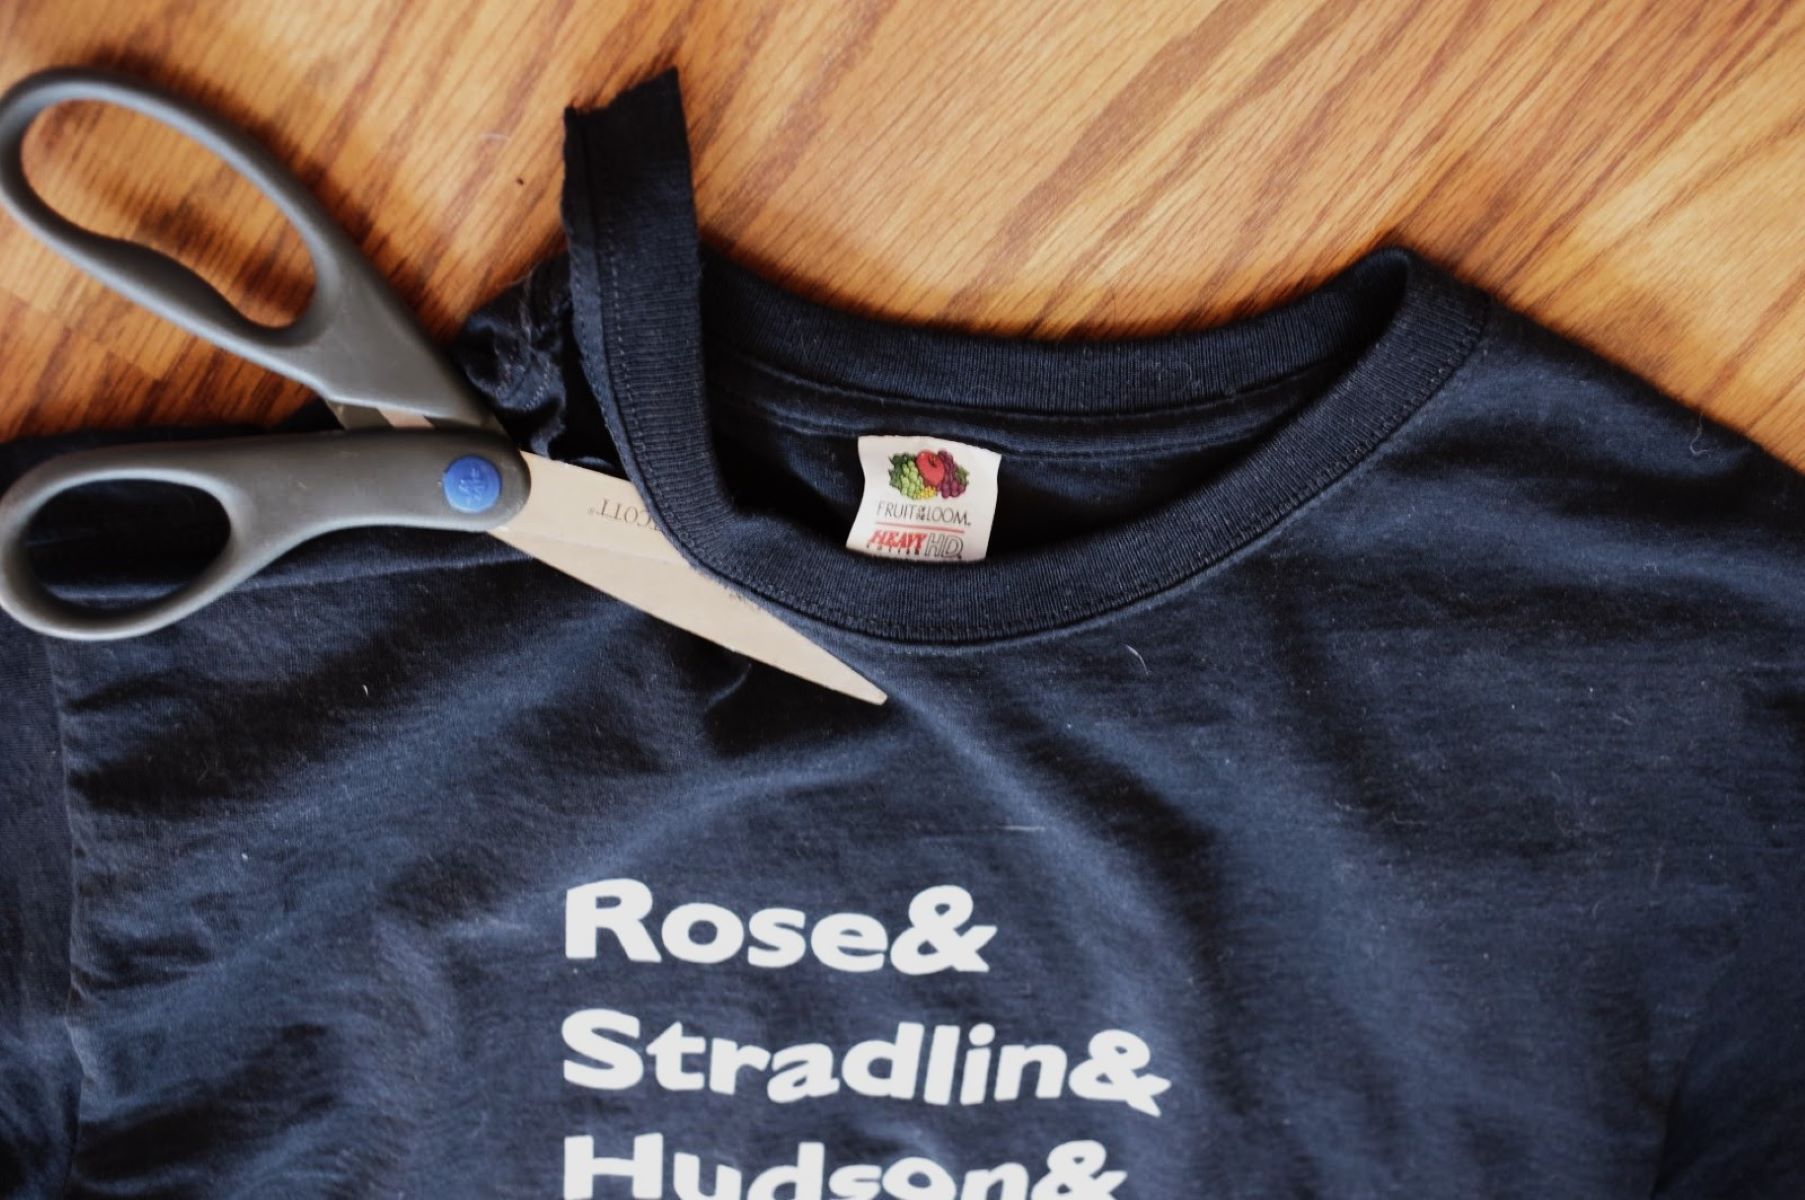
2. Scissors:
- A pair of sharp fabric scissors for precise and clean cuts
- Alternatively, fabric shears or small craft scissors can also be used
3. Marking Tools:
- Chalk or fabric markers for outlining designs and cutting lines on the shirts
- These tools help ensure accuracy and precision during the cutting process
Read more: How To Build Custom Cedar Shutters
4. Embellishments (Optional):
- Decorative elements such as studs, sequins, patches, or fabric paint for adding personalized touches to your cut shirts
- These embellishments can elevate the look of your DIY creations and reflect your unique style
5. Cutting Surface:
- A flat and stable surface, such as a table or cutting board, to provide a secure area for cutting the shirts
- Ensure that the surface is clean and free of any obstructions to prevent accidents during the cutting process
With these basic materials at your disposal, you’re ready to embark on your shirt cutting journey and explore the endless possibilities of transforming ordinary shirts into extraordinary works of wearable art. Now that you’re equipped with the necessary supplies, let’s delve into the fundamental techniques of shirt cutting and discover the creative projects that await!
Basic Shirt Cutting Techniques
Mastering fundamental shirt cutting techniques is the key to unlocking your creativity and unleashing the potential of your old or plain shirts. Whether you’re aiming for a casual, bohemian look or a sleek and modern style, the following techniques will serve as your foundation for transforming shirts into personalized fashion statements:
1. Crop Top:
Transform a regular t-shirt into a trendy crop top by carefully cutting it to your desired length. For a classic crop top, measure the desired length from the bottom hem of the shirt and mark it with chalk or a fabric marker. Use sharp scissors to make a straight and even cut along the marked line. You can customize the length based on your preference, from a subtle midriff-baring style to a more daring cropped look.
2. Off-Shoulder or Cold Shoulder:
Create an off-shoulder or cold shoulder top by cutting along the neckline of the shirt. For an off-shoulder style, cut the neckline to create a wide and flattering neckline that rests just below the shoulders. For a cold shoulder look, make small slits or cutouts along the shoulders to expose a hint of skin while maintaining the structure of the shirt. These styles add a touch of elegance and playfulness to your wardrobe.
3. Fringe or Tassel Detailing:
Add a bohemian flair to your shirts by incorporating fringe or tassel detailing. To achieve this, make vertical cuts along the bottom hem of the shirt, leaving a few inches uncut at the top. Once the cuts are made, gently tug on each strip to create a fringed effect. You can also knot the strips or add beads for a personalized touch, resulting in a playful and dynamic look.
4. Cut-Out Designs:
Elevate your shirts with intricate cut-out designs, such as geometric shapes, symbols, or intricate patterns. Use chalk or fabric markers to sketch your desired design on the shirt, then carefully cut along the outlined shapes. This technique allows you to infuse your shirts with artistic flair and express your individuality through visually striking cut-out motifs.
By mastering these basic shirt cutting techniques, you’ll have the foundation to explore more advanced and creative designs, allowing you to transform your shirts into unique and personalized pieces that reflect your style and personality. Now that you’ve honed your cutting skills, let’s delve into the exciting world of DIY projects using cut shirts!
DIY Projects Using Cut Shirts
Once you’ve mastered the art of shirt cutting, the next step is to explore a myriad of DIY projects that breathe new life into your cut shirts. From stylish accessories to versatile home decor, the following projects will inspire you to unleash your creativity and transform your shirts into functional and fashionable items:
Read more: How To Use Stucco Siding And Its Benefits
1. Braided Headbands:
Repurpose your cut shirts into trendy and comfortable braided headbands. Cut the shirt into long strips, then braid the strips together to create a stylish headband that adds a touch of bohemian charm to your outfits. These headbands are perfect for keeping your hair in place while adding a unique accessory to your look.
2. Tote Bags:
Turn your cut shirts into eco-friendly tote bags that are both practical and stylish. By cutting the sleeves and neckline of the shirt and adding a few simple seams, you can create a reusable tote bag that’s perfect for carrying groceries, books, or everyday essentials. Personalize the bag with embellishments or fabric paint to make it truly your own.
3. Knotted Scarves:
Create fashionable knotted scarves by cutting your shirts into long strips and tying them together to form a soft and versatile accessory. These scarves can be worn in various styles, such as draped around the neck or knotted as a headband, adding a touch of flair to any outfit. Experiment with different colors and patterns to expand your scarf collection.
4. Throw Pillow Covers:
Give your living space a fresh and cozy update by repurposing cut shirts into decorative throw pillow covers. By cutting the shirt to fit the dimensions of your pillow insert and adding simple seams, you can create unique and personalized pillow covers that infuse your home decor with a touch of DIY charm.
Read more: How To Build A Trellis
5. Woven Rugs:
Transform cut shirts into woven rugs that add warmth and texture to your living space. Cut the shirts into strips and weave them together using a simple loom or by braiding and knotting the strips. These handmade rugs add a touch of rustic charm to any room and provide a creative outlet for repurposing old shirts.
By exploring these DIY projects, you’ll discover endless opportunities to repurpose and upcycle your cut shirts, giving them new life and purpose beyond traditional clothing. These projects not only showcase your crafting skills but also contribute to sustainable and eco-friendly practices by reducing textile waste. With your newfound inspiration, it’s time to embark on these creative projects and infuse your surroundings with the charm of DIY cut shirts!
Tips and Tricks
As you embark on your DIY shirt cutting journey, keep the following tips and tricks in mind to ensure a seamless and enjoyable crafting experience:
1. Practice on Old or Unwanted Shirts:
Before cutting into your favorite shirts, practice your cutting techniques on old or unwanted shirts to gain confidence and refine your skills. This allows you to experiment with different designs and styles without the fear of making irreversible mistakes.
2. Use Fabric Markers for Precision:
When outlining designs or cutting lines on the shirts, opt for fabric markers or chalk that easily washes off. This ensures precision and accuracy during the cutting process while allowing you to make adjustments as needed.
3. Embrace Imperfections for a Unique Touch:
Don’t be afraid to embrace imperfections and asymmetry in your cut shirt designs. These subtle variations add character and uniqueness to your creations, making them truly one-of-a-kind pieces.
4. Explore Embellishments for Personalization:
Enhance your cut shirts with embellishments such as studs, sequins, or fabric paint to add a personalized touch. These details allow you to express your individual style and elevate the visual appeal of your DIY creations.
5. Experiment with Layering and Styling:
Explore the versatility of cut shirts by layering them over contrasting colored tops or pairing them with different bottoms. Mixing and matching your cut shirts with other clothing items allows you to create diverse and stylish ensembles.
6. Share Your Creations on Social Media:
Share your DIY cut shirt projects on social media platforms to inspire others and connect with fellow crafting enthusiasts. Engaging with a community of like-minded individuals can provide valuable feedback and encouragement for your creative endeavors.
Read more: How To Sell Your DIY Projects
7. Upcycle Scraps into Small Accessories:
Don’t discard the leftover fabric scraps from your shirt cutting projects. Instead, repurpose them into small accessories such as hair ties, keychains, or fabric patches, minimizing waste and maximizing the utility of the materials.
By incorporating these tips and tricks into your DIY shirt cutting endeavors, you’ll not only refine your skills but also infuse your creations with personal flair and creativity. Embrace the process of experimentation and self-expression, and let your imagination guide you as you transform ordinary shirts into extraordinary works of wearable art!
Conclusion
Congratulations on embarking on a creative journey filled with endless possibilities and self-expression through DIY shirt cutting! By mastering basic cutting techniques, exploring innovative DIY projects, and incorporating valuable tips and tricks, you’ve unlocked the potential to transform ordinary shirts into personalized and stylish creations.
As you continue to hone your skills and explore new designs, remember that DIY shirt cutting is not just a crafting endeavor—it’s a form of self-expression and a means of contributing to sustainable and eco-friendly practices. By repurposing old shirts and minimizing textile waste, you’re making a positive impact on the environment while indulging in a fulfilling and creative pastime.
Whether you’re creating trendy crop tops, crafting versatile accessories, or infusing your home decor with DIY charm, each cut shirt project is a testament to your creativity and ingenuity. Embrace the imperfections, celebrate the uniqueness of your creations, and share your journey with others to inspire and connect with fellow crafting enthusiasts.
As you continue to explore the art of shirt cutting, remember that the possibilities are limitless, and your imagination is the only constraint. Keep experimenting, learning, and refining your skills, and most importantly, have fun along the way. Your DIY cut shirt creations are a reflection of your individuality and creativity, so let your passion for crafting guide you as you breathe new life into every shirt that crosses your path.
So, grab your scissors, unleash your creativity, and let the art of DIY shirt cutting inspire you to transform the ordinary into the extraordinary. With each cut and stitch, you’re not just crafting garments—you’re crafting moments and memories that reflect your unique style and creative spirit.
Now, armed with the knowledge and inspiration from this guide, it’s time to embark on your next DIY shirt cutting adventure. Embrace the process, savor the journey, and revel in the joy of transforming simple shirts into remarkable works of wearable art. Happy crafting!
Frequently Asked Questions about How To Cut Shirts For DIY Projects
Was this page helpful?
At Storables.com, we guarantee accurate and reliable information. Our content, validated by Expert Board Contributors, is crafted following stringent Editorial Policies. We're committed to providing you with well-researched, expert-backed insights for all your informational needs.


0 thoughts on “How To Cut Shirts For DIY Projects”