Articles
How To Store Homemade Focaccia Bread
Modified: December 7, 2023
Discover the best way to store your homemade focaccia bread with these helpful articles. Keep your bread fresh and delicious for longer with expert tips.
(Many of the links in this article redirect to a specific reviewed product. Your purchase of these products through affiliate links helps to generate commission for Storables.com, at no extra cost. Learn more)
Introduction
Welcome to the wonderful world of homemade bread! There’s something truly magical about the process of making your own bread from scratch, and focaccia bread is no exception. This delicious Italian bread is known for its soft texture, chewy crust, and delightful toppings.
One of the benefits of making homemade focaccia bread is that you can customize it to your liking. Whether you prefer a classic version with just a sprinkle of sea salt or you want to get creative with your toppings, the possibilities are endless. But what happens when you’ve baked a batch of delicious focaccia bread and you can’t finish it all in one sitting? That’s where proper storage comes in.
In this article, we’ll guide you through the process of storing homemade focaccia bread, ensuring that it stays fresh and delicious for days to come. So let’s get started!
Key Takeaways:
- Enjoy the freedom of customizing your homemade focaccia bread with various toppings, and ensure its freshness by following simple storage techniques for up to 5 days in the refrigerator.
- Master the art of making and storing homemade focaccia bread to impress your loved ones with your culinary skills and savor the satisfaction of baking your own delicious bread.
Read more: How To Store Focaccia
Ingredients
Before we dive into the storage process, let’s first take a look at the ingredients you’ll need to make homemade focaccia bread:
- 2 1/4 cups all-purpose flour
- 1 teaspoon salt
- 1 teaspoon sugar
- 1 tablespoon active dry yeast
- 1 cup warm water
- 3 tablespoons olive oil
These simple ingredients come together to create a flavorful and tender bread that will surely impress your family and friends.
Additionally, keep in mind that the toppings for your focaccia bread are completely customizable. Some popular options include:
- Coarse sea salt
- Fresh herbs (such as rosemary, thyme, or basil)
- Sliced olives
- Cherry tomatoes
- Caramelized onions
- Crumbled feta cheese
Feel free to experiment and get creative with your toppings based on your personal preferences. Now that we have our ingredients ready, let’s move on to the next step: preparing the dough.
Equipment Needed
Before you start making your homemade focaccia bread, ensure that you have the necessary equipment on hand. Here’s what you’ll need:
- Large mixing bowl: A sturdy mixing bowl will be used to combine the ingredients and allow the dough to rise.
- Measuring cups and spoons: Accurate measurements are essential for baking, so make sure you have the appropriate measuring tools.
- Whisk or spoon: You’ll need a whisk or spoon to mix the ingredients together and activate the yeast.
- Baking sheet: Choose a baking sheet or baking pan that can accommodate the size of your focaccia bread.
- Parchment paper or silicone baking mat: To prevent the dough from sticking to the baking sheet, line it with parchment paper or a silicone baking mat.
- Plastic wrap or kitchen towel: You’ll need something to cover the dough during the rising process to prevent it from drying out.
- Kitchen brush: A kitchen brush will come in handy when brushing olive oil over the bread and adding toppings.
- Oven: Of course, you’ll need an oven to bake your focaccia bread to perfection.
Having these essential tools ready will ensure a smooth and enjoyable baking experience. Now that we have everything we need, let’s move on to the next step: preparing the dough.
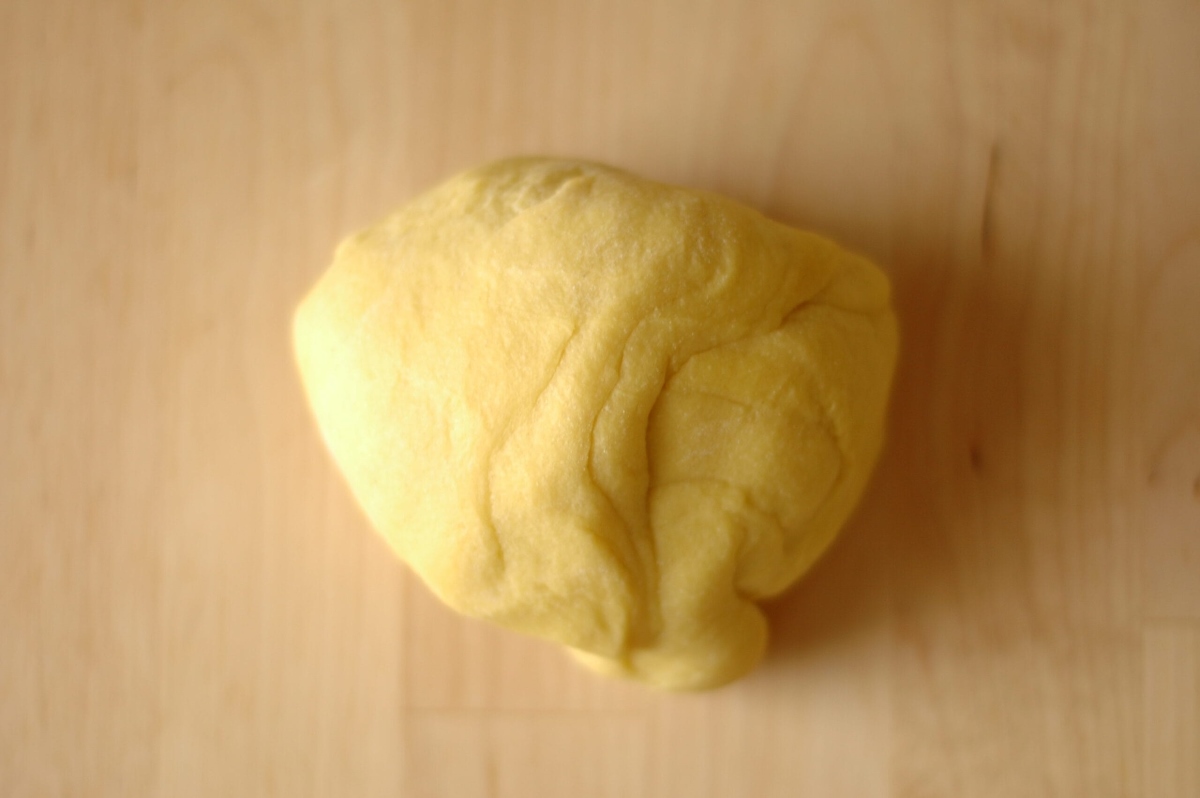
Step 1: Preparing the Dough
The first step in making homemade focaccia bread is to prepare the dough. Follow these simple instructions:
- In a large mixing bowl, combine the all-purpose flour, salt, and sugar. Mix well to evenly distribute the ingredients.
- In a separate small bowl, dissolve the active dry yeast in warm water. Let it sit for a few minutes until it becomes frothy.
- Make a well in the center of the dry ingredients and pour the yeast mixture into the well.
- Add the olive oil to the bowl.
- Using a whisk or spoon, gradually incorporate the flour mixture into the liquid ingredients. Continue mixing until a dough forms.
- Dust a clean surface with flour and transfer the dough onto it.
- Knead the dough for about 5-7 minutes until it becomes smooth and elastic.
It’s important to note that the consistency of the dough may vary slightly depending on factors such as humidity and temperature. If the dough feels too sticky, sprinkle a small amount of flour and continue kneading until it reaches the desired texture.
Once you’ve prepared the dough, it’s time for the next step: allowing it to rise.
Step 2: Letting the Dough Rise
After preparing the dough for your homemade focaccia bread, it’s crucial to let it rise. This step allows the yeast to ferment and gives the bread its light and airy texture. Follow these instructions:
- Lightly grease the mixing bowl with olive oil to prevent the dough from sticking.
- Place the kneaded dough back into the greased mixing bowl.
- Cover the bowl with plastic wrap or a clean kitchen towel.
- Find a warm spot in your kitchen, away from drafts, and let the dough rise for approximately 1 to 1 ½ hours.
- During this time, the dough should double in size.
Patience is key during the rising process. Keep in mind that the timing may vary depending on temperature and humidity. You’ll know the dough is ready when it has visibly expanded and feels light and springy to the touch.
Once the dough has risen, it’s time to move on to the next step: shaping the focaccia bread.
Read more: How To Store Focaccia With Tomatoes
Step 3: Shaping the Focaccia Bread
Now that the dough has risen, it’s time to shape your homemade focaccia bread. Follow these steps:
- Preheat your oven to 425°F (220°C) to ensure it’s nice and hot for baking.
- Lightly grease a baking sheet or line it with parchment paper or a silicone baking mat.
- Punch down the risen dough to release any air bubbles.
- Transfer the dough onto the prepared baking sheet.
- Gently press and stretch the dough into a rectangular or square shape, about ½-inch thick.
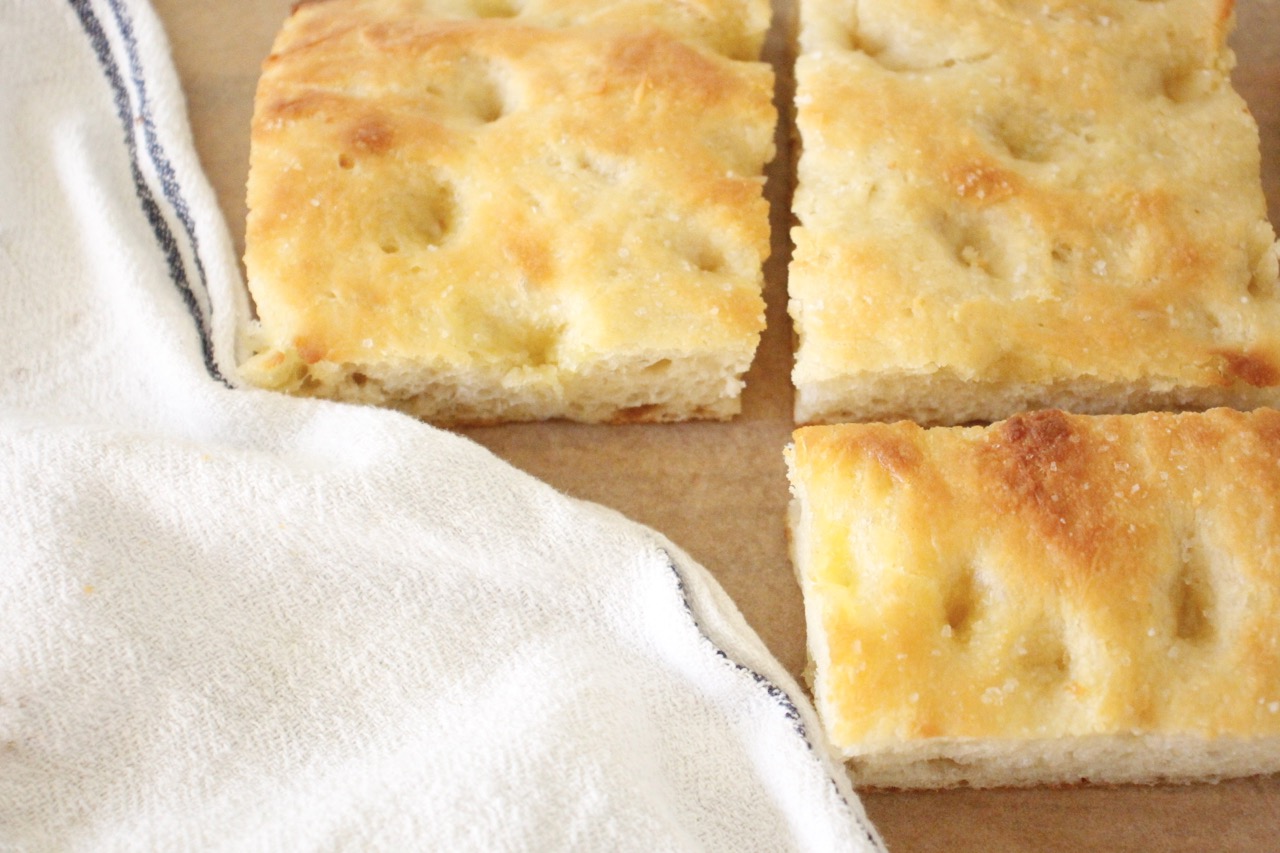
Focaccia bread is known for its dimpled appearance, which allows the toppings to settle into the bread. To create these iconic dimples, use your fingertips to press lightly into the dough, making small indentations all over.
Now that you’ve shaped the focaccia bread, it’s time to move on to the next step: adding toppings.
After baking, cool the focaccia completely on a wire rack. Store it in an airtight container or resealable plastic bag at room temperature for up to 2 days, or freeze for longer storage. Reheat in the oven for a few minutes before serving.
Step 4: Adding Toppings
Adding toppings to your homemade focaccia bread is where you can get creative and truly make it your own. Follow these steps to enhance the flavor and visual appeal of your bread:
- Drizzle a generous amount of olive oil over the top of the shaped dough, making sure to cover the entire surface.
- Sprinkle coarse sea salt or kosher salt evenly over the dough. This will give the bread a savory kick.
- If desired, add your choice of toppings. Some popular options include fresh herbs like rosemary, thyme, or basil. You can also incorporate sliced olives, cherry tomatoes, caramelized onions, or crumbled feta cheese.
- Press the toppings lightly into the dough, ensuring they adhere as the bread bakes.
These toppings not only add flavor but also create a visually appealing presentation. Feel free to experiment and make combinations that suit your taste preferences.
Once you’ve added the toppings, it’s time to move on to the next step: the second rise.
Step 5: Second Rise
After adding the toppings to your focaccia bread, it’s time for the second rise. This step helps the dough relax and allows for further fermentation, resulting in a light and airy texture. Follow these instructions:
- Cover the topped dough with plastic wrap or a clean kitchen towel.
- Let the dough rest and rise for another 30 minutes to an hour.
- During this time, the dough will slightly puff up, giving it a bit more volume.
It’s important to note that the second rise time may vary depending on room temperature and the specific recipe you’re following. Keep an eye on the dough during this phase to ensure it doesn’t overproof or deflate.
Once the dough has completed its second rise, it’s time to move on to the next step: baking the focaccia bread.
Step 6: Baking the Focaccia Bread
Now that your focaccia dough has risen for the second time and the toppings have been added, it’s time to bake it to perfection. Follow these steps for a deliciously golden and flavorful homemade focaccia bread:
- Preheat your oven to 425°F (220°C) to ensure it’s hot and ready to go.
- Place the baking sheet with the prepared focaccia dough in the preheated oven.
- Bake for approximately 20-25 minutes, or until the bread turns a beautiful golden brown color.
- Keep an eye on the focaccia bread as it bakes to prevent it from burning. If needed, you can tent it with foil towards the end of the baking time to protect the toppings from excessive browning.
- Once baked, remove the focaccia bread from the oven and transfer it to a wire rack to cool.
The aroma of freshly baked focaccia bread will fill your kitchen, enticing everyone around. Resist the temptation to cut into it right away, as the bread needs to cool before you can fully enjoy it.
Now that the focaccia bread is baked and cooling, let’s move on to the final step: cooling and storing.
Read more: How To Store Homemade Bread
Step 7: Cooling and Storing
The final step in the process of making homemade focaccia bread is to properly cool and store it. Follow these instructions to ensure the bread stays fresh and delicious:
- Allow the baked focaccia bread to cool completely on a wire rack. This will take approximately 20-30 minutes.
- During the cooling process, the crust will crisp up while the interior retains its soft and tender texture.
- Once cooled, you can choose to enjoy the bread immediately or store it for later use.
- To store the focaccia bread, wrap it tightly in plastic wrap or place it in an airtight container.
- Store the bread at room temperature for up to 2 days. If you wish to keep it for longer, it’s best to refrigerate it for up to 5 days.
- When ready to eat, you can warm the refrigerated focaccia bread in a preheated oven at 350°F (175°C) for a few minutes to regain its freshness.
It’s important to note that the texture of the focaccia bread may slightly change after refrigeration. However, it will still be delicious and enjoyable.
Remember that for the best flavor and texture, homemade focaccia bread is always the most delicious when enjoyed fresh. So try to consume it as soon as possible for the ultimate culinary experience.
With these simple steps, you can now enjoy your homemade focaccia bread at its best, whether you’re savoring it right away or savoring it later.
Now that you know how to store your homemade focaccia bread, you can confidently embark on your bread-making adventures and share the joy of freshly baked bread with your loved ones.
Happy baking!
Conclusion
Congratulations! You have successfully learned how to make homemade focaccia bread from scratch and store it for later enjoyment. Making your own focaccia bread allows you to create a delicious and customizable bread that can be enjoyed in various ways.
From preparing the dough, letting it rise, shaping it, adding your favorite toppings, and finally baking it to perfection, each step is a labor of love that yields a delightful loaf of bread.
Remember to give yourself some creative freedom when it comes to choosing the toppings for your focaccia bread. Whether you prefer classic toppings like sea salt and herbs or want to experiment with unique combinations, the choice is yours.
Properly cooling and storing your homemade focaccia bread is key to maintaining its freshness. With the right storage techniques, you can enjoy the bread for up to 2 days at room temperature or up to 5 days in the refrigerator.
So, why not invite friends and family over, slice up some of your homemade focaccia bread, and share the joy of your baking prowess? Whether you serve it as an appetizer, sandwich bread, or simply enjoy it on its own, your homemade focaccia bread is sure to be a hit.
Now that you have mastered the art of making and storing homemade focaccia bread, you can unleash your creativity and experiment with different flavors and toppings. So, get ready to savor the satisfaction of baking your own delicious bread and impressing your loved ones with your culinary skills.
Happy baking and enjoy every bite of your homemade focaccia bread!
Frequently Asked Questions about How To Store Homemade Focaccia Bread
Was this page helpful?
At Storables.com, we guarantee accurate and reliable information. Our content, validated by Expert Board Contributors, is crafted following stringent Editorial Policies. We're committed to providing you with well-researched, expert-backed insights for all your informational needs.


0 thoughts on “How To Store Homemade Focaccia Bread”