Articles
How To Store Ribbon In Craft Room
Modified: April 23, 2024
Learn how to store ribbon in your craft room with these helpful articles. Organize and keep your ribbon collection tidy and accessible for your next crafting project.
(Many of the links in this article redirect to a specific reviewed product. Your purchase of these products through affiliate links helps to generate commission for Storables.com, at no extra cost. Learn more)
Introduction
Welcome to the world of crafting! If you’re someone who loves DIY projects and getting creative, then you probably have a diverse collection of ribbons in your craft room. Ribbons are not only a beautiful addition to any craft project, but they also come in various colors, patterns, and textures, making them a versatile crafting accessory. However, with such a wide variety of ribbons, it’s important to have an organized and efficient way of storing them.
Properly storing your ribbons not only helps you maintain a clutter-free craft room, but it also preserves the quality and beauty of your ribbons for future projects. Imagine having your ribbons neatly organized and easily accessible whenever you need them – it can save you valuable time and frustration in the long run.
In this article, we will explore the importance of properly storing ribbon in your craft room and provide you with some practical tips and storage solutions. Whether you have a small craft space or a dedicated craft room, there are plenty of options to help you keep your ribbons organized and ready for use.
Key Takeaways:
- Efficient ribbon storage is essential for maintaining an organized and visually appealing craft room. Proper storage, labeling, and maintenance ensure easy access to ribbons and inspire endless creativity.
- Organizing ribbons by color or size, utilizing clear and consistent labeling, and practicing regular maintenance are key to preserving the quality and longevity of your ribbon collection. Embrace the art of ribbon storage to transform your craft room into an organized oasis.
Read more: How To Store Ribbon
Importance of Properly Storing Ribbon
Properly storing your ribbons may seem like a minor detail, but it can make a significant difference in the overall organization and functionality of your craft room. Here are a few reasons why it is important to prioritize ribbon storage:
Preservation: Ribbons are delicate materials that can easily become tangled, frayed, or faded if not stored properly. By keeping them neatly organized, you can prevent damage and ensure that your ribbons remain in pristine condition for longer periods of time.
Accessibility: Have you ever spent countless minutes searching for the perfect ribbon, only to find it tangled in a mess of other ribbons? Proper storage allows you to easily see and access your ribbons whenever you need them, saving you time and frustration during your crafting sessions. You’ll be able to find the perfect ribbon for your project without any hassle.
Space Optimization: Craft rooms are often limited in space, and having a messy ribbon collection can take up unnecessary room. Organizing your ribbons efficiently can help maximize your available space, allowing you to store more ribbons and have more room for other essential crafting supplies.
Inspiration and Creativity: A well-organized ribbon collection can spark inspiration and fuel your creativity. When you can easily see your ribbons, you may discover combinations you hadn’t thought of before, leading to more unique and imaginative craft projects.
Cost-Effective: Proper storage can help you keep track of your ribbon inventory, preventing duplicate purchases. By knowing what you already have, you can avoid buying unnecessary ribbons and save money in the long run.
Now that we understand the importance of properly storing ribbons, let’s explore some practical tips and storage solutions to help you maintain an organized and efficient craft room.
Assessing Your Craft Room’s Space
Before diving into ribbon storage solutions, it is important to assess the available space in your craft room. Understanding the size and layout of your craft room will help you determine the best storage options for your ribbon collection. Here are a few tips for assessing your craft room’s space:
Measurements: Take accurate measurements of your craft room, including the dimensions of walls, shelves, cabinets, and any other storage units. This will help you plan and select the most suitable storage options for your ribbons.
Identify Vertical Space: Look for unused vertical space in your craft room. This can be wall areas, the back of doors, or even the ceiling. Utilizing vertical space can free up valuable floor and countertop space for other crafting activities.
Evaluate Existing Storage: Take a close look at your current storage solutions in your craft room. Are there any underutilized spaces? Can you repurpose existing storage units to accommodate your ribbon collection? By optimizing your existing storage, you may find creative ways to incorporate ribbon storage without adding extra furniture.
Consider Workflow: Think about your crafting workflow and how you use your ribbons. Do you prefer having them visible and easily accessible? Or do you prefer a system where they are neatly tucked away but still easily retrievable? Understanding your workflow will help you determine the best storage solutions that align with your crafting habits.
Flexibility: Keep in mind that your craft room’s space may change over time. As your crafting needs and supplies evolve, you may need to reevaluate your ribbon storage solutions and make adjustments accordingly. Choose storage options that offer flexibility and can be easily adapted as your craft room evolves.
By carefully assessing your craft room’s space and considering these factors, you can create an efficient and organized environment that works best for you. With a clear understanding of your available space, you can explore different storage options for your precious ribbon collection.
Considering Different Storage Options
When it comes to storing ribbons in your craft room, there are a variety of options to choose from. The right storage solution for you will depend on the size of your ribbon collection, the space available in your craft room, and your personal preference. Let’s explore some of the popular storage options:
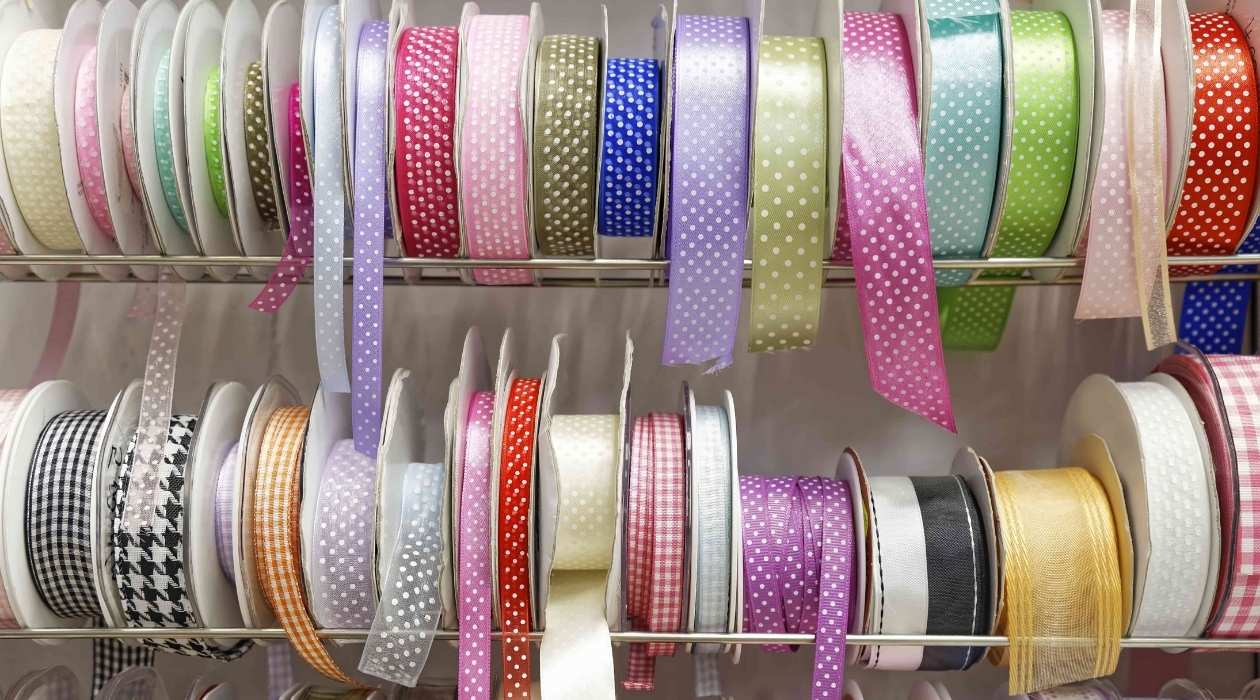
Traditional Spool Storage: This is a classic and straightforward method of storing ribbons. You can use a ribbon spool holder or a dowel rod to stack your ribbons vertically. This allows you to easily see and access each ribbon. To prevent the ribbons from unraveling, you can secure the loose end with a clip or a pin. This method is ideal for those who have a smaller ribbon collection and prefer a compact and visible storage option.
Drawer Storage: If you prefer to keep your ribbons out of sight, drawer storage is a great option. Invest in some clear or labeled drawers specifically designed for ribbon storage. This allows you to neatly arrange your ribbons and easily pull out the desired length when needed. To prevent tangling, using small plastic bags or cardboard inserts can help keep each ribbon separate and organized within the drawer.
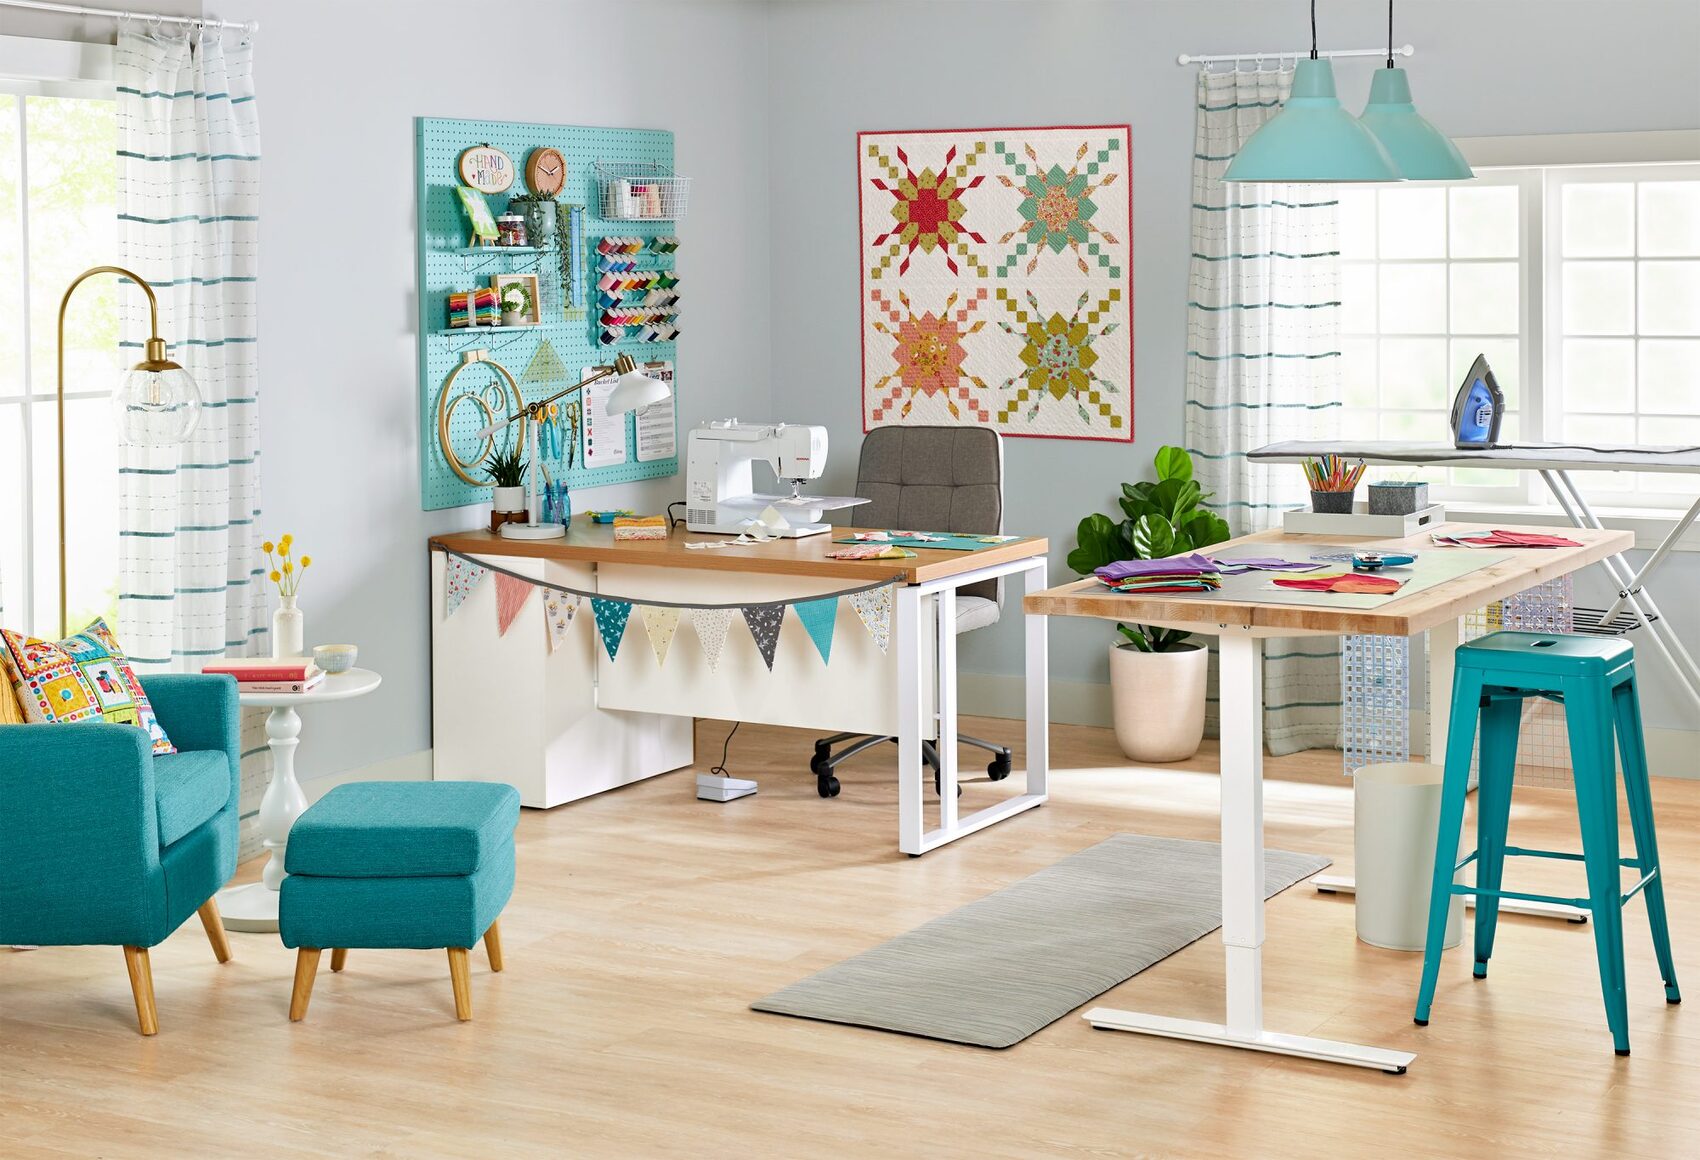
Wall-mounted Storage Solutions: Utilizing the wall space in your craft room can be a practical and space-saving option for ribbon storage. Install a pegboard or a wall-mounted ribbon organizer, which typically consists of hooks or dowels, to keep your ribbons visible and easily accessible. This option allows you to customize your ribbon display, making it both functional and decorative.
Hanging Storage Solutions: For larger ribbon collections or spools with a lot of yardage, hanging storage solutions are a convenient choice. You can use a hanging shoe organizer with clear pockets, where each pocket can hold a spool of ribbon. Another option is using a hanging rod or a tension rod with shower curtain rings. Simply thread the ribbons onto the rings and hang them for easy access and visibility.
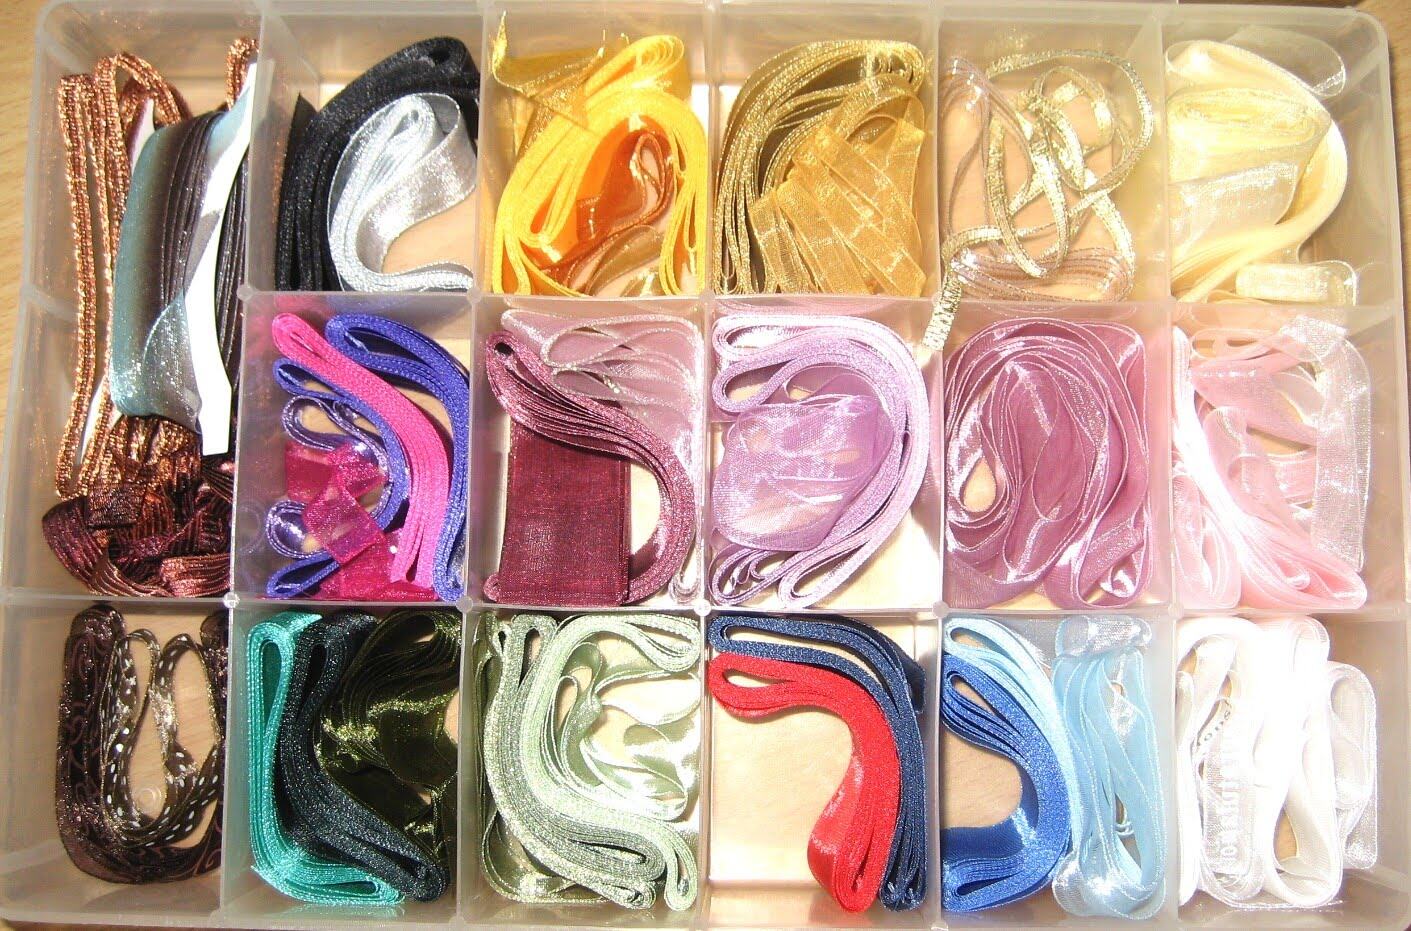
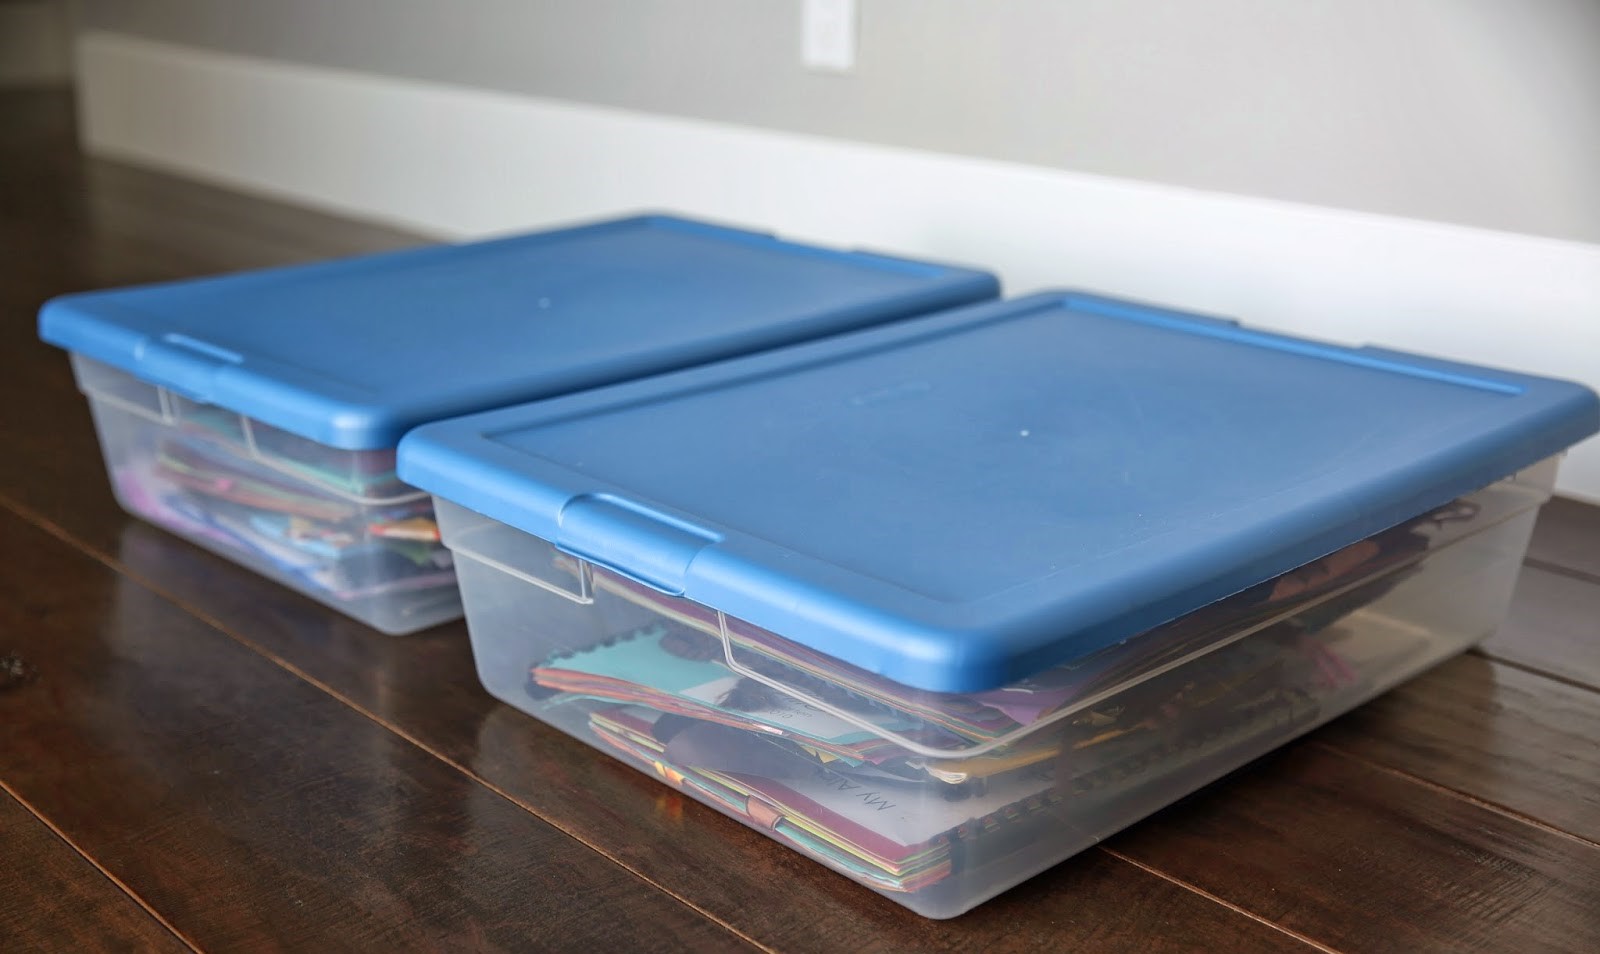
Storage Boxes or Bins: If you have ribbons of different sizes or types, consider using storage boxes or bins with dividers. Label each compartment or use clear containers to easily identify the ribbon you need. This storage option is versatile and can be stacked on shelves or underneath your crafting table, depending on the available space.
Remember to choose a storage option that suits your needs and the size of your ribbon collection. Assess the available space in your craft room and consider the accessibility and visibility of your ribbons when making your decision.
Traditional Spool Storage
One of the most popular and traditional methods for storing ribbons is through spool storage. Using spools allows you to neatly organize your ribbons and keep them easily accessible. Here are some tips for utilizing traditional spool storage:
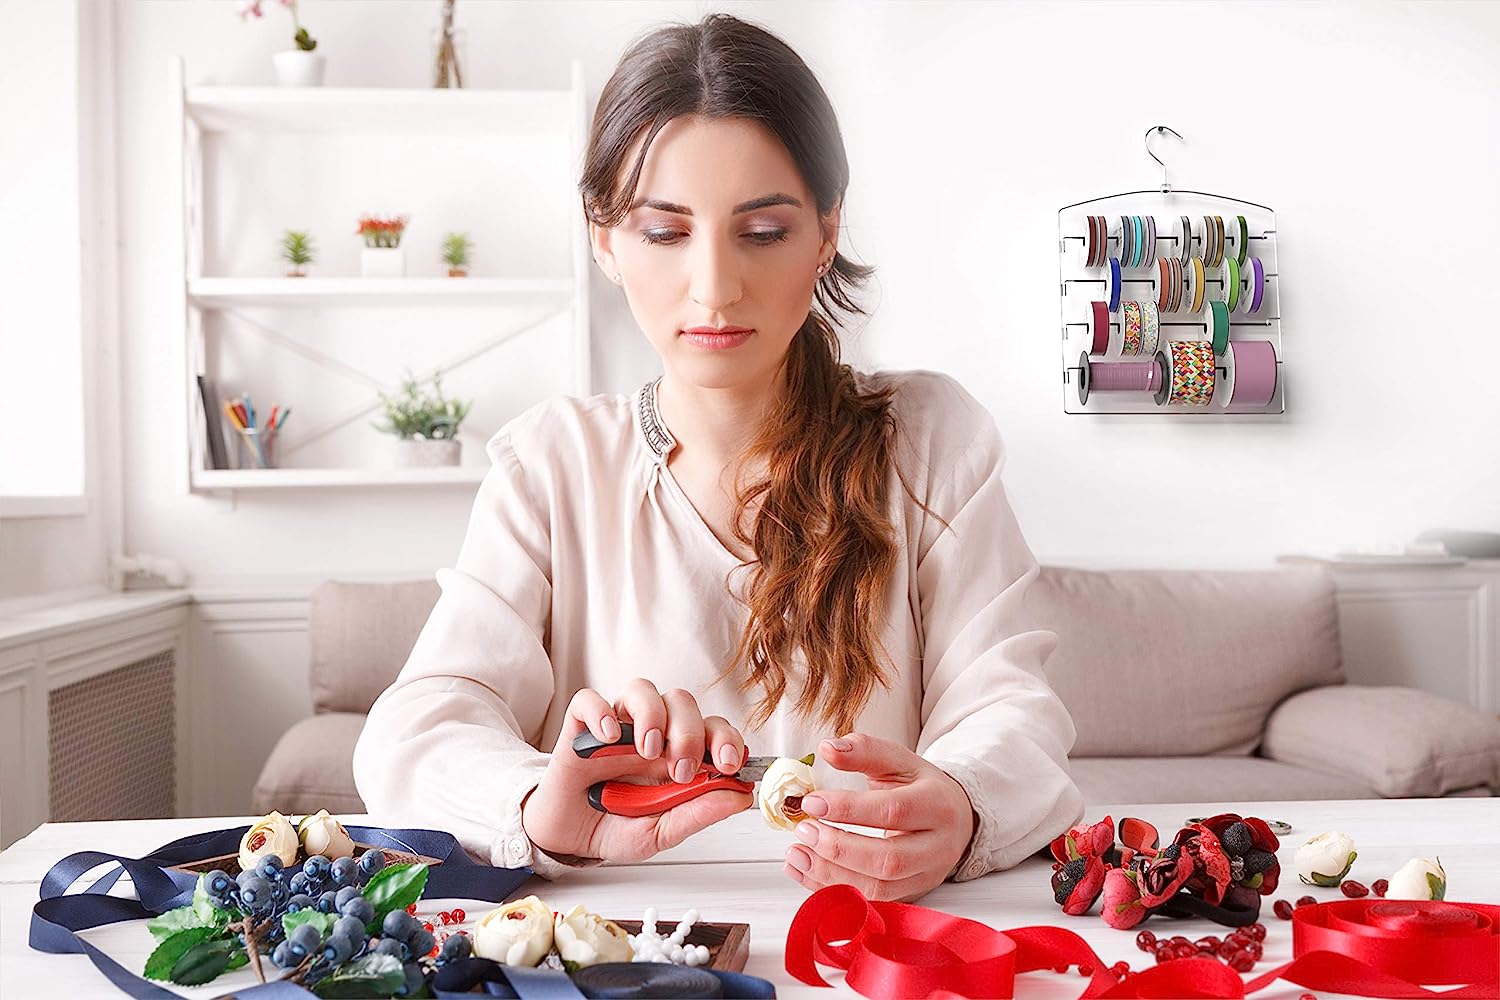
Ribbon Spool Holders: Invest in a ribbon spool holder, which is specifically designed to hold multiple spools of ribbon. These holders can either be wall-mounted or freestanding, and they come in various sizes to accommodate different ribbon spool quantities. The holders often have rods or dowels where you can slide your ribbon spools, keeping them neatly organized and preventing them from unraveling.
Dowel Rods: If you prefer a more DIY approach, you can use dowel rods to store your ribbon spools. Simply find a sturdy rod, such as a wooden dowel or PVC pipe, and attach it to the wall or a shelf in your craft room. Slide your ribbon spools onto the rod, organizing them by color or size. This method allows for easy access and visibility of your ribbons.
Organizing by Color or Size: One advantage of traditional spool storage is the ability to easily organize your ribbons by color or size. This allows you to quickly find the ribbon you’re looking for without having to fumble through a messy pile. Consider arranging your ribbon collection in a gradient or rainbow pattern, or group similar colors together to create a visually appealing display.
Securing the Ends: To prevent your ribbon spools from unraveling and becoming tangled, it’s important to secure the loose ends. You can use clips, clothespins, or even small rubber bands to keep the ribbons in place. Alternatively, you can insert the end of the ribbon into a small notch or slit on the side of the spool to hold it securely.
Labeling: For ease of identification, consider labeling your ribbon spools. You can use small adhesive labels or even washi tape with handwritten or printed labels. Attach the labels to the end of each spool or on the spool holder itself, indicating the color, pattern, or any other relevant information about the ribbon.
The traditional spool storage method is ideal for those who have a smaller ribbon collection or prefer a compact and visible storage option. It not only keeps your ribbons organized and easily accessible but also adds a touch of charm to your craft room with rows of colorful spools. Remember to regularly assess and rearrange your spools to accommodate new additions to your ribbon collection.
Read more: How To Store Ribbon Rolls
Drawer Storage
If you prefer a more concealed and organized approach for storing your ribbons, drawer storage is an excellent option. Utilizing drawers allows you to keep your ribbons neatly tucked away while still providing easy access when needed. Here are some tips for utilizing drawer storage for your ribbon collection:
Clear Drawers: Investing in clear or transparent drawers is a great way to easily see and identify your ribbons without having to open each drawer. This allows you to quickly find the ribbon you need, saving you time and effort during your crafting sessions. If clear drawers are not readily available, consider using drawer organizers or dividers to separate and categorize your ribbons.
Labeling: To further enhance your organizing system, label each drawer according to the color, pattern, or type of ribbon it contains. You can affix adhesive labels or use a label maker to ensure that each drawer is properly labeled. This way, you can effortlessly locate the specific ribbon you’re searching for without having to rummage through multiple drawers.
Spool Holders: To prevent your ribbons from getting tangled and unraveled, consider using spool holders within the drawers. These can come in the form of specially designed cards or small rods where you can slide your ribbon spools. By keeping the ribbons securely in place, you can easily pull out the desired length without any hassle.
Cardboard Inserts or Bags: Another way to keep your ribbons organized within the drawers is by using cardboard inserts or small plastic bags. Cut strips of cardboard and wrap each ribbon around it, securing the loose end. This helps prevent tangling and ensures that each ribbon remains neatly organized. Alternatively, place each ribbon within a small plastic bag and label it accordingly.
Divide by Size or Type: If you have ribbons of different sizes or types, consider dividing your drawers accordingly. You can designate specific drawers for thin ribbons, thick ribbons, satin ribbons, or any other categorization that suits your collection. This allows for easy navigation and lessens the likelihood of a tangled mess.
Drawer storage is an excellent option for those who prefer a clean and organized craft room. It keeps your ribbons hidden and protected while still providing convenient access when needed. With proper labeling and strategic placement, your drawer storage system will ensure that your ribbons are maintained in pristine condition and easily accessible for all your crafting endeavors.
To store ribbon in a craft room, consider using a ribbon organizer or a clear plastic container with dividers to keep the ribbons neatly organized and easily accessible. This will help prevent tangling and make it easier to find the right ribbon for your projects.
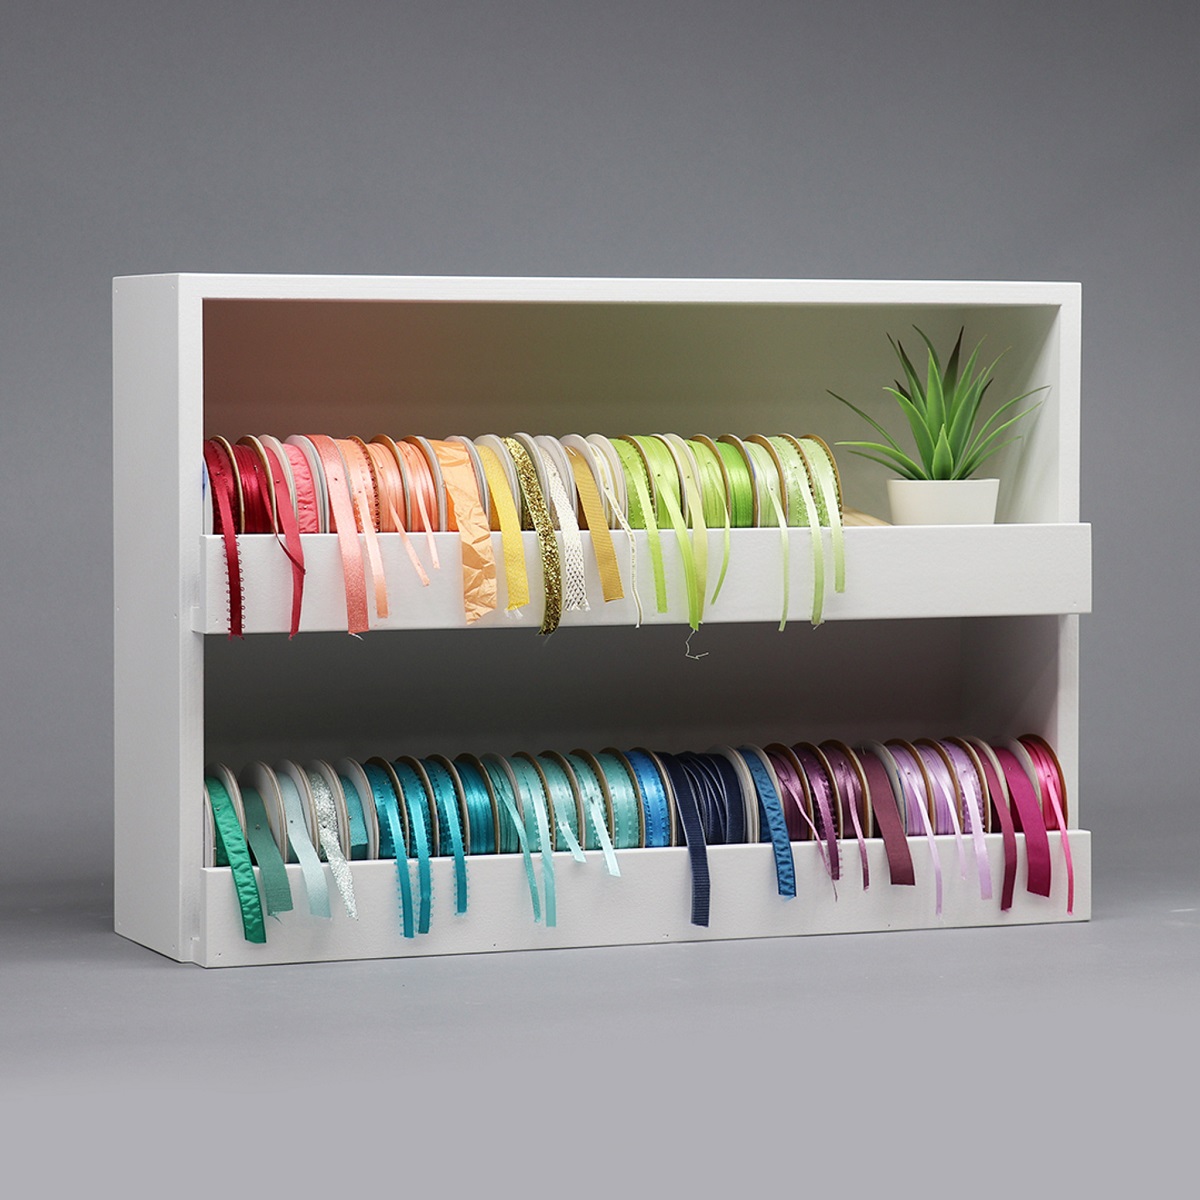
Wall-mounted Storage Solutions
Maximizing the vertical space in your craft room is essential, especially when it comes to ribbon storage. Wall-mounted storage solutions provide a practical and visually appealing way to keep your ribbons organized and easily accessible. Here are some popular wall-mounted storage options for your ribbon collection:
Pegboard: Installing a pegboard on your craft room wall is an excellent way to create a versatile storage space for your ribbons. With a pegboard, you can attach hooks or dowels to hang your ribbon spools. This allows you to easily see your ribbons and select the desired one for your project. Additionally, you can add baskets or small shelves to hold ribbon scraps or other crafting supplies.
Ribbon Organizers: Wall-mounted ribbon organizers are specifically designed to hold and display ribbons in an organized manner. These organizers usually consist of rods or dowels where you can slide your ribbon spools. The rods can be horizontally or vertically oriented, depending on your preference and space availability. Some ribbon organizers also provide additional storage compartments for ribbon scraps or other small accessories.
Hanging Buckets or Baskets: Another creative way to store your ribbons on the wall is by using hanging buckets or baskets. Attach hooks or rods to the wall and hang the buckets or baskets using S-hooks or clips. Place your ribbon spools or rolls inside the buckets or baskets, allowing them to hang freely. This method not only keeps your ribbons organized but also adds a decorative element to your craft room.
Decorative Wall-mounted Shelves: If you prefer a more decorative storage solution, opt for wall-mounted shelves that can hold your ribbon collection. Look for shelves with individual compartments or dividers to keep your ribbons neatly separated. You can arrange the ribbons by color or size for easy visual identification. Additionally, consider incorporating decorative accents or labels to enhance the overall aesthetic of your wall-mounted ribbon storage display.
Tension Rods: Tension rods offer a simple and budget-friendly solution for wall-mounted ribbon storage. Install tension rods vertically or horizontally on your craft room wall and slide your ribbon spools onto the rods. This allows you to easily access and remove the desired length of ribbon without any hassle. Tension rods also provide flexibility, as you can adjust the spacing between them to accommodate different ribbon sizes.
Wall-mounted storage solutions not only keep your ribbons organized and within reach but also act as a functional piece of wall decor. By utilizing the available wall space in your craft room, you can create an efficient and visually appealing storage display for your ribbon collection.
Hanging Storage Solutions
For those who have a large ribbon collection or spools with a substantial amount of yardage, hanging storage solutions are a practical and space-saving option. Hanging your ribbons keeps them easily accessible while preventing tangling and preserving their quality. Here are some popular hanging storage solutions for your ribbon collection:
Hanging Shoe Organizer: Repurposing a hanging shoe organizer is a cost-effective and efficient way to store your ribbons. The clear pockets in a shoe organizer make it easy to see and access each ribbon spool. Simply slip one or more spools into each pocket, organizing them by color or size. You can hang the shoe organizer on the back of a door or on a wall using hooks or nails. This option is particularly useful if you have a large quantity of ribbons or limited space.
Hanging Rod or Tension Rod: Installing a hanging rod or a tension rod in your craft room is a versatile solution for storing your ribbons. Thread your ribbon spools onto shower curtain rings or small clips, then hang them onto the rod. This allows you to easily slide the rings or clips to access the desired ribbon without disturbing the others. The hanging rod can be mounted on the wall or even between two bookshelves. Adjust the spacing between the rings or clips based on the size and length of your ribbons.
Hanging Ribbon Dispenser: If you want a more specialized hanging storage solution, consider using a ribbon dispenser. These dispensers are designed to hold multiple ribbon spools and allow you to pull out the desired length with minimal effort. Most ribbon dispensers come with a built-in cutter or blade that cleanly cuts the ribbon. Hang the dispenser on a wall, cabinet door, or pegboard for easy access. This option is ideal for crafters who frequently use ribbons and need a hassle-free way to dispense and store them.
Hanging Fabric Tubes: Another creative option is to create fabric tubes for your ribbons and hang them on hooks or rods. Cut long strips of fabric, fold them in half lengthwise, and sew one end closed. Slide your ribbon spools into the fabric tubes and secure the open end with a knot or button closure. Hang the fabric tubes using hooks or rods mounted on the wall. This storage method not only keeps your ribbons organized but also adds a charming touch to your craft room.
Macrame Ribbon Holder: If you’re feeling crafty, consider making a macrame ribbon holder. Macrame is an intricate knotting technique that can create beautiful and functional designs. You can find various macrame ribbon holder patterns online that allow you to weave and suspend your ribbon spools. Hang the macrame holder on a wall or from a ceiling hook to display your ribbons in an elegant and unique way.
Hanging storage solutions offer a practical way to keep your ribbons organized, visible, and easily accessible. Whether you choose a hanging shoe organizer, a hanging rod, a ribbon dispenser, fabric tubes, or a macrame holder, finding the right hanging storage solution for your ribbon collection will help streamline your crafting process.
Organizing Ribbons by Color or Size
Organizing your ribbons by color or size is a practical and visually appealing way to maintain an organized craft room. By implementing a color or size system, you can easily find the ribbon you need for your project and create a cohesive and aesthetically pleasing storage display. Here are some tips for organizing your ribbons by color or size:
Color Coding: One of the most common ways to organize ribbons is by color. Grouping ribbons together based on their color creates a visually striking display and makes it easier to find specific colors when working on a project. Start by sorting your ribbons into color categories, such as reds, blues, greens, etc. You can choose to arrange them in a gradient pattern or group similar shades together. You can use clear drawers, spool holders, or ribbon organizers to store and display your color-coded ribbons.
Size Categorization: If you have ribbons of various sizes, organizing them by size can be beneficial. This helps ensure that you can easily find ribbons of the desired width or length for different projects. Stack or arrange ribbons of similar sizes together. You can create separate sections or compartments within your storage system for thin ribbons, wide ribbons, or ribbon rolls. Using drawer dividers, clear plastic bags, or labeled containers can further enhance the organization and visibility of the ribbons.
Combined Categorization: For a more comprehensive organization scheme, you can combine both color and size categorization. For example, you can organize ribbons first by color and then within each color category, arrange them by size. This allows for finer sorting and customization, providing a high level of visibility and ease of selection. Using labeled storage containers or dividers will help maintain the integrity of the organizational system while providing clear indications of the ribbon’s color and size.
Ribbon Cards or Swatches: To enhance the visual appeal of your organized ribbon collection, consider creating ribbon cards or swatches. Cut small pieces of cardstock or sturdy paper and wrap each ribbon around them, securing the ends. Punch a hole in the cardstock and hang the ribbon cards on hooks, rods, or within a binder. This method allows you to easily see and compare the colors or sizes of your ribbons without the need to unwound them from spools or rolls.
Labeling: Labeling is a crucial step in organizing your ribbons by color or size. You can create color-coded labels or use small adhesive labels on each spool, drawer, or container to indicate the color or size of the ribbons. This ensures that you can quickly and accurately identify the ribbon you need for your project. Clear and consistent labeling will make it easier to maintain the organization as you add or remove ribbons from your collection.
By organizing your ribbons by color or size, you create a visually pleasing display and can easily locate the desired ribbon for your projects. Whether you choose a pure color-based organization or combine color and size categorization, finding the right organizational system will enhance the functionality and aesthetic appeal of your craft room.
Read more: How To Store Ribbon Not On Spools
Labeling and Categorizing Your Ribbon Storage
Labeling and categorizing your ribbon storage is a crucial aspect of maintaining an organized craft room. These practices not only help you quickly find the ribbon you need for your projects but also ensure that your ribbons remain neatly organized and easily accessible. Here are some tips for effectively labeling and categorizing your ribbon storage:
Clear and Consistent Labeling: Use clear and legible labels to identify your ribbon storage areas. Whether you’re using drawer dividers, spool holders, containers, or other storage solutions, make sure each label clearly indicates the contents of the space. Use a label maker or adhere printed labels to ensure consistency and ease of identification.
Categorization System: Create a categorization system that suits your ribbon collection. This can be based on color, size, type of ribbon, or even project theme. Choose a system that makes the most sense to you and aligns with your crafting habits. For example, you could have separate sections or containers for solid-colored ribbons, patterned ribbons, or holiday-themed ribbons.
Color-Coded Labels: If you’ve organized your ribbons by color, using color-coded labels can be a helpful addition. Create labels in corresponding colors and adhere them to your storage bins, drawers, or other containers. This extra visual cue will make it even easier to locate the desired ribbon based on color alone.
Numbering System: If you have a large collection of ribbons, consider implementing a numbering system to label each ribbon or ribbon spool. This is especially useful if you store your ribbons in containers or drawers where they may not be easily visible. Use small adhesive labels with unique numbers and create a corresponding inventory list to keep track of each numbered ribbon.
Labels for Ribbon Ends: To avoid wasting time unraveling ribbons to find a specific one, consider labeling the ends of your ribbon spools. Use small adhesive labels or colored tape to mark the ends with relevant information such as the color, pattern, or size. This allows you to quickly identify and select the ribbon you need without removing it from the storage location.
Label Placement: Be consistent with the placement of your labels. Whether it’s on the front of bins, the sides of drawers, or the base of spool holders, choose a specific location and stick to it. This will ensure that you can easily find and read the labels at a glance, regardless of which part of your ribbon storage you’re accessing.
Regular Maintenance: As you add new ribbons to your collection or remove existing ones, make it a habit to update your labels accordingly. This helps maintain the accuracy and organization of your ribbon storage over time. Regularly review and re-categorize your ribbons as needed to ensure that your storage system remains functional and efficient.
Labeling and categorizing your ribbon storage is essential to creating a well-organized craft room. By clearly labeling your containers, drawers, spool holders, and other storage options, and implementing a logical categorization system, you’ll be able to quickly locate the ribbons you need to complete your projects, saving you time and frustration in the process.
Maintenance and Cleaning Tips for Stored Ribbons
Proper maintenance and cleaning of your stored ribbons are essential to ensure their longevity and keep them in optimal condition. Dust, dirt, and environmental factors can affect the appearance and quality of your ribbons over time. Here are some tips for maintaining and cleaning your stored ribbons:
Regular Inspection: Make it a habit to inspect your ribbon collection regularly. Check for any signs of damage, such as fraying, discoloration, or mold. Remove any ribbons that are damaged beyond repair to prevent them from affecting the rest of your collection.
Storage Environment: Pay attention to the storage environment of your ribbons. Keep them away from direct sunlight, as prolonged exposure can fade the colors. Avoid storing them in areas that are prone to extreme temperature fluctuations or high humidity levels, as these can also damage the ribbons. Choosing a cool, dry, and dark storage area will help maintain the quality of your ribbons over time.
Avoid Contact with Moisture: Moisture can cause ribbons to become limp, moldy, or discolored. Be cautious about storing ribbons in areas where they may come into contact with moisture, such as near sinks, windows, or in damp basements. If you live in a particularly humid climate, consider using moisture-absorbing packets or silica gel packs in your storage containers to help control humidity.
Careful Handling: Handle your ribbons with clean and dry hands to prevent any dirt, oil, or moisture from transferring onto the ribbons. Avoid excessive pulling or tugging, as this can cause the ribbons to stretch or warp. Gently unwind and rewind the ribbons onto their spools or cards to prevent tangling.
Spot Cleaning: For minor stains or soiling on your ribbons, spot cleaning can be effective. Use a clean, damp cloth or a cotton swab dipped in mild soap and water to gently dab the affected area. Blot the area with a dry cloth to remove excess moisture, and allow the ribbon to air dry completely before returning it to storage.
Avoid Harsh Chemicals: Harsh cleaning agents or solvents can cause damage to your ribbons, so avoid using them. Stick to mild soap and water for spot cleaning, and avoid any abrasive or bleach-based cleaners.
Proper Storage Techniques: Ensure that your ribbons are stored properly to prevent damage. If using spool holders or ribbon cards, make sure the ribbons are wound tightly and secured to prevent unraveling. Keep them in a dust-free environment, whether that’s in clear storage boxes, drawers, or hanging storage solutions.
Rotate and Use: To prevent your ribbons from becoming stagnant, periodically rotate them by using the ones that have been in storage for a longer time. This not only keeps your ribbons fresh but also helps you assess their condition and make any necessary repairs or replacements if needed.
By following these maintenance and cleaning tips, you can ensure that your stored ribbons remain in the best possible condition for future crafting projects. Regular inspection, proper storage, careful handling, and occasional cleaning will help preserve the beauty and quality of your ribbons, allowing you to enjoy using them for years to come.
Conclusion
Proper storage and organization of your ribbon collection are vital for maintaining an efficient and visually appealing craft room. By implementing the right storage solutions, labeling and categorizing your ribbons, and practicing regular maintenance and cleaning, you can enjoy a clutter-free space that allows for easy access to your ribbons whenever inspiration strikes.
Starting with an assessment of your craft room’s space, you can determine the best storage options that fit your needs and available area. Traditional spool storage provides a classic and visible method for showcasing your ribbons, while drawer storage keeps them neatly concealed. Wall-mounted and hanging storage solutions maximize vertical space, making your ribbons accessible and adding aesthetic appeal to your craft room.
Organizing ribbons by color or size helps you quickly locate the specific ribbon you need for your projects. Utilizing clear and consistent labeling, whether through color-coded labels, numbering systems, or ribbon cards, ensures efficient navigation of your ribbon collection. Additionally, maintaining and cleaning your ribbons regularly helps to extend their lifespan and preserve their quality.
Remember to assess and update your storage solutions as your ribbon collection grows and changes. With proper storage, labeling, categorization, and maintenance, you can create a well-organized and inspiring craft room that sets the stage for endless creativity.
So, embrace the art of ribbon storage and transform your craft room into an organized oasis. Your ribbon collection will thank you, and you’ll be ready to embark on countless crafts with the ease and joy that comes from having a well-organized space.
Frequently Asked Questions about How To Store Ribbon In Craft Room
Was this page helpful?
At Storables.com, we guarantee accurate and reliable information. Our content, validated by Expert Board Contributors, is crafted following stringent Editorial Policies. We're committed to providing you with well-researched, expert-backed insights for all your informational needs.

0 thoughts on “How To Store Ribbon In Craft Room”