Articles
How To Store Ribbon Spools
Modified: August 30, 2024
Learn how to store ribbon spools effectively with these helpful articles. Keep your ribbons organized and tangle-free with our expert tips and tricks.
(Many of the links in this article redirect to a specific reviewed product. Your purchase of these products through affiliate links helps to generate commission for Storables.com, at no extra cost. Learn more)
Introduction
When it comes to crafting, one essential item that we often need is ribbon. Whether it’s for gift wrapping, scrapbooking, or DIY projects, having a collection of ribbon spools on hand can be incredibly convenient. However, storing these spools can quickly become a messy and frustrating task if not properly organized.
In this article, we will explore various storage solutions to help you keep your ribbon spools neat, easily accessible, and tangle-free. From ribbon dispenser boxes to wall-mounted displays, we will cover different options to suit different needs and preferences.
By implementing these storage ideas, not only will you save time searching for the right ribbon, but you will also prolong the lifespan of your ribbons by keeping them in optimal condition. So let’s dive into the world of ribbon storage and discover the best way to keep your spools neatly organized!
Key Takeaways:
- Keep your ribbon spools organized and easily accessible with storage solutions such as dispenser boxes, DIY cardboard wrapping, organizers, and wall displays. Choose the method that suits your space and preferences for hassle-free crafting.
- Whether you have a large ribbon collection or prefer a compact option, there’s a storage solution for you. From drawer storage to wall-mounted displays, find the perfect way to keep your ribbons tangle-free and ready for creative projects.
Read more: How To Store Ribbon Not On Spools
Choosing the Right Storage Solution
Before diving into the specifics of different storage options, it’s important to consider your specific needs and available space. Take some time to assess how many ribbon spools you have, the sizes and lengths of the spools, and the amount of storage space you have available.
One popular option for storing ribbon spools is a ribbon dispenser box. These boxes are specifically designed to hold multiple spools of ribbon and usually feature a cutting edge or hole for easy dispensing. Ribbon dispenser boxes are a great choice if you have a large collection of ribbons and want to keep them organized in one place. They come in various sizes and can be stacked or stored on a shelf.
If you prefer a more DIY approach, you can wrap your ribbon spools around a cardboard square or rectangle. Cut a piece of sturdy cardboard to the desired size, make a small slit on each corner, and wrap the ribbon around the cardboard. This method works well for smaller collections and allows you to easily see and access each spool.
Another option is to use a ribbon organizer. These organizers typically have multiple compartments or rods to hold individual spools. They are compact, portable, and perfect for crafters who like to take their supplies on the go. With a ribbon organizer, you can quickly find and grab the ribbon you need without any hassle.
If you have limited space and prefer to keep your ribbons stored out of sight, consider using a drawer specifically designated for ribbon storage. You can use dividers or small boxes within the drawer to keep the ribbons separated by color or type. This method works particularly well if you have a substantial ribbon collection and want to keep everything neatly tucked away.
For crafters who prefer a visual display, hanging ribbons on a rod or hanger is a popular choice. You can use a tension rod inside a closet or a wall-mounted rod to hang your ribbons. This method not only keeps the ribbons organized and easily accessible, but it also adds a colorful and decorative touch to your craft space.
If you have a bit more wall space available, creating a wall-mounted ribbon storage display can be a great option. You can use a pegboard, hooks, or even a decorative frame with ribbons stretched across it. This method allows you to showcase your ribbon collection and easily grab the specific one you need for your project.
Lastly, for those who want a compact and versatile option, a multi-compartment box can be the answer. These boxes feature small compartments that can hold individual spools or smaller ribbon scraps. You can organize your ribbons by color, size, or even project, making it easy to find the perfect ribbon for any occasion.
Remember to choose a storage solution that suits your specific needs and preferences. Experiment with different methods to find the one that keeps your ribbon spools organized and easily accessible. Now that we have explored the different storage options, let’s delve into each method in more detail.
Using a Ribbon Dispenser Box
A ribbon dispenser box is a convenient and efficient storage solution for those who have a large collection of ribbon spools. These boxes are specifically designed to hold multiple spools of ribbon and provide easy access to each one.
To use a ribbon dispenser box, start by choosing a box that suits your needs. They come in various sizes, so select one that can accommodate the number of ribbon spools you have. You can find ribbon dispenser boxes at craft stores or online.
Once you have your ribbon dispenser box, remove the lid and place it aside. It’s important to note that some ribbon dispenser boxes have a clear lid, allowing you to see the ribbons without opening the box.
Next, take your ribbon spools and thread the end of each one through the hole or slot in the box. This will allow you to easily pull the ribbon out for cutting or use. If your box doesn’t have a pre-made hole, you can make one using a hole punch or scissors.
Once all the ribbon spools are threaded through the dispenser box, you can secure the end of each spool with a small piece of tape. This will prevent the ribbon from unraveling and getting tangled.
If your ribbon dispenser box has a cutting edge, you can use it to cut the ribbon to the desired length. This eliminates the need for scissors and adds convenience to the crafting process.
Another benefit of using a ribbon dispenser box is that it keeps the ribbons neatly organized and prevents them from getting tangled or damaged. The box provides a compact and secure storage solution, making it easy to transport and store your ribbon collection.
Additionally, using a ribbon dispenser box allows you to quickly see and access each spool of ribbon. This saves valuable time during crafting projects, as you can easily identify the right ribbon for your needs.
To keep your ribbon dispenser box even more organized, you can group your ribbons by color or theme. This will make it easier to find the exact ribbon you’re looking for and add a touch of visual appeal to your crafting space.
Overall, using a ribbon dispenser box is a practical and effective way to store and access your ribbon spools. It keeps them organized, prevents tangling, and allows for easy cutting and dispensing. Consider using a ribbon dispenser box if you have a large collection of ribbons and want a hassle-free storage solution.
Wrapping Spools Around a Cardboard Square
If you have a smaller collection of ribbon spools or are looking for a budget-friendly storage solution, wrapping your spools around a cardboard square or rectangle is a simple and effective method.
To start, gather some sturdy cardboard. You can cut a piece to the desired size, depending on the length and number of ribbon spools you have. A square shape works well, but you can also use a rectangle if that suits your needs better.
Once you have your cardboard, make small slits on each corner. These slits will hold the ends of the ribbon in place and prevent them from unraveling.
Take one end of a ribbon spool and insert it into one of the slits on the cardboard. Wrap the ribbon around the cardboard in a neat and organized manner, making sure to keep it taut. When you reach the other end of the ribbon, insert it into another slit, securing it in place.
Repeat this process with each ribbon spool, wrapping them around the cardboard and securing the ends in the slits. Depending on the thickness of the ribbon, you may need to adjust the size of the slits to ensure a snug fit.
Wrapping your ribbon spools around a cardboard square has several benefits. Firstly, it keeps your ribbons neatly organized and prevents them from tangling or getting damaged. Each spool is clearly visible and easily accessible, making it simple to find the ribbon you need for your project.
This method is also cost-effective, as you can use cardboard that you already have at home or can easily obtain. It’s a great option if you’re on a tight budget or prefer a more sustainable storage solution.
To enhance the organization of your ribbon spools, you can label the cardboard square or use different colored cardboards for different types or colors of ribbons. This will make it even easier to find the specific ribbon you’re looking for.
Keep in mind that this method may not be suitable for very long or wide ribbons, as they may be challenging to wrap around a small cardboard square. In such cases, you might consider using a ribbon dispenser box or another storage solution.
Wrapping your ribbon spools around a cardboard square is a simple and affordable way to keep your ribbons organized and easily accessible. It’s a great option for smaller collections or when you want to create a DIY storage solution. Give it a try and enjoy the convenience it brings to your crafting projects!
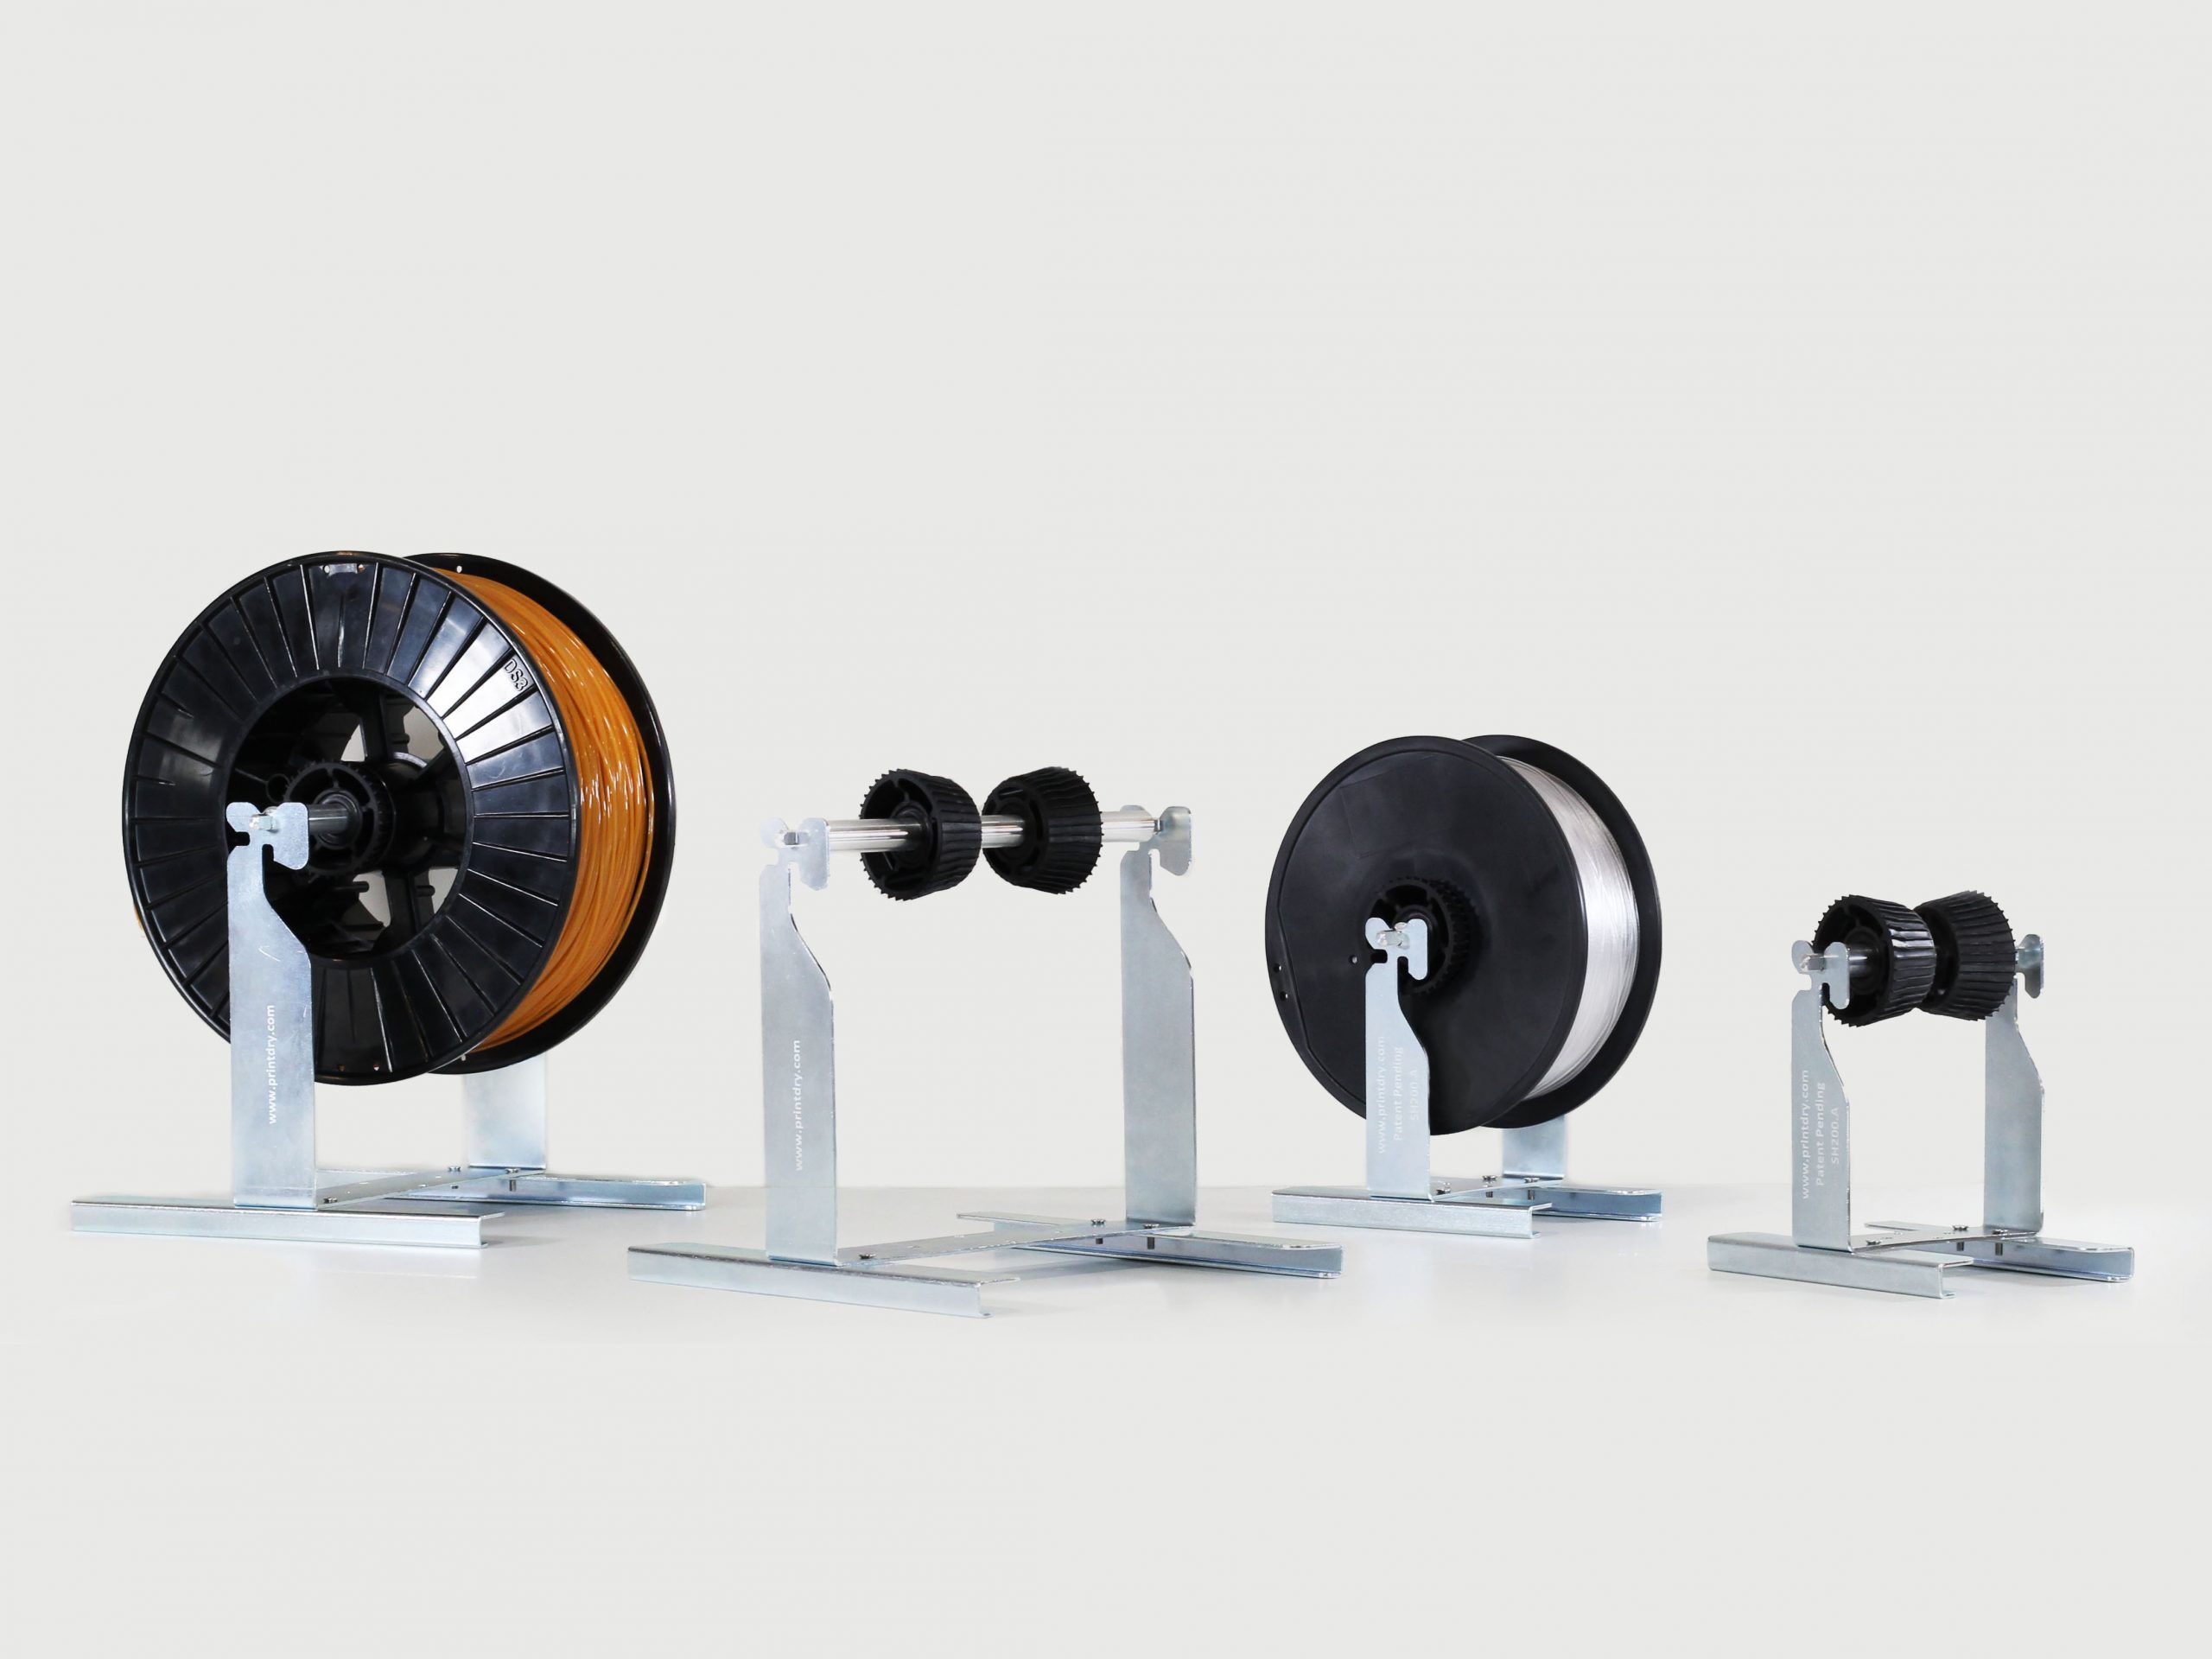
Making Use of a Ribbon Organizer
A ribbon organizer is a handy storage solution for crafters who want to keep their ribbon spools organized and easily accessible. These organizers typically have multiple compartments or rods to hold individual spools, allowing for efficient storage and quick retrieval of ribbons.
When choosing a ribbon organizer, consider the size and capacity you need based on the number of ribbons you have. Opt for an organizer with enough compartments or rods to accommodate your collection.
Once you have your ribbon organizer, start by sorting your ribbon spools by color, type, or any other categorization that suits your needs. This will make it easier to locate specific ribbons when you’re working on a project.
Next, place each ribbon spool into an individual compartment or onto a rod. Depending on the design of the organizer, you may need to thread the ribbon through a hole or hook it onto a rod.
One of the advantages of using a ribbon organizer is that it allows you to easily see all the ribbons you have at a glance. This makes it convenient to compare colors, patterns, or textures and select the perfect ribbon for your project.
Ribbon organizers come in various shapes and sizes. Some are portable and foldable, while others are designed to be kept on a craft table or shelf. Choose one that suits your storage space and provides easy access to your ribbons.
One popular type of ribbon organizer is a ribbon rack. These racks typically have multiple rods that can hold numerous spools of ribbon. They often come with a built-in cutting tool, allowing you to cut the desired length of ribbon without needing additional tools.
Another option is a ribbon box with multiple compartments. These boxes feature separate sections for each spool, keeping them neatly organized and preventing tangling. Some ribbon boxes even come with a handle, making them portable and convenient for crafting on the go.
A ribbon organizer not only keeps your ribbons organized but also protects them from dust, sunlight, and other potential damage. It helps maintain the condition of the ribbons, ensuring that they are ready to use whenever you need them.
To further enhance the organization of your ribbon collection, consider labeling each compartment or rod. This will make it even easier to quickly find the specific ribbon you’re looking for.
Whether you have a small or large ribbon collection, a ribbon organizer is a practical and efficient storage solution. It ensures that your ribbons are organized, easily accessible, and protected. Choose the right organizer for your needs, and enjoy the convenience it brings to your crafting projects!
Store ribbon spools by using a ribbon organizer or a simple shoebox with holes punched in the sides to thread the ribbons through. This keeps them tidy and easily accessible.
Read more: How To Store Ribbon
Storing Ribbon in a Drawer
If you have limited space or prefer to keep your ribbon collection stored out of sight, utilizing a drawer can be a practical and organized storage solution. Storing ribbons in a drawer helps keep them protected, tidy, and easily accessible when needed for crafting projects.
Begin by selecting a drawer that is large enough to accommodate the length and number of ribbon spools you have. If possible, choose a drawer that is shallow enough to prevent the ribbons from becoming tangled or damaged.
Before placing the ribbons in the drawer, it’s a good idea to add dividers or small boxes to keep the spools neatly separated. This will prevent the ribbons from intertwining and make it easier to find the specific ribbon you’re looking for.
Depending on the size of the drawer and the number of ribbons you have, you can use small plastic containers, repurpose old gift boxes, or even DIY your own dividers using cardboard or foam board.
Once you have added the dividers or boxes, place each ribbon spool in its designated section. You can arrange them by color, type, or any categorization that makes sense for your collection. This organization method allows for easy sorting and retrieval of the ribbons.
To make it even more convenient, you can attach a small adhesive label or write directly onto each storage compartment, indicating the color or type of ribbon it contains.
By storing your ribbons in a drawer, you keep them protected from dust, sunlight, and other potential environmental damage. This helps maintain the quality of the ribbons and ensures they are ready for use whenever you have a creative project.
Additionally, storing ribbons in a drawer allows you to maximize your storage space, especially if you have limited room in your craft area. It keeps the ribbons organized and free from clutter, creating a tidy workspace where you can easily access your supplies.
Consider adding a sachet or small bag of lavender or other fragrant herbs to the drawer to keep your ribbons smelling fresh and adding a pleasant aroma to your crafting space.
Remember to periodically check and organize your ribbon drawer to ensure everything remains in order. You can take this opportunity to remove any damaged or unused ribbons and make space for new additions to your collection.
Storing ribbon in a drawer is a practical and efficient way to keep your ribbons organized, protected, and out of sight. With a well-organized drawer, you’ll be able to quickly find the perfect ribbon for any crafting project and enjoy a clutter-free creative space.
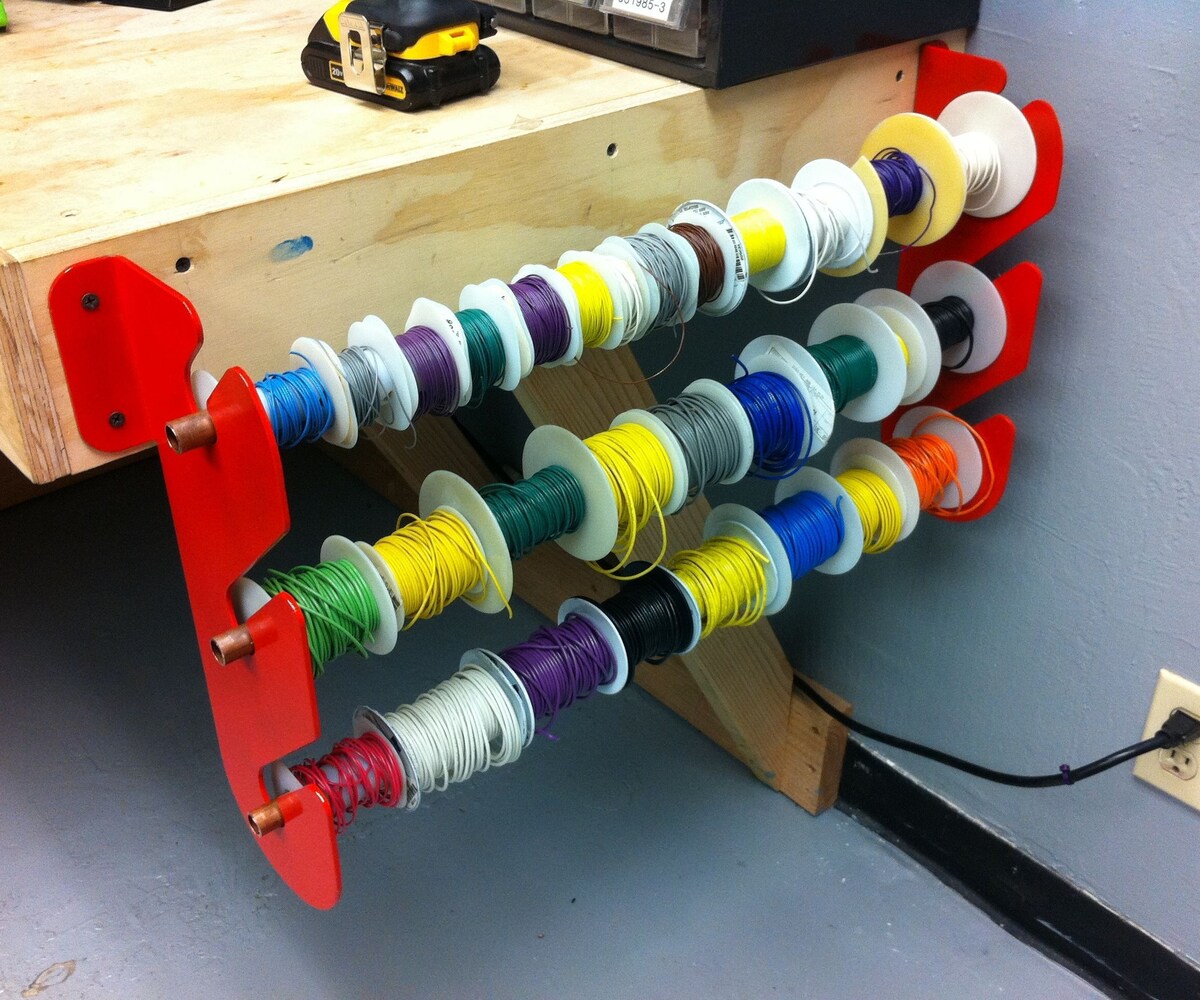
Hanging Ribbons on a Rod or Hanger
If you’re looking for a visually appealing storage solution for your ribbon collection, consider hanging them on a rod or hanger. This method not only keeps your ribbons organized and easily accessible but also adds a decorative touch to your craft space.
To get started, you’ll need a sturdy rod or hanger that can support the weight of your ribbon spools. You can use a tension rod installed inside a closet or a wall-mounted rod specifically designed for ribbon storage.
If you’re using a tension rod, place it inside a closet or similar space where it will be out of the way but still easily accessible. Adjust the rod’s length to fit the width of the space, ensuring it is stable and secure.
For a wall-mounted ribbon storage option, choose a location that is convenient for you to reach and allows for easy access to the ribbons. You can mount the rod to a wall using hooks or brackets, making sure it is firmly attached.
Once you have your rod or hanger in place, begin by gathering your ribbon spools. Sort them by color, type, or any other categorization that suits your needs.
Starting with one ribbon spool, remove the label or any packaging material and thread the end of the ribbon through the rod or hanger. Allow the ribbon to dangle freely, ensuring that it doesn’t get tangled or caught on any other ribbons.
Continue this process with each ribbon spool, spacing them out evenly along the rod or hanger to create an organized display.
One of the benefits of hanging your ribbons on a rod or hanger is that it allows you to easily see all your ribbons at once. This makes it convenient to compare colors, patterns, or textures and choose the perfect ribbon for your project.
In addition to practicality, hanging ribbons can also serve as a decorative element in your craft space. The colorful ribbons add visual interest and create a vibrant and inspiring atmosphere.
If you’re worried about the ribbons getting dusty or dirty, you can cover them with a lightweight fabric or plastic cover. This will help protect the ribbons while still allowing you to see and access them easily.
Consider arranging your ribbons in a gradient or ombre pattern to create an even more eye-catching display. This can be achieved by arranging the ribbons from light to dark or by coordinating them based on complementary colors.
Keep in mind that this storage method is best suited for shorter ribbon lengths. If you have longer ribbons, you may need to fold them or secure them with a clip to prevent them from touching the floor and getting tangled.
Hanging ribbons on a rod or hanger is not only a practical storage solution but also a visually appealing way to showcase your ribbon collection. Enjoy the easy access to your ribbons and the decorative touch they add to your craft space!
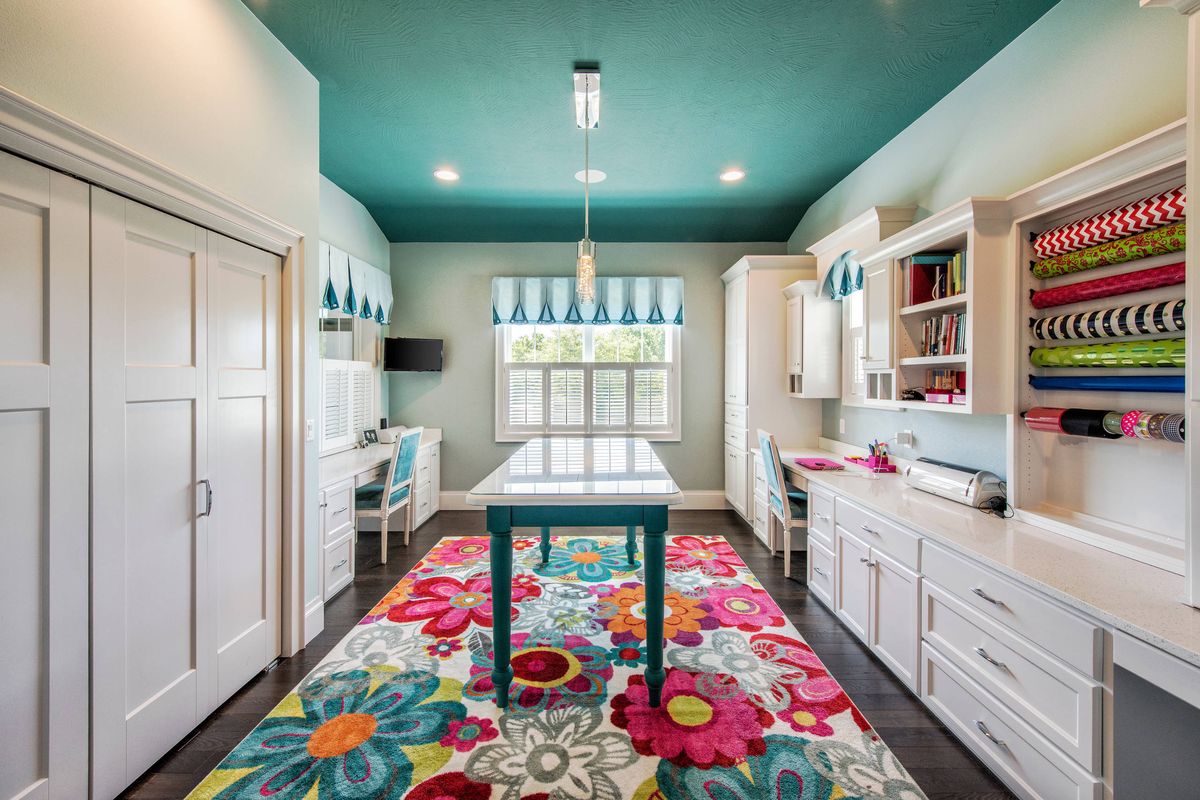
Creating a Wall-Mounted Ribbon Storage Display
If you’re looking for a creative and decorative way to store and showcase your ribbon collection, consider creating a wall-mounted storage display. This method not only keeps your ribbons organized and easily accessible but also adds a visual focal point to your craft room or workspace.
To start, you’ll need a wall-mounted storage solution that can hold your ribbon spools securely. There are several options available, such as a pegboard, hooks, or even a decorative frame with ribbons stretched across.
If you choose to use a pegboard, select one that fits the size of your ribbons and allows for easy customization. Attach the pegboard securely to the wall using hooks, screws, or adhesive strips, ensuring it is stable and can support the weight of the ribbons.
Once the pegboard is mounted, you can insert hooks or dowels into the holes to hold your ribbon spools. Arrange the hooks or dowels in a way that allows for easy access to each ribbon and creates an aesthetically pleasing display.
If you prefer a more decorative approach, you can use a frame with crisscrossed ribbons stretched across it. Start by selecting a frame that fits your ribbon collection and complements your craft room decor.
Remove the glass or backing from the frame and attach lengths of ribbon across the frame in a crisscross pattern. Secure the ribbons tightly so that they can hold the weight of the spools without sagging.
Once the ribbons are in place, you can attach your ribbon spools to the ribbons using small clips or clothespins. Make sure to space them evenly and create a visually appealing arrangement.
One advantage of a wall-mounted ribbon display is that it allows you to easily see and access your ribbons at a glance. This makes it convenient to choose the perfect ribbon for a project without rummaging through drawers or boxes.
A wall-mounted display also serves as a decorative element in your craft room. The colorful ribbons create a vibrant and visually appealing focal point, adding a touch of creativity and inspiration to your workspace.
Consider organizing your ribbon collection by color, type, or theme to create a visually striking display. You can arrange the ribbons from light to dark, group them by color families, or even create a rainbow effect for added visual impact.
Remember to periodically check and rearrange your ribbon display to ensure that everything remains neat and organized. You can remove any unused or unwanted ribbons and incorporate new additions to your collection.
A wall-mounted ribbon storage display not only keeps your ribbons within easy reach but also adds a unique and decorative element to your craft room. Enjoy the convenience and creativity that this storage solution brings to your crafting projects!
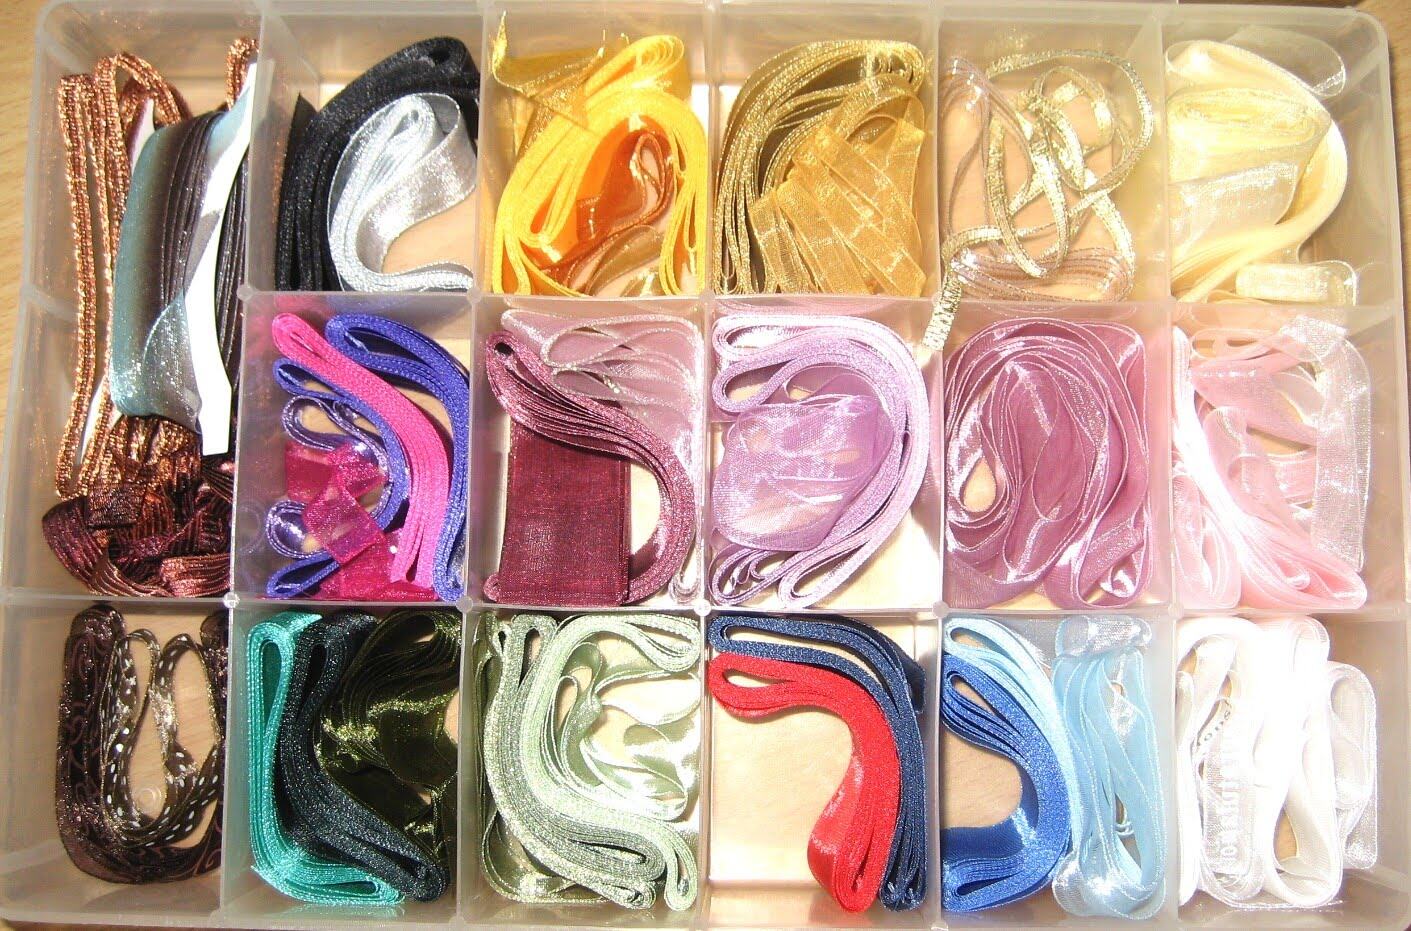
Keeping Ribbons in a Multi-Compartment Box
If you desire a compact and versatile storage solution for your ribbon collection, using a multi-compartment box is an excellent choice. This method allows you to keep your ribbons organized, protected, and easily accessible in one convenient container.
Start by selecting a multi-compartment box that suits the size and number of your ribbon spools. There are various options available, ranging from plastic containers with adjustable dividers to wooden boxes with pre-set compartments.
Once you have your multi-compartment box, begin by organizing your ribbon spools based on color, type, or any other categorization that suits your preferences. This will make it easier to find the specific ribbon you need when working on a project.
Place each ribbon spool in a separate compartment, ensuring they are securely held in place and won’t become tangled or mixed up with one another. If necessary, you can use dividers or small boxes within the larger box to create additional sections for better organization.
The advantage of using a multi-compartment box is that it keeps your ribbons tidy, preventing them from tangling or getting damaged. Each spool is easily visible and accessible, allowing you to find the perfect ribbon for your crafting needs quickly.
Additionally, keeping ribbon spools in a box protects them from dust, sunlight, and other potential environmental elements. This helps maintain the condition of the ribbons and ensures they are ready for use whenever you need them.
A multi-compartment box is also great for on-the-go crafting. Its compact design allows you to easily transport your ribbon collection to workshops, classes, or crafting events without worrying about damage or tangling.
If desired, you can further enhance the organization of your multi-compartment box by labeling each section or compartment. This will make it even easier to find the specific ribbon you’re looking for and keep your collection neat and orderly.
Consider arranging your ribbons in a way that is visually appealing, such as by color gradient or by grouping complementary colors together. This not only adds aesthetic appeal to your storage box but also makes it easier to locate specific ribbons for your projects.
Periodically check and reorganize your multi-compartment box to ensure everything remains in order. Remove any damaged or unused ribbons and make space for new additions to your collection.
A multi-compartment box is a versatile and efficient storage solution for ribbon enthusiasts. It keeps your ribbons organized, protected, and easily accessible, making it a practical choice for both home and on-the-go crafting. Enjoy the convenience and neatness this storage method offers to your creative endeavors!
Read more: How To Store Spools Of Thread
Conclusion
Storing and organizing ribbon spools is essential for crafters who want to maintain a tidy and efficient workspace. By implementing the right storage solution, you can keep your ribbons neatly organized, easily accessible, and protected from damage.
In this article, we explored various storage options for ribbon spools, each offering its own benefits and advantages. From ribbon dispenser boxes and cardboard wrapping to ribbon organizers and wall-mounted displays, there is a solution to suit every preference and space requirement.
Ribbon dispenser boxes are ideal for those with a large collection of ribbons, providing easy access and eliminating the risk of tangling. Wrapping spools around a cardboard square is a budget-friendly option for smaller collections, while ribbon organizers offer portability and convenient access on the go.
For those with limited space or a desire to keep ribbons out of sight, storing them in a drawer provides a compact and organized solution. Hanging ribbons on a rod or hanger combines functionality with decorative appeal, enhancing your craft space.
If you prefer to showcase your ribbons while keeping them organized, a wall-mounted ribbon storage display is an excellent option. Lastly, using a multi-compartment box offers versatility and ease of transport for crafters on the move.
No matter which storage solution you choose, the key is to keep your ribbons organized and protected. Sort them by color, type, or theme, and periodically check and reorganize to maintain order.
By implementing the storage ideas in this article, you’ll have a well-organized ribbon collection that is easily accessible, tangle-free, and ready to inspire your creative projects.
Remember to select the right storage solution based on your needs, available space, and personal preferences. Experiment with different methods to find the one that suits you best.
Enjoy the convenience, efficiency, and beauty that comes with a well-organized ribbon storage system. Happy crafting!
Frequently Asked Questions about How To Store Ribbon Spools
Was this page helpful?
At Storables.com, we guarantee accurate and reliable information. Our content, validated by Expert Board Contributors, is crafted following stringent Editorial Policies. We're committed to providing you with well-researched, expert-backed insights for all your informational needs.


0 thoughts on “How To Store Ribbon Spools”