Home>Interior Design>How To Make A Ribbon Wreath: 6 Easy Steps For Beginners

Interior Design
How To Make A Ribbon Wreath: 6 Easy Steps For Beginners
Modified: January 5, 2024
Learn how to make a stunning ribbon wreath in just 6 simple steps, perfect for interior design enthusiasts and beginners alike.
(Many of the links in this article redirect to a specific reviewed product. Your purchase of these products through affiliate links helps to generate commission for Storables.com, at no extra cost. Learn more)
Introduction
Welcome to the world of ribbon wreath making! If you’re a beginner and looking for a fun and creative DIY project, making a ribbon wreath is the perfect choice. Whether you want to decorate your front door, spruce up your living space, or create a personalized gift, a ribbon wreath is a versatile and eye-catching accessory.
Not only are ribbon wreaths beautiful, but they are also easy to make. With just a few materials and some basic crafting skills, you can create a stunning wreath that will impress your friends and family. In this article, we will guide you through the process of making a ribbon wreath in 6 simple steps.
Before we get started, let’s talk a little bit about why ribbon wreaths are so popular. One of the main reasons is the wide variety of ribbons available. From satin and grosgrain to burlap and lace, there are endless options to choose from. You can mix and match different colors, patterns, and textures to create a wreath that suits your personal style and the occasion.
Additionally, ribbon wreaths are a cost-effective alternative to buying pre-made wreaths. Instead of spending a fortune on a store-bought wreath, you can save money by making your own. Plus, it’s a great way to unleash your creativity and customize the design to reflect your personality.
So, if you’re ready to dive into the wonderful world of ribbon wreath making, let’s gather our materials and get started on this exciting DIY project!
Key Takeaways:
- Dive into the world of ribbon wreath making with 6 easy steps for beginners. Create a stunning and cost-effective DIY project that showcases your creativity and adds a unique touch to your home decor.
- Gather materials, choose a wreath frame, cut and attach ribbons, fill in gaps, and add embellishments to make a beautiful ribbon wreath. Enjoy the process and impress everyone with your DIY skills!
Step 1: Gather Materials
Before you begin making your ribbon wreath, it’s important to gather all the necessary materials. Here’s a list of what you’ll need:
- Wreath frame: There are various types of wreath frames available, such as wire frames or foam wreath forms. Choose a size and shape that suits your preference.
- Ribbons: Select a variety of ribbons in different colors, patterns, and textures. Make sure to choose ribbons that are wide enough to create a visually appealing wreath.
- Scissors: A pair of sharp scissors will come in handy for cutting the ribbons.
- Hot glue gun and glue sticks: You’ll need a hot glue gun to attach the ribbons to the wreath frame.
- Embellishments: Optional embellishments like flowers, bows, or ornaments can be used to enhance the look of your wreath.
- Wire or ribbon for hanging: If you plan to hang your wreath, make sure to have wire or ribbon to create a hanger.
Once you have gathered all your materials, you’re ready to move on to the next step. Having everything ready and within reach will make the process smoother and more enjoyable.
Step 2: Choose a Wreath Frame
Choosing the right wreath frame is an important step in the ribbon wreath making process. The wreath frame provides the structure and shape for your wreath, and there are several options to consider.
One common type of wreath frame is a wire frame. These frames are made of sturdy wire and come in various shapes and sizes, such as circular, heart-shaped, or even a custom shape. Wire frames are versatile and can be easily covered with ribbons to create a beautiful wreath.
Another popular option is a foam wreath form. Foam forms are lightweight and can be found in different sizes. They are usually covered with a layer of fabric or ribbon to create a clean and polished look. Foam forms are great for attaching ribbons with pins or hot glue.
When choosing a wreath frame, consider the size and shape that works best for your desired wreath design. If you want a large and impactful wreath, opt for a larger frame. For a more delicate and petite wreath, choose a smaller frame.
Additionally, think about the overall aesthetic you want to achieve. If you prefer a rustic look, consider a grapevine wreath frame made of natural materials. For a more modern and sleek design, a metal frame might be the perfect choice.
Take some time to browse through different options and consider your preferences and the style of your space. Once you’ve chosen the perfect wreath frame, you can move on to the next step of the ribbon wreath making process.
Step 3: Cut the Ribbon
Now that you have your wreath frame ready, it’s time to cut the ribbon. This step involves preparing the ribbons that will be used to cover the wreath frame and create the beautiful layers and textures of your ribbon wreath.
Start by selecting the ribbons you want to use. Choose a variety of colors, patterns, and textures to add visual interest to your wreath. You can mix and match different ribbons to create a unique and eye-catching design.
Next, measure and cut the ribbons into pieces of varying lengths. The length of the ribbon will depend on the size of your wreath frame and the desired look you want to achieve. As a general guideline, cut the ribbons to be about 10-12 inches long.
It’s a good idea to cut more ribbons than you think you’ll need. This will allow you to have a variety of options and ensure that you have enough ribbons to cover the entire wreath frame.
When cutting the ribbons, you can choose to cut them in a straight edge or angle the ends for a more decorative look. Experiment with different cutting styles to see what suits your wreath design best.
Once you have all your ribbons cut and ready, it’s time to move on to the next step: attaching them to the wreath frame.
Note: When cutting the ribbons, make sure to handle scissors with care to avoid any accidents or injuries.
When making a ribbon wreath, start by choosing a color scheme and ribbon width that complements each other. This will ensure a cohesive and visually appealing final product.
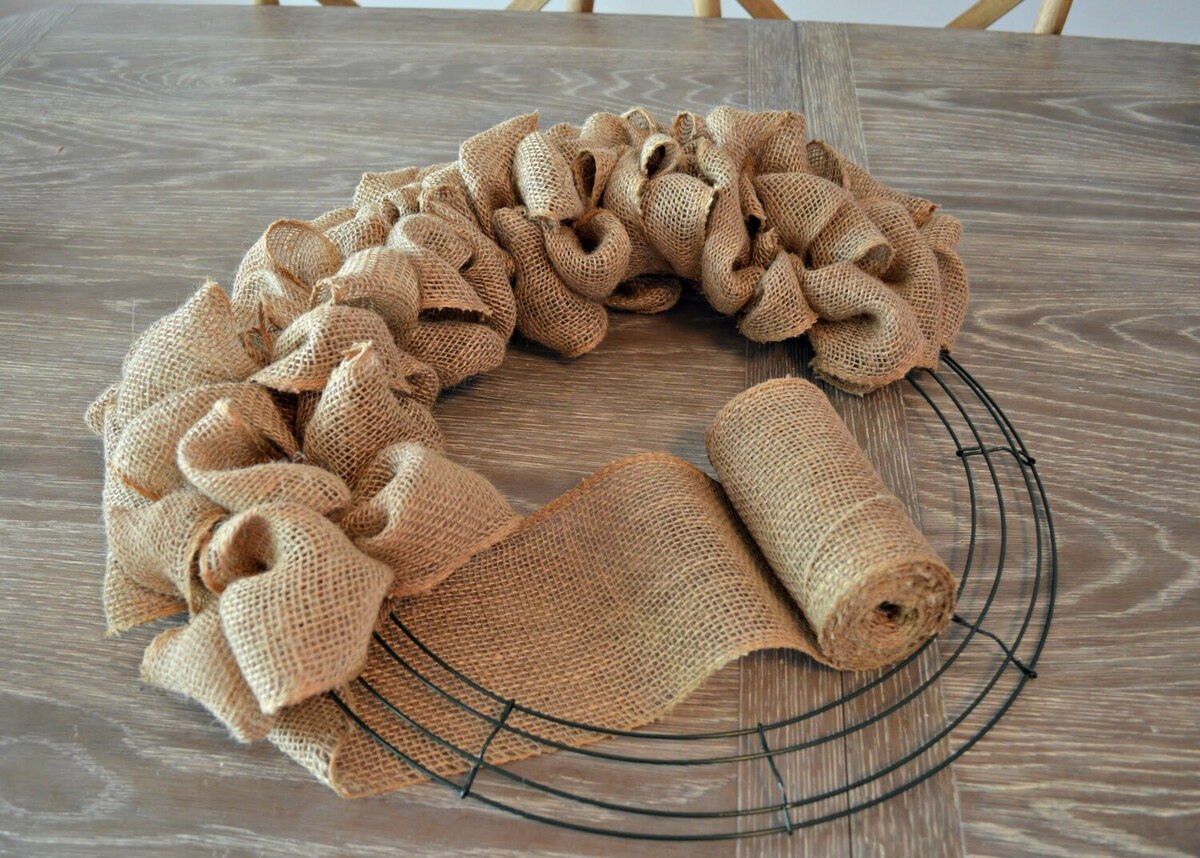
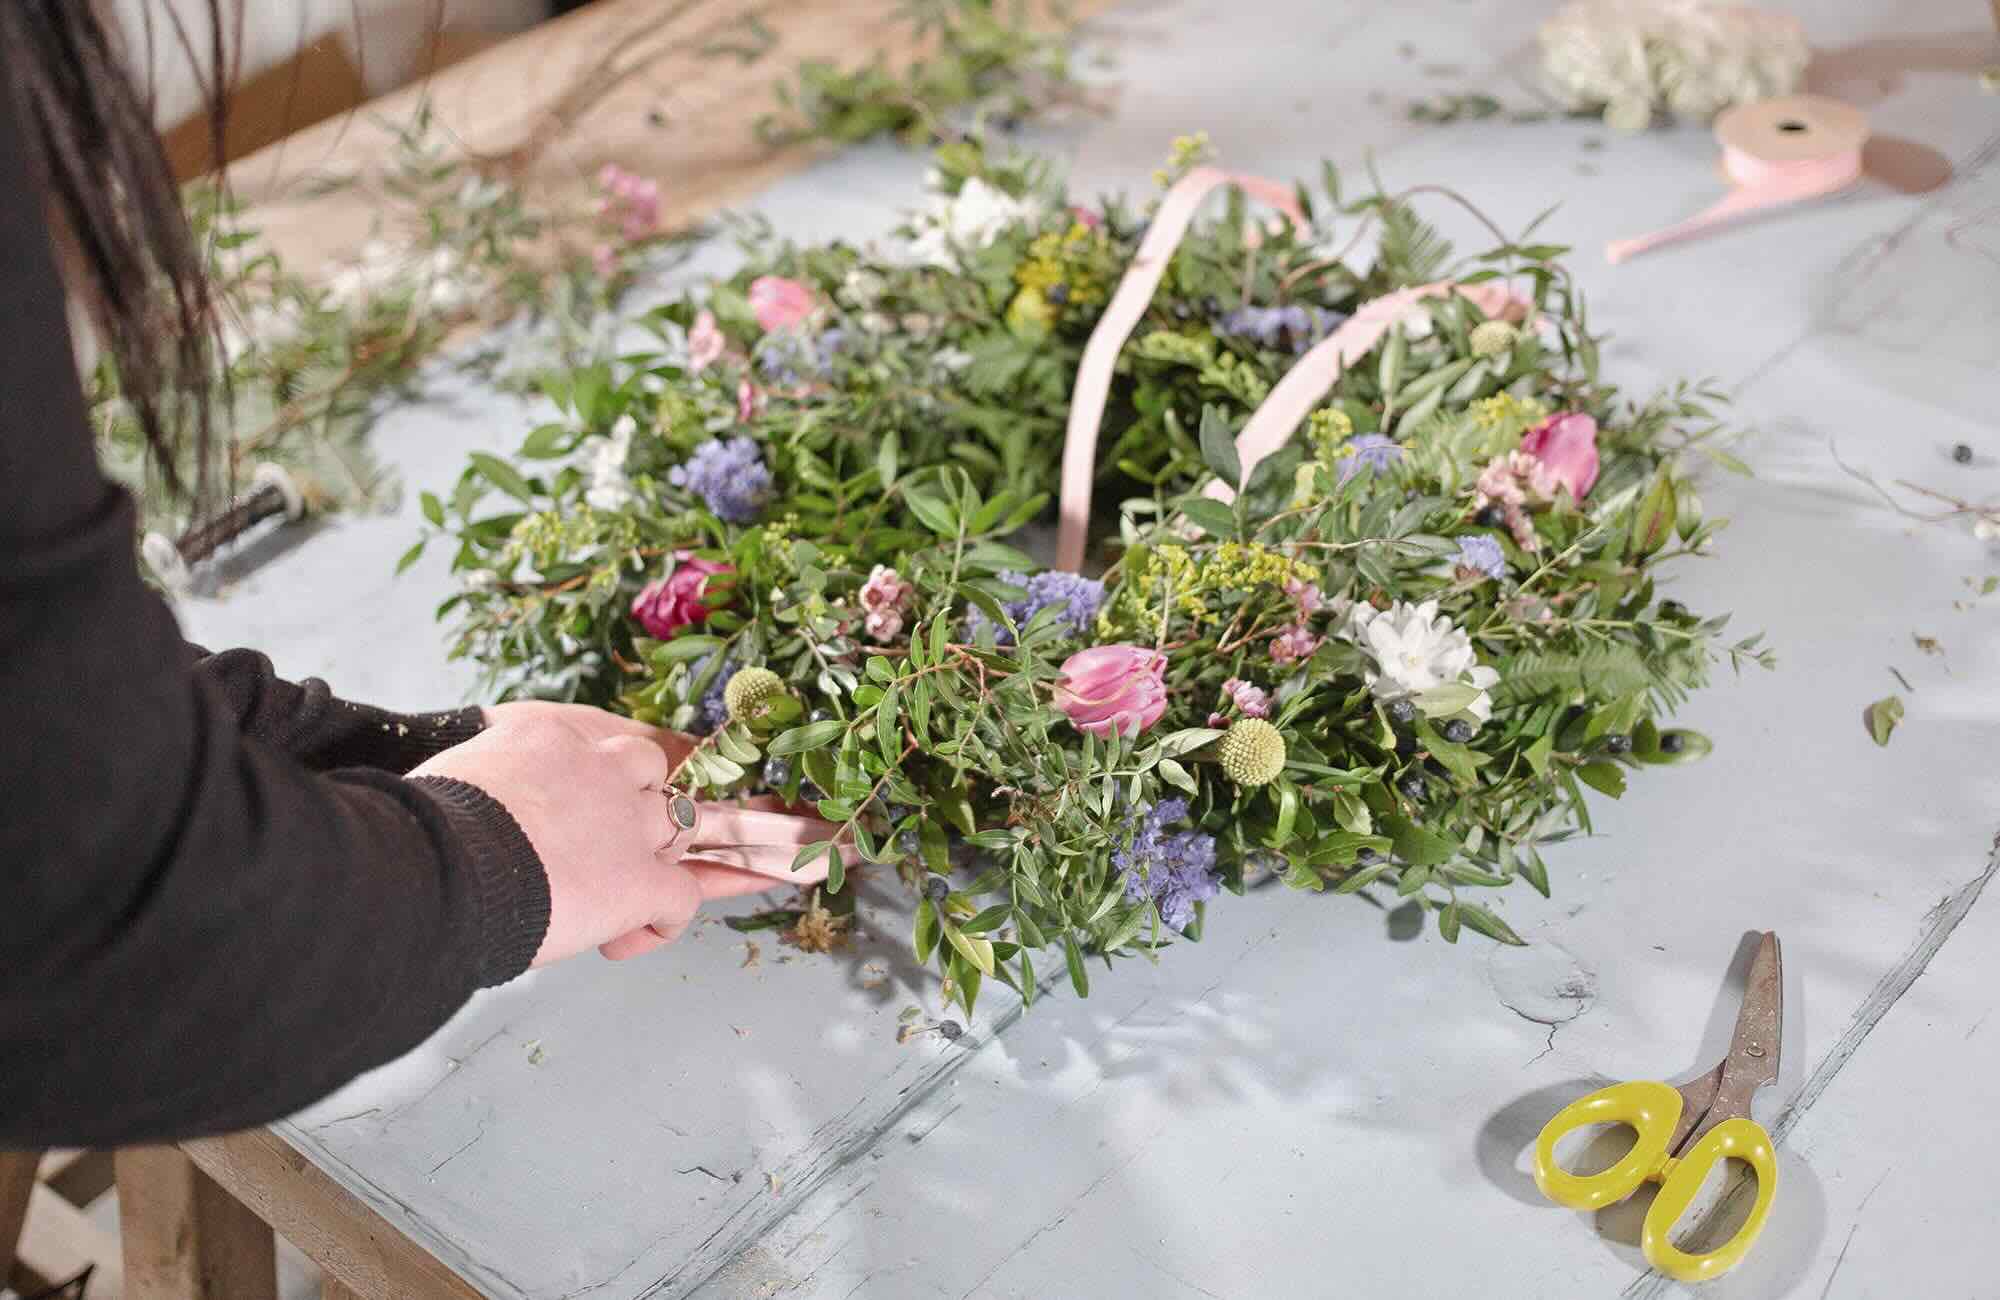
Step 4: Attach the Ribbon to the Frame
With your ribbons cut and ready, it’s time to start attaching them to the wreath frame. This step is where the magic happens as you begin to see your ribbon wreath take shape.
Begin by selecting a ribbon to start with. You can choose any color or pattern that you like. Take one end of the ribbon and secure it to the back of the wreath frame using hot glue or by tying a knot.
Once the ribbon is secure, start wrapping it around the wreath frame, making sure to keep the ribbon flat and smooth. You can wrap it tightly or slightly overlap the layers for a fuller look.
Continue wrapping the ribbon around the frame, using hot glue or small dabs of glue every few inches to secure the ribbon in place. Take your time and ensure that the ribbon is evenly positioned and covering the frame completely.
When you reach the end of the ribbon, secure it to the back of the frame with hot glue or another knot. Trim any excess ribbon if necessary.
Repeat this process with the remaining ribbons, attaching them to the wreath frame one by one. Experiment with different colors and patterns to create a visually appealing design.
As you attach the ribbons, you can vary the placement and direction of the ribbons to add depth and dimension to your wreath. You can also layer different ribbons on top of each other for a more textured look.
Continue attaching ribbons until the entire wreath frame is covered. Don’t worry if there are gaps or uneven areas—it will all be filled in the next step.
Once you have attached all the ribbons, step back and admire your progress. Your wreath is starting to come to life! Now it’s time to move on to the next step and fill in any gaps.
Step 5: Repeat and Fill in the Gaps
Now that you have all your ribbons attached to the wreath frame, it’s time to fill in any gaps and ensure that your wreath looks full and complete. This step is crucial for achieving a polished and professional-looking ribbon wreath.
Take a step back and assess your wreath. Look for any areas where the wreath frame is still visible or where the ribbons are sparse. These are the areas that need attention.
Choose a ribbon that complements the existing design and cut it into smaller pieces. These pieces should be long enough to cover the gaps but not too long that they overwhelm the overall look of the wreath.
Using hot glue or small dabs of glue, attach the smaller ribbon pieces to the areas that need filling. Be strategic about the placement to ensure a balanced and visually appealing result.
Repeat this process with different ribbons until all the gaps are filled and the wreath looks full and lush. Feel free to layer the ribbons on top of each other to create depth and texture.
As you fill in the gaps, step back periodically to assess your progress. Make any necessary adjustments or additions as needed.
Remember, the goal is to create a wreath that is visually pleasing and harmonious. Take your time in this step and pay attention to detail.
Once you’re satisfied with the look of your wreath and all the gaps are filled, you can move on to the final step: adding embellishments.
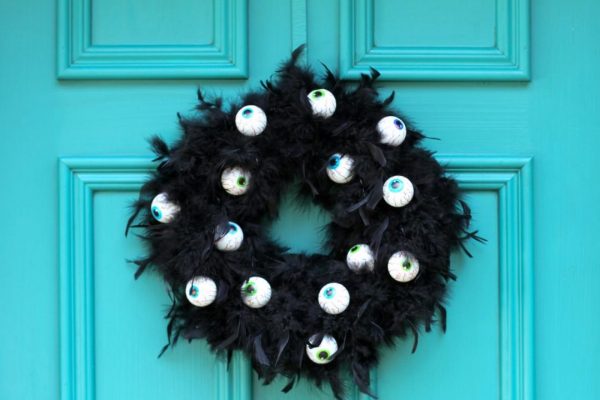
Step 6: Add Embellishments
In the final step of creating your ribbon wreath, it’s time to add some embellishments to enhance its beauty even further. Embellishments are optional but can take your wreath to the next level and make it truly unique.
There are so many embellishment options to choose from, so let your creativity soar. Here are a few ideas to inspire you:
- Flowers: Attach silk flowers or floral picks to your wreath for a touch of elegance and a pop of color.
- Bows: Add a big, beautiful bow to the top or bottom of your wreath to make a bold statement.
- Ornaments: Hang small ornaments or baubles throughout the wreath for a festive touch.
- Faux fruits: Attach artificial fruits, such as berries or citrus slices, for a whimsical and nature-inspired look.
- Ribbon streamers: Add long ribbon streamers to the bottom of your wreath for a playful and dynamic effect.
When adding embellishments, consider the overall theme and style of your wreath. Choose embellishments that complement the ribbons and enhance the desired look you’re going for.
Secure the embellishments to the wreath frame using hot glue or floral wire. Take care to position them in a way that creates balance and visual interest. Step back and assess the placement as you go to ensure a cohesive and appealing design.
Remember, embellishments should enhance the wreath without overpowering it. Keep a delicate balance between the ribbons and the added decorations.
Once you’ve added all the embellishments and are happy with the final result, take a moment to admire your beautiful ribbon wreath. It’s now ready to be displayed and enjoyed.
Whether you hang it on your front door, display it on a wall, or give it as a gift, your ribbon wreath is sure to make a statement and spread joy.
Congratulations on completing your ribbon wreath! By following these 6 simple steps, you’ve created a stunning DIY project that showcases your creativity and adds a unique touch to your home decor.
Enjoy your ribbon wreath and the smiles it brings!
Conclusion
Creating a ribbon wreath is a satisfying and enjoyable DIY project that allows you to showcase your creativity and add a personal touch to your home decor. With just a few materials and some basic crafting skills, you can make a stunning wreath that will impress everyone who sees it.
In this article, we walked through the 6 easy steps to make a ribbon wreath for beginners. We started by gathering all the necessary materials, including a wreath frame, ribbons, scissors, and embellishments. Then, we learned how to choose the right wreath frame and cut the ribbons to the desired length and design.
Next, we covered the process of attaching the ribbons to the wreath frame, creating layers and textures that make the wreath visually appealing. We also discussed the importance of filling in any gaps to achieve a full and balanced look.
Finally, we explored the fun part of adding embellishments to enhance the beauty of the wreath. Whether it’s flowers, bows, ornaments, or ribbon streamers, embellishments provide the finishing touches that make your wreath truly unique.
Remember, making a ribbon wreath is not about perfection, but about expressing your creativity and enjoying the process. Feel free to experiment with different color combinations, patterns, and embellishments to create a wreath that reflects your personal style and taste.
Now that you have learned the steps to make a beautiful ribbon wreath, it’s time to put your skills to the test and create your own masterpiece. Whether you’re making a wreath for yourself or as a thoughtful gift, it’s a project that brings joy and adds a touch of elegance to any space.
So, gather your materials, let your creativity flow, and have fun making your ribbon wreath. Get ready to impress everyone with your DIY skills and enjoy the satisfaction of creating something beautiful with your own hands.
Happy crafting!
Frequently Asked Questions about How To Make A Ribbon Wreath: 6 Easy Steps For Beginners
Was this page helpful?
At Storables.com, we guarantee accurate and reliable information. Our content, validated by Expert Board Contributors, is crafted following stringent Editorial Policies. We're committed to providing you with well-researched, expert-backed insights for all your informational needs.


0 thoughts on “How To Make A Ribbon Wreath: 6 Easy Steps For Beginners”