Articles
How To Use Quilt Stencils
Modified: August 16, 2024
Learn how to use quilt stencils effectively with these informative articles. Discover tips and techniques for creating stunning quilt designs.
(Many of the links in this article redirect to a specific reviewed product. Your purchase of these products through affiliate links helps to generate commission for Storables.com, at no extra cost. Learn more)
Introduction
Quilt stencils are an essential tool for any quilting enthusiast. These versatile templates provide a wide array of design options and can help bring your quilting projects to life. Whether you’re a beginner or an experienced quilter, quilt stencils offer a fantastic way to add intricate and professional-looking designs to your quilts.
With quilt stencils, you can achieve consistent and precise patterns on your quilt top, giving your project a polished and professional finish. These stencils come in a variety of shapes, sizes, and styles, allowing you to personalize your quilt and give it a unique touch.
Not only do quilt stencils offer aesthetic benefits, but they also make the quilting process more efficient and enjoyable. By using a stencil, you can save time and effort in creating complex designs, as the stencil provides you with a guide to follow. Whether you’re aiming for basic geometric patterns or intricate floral motifs, quilt stencils can help you achieve stunning results.
In this article, we will explore the benefits of using quilt stencils and provide you with a comprehensive guide on how to use them effectively. We’ll discuss how to choose the right quilt stencil for your project, gather the necessary materials, prepare your quilt, and transfer the design using the stencil. Additionally, we’ll provide tips on selecting the right tools and adding the finishing touches to your quilted masterpiece.
So, whether you’re a hobbyist or a professional quilter, get ready to elevate your quilting game as we delve into the world of quilt stencils and discover how they can transform your projects.
Key Takeaways:
- Elevate your quilting game with quilt stencils, achieving precision, consistency, and professional-looking results. From choosing the right stencil to adding finishing touches, unleash your creativity and transform your quilting projects.
- Embrace the power of quilt stencils to save time, enhance creativity, and achieve stunning quilted masterpieces. Position, secure, and trace with care to unlock a world of possibilities in your quilting journey.
Read more: How To Use A Stencil Printer
What are Quilt Stencils?
Quilt stencils are templates made from a variety of materials, such as plastic or cardboard, that are used to create specific designs on fabric. They come in a wide range of shapes, sizes, and patterns, allowing quilters to add decorative motifs, borders, and even entire quilt designs with ease.
These stencils feature cut-out patterns or designs that can be traced onto the fabric. They serve as a guide to ensure accuracy and consistency in the quilt design, making it easier for quilters to create intricate and precise patterns.
Quilt stencils can be purchased from quilting supply stores or online, and they are available in an extensive range of styles and designs, catering to different tastes and preferences. From traditional motifs like feathers, stars, or flowers to more modern geometric patterns, there is a quilt stencil available for almost any type of quilt design.
Some quilt stencils are designed to be used in specific areas of the quilt, such as borders or corners, while others cover the entire fabric surface. These versatile tools can be used on quilting projects of all sizes, whether you’re working on a small wall hanging or a large bed-sized quilt.
Quilt stencils are often made with durability in mind, ensuring that they can withstand repeated use without deterioration. They can be easily cleaned and stored, making them a long-lasting and practical addition to any quilter’s toolkit.
In addition to the traditional pre-made stencils available, many quilters also create their own custom quilt stencils. This allows for even more creativity and personalization in the quilt design. Quilters can trace their own designs onto stencil material or use computer programs and cutting machines to create unique patterns.
Overall, quilt stencils are invaluable tools for quilters, providing a simple and effective way to add stunning and intricate designs to their projects. Whether you’re a beginner or an experienced quilter, incorporating quilt stencils into your work will undoubtedly enhance the beauty and precision of your quilting creations.
Benefits of Using Quilt Stencils
Using quilt stencils offers a wide range of benefits for quilters of all skill levels. Here are some of the advantages of incorporating quilt stencils into your quilting projects:
- Precision and Consistency: Quilt stencils provide a precise and consistent guide for creating intricate designs. By following the lines of the stencil, quilters can ensure that their patterns are uniform and evenly spaced throughout the quilt top.
- Professional-Looking Results: Quilt stencils allow quilters to achieve professional-looking results, even if they are new to quilting. The designs created with stencils are clean, crisp, and well-defined, giving the quilt a polished and refined appearance.
- Time-Saving: Quilt stencils help save time during the quilting process. Instead of hand-drawing designs or using complicated free-motion techniques, quilters can quickly trace the stencil onto the fabric, reducing the time required to create intricate patterns.
- Versatility: Quilt stencils come in a wide range of designs, making them suitable for various quilt styles, themes, and sizes. Whether you’re working on a traditional quilt or a modern art quilt, there is a stencil available to suit your project.
- Consistency in Replication: If you are making multiple quilts with the same design, quilt stencils ensure that the pattern is replicated accurately across all the quilts. This is particularly useful for quilters who create quilts for sale or gift-giving.
- Learning Tool for Beginners: Quilt stencils serve as valuable learning tools for beginner quilters. They provide a structured way to practice different quilting patterns and techniques, helping beginners develop their skills and build confidence.
- Enhanced Creativity: While quilt stencils offer predefined designs, they also inspire creativity. Quilters can modify and customize the stencils to create their unique variations or incorporate multiple stencils together to design complex and layered patterns.
- Stress-Free Designing: Quilt stencils eliminate the anxiety of freehand designing. By having a stencil as a guide, quilters can relax and enjoy the process, knowing that their designs will turn out as intended.
By utilizing quilt stencils in your quilting projects, you can elevate your quilting skills, save time, and achieve consistent and professional-looking results. Whether you’re aiming for classic elegance or modern creativity, quilt stencils are an invaluable tool that every quilter should have in their arsenal.
Choosing the Right Quilt Stencil
When it comes to choosing the right quilt stencil for your project, there are a few factors to consider. Taking the time to select the appropriate stencil will ensure that your design aligns with your vision and complements your quilt. Here are some tips to help you make the right choice:
- Quilt Design: Consider the overall design of your quilt. Choose a stencil that complements the theme, style, and size of your quilt. For example, if your quilt incorporates floral patterns, a stencil with flower motifs would be a suitable choice.
- Pattern Size: Take into account the size of the stencil pattern in relation to your quilt. A large stencil design may overwhelm a small quilt, while a small stencil may get lost in a larger quilt. Ensure that the stencil size is proportionate to your project.
- Skill Level: Consider your skill level and comfort with different stencil designs. If you’re a beginner, start with simpler stencil patterns that are easier to trace. As you gain experience, you can venture into more intricate and complex designs.
- Stencil Material: Stencils are made from various materials, such as plastic, cardboard, or Mylar. Each material has its own advantages. Plastic stencils are durable and easy to clean, while Mylar stencils are more flexible and can be reused multiple times. Choose a material that suits your preferences and needs.
- Variety: Look for a stencil that offers a range of design options. Stencils with multiple patterns or designs give you more flexibility and creative freedom. It’s also beneficial to have stencils with various motifs and shapes to cater to different quilt projects.
- Reviews and Recommendations: Read reviews and seek recommendations from other quilters. Online quilting communities, social media groups, and quilting forums are great resources to gather insights and opinions on different quilt stencils. Learn from the experiences of others before making your final decision.
Remember, choosing the right quilt stencil is a personal decision based on your quilt design, skill level, and preferences. Take your time to explore different options and consider how the stencil will enhance your quilt. With careful selection, you can find the perfect stencil to bring your quilt design to life.
Gathering Materials
Before you begin using quilt stencils, it’s important to gather the necessary materials to ensure a smooth and successful quilting experience. Having the right tools on hand will enable you to work efficiently and create beautifully patterned quilts. Here are the essential materials you’ll need:
- Quilt Stencil: Of course, the most important material is the quilt stencil itself. Choose the stencil that best suits your project, taking into account the size, design, and theme of your quilt.
- Fabric: Select the fabric for your quilt top and backing. Consider the fabric’s color, texture, and weight, as these factors will influence the overall appearance and feel of your finished quilt. Ensure that the fabric is pre-washed and pressed before using it.
- Quilting Ruler: A quilting ruler is an essential tool for measuring and marking your fabric. Choose a transparent ruler with clear markings for accurate measurements. A ruler with a non-slip surface will ensure stability as you trace the stencil.
- Fabric Marking Tool: You’ll need a fabric marking tool to transfer the stencil design onto your fabric. Options include washable fabric markers, water-soluble pens or pencils, or even tailor’s chalk. Choose a marking tool that contrasts well with the fabric color but is also easy to remove once you’ve completed the quilting.
- Quilting Pins or Clips: Use quilting pins or clips to secure the stencil to your fabric while tracing the design. These will keep the stencil in place, preventing any movement or shifting during the tracing process.
- Light Source: Ensure that you have ample lighting in your quilting area. Whether it’s natural daylight or a bright work lamp, good lighting is crucial for accurately tracing the stencil and ensuring clean lines.
- Working Surface: Have a flat and stable working surface, such as a cutting mat or an ironing board, to lay your fabric on. This will provide a smooth and even surface for tracing the stencil.
- Optional Tools: Depending on your quilting preferences, you may also want to have additional tools on hand, such as an eraser or fabric marker remover for any mistakes or stray marks, or a rotary cutter and mat for precise fabric cutting.
By gathering these materials before you begin, you’ll have everything you need for a successful quilting session. Having the right tools will not only make the process more enjoyable but also ensure that you achieve accurate and beautifully patterned quilts with the help of your quilt stencil.
Read more: How To Store Stencils
Preparing Your Quilt
Before you start using your quilt stencil, it’s important to properly prepare your quilt. Preparing the fabric ensures that you have a smooth and even surface to work with, allowing for precise and accurate tracing of the stencil design. Here are some steps to follow when preparing your quilt:
- Press the Fabric: Start by pressing your fabric to remove any wrinkles or creases. This will create a flat and even surface, which will facilitate the tracing of the stencil design. Use a steam iron on a suitable heat setting for your fabric type.
- Trim Excess Threads: Carefully trim any loose threads or stray fibers from the top layer of your quilt. These can interfere with the tracing of the stencil design and create unwanted bumps or lumps in the fabric.
- Secure the Layers: If your quilt has multiple layers, such as a quilt top, batting, and backing, ensure that they are securely basted or pinned together. This will prevent any shifting or movement of the layers when tracing the stencil, resulting in a more accurate and aligned design.
- Square and Align: Check that your quilt top and backing are square and aligned. Use a quilting ruler and square to ensure that the edges are straight and the corners are at right angles. This will provide a tidy and even base for tracing the stencil design.
- Consider Seam Allowance: Depending on your quilting technique and design, you may need to factor in seam allowances when positioning the stencil. Take into account any allowances needed for piecing or joining the quilt blocks.
- Identify Placement: Carefully plan the placement of the stencil on your quilt top. Visualize how the design will look on your quilt and consider any borders, blocks, or specific areas where you want to incorporate the stencil pattern.
- Mark Reference Points: If desired, mark reference points on your quilt top to guide the positioning of the stencil. Use fabric markers, pins, or temporary adhesive to mark the center or other key points of the stencil design.
By taking the time to properly prepare your quilt, you ensure that the fabric is in prime condition for tracing the stencil design. This preparation will help you achieve precise and well-aligned quilt patterns, making the quilting process smoother and more enjoyable.
Positioning the Stencil
Once you have prepared your quilt, it’s time to position the stencil onto the fabric. Proper positioning is crucial for achieving accurate and well-placed designs. Here are some steps to help you position the stencil effectively:
- Refer to the Stencil Guidelines: Some stencils may come with guidelines or markings to assist with positioning. These guidelines can help you align the stencil correctly on your fabric. Take a moment to familiarize yourself with any guidelines provided with the stencil.
- Align with Reference Points: If you marked reference points on your quilt top during the preparation stage, use these points to align the stencil. Place the stencil over the marked points, ensuring that it is centered and positioned exactly where you want the design to be.
- Use Quilting Ruler: A quilting ruler can be helpful for positioning the stencil accurately. Measure the distance from the edges of your quilt top to ensure that the stencil is centered and evenly spaced from all sides.
- Consider Design Flow: Take into account the flow and direction of your overall quilt design. If you have a specific design theme or pattern that you want to maintain, position the stencil in a way that complements the existing elements of your quilt.
- Avoid Seams or Sideways Placement: When positioning the stencil, try to avoid placing it directly on seams or over bulky areas, as this can result in distorted or uneven designs. Additionally, avoid positioning the stencil in a sideways or tilted manner, as it may affect the precision of the design.
- Secure the Stencil: Once you are satisfied with the stencil’s position, secure it to the fabric using quilting pins or clips. This will prevent the stencil from shifting or moving while you trace the design.
- Test Placement: Before you start tracing the stencil, it’s a good idea to do a test run on a scrap piece of fabric or an inconspicuous area of your quilt. This allows you to ensure that the stencil placement is correct and that you are happy with how the design looks before proceeding.
By carefully positioning the quilt stencil on your fabric, you can ensure that your quilt designs are accurately placed and well-balanced. Take the time to align the stencil correctly and consider how it interacts with the overall design of your quilt. With proper positioning, you’ll be on your way to creating stunning quilts with beautifully traced stencil patterns.
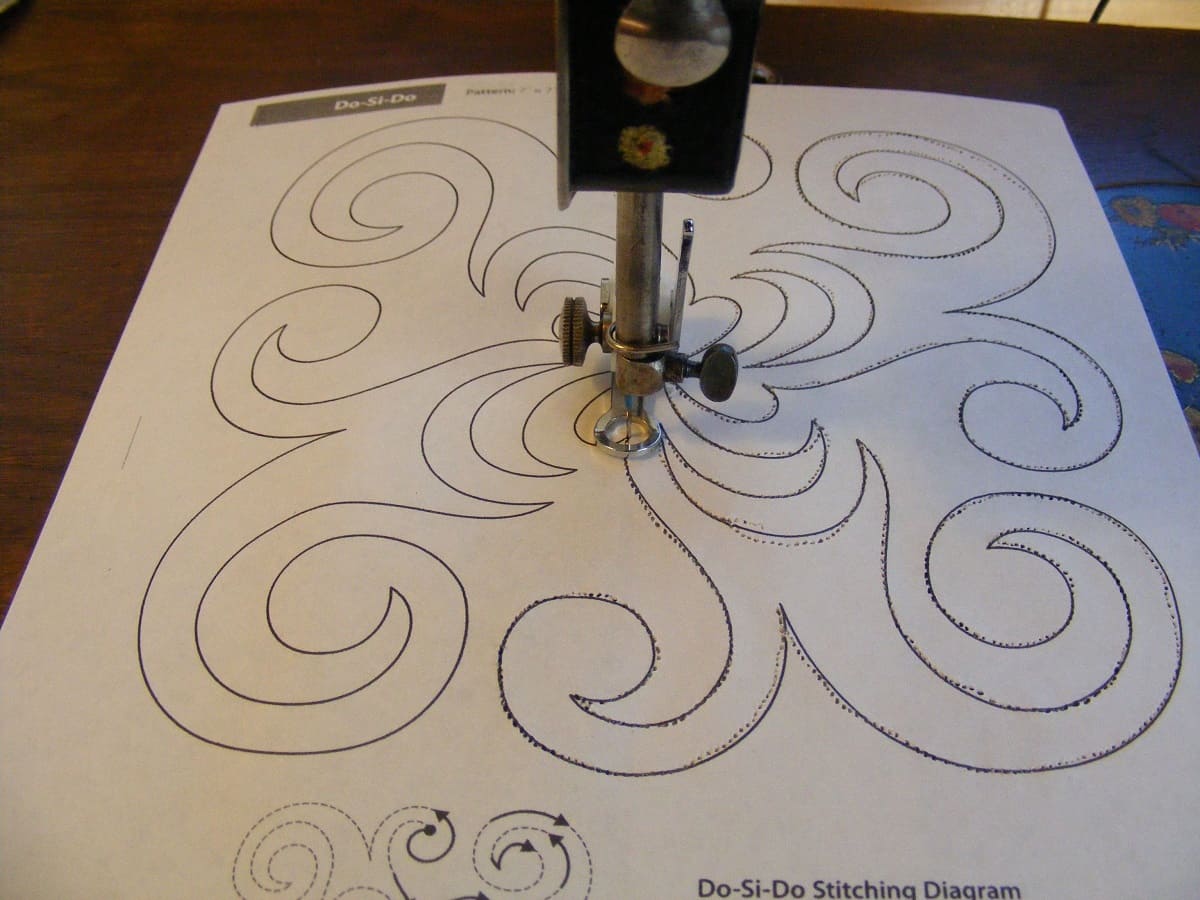
When using quilt stencils, secure the stencil to the fabric with masking tape to prevent it from shifting while you trace the design with a fabric marker or chalk. This will help ensure accurate and clean lines in your quilting project.
Securing the Stencil
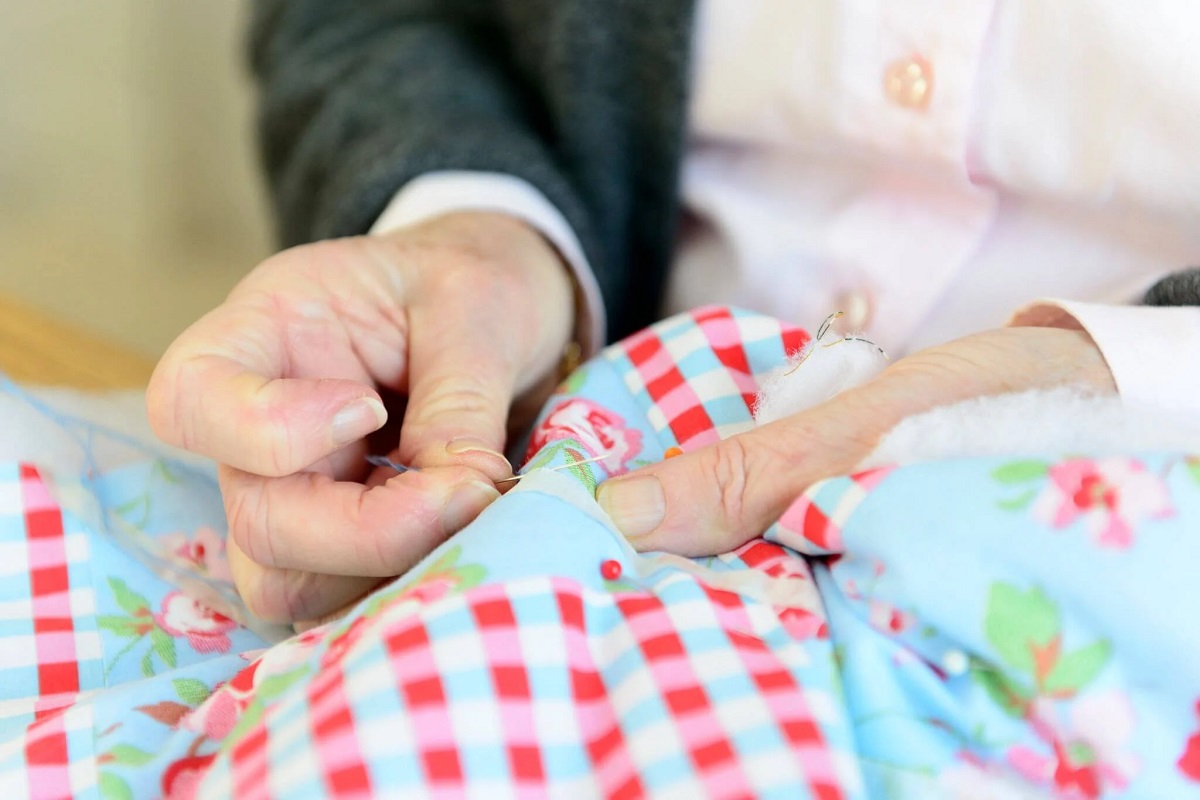
Securing the stencil to your fabric is an important step to ensure that it stays in place while you trace the design. Properly securing the stencil prevents any movement or shifting, resulting in crisp and precise quilt patterns. Here are some techniques you can use to secure the stencil:
- Quilting Pins: Using quilting pins is a common and effective method to secure the stencil. Place the pins along the edges of the stencil, evenly spacing them to hold the stencil firmly in place. Ensure that the pins are inserted through both the fabric and stencil material to secure them together.
- Masking Tape: If you prefer not to use pins or if you’re working with a delicate fabric, masking tape can be a good alternative. Place strips of masking tape along the edges of the stencil, adhering it to the fabric. Be gentle when removing the tape to avoid damaging the fabric.
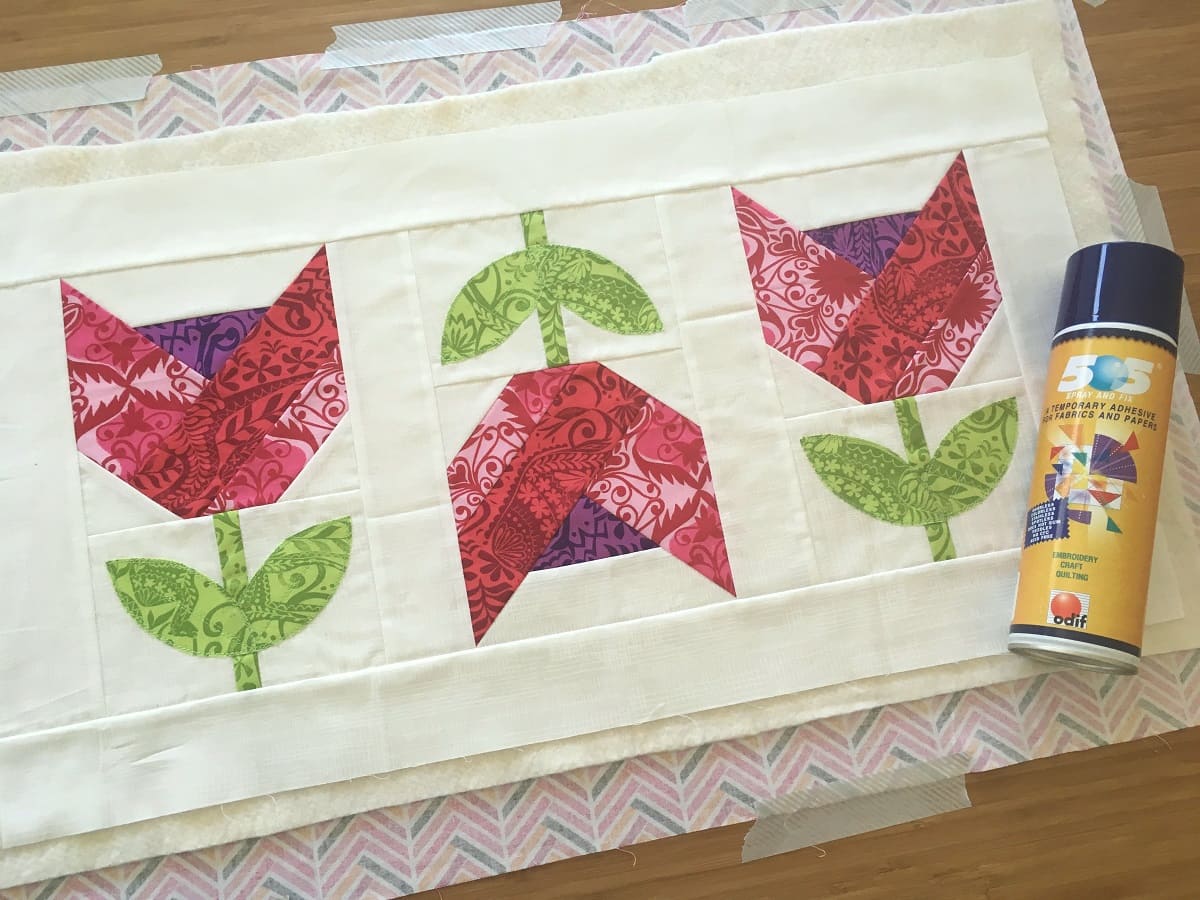
- Temporary Adhesive: Spray-on fabric adhesive or temporary adhesive spray can be used to temporarily bond the stencil to the fabric. Apply a light mist of the adhesive to the back of the stencil, following the manufacturer’s instructions, and press it onto the fabric. This method allows for easy repositioning while securely holding the stencil in place.
- Discover what works best for you: Every quilter has their preferred method of securing stencils. It’s important to experiment and find the technique that works best for you and your specific quilt project. Some quilters might find pinning to be the most effective, while others may prefer using tape or adhesive.
When securing the stencil, it’s essential to strike a balance between keeping it firmly in place and avoiding any damage to the fabric. Be cautious with pins to prevent accidental pricks, especially if you’re working with delicate or lightweight fabric.
Remember to remove any securing materials as you trace the stencil to ensure smooth and uninterrupted movement. Taking the time to properly secure the stencil will guarantee that your tracing is precise and your quilt patterns turn out beautifully.
Selecting the Right Tools
Having the right tools is essential for successfully using quilt stencils and achieving the desired results. The following are some tools you should consider when working with quilt stencils:
- Fabric Marking Tool: Choose a fabric marking tool that suits your fabric and personal preference. Options include washable fabric markers, water-soluble pens or pencils, or tailor’s chalk. Test the marking tool on a scrap piece of fabric to ensure that the marks are easily visible and will disappear as desired.
- Tracing Implement: Depending on the fabric and the quilt stencil material, various tracing implements can be used. Consider using a quilting pencil, soft leaded mechanical pencil, or stylus to trace the design onto the fabric. Ensure that the tool you choose creates clear and precise lines without damaging the fabric.
- Light Source: Adequate lighting is crucial when using quilt stencils to ensure accurate tracing. Natural daylight or a bright work lamp can help illuminate your work area, making it easier to see the stencil design and trace it accurately.
- Quilting Ruler: A quilting ruler is an essential tool for measuring and marking your fabric. Choose a ruler with clear markings and a non-slip surface to ensure accurate measurements and steady tracing along the edges of the stencil.
- Stabilizing Surface: Use a stable and firm surface to support your fabric while tracing. A cutting mat or an ironing board can provide a smooth and even surface that will allow for precise tracing and prevent accidental slipping or movement of the fabric.
- Small Brushes or Pounce Pad: Depending on your preferred tracing method, you may need small brushes or a pounce pad. These tools can be used to apply powder or chalk to the stencil design, enabling you to transfer the pattern onto the fabric accurately.
- Cleaning Tools: Keep cleaning tools like an eraser or fabric marker remover nearby in case you make any mistakes or need to remove stray marks. These tools will allow you to correct errors without causing damage to the fabric.
When selecting tools, consider the fabric you are working with, the type of quilt stencil, and your personal preferences. Test different tools and techniques on scrap fabric to see which ones yield the best results for your specific project.
By using the right tools for tracing and marking, you will be able to accurately transfer the stencil design onto your fabric, resulting in a beautifully patterned quilt.
Read more: How To Use A Quilt As A Slipcover
Transferring the Design
Transferring the design from the quilt stencil onto your fabric is a crucial step in using quilt stencils effectively. Proper transfer ensures that you have a clear and accurate guide for quilting. The following are some techniques for transferring the design:
- Tracing: Place the quilt stencil on the fabric in the desired location and hold it firmly in place. Using a fabric marking tool, carefully trace along the cut-out lines of the stencil design. Be sure to trace with steady pressure to create clear and accurate lines. Lift the stencil periodically to check if you have missed any areas or if adjustments need to be made.
- Stencil Powder or Chalk: For certain fabrics, you can use stencil powder or chalk to transfer the design. Apply the powder or chalk to the stencil design using a small brush or pounce pad. Gently tap or brush the powder over the stencil, allowing it to seep through the cut-out areas and create an outline on the fabric.
- Masking Tape Transfer: Another method involves using masking tape to transfer the design. Position the stencil onto the fabric and secure it with tape. Then, apply a thin layer of fabric marking tool (e.g., chalk) to the top side of the stencil. Carefully remove the stencil and the tape, leaving the transferred design on the fabric.
- Temporary Adhesive Transfer: If you prefer a more adhesive-based method, you can use a temporary fabric adhesive spray. Apply a light mist of the adhesive to the back of the stencil, press it onto the fabric, and then gently peel off the stencil. The adhesive will leave a temporary design on the fabric for you to follow.
When transferring the design, it’s essential to work slowly and carefully to ensure that the lines are accurate and clearly visible. Take breaks to assess your progress and make any necessary adjustments along the way. If you make any mistakes, you can use an eraser or fabric marker remover to correct them before proceeding.
Remember to remove any excess powder, chalk, or adhesive residue from the fabric before quilting. It’s best to follow the manufacturer’s instructions on how to remove the transferred design without damaging the fabric.
By employing these techniques, you can confidently transfer the design from the quilt stencil onto your fabric, providing yourself with a clear and reliable guide for quilting your beautiful quilt.
Tracing the Stencil
Tracing the stencil design onto your fabric is the next step in using quilt stencils. The tracing process allows you to create the quilt pattern accurately and precisely. Follow these steps to ensure successful tracing:
- Secure the Stencil: Double-check that the stencil is securely fastened to the fabric using pins, clips, or temporary adhesive. This will prevent any movement or shifting while tracing the design.
- Slow and Controlled Movements: Use a fabric marking tool to trace along the cut-out lines of the stencil design. Maintain slow and controlled movements to ensure accuracy and avoid any accidental slips or deviations from the design.
- Steady Pressure: Apply steady pressure to the fabric marking tool, creating clear and defined lines. It can be helpful to practice tracing on a scrap piece of fabric or in an inconspicuous area before starting on your quilt top.
- Continue Tracing: Follow the entire stencil design, tracing each section carefully. Lift the stencil periodically to check your progress and make sure you haven’t missed any areas. Adjust the fabric and stencil as necessary to ensure proper alignment.
- Avoid Smudging: Be mindful of the fabric marking tools you are using and take precautions to prevent smudging the traced lines. Allow the lines to dry if using ink-based markers or pens to avoid smearing or bleeding onto the fabric.
- Clean and Clear Lines: Make sure that the traced lines are visible and distinct on the fabric. Check for any faint or incomplete lines and go back over them if necessary to ensure a crisp and clear quilt pattern.
- Remove the Stencil: Once you have finished tracing the entire design, carefully remove the pins, clips, or temporary adhesive and gently lift the stencil off the fabric. Ensure that the fabric marking tool has fully dried before proceeding to avoid smudging or transferring the design onto other areas of the quilt.
Tracing the stencil requires patience, focus, and attention to detail. Take your time to ensure that the lines are accurately traced, as they will guide your quilting process and contribute to the overall beauty of your finished quilt.
If you make any mistakes while tracing, you can use an eraser or fabric marker remover to correct them. Remember to follow the manufacturer’s instructions to prevent any damage to the fabric.
By following these steps, you’ll be able to successfully trace the stencil design onto your fabric, paving the way for precise and stunning quilt patterns.
Removing the Stencil
Once you have finished tracing the quilt stencil design onto your fabric, it’s time to remove the stencil. This step ensures that the stencil doesn’t interfere with the quilting process and allows you to admire the clean lines of your traced design. Here’s how to remove the stencil effectively:
- Check the Dryness: Before removing the stencil, ensure that any fabric marking tool you used to trace the design has fully dried. This prevents the risk of smudging or transferring the design onto other areas of the fabric.
- Remove Securing Materials: If you used pins, clips, or temporary adhesive to secure the stencil, carefully remove them one by one. Take your time to avoid accidentally pulling or stretching the fabric.
- Gently Peel off the Stencil: Starting from one corner, gently peel off the quilt stencil from the fabric. Be cautious not to drag or rub the stencil against the fabric, as this may cause smudging or damage to the traced design.
- Inspect the Traced Design: Once the stencil is removed, examine the traced design on your fabric. Check for any smudges, smears, or incomplete lines that may have occurred during the tracing process. If you spot any imperfections, you can touch them up by re-tracing or using an appropriate fabric marker or pen.
- Remove Excess Tracing Marks: If any excess tracing marks are visible on your fabric, gently remove them using an eraser or fabric marker remover. Take care not to rub too forcefully, as this may cause the fabric to fray or become damaged. Always test the eraser or marker remover on a scrap piece of fabric before using it on your quilt.
Removing the stencil is an important step in preparing your fabric for quilting. By doing so, you eliminate any potential distractions or obstructions that may interfere with your quilting process. It also allows you to clearly see the traced design and make necessary adjustments if needed.
Remember to handle the fabric with care as you remove the stencil to avoid any accidental damage. Take your time and be gentle to ensure that the fabric remains in excellent condition for the rest of the quilting process.
By following these steps, you can safely and effectively remove the quilt stencil, leaving behind a beautifully traced design ready for the next stage of your quilting journey.
Finishing Touches
After you have completed the quilting process using your traced stencil design, it’s time to add the finishing touches to your quilt. These final touches will enhance the overall appearance and give your quilt that extra special touch. Here are some ideas for adding those finishing touches:
- Binding: Apply binding to the edges of your quilt to give it a neat and professional finish. Choose a fabric that complements the colors and design of your quilt. There are various binding techniques to explore, such as double-fold and bias binding.
- Quilting Embellishments: Consider adding quilting embellishments to enhance your design further. These can include embroidery, appliqué, or beadwork. Select embellishments that enhance the theme or style of your quilt.
- Labeling: Create a fabric label for your quilt, which includes your name, the date the quilt was completed, and any other relevant information. Sew or attach the label securely to the quilt back to add a personal touch and document the quilt’s history.
- Quilt Care Instructions: Include care instructions for the quilt by attaching a small card or label. This ensures that the recipient or future generations will know how to care for the quilt properly.
- Quilt Labeling: Labeling your quilt can help identify it and provide essential information. Some quilters prefer to embroider or quilt their signature onto the quilt or include a fabric label with necessary details about the quilt’s creation.
- Blocking or Pressing: Carefully block or press the finished quilt to ensure that it lies flat and the design is crisp. This step gives your quilt a polished and professional appearance.
- Photograph or Document the Quilt: Take photographs of your finished quilt to document your creation. You can also keep a small journal where you can write about your inspiration, design choices, and any challenges or triumphs you experienced during the quilting process.
Remember to celebrate your accomplishment and take pride in your finished quilt. Display it in your home or give it as a heartfelt gift to someone special. The finishing touches add unique and personal elements that make your quilt truly one-of-a-kind.
Each quilt will have its own unique finishing touches based on your creativity and vision. Embrace the opportunity to add those final details that will make your quilt shine and be treasured for years to come.
Read more: How To Use Quilt Templates
Conclusion
Quilt stencils are powerful tools that allow quilters to add intricate and professional-looking designs to their quilts. By using quilt stencils, you can achieve precise and consistent patterns, enhance your quilting skills, and create stunning quilted masterpieces.
In this article, we explored the world of quilt stencils and learned about the numerous benefits they offer. From precision and consistency to time-saving techniques, quilt stencils allow quilters of all skill levels to elevate their quilting projects.
We discussed the importance of choosing the right quilt stencil, considering factors such as design, size, and skill level. Knowing how to gather the necessary materials and appropriately prepare your quilt for stencil work is essential for a successful quilting experience.
Positioning and securing the stencil accurately are crucial steps that ensure the design aligns with your vision. Through tracing the stencil and transferring the design onto your fabric, you create a clear guide for quilting your intricate patterns.
As you complete your quilt, don’t forget the importance of the finishing touches. Binding, embellishments, labeling, and proper care instructions add that extra touch of personalization and professionalism to your creation.
Quilting is a journey of creativity and craftsmanship, and quilt stencils are valuable companions along the way. By incorporating quilt stencils into your quilting projects, you can unlock a world of possibilities and elevate the beauty and precision of your designs.
So, embrace the power of quilt stencils, let your creativity flourish, and enjoy the process of bringing your quilts to life. Whether you’re a beginner or an experienced quilter, quilt stencils will undoubtedly become an essential tool in your quilting toolkit.
Frequently Asked Questions about How To Use Quilt Stencils
Was this page helpful?
At Storables.com, we guarantee accurate and reliable information. Our content, validated by Expert Board Contributors, is crafted following stringent Editorial Policies. We're committed to providing you with well-researched, expert-backed insights for all your informational needs.


0 thoughts on “How To Use Quilt Stencils”