Home>Furniture & Design>Interior Design Trends>How To Stencil On Glass
Interior Design Trends
How To Stencil On Glass
Modified: September 1, 2024
Learn how to stencil on glass to create stunning interior design trends. Discover tips and techniques for adding a unique touch to your home decor. Elevate your space with personalized glass stenciling.
(Many of the links in this article redirect to a specific reviewed product. Your purchase of these products through affiliate links helps to generate commission for Storables.com, at no extra cost. Learn more)
Introduction
Stenciling on glass is a creative and versatile way to add a personal touch to your home decor. Whether you want to embellish glass windows, doors, or tabletops, stenciling offers a myriad of design possibilities that can instantly elevate the ambiance of any space. This artistic technique allows you to customize glass surfaces with intricate patterns, whimsical motifs, or elegant typography, making it a popular choice for DIY enthusiasts and interior design aficionados alike.
By mastering the art of stenciling on glass, you can infuse your living spaces with unique charm and character, transforming ordinary glass surfaces into captivating focal points. Whether you're aiming for a vintage-inspired look, a contemporary aesthetic, or a whimsical vibe, stenciling provides a creative outlet to express your personal style and enhance the visual appeal of your home.
In this comprehensive guide, we will explore the step-by-step process of stenciling on glass, from preparing the surface to selecting the right stencil and applying it with precision. We will delve into the essential materials needed for this project, as well as the techniques required to achieve professional-looking results. Whether you're a seasoned crafter or a novice enthusiast, this guide will equip you with the knowledge and confidence to embark on your stenciling journey with glass as your canvas.
Get ready to unleash your creativity and embark on a transformative DIY adventure as we delve into the art of stenciling on glass. With the right tools, techniques, and a dash of inspiration, you'll be well on your way to adorning your living spaces with stunning, personalized designs that reflect your unique taste and style. Let's dive into the world of glass stenciling and unlock the endless possibilities that await at the intersection of art and interior design.
Key Takeaways:
- Transform ordinary glass surfaces into personalized works of art with stenciling. Add elegance and charm to your living spaces by infusing your unique style into windows, mirrors, and tabletops.
- Stenciling on glass empowers creativity, allowing you to tell a story and express your individuality. From meticulous preparation to thoughtful finishing touches, unleash your artistic vision on glass surfaces.
Read more: How To Store Stencils
Materials Needed
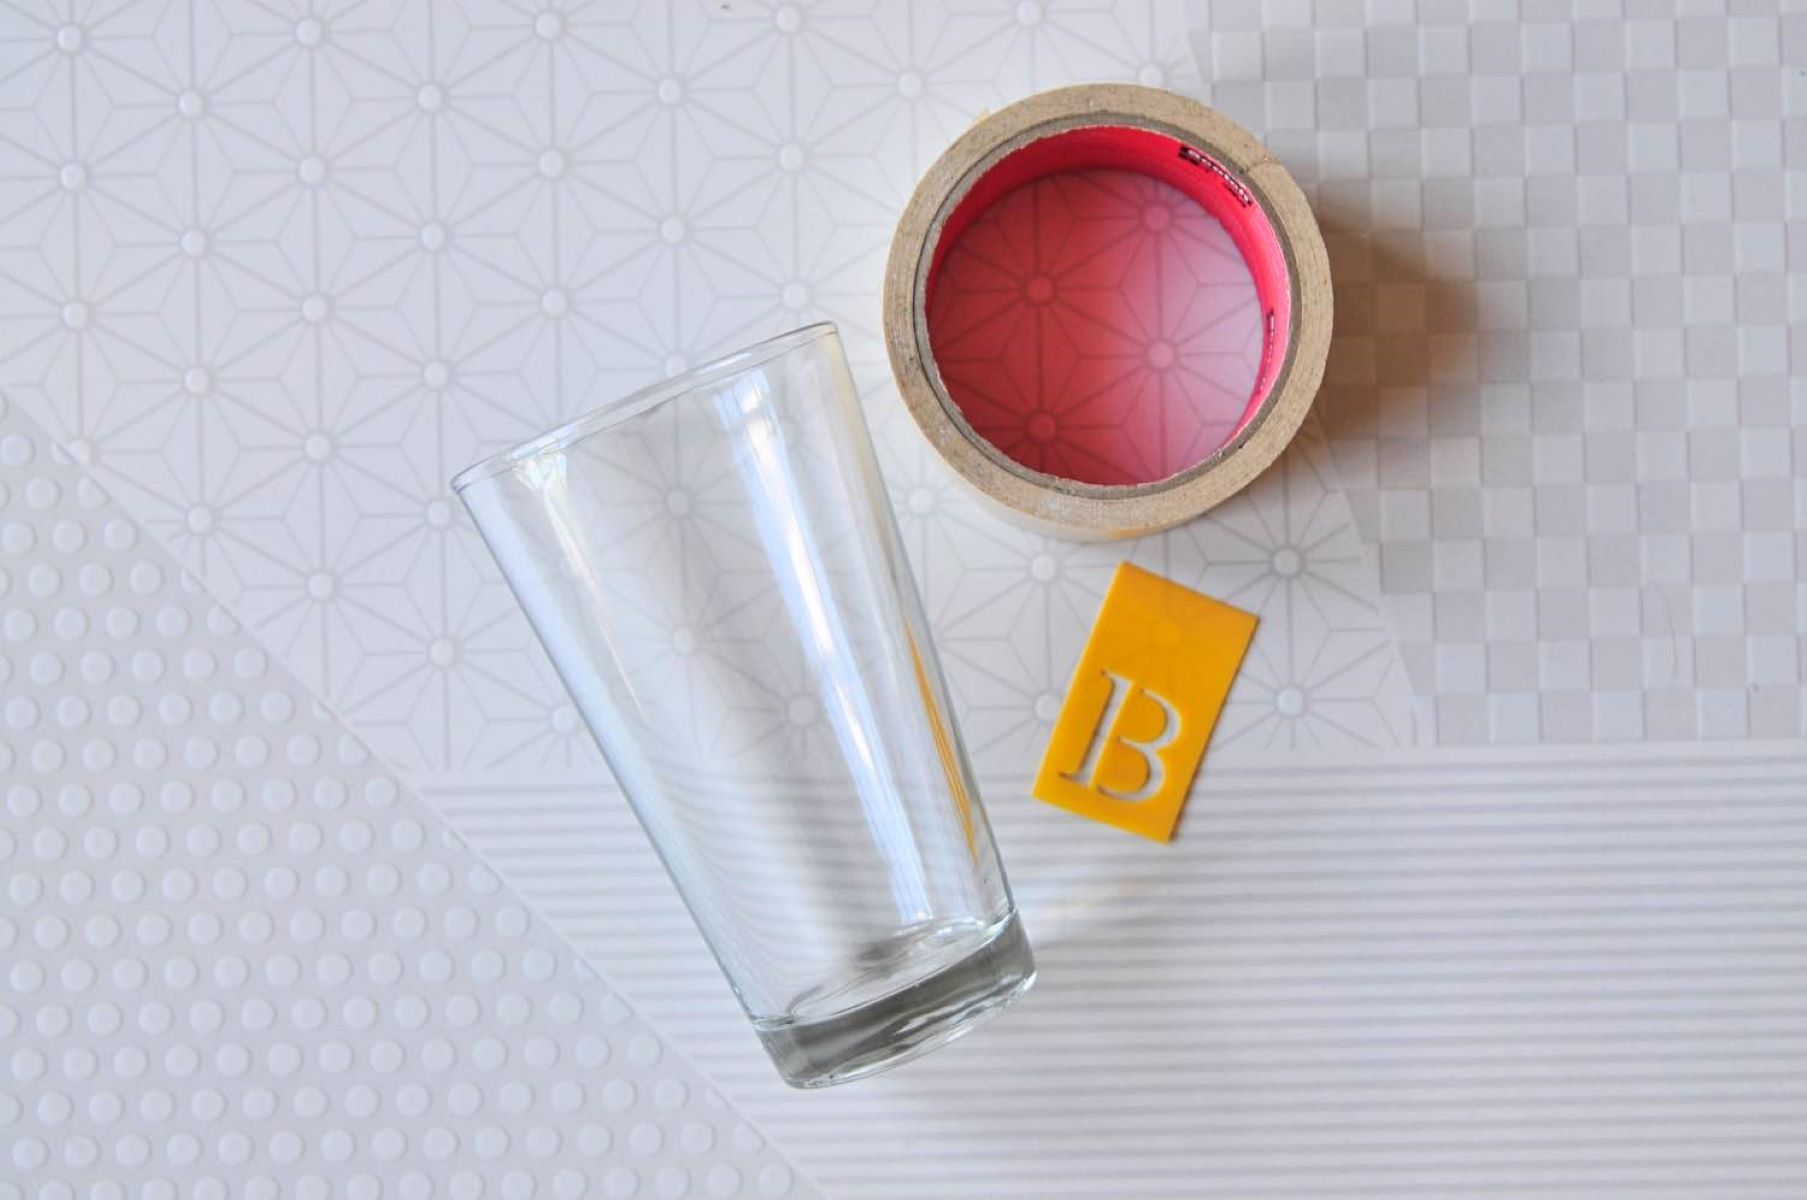
Stenciling on glass requires a specific set of materials to ensure a smooth and successful creative process. Before diving into this artistic endeavor, it's essential to gather the following items:
-
Glass Surface: Whether it's a window, mirror, glass tabletop, or any other glass object, ensure that the surface is clean and free from any dust, dirt, or residue. This will provide a smooth canvas for the stencil design.
-
Stencil: Select a high-quality stencil designed for use on glass surfaces. Stencils come in a variety of patterns, ranging from intricate designs to simple motifs, allowing you to personalize your glass with a unique touch.
-
Stencil Adhesive or Spray: To secure the stencil firmly onto the glass surface, a stencil adhesive or spray is essential. This adhesive ensures that the stencil stays in place during the painting process, preventing any smudges or smears.
-
Glass Paint: Opt for specialized glass paint that adheres well to glass surfaces and offers durability and longevity. These paints are available in a wide range of colors, finishes, and opacities, allowing you to achieve the desired look for your stenciled design.
-
Paint Applicator: A high-quality paint applicator, such as a stencil brush or foam dauber, is crucial for achieving clean and precise paint application. These applicators help control the amount of paint and prevent bleeding under the stencil edges.
-
Painter's Tape: Use painter's tape to secure the edges of the stencil and create clean, defined borders for your design. This helps maintain the integrity of the stencil pattern and prevents any accidental paint smudges.
-
Protective Gear: When working with glass paint and adhesive, it's important to prioritize safety. Wear protective gloves and ensure proper ventilation in the workspace to minimize exposure to fumes.
-
Cleaning Supplies: Have a glass cleaner and lint-free cloth on hand to clean the glass surface before and after stenciling. This ensures that the glass remains pristine and free from any residual paint or adhesive.
By assembling these essential materials, you'll be well-equipped to embark on your glass stenciling project with confidence and creativity. Each item plays a crucial role in the stenciling process, contributing to the overall quality and longevity of the finished design. With the right materials at your disposal, you can unleash your artistic vision and transform ordinary glass surfaces into captivating works of personalized art.
Preparing the Glass Surface
Before diving into the stenciling process, it is crucial to prepare the glass surface meticulously to ensure optimal adhesion and a flawless end result. Follow these steps to create a pristine canvas for your stenciled design:
-
Cleaning the Glass: Begin by thoroughly cleaning the glass surface using a high-quality glass cleaner and a lint-free cloth. Remove any dust, fingerprints, or smudges that may hinder the adhesion of the stencil and affect the paint application. Ensure that the glass is completely free from any residue, allowing the stencil to adhere seamlessly.
-
Drying the Surface: After cleaning the glass, allow it to dry completely. Any moisture or residual cleaning solution can interfere with the stencil adhesive and paint, leading to potential smudging or uneven application. Patience is key at this stage, as a fully dry surface sets the stage for a successful stenciling process.
-
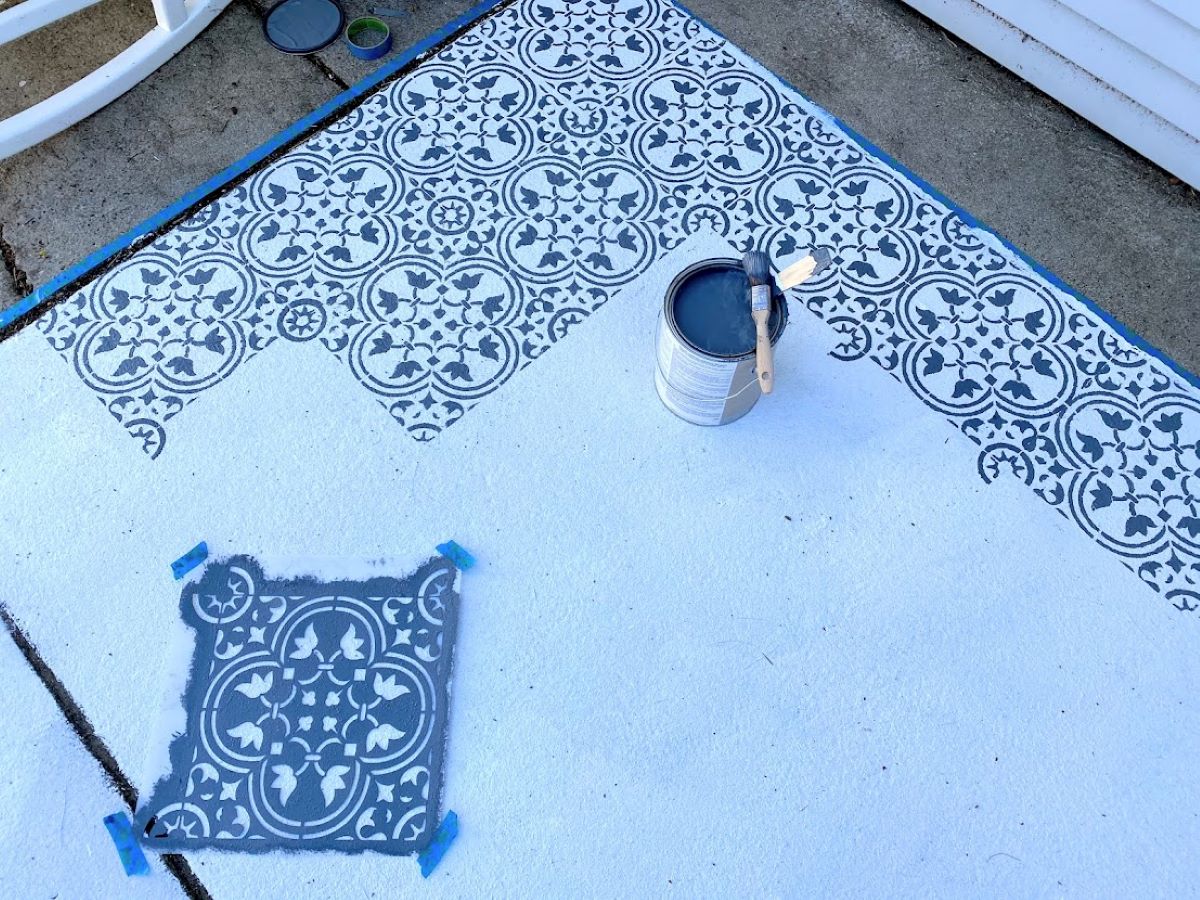
Securing the Stencil: Once the glass surface is dry, carefully position the stencil on the desired area. Use painter's tape to secure the edges of the stencil, ensuring that it remains in place during the painting process. This step is crucial for achieving clean and precise lines in your design, preventing any unintended smudges or paint bleed.
-
Applying Stencil Adhesive: If the stencil does not have an adhesive backing, apply a thin, even layer of stencil adhesive to the back of the stencil. This adhesive helps maintain the stencil's position and prevents it from shifting while you apply the glass paint. Be sure to follow the manufacturer's instructions for the specific adhesive product you are using.
By meticulously preparing the glass surface and securing the stencil in place, you set the stage for a successful stenciling endeavor. These preparatory steps lay the foundation for a seamless and professional-looking design, ensuring that your stenciled creation adheres flawlessly to the glass surface and withstands the test of time. With the glass surface primed and ready, you are now poised to bring your artistic vision to life through the intricate art of stenciling on glass.
Choosing the Right Stencil
Selecting the right stencil is a pivotal step in the glass stenciling process, as it sets the tone for the overall aesthetic and impact of your design. When choosing a stencil for your glass stenciling project, consider the following factors to ensure a harmonious and visually compelling result.
Design and Scale
The design of the stencil plays a significant role in determining the visual impact of your stenciled creation. Consider the overall theme and style of your living space, as well as the specific area of the glass surface you intend to stencil. Intricate patterns, floral motifs, geometric shapes, or ornate borders can infuse a sense of elegance and charm, while bold typography or contemporary designs can lend a modern and dynamic touch. Additionally, consider the scale of the stencil in relation to the size of the glass surface. A large stencil may serve as a striking focal point on a window or door, while smaller stencils can add delicate accents to mirrors or glass tabletops.
Read more: How To Use Quilt Stencils
Transparency and Opacity
When selecting a stencil for glass stenciling, consider the level of transparency and opacity required for your design. Some stencils feature open, airy designs that allow light to pass through, creating a delicate and ethereal effect. These transparent stencils are ideal for windows and glass partitions, as they maintain visibility while adding a touch of decorative flair. On the other hand, opaque stencils offer solid, bold designs that provide privacy and visual impact. Depending on your preferences and the intended function of the stenciled glass, choose a stencil that aligns with the desired level of transparency and opacity.
Versatility and Personalization
Opt for stencils that offer versatility and room for personalization. Look for designs that can be adapted to suit different color schemes, interior styles, and seasonal themes. Stencils with customizable elements, such as interchangeable motifs or modular patterns, allow for creative experimentation and adaptability. This versatility enables you to refresh the look of your stenciled glass surfaces over time, ensuring that they remain relevant and captivating amidst evolving design trends and preferences.
Quality and Durability
Prioritize stencils crafted from durable materials that can withstand the glass stenciling process and maintain their integrity over time. High-quality stencils are designed to endure multiple uses, offering crisp, clear lines and intricate details with each application. Additionally, consider stencils that are easy to clean and maintain, as this contributes to their longevity and ensures consistent performance across various glass surfaces.
By carefully considering the design, transparency, versatility, and quality of the stencil, you can make an informed choice that aligns with your creative vision and the unique characteristics of your living space. The right stencil serves as a catalyst for artistic expression, allowing you to transform ordinary glass surfaces into captivating showcases of personalized design and creativity.
Applying the Stencil
With the glass surface meticulously prepared and the chosen stencil at the ready, it's time to embark on the transformative process of applying the stencil to the glass. This pivotal step sets the stage for the actual stenciling and painting, requiring precision and attention to detail to ensure a flawless outcome.
-
Positioning the Stencil: Carefully place the stencil onto the prepared glass surface, ensuring that it aligns with the desired location and orientation. Take the time to adjust and center the stencil, ensuring that it sits securely and evenly on the glass. The precision of this initial placement is crucial, as it dictates the overall alignment and balance of the stenciled design.
-
Securing the Stencil: Once the stencil is positioned to your satisfaction, use painter's tape to secure the edges of the stencil firmly onto the glass. This step is essential for preventing any movement or shifting of the stencil during the painting process, maintaining the integrity of the design and ensuring clean, crisp lines.
-
Applying Glass Paint: With the stencil securely in place, it's time to apply the glass paint using a high-quality paint applicator, such as a stencil brush or foam dauber. Dip the applicator into the glass paint, ensuring that it is evenly coated without excess paint that could lead to smudges or bleeding. Begin applying the paint to the open areas of the stencil, using a gentle dabbing or swirling motion to achieve consistent coverage.
-
Maintaining Precision: As you apply the glass paint, exercise patience and precision to prevent any seepage or smudging. Work methodically, starting from the center of the stencil and gradually moving outward, ensuring that the paint is evenly distributed and adheres to the glass surface with clarity and vibrancy. Take care to avoid applying excessive pressure, as this can cause the paint to seep under the stencil edges, compromising the crispness of the design.
-
Layering and Detailing: Depending on the desired opacity and depth of the design, consider applying multiple layers of paint to achieve the desired effect. Allow each layer to dry completely before adding subsequent coats, ensuring that the colors remain vibrant and true to the stencil design. For intricate details and shading, utilize smaller brushes or fine-tipped applicators to add nuance and dimension to the stenciled design.
By following these meticulous steps and exercising patience and precision, you can achieve a beautifully stenciled design that enhances the glass surface with elegance and artistry. The process of applying the stencil demands a delicate balance of technique and creativity, culminating in a visually captivating and personalized addition to your home decor.
Read more: How To Use A Stencil Printer
Removing the Stencil
Once the glass paint has been applied and allowed to dry to the desired opacity and vibrancy, the next crucial step in the glass stenciling process is the careful removal of the stencil. This pivotal moment marks the unveiling of the intricately designed pattern or motif, revealing the culmination of your creative vision and precision. The process of removing the stencil requires finesse and attention to detail to ensure that the stenciled design remains pristine and visually striking.
To remove the stencil from the glass surface, follow these meticulous steps:
-
Assessing Dryness: Before proceeding with the stencil removal, ensure that the glass paint has dried completely. Depending on the specific type of glass paint used and the environmental conditions, drying times may vary. It is essential to exercise patience and allow the paint to set fully to avoid any smudging or distortion of the design during the removal process.
-
Peeling Back the Stencil: Gently lift the edges of the stencil from the glass surface, taking care to maintain a steady and controlled motion. Slowly peel back the stencil, ensuring that the paint adheres firmly to the glass without any unintended lifting or smearing. If any resistance is encountered, pause and assess the adherence of the paint to the glass before proceeding.
-
Precision and Delicacy: As the stencil is lifted, pay close attention to the areas where the paint meets the stencil edges. Exercise precision and delicacy to prevent any accidental smudging or disruption of the design. If the paint exhibits any tendency to lift with the stencil, use a fine-tipped tool to gently guide it back into place before continuing the removal process.
-
Final Inspections: Once the stencil has been completely removed, carefully inspect the stenciled design for any imperfections or inconsistencies. Address any minor touch-ups or refinements as needed, ensuring that the design retains its clarity and integrity. This meticulous inspection allows for the refinement of the stenciled design, ensuring that it meets your exacting standards.
By approaching the removal of the stencil with patience, precision, and a keen eye for detail, you can unveil a flawlessly stenciled design that enhances the glass surface with artistry and sophistication. The careful removal of the stencil marks the culmination of the stenciling process, unveiling a personalized and visually captivating addition to your home decor.
Finishing Touches
After the meticulous process of stenciling on glass, the application of finishing touches serves as the final act of refinement, elevating the stenciled design to its full potential. These subtle yet impactful touches contribute to the overall polish and visual allure of the stenciled glass surface, ensuring that it seamlessly integrates into its intended environment while exuding a sense of artistry and sophistication.
Cleaning and Detailing
Once the stencil has been removed and the stenciled design has been inspected, it is essential to address any residual paint smudges or imperfections. Utilize a fine-tipped brush or a damp cloth to gently remove any stray paint particles or minor blemishes, ensuring that the edges of the design remain crisp and defined. This meticulous cleaning process contributes to the overall clarity and precision of the stenciled pattern, creating a polished and professional appearance.
Sealing and Protection
To safeguard the longevity and durability of the stenciled design, consider applying a protective sealant specifically formulated for glass surfaces. This sealant serves as a shield against potential scratches, abrasions, and environmental factors, preserving the vibrancy and integrity of the stenciled design over time. Follow the manufacturer's instructions for the application of the sealant, ensuring thorough coverage and even distribution across the entire stenciled area.
Read more: How To Make A Tattoo Stencil With A Printer
Complementing the Design
Incorporate complementary elements to accentuate the stenciled glass surface and harmonize it with its surroundings. Consider framing the stenciled design with decorative molding or integrating it into a larger artistic composition within the space. Additionally, strategically placing accent lighting near the stenciled glass can enhance its visual impact, casting captivating shadows and illuminating the intricacies of the design. By thoughtfully integrating the stenciled glass into the broader context of the room, you can create a cohesive and visually engaging aesthetic.
Reflecting Personal Style
Infuse the stenciled glass surface with personal touches that reflect your unique style and preferences. Whether it's incorporating additional embellishments, such as metallic accents or decorative motifs, or integrating the stenciled glass into a thematic arrangement, such as a gallery wall or a curated display, these personalized elements impart a sense of individuality and creativity to the overall design. Embrace the opportunity to showcase your artistic sensibilities and infuse the stenciled glass with a touch of your personality.
Maintenance and Care
Finally, establish a routine maintenance and care regimen to preserve the beauty and allure of the stenciled glass surface. Regularly clean the glass with a gentle glass cleaner and a soft, lint-free cloth to remove dust and maintain its pristine appearance. Additionally, periodically inspect the stenciled design for any signs of wear or damage, addressing any issues promptly to uphold its visual appeal and longevity.
By attending to these finishing touches with precision and care, you can elevate the stenciled glass surface from a mere decorative element to a captivating expression of artistry and individuality. The application of these refined details ensures that the stenciled design seamlessly integrates into its environment, leaving a lasting impression of creativity and sophistication.
Conclusion
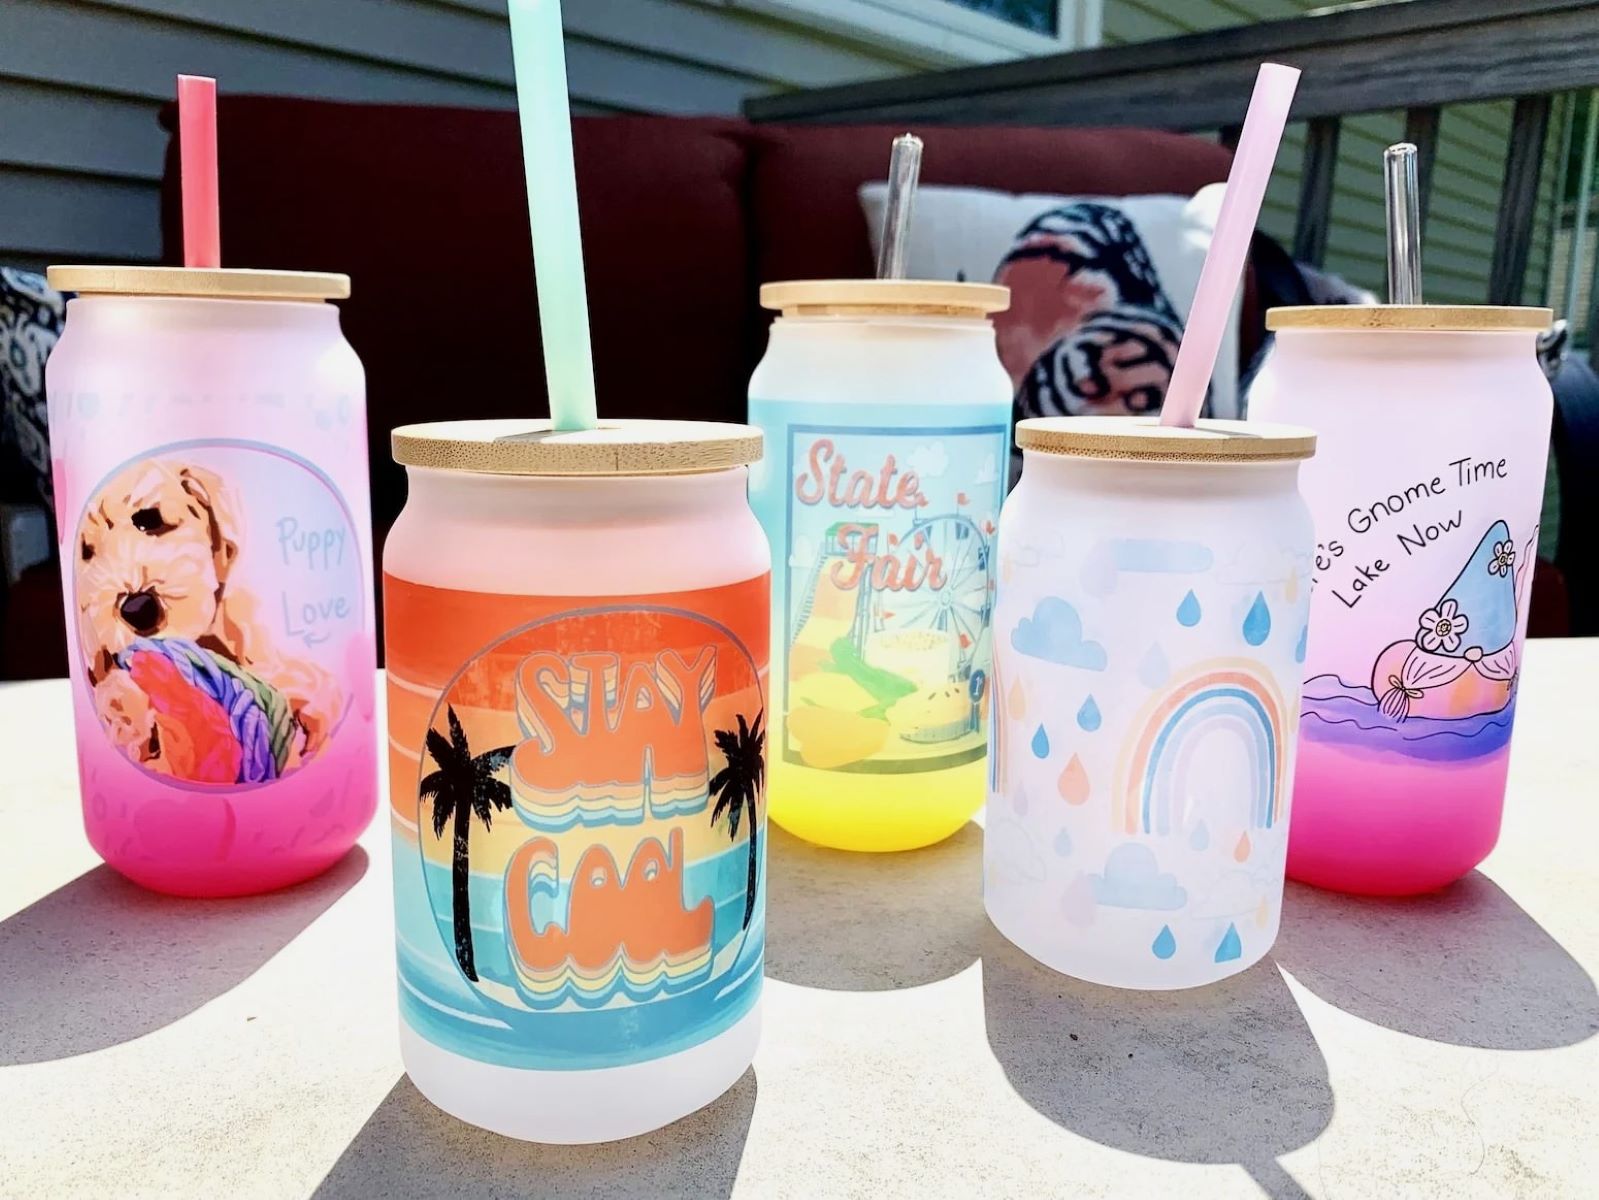
In conclusion, the art of stenciling on glass offers a boundless avenue for creative expression and personalization within interior design. Through the meticulous application of stencils and glass paint, ordinary glass surfaces can be transformed into captivating showcases of artistry and individuality. The journey of stenciling on glass encompasses a series of deliberate steps, from meticulous preparation and stencil selection to precise application and thoughtful finishing touches. Each stage of the process demands patience, precision, and a keen eye for detail, culminating in the creation of visually striking and personalized designs that enrich living spaces with elegance and charm.
The allure of stenciling on glass lies in its versatility and adaptability, allowing individuals to infuse their living spaces with designs that reflect their unique tastes and sensibilities. Whether it's adorning windows with intricate patterns, embellishing mirrors with whimsical motifs, or adding personalized touches to glass tabletops, the possibilities for stenciling on glass are as diverse as the creative visions of those who embark on this artistic journey. The ability to customize and personalize glass surfaces through stenciling empowers individuals to curate living spaces that resonate with their personalities and preferences, fostering a sense of connection and ownership within their homes.
Furthermore, the art of stenciling on glass transcends mere decoration, serving as a medium for storytelling, self-expression, and artistic exploration. Each stenciled design carries with it a narrative, a reflection of the creator's imagination and aesthetic inclinations. Whether it evokes a sense of nostalgia, conveys a contemporary aesthetic, or celebrates a whimsical spirit, the stenciled glass becomes a tangible manifestation of creativity and individuality within the home environment.
As we conclude this exploration of stenciling on glass, it is evident that this artistic endeavor holds the power to elevate interior design, infusing living spaces with a touch of artistry and personalization. By embracing the art of stenciling on glass, individuals can embark on a transformative journey of creative expression, leaving an indelible mark of their unique style and vision within their homes. With each stenciled design, a story unfolds, a testament to the fusion of art and interior design, and a celebration of the boundless possibilities that await at the intersection of creativity and glass surfaces.
Frequently Asked Questions about How To Stencil On Glass
Was this page helpful?
At Storables.com, we guarantee accurate and reliable information. Our content, validated by Expert Board Contributors, is crafted following stringent Editorial Policies. We're committed to providing you with well-researched, expert-backed insights for all your informational needs.


0 thoughts on “How To Stencil On Glass”