Articles
How To Store Sterilized Pump Parts
Modified: December 7, 2023
Learn how to properly store sterilized pump parts with our informative articles. Keep your pumping equipment clean and safe for your baby's health.
(Many of the links in this article redirect to a specific reviewed product. Your purchase of these products through affiliate links helps to generate commission for Storables.com, at no extra cost. Learn more)
Introduction
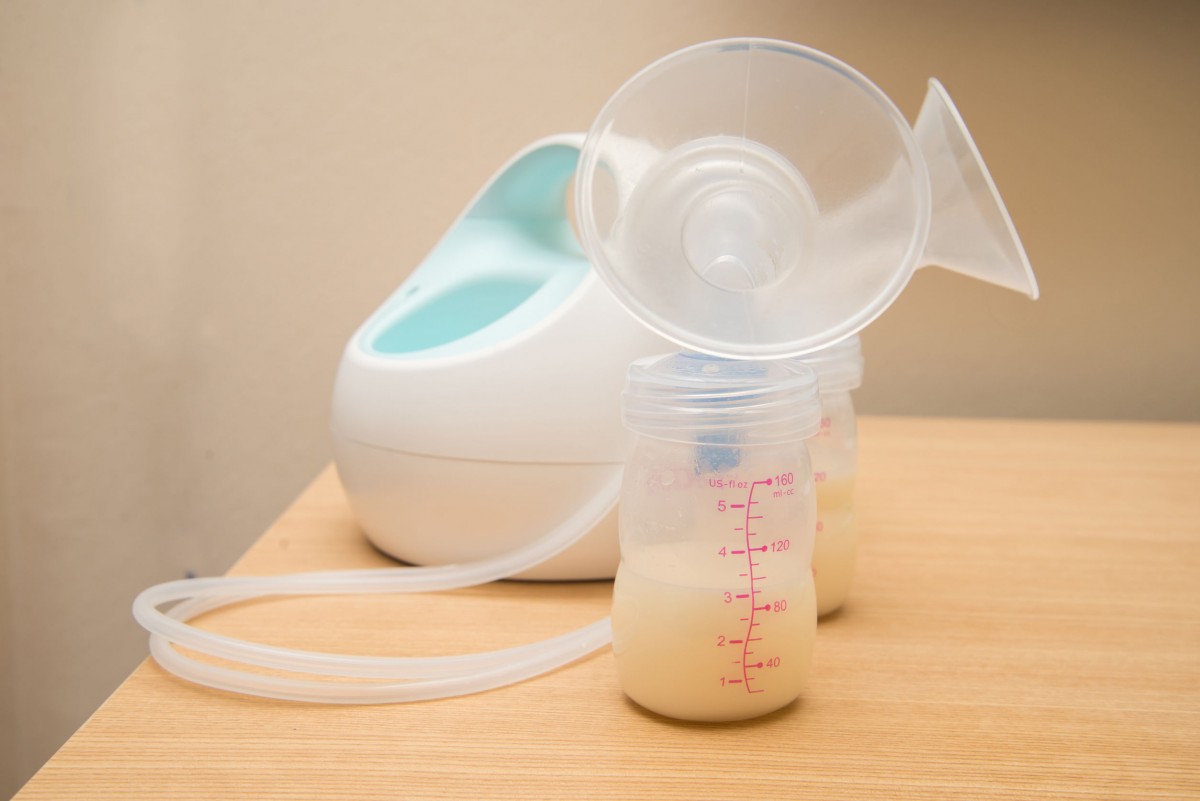
Welcome to the world of breastfeeding and pumping! If you are a pumping mom, you know how crucial it is to keep your pump parts sterilized to ensure the safety and well-being of your baby. Properly sterilizing your pump parts helps to eliminate harmful bacteria and keep your little one healthy.
In this article, we will guide you through the process of storing sterilized pump parts. We will discuss why sterilizing pump parts is important, as well as provide step-by-step instructions on how to clean, sterilize, dry, and store your pump parts. By following these guidelines, you can maintain the cleanliness and integrity of your pump parts, ensuring their longevity and effectiveness.
So, let’s dive in and learn how to store sterilized pump parts!
Key Takeaways:
- Properly sterilizing and storing pump parts is essential for ensuring the safety and health of your baby. Following the step-by-step guide will help you maintain cleanliness, eliminate harmful bacteria, and extend the lifespan of your pump parts.
- By implementing regular cleaning, sterilization, and storage practices, you can confidently provide safe breast milk for your baby, reducing the risk of infections and ensuring optimal health and well-being. Happy pumping and best wishes on your breastfeeding journey!
Read more: How To Store Bottles After Sterilizing
Why Sterilizing Pump Parts is Important
Sterilizing pump parts is an essential step in ensuring your baby’s safety and maintaining their health. Here are a few reasons why sterilizing your pump parts is so important:
- Bacteria Elimination: Pump parts come in contact with breast milk, which is a rich source of nutrients and can also harbor bacteria. Sterilizing your pump parts helps to eliminate harmful bacteria, viruses, and other contaminants that can compromise your baby’s immune system.
- Prevents Infections: Sterilizing pump parts reduces the risk of infections, such as thrush, mastitis, and other bacterial or yeast-related infections. These infections can be painful for you and can even be transmitted to your baby during breastfeeding.
- Maintains Milk Quality: Clean and sterilized pump parts ensure that your breast milk remains fresh and of high quality. Contaminated pump parts can introduce bacteria that may cause spoilage or affect the taste and nutritional value of your breast milk.
- Extended Lifespan of Pump Parts: Proper sterilization and care of your pump parts can help prolong their lifespan. Regular cleaning and sterilizing remove residue and prevent the buildup of milk deposits, which can lead to pump malfunction or decreased suction.
- Peace of Mind: Sterilizing your pump parts gives you peace of mind as a parent. Knowing that you have taken the necessary precautions to ensure cleanliness and safety provides reassurance that you are providing the best for your baby.
Now that we understand the importance of sterilizing pump parts, let’s move on to the step-by-step process of cleaning, sterilizing, drying, and storing your pump parts.
Step 1: Cleaning the Pump Parts
Cleaning your pump parts is the first and crucial step in preparing them for sterilization. Here’s how to properly clean your pump parts:
- Disassemble the pump: Take apart all removable parts of your breast pump, including the flanges, valves, membranes, and any other small pieces. Refer to the instruction manual if needed.
- Rinse with warm water: Start by rinsing your pump parts under warm running water to remove any visible milk or residue. Gently scrub the parts with a soft brush or sponge to ensure thorough cleaning.
- Use mild soap: Apply a small amount of mild dish soap to your pump parts. Be sure to choose a soap that is fragrance-free and free of any harsh chemicals that may leave residues or irritate your baby’s skin.
- Scrub and rinse again: Scrub each part with the soapy water, paying attention to any areas that might have milk residue. Rinse the pump parts thoroughly to remove all traces of soap.
- Inspect for cleanliness: Before proceeding to sterilization, visually inspect each part to ensure they are clean and free from any residue or soap. If needed, repeat the cleaning process or use a bottle brush to clean hard-to-reach areas.
- Dry completely: Allow your pump parts to air dry completely before moving on to sterilization. Placing them on a clean, dry towel or a drying rack can help expedite the drying process.
Remember, cleanliness is key in keeping your pump parts safe for your baby. By properly cleaning your pump parts, you can ensure that sterilization is more effective and maintain the overall hygiene of your breast milk pumping routine.
Now that your pump parts are clean, let’s move on to the next step: sterilizing the pump parts.
Step 2: Sterilizing the Pump Parts
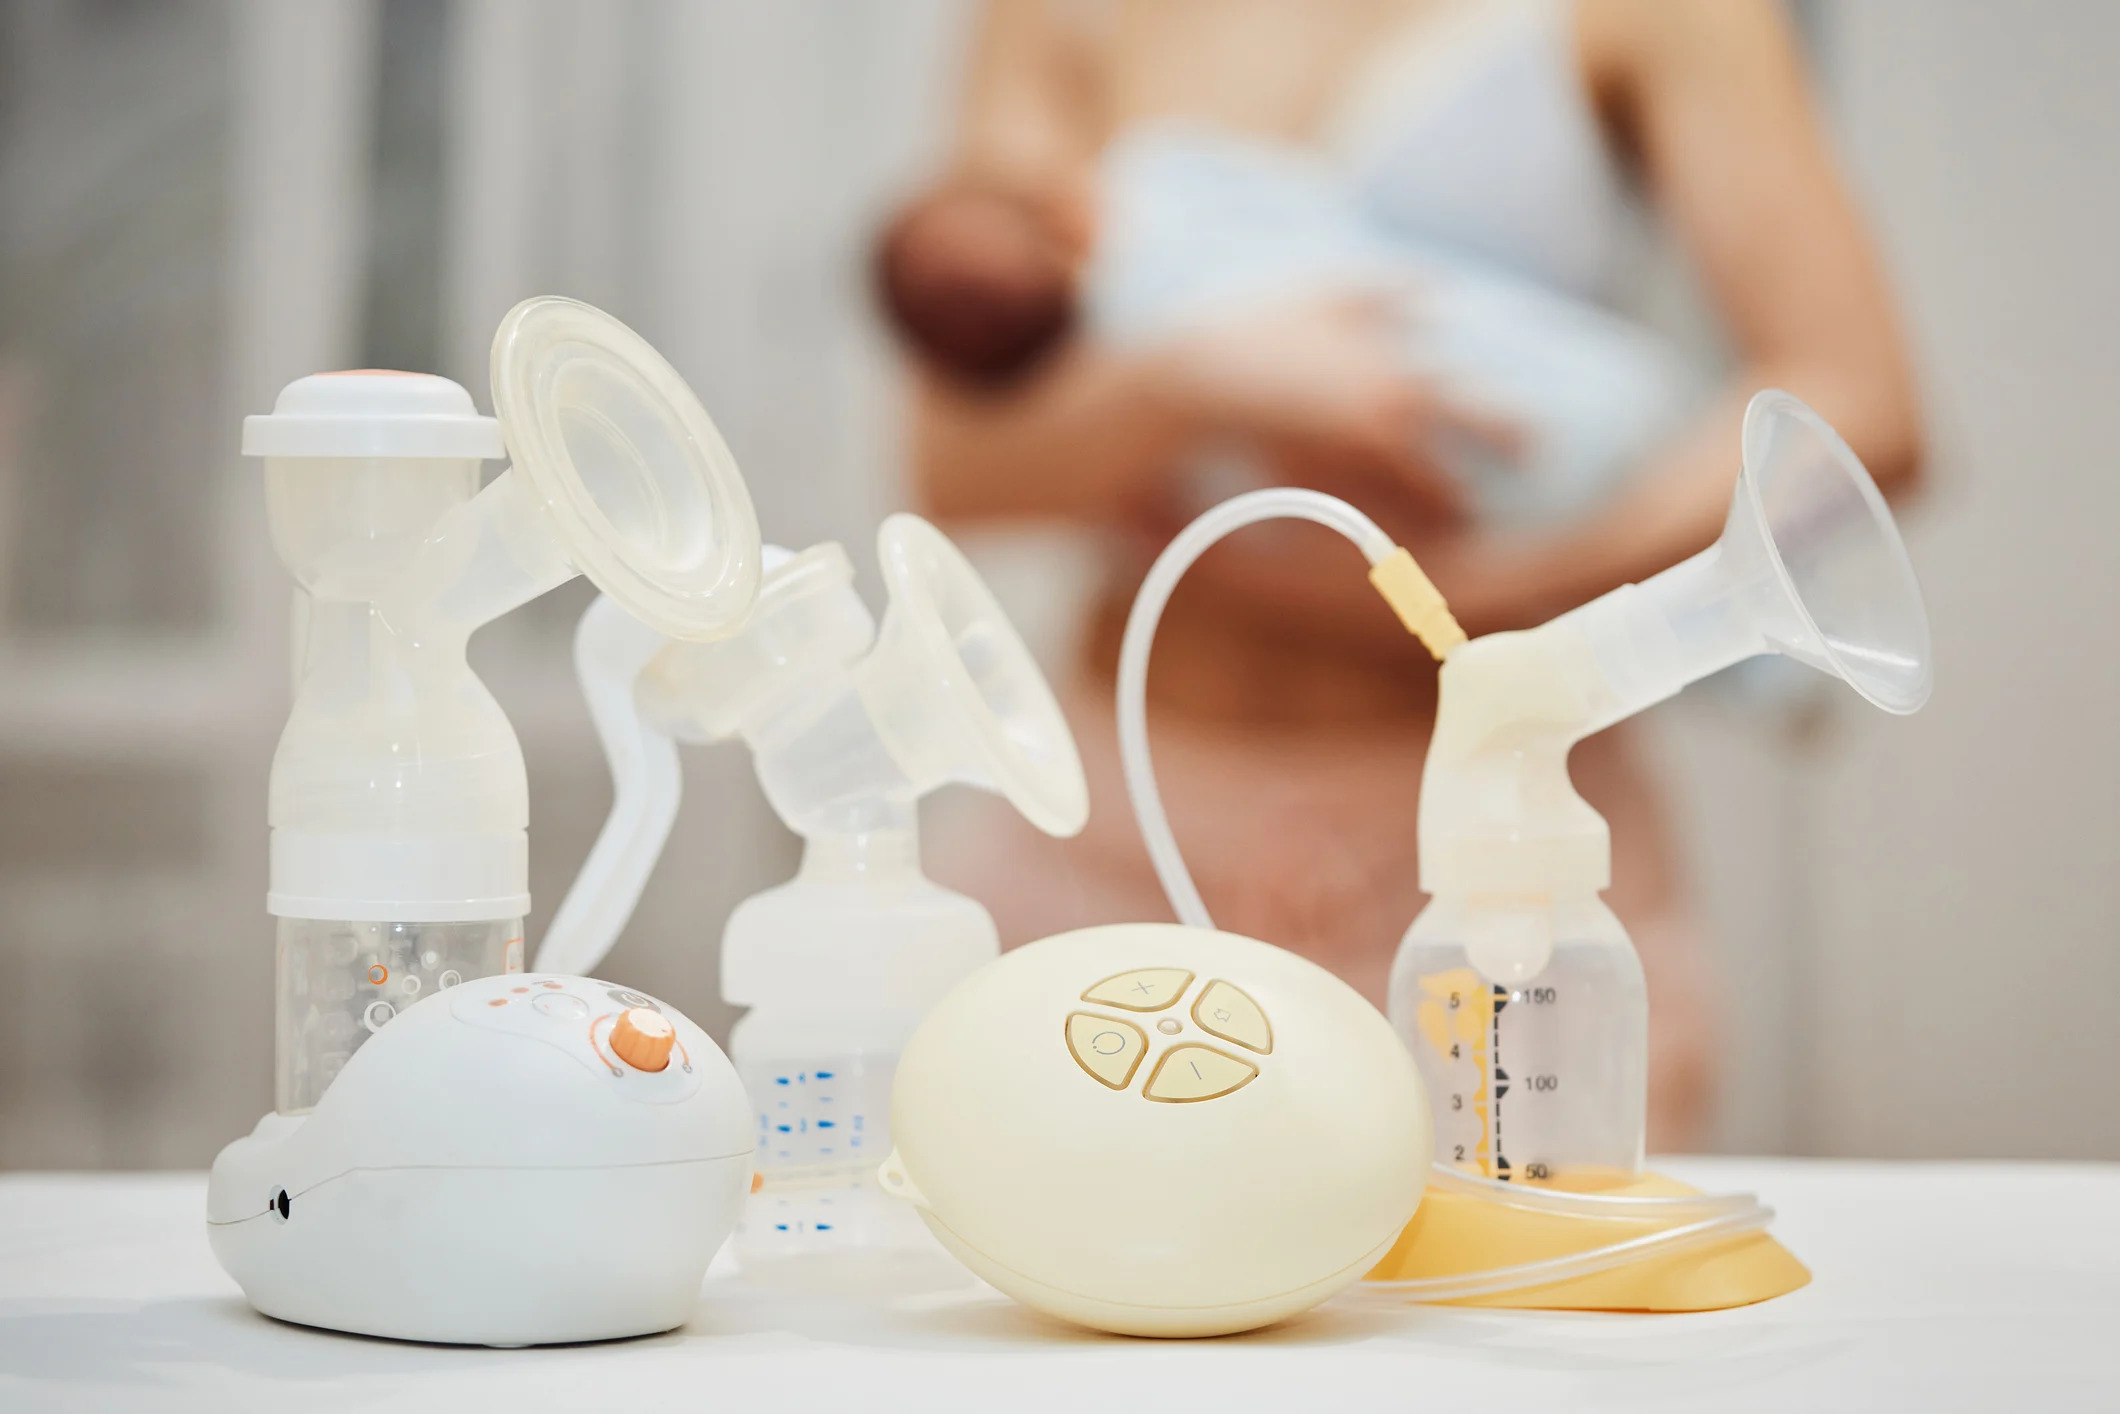
After cleaning your pump parts, the next step is to sterilize them to eliminate any remaining microorganisms effectively. There are several methods you can choose from to sterilize your pump parts:
- Option 1: Boiling the pump parts: This is a simple and cost-effective method of sterilization. Place the cleaned pump parts into a pot of boiling water, ensuring they are fully submerged. Boil for at least 5 minutes to ensure proper sterilization. Use tongs or a clean utensil to remove the parts from the boiling water and allow them to cool before handling.
- Option 2: Using a steam sterilizer: Electric steam sterilizers are a convenient and time-saving option. Follow the manufacturer’s instructions to place the cleaned pump parts inside the sterilizer and run the sterilization cycle. Make sure to allow the parts to cool down before removing them.
- Option 3: Using a microwave steam bag: Microwave steam bags are an excellent option for sterilizing pump parts on the go. Simply place the cleaned pump parts in the bag, add a small amount of water, and seal it tightly. Follow the instructions on the bag for the appropriate microwave time and power level. After microwaving, carefully remove the bag and allow it to cool before opening.
Remember to follow the manufacturer’s recommendations for each sterilization method to ensure that the process is effective and safe for your pump parts.
Now that your pump parts are sterilized, it’s time to move on to the next step: drying them properly.
Step 2: Sterilizing the Pump Parts
Read more: How To Store Baby Bottles After Sterilizing
– Option 1: Boiling the Pump Parts
Boiling the pump parts is a simple yet effective method for sterilization. Here’s how to do it:
- Gather the pump parts: Collect all the disassembled pump parts, including flanges, valves, membranes, and any other detachable pieces.
- Prepare a pot of water: Fill a clean pot with enough water to fully submerge all the pump parts. Make sure the pot is large enough to accommodate the parts without overcrowding.
- Boil the water: Place the pot on the stove and bring the water to a rolling boil.
- Add the pump parts: Carefully place the cleaned pump parts into the boiling water. Make sure all the parts are fully submerged.
- Boil for at least 5 minutes: Let the pump parts boil for a minimum of 5 minutes to ensure proper sterilization. If you are unsure about the recommended boiling time, you can consult the manufacturer’s instructions.
- Remove and cool the pump parts: After the boiling time is complete, use tongs or a clean utensil to carefully remove the pump parts from the boiling water. Place them on a clean, dry towel or a drying rack to cool down completely before handling.
Boiling is a convenient method because it requires minimal equipment and is accessible to anyone. It effectively kills various bacteria and fungi, ensuring that your pump parts are germ-free and safe to use.
Remember to clean your pot thoroughly before using it for boiling pump parts to avoid transferring any contaminants. Additionally, it’s a good idea to check your pump parts for any signs of wear or damage regularly. Damaged parts may not be suitable for boiling and may need to be replaced.
Now that you know how to boil your pump parts for sterilization, let’s move on to explore other sterilization options, such as using a steam sterilizer or a microwave steam bag.
Step 2: Sterilizing the Pump Parts
– Option 2: Using a Steam Sterilizer
Using a steam sterilizer is a convenient and efficient method for sterilizing pump parts. Follow these steps to sterilize your pump parts using a steam sterilizer:
- Disassemble the pump parts: Take apart all the removable pieces of your breast pump, such as the flanges, valves, membranes, and any other small components. Refer to the instruction manual if needed.
- Prepare the steam sterilizer: Fill the water reservoir of your steam sterilizer with the required amount of water, following the manufacturer’s instructions. Make sure to use distilled or filtered water to avoid mineral deposits.
- Place the pump parts in the sterilizer: Arrange the cleaned pump parts in the designated areas of the sterilizer. Make sure they are properly spaced and not overcrowded to allow steam to circulate freely.
- Start the sterilization cycle: Close the lid of the sterilizer and select the appropriate sterilization cycle, following the manufacturer’s instructions. The sterilization cycle usually takes around 10-15 minutes.
- Allow the sterilizer to cool down: Once the sterilization cycle is complete, wait for the sterilizer to cool down before opening the lid. This will prevent any accidental burns from the hot steam.
- Remove the pump parts: Carefully remove the sterilized pump parts from the sterilizer using clean tongs or utensils. Place them on a clean, dry towel or a drying rack to cool down completely before handling.
Using a steam sterilizer provides a reliable and efficient way to eliminate bacteria and other harmful microorganisms from your pump parts. It ensures that your pump parts remain hygienic and safe for your baby’s use.
Remember to clean your steam sterilizer regularly following the manufacturer’s instructions to avoid any buildup or residue that may affect its performance. Additionally, check the condition of your pump parts periodically and replace any damaged or worn-out components for optimal sterilization results.
Now that you’ve learned about using a steam sterilizer, let’s explore another option: sterilizing pump parts using a microwave steam bag.
Step 2: Sterilizing the Pump Parts
Read more: How To Sterilize A Mattress
– Option 3: Using a Microwave Steam Bag
Using a microwave steam bag is a convenient and portable option for sterilizing your pump parts. Here’s how you can effectively sterilize your pump parts using a microwave steam bag:
- Disassemble the pump parts: Take apart all the detachable pieces of your breast pump, including the flanges, valves, membranes, and any other small parts. Refer to the instruction manual if needed.
- Place the pump parts in the microwave steam bag: Arrange the cleaned pump parts inside the microwave steam bag. Make sure not to overcrowd the bag to allow steam circulation.
- Add water to the bag: Follow the instructions provided with the microwave steam bag and add the recommended amount of water. The water will create steam, which will sterilize the pump parts.
- Seal the bag: Close the microwave steam bag securely, ensuring that it is tightly sealed to trap the steam inside during the sterilization process.
- Place the bag in the microwave: Put the sealed microwave steam bag in the microwave, following the instructions on the bag for the appropriate microwave time and power level.
- Microwave and cool down: Start the microwave and let it run for the recommended amount of time. Once the sterilization cycle is complete, carefully remove the bag from the microwave using oven mitts or heat-resistant gloves. Allow the bag to cool down before opening.
- Remove and cool the pump parts: Open the microwave steam bag and carefully remove the sterilized pump parts. Place them on a clean, dry towel or a drying rack to cool down completely before handling.
Using a microwave steam bag offers convenience and simplicity, especially when you are on the go or need to quickly sterilize your pump parts. The steam generated inside the bag effectively kills bacteria and ensures the cleanliness of your pump parts.
Remember to follow the instructions provided with the specific microwave steam bag you are using, as the recommended microwave times and power levels may vary. Additionally, inspect your pump parts regularly and replace any damaged or worn-out components to maintain effective sterilization.
Now that you have learned about the different sterilization options, let’s move on to the next step: drying the pump parts.
Step 3: Drying the Pump Parts
After sterilizing your pump parts, it is crucial to ensure that they are thoroughly dried before storing them. Proper drying helps prevent the growth of bacteria and maintains the hygiene of your pump parts. Here’s how to effectively dry your pump parts:
- Air drying: The most common and recommended method of drying pump parts is by air drying. Place the sterilized pump parts on a clean, dry towel, or a drying rack. Ensure that all parts are spread out and not touching each other to allow air circulation. Let them air dry completely, which may take a few hours.
- Pat drying: If you prefer a faster drying method, you can use a clean, lint-free cloth or paper towels to gently pat dry the pump parts. Make sure the cloth or paper towels are clean and free of fibers or residues that could transfer onto the pump parts.
- Avoid towel drying: While it may be tempting to use a towel to dry your pump parts quickly, it’s best to avoid this method. Towels can harbor bacteria or lint, which may contaminate the pump parts, defeating the purpose of sterilization.
- Check for moisture: After drying, inspect the pump parts carefully to ensure that there is no moisture or water droplets remaining. Moisture can create a breeding ground for bacteria, so it’s important to make sure the parts are completely dry.
- Allow additional drying time: Depending on the material and design of your pump parts, they may require extra drying time. Silicone parts, for example, may take longer to dry compared to plastic parts. Be patient and allow enough time for thorough drying.
Properly dried pump parts will help maintain their integrity, prevent bacterial growth, and keep them in optimum condition for future use. Remember to store the pump parts in a clean and dry area to prevent any contamination before and after use.
Now that your pump parts are dry, let’s move on to the final step: storing the sterilized pump parts.
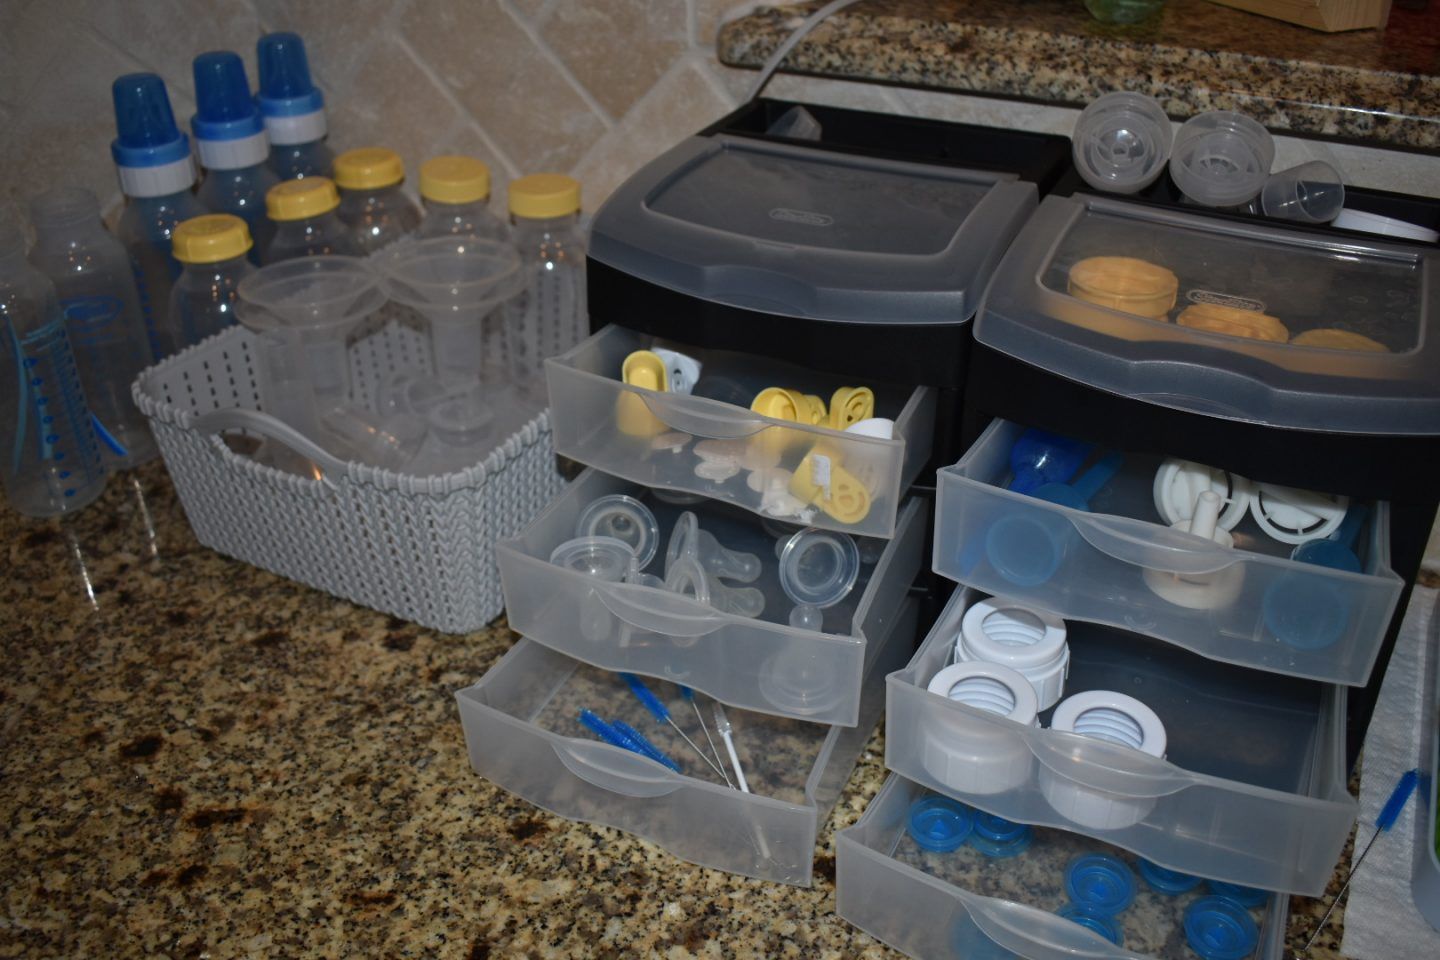
Step 4: Storing the Sterilized Pump Parts
Storing your sterilized pump parts properly is crucial to maintain their cleanliness and hygiene. Follow these guidelines to ensure the safe and contamination-free storage of your pump parts:
- Option 1: Storing in a clean container: Place the dried pump parts in a clean, airtight container. Choose a container that is BPA-free, food-grade, and specifically designed for storing breast pump parts. Make sure to clean the container thoroughly before use.
- Option 2: Using a sterilization bag: Sterilization bags are a convenient option for storing sterilized pump parts. These bags are designed to keep the pump parts sterile until their next use. Simply place the dried pump parts in the bag, seal it tightly, and store it in a clean and dry area.
- Option 3: Storing in sterilization pouches: Sterilization pouches are another popular choice for storing sterilized pump parts. These pouches are made of medical-grade materials and have a self-sealing mechanism to keep the pump parts sterile. Put the dried pump parts in the pouch, seal it securely, and store it in a clean and dry place.
- Label the storage containers: If you are storing multiple sets of pump parts, it’s helpful to label the containers or bags with the date of sterilization. This way, you can ensure that you are rotating and using the pump parts in a timely manner to prevent any contamination or degradation of the parts.
- Store in a clean and dry area: Choose a storage area that is clean, dry, and away from direct sunlight. Avoid storing pump parts near chemicals, cleaning agents, or areas prone to moisture or dust. Keep the storage area well-ventilated to prevent the build-up of humidity.
By following these storage guidelines, you can maintain the sterility and hygiene of your pump parts until their next use. Always remember to wash and sterilize the pump parts before using them, even if they have been stored properly.
Now that you have learned how to store your sterilized pump parts, let’s explore some additional tips for maintaining sterilized pump parts.
Step 4: Storing the Sterilized Pump Parts
Read more: How To Sterilize Glass Jars
– Option 1: Storing in a Clean Container
Storing your sterilized pump parts in a clean container is a convenient option that ensures the safety and hygiene of your pump parts. Here’s how you can effectively store your pump parts in a clean container:
- Select a clean container: Choose a container that is specifically designed for storing breast pump parts. Look for containers that are BPA-free, food-grade, and have an airtight seal to keep the pump parts protected from contaminants.
- Clean the container: Before using the container, wash it thoroughly with warm water and mild dish soap. Rinse it well to remove any soap residue. Ensure that the container is completely dry before storing the sterilized pump parts.
- Place the pump parts in the container: Arrange the dried pump parts in the clean container. Make sure they are properly spaced out and not touching each other to maintain their cleanliness and prevent any possible cross-contamination.
- Seal the container: Once the pump parts are placed in the container, securely close the lid to create an airtight seal. This will help keep the pump parts protected from dust, dirt, and other contaminants.
- Label the container: If you are storing multiple sets of pump parts or if you want to keep track of the date they were sterilized, label the container with the date of sterilization. This way, you can easily identify and rotate the pump parts to ensure their freshness and hygiene.
- Store in a clean and dry area: Find a designated spot in your clean and dry storage area to keep the container of sterilized pump parts. Make sure the area is away from direct sunlight, humidity, and any potential sources of contamination, such as chemicals or cleaning agents.
Storing your sterilized pump parts in a clean container maintains their cleanliness and safeguards them from any potential contaminants. Remember to always wash and sterilize the pump parts before using them again, even if they have been stored in a clean container.
Now that you understand how to store the pump parts in a clean container, let’s explore some additional tips to help you maintain sterilized pump parts effectively.
Step 4: Storing the Sterilized Pump Parts
– Option 2: Using a Sterilization Bag
Using a sterilization bag is a convenient option for storing your sterilized pump parts while maintaining their hygiene and cleanliness. Here’s how you can effectively store your pump parts using a sterilization bag:
- Select a sterilization bag: Choose a sterilization bag that is specifically designed for storing breast pump parts. Look for bags that are made of medical-grade materials and have a self-sealing mechanism to ensure the sterility of the pump parts.
- Place the pump parts in the bag: Arrange the dried pump parts inside the sterilization bag. Make sure the parts are properly spaced out and not touching each other to prevent any potential cross-contamination.
- Seal the bag: Once the pump parts are placed inside the sterilization bag, seal it tightly using the self-sealing feature. Make sure the seal is secure to maintain the sterility of the pump parts.
- Label the bag: If you are storing multiple sets of pump parts or if you want to keep track of the sterilization date, label the bag with the necessary information. This will help you easily identify and rotate the pump parts for future use.
- Store in a clean and dry area: Find a designated spot in your clean and dry storage area to keep the sealed sterilization bag. Ensure that the storage area is kept away from direct sunlight, humidity, and any potential sources of contamination.
- Inspect the bag before use: Before using the pump parts from the sterilization bag, visually inspect the bag to ensure its integrity. If you notice any signs of damage or compromise, replace the bag to maintain the sterility of the pump parts.
Using a sterilization bag provides a convenient and reliable way to store your sterilized pump parts while keeping them protected from contaminants until their next use. Remember to always wash and sterilize the pump parts before using them, even if they have been stored in a sterilization bag.
Now that you understand how to use a sterilization bag for storing your pump parts, let’s explore some additional tips to help maintain the sterility of your pump parts.
Step 4: Storing the Sterilized Pump Parts
Read more: How To Store Computer Parts
– Option 3: Storing in Sterilization Pouches
Storing your sterilized pump parts in sterilization pouches provides a convenient and effective way to keep them clean and germ-free. Follow these steps to store your pump parts in sterilization pouches:
- Select sterilization pouches: Choose sterilization pouches that are specifically designed for storing and sterilizing breast pump parts. Look for pouches made of medical-grade materials that provide an airtight seal for maximum sterility.
- Prepare the pouches: Open the sterilization pouches according to the instructions provided. Most pouches have a built-in indicator that changes color to indicate successful sterilization.
- Place the pump parts in the pouches: Arrange the dried pump parts inside the sterilization pouches. Ensure that they are properly spaced out and not overlapping to allow for effective sterilization.
- Seal the pouches: Close the sterilization pouches using the adhesive strip or heat-sealing mechanism provided. Make sure that the pouches are sealed tightly to maintain the sterilization of the pump parts.
- Label the pouches: If you are storing multiple sets of pump parts or want to keep track of the sterilization date, label the pouches with the necessary information. This will help you identify and rotate the pump parts as needed.
- Store in a clean and dry area: Find a designated spot in your clean storage area to keep the sealed sterilization pouches. Ensure that the storage area is away from direct sunlight, humidity, and any potential sources of contamination.
- Inspect the pouches before use: Before using the pump parts from the sterilization pouches, visually inspect the pouches to ensure their integrity. Check for any signs of damage or compromise, and if noted, replace the pouch to maintain the sterility of the pump parts.
Storing your sterilized pump parts in sterilization pouches helps to preserve their sterility until you’re ready to use them. Always remember to wash and sterilize the pump parts before using them, even if they have been stored in sterilization pouches.
Now that you understand how to store your pump parts in sterilization pouches, let’s explore some additional tips for maintaining sterilized pump parts.
Tips for Maintaining Sterilized Pump Parts
Once you have sterilized and stored your pump parts, it’s important to maintain their cleanliness and sterility. Here are some tips to help you maintain your sterilized pump parts effectively:
- Wash your hands: Before handling sterilized pump parts, always wash your hands with warm water and soap to reduce the risk of introducing any contaminants.
- Use a dedicated storage area: Designate a specific area for storing your sterilized pump parts. This area should be clean, dry, and away from any potential sources of contamination.
- Keep pump parts covered: While in storage, cover your pump parts with a clean cloth or lid to protect them from dust, debris, and potential airborne contaminants.
- Regularly inspect the pump parts: Periodically check your pump parts for any signs of wear, damage, or discoloration. Damaged or worn-out parts should be replaced to ensure optimal performance and hygiene.
- Replace storage containers and bags: If your storage containers or sterilization bags show signs of wear or damage, replace them promptly to maintain the integrity and sterility of your pump parts.
- Follow recommended sterilization methods: Always follow the manufacturer’s instructions for sterilizing your pump parts. Different pump models and brands may have specific guidelines for cleaning, sterilizing, and storing.
- Keep track of sterilization dates: Label your storage containers or bags with the date of sterilization to help ensure that you are rotating and using the pump parts in a timely manner. This practice prevents the risk of using outdated or expired sterilized parts.
- Avoid contamination during assembly: When assembling the pump parts before use, make sure to handle them with clean hands and on a clean surface to prevent contamination.
- Clean and sterilize regularly: Establish a regular cleaning and sterilization routine for your pump parts. Aim to clean and sterilize the parts after each use to maintain their hygiene and prevent the build-up of bacteria or residue.
- Replace worn-out pump parts: Over time, certain pump parts, such as valves or membranes, may wear out and become less effective in maintaining sterility. Regularly check and replace these parts as needed to ensure proper functionality and hygiene.
By following these tips, you can maintain the cleanliness and sterility of your pump parts, ensuring the health and safety of your baby. Remember that proper cleaning, sterilization, and storage are key to preserving the integrity of your pump parts.
Now you’re equipped with the knowledge to effectively clean, sterilize, dry, and store your pump parts. By following these guidelines, you can confidently continue your breastfeeding and pumping journey with peace of mind.
Happy pumping!
Conclusion
Properly sterilizing and storing your pump parts is crucial for maintaining the safety and health of your baby. By following the steps outlined in this guide, you can ensure that your pump parts are thoroughly cleaned, effectively sterilized, properly dried, and safely stored.
Start by cleaning your pump parts with warm water and mild soap, ensuring that all residue is removed. Next, choose from various sterilization methods such as boiling, using a steam sterilizer, or using a microwave steam bag. Each method is effective in eliminating harmful bacteria and germs.
After sterilizing your pump parts, make sure they are properly dried. Air drying or pat drying with a clean cloth is recommended to prevent the growth of bacteria due to moisture.
When it comes to storing the sterilized pump parts, you have several options. Storing them in a clean container, using sterilization bags, or storing them in sterilization pouches are all effective choices. Choose the method that suits your needs and ensure that the storage area is clean, dry, and away from potential sources of contamination.
To maintain the sterility of your pump parts, it’s important to handle them with clean hands, regularly inspect them for wear or damage, and follow the recommended sterilization methods provided by the manufacturer. Stay organized by labeling and keeping track of the sterilization dates to ensure that you are using the pump parts within their recommended freshness timeline.
By implementing these practices and tips, you can confidently provide clean and safe breast milk for your baby, reducing the risk of infections and ensuring optimal health and well-being.
Remember to establish a regular cleaning and sterilization routine and replace worn-out pump parts as needed. Your dedication to maintaining the cleanliness and sterility of your pump parts contributes to the overall success of your breastfeeding and pumping journey.
Now, armed with this comprehensive guide, you can confidently navigate the process of storing sterilized pump parts and continue to provide the best for your baby.
Happy pumping and best wishes on your breastfeeding journey!
Frequently Asked Questions about How To Store Sterilized Pump Parts
Was this page helpful?
At Storables.com, we guarantee accurate and reliable information. Our content, validated by Expert Board Contributors, is crafted following stringent Editorial Policies. We're committed to providing you with well-researched, expert-backed insights for all your informational needs.
0 thoughts on “How To Store Sterilized Pump Parts”