
Articles
How To Store Your Pattern Collection
Modified: December 7, 2023
Learn the best methods for storing your valuable articles and patterns to keep them organized and protected. Find expert tips and tricks for efficient storage solutions.
(Many of the links in this article redirect to a specific reviewed product. Your purchase of these products through affiliate links helps to generate commission for Storables.com, at no extra cost. Learn more)
Introduction
In the world of crafts and sewing, patterns are essential tools that help bring creative ideas to life. Whether you are a seasoned seamstress or an enthusiastic beginner, having a well-organized and easily accessible storage system for your patterns is crucial. A well-maintained pattern collection not only saves time and effort when searching for a specific design but also helps preserve the integrity of the patterns themselves.
In this article, we will guide you through the process of storing patterns effectively. We’ll cover everything from choosing the right storage space to cleaning, folding, labeling, and categorizing your patterns. By following these steps, you can create a streamlined and efficient system that allows for easy access and long-lasting preservation of your valuable pattern collection.
Without further ado, let’s dive into the world of pattern storage and discover the secrets behind keeping your patterns in top-notch condition!
Key Takeaways:
- Organize and preserve your patterns with a well-structured storage system to save time and effort in finding specific designs for your sewing projects. Maintain and update the system to ensure long-term preservation and adapt to the growth of your collection.
- Choose a suitable storage space, clean and prep your patterns, fold and organize them thoughtfully, use protective coverings, label and categorize, store in appropriate containers, and maintain and update the storage system for a seamless and enjoyable sewing experience.
Read more: How To Store Your Shopkins
Step 1: Choose Suitable Storage Space
The first step in creating an organized pattern storage system is to choose an appropriate storage space. You’ll want to consider factors such as accessibility, protection from the elements, and available storage options.
When selecting a storage space, it’s important to find a location that is easily accessible. Ideally, this would be a spot where you can easily retrieve and return your patterns without any hassle. Consider areas like a closet, storage room, or a dedicated shelf or cabinet specifically for your patterns.
Furthermore, it’s crucial to protect your patterns from factors that can damage them, such as sunlight, dust, and moisture. Look for a location that is away from direct sunlight, as ultraviolet rays can fade and deteriorate the paper patterns over time. Additionally, ensure that the storage space is clean and dry, as moisture can cause mold and mildew to develop on your patterns.
Once you’ve identified a suitable storage space, take stock of the available storage options within that area. You can choose between various storage solutions depending on the size and quantity of your pattern collection. Some popular options include storage boxes, binders, file folders, or plastic sleeves. Consider the dimensions of your patterns and the level of protection required when deciding on the best storage containers.
Remember, the goal of choosing a suitable storage space is to find a location that is easily accessible, protects your patterns from any potential damage, and offers appropriate storage options that fit your collection. By selecting the right storage space, you’re setting the foundation for an organized and well-preserved pattern storage system.
Step 2: Clean and Prep the Patterns
Before storing your patterns, it’s important to ensure that they are clean and free from any dirt, debris, or stains. Cleaning and prepping the patterns will not only help maintain their overall quality but also prevent any potential damage or degradation over time.
Start by gently removing any loose dirt or dust from the patterns using a soft-bristle brush or a lint roller. Be careful not to apply too much pressure or force to avoid tearing or damaging the delicate paper. If there are any stubborn stains or marks on the patterns, you can gently spot clean them using a mild fabric cleaner or a damp cloth. However, it’s essential to test any cleaning product on a small, inconspicuous area of the pattern first to ensure that it doesn’t cause discoloration or damage.
Once the patterns are clean, allow them to air dry completely. Avoid using heat sources such as hairdryers or direct sunlight, as this can cause the paper to warp or fade. Additionally, make sure that the patterns are completely dry before moving on to the next step to prevent the growth of mold or mildew.
To further protect and prepare the patterns for storage, you may consider reinforcing any weak or fragile areas. This can be done by using clear adhesive tape on torn edges or along the fold lines to prevent further tearing. Alternatively, you can also transfer the patterns onto sturdier materials such as cardstock or pattern tracing paper.
By taking the time to clean and prep your patterns, you are ensuring that they are in optimal condition before storing them. This step not only helps preserve the integrity of the patterns but also contributes to a more organized and visually appealing pattern storage system.
Step 3: Fold and Organize the Patterns
After cleaning and prepping your patterns, it’s time to fold and organize them in a way that maximizes space and makes them easily accessible. Proper folding and organization techniques not only help save space but also ensure that you can quickly locate and retrieve specific patterns when needed.
Start by carefully folding the patterns according to their original folding lines, if available. This will help maintain the integrity of the patterns and prevent unnecessary creasing. If the patterns don’t have pre-existing folding lines, you can fold them in half vertically and then horizontally to create four equal quadrants. Fold them neatly and avoid creating sharp creases that could weaken the paper over time.
Once the patterns are folded, consider organizing them by category or garment type. You can group patterns together based on criteria such as dresses, tops, bottoms, or by a specific design style. This will make it easier to locate patterns when you’re looking for a particular style or project.
Within each category, further organize the patterns by size or pattern company. This can be done by labeling the patterns with the appropriate size or by using dividers or tabs to separate different pattern companies. This organization system will streamline the process of finding the right size and make it easier to navigate through your pattern collection.
When placing the folded patterns in storage containers, be mindful of the space available. Ensure that the containers are not overcrowded, as this can cause unnecessary pressure and creasing of the patterns. If needed, use additional containers or dividers to separate different categories or sizes to maintain an organized layout.
By folding and organizing your patterns thoughtfully, you can maximize storage space while keeping them easily accessible and organized. This step contributes to an efficient and visually appealing pattern storage system that makes finding and selecting patterns a breeze.
Step 4: Use Protective Coverings
To ensure the long-term preservation of your patterns, it’s essential to use protective coverings that shield them from potential damage and wear. Protective coverings act as a barrier against dust, moisture, and other environmental elements that can affect the quality and longevity of your patterns.
One common protective covering option is clear plastic sleeves or sheet protectors. These sleeves are typically made of archival-safe materials that help prevent yellowing or deterioration of the patterns. They provide a transparent layer that allows you to see the pattern while keeping it safe from potential spills or accidental damage.
If you prefer a more eco-friendly option, you can also use acid-free tissue paper to wrap your folded patterns individually. Acid-free tissue paper is a gentle and breathable material that safeguards your patterns against dust and moisture. It’s important to avoid using regular tissue paper, as it may contain acids that can degrade the patterns over time.
In addition to protective coverings, consider using acid-free envelopes or storage bags for larger pattern pieces or pattern sets. These envelopes provide an added layer of protection and can be labeled and categorized for easy identification.
Remember to select coverings that are appropriate for the size and type of patterns you have. For larger patterns or pattern sets, make sure the coverings can accommodate their dimensions without bending or folding the pieces. Be sure to use coverings that are made of archival-safe and acid-free materials to provide the best protection for your patterns.
By using protective coverings, you are taking an extra step to safeguard your patterns against potential damage and preserve their quality. These coverings not only protect your patterns but also contribute to an organized and visually appealing pattern storage system.
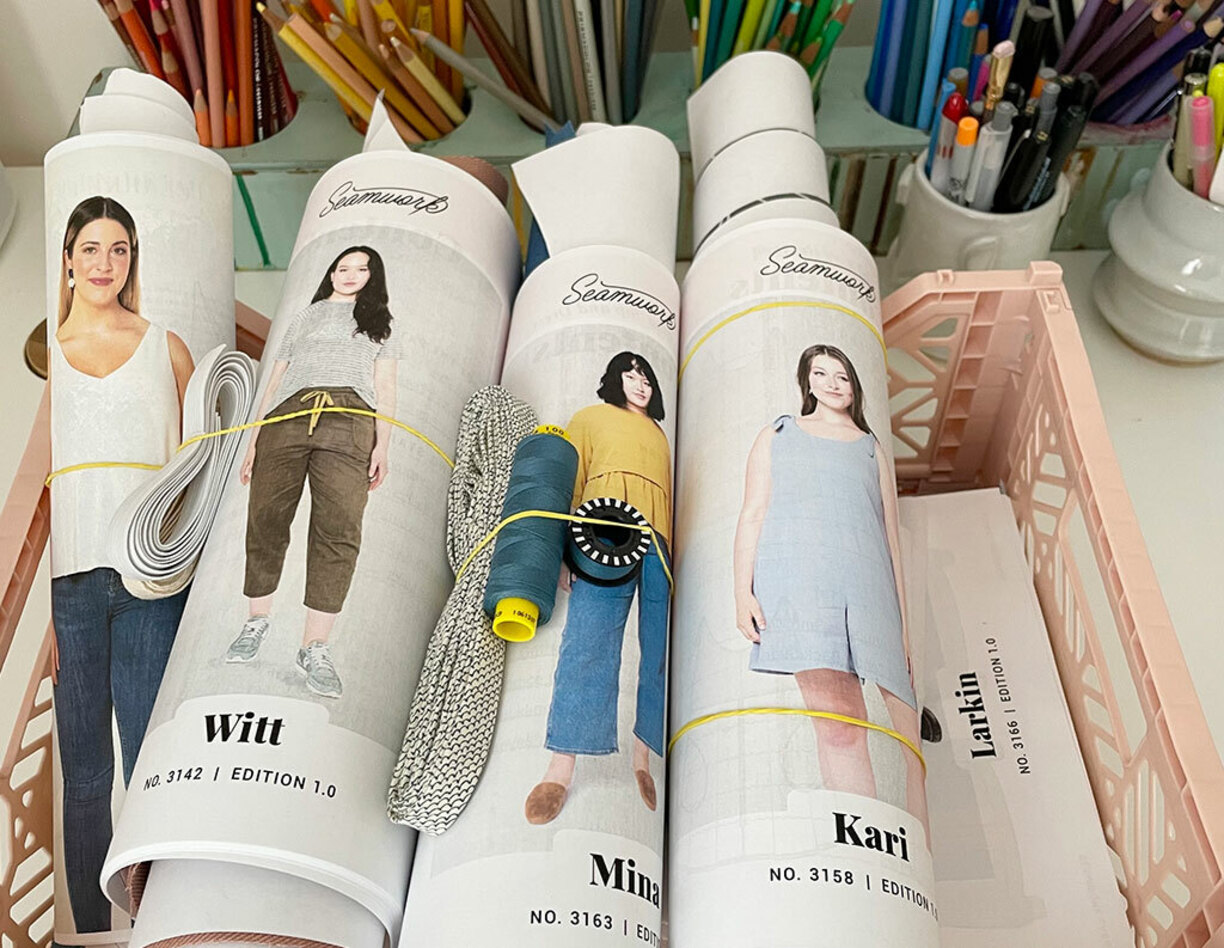
Store patterns by rolling or folding them neatly and placing them in a clear plastic bag or container to prevent them from getting wrinkled or damaged. Keep them in a cool, dry place away from direct sunlight.
Read more: How To Store Collectible Toys
Step 5: Label and Categorize the Patterns
In order to easily locate specific patterns within your collection, it is important to properly label and categorize them. This step ensures that you can quickly find the patterns you need for your sewing projects, saving you time and effort.
Start by labeling each pattern with relevant information such as the pattern company, pattern number, and garment type. You can also include additional details like the size range, fabric recommendations, and any modifications you’ve made to the pattern. Use a permanent marker or label maker to clearly write or print this information on the pattern envelope or plastic sleeve.
Consider creating a catalog or inventory system to keep track of your patterns. This can be a physical notebook or a digital spreadsheet where you list all the patterns in your collection, along with their corresponding details. This catalog will serve as a reference, allowing you to easily search for specific patterns by company, number, or garment type.
Next, categorize the patterns into logical groups based on their garment type, style, or level of difficulty. You can create categories such as dresses, tops, bottoms, outerwear, or separates. This categorization ensures that patterns are organized in a way that makes sense and provides a clear structure for easy navigation.
If you have a large collection, consider using dividers or tabs within your storage containers to separate different categories or sections. This will make it even easier to find the patterns you’re looking for without having to search through the entire collection.
Lastly, consider implementing a numerical or alphabetical system to further organize your patterns. This can be done by assigning each pattern a unique identification number or by alphabetizing them based on the pattern company name. This system provides an additional layer of organization and streamlines the process of locating specific patterns.
By labeling and categorizing your patterns, you create a well-organized storage system that enables you to quickly identify and retrieve the patterns you need for your sewing projects. This step simplifies the overall pattern management process and ensures a more efficient and enjoyable sewing experience.
Step 6: Store in Appropriate Containers
Once you have labeled and categorized your patterns, it’s time to store them in appropriate containers that provide maximum protection and organization. The right storage containers will ensure that your patterns remain in good condition and are easily accessible whenever you need them.
When choosing storage containers, opt for ones that are sturdy and can safely hold the weight of your pattern collection. Clear plastic bins or boxes with secure lids are a popular choice as they provide visibility and protect the patterns from dust and moisture. Ensure that the containers are the right size to accommodate your folded patterns without excessive compression or bending.
If you prefer a more aesthetically pleasing option, consider decorative storage boxes or baskets that align with your personal style. Just make sure that they offer enough protection and can fit your patterns comfortably.
It’s also worth considering additional storage solutions such as hanging garment bags or plastic file folders for larger patterns or pattern sets. These allow for vertical storage and prevent unnecessary folding, preserving the integrity of the pattern pieces.
Arrange the containers in a way that makes sense to you, whether it’s stacking them on shelves or placing them in a designated area such as a closet or storage room. Keep in mind that accessibility is key, so arrange the containers in a manner that allows you to easily see and retrieve the desired patterns without having to move multiple containers.
For added organization, consider using dividers or file folders within the containers to separate different categories or sizes. This will help maintain a neat and organized pattern storage system.
Remember that storing your patterns in appropriate containers not only protects them from potential damage but also ensures that they are easily accessible whenever you need them. By investing in quality storage solutions, you can maintain the longevity of your patterns and simplify the process of finding the perfect design for your next sewing project.
Step 7: Maintain and Update the Storage System
Creating an organized pattern storage system is not a one-time task; it requires regular maintenance and updates to ensure its effectiveness and efficiency. By implementing ongoing maintenance practices, you can keep your pattern collection in top-notch condition and make necessary updates as your collection grows or changes.
Regularly inspect your patterns and storage containers to check for any signs of damage or deterioration. Ensure that the containers are clean and free from dust or debris. If you notice any issues like torn envelopes or damaged plastic sleeves, replace them promptly to prevent further damage to the patterns.
Periodically review and reassess your categorization and labeling system. As your collection expands or your sewing preferences evolve, you may find the need to reorganize or add new categories. Update your catalog or inventory system accordingly to reflect these changes, ensuring that patterns are properly labeled and easy to locate.
Consider implementing a system for tracking pattern usage. This can be a simple note-taking method where you record which patterns you have used and any modifications you made. This can help you identify patterns that you rarely use or ones that have become favorites.
Additionally, if you acquire new patterns, make sure to incorporate them into your storage system promptly. Label them, categorize them, and find an appropriate place within your storage containers. This way, your collection stays up to date, and you can easily find and access all your patterns.
Lastly, periodically review your storage space and containers to ensure they still meet your needs. If your pattern collection grows significantly, you might need to invest in additional storage solutions or reevaluate the organization of your patterns. Keeping an eye on the storage system will help you maintain a functional and efficient setup.
By regularly maintaining and updating your storage system, you ensure that your pattern collection remains well-organized and easy to navigate. This step enables you to quickly find patterns, keep them in good condition, and adapt to any changes in your collection. With a well-maintained storage system, you can have confidence in knowing that your patterns are safely preserved and readily accessible for your sewing projects.
Conclusion
Creating a comprehensive and well-organized pattern storage system is essential for any sewing enthusiast. By following the steps outlined in this article, you can ensure that your patterns are easily accessible, well-preserved, and protected from potential damage. Let’s recap the key points:
Step 1: Choose a suitable storage space that is easily accessible and provides protection from elements like sunlight and moisture.
Step 2: Clean and prep your patterns by removing dirt and stains and reinforcing any weak areas.
Step 3: Fold and organize your patterns by following their original folding lines, categorize them by garment type, and consider using dividers for easy navigation.
Step 4: Use protective coverings such as plastic sleeves or acid-free tissue paper to shield the patterns from dust and moisture.
Step 5: Label and categorize your patterns with relevant information like pattern company, number, and garment type. Create a catalog or inventory system for easy reference.
Step 6: Store your patterns in appropriate containers like clear plastic bins or decorative storage boxes. Use dividers or file folders to organize and separate different categories or sizes.
Step 7: Maintain and update your storage system by inspecting and replacing damaged containers or coverings, reassessing categorization and labeling, and incorporating new patterns promptly.
By following these steps, you can create a well-structured and efficient pattern storage system that saves you time and effort in finding specific designs for your sewing projects. Additionally, maintaining and updating your storage system ensures the long-term preservation of your patterns and adapts to the growth and evolution of your collection.
So, take the time to invest in organizing and preserving your patterns. With a well-maintained pattern storage system, you’ll have a seamless and enjoyable sewing experience, knowing that your cherished patterns are protected and readily available whenever inspiration strikes.
Frequently Asked Questions about How To Store Your Pattern Collection
Was this page helpful?
At Storables.com, we guarantee accurate and reliable information. Our content, validated by Expert Board Contributors, is crafted following stringent Editorial Policies. We're committed to providing you with well-researched, expert-backed insights for all your informational needs.





0 thoughts on “How To Store Your Pattern Collection”