Articles
How To Turn Desk Into Vanity
Modified: August 28, 2024
Learn how to transform your desk into a stunning vanity with these informative articles. Find step-by-step guides, expert tips, and style inspiration.
(Many of the links in this article redirect to a specific reviewed product. Your purchase of these products through affiliate links helps to generate commission for Storables.com, at no extra cost. Learn more)
Introduction
Transforming a simple desk into a stylish vanity can elevate your morning routine and make getting ready a more enjoyable experience. Whether you want to create a glamorous Hollywood-inspired vanity or a minimalist Scandinavian design, turning a desk into a vanity is a creative and cost-effective solution.
In this article, we will guide you through the step-by-step process of transforming a desk into a stunning vanity that suits your personal style and needs. We will cover everything from clearing and organizing your workspace to adding mirrors, lighting, and storage options. With a little creativity and some handy tools, you can create a vanity that combines functionality, style, and convenience.
So, if you’re tired of your old, plain desk and looking for a fun DIY project to revamp your space, let’s dive into the world of desk-to-vanity transformations!
Key Takeaways:
- Elevate your morning routine by transforming a simple desk into a stylish vanity. Follow the step-by-step process to create a personalized and functional beauty haven that reflects your unique style and personality.
- Clear, organize, and personalize your vanity to create a space that inspires and motivates you during your daily beauty routine. Enjoy the process of creating a stunning and functional vanity area that you can truly call your own.
Read also: 13 Best Vanity Desk for 2025
Step 1: Clearing and Organizing
The first step in transforming a desk into a vanity is to clear and organize the workspace. Start by removing any items from the desk and its surrounding area. This includes paperwork, office supplies, and any other clutter that may be occupying the space.
Once you’ve cleared the desk, take the time to organize your makeup, skincare products, and other beauty essentials. Sort them into categories and decide how you want to store them. This will help you determine what storage options you’ll need to incorporate into your vanity.
For smaller items like makeup brushes and hair accessories, consider using organizers or containers that can fit neatly on the desk. Drawer dividers are also a great way to keep your products separated and easily accessible. Make sure to declutter any expired or unused products to make space for your essentials.
Next, assess the lighting situation in your workspace. Natural lighting is ideal for applying makeup, so if possible, position your vanity near a window. If natural light is not sufficient, plan to incorporate adequate lighting fixtures later in the process.
By clearing and organizing your workspace, you’ll have a clean canvas to work with and a better understanding of how to design your vanity. Let’s now move on to preparing the desk itself.
Step 2: Preparing the Desk
Now that you have a clean and organized workspace, it’s time to prepare the desk for its transformation into a vanity. Begin by thoroughly cleaning the desk surface and removing any dust or debris.
If your desk has a smooth surface, you can consider painting or refinishing it to give it a fresh look. Choose a paint color that complements your room decor or opt for a classic white or black finish for a sleek and modern vanity design. Be sure to choose a paint that is suitable for the material of your desk, whether it’s wood, metal, or laminate.
If you decide to paint the desk, make sure to apply a primer first for better adhesion and durability. Allow the primer to dry completely before applying the paint. Use smooth and even brush strokes to achieve a professional finish. Once the paint is dry, you can optionally apply a clear coat or protective finish to enhance the durability of the desk.
Alternatively, if you prefer to maintain the natural look of the desk, consider applying a clear sealant to protect the surface from scratches and stains.
In addition to painting or sealing the desk, you may also want to consider adding decorative elements such as drawer knobs or handles. This can instantly upgrade the appearance of the desk and add a personal touch to your vanity. Choose knobs or handles that complement the style of your room and vanity.
Once you’ve prepared and modified the desk to your liking, it’s time to move on to the next step: adding a mirror.
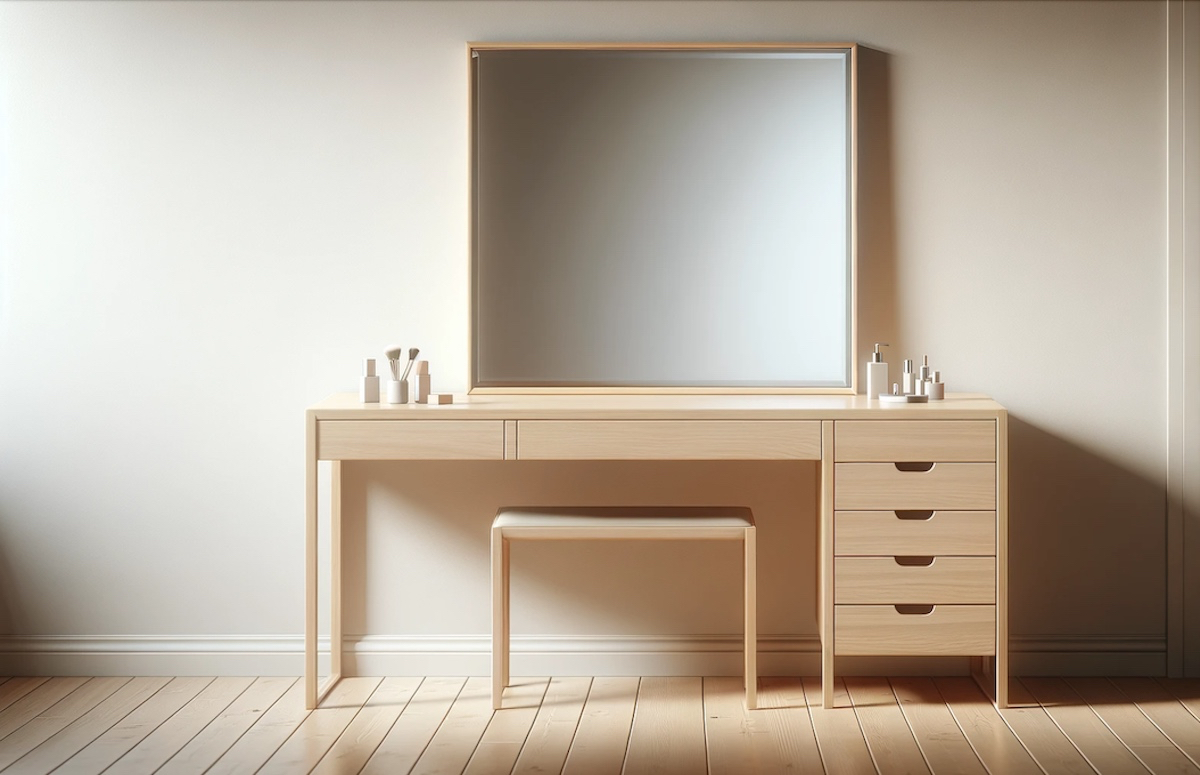
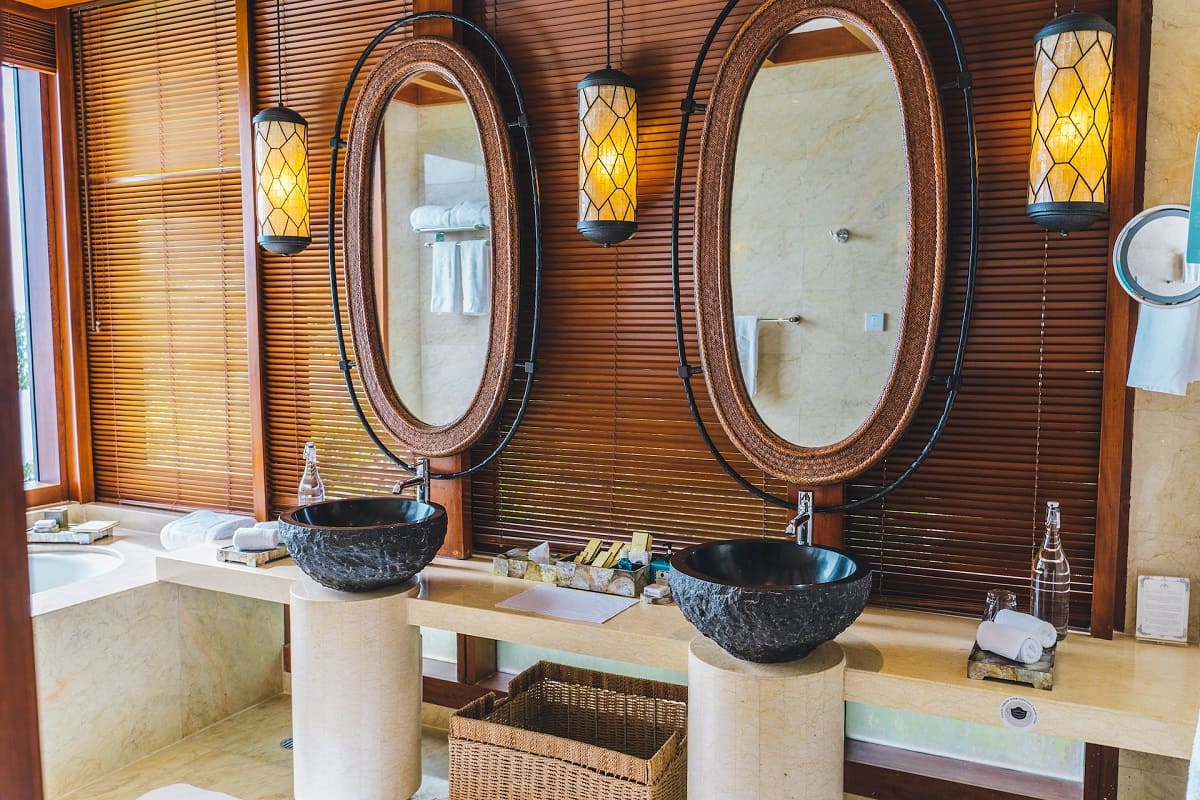
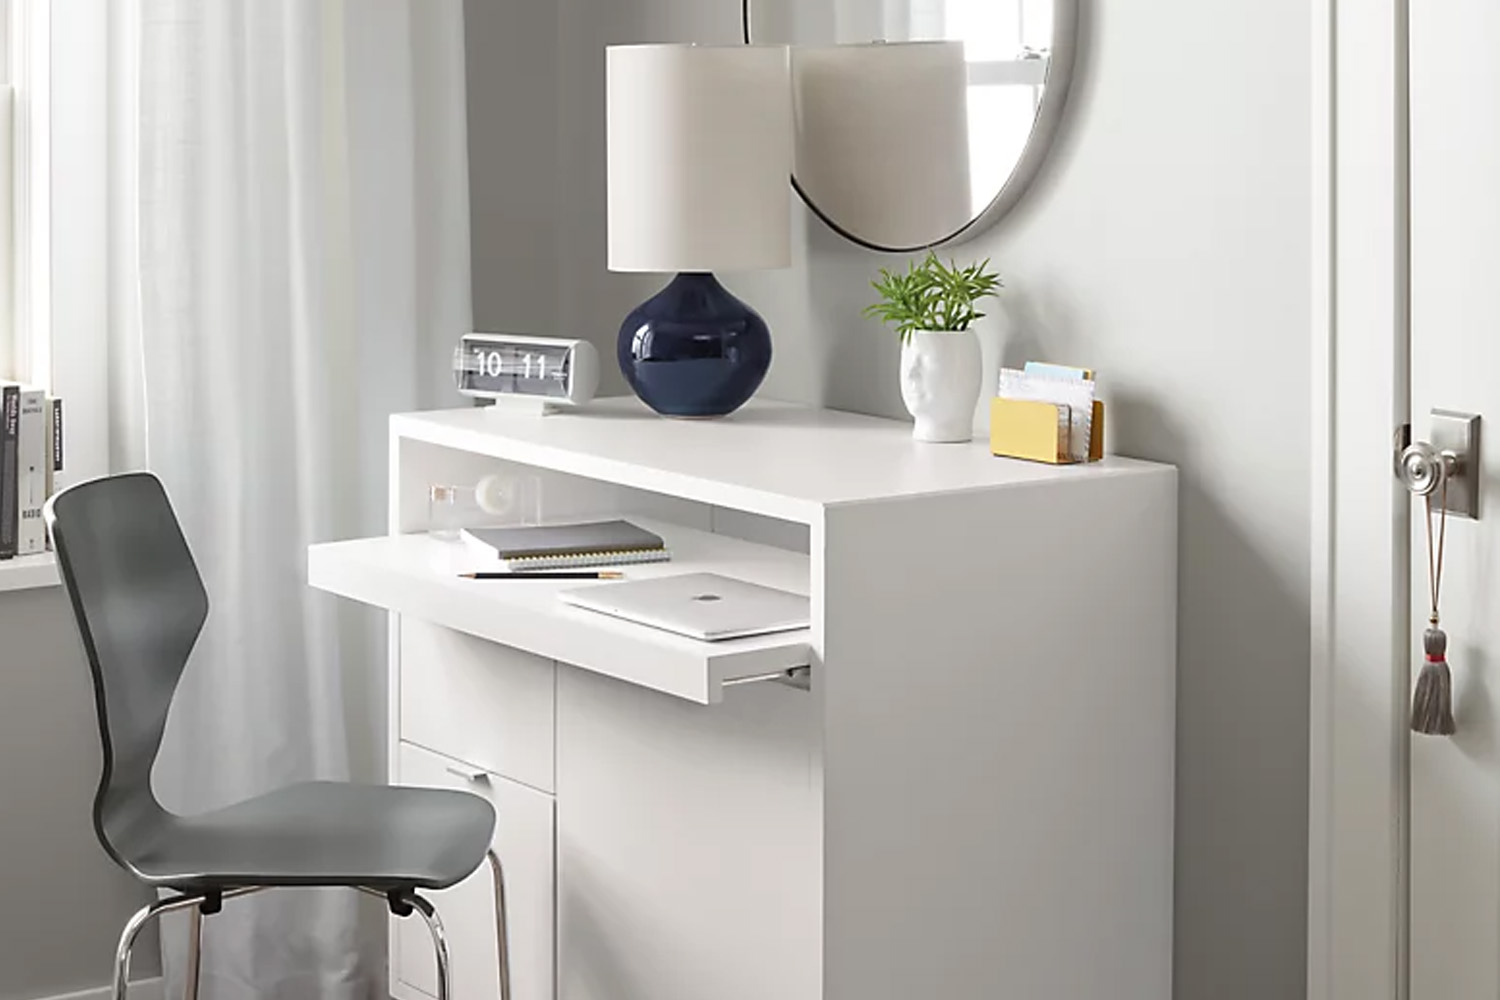
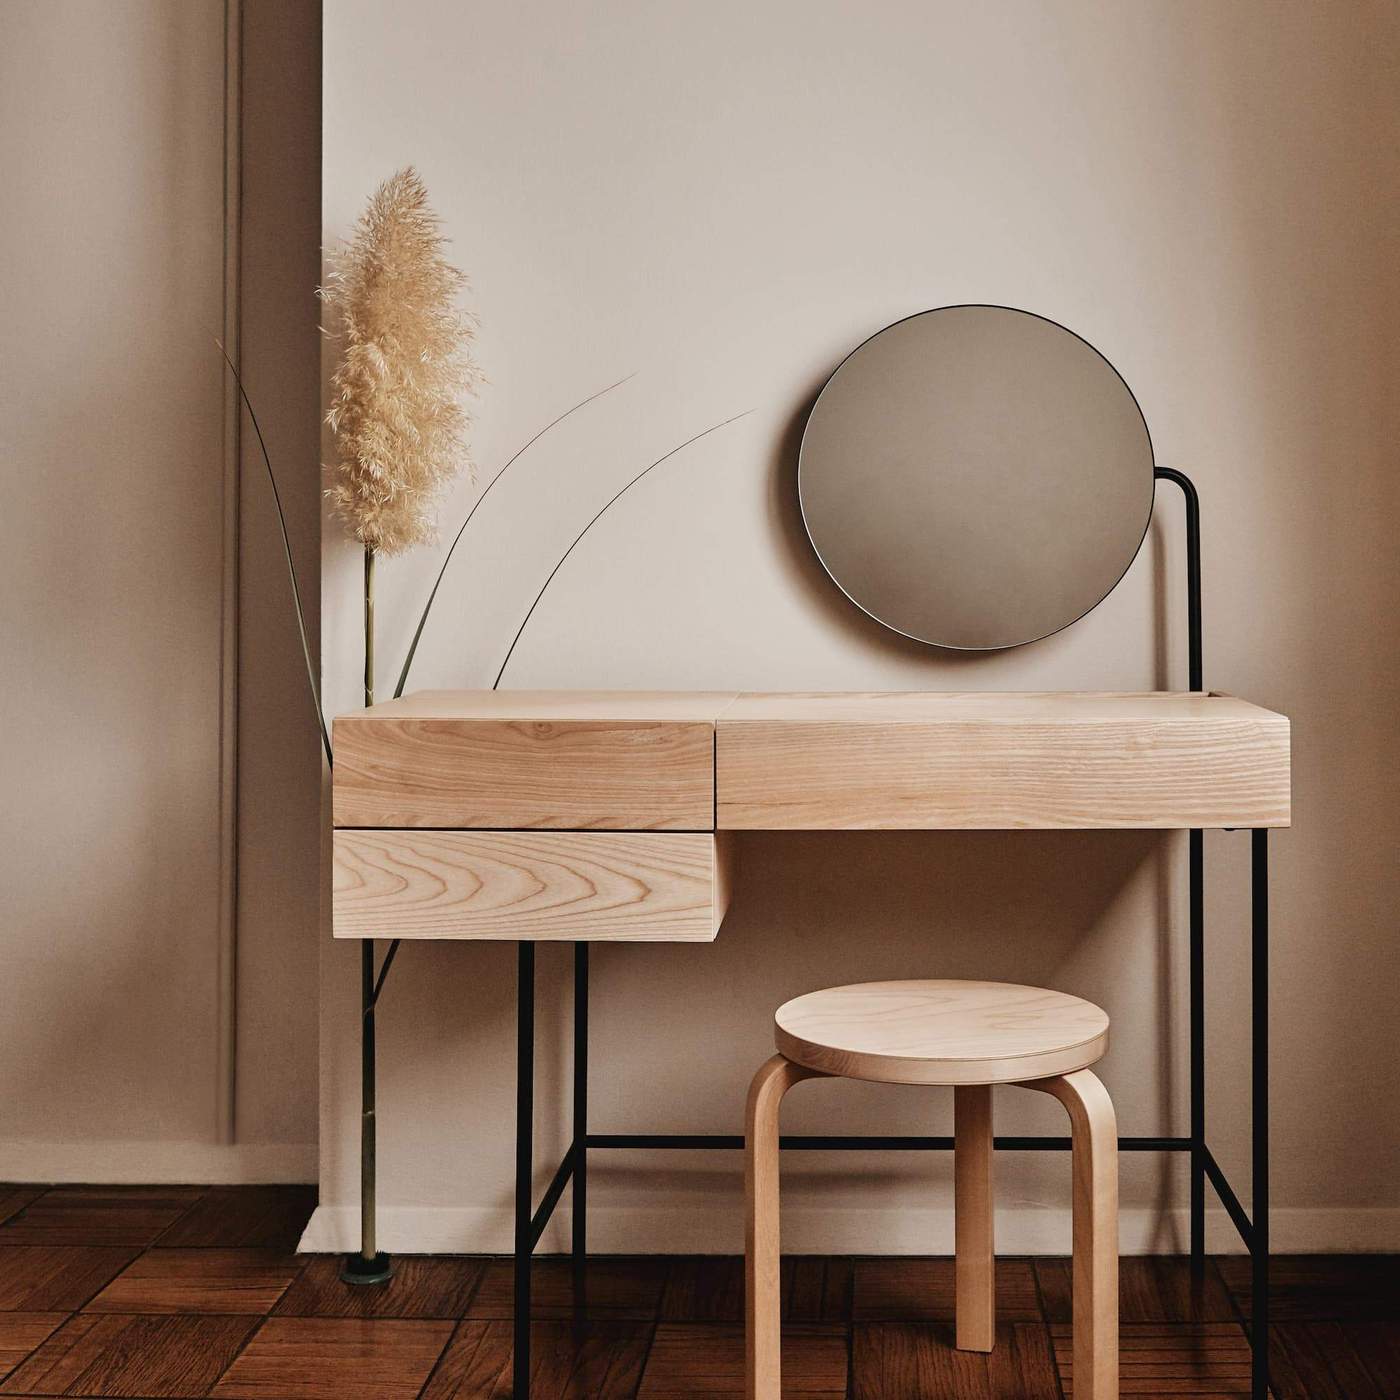
Step 3: Adding a Mirror
Adding a mirror is a crucial step in turning your desk into a vanity. A well-placed mirror not only serves a functional purpose but also enhances the overall aesthetics of the vanity.
First, determine the size and shape of the mirror you want to incorporate. Consider the dimensions of your desk and the available space in your room. A full-length mirror can provide a glamorous and functional touch, allowing you to view your entire outfit. Alternatively, a smaller, framed mirror can add a vintage or contemporary vibe, depending on your preference.
Once you have chosen the mirror, decide how you want to install it. There are several options depending on the type of mirror and your desk’s structure. If the desk has a plain back or a removable panel, you can attach the mirror directly to it using screws or brackets. Make sure to measure and mark the desired placement of the mirror to ensure it is level and centered.
If your desk does not have a suitable surface for mounting a mirror, you can consider using adhesive hooks or hanging the mirror on the wall behind the desk. This allows for more flexibility in positioning the mirror and can create an illusion of a larger vanity area.
Ensure that the mirror is securely attached or hung to prevent any accidents or damage. Take into consideration the height and angle at which the mirror is positioned to provide a comfortable and functional view while sitting at the vanity.
Adding a mirror not only serves its practical purpose but also adds an element of style and elegance to your vanity. With the mirror in place, it’s time to focus on the next step: installing lighting.
Use a wall-mounted mirror to save space on the desk. Add a small tray or organizer to keep makeup and beauty products tidy. Consider adding a small stool or chair for comfort.
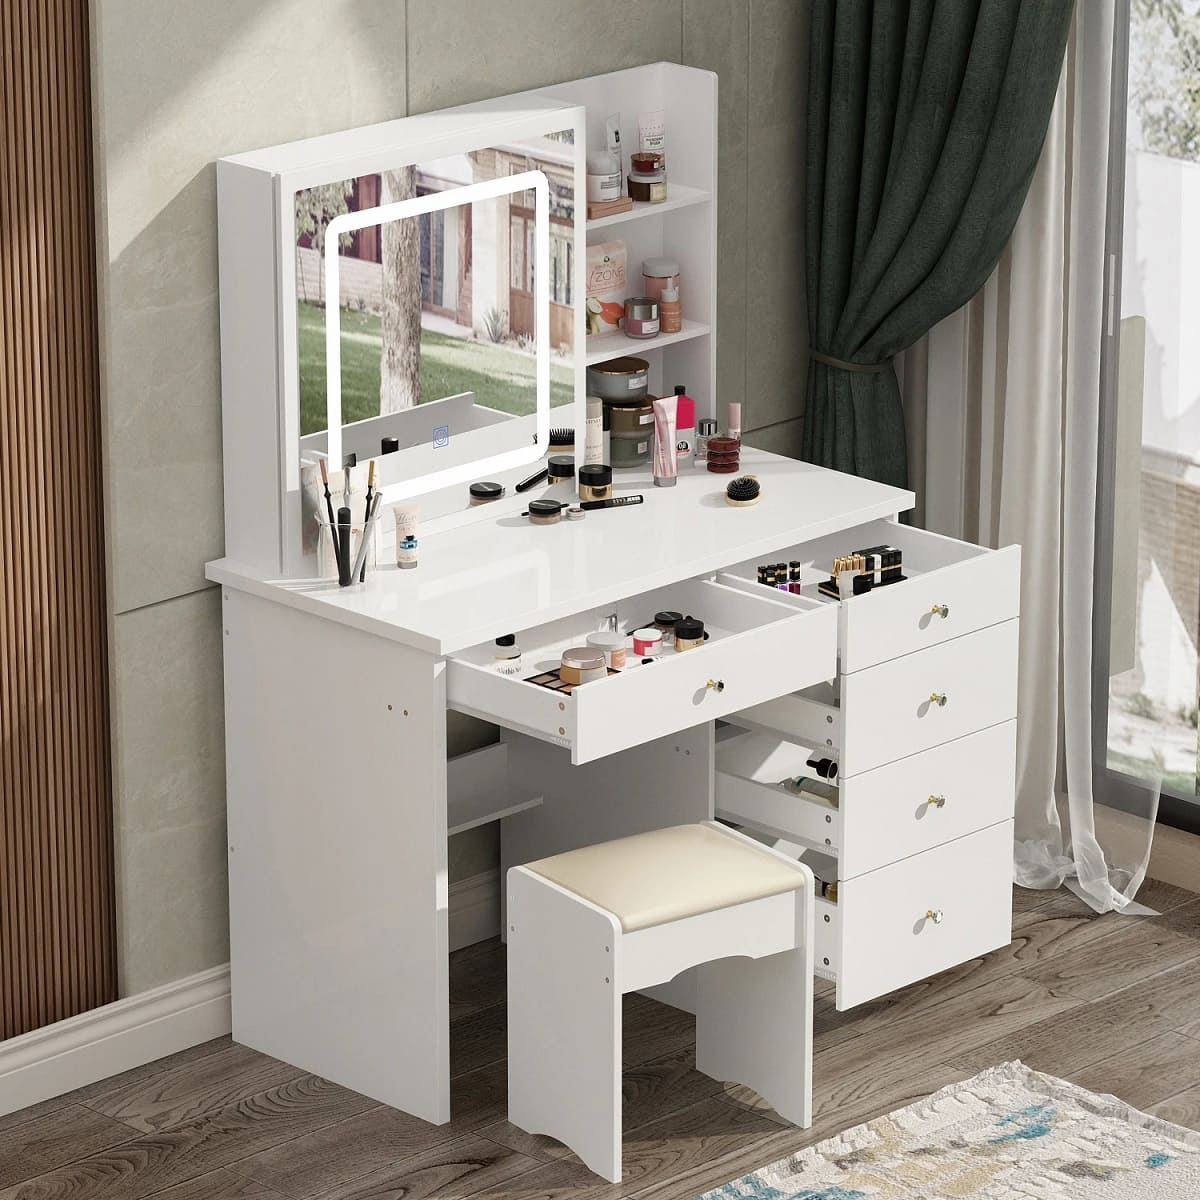
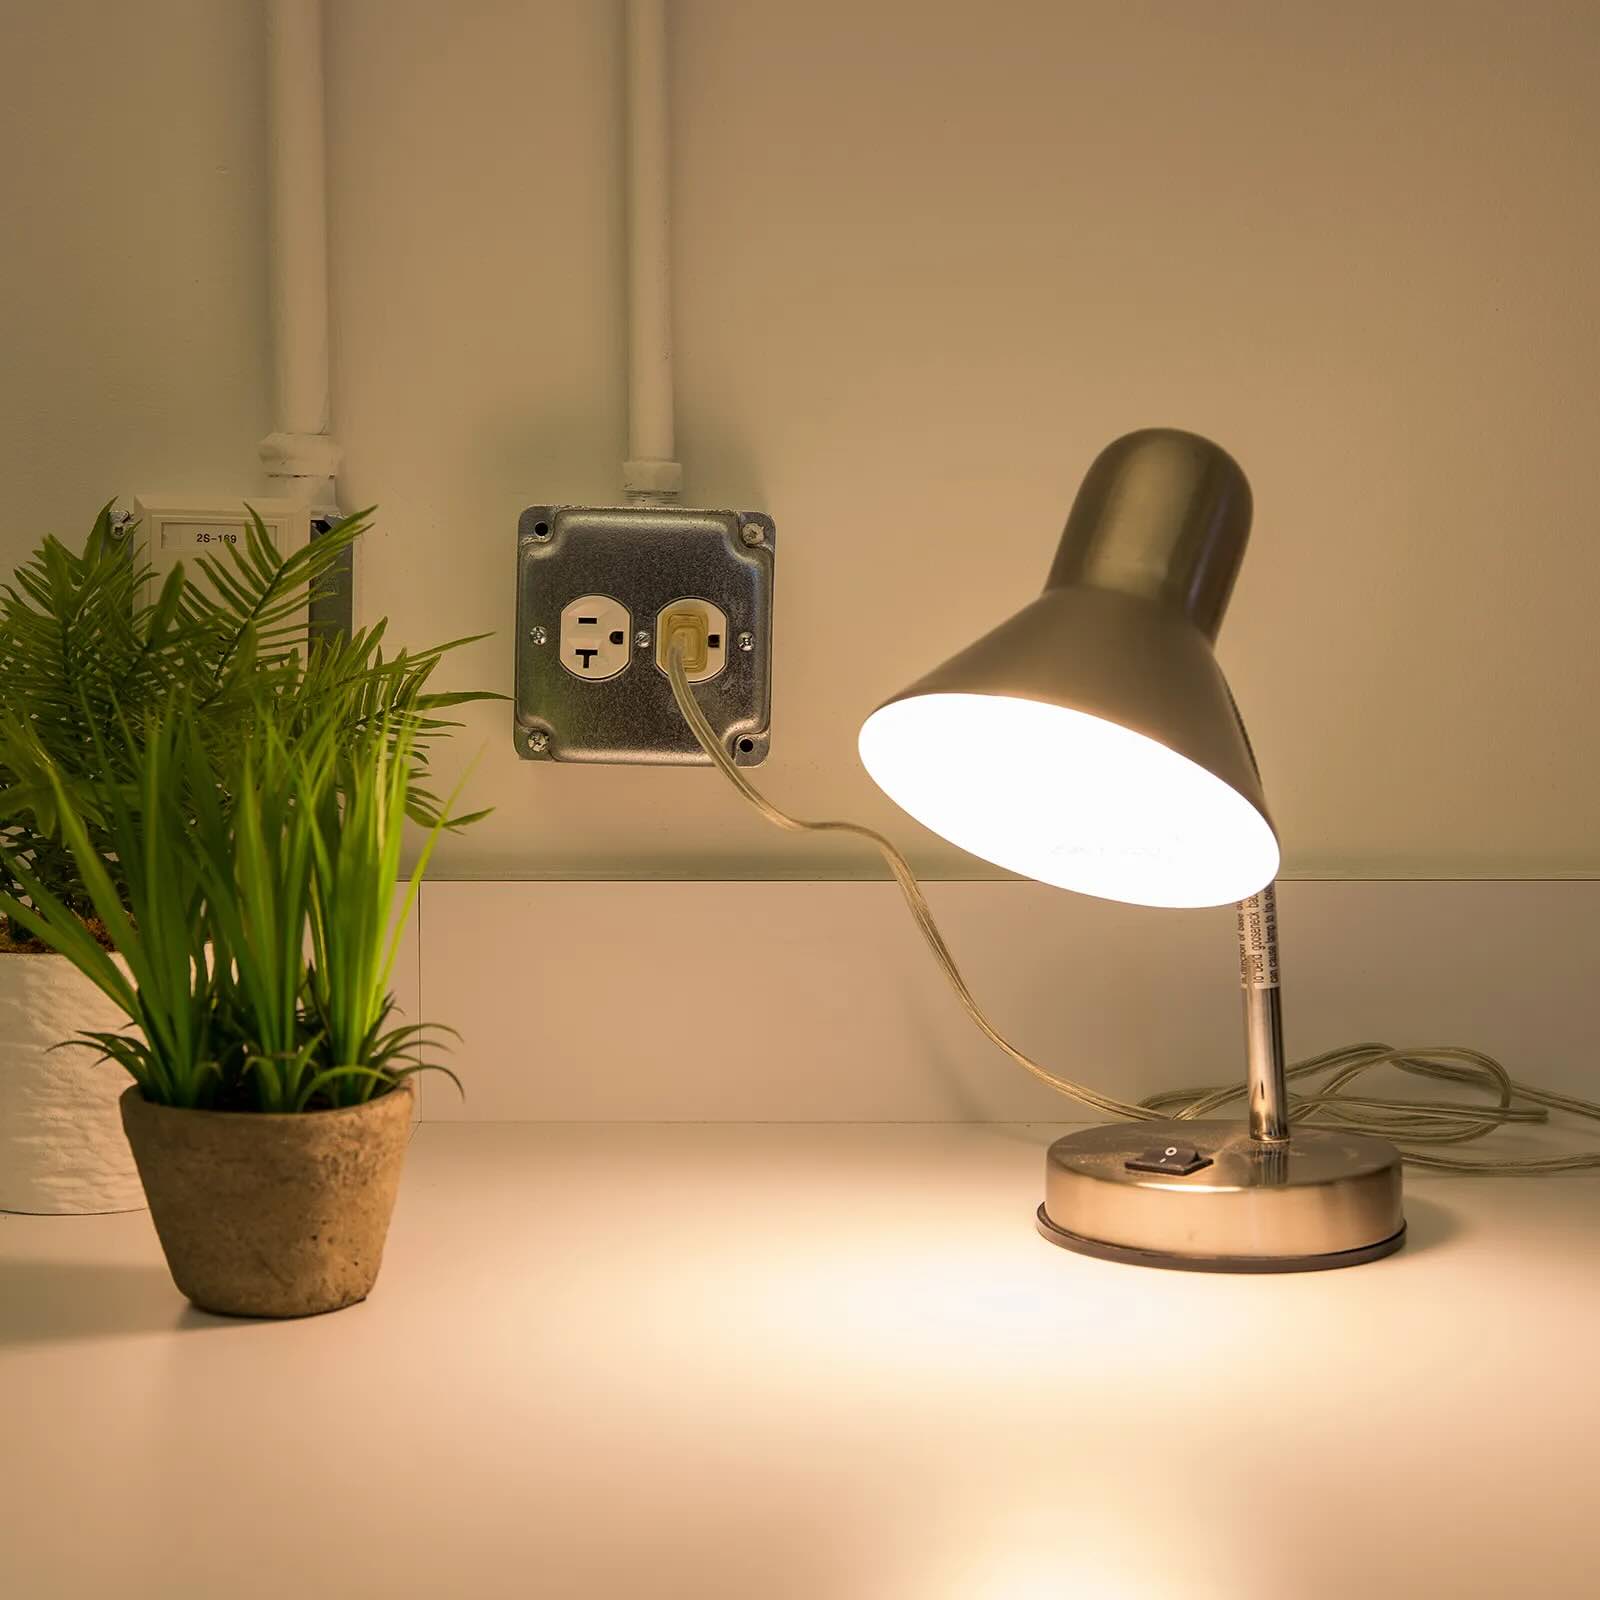
Step 4: Installing Lighting
Proper lighting is essential for creating a functional and well-lit vanity area. When it comes to installing lighting, there are several options to consider based on your preference, budget, and available space.
If you have access to natural light in your vanity area, position your desk near a window to take advantage of the natural lighting during the day. This will provide the best lighting conditions for applying makeup and getting ready. However, natural lighting may not always be available or sufficient, especially during the evening or in rooms with limited windows.
In such cases, consider adding artificial lighting to ensure adequate illumination. One popular option is to install wall sconces or vanity lights around the mirror. This provides you with targeted lighting that minimizes shadows and evenly lights up your face. Choose fixtures that match the style of your vanity and room decor.
If wall sconces are not an option, you can utilize tabletop vanity lights or desk lamps. These can be placed on either side of the mirror or directly on the desk surface to provide ample illumination. Adjustable lamps with adjustable brightness settings are particularly useful as they allow you to customize the lighting to your preference.
Remember to ensure that the lighting setup is safe and wiring is properly installed by consulting a professional electrician if needed. Additionally, consider using LED bulbs, as they are energy-efficient and produce a bright, white light that is favorable for makeup application.
By installing proper lighting, you ensure that your vanity area is well-lit and optimized for your beauty routine. Now, let’s move on to the next step: adding storage options.
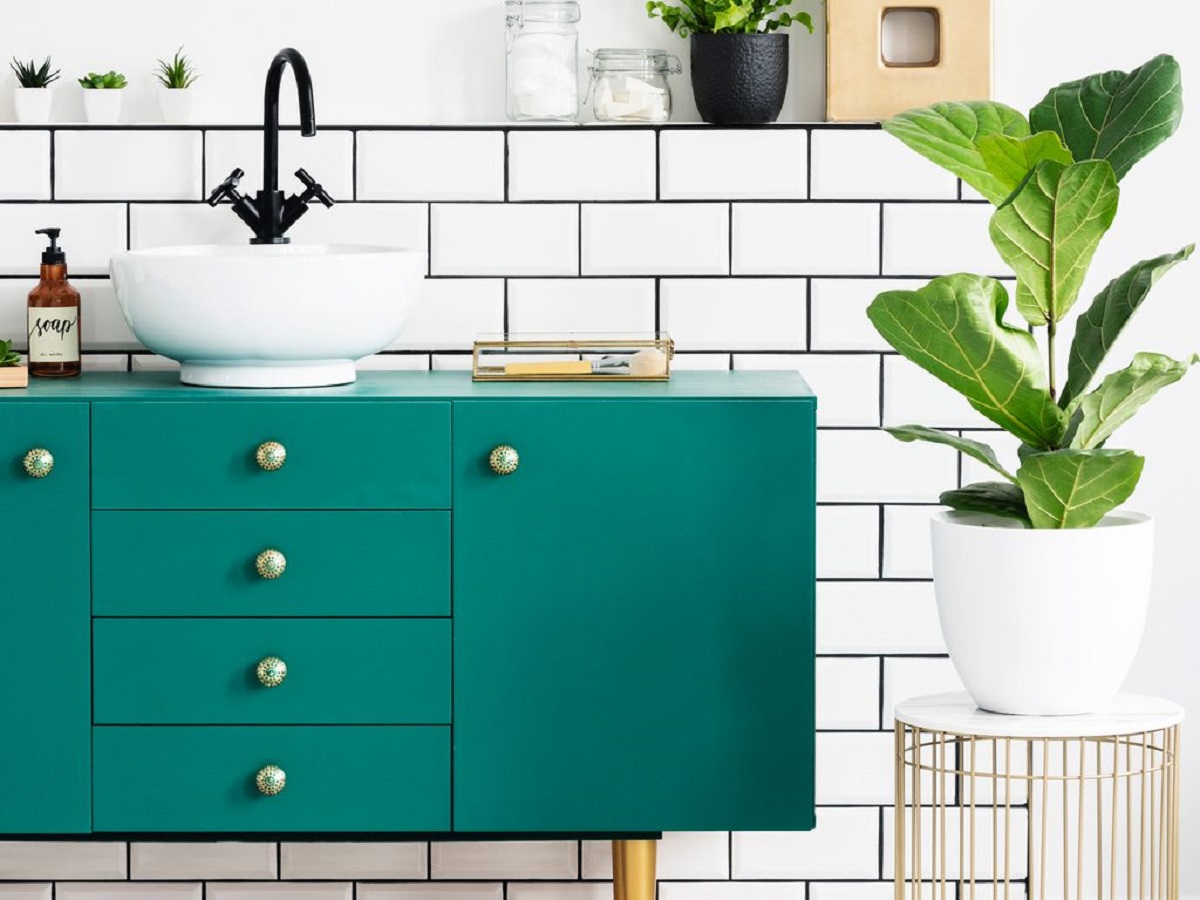
Step 5: Including Storage Options
When turning a desk into a vanity, incorporating storage options is essential to keep your beauty products and accessories organized and easily accessible. There are various storage solutions you can consider based on your needs and the available space.
Start by assessing the desk’s existing storage options, such as drawers or shelves. Determine if they are sufficient for your storage needs or if additional organization tools are required. If the desk has drawers, consider using drawer dividers or inserts to separate and categorize different items.
If you need additional storage space, you can explore various options. One popular choice is to incorporate acrylic or plastic organizers that can fit on the desk’s surface or inside drawers. These organizers come in various sizes and configurations, allowing you to neatly display and store your makeup brushes, palettes, and other beauty products.
Another option is to add small baskets or bins on the desk to hold larger items or extra supplies. These can be decorative and functional, adding a touch of charm to your vanity area. Labeling the baskets or bins can help you locate items quickly and keep the space organized.
Utilizing wall-mounted shelves or hanging organizers is another great way to maximize storage while saving desk space. These can hold skincare products, perfumes, hair tools, or any other beauty essentials you want to keep within reach.
Remember to assess your storage needs and the available space in your vanity area to choose the most suitable options. Declutter regularly to ensure optimal organization and to prevent your vanity from becoming overwhelmed with unnecessary items.
With storage solutions in place, your vanity area becomes more functional and efficient. Now, let’s move on to the final step: personalizing your vanity.
Step 6: Personalizing Your Vanity
The final step in transforming your desk into a vanity is to add personal touches that reflect your style and personality. This step allows you to create a space that makes you feel inspired and comfortable during your daily beauty routine.
Start by adding decorative elements that enhance the overall aesthetics of your vanity. This can include items like candles, plants, a small vase with fresh flowers, or decorative trays to hold your favorite beauty products. Choose pieces that complement the color scheme and theme of your vanity area.
Consider incorporating a small stool or chair that matches your vanity’s style. This provides a comfortable seating option while you get ready and adds a touch of sophistication to the overall look. Adding a cozy and decorative cushion to the seat can make it even more inviting.
Personalize the space further by adding framed photos, inspirational quotes, or artwork that inspires and motivates you. These personal touches create a sense of warmth and make the vanity area truly feel like your own.
Don’t forget to include a small mirror or magnifying mirror on the desk itself for close-up makeup application or skincare routines. This additional mirror allows for a closer and more detailed view of your face.
Lastly, keep in mind that the vanity area should be kept clean and clutter-free to maintain a serene and organized space. Regularly wipe down the surfaces, clean any makeup spills, and return products to their designated storage spots. This ensures that your vanity remains a functional and visually appealing space.
Personalizing your vanity allows you to make it uniquely yours while adding a touch of personality and style. Once you’ve added those personal touches, take a step back and enjoy the transformed space!
Congratulations! You have successfully turned your desk into a beautiful and functional vanity. Whether you’re getting ready for a glam night out or simply pampering yourself in the morning, your new vanity provides a dedicated space for self-care and beauty routines.
Remember to capture the essence and beauty of your vanity area by arranging it in a visually pleasing manner. Take a moment to admire and appreciate the space you’ve created and make the most out of your new beauty haven.
Happy beautifying!
Conclusion
Transforming a desk into a vanity is a rewarding and creative project that can elevate your daily beauty routine. By following the step-by-step process outlined in this article, you can create a personalized and stylish vanity that reflects your unique taste and meets your storage and organization needs.
Starting with the clearing and organizing of your workspace, you set the foundation for a clutter-free and functional vanity area. Preparing the desk by cleaning, refinishing, or painting it gives it a fresh new look and sets the stage for the transformation. Adding a mirror not only serves a practical purpose but also enhances the overall aesthetics of the vanity.
Proper lighting is crucial in creating a well-lit vanity area. Whether it is natural lighting or artificial fixtures, ensuring that you have adequate illumination is key. Including storage options allows you to keep your beauty products and accessories organized, helping you maintain a neat and efficient workspace.
Personalizing your vanity with decorative elements, seating, and personal touches truly makes it your own. Creating a space that reflects your style and personality adds an element of comfort and inspiration to your daily beauty routine.
Remember to maintain your vanity area by regularly cleaning and decluttering. This ensures that the space remains functional, inviting, and a joy to use.
So, whether you’re transforming a desk into a Hollywood-inspired vanity with a full-length mirror or creating a minimalist Scandinavian design, the possibilities are endless. Embark on this DIY project and enjoy the process of creating a stunning and functional vanity area that you can truly call your own.
Now, go ahead and treat yourself to a fabulous and glamorous vanity experience. Happy beautifying!
Frequently Asked Questions about How To Turn Desk Into Vanity
Was this page helpful?
At Storables.com, we guarantee accurate and reliable information. Our content, validated by Expert Board Contributors, is crafted following stringent Editorial Policies. We're committed to providing you with well-researched, expert-backed insights for all your informational needs.


0 thoughts on “How To Turn Desk Into Vanity”