Home>Articles>How To Turn Single Sink Vanity Into Double Sink

Articles
How To Turn Single Sink Vanity Into Double Sink
Modified: October 20, 2024
Learn how to transform your single vanity into a stylish double vanity with our expert articles, providing you with valuable tips and ideas for maximizing your bathroom space.
(Many of the links in this article redirect to a specific reviewed product. Your purchase of these products through affiliate links helps to generate commission for Storables.com, at no extra cost. Learn more)
Introduction
Are you tired of sharing your bathroom vanity with your partner? Do you dream of having your own space to get ready in the morning? Well, you’re in luck! With a little bit of planning and some DIY know-how, you can easily turn your single vanity into a double vanity. Not only will this upgrade provide you with more counter space, but it will also give your bathroom an instant facelift.
Turning a single vanity into a double may sound like a daunting task, but don’t worry! In this article, we will guide you through the process step-by-step, ensuring a smooth and successful transformation. So put on your tool belt and get ready to create the bathroom of your dreams!
Before we dive in, it’s important to note that the feasibility of converting a single vanity to a double vanity largely depends on the available space in your bathroom. In some cases, the dimensions of the room may not allow for the installation of a double vanity. So, before you get too excited, let’s start by measuring and assessing your space.
Key Takeaways:
- Upgrade your bathroom with a DIY double vanity transformation, providing more space and a stunning facelift. Prioritize safety and accuracy throughout the process, and enjoy the luxury and convenience of your new stylish centerpiece.
- Measure, assess, and prepare your space for a successful double vanity installation. From plumbing to finishing touches, create a functional and visually appealing bathroom upgrade with careful planning and attention to detail.
Read more: How To Install A Double Sink Vanity
Step 1: Measuring and Assessing Space
The first step in turning your single vanity into a double vanity is to measure and assess the available space in your bathroom. This is crucial to ensure that there is enough room to accommodate the larger double vanity. Here’s what you need to do:
- Measure the width: Use a measuring tape to measure the width of your existing single vanity. Make sure to measure from the outer edges of the countertop or cabinet. This measurement will give you an idea of the maximum width that your double vanity can be.
- Assess the wall space: Look at the wall where your single vanity is currently installed. Determine if there is enough wall space to accommodate a wider double vanity. Consider any obstacles such as doors, windows, or electrical outlets that may limit the width of the vanity.
- Check the plumbing: Examine the plumbing connections and pipes behind your single vanity. Take note of their location and make sure there is enough space to accommodate the additional plumbing needed for a double vanity.
- Consider the layout: Think about how the double vanity will fit into the overall layout of your bathroom. Will it obstruct any other fixtures? Will there be enough space for you and your partner to comfortably use the vanity?
Once you have measured the width, assessed the wall space, checked the plumbing, and considered the layout, you will have a better understanding of whether converting your single vanity to a double vanity is feasible in your bathroom. If everything looks good, then proceed to the next step!
Step 2: Removing the Existing Single Vanity
Now that you have assessed the space and determined that it is feasible to install a double vanity, it’s time to remove the existing single vanity. Follow these steps to safely and efficiently remove the old vanity:
- Turn off the water supply: Before starting any plumbing-related tasks, locate the shut-off valves for the vanity and turn off the water supply. This will prevent any leaks or water damage during the removal process.
- Disconnect the plumbing: Use a wrench to loosen and disconnect the supply lines that connect the faucet to the water supply. Additionally, disconnect the drain pipe that connects the vanity sink to the main drain. Place a bucket under the drain pipe to catch any remaining water.
- Remove the countertop: Most single vanities have a separate countertop that can be removed. If this is the case, carefully detach the countertop from the vanity cabinet. This may involve unscrewing any screws or bolts that secure the countertop in place.
- Detach the vanity cabinet: Once the countertop is removed, you can now focus on detaching the vanity cabinet from the wall. Look for screws or brackets that secure the cabinet to the wall and remove them. Gradually lift the cabinet away from the wall, ensuring that there are no remaining connections.
- Inspect the wall: With the old vanity removed, take a moment to inspect the wall for any damage or repairs that may be necessary. Patch up any holes or cracks, and ensure that the wall is smooth and clean before moving on to the next step.
By following these steps, you can safely remove the existing single vanity from your bathroom. With the old vanity out of the way, you are now ready to move on to the next phase of the transformation process.
Step 3: Preparing the Plumbing
With the old single vanity removed, it’s time to prepare the plumbing for the installation of the new double vanity. This step is essential to ensure that the plumbing connections are properly set up and ready for the new fixtures. Here’s what you need to do:
- Inspect the existing plumbing: Take a close look at the plumbing connections that were previously attached to the single vanity. Check for any signs of damage or wear, such as leaks or corroded pipes. If any issues are identified, it’s recommended to replace or repair the affected components before proceeding.
- Modify the drain pipe: Since you will be installing a double vanity, modifications might be needed to accommodate the additional drain pipe. Measure the distance between the existing drain pipe and where it needs to connect to the new double vanity. Cut the pipe to the appropriate length and install fittings as necessary to connect it to the new vanity.
- Adjust the water supply lines: Depending on the width and design of the new double vanity, you may need to adjust the water supply lines. Measure the distance between the existing supply lines and the connection points on the new vanity. Use appropriately sized flexible supply lines or copper pipes to extend or adjust the water supply connections.
- Install shut-off valves (if necessary): If your existing plumbing system does not have shut-off valves specifically for the vanity, it is highly recommended to install them. Shut-off valves allow you to easily turn off the water supply to the vanity in case of leaks or maintenance needs. Consult a plumber for assistance if needed.
- Test the plumbing: Before proceeding with the installation of the new double vanity, it’s crucial to test the plumbing connections. Turn on the water supply, check for any leaks or drips, and verify that the water flows freely through the drain pipe. Make any necessary adjustments or repairs before moving on.
By properly preparing the plumbing for the installation, you can ensure that your new double vanity will function flawlessly. Taking the time to inspect, modify, and test the plumbing will save you from potential headaches and problems in the future.
Step 4: Installing Additional Supports
With the plumbing prepared, it’s time to move on to installing additional supports for your new double vanity. This step is crucial to ensure that the vanity is securely mounted to the wall and can withstand the weight of the fixtures and countertops. Follow these steps to properly install the necessary supports:
- Locate the studs: Use a stud finder to locate the wall studs behind the area where the double vanity will be installed. Mark the positions of the studs on the wall using a pencil.
- Measure and mark the height: Determine the desired height for your double vanity and mark it on the wall. Use a level to ensure that the marks are level.
- Install the support boards: Cut support boards to the length of the vanity and attach them to the wall at the marked height. Use screws that are long enough to penetrate the wall studs for secure anchoring.
- Secure the vanity to the support boards: Place the double vanity on top of the installed support boards. Use screws to secure the vanity to the boards from the inside of the cabinet. This will ensure that the vanity is securely attached to the supports.
- Check for stability: Once the vanity is secured to the support boards, check for any wobbling or instability. Make any necessary adjustments to ensure that the vanity is stable and level.
By installing additional supports, you can ensure the stability and durability of your new double vanity. This step is vital, especially if your new vanity is larger or heavier than the previous single vanity. Taking the time to properly secure the vanity will prevent any potential accidents or damage in the future.
Consider adding a second sink and faucet to the existing single vanity. Ensure there is enough space for both users and that the plumbing can accommodate the additional fixtures.
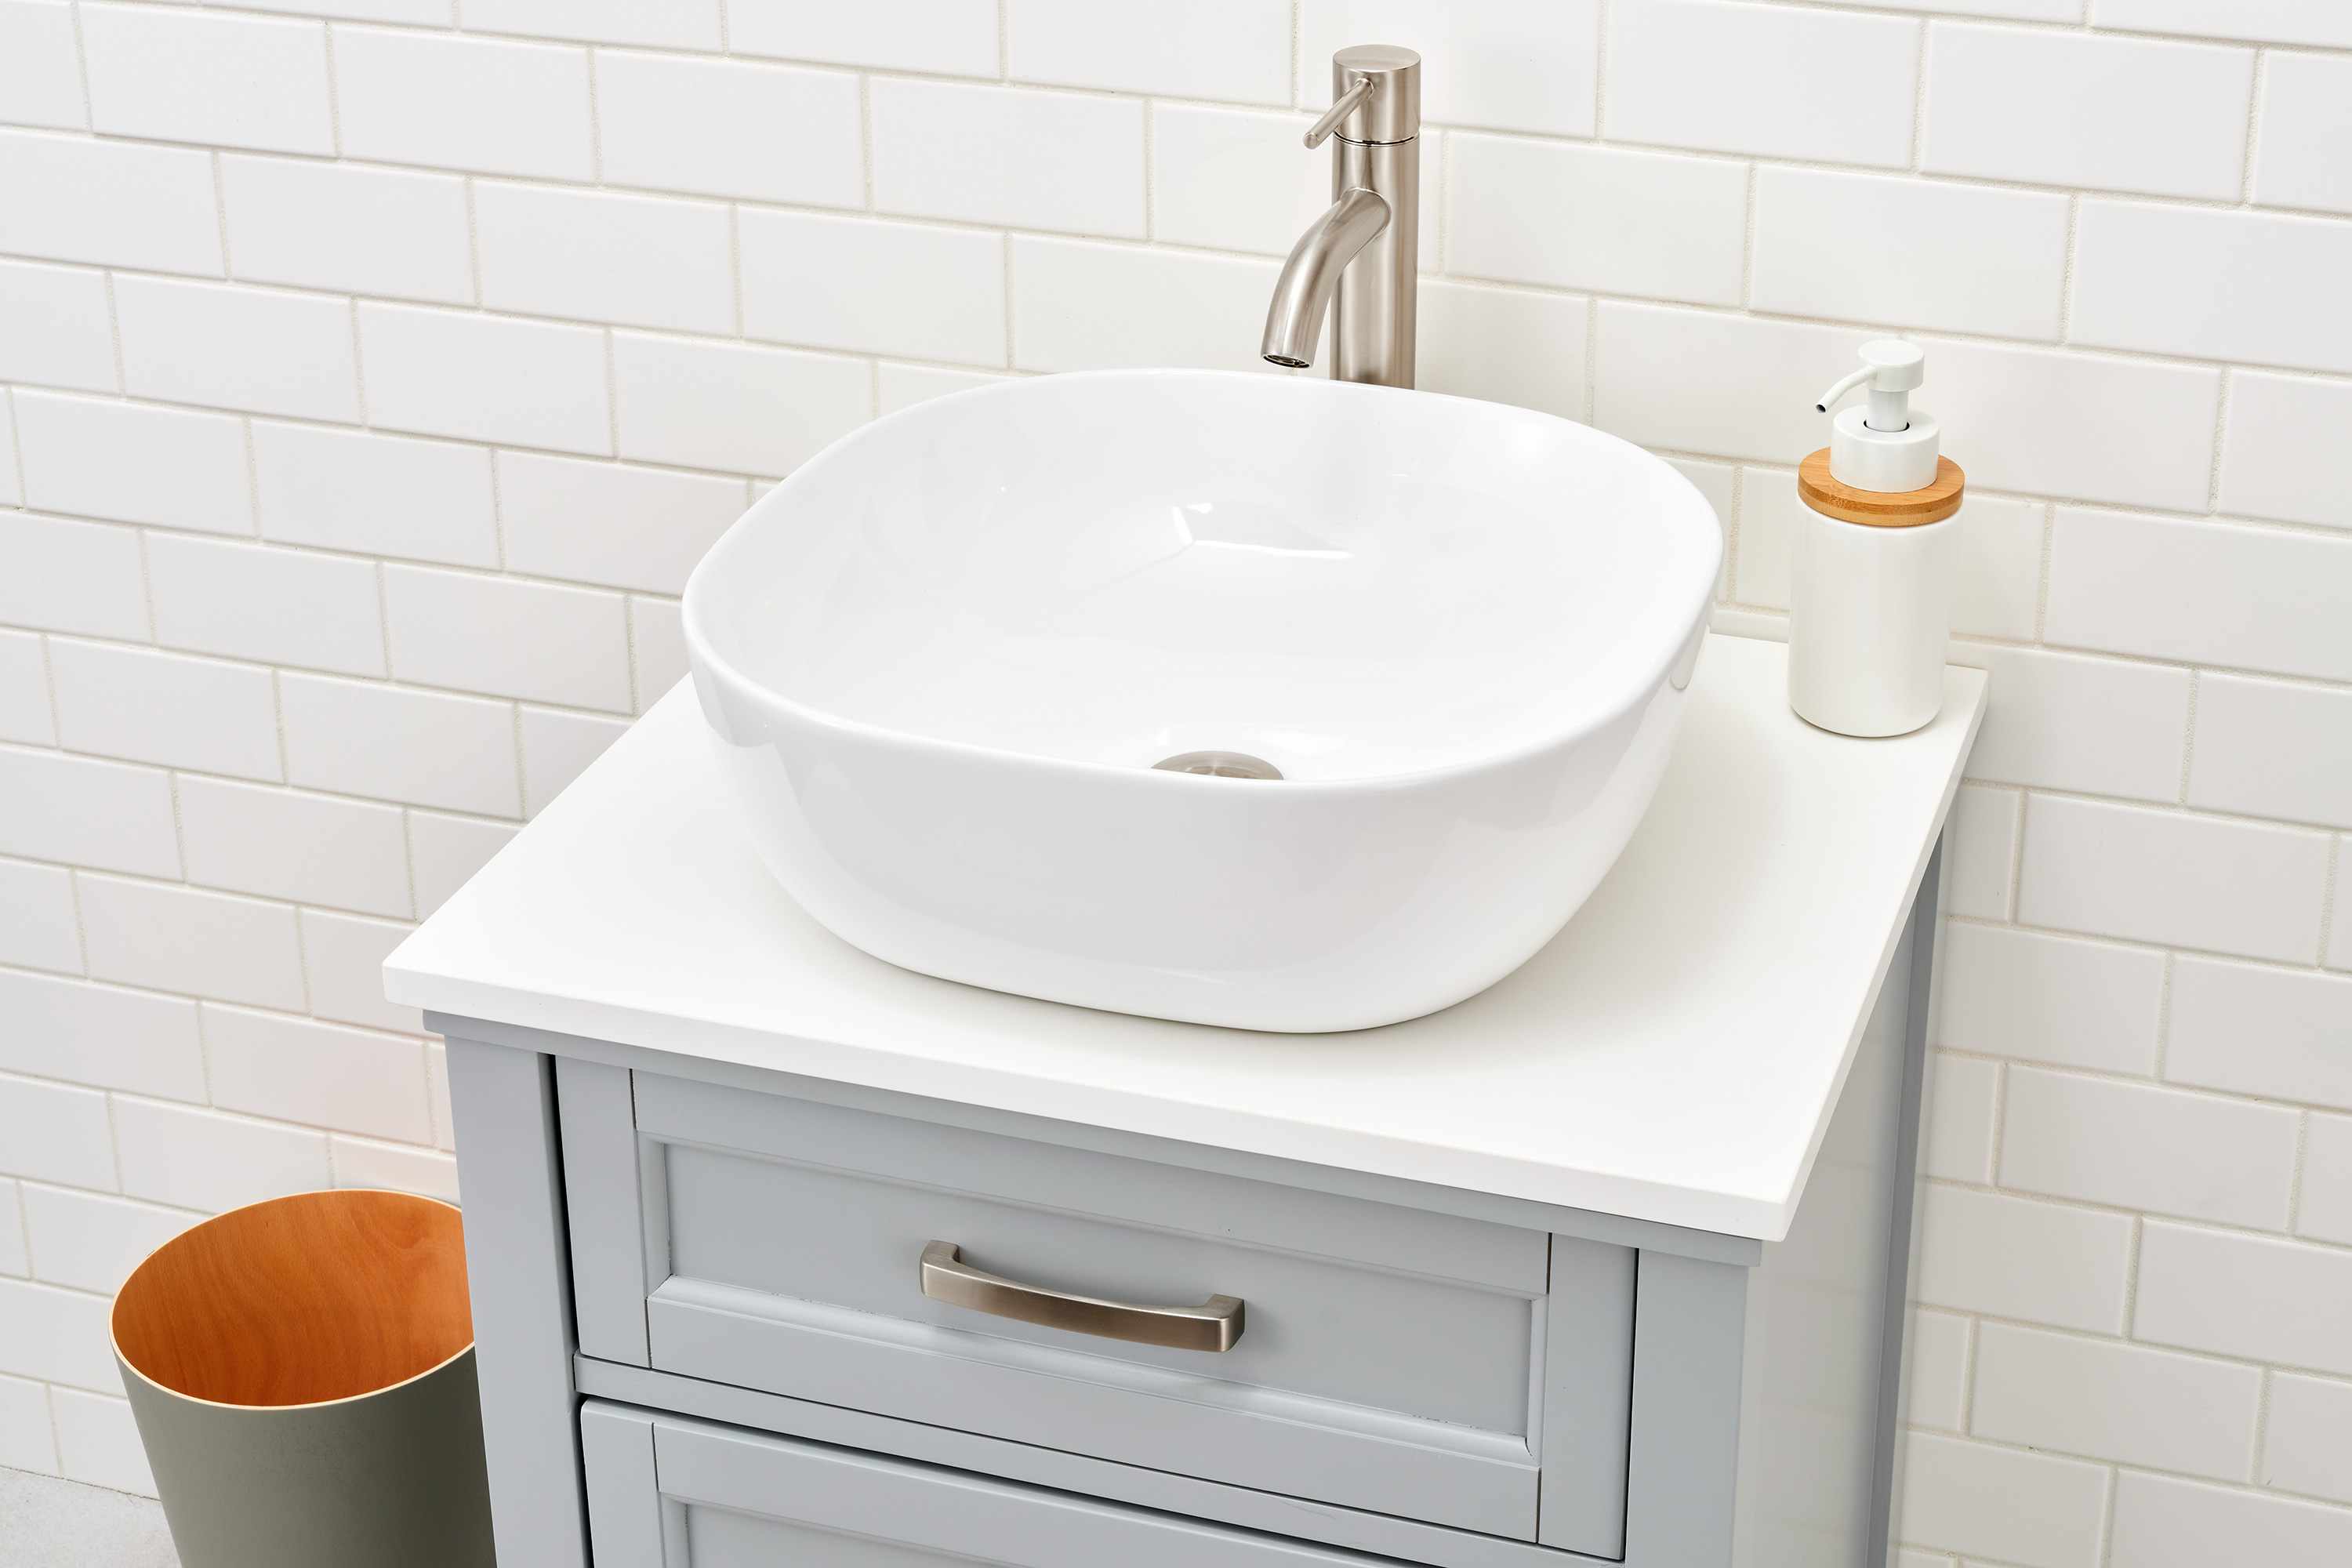
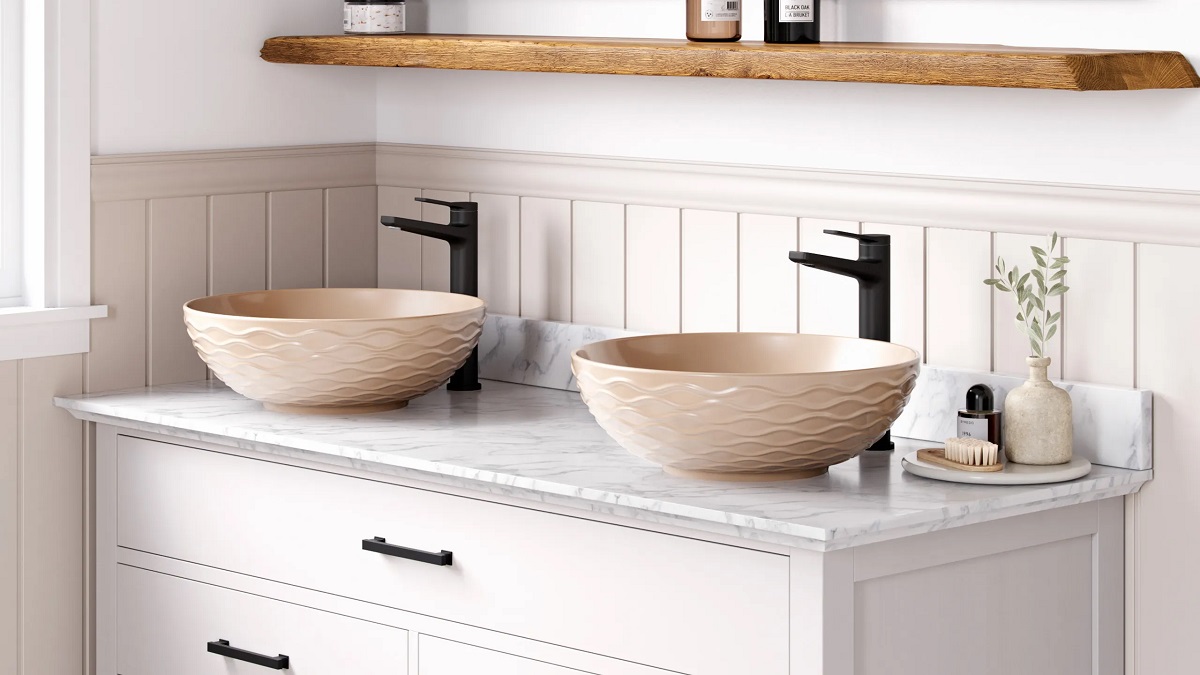
Step 5: Selecting and Preparing the New Double Vanity
Now that you have completed the necessary preparations, it’s time to select and prepare the new double vanity. This step involves choosing a vanity that fits your style and needs, as well as making any necessary adjustments for installation. Follow these steps to ensure a smooth and successful process:
- Measure the space: Refer back to the measurements you took in the first step to determine the maximum width and depth that your new double vanity can be. Keep in mind any obstructions such as doors or windows that may affect the size.
- Consider the style and design: Choose a double vanity that matches your bathroom’s aesthetic. Consider the materials, finishes, and design elements that will complement your existing decor. Take into account factors such as storage space, countertop options, and sink configurations based on your needs.
- Ensure proper ventilation: Check if the new vanity has adequate ventilation options, such as cutouts or venting systems, especially if the vanity has a closed back or is located against a wall. Proper ventilation helps prevent moisture buildup and ensures the longevity of your vanity.
- Prepare the vanity for installation: If the new vanity requires any assembly, follow the manufacturer’s instructions to put it together. Make any necessary adjustments or modifications to the vanity, such as cutting holes for plumbing and electrical connections.
- Apply sealant or finish: Depending on the material of the vanity, it may require applying a sealant or finish for protection against water damage or staining. Follow the manufacturer’s recommendations for the appropriate sealant or finish for your specific vanity material.
By carefully selecting and preparing your new double vanity, you can ensure that it not only meets your functional needs but also enhances the overall aesthetic of your bathroom. Take your time during this step to find the perfect vanity that will be the centerpiece of your bathroom transformation.
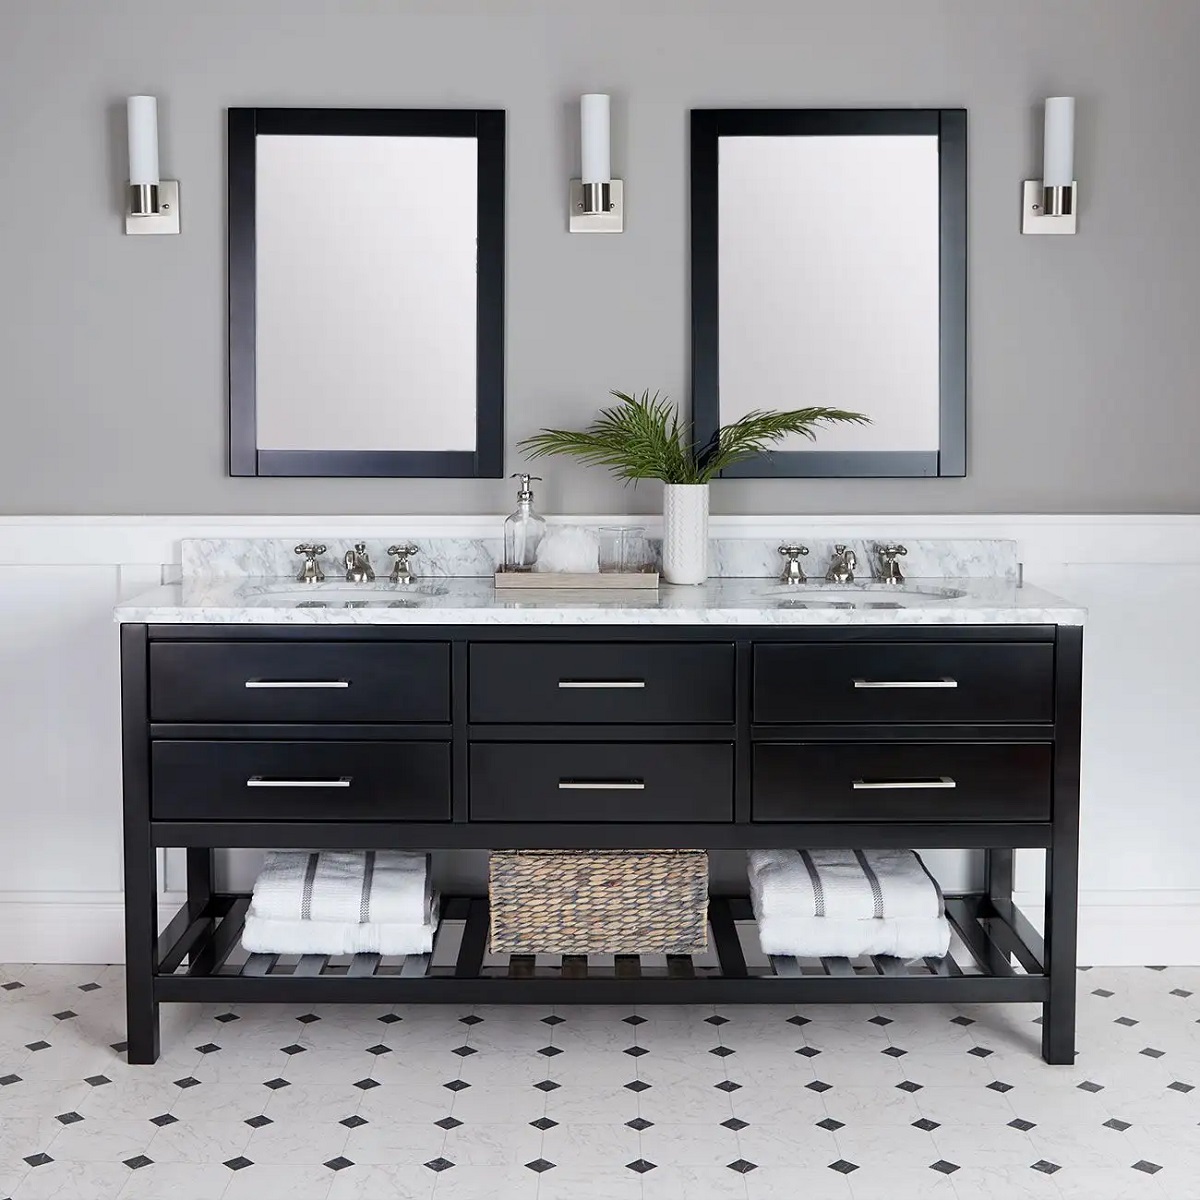
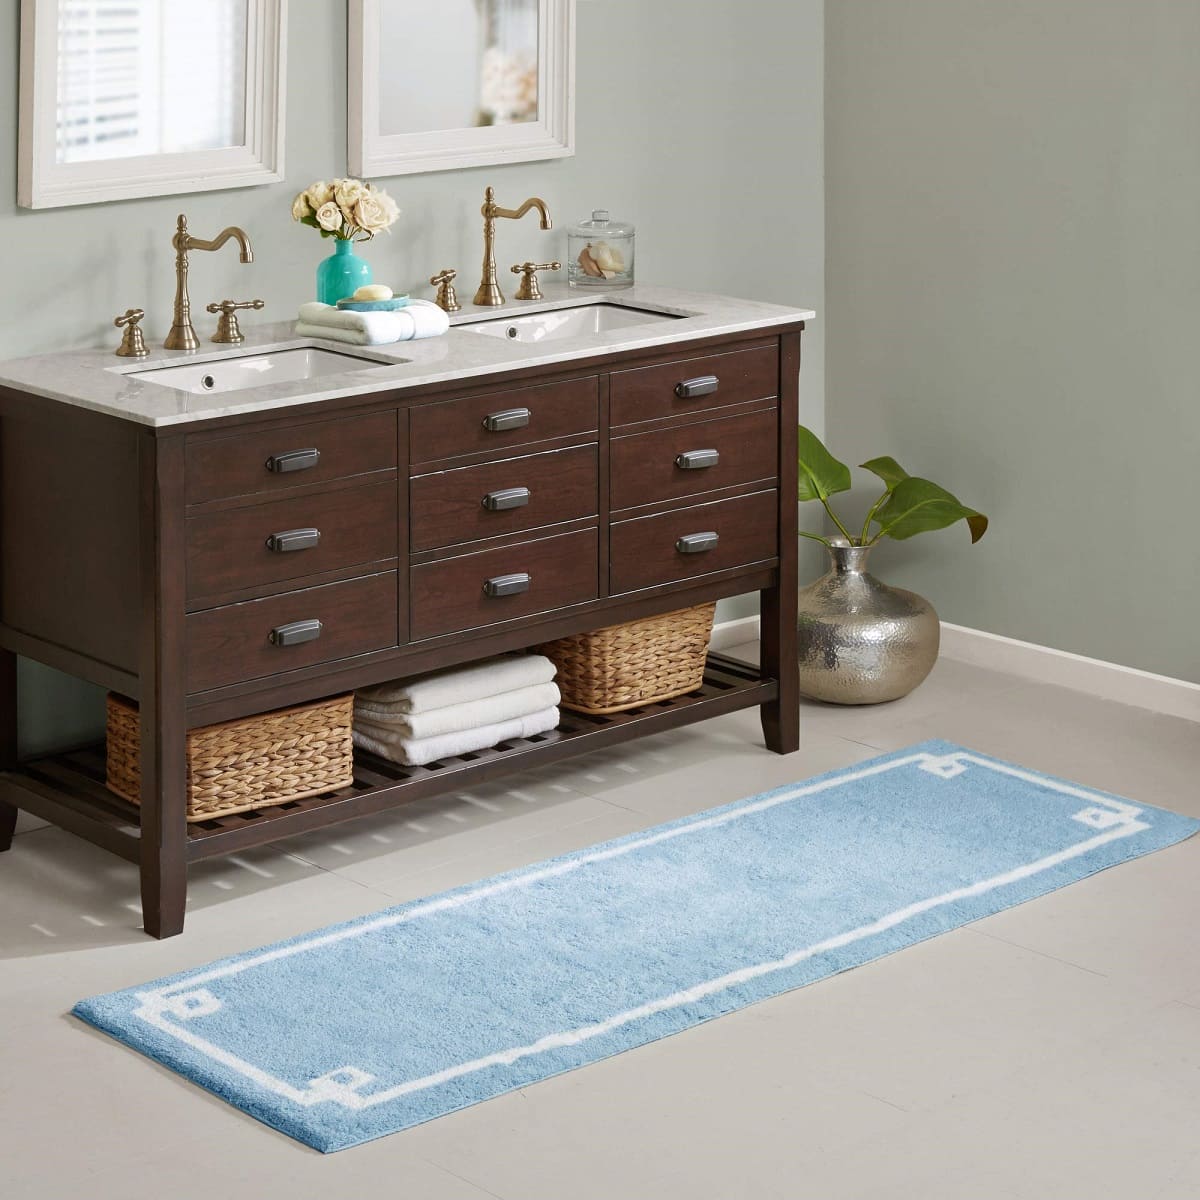
Step 6: Installing the New Double Vanity
Now that you have selected and prepared your new double vanity, it’s time to move on to the installation process. Follow these steps to ensure a successful and secure installation:
- Position the vanity: Carefully position the new double vanity in the desired location. Make sure it is centered and aligned with the support boards installed in the previous steps.
- Level the vanity: Use a level to ensure that the vanity is level both horizontally and vertically. Adjust the positioning as needed, adding shims under the vanity if necessary.
- Attach the vanity to the wall: Once the vanity is level, use a drill and screws to secure it to the wall. Drive the screws through the back of the vanity and into the support boards, ensuring a sturdy and secure attachment.
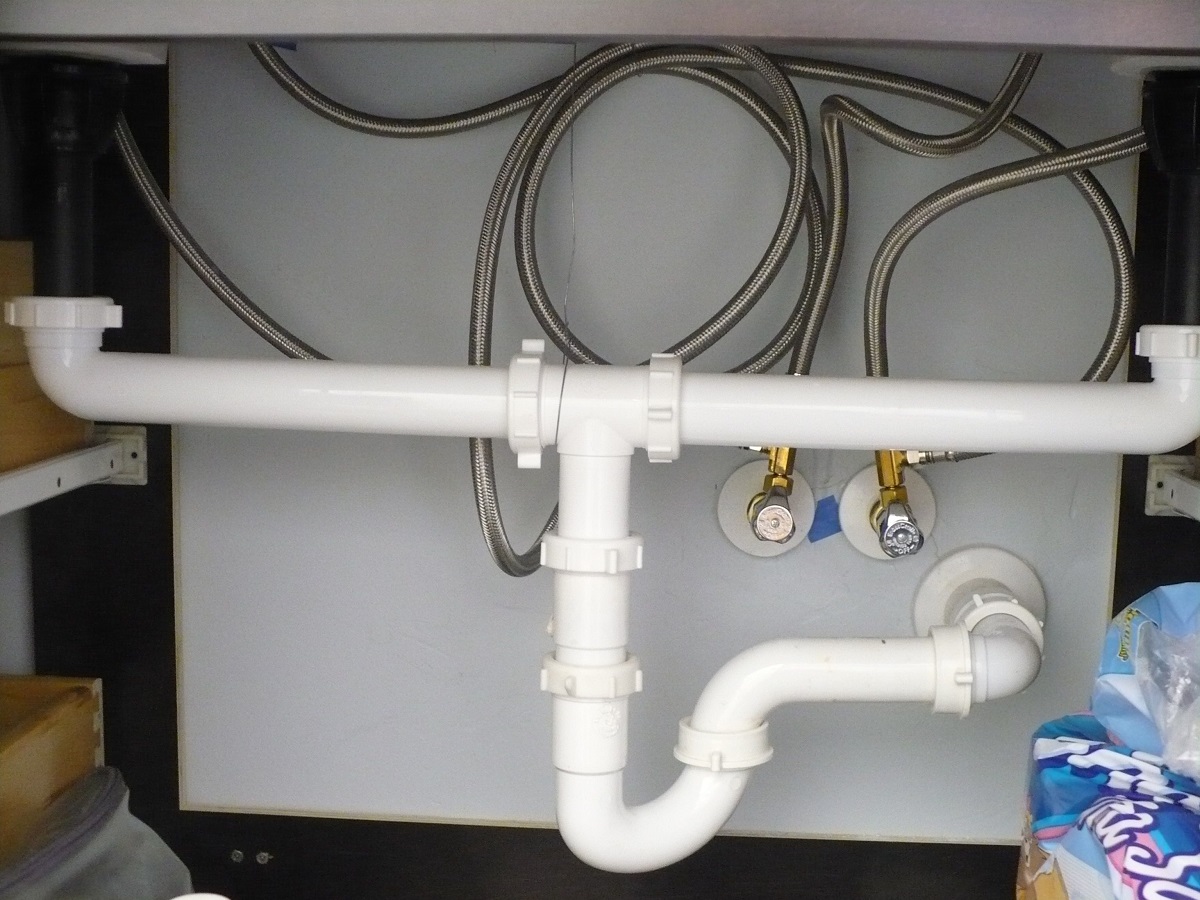
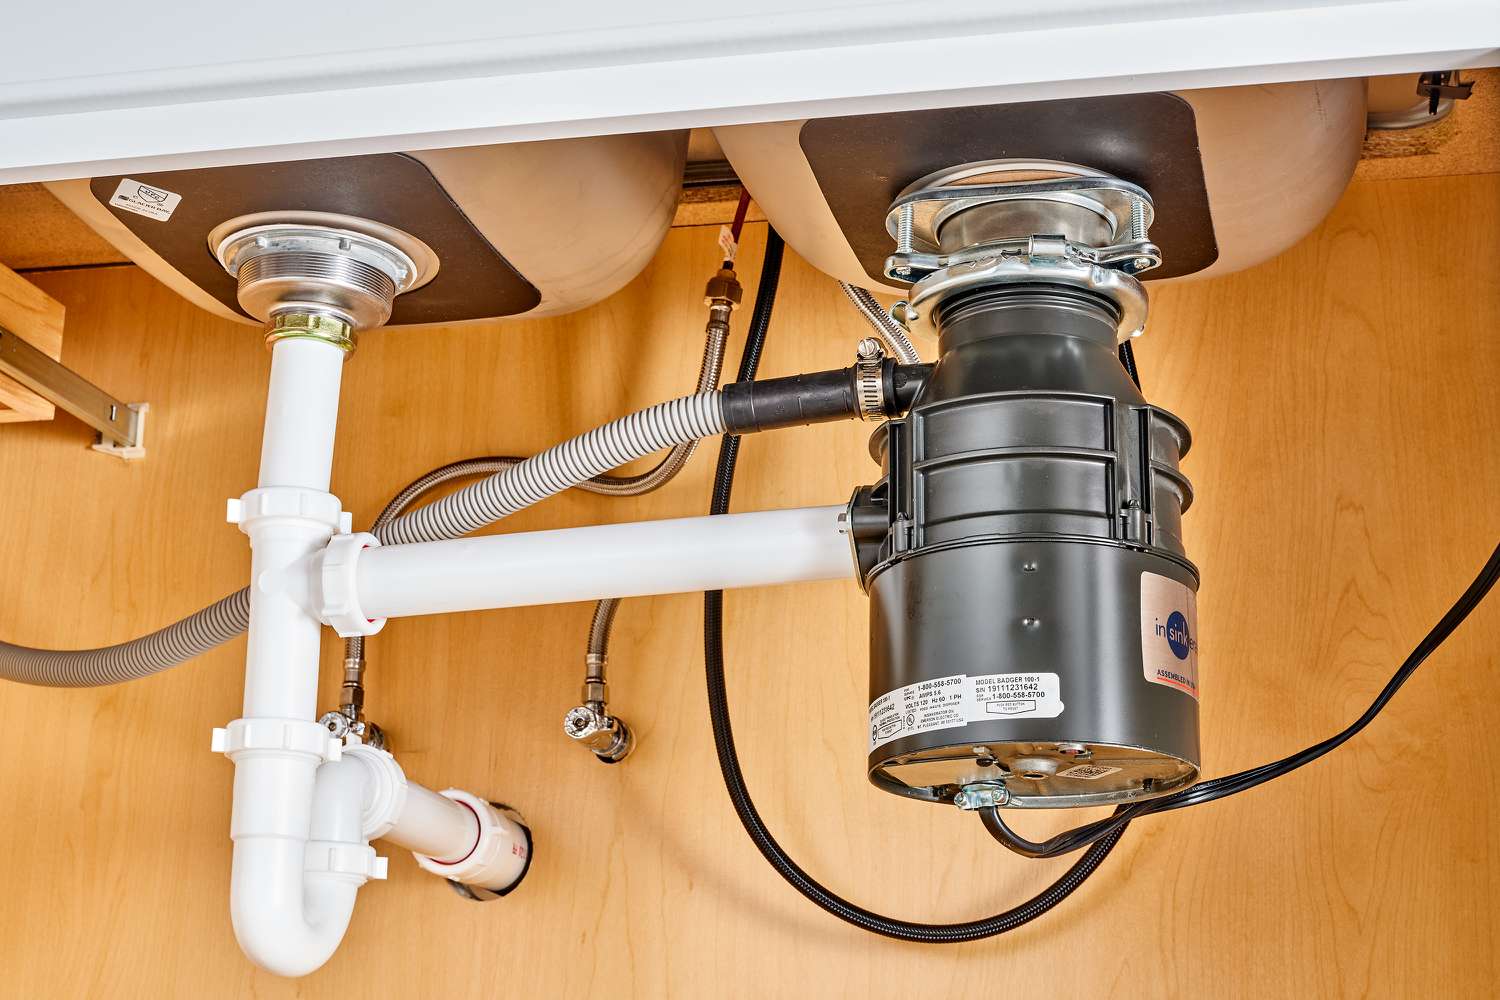
- Connect the plumbing: Reconnect the water supply lines to the faucets of the new vanity. Tighten the connections securely using a wrench. Also, connect the drain pipe to the new sink’s drain assembly.
- Check for leaks: Turn on the water supply and check for any leaks around the connections. Make sure the faucets operate correctly and that the drain is working properly.
- Secure the countertop: If your new double vanity includes a separate countertop, follow the manufacturer’s instructions to attach it securely to the vanity cabinet. This step may involve using adhesive or screws.
- Make any final adjustments: Check that all doors and drawers of the vanity are aligned properly and function smoothly. Make any necessary adjustments to ensure that everything looks and functions as it should.
By following these steps, you can confidently install your new double vanity and ensure that it is securely attached and functional. Take your time throughout this process to ensure a precise and professional installation.
Step 7: Connecting the Plumbing
With the new double vanity securely installed, it’s time to connect the plumbing to ensure proper functioning. Follow these steps to successfully connect the plumbing:
- Connect the supply lines: Attach the water supply lines to the faucets of your new double vanity. Use adjustable wrenches to tighten the connections, ensuring they are secure but not over-tightened which could cause leaks.
- Connect the drain: Attach the drain pipe to the sink’s drain assembly. Use a combination of slip nuts, washers, and plumber’s tape to create a watertight seal. Check for any leaks and make sure the drain is functioning properly.
- Test the water flow: Turn on the water supply and check for any leaks around the supply connections. Ensure that the water flows smoothly from the faucets and that there are no irregularities or blockages.
- Check the drain: Fill the sinks with water and then drain them. Watch for any signs of slow drainage or leaks. Clear any blockages that might be hindering proper drainage.
- Seal gaps: Use silicone caulk to seal any gaps between the vanity and the walls, as well as around the faucet and drain openings. This will prevent water from seeping into those spaces and causing damage.
By properly connecting the plumbing, you can ensure that your new double vanity functions smoothly without any leaks or drainage issues. Take your time during this step to ensure a proper and secure connection, and don’t hesitate to seek professional help if needed.
Step 8: Finishing Touches
With the plumbing successfully connected, it’s time to add the finishing touches to your newly transformed double vanity. These final steps will bring the entire project together and enhance the overall look and functionality of your bathroom:
- Install the faucets: Place the faucet fixtures onto the sink or countertop according to the manufacturer’s instructions. Tighten the mounting hardware and ensure that the faucets are properly aligned and secure.
- Add the hardware: Install the handles or knobs on the doors and drawers of your double vanity. Choose hardware that matches the style and design of your bathroom, providing a cohesive and polished look.
- Apply a sealant: Depending on the material of the countertop or vanity, you may need to apply a sealant to protect it from moisture and stains. Follow the manufacturer’s instructions for the appropriate sealant and apply it evenly and thoroughly.
- Accessorize and organize: Add your personal touch to the double vanity by adding accessories such as soap dispensers, toothbrush holders, or decorative elements. Additionally, organize the interior of the vanity with organizers or trays to keep your items neatly arranged.
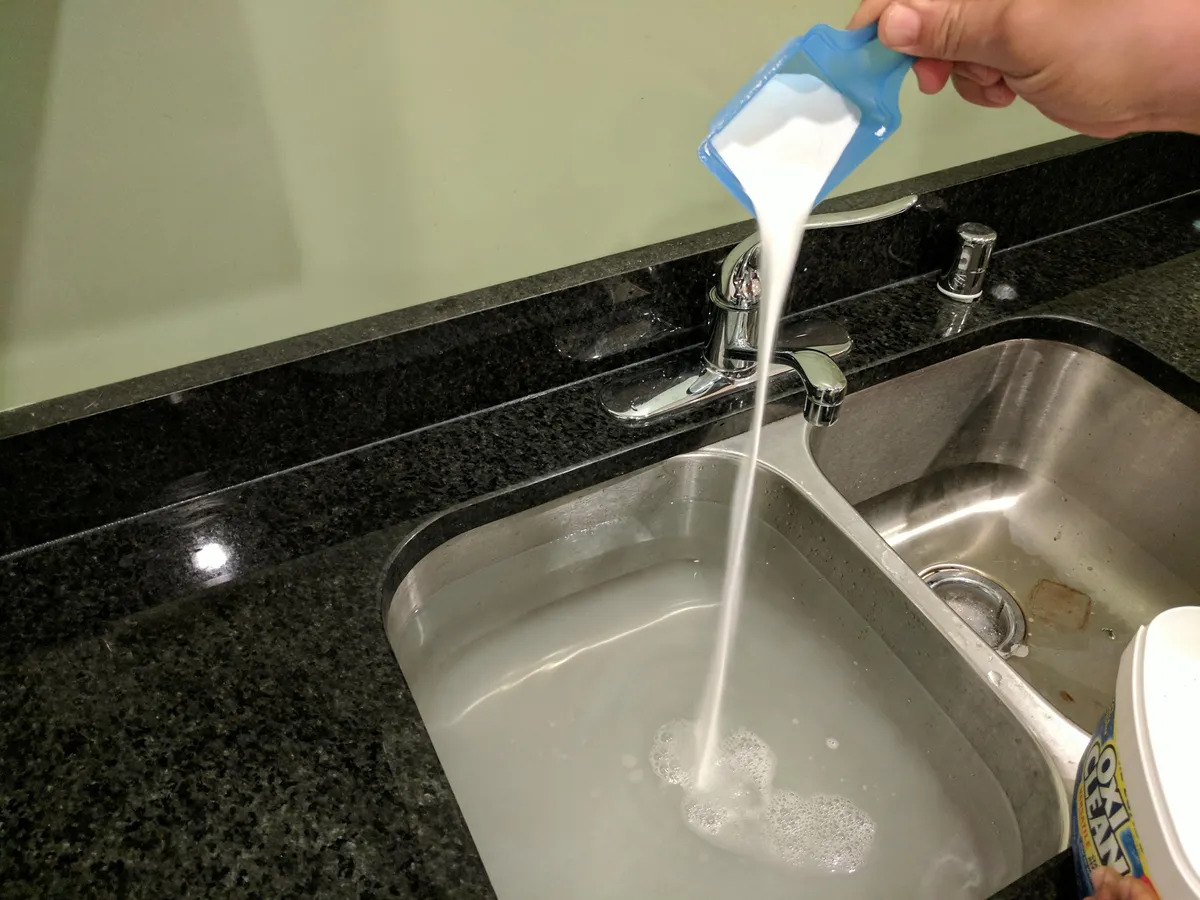
- Clean up and admire: Give your new double vanity a thorough cleaning to remove any dirt or debris. Wipe down the countertops, sinks, and mirrors to reveal their sparkling beauty. Stand back, admire your hard work, and enjoy your newly transformed bathroom!
By completing these final touches, you can truly bring your double vanity installation project to fruition. Take your time to ensure that everything is properly installed, organized, and clean. The finishing touches will add that extra level of polish and make your new double vanity a standout feature in your bathroom.
Conclusion
Congratulations! You have successfully turned your single vanity into a beautiful and functional double vanity. This DIY project has not only provided you with more counter space and storage but has also given your bathroom a stunning upgrade. By following the steps outlined in this guide, you were able to measure and assess the space, remove the old single vanity, prepare the plumbing, install additional supports, select and prepare the new double vanity, and connect the plumbing. Finally, you added the finishing touches that made your new double vanity truly shine.
Remember, throughout the entire process, it’s important to prioritize safety and accuracy. Take your time and consult professional help if needed, especially when it comes to handling plumbing and electrical connections.
Now that you have a spacious and stylish double vanity, enjoy the benefits of having your own designated space in the bathroom. No more sharing or jostling for counter space! Take advantage of the increased storage and organization options to keep your essentials neatly tucked away.
Your bathroom transformation not only adds functionality but also creates a more visually appealing space. The new double vanity serves as a centerpiece and brings a sense of luxury and sophistication to the room.
Maintain the beauty and longevity of your double vanity by regularly cleaning and properly maintaining it. Check for any signs of wear and tear and address them promptly to prevent any issues from worsening.
Thank you for following this guide. We hope it has been helpful in your journey to transform your bathroom. Embrace the joy and convenience of your new double vanity, and enjoy your enhanced bathroom experience!
Frequently Asked Questions about How To Turn Single Sink Vanity Into Double Sink
Was this page helpful?
At Storables.com, we guarantee accurate and reliable information. Our content, validated by Expert Board Contributors, is crafted following stringent Editorial Policies. We're committed to providing you with well-researched, expert-backed insights for all your informational needs.


0 thoughts on “How To Turn Single Sink Vanity Into Double Sink”