Articles
How To Use A Coping Saw
Modified: May 6, 2024
Learn how to effectively use a coping saw with our informative articles. Enhance your woodworking skills and achieve precise cuts effortlessly.
(Many of the links in this article redirect to a specific reviewed product. Your purchase of these products through affiliate links helps to generate commission for Storables.com, at no extra cost. Learn more)
Introduction
A coping saw is a versatile and handy tool that every woodworker should have in their arsenal. It provides the ability to make intricate cuts, both straight and curved, with ease. Whether you are a beginner or a seasoned craftsman, mastering the art of using a coping saw can greatly enhance your woodworking projects.
In this article, we will explore the ins and outs of using a coping saw effectively. We will discuss the different types of coping saws available, the importance of choosing the right blade, and the proper techniques for making straight and curved cuts. Additionally, we will provide some useful tips to improve your coping saw performance and ensure your safety while using this tool.
So, if you’re ready to take your woodworking skills to the next level, let’s dive into the world of coping saws and discover how to use them like a pro.
Key Takeaways:
- Master the art of using a coping saw by selecting the right blade, handling it properly, and following safety precautions. Elevate your woodworking projects with precise and intricate cuts.
- Enhance your coping saw performance with valuable tips, such as selecting the right blade, maintaining proper tension, and practicing patience. Prioritize safety to prevent accidents and injuries while enjoying woodworking.
Read more: How To Use A Hand Saw
Understanding the Coping Saw
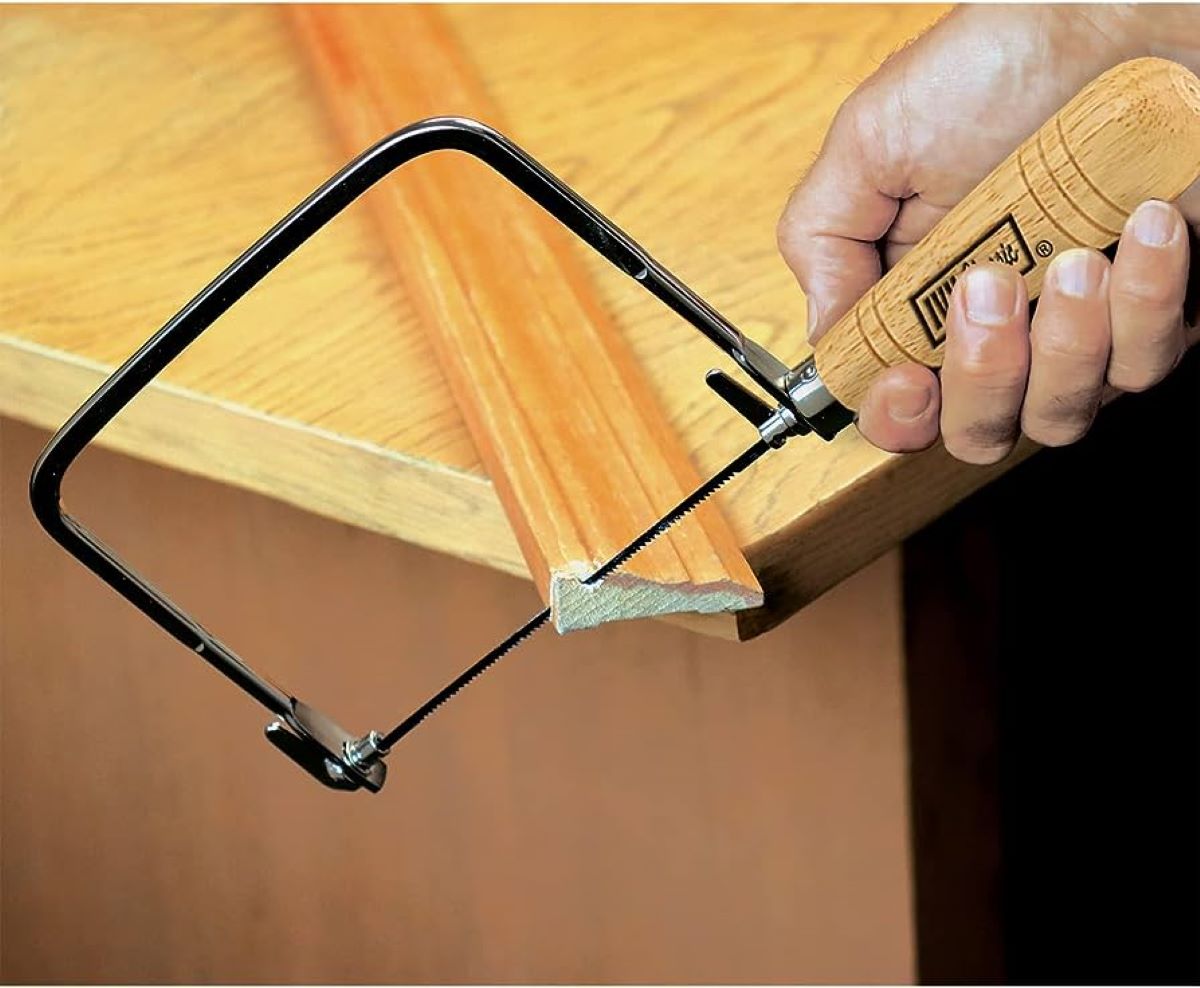
A coping saw is a hand-powered cutting tool that is primarily used in woodworking for making intricate and delicate cuts. It consists of a thin, narrow, and fine-toothed blade stretched across a U-shaped frame. The blade is held in tension by tightening the handle, allowing for precise cutting action.
The frame of a coping saw is typically made of metal, but it can also be found in various materials, such as wood or plastic. The U-shaped design of the frame allows for easy maneuverability and access to tight corners and curves. This makes the coping saw the ideal tool for tasks like cutting intricate patterns, removing waste material, or creating intricate joinery.
Unlike other saws, the coping saw blade is removable and can be easily replaced. This provides flexibility in terms of the type of cuts you can make, as different blades are available for cutting various materials and for creating different styles of cuts.
One of the key features of a coping saw is its adjustable blade angle. This allows you to tilt the blade to match the angle of the cut you want to make. By doing so, you can achieve more precise and accurate cuts, especially when working on complex shapes or curved surfaces.
Now that we have a basic understanding of the coping saw, let’s move on to the next important aspect: choosing the right blade.
Choosing the Right Blade
Selecting the correct blade for your coping saw is crucial for achieving clean and accurate cuts. There are several factors to consider when choosing a blade, including the material you are cutting, the desired cut type, and the complexity of the project.
Firstly, the material you are working with will determine the type of blade you need. For general woodworking applications, a carbon steel blade is a popular choice. It is versatile and can handle cutting through various types of wood with ease. However, if you are cutting harder materials such as metal or plastic, you may want to opt for a bimetal or tungsten carbide blade, respectively.
The next factor to consider is the desired cut type. If you are making straight cuts, a blade with fewer teeth per inch (TPI) is recommended. This will allow for faster cutting speeds and efficient waste removal. On the other hand, if you are working on curves or intricate designs, a blade with higher TPI will provide better control and smoother cuts.
Additionally, the complexity of your project should also be taken into account. If you are working on a highly detailed piece with intricate patterns, a scroll blade with fine teeth and narrow width is ideal. This type of blade allows for precise maneuverability and intricate cuts. For simpler projects, a standard coping saw blade with medium TPI will usually suffice.
It is worth noting that blades come in different lengths as well. Longer blades are better suited for making long, straight cuts, while shorter blades are more maneuverable and are excellent for intricate work.
Lastly, it is essential to ensure that the blade you choose fits your coping saw frame properly. Most coping saw blades have pins on each end that fit into the slots on the frame. Make sure the blade is securely inserted and tightened to avoid wobbling during use.
By considering the material, desired cut type, complexity of the project, and proper blade fitting, you can select the right blade for your coping saw, ensuring optimal performance and achieving precise cuts. Now that we have covered the blade selection process, let’s move on to the proper handling of the coping saw.
Proper Handling of the Coping Saw
Using a coping saw requires proper technique and handling to ensure accurate and smooth cuts. Here are some key points to keep in mind when handling a coping saw:
- Grip the handle: Hold the handle firmly but not too tightly. Find a grip that feels comfortable and allows you to have control over the saw. Remember to keep your wrist straight to maintain stability.
- Position the workpiece: Secure the workpiece in a vise or clamp it down to ensure stability during the cutting process. This will help prevent any unwanted movement and allow for more precise cuts.
- Angle the blade: Tilt the blade of the coping saw to match the angle of the cut you want to make. This is especially important when cutting curves or complex shapes. Adjust the blade angle accordingly to achieve accurate cuts.
- Start with a pilot hole: If you are making an interior cut, such as cutting out a shape within a piece of wood, it is recommended to start by drilling a pilot hole. This will allow you to easily thread the coping saw blade through and begin cutting.
- Start the cut: Begin the cut by using light pressure and a slow, steady motion. Let the saw do the work and avoid forcing it through the material. This will prevent the blade from bending or breaking, ensuring a smoother cutting process.
- Follow the line: Keep your eye on the cutting line and carefully guide the coping saw along the desired path. Take it slow and make adjustments as needed to ensure accuracy and maintain control over the saw.
- Don’t twist the blade: Avoid twisting the coping saw blade while cutting. This can result in uneven cuts and may cause the blade to snap. Instead, focus on maintaining a steady and straight cutting motion.
- Practice patience: Coping saw cuts require patience and precision. Take your time and work at a pace that allows for accuracy. Rushing through the cut can lead to mistakes and compromise the quality of your work.
By following these guidelines, you can handle the coping saw effectively and achieve clean, precise cuts. Now, let’s move on to exploring the techniques for making straight cuts with a coping saw.
Making Straight Cuts
While coping saws are often associated with making intricate curved cuts, they can also be used to make straight cuts with relative ease. Here are the steps to follow when making straight cuts with a coping saw:
- Mark the cut line: Use a pencil or marking tool to indicate the exact line where you want to make the cut. This will serve as a guide throughout the cutting process.
- Secure the workpiece: Clamp the workpiece securely to a workbench or use a vise to keep it stable during the cutting process. This will prevent any movement and allow for precise cuts.
- Start the cut: Place the coping saw blade against the marked cut line and apply light pressure to start the cutting motion. Begin with short strokes and gradually increase the length of the strokes as you gain confidence.
- Guiding the saw: Keep your eye on the cut line and guide the coping saw along it with steady and controlled movements. It is essential to maintain a straight cutting motion to ensure accurate and even cuts.
- Finishing the cut: As you approach the end of the cut, reduce your stroke length and take extra caution to ensure a clean finish. Take your time and make small adjustments if necessary to achieve the desired outcome.
- Smoothing the edges: After completing the straight cut, use sandpaper or a file to smooth out any rough edges or imperfections left by the saw. This will provide a clean and professional finish to your workpiece.
Remember to take your time and work with precision when making straight cuts with a coping saw. Practice will help you develop your technique and improve your ability to achieve straight and accurate cuts consistently.
Now that we have covered the technique for making straight cuts, let’s move on to exploring the process of making curved cuts with a coping saw.
When using a coping saw, make sure to keep the blade perpendicular to the work surface for accurate and clean cuts. Also, use light pressure and let the saw do the work.
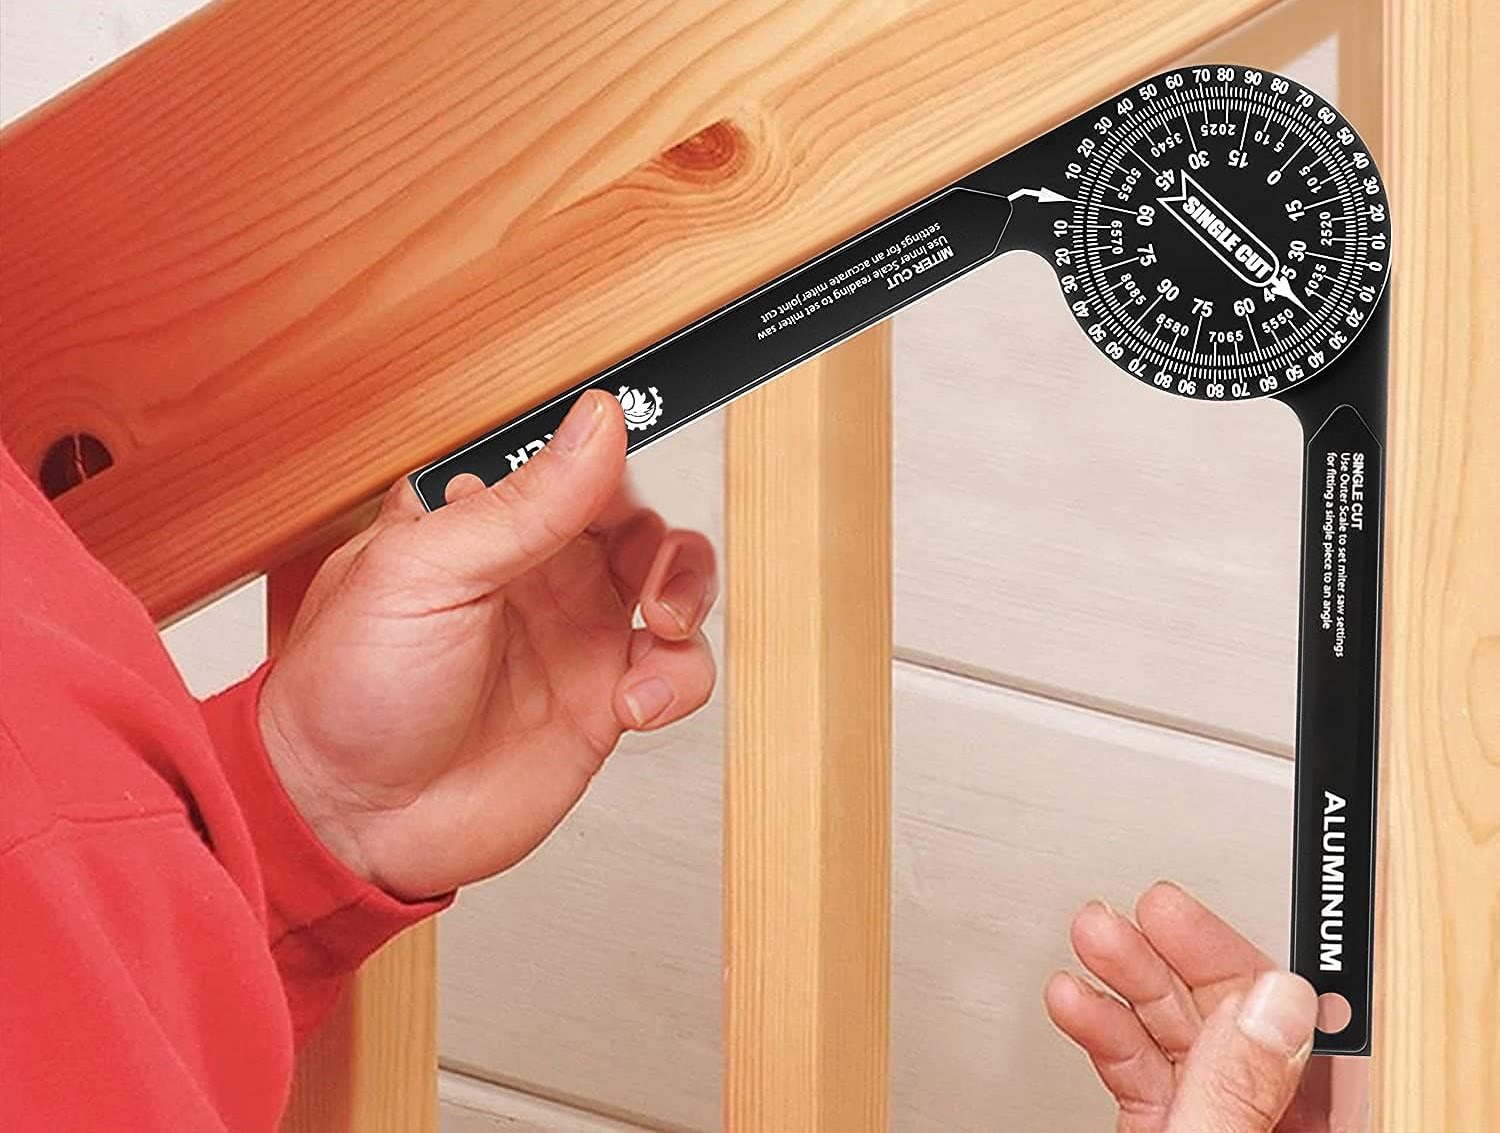
Read more: How To Use A Miter Saw
Making Curved Cuts
One of the primary advantages of a coping saw is its ability to make intricate curved cuts. Whether you’re creating decorative designs or cutting out curved shapes, the coping saw can deliver precise and smooth results. Here’s a step-by-step guide on making curved cuts with a coping saw:
- Mark the cut line: Use a pencil or marking tool to draw the desired curve on your workpiece. It’s essential to mark the cut line accurately, as it will serve as your guide during the cutting process.
- Secure the workpiece: Clamp the workpiece securely to a workbench or use a vise to ensure stability. This will prevent any movement and allow for more precise cutting.
- Angle the blade: Tilt the coping saw blade to match the curvature of the cut line. Adjust the blade angle slowly and carefully until it aligns with the curve you want to create.
- Begin the cut: Start the cut by applying light pressure and using short, controlled strokes. Take your time and focus on guiding the coping saw along the marked cut line.
- Follow the curve: Continuously adjust the angle and direction of the saw to follow the curve accurately. It’s important to have a steady hand and maintain a smooth and fluid cutting motion.
- Cutting tight curves: For tighter curves, it may be necessary to remove the coping saw blade and thread it through a pilot hole drilled at the starting point of the curve. Reattach the blade and continue cutting along the curve.
- Finishing the cut: As you approach the endpoint of the curve, reduce your stroke length and take extra care to ensure a clean and smooth finish. Make small adjustments if needed to maintain the desired shape and avoid overcutting.
- Smoothing the edges: After completing the curved cut, use sandpaper or a file to smooth out any rough edges or imperfections. This will give your workpiece a polished and professional appearance.
Making curved cuts with a coping saw requires practice and patience. Take your time, follow the cut line carefully, and adjust the blade angle as needed to achieve the desired curve. With practice, you’ll become more skilled at creating precise and intricate curved cuts.
Now that we’ve covered making curved cuts with a coping saw, let’s move on to some tips to improve your coping saw performance.
Tips for Better Coping Saw Performance
To enhance your coping saw performance and achieve better results, here are some valuable tips to keep in mind:
- Select the right blade: As mentioned earlier, choosing the appropriate blade for your specific task is crucial. Consider the material, cut type, and complexity of the project when selecting the blade. Using the right blade will improve your cutting efficiency and the quality of your work.
- Use the proper blade tension: Ensure that the blade is properly tensioned. If it’s too loose, it may result in wobbling and imprecise cuts. Conversely, if it’s too tight, it can lead to blade breakage. Experiment with different tension levels and find the sweet spot for optimal performance.
- Let the saw do the cutting: It’s important to allow the coping saw to do the work. Apply gentle forward pressure and let the teeth of the blade do the cutting. Forcing the saw can cause inaccuracies and lead to blade damage.
- Keep the saw perpendicular to the workpiece: Maintain a perpendicular angle between the saw blade and the workpiece. This will ensure straight and even cuts. Deviating from this angle can result in skewed cuts or uneven edges.
- Practice proper hand placement: Hold the coping saw with a comfortable but firm grip. Keep your hands away from the blade path to avoid accidental injuries. It’s also advisable to use a handle with an ergonomic design for added comfort during extended use.
- Take breaks as needed: Coping saw work can be physically demanding, especially for longer projects. Take breaks and rest your hands and wrists to prevent fatigue and promote accuracy in your cuts. Stretching exercises can also help maintain dexterity.
- Use a backing board: When making cuts that may cause tear-out or splintering on the backside of the workpiece, place a backing board behind it. This will help minimize any damage to the material and result in cleaner cuts.
- Practice on scrap material: If you’re new to using a coping saw or trying out a new technique, it’s always a good idea to practice on scrap material first. This allows you to familiarize yourself with the tool, test different blade types, and refine your cutting technique before working on your actual project.
- Maintain a steady pace: Avoid rushing through cuts or applying excessive force. Instead, work at a steady pace and let the saw teeth do the work. This will improve cutting accuracy and reduce the chance of mistakes.
By implementing these tips, you can optimize your coping saw performance and achieve better results in your woodworking projects. Remember to practice regularly and develop your skills to become more proficient with this versatile tool.
Now, before we wrap up, let’s discuss some essential safety precautions when using a coping saw.
Safety Precautions
While using a coping saw can be a rewarding and enjoyable experience, it is essential to prioritize safety to prevent accidents and injuries. Here are some crucial safety precautions to follow when using a coping saw:
- Wear protective gear: Always wear safety glasses or goggles to protect your eyes from flying debris. Additionally, consider wearing a dust mask or respirator to prevent inhaling dust particles generated during the cutting process.
- Secure the workpiece: Ensure that the workpiece is stable and securely clamped before making any cuts. This will prevent it from moving or slipping, reducing the risk of accidents.
- Use a proper stance: Stand in a comfortable and balanced position while using the coping saw. Having a stable stance minimizes the risk of losing control and maintains balance throughout the cutting process.
- Keep fingers away from the blade: Avoid placing your fingers or hands directly in the line of the saw blade. Use the handle for control and guide the saw with your grip rather than exerting pressure with your fingertips.
- Be mindful of the blade path: Stay aware of the path of the coping saw blade at all times. Avoid any sudden movements or distractions that may cause the saw to deviate from the intended cutting line.
- Take breaks: If you’re working on a project for an extended period, take regular breaks to rest your hands and prevent fatigue. Overexertion and tiredness can lead to decreased focus and increased risk of accidents.
- Store the coping saw safely: When not in use, store your coping saw in a safe place to prevent it from being accidentally knocked over or mishandled. This will also protect the blade and prevent any potential injuries.
- Keep the work area clean: Clear your work area of unnecessary clutter or debris that may obstruct your movement or cause accidents. A clean and organized workspace reduces the risk of tripping or accidents while using the coping saw.
- Follow manufacturer instructions: Always refer to the manufacturer’s instructions and guidelines provided with your coping saw. This ensures that you are using the tool correctly and in accordance with the intended usage.
- Seek assistance if needed: If you’re unsure about any aspect of using the coping saw or handling a specific task, don’t hesitate to seek guidance from a more experienced woodworker or a professional. It’s better to ask for help than to risk injury or damage.
Prioritizing safety when using a coping saw is crucial for both the quality of your work and your personal well-being. By following these safety precautions, you can enjoy your woodworking projects with peace of mind and reduce the chances of accidents or injuries.
Now that we’ve covered the safety precautions, let’s conclude our exploration of coping saw usage.
Conclusion
Using a coping saw is a skill that every woodworker should strive to learn and master. This versatile tool allows you to create intricate and precise cuts, whether it’s for making curved designs or straight lines. By understanding the different aspects of coping saw usage, such as selecting the right blade, handling the tool properly, and following safety precautions, you can elevate your woodworking projects to new heights.
Throughout this article, we have explored the anatomy of a coping saw, the importance of choosing the appropriate blade, the techniques for making straight and curved cuts, and valuable tips to enhance your coping saw performance. Each of these aspects plays a key role in achieving accurate and professional results.
Remember, practice is essential for improving your coping saw skills. Take the time to experiment with different blade types, practice on scrap material, and refine your cutting techniques. With each project, you will gain more confidence and precision in your work, allowing you to tackle more complex and intricate designs.
However, while pursuing perfection in your woodworking, never compromise on safety. Adhere to the safety precautions outlined in this article, wear the necessary protective gear, and maintain a clean and organized work area. Your well-being should always be the top priority.
Whether you are a beginner exploring woodworking or an experienced craftsman looking to expand your techniques, incorporating a coping saw into your toolkit is a wise investment. Its versatility and ability to create detailed cuts will undoubtedly enhance your woodworking capabilities and open the door to a world of creative possibilities.
So, grab your coping saw, select the right blade, and start honing your cutting skills. With time, practice, and a dash of creativity, you’ll be amazed at what you can accomplish with this invaluable tool.
Happy woodworking!
Ready to take your woodworking projects to the next level? Our latest article on the best woodworking tools for 2024 is packed with essential information to help you pick top-quality equipment. And if you're curious about why engaging in do-it-yourself projects can be so rewarding, don't miss our insightful piece that breaks down the benefits and joys of DIY projects. Whether you're a seasoned craftsman or just starting out, these reads will surely enrich your crafting journey.
Frequently Asked Questions about How To Use A Coping Saw
Was this page helpful?
At Storables.com, we guarantee accurate and reliable information. Our content, validated by Expert Board Contributors, is crafted following stringent Editorial Policies. We're committed to providing you with well-researched, expert-backed insights for all your informational needs.


0 thoughts on “How To Use A Coping Saw”