Articles
How To Use A Miter Saw
Modified: October 18, 2024
Looking for articles on how to use a miter saw? Discover expert tips and step-by-step guides to master this essential woodworking tool.
(Many of the links in this article redirect to a specific reviewed product. Your purchase of these products through affiliate links helps to generate commission for Storables.com, at no extra cost. Learn more)
Introduction
When it comes to woodworking, having the right tools is crucial to achieve precise and efficient cuts. One such tool that every woodworker, whether amateur or professional, should have in their arsenal is a miter saw. A miter saw, also known as a chop saw, is designed to make accurate crosscuts and angled cuts in wood, allowing you to create perfectly finished pieces for your projects.
In this article, we will guide you through the process of using a miter saw effectively and safely. We will cover all the essential steps, from setting up the saw to making various types of cuts, as well as maintenance tips to keep your miter saw in top condition. So, if you’re ready to take your woodworking skills to the next level, let’s dive in!
Before we begin, it’s important to note that using a miter saw requires caution and adherence to safety guidelines. Always wear appropriate safety gear, such as goggles, ear protection, and a dust mask, when operating power tools. Additionally, make sure you carefully read and follow the manufacturer’s instructions provided with your specific miter saw.
Key Takeaways:
- Mastering the miter saw involves precision, safety, and maintenance. From crosscuts to bevel cuts, utilizing laser guides and accessories enhances efficiency and accuracy, elevating woodworking projects to professional levels.
- Prioritize safety, maintenance, and technique when using a miter saw. Incorporate stop blocks, miter sleds, and digital angle finders for efficient and precise cuts. Continuous learning and exploration lead to stunning woodworking creations.
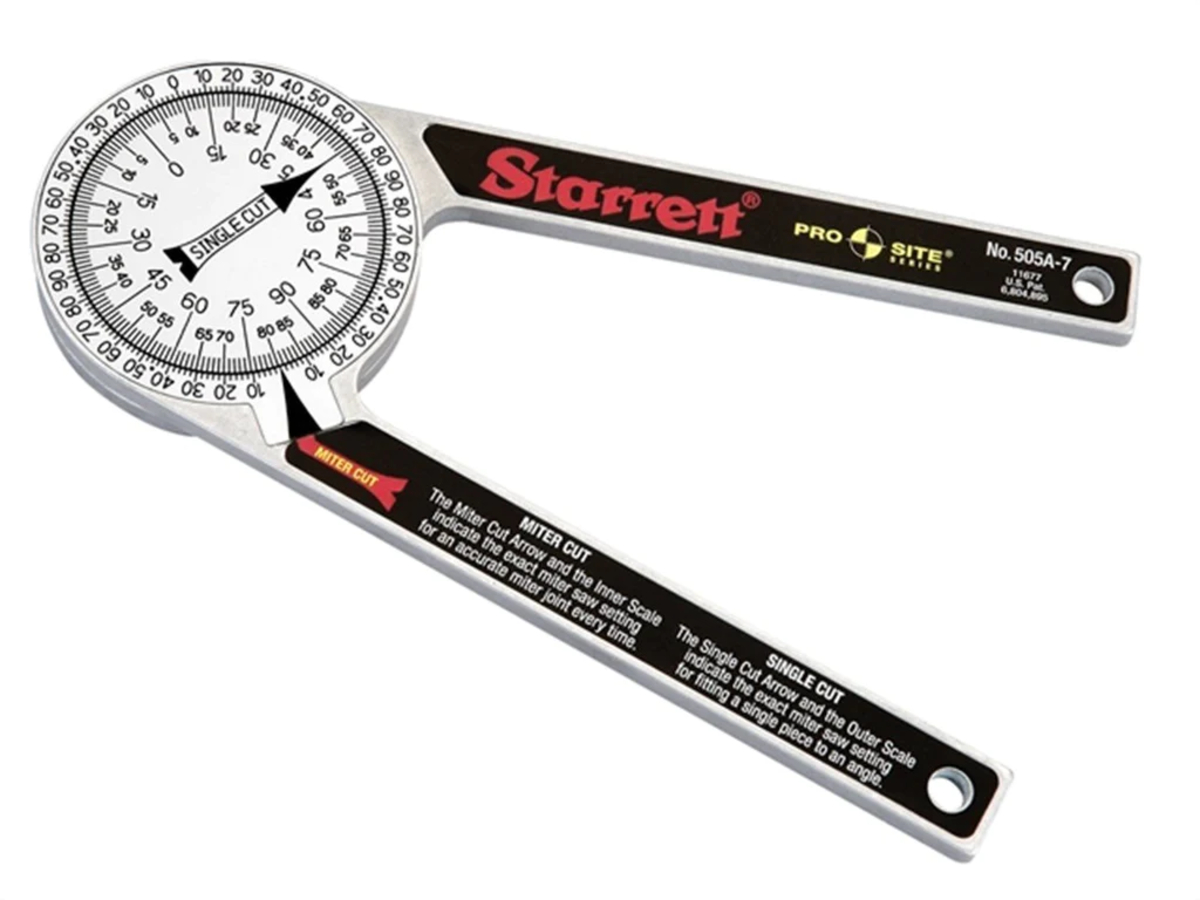
Read more: How To Use A Miter Saw Protractor
Safety Precautions
When it comes to power tools, safety should always be your top priority. Here are some essential safety precautions to follow when using a miter saw:
- Wear Safety Gear: Before you start using a miter saw, make sure to wear safety goggles, ear protection, and a dust mask to protect yourself from flying debris and loud noises.
- Secure the Workpiece: Always make sure to secure the workpiece properly before making any cuts. Use clamps or supports to hold the wood firmly in place, ensuring that it won’t move or kick back during the cutting process.
- Keep Your Hands Clear: Never place your hands near the blade while the saw is in operation. Always wait for the blade to come to a complete stop before removing or adjusting the workpiece.
- Maintain a Firm Stance: Stand with your feet shoulder-width apart and maintain a stable stance while operating the miter saw. This will help you maintain balance and control throughout the cutting process.
- Use the Blade Guard: Ensure that the blade guard is in place and functioning properly before using the miter saw. The blade guard helps to protect you from accidental contact with the blade and should never be removed or bypassed.
- Adjust the Cutting Depth: Set the cutting depth of the blade so that it only extends slightly below the workpiece. This will help prevent the blade from hitting the table or other objects beneath the wood.
- Be Mindful of Cords: Keep the power cord and extension cord away from the cutting area to avoid accidentally cutting through them. Always make sure that the cords are properly secured and not tangled or obstructing your movement.
- Maintain a Clean Workspace: Remove any debris, sawdust, or scraps from the cutting area before starting the miter saw. Having a clean workspace will help prevent accidents and ensure a clear view of the cutting line.
- Take Breaks: If you’re using the miter saw for an extended period, remember to take regular breaks to prevent fatigue. Operating power tools requires focus and concentration, so it’s important to give yourself time to rest and re-energize.
- Keep Children and Pets Away: Always work in a safe and controlled environment, keeping children and pets at a safe distance from the miter saw. Never leave the saw unattended while it is still running or when the blade is in motion.
By following these safety precautions, you can ensure a safe working environment and minimize the risk of accidents while using a miter saw. Remember, it’s always better to be cautious and take the necessary steps to protect yourself and those around you.
Setting Up and Adjusting the Miter Saw
Before you start cutting with a miter saw, it’s important to properly set it up and make necessary adjustments to ensure accurate and precise cuts. Here’s a step-by-step guide to help you set up and adjust your miter saw:
- Choose the Right Location: Find a sturdy and level surface to place your miter saw. Make sure there is enough space around the saw for the workpiece and that there are no obstructions that could hinder your movement.
- Secure the Miter Saw: Depending on the type of miter saw you have, there may be specific instructions for mounting it securely to a workbench or stand. Follow the manufacturer’s guidelines to ensure stability and safety.
- Verify the Angle Indicator: Check the accuracy of the angle indicator on your miter saw. Use a reliable square or protractor to confirm that the saw is set at a 90-degree angle when positioned straight up.
- Calibrate the Bevel Angle: If your miter saw has a bevel function for making angled cuts, you’ll need to calibrate the bevel angle. Follow the instructions in your saw’s manual to do this correctly, ensuring that the bevel angle matches the indicated setting.
- Align the Blade with the Fence: Adjust the position of the blade so that it is parallel to the miter saw fence. This alignment is crucial for making accurate crosscuts. Refer to your saw’s manual to find the specific steps for adjusting the blade alignment.
- Check the Cutting Line: Position a scrap piece of wood on the miter saw and run the blade through it without turning on the saw. Examine the cutting line to ensure that it aligns with the kerf or the mark left by the blade. If adjustments are needed, consult your saw’s manual for instructions on how to adjust the cutting line.
- Test the Miter and Bevel Angles: Once your miter saw is set up, take the time to test the accuracy of both the miter and bevel angles. Use a miter gauge or other angle measuring tools to check the alignment and make any necessary adjustments before proceeding to the actual cutting.
By properly setting up and adjusting your miter saw, you’ll ensure that it is ready to deliver precise cuts for your woodworking projects. Take the time to understand your specific saw’s manual and follow the manufacturer’s instructions for accurate calibration and alignment.
Selecting and Installing the Proper Blade
Choosing the right blade for your miter saw is crucial for achieving clean and accurate cuts. The type and quality of the blade will depend on the material you’re working with and the specific cut you need to make. Here are some tips to help you select and install the proper blade for your miter saw:
- Determine the Material: Consider the type of material you’ll be cutting. If you primarily work with wood, a general-purpose crosscutting or combination blade with carbide teeth will suffice. For cutting other materials like metal or plastic, specific blades designed for those materials should be used.
- Consider the Tooth Count: The tooth count on a blade determines the smoothness and speed of the cut. Blades with a higher tooth count, such as 60 or 80 teeth, produce finer cuts with less tear-out on the wood surface. Lower tooth count blades, around 24 or 40 teeth, are ideal for rough cuts and faster material removal.
- Blade Diameter: Make sure the blade diameter matches the specifications of your miter saw. Common blade diameters for miter saws range from 8 inches to 12 inches. Ensure your miter saw can accommodate the chosen blade diameter before purchasing.
- Install the Blade Correctly: Follow the manufacturer’s instructions for installing the blade on your miter saw. Typically, this involves loosening the arbor nut, placing the blade onto the arbor, and tightening the nut securely. Use the appropriate tools and ensure the blade is centered and tightly secured for safe operation.
- Blade Maintenance: Keep your blade clean and sharp to ensure optimal performance. Regularly remove built-up sawdust and resin from the teeth using a blade cleaning solution or wire brush. When the blade starts to dull or show signs of wear, consider sharpening or replacing it to maintain efficient cutting.
Remember, always prioritize safety when selecting and installing a blade. Ensure the saw is unplugged and the blade has come to a complete stop before attempting to install or remove it. Use protective gloves when handling the blade to prevent cuts or injuries.
By selecting the proper blade and following correct installation procedures, you’ll be able to achieve clean and precise cuts with your miter saw, enhancing the quality of your woodworking projects.
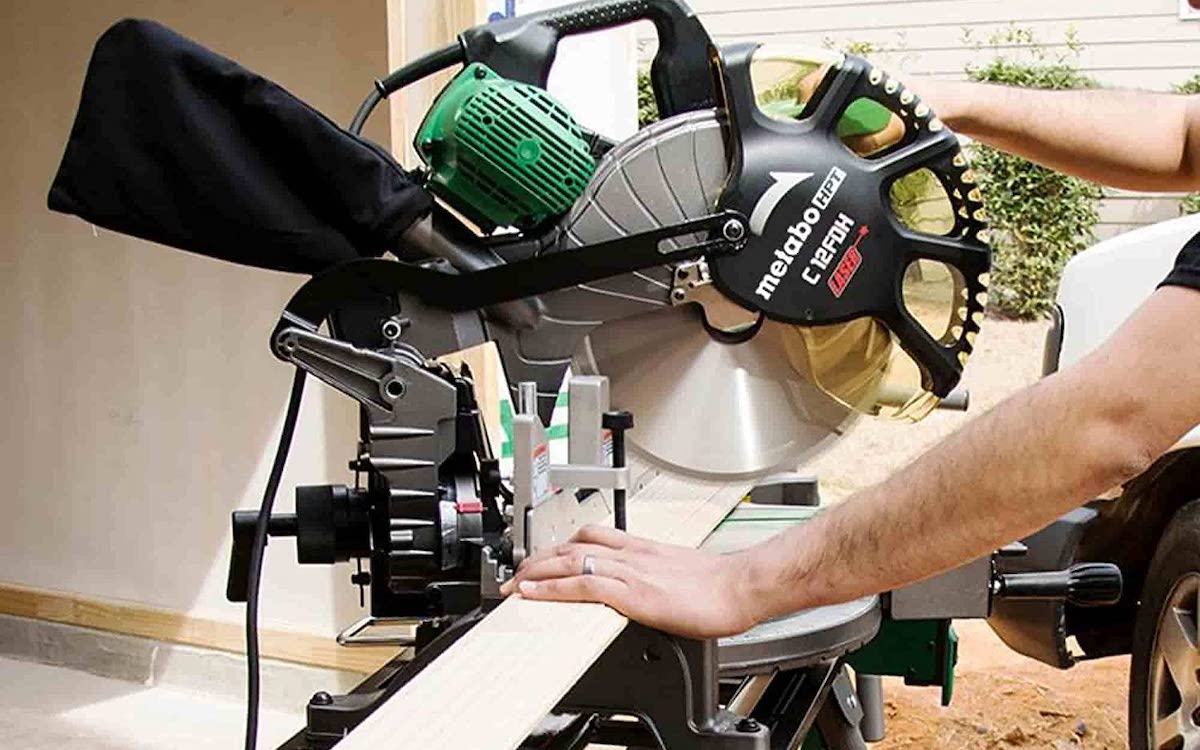
Making Crosscuts
One of the primary functions of a miter saw is to make accurate crosscuts, which are straight cuts perpendicular to the wood grain. Follow these steps to make precise crosscuts with your miter saw:
- Measure and Mark the Wood: Start by measuring the desired length of the cut on your workpiece and marking it with a pencil or a marking tool.
- Position and Secure the Wood: Place the workpiece on the miter saw table, ensuring that the marked cutting line aligns with the blade. Use clamps or supports to secure the wood to prevent any movement during cutting.
- Activate the Blade and Align the Cut: Make sure you’re in a comfortable operating position, and activate the miter saw’s power switch. Bring the blade down onto the workpiece, aligning the marked cutting line with the blade’s teeth.
- Make the Cut: Push the miter saw handle down smoothly and steadily to make the cut. Let the blade do the work, avoiding excessive forcing or applying excessive pressure. Maintain a firm grip on the handle for control throughout the cut.
- Release the Power Switch and Wait for the Blade to Stop: Once the cut is complete, release the power switch and wait for the blade to come to a complete stop before lifting it away from the workpiece.
- Inspect and Smooth the Cut: After making the crosscut, carefully inspect the cut for accuracy and smoothness. If needed, use sandpaper or a file to remove any rough edges or burrs.
Note: Always follow the safety precautions outlined earlier in the article and refer to the manufacturer’s instructions for your specific miter saw.
With practice, you’ll be able to achieve precise and clean crosscuts with your miter saw. Take your time to ensure accurate measurements and proper alignment before making the cut, and always prioritize safety throughout the process.
Read more: How To Store A Miter Saw
Making Miter Cuts
Miter cuts are angled cuts made across the width of the wood, commonly used to join two pieces together at a corner. Whether you’re working on picture frames, crown molding, or other projects, miter cuts can add a professional touch to your woodworking. Here’s a step-by-step guide on how to make miter cuts with your miter saw:
- Measure and Mark the Wood: Determine the angle at which you want to make the miter cut. Use a protractor or a miter gauge to measure the exact angle, or use a pre-set detent on your miter saw. Mark the wood on the face that will be visible after the cut.
- Set the Miter Angle: Adjust the miter angle on your miter saw to match the desired angle for the cut. Most miter saws have positive stops that click into place at common angles like 45 degrees or 90 degrees. Make sure the miter gauge is securely locked in place.
- Position and Secure the Wood: Place the workpiece on the miter saw table, aligning the mark with the blade. Ensure that the wood is securely held in place with clamps or supports to prevent any movement during the cutting process.
- Activate the Blade and Align the Cut: Turn on the miter saw and carefully bring the blade down onto the workpiece, aligning the mark with the blade. Take your time to ensure the correct alignment and double-check the angle before proceeding.
- Make the Cut: Push the miter saw handle down smoothly and steadily to make the miter cut. Maintain a firm grip on the handle and avoid forcing or jerking the blade through the wood. Let the blade do the work.
- Release the Power Switch and Wait for the Blade to Stop: Once the cut is complete, release the power switch and wait for the blade to come to a complete stop before lifting it away from the workpiece.
- Inspect and Adjust: After making the miter cut, carefully inspect the angle for accuracy. If adjustments are needed, use a miter gauge or protractor to make minor corrections and ensure a precise fit when joining the pieces together.
As with any cutting operation, always prioritize safety by wearing appropriate protective gear and following the manufacturer’s instructions for your specific miter saw.
By mastering the art of making miter cuts, you’ll be able to create seamless joints and achieve a professional-quality finish on your woodworking projects.
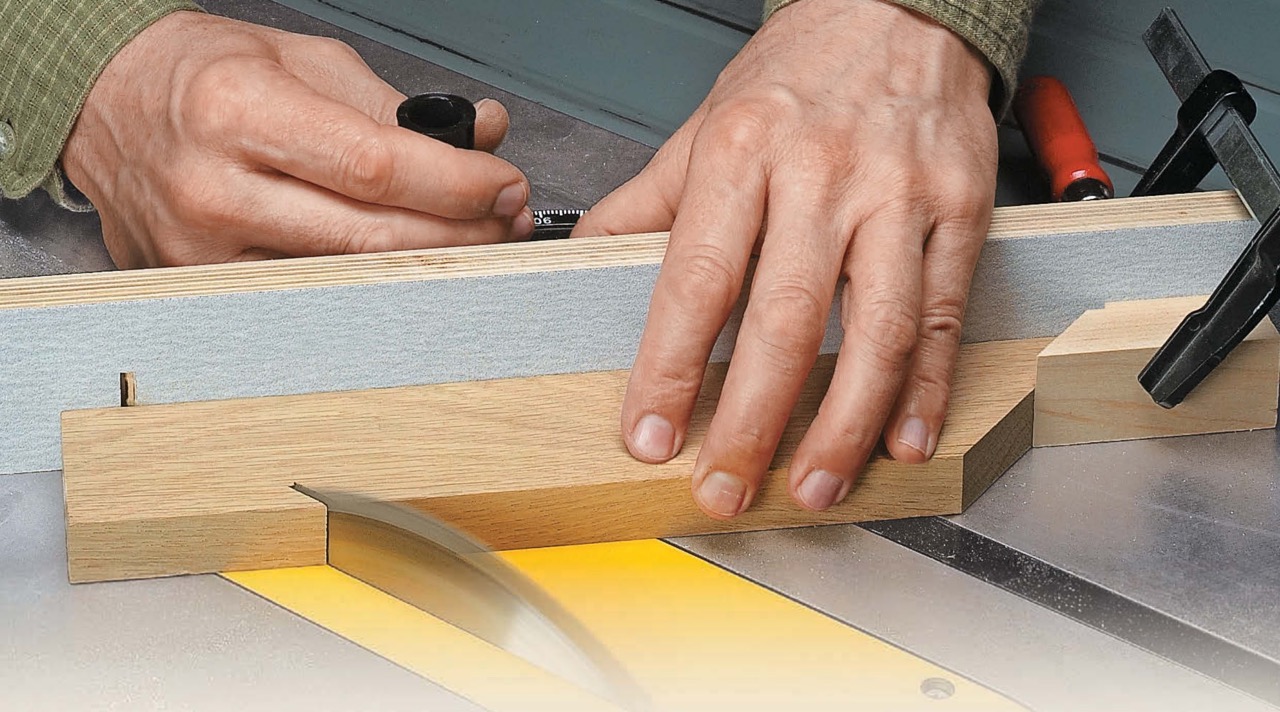
When using a miter saw, always wear safety goggles to protect your eyes from flying debris. This is essential for preventing any potential injuries while cutting wood.
Making Bevel Cuts
Bevel cuts are angled cuts made through the thickness of the wood, allowing you to create tapered edges or chamfers on your woodworking projects. Whether you’re working on furniture, trim, or decorative elements, knowing how to make bevel cuts with your miter saw is essential. Here’s a step-by-step guide to help you make accurate bevel cuts:
- Measure and Mark the Wood: Determine the angle and depth of the bevel cut you want to make. Measure and mark the wood accordingly, indicating both the angle and the depth on the surface that will be visible after the cut.
- Set the Bevel Angle: Adjust the bevel angle on your miter saw to match the desired angle for the cut. Most miter saws have a bevel adjustment knob or lever that allows you to tilt the saw blade to the desired angle.
- Position and Secure the Wood: Place the workpiece on the miter saw table, aligning the marked line with the blade. Make sure the wood is securely held in place with clamps or supports to prevent any movement during the cutting process.
- Activate the Blade and Align the Cut: Turn on the miter saw and carefully bring the blade down onto the workpiece, aligning the marked line with the blade. Take your time to ensure the correct alignment and double-check the bevel angle before proceeding.
- Make the Cut: Push the miter saw handle down smoothly and steadily to make the bevel cut. Be aware of the blade’s entry and exit points on the wood and adjust your grip accordingly. Allow the blade to make a clean and smooth cut without forcing or jerking.
- Release the Power Switch and Wait for the Blade to Stop: Once the cut is complete, release the power switch and wait for the blade to come to a complete stop before lifting it away from the workpiece.
- Inspect and Adjust: After making the bevel cut, carefully inspect the angle and depth for accuracy. If necessary, make minor adjustments to the bevel angle and depth settings to achieve the desired result.
Remember to prioritize safety by wearing appropriate protective gear and following the manufacturer’s instructions for your specific miter saw.
With practice and careful attention to the cutting angle and depth, you’ll be able to create precise and clean bevel cuts in your woodworking projects, adding an extra touch of creativity and design.
Using a Miter Saw with a Laser Guide
A miter saw equipped with a laser guide can greatly enhance the accuracy and precision of your cuts. The laser guide provides a visual reference to help you align the blade with the cutting line, resulting in cleaner and more precise cuts. Here’s how you can effectively use a miter saw with a laser guide:
- Activate the Laser Guide: Before making any cuts, turn on the laser guide feature on your miter saw. Most miter saws have a switch or button that activates the laser guide. Ensure that the laser beam is visible and aligned with the blade.
- Position and Secure the Wood: Place the workpiece on the miter saw table, ensuring it is positioned correctly for the desired cut. Use clamps or supports to secure the wood, preventing any movement during the cutting process.
- Align the Cutting Line with the Laser: Align the marked cutting line on the wood with the laser beam. The laser will project a straight line across the workpiece, guiding you to accurately position the blade for the cut.
- Activate the Blade and Align the Cut: With the laser guide helping you align the cutting line, bring the blade down onto the workpiece. Make any necessary adjustments to ensure the blade aligns perfectly with the marked line.
- Make the Cut: Push the miter saw handle down smoothly, following the laser guide and keeping the blade aligned with the cutting line. Allow the blade to cut through the wood without forcing or applying excessive pressure.
- Release the Power Switch and Wait for the Blade to Stop: Once the cut is complete, release the power switch and wait for the blade to come to a complete stop before lifting it away from the workpiece.
- Inspect and Fine-Tune: After making the cut, inspect the result for accuracy. If needed, make minor adjustments to the position of the laser guide or the cutting line for improved precision in future cuts.
It’s important to note that the laser guide is a visual aid and should not replace proper measurement and marking techniques. Always measure and mark your cutting lines accurately before relying on the laser guide.
By utilizing the laser guide on your miter saw, you’ll be able to achieve greater accuracy and efficiency in your cuts, especially when dealing with angles and complex woodworking projects.
Maintaining and Cleaning the Miter Saw
To ensure optimal performance and prolong the lifespan of your miter saw, regular maintenance and cleaning are essential. Here are some tips to help you properly maintain and clean your miter saw:
- Regularly Inspect Your Miter Saw: Take the time to inspect your miter saw regularly for any signs of wear or damage. Check the power cord, switches, guards, and other components to ensure they are in good working condition. If you notice any issues, address them promptly to prevent further damage.
- Keep the Blade Clean: Sawdust and resin can accumulate on the blade, affecting its cutting performance. To clean the blade, disconnect the power and remove it from the miter saw. Use a blade cleaning solution or a wire brush to remove any debris. Be cautious and wear protective gloves when handling the blade.
- Clean the Cutting Area: After each use, clean the miter saw’s cutting area to remove sawdust, wood particles, and other debris. Use a brush or a vacuum to clear the dust and ensure a clean workspace. Removing debris will help maintain precise cuts and prevent any blockage or damage to the saw’s components.
- Inspect and Lubricate Moving Parts: Regularly inspect the moving parts of your miter saw, such as the pivot points, slides, and bevel mechanism. If needed, apply a small amount of lubricating oil to ensure smooth and friction-free movement. Refer to the manufacturer’s instructions for the appropriate type of lubricant to use.
- Check and Adjust Alignment: Over time, the alignment of your miter saw’s blade and fences may shift slightly. Periodically check and adjust the alignment to maintain accuracy. Consult your miter saw’s manual for instructions on how to calibrate and align the components correctly.
- Store Properly: When not in use, store your miter saw in a clean and dry area, protected from dust and moisture. Ensure the power cord is properly coiled and not tangled. If possible, cover the saw to provide an extra layer of protection.
- Follow Manufacturer’s Maintenance Guidelines: Every miter saw model may have specific maintenance requirements outlined by the manufacturer. Be sure to read and follow these instructions carefully to ensure proper care and prolong the lifespan of your miter saw.
By regularly maintaining and cleaning your miter saw, you’ll ensure its optimal performance and longevity. Taking the time to inspect, clean, and lubricate the necessary components will result in smoother operation and more accurate cuts, ultimately enhancing your woodworking experience.
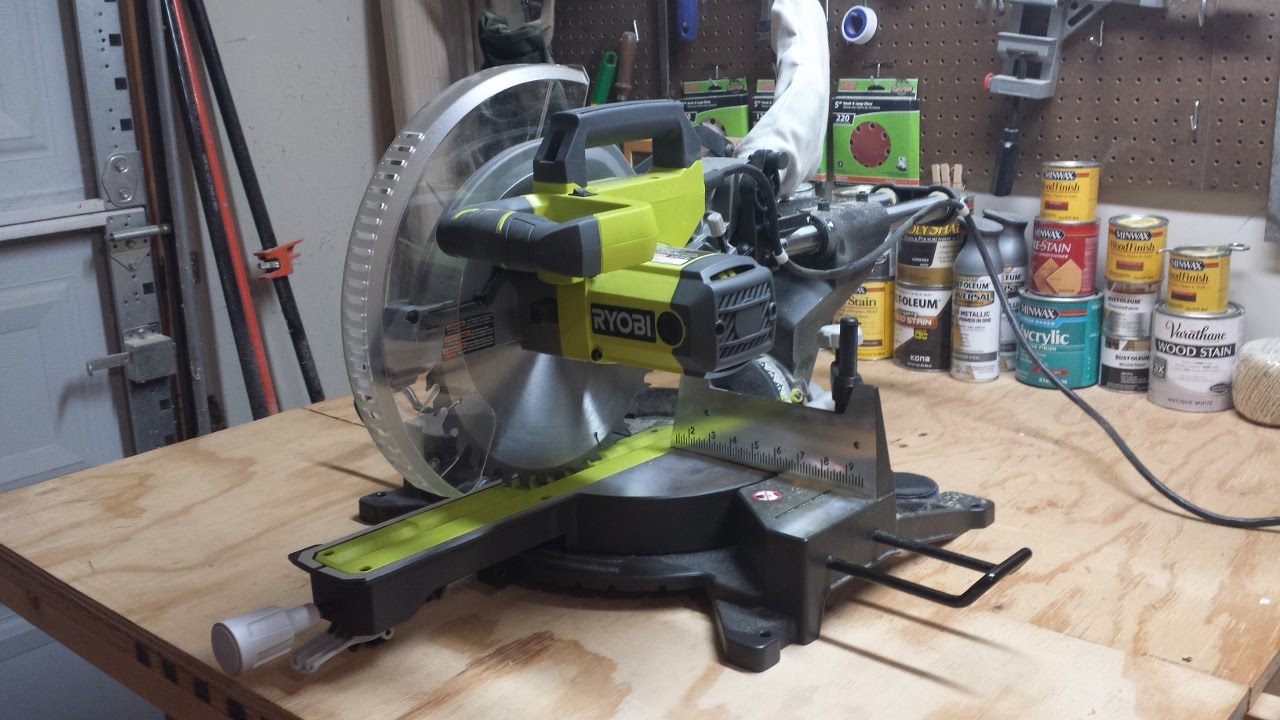
Read more: How To Unlock A Ryobi Miter Saw
Tips and Tricks for Efficient Use
Mastering the use of a miter saw involves not only following the proper techniques but also employing some tips and tricks to improve your efficiency and achieve precise cuts. Here are some valuable tips and tricks to enhance your miter saw usage:
- Use a Stop Block: To ensure consistent and accurate cuts, create a stop block by clamping a scrap piece of wood to the miter saw table. This will serve as a guide for repetitive cuts at the same length, saving time and improving accuracy.
- Utilize a Miter Sled: When working with wider boards or long pieces of material, a miter sled can provide extra support and stability. It acts as an extended fence, allowing for more precise and safer cuts.
- Make Test Cuts: Before cutting into your actual workpiece, it’s beneficial to make a test cut on a scrap piece of wood. This will allow you to fine-tune the cutting angle or bevel and ensure that the actual cut will be accurate.
- Secure Thin or Small Workpieces: When working with thin or small pieces of wood that may not provide enough surface area to be clamped securely, use double-sided tape or adhesive-backed sandpaper to hold them in place on the miter saw table.
- Support Long Workpieces: When cutting long boards or moldings, it’s helpful to have additional support to prevent sagging or wobbling during the cut. Use adjustable work supports or roller stands to provide extra stability.
- Consider a Zero-Clearance Insert: A zero-clearance insert is a custom-made throat plate that reduces tear-out and ensures cleaner cuts, especially when working with delicate or fragile materials. It provides additional support around the blade, minimizing the gap between the blade and the table.
- Use a Digital Angle Finder: For precise angle measurements, a digital angle finder can be a handy tool to have. It allows you to accurately measure and set the miter and bevel angles, eliminating guesswork and ensuring consistency.
- Keep Safety in Mind: Always prioritize safety when using a miter saw. Wear appropriate safety gear, keep your work area clear of debris, and maintain a firm grip on the saw handle. Follow all safety guidelines provided by the manufacturer and exercise caution throughout the cutting process.
- Practice Proper Technique: Regular practice and honing your technique will improve your proficiency with the miter saw. Pay attention to your body positioning, hand placement, and the direction of the cut to ensure precise and controlled movements.
- Pay Attention to Blade Selection: Using the right blade for the specific material and cut is vital. Different blades are designed for various purposes, including crosscuts, rip cuts, and specialized cuts like laminate or non-ferrous metal. Invest in a selection of quality blades for different woodworking tasks.
By incorporating these tips and tricks into your miter saw usage, you’ll be able to work more efficiently and achieve better results in your woodworking projects. Remember to practice safe and precise cutting techniques while making the most of the features and accessories available with your miter saw.
Conclusion
Using a miter saw with skill and precision can significantly elevate your woodworking projects. By following the appropriate techniques, adhering to safety precautions, and implementing the tips and tricks outlined in this article, you’ll be well-equipped to make accurate and clean cuts with confidence.
Remember to prioritize safety at all times, wearing the necessary protective gear and carefully following the manufacturer’s instructions for your specific miter saw model. Regular maintenance, including cleaning, lubrication, and alignment checks, will ensure the longevity and optimal performance of your miter saw.
Whether you’re making crosscuts, miter cuts, or bevel cuts, the versatility of a miter saw allows you to tackle a wide range of woodworking projects with precision and efficiency. With practice, your skill with the miter saw will evolve, and your ability to create intricate joinery and flawless finishes will improve.
By utilizing the laser guide, stop blocks, miter sleds, and other helpful accessories, you can enhance your accuracy and efficiency even further. Continually exploring new techniques, experimenting with different blade options, and seeking out inspiration will expand your skillset and unleash your creativity.
Ultimately, becoming proficient in using a miter saw is a journey of continuous learning and improvement. Take the time to familiarize yourself with your specific miter saw, practice different cuts, and explore the possibilities it offers. With dedication and passion, you’ll be able to produce stunning woodworking projects that showcase both your skills and the power of a miter saw.
Frequently Asked Questions about How To Use A Miter Saw
Was this page helpful?
At Storables.com, we guarantee accurate and reliable information. Our content, validated by Expert Board Contributors, is crafted following stringent Editorial Policies. We're committed to providing you with well-researched, expert-backed insights for all your informational needs.

0 thoughts on “How To Use A Miter Saw”