Articles
How To Vacuum A Car AC System
Modified: October 20, 2024
Learn the proper steps to vacuum a car AC system and ensure it's running efficiently. Discover expert articles and tips to keep your vehicle cool and comfortable.
(Many of the links in this article redirect to a specific reviewed product. Your purchase of these products through affiliate links helps to generate commission for Storables.com, at no extra cost. Learn more)
Introduction
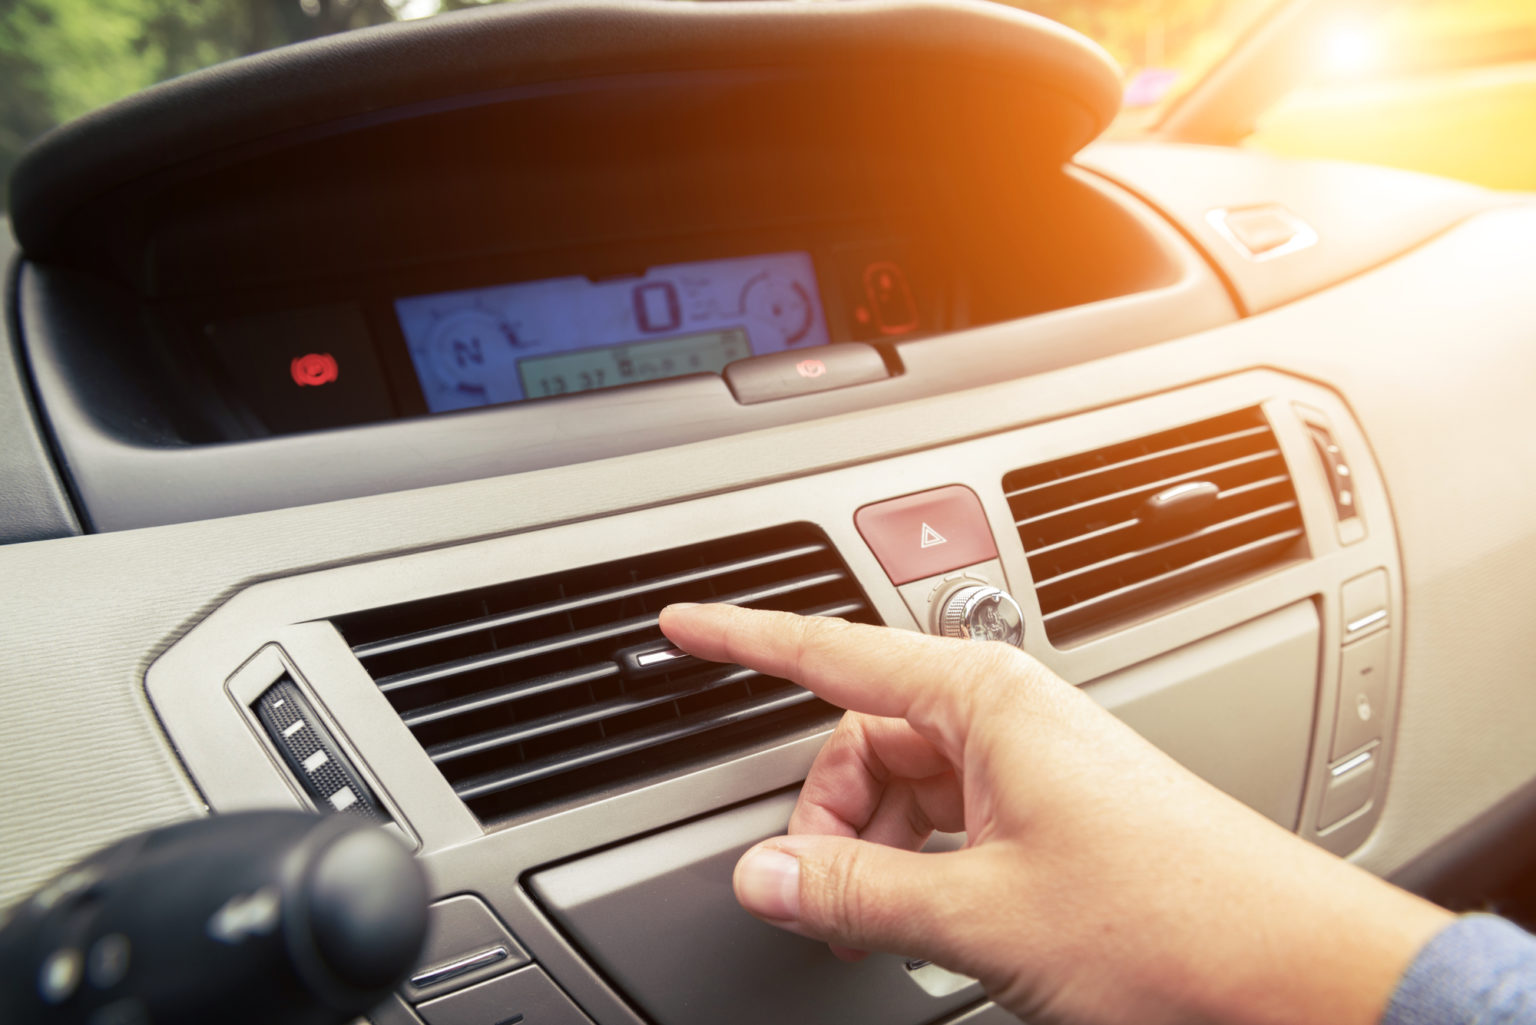
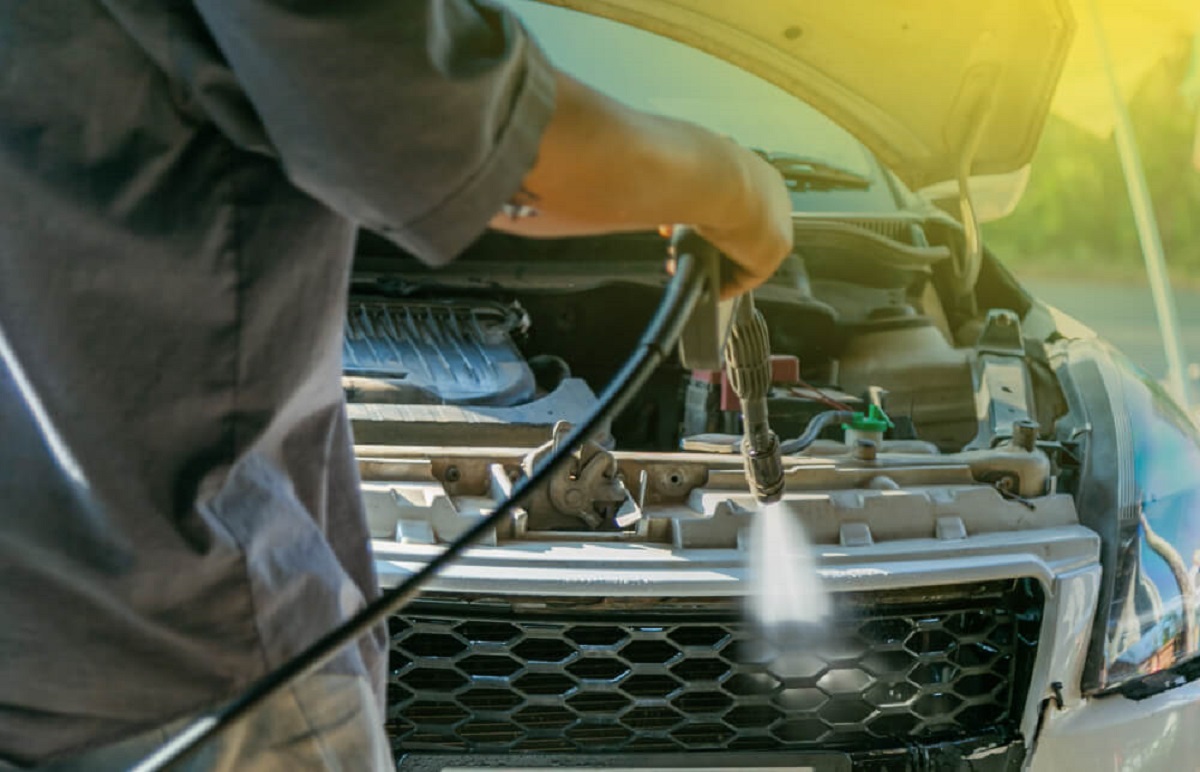
Having a functioning air conditioning (AC) system in your car is vital for a comfortable driving experience, especially during hot summer days. Over time, your car’s AC system may accumulate moisture and air bubbles, causing it to lose its cooling efficiency. To restore the optimal performance of your car’s AC system, vacuuming is an essential step in the maintenance process.
Vacuuming the car’s AC system helps to remove air and moisture that can hinder its cooling capabilities. By creating a low-pressure environment within the system, the vacuum pump removes contaminants and any residual refrigerant, preparing it for a recharge. This process ensures proper functionality and efficient cooling.
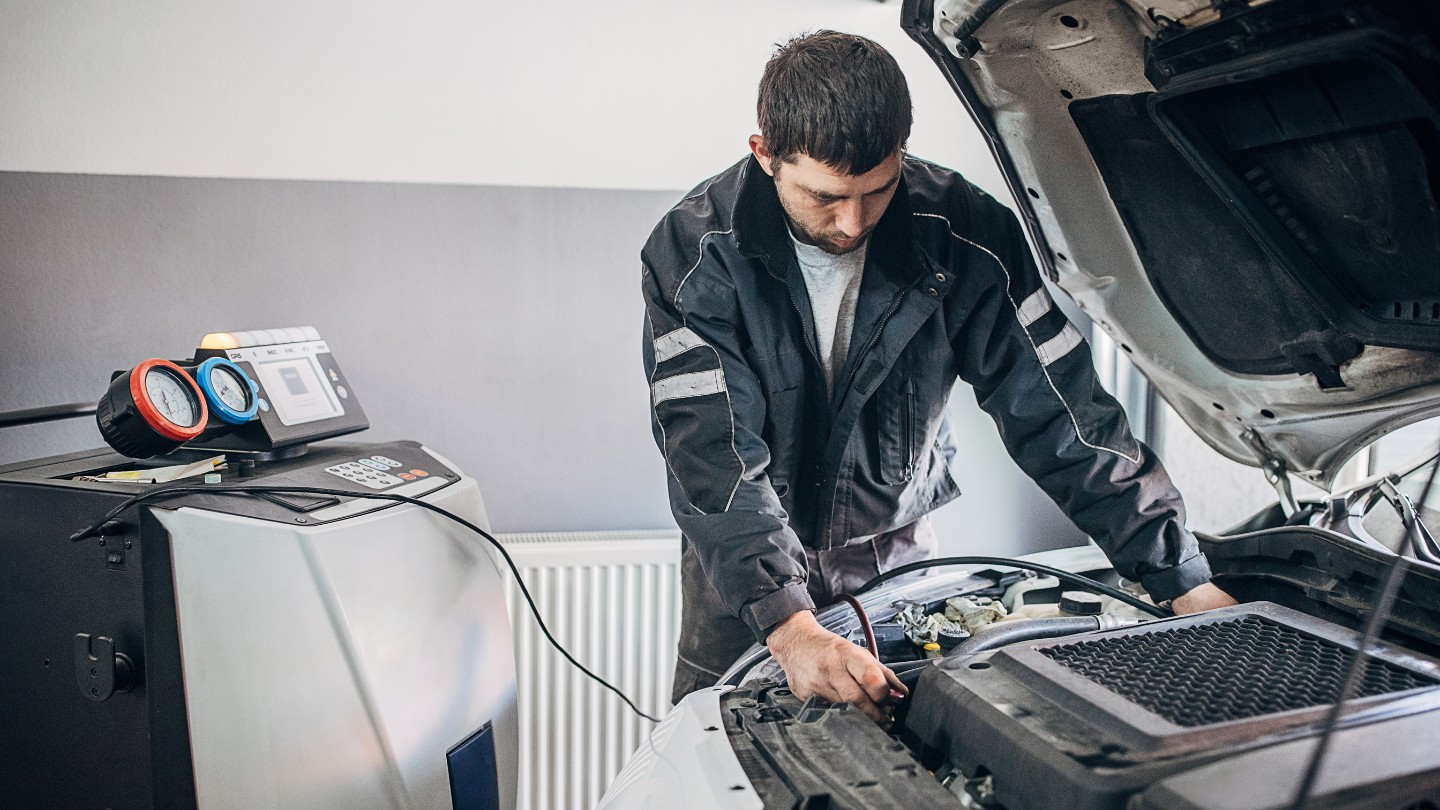
While it is possible to take your car to a professional mechanic for vacuuming, you can save money and do it yourself at home with the right tools and safety precautions. In this article, we will guide you through the step-by-step process of vacuuming your car’s AC system to help you maintain its cooling performance and keep you comfortable on the road.
Key Takeaways:
- Prioritize safety by wearing protective gear, preparing the necessary equipment, and following step-by-step instructions to effectively vacuum your car’s AC system. Regular maintenance ensures a comfortable and reliable driving experience.
- By monitoring gauges, closing valves, and safely disconnecting the vacuum pump, you can successfully complete the vacuuming process and proceed to recharge the AC system. Regular maintenance prolongs the life of the system and prevents potential issues.
Read more: How To EvACuate Car AC System At Home
Safety Precautions
Before you begin vacuuming your car’s AC system, it’s important to follow certain safety precautions to protect yourself and ensure a successful and safe procedure. Here are some essential safety measures to keep in mind:
- Make sure the engine is turned off and the car is parked in a well-ventilated area before starting any work on the AC system.
- Wear appropriate protective gear, including safety goggles, gloves, and a face mask, to shield yourself from potential refrigerant leaks and harmful chemicals.
- Ensure that the AC system is depressurized and that there is no residual refrigerant remaining. Refrigerant can be harmful if it comes into contact with your skin or eyes.
- Work in a well-lit area, as you’ll need to identify various components and access points within the AC system.
- If you are unsure about any aspect of vacuuming the AC system, consult the car’s manual or seek assistance from a professional.
- Never attempt to vacuum the AC system if you have no prior experience or if you’re not confident in your abilities. It’s always better to seek professional help if in doubt.
- Dispose of any refrigerant or other waste materials responsibly, following local environmental regulations.
By following these safety precautions, you can reduce the risk of accidents, injuries, and damage to your vehicle’s AC system. Safety should always be your top priority when working with any automotive systems.
Tools and Equipment Needed
Before you begin vacuuming your car’s AC system, gather the necessary tools and equipment to ensure a smooth and efficient process. Here’s a list of items you’ll need:
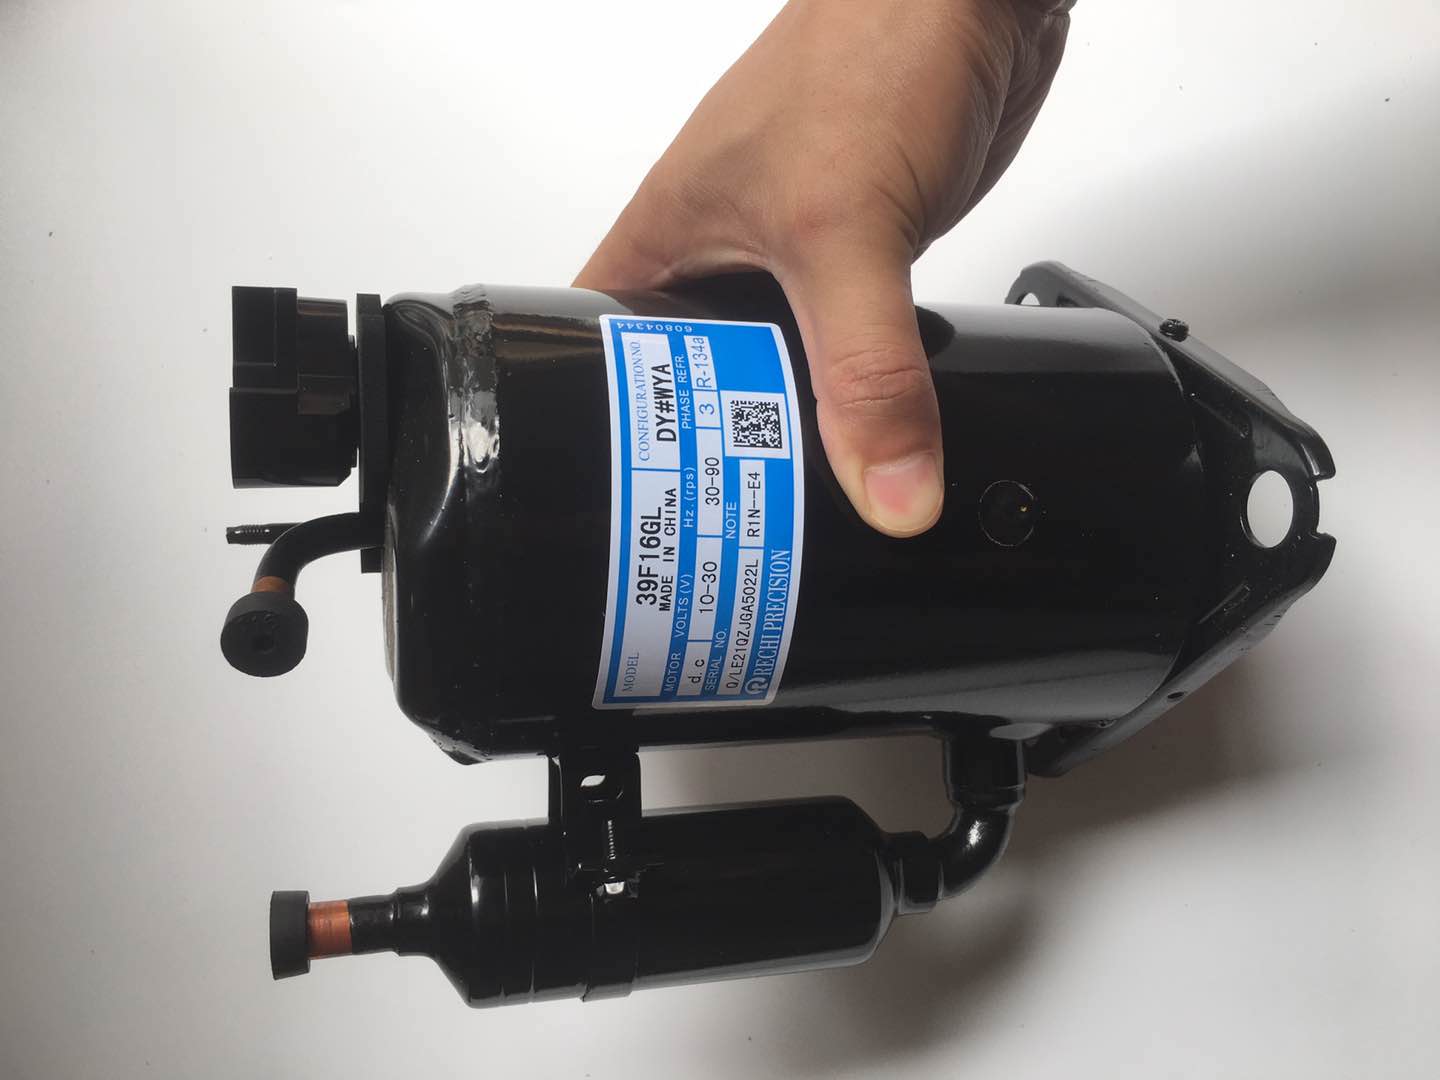
- Vacuum pump: This is the main tool used for creating a vacuum within the AC system. Make sure you have a vacuum pump specifically designed for automotive applications.
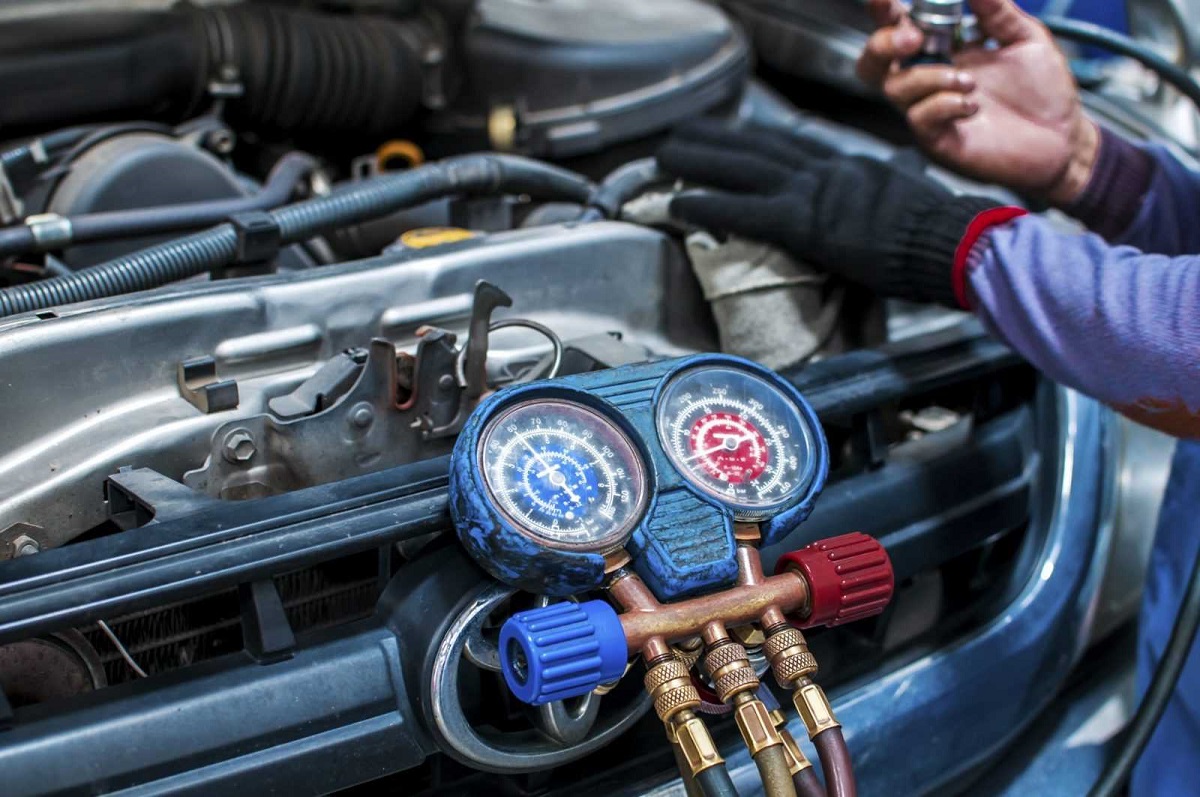
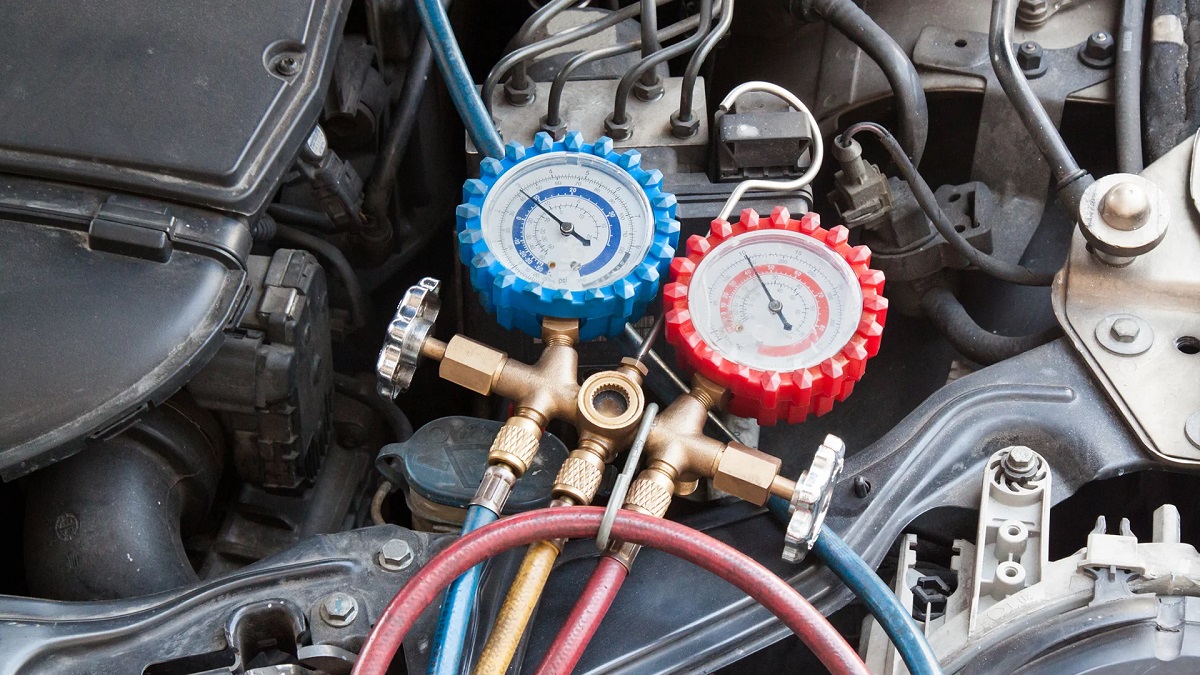
- Manifold gauge set: This set includes both low-side and high-side gauges, which help monitor the pressure within the system during the vacuuming process.
- R134a can tap: This tool allows you to connect a refrigerant can to the AC system during the recharge process.
- Torch or flashlight: This will help you better see and identify AC system components and access points in dimly lit areas.
- Refrigerant recovery tank: If you’re planning to remove and store any residual refrigerant, you’ll need a recovery tank to safely store it.
- Wrench or pliers: These tools will come in handy for tightening and loosening various AC system connections.
- Leak detection dye: If you suspect any leaks in your AC system, the dye can help you identify the source by illuminating under UV light.
- Safety goggles, gloves, and face mask: These protective gear items are essential for safeguarding yourself from any potential harm or exposure to chemicals.
- Container or bucket: Keep a container or bucket nearby to collect any liquid or debris that may come out during the vacuuming process.
Having these tools and equipment readily available will make the vacuuming process more efficient and help you complete the task with ease. Ensure that all tools are in good working condition before you begin. If any tools are damaged or malfunctioning, it’s best to replace them before starting the job.
Step 1: Wear Protective Gear
Before you start vacuuming your car’s AC system, it’s important to prioritize your safety by wearing the appropriate protective gear. This will help prevent potential injuries and ensure a safe working environment. Here are the essential protective items you should have:
- Safety goggles: Protect your eyes from any debris, refrigerant, or chemicals that may be released during the vacuuming process. Safety goggles provide a barrier and prevent any harmful substances from coming into direct contact with your eyes.
- Gloves: Wear chemical-resistant gloves to shield your hands from potential exposure to refrigerant and other chemicals. This will help prevent any skin irritation or burns that can occur from prolonged contact.
- Face mask: Use a face mask to protect yourself from inhaling any harmful fumes or chemicals. A high-quality mask will filter out particles and ensure that you can breathe comfortably while working on your car’s AC system.
Wearing protective gear is crucial as it provides a barrier between you and potentially hazardous substances. It minimizes the risk of eye irritation, skin burns, respiratory problems, and other health issues that may arise from working with automotive refrigerants.
Prioritize your safety by putting on your safety goggles, gloves, and face mask before starting the vacuuming process. Ensure that the protective gear fits properly and is in good condition. If any of the items are damaged or worn out, replace them with new ones to maintain optimal protection.
Remember, safety is paramount, and taking precautions while working on your car’s AC system will help you have a successful and incident-free experience.
Step 2: Prepare the Vacuuming Equipment
Once you’re properly geared up, it’s time to prepare the necessary equipment for vacuuming your car’s AC system. Follow these steps to ensure you have everything ready:
- Inspect the vacuum pump: Check the vacuum pump to ensure it’s in good working condition. Examine the hoses, connections, and the pump itself for any signs of damage or leaks. If any parts are faulty, repair or replace them before proceeding.
- Inspect the manifold gauge set: Take a close look at the manifold gauge set. Verify that both the low-side and high-side gauges are functioning properly and that the hoses and connections are secure.
- Connect the vacuum pump: Attach one end of the manifold gauge set’s hose to the vacuum pump’s intake port. Make sure the connection is tight and secure.
- Connect the other end of the manifold gauge set: Attach the other end of the manifold gauge set’s hose to the low-side port of the AC system. This port is typically located on the larger-diameter hose coming from the compressor.
- Secure all connections: Double-check that all connections are properly tightened to prevent any leaks during the vacuuming process.
By thoroughly inspecting and preparing your vacuuming equipment, you ensure that everything is in good working order and ready for use. Proper equipment setup is critical for a successful vacuuming process and will help you achieve the desired results.
Take your time in checking each component and connection to avoid any potential issues that may arise during vacuuming. Once you have confirmed that all equipment is in optimal condition, you can proceed to the next step with confidence.
Read more: How To Pull A Vacuum On HVAC
Step 3: Locate the AC System Components
Before you can start vacuuming your car’s AC system, you need to locate the various components within the system. This will help you identify the access points for connecting the vacuum pump and gauge set. Follow these steps to locate the AC system components:
- Identify the compressor: The compressor is usually located at the front of the engine bay. It has a pulley and a belt attached to it. Identify the compressor’s location to help you trace the AC system’s components.
- Locate the low-side and high-side ports: The low-side port is typically located on the larger diameter hose coming from the compressor. It is usually marked with an “L” or “Low.” The high-side port is usually located on the thinner hose, closer to the condenser. Look for marks or labels indicating “H” or “High.”
- Find the AC accumulator or receiver dryer: The AC accumulator or receiver dryer is a canister-shaped component usually located near the firewall or in the front of the vehicle. It acts as a filter and moisture remover in the AC system.
- Identify the AC lines: Follow the hoses and lines connected to the compressor and accumulator. These lines transport refrigerant and connect various components within the AC system. Take note of their locations as you will be connecting the gauge set and vacuum pump to these lines.
It’s crucial to familiarize yourself with the location of these components, as it will make the process of connecting the vacuum pump and gauge set much easier. Take your time to identify and understand the layout of the AC system in your car. Refer to your vehicle’s manual or online resources for more specific information on component location if needed.
Once you have successfully located the AC system components, you are ready to move on to the next step of connecting the vacuum pump to begin the vacuuming process.
Step 4: Connect the Vacuum Pump
Now that you have identified the AC system components, it’s time to connect the vacuum pump to begin the vacuuming process. Follow these steps to ensure a proper connection:
- Ensure the vacuum pump is turned off: Before connecting it to the AC system, make sure that the vacuum pump is switched off.
- Connect the intake hose: Take the hose attached to the vacuum pump and connect it to the low-side port of the AC system. Ensure that the connection is secure and tight to prevent any leaks during the vacuuming process.
- Secure the connection: Use a wrench or pliers to tighten the connection between the hose and the low-side port. This will help ensure a proper seal and prevent any air or refrigerant from escaping during the vacuuming process.
It’s important to handle the vacuum pump and hoses with care and precision during this step. Make sure you align the hose correctly with the low-side port before tightening the connection. A secure connection is crucial for an effective vacuuming process.
Once you have successfully connected the vacuum pump to the AC system, you are ready to move on to the next step and open the low-side valve to start the vacuuming process.
Step 5: Open the Low-Side Valve
With the vacuum pump connected to the low-side port, it’s time to open the low-side valve to allow the pump to create a vacuum within the AC system. Follow these steps to open the low-side valve:
- Locate the low-side valve: The low-side valve is typically located on the manifold gauge set, near the end of the hose connected to the AC system’s low-side port. It is usually marked with an “L” or “Low” label.
- Check the valve position: The low-side valve has two positions: closed and open. Ensure that the valve is closed before proceeding.
- Open the low-side valve: Slowly turn the valve counterclockwise to open it. This will allow the vacuum pump to draw air and moisture out of the AC system.
- Monitor the manifold gauge set: Keep an eye on the gauge readings as the vacuum pump operates. The low-side gauge should indicate a decrease in pressure as the system is being evacuated.
Opening the low-side valve is a critical step as it enables the vacuum pump to start creating a vacuum within the AC system. This process removes air and moisture, preparing the system for a recharge and ensuring optimal performance.
As you open the low-side valve, pay attention to the gauge readings. The pressure should gradually decrease, indicating that the vacuum pump is effectively removing air and moisture from the system. If you notice any abnormal readings or fluctuations, double-check your connections and ensure that the valve is properly opened.
Once the low-side valve is open, the vacuuming process will commence. It is recommended to let the system vacuum for around 30 minutes to ensure a thorough evacuation. During this time, keep a close watch on the gauges and monitor the progress.
When vacuuming a car AC system, make sure to use a vacuum pump to remove any air and moisture from the system before recharging it with refrigerant. This will ensure optimal performance and prevent damage to the components.
Step 6: Start the Vacuum Pump
With the low-side valve open, it’s time to start the vacuum pump and initiate the vacuuming process. Follow these steps to start the pump:
- Ensure that the vacuum pump’s power switch is set to the “Off” position before starting.
- Double-check that all connections between the vacuum pump and the AC system are secure and tightened.
- Plug in the vacuum pump to a power source.
- Switch on the vacuum pump by turning its power switch to the “On” position.
Starting the vacuum pump is a crucial step as it initiates the process of creating a vacuum within the AC system. The pump draws air and moisture out of the system, preparing it for a recharge and ensuring optimal cooling performance.
As the vacuum pump operates, you might hear a humming or buzzing sound, indicating that it is working correctly. Additionally, you may notice the gauge readings on the low-side and high-side gauges changing as the vacuum pump removes air and moisture from the system.
During this step, it’s important to be patient and allow the vacuum pump to do its job for the recommended time, usually around 30 minutes. Avoid interrupting the process to ensure a thorough evacuation of the AC system.
Once the vacuum pump is running, you can proceed to the next step and monitor the gauges and valve to ensure a successful vacuuming process.
Read more: How To Check AC Pressure In Car
Step 7: Let the System Vacuum for 30 Minutes
Once the vacuum pump is running, it’s important to allow the AC system to vacuum for approximately 30 minutes. This duration gives the pump enough time to remove air and moisture, ensuring a thorough evacuation. Follow these steps to let the system vacuum:
- Monitor the manifold gauge set: Keep a close eye on the readings displayed on the low-side and high-side gauges throughout the vacuuming process.
- Observe the pressure readings: The gauge readings will gradually decrease, indicating the removal of air and moisture from the AC system.
- Check for stable pressure: Once the pressure readings stabilize and stop decreasing, it indicates that the majority of the air and moisture has been removed.
- Carry out the full 30-minute vacuuming process: During this time, avoid opening any valves or interrupting the process. Allow the vacuum pump to operate continuously for the full recommended duration to achieve a complete evacuation.
It’s crucial to let the system vacuum for the specified duration as it ensures the removal of air, moisture, and any other contaminants that may hinder the performance of the AC system. Following the recommended time frame will result in a more effective vacuuming process.
Keep in mind that the duration may vary depending on the specific requirements of your car’s AC system. Always refer to the manufacturer’s recommendations or consult your vehicle’s manual for more accurate vacuuming time guidelines.
Once the 30-minute vacuuming process is complete, you can proceed to the next step and monitor the gauges and valve before closing the low-side valve to prepare for recharging the AC system.
Step 8: Monitor the Gauges and Valve
Monitoring the gauges and valve during the vacuuming process is crucial to ensure that everything is functioning properly. Continuously observing the readings on the manifold gauge set and the position of the low-side valve will help you assess the progress of the vacuuming process. Follow these steps to monitor the gauges and valve:
- Keep an eye on the low-side gauge: The low-side gauge will indicate the pressure within the AC system. As the vacuum pump removes air and moisture, the pressure reading on the gauge should steadily decrease.
- Monitor the high-side gauge: The high-side gauge measures the pressure on the high side of the AC system. Its reading should remain relatively stable during the vacuuming process.
- Check for any unusual fluctuations or sudden pressure drops: If you notice any abnormal behavior in the gauge readings, it may indicate a possible issue with the vacuum pump or a leak within the system. If this occurs, stop the vacuuming process and inspect the system for any leaks or faults.
- Observe the low-side valve position: Ensure that the low-side valve remains open throughout the vacuuming process. It should be adjusted only when necessary, such as during system troubleshooting or maintenance.
Monitoring the gauges and valve is essential to gauge the effectiveness of the vacuuming process. The stable decrease in pressure on the low-side gauge indicates that air and moisture are being effectively removed from the AC system.
However, if you notice any drastic fluctuations or sudden pressure drops, it may indicate a potential problem. In such cases, it is recommended to stop the vacuuming process and investigate for any leaks or issues that need to be addressed before proceeding.
By closely observing the gauges and valve during the vacuuming process, you can ensure a successful and thorough evacuation of the AC system, setting the stage for the next steps of the maintenance process.
Step 9: Close the Low-Side Valve
After the vacuuming process is complete, it’s important to close the low-side valve to prevent any air or moisture from entering the AC system. Follow these steps to close the low-side valve:
- Check the gauge readings: Ensure that the pressure readings on the low-side and high-side gauges have stabilized and are no longer decreasing.
- Turn off the vacuum pump: Switch off the vacuum pump by turning its power switch to the “Off” position.
- Carefully close the low-side valve: Using a wrench or pliers, turn the low-side valve clockwise to close it. This will isolate the AC system from the vacuum pump and prevent any air or moisture from entering.
- Confirm valve closure: Once the valve is closed, monitor the gauges to ensure that the pressure remains stable and does not increase.
Closing the low-side valve is an important step as it maintains the integrity of the vacuum within the AC system. It prevents any outside contaminants from entering and ensures that the system is ready for the next stage of the maintenance process, which is recharging the AC system.
Take care when closing the low-side valve, ensuring that you turn it clockwise to tighten it properly. A secure closure will help maintain the vacuum within the system until it’s time to recharge.
Once the low-side valve is closed, you can proceed to the next step and safely disconnect the vacuum pump from the AC system.
Step 10: Disconnect the Vacuum Pump
After closing the low-side valve and completing the vacuuming process, it’s time to disconnect the vacuum pump from the AC system. Follow these steps to safely disconnect the pump:
- Ensure that the vacuum pump is turned off and the power switch is in the “Off” position.
- Carefully remove the intake hose from the low-side port of the AC system. Loosen any fittings or connections using a wrench or pliers if necessary.
- Inspect the area: Once the vacuum pump is disconnected, examine the low-side port and hose for any signs of damage or leaks. If you notice any issues, address them before proceeding.
- Securely cap the low-side port: To prevent any debris or contaminants from entering the system, install a cap on the low-side port. This will maintain the integrity of the AC system until you’re ready to proceed with the next steps of recharging.
Disconnecting the vacuum pump signals the completion of the vacuuming process and prepares the AC system for the next stage of maintenance, which is recharging. It’s important to handle the vacuum pump and hoses with care to avoid any accidental damage or leaks during the disconnection process.
After removing the intake hose, take a moment to inspect the area for any signs of damage or leaks. It’s crucial to address any issues before moving forward with the recharging process to maintain the efficiency and performance of the AC system.
Lastly, make sure to securely cap the low-side port to protect the system from debris and contaminants. This will help ensure that the AC system remains clean and ready for the recharge process.
With the vacuum pump safely disconnected, you can now proceed to the final steps of recharging the AC system to restore its cooling efficiency.
Read more: How To Use An AC Vacuum Pump
Step 11: Recharge the AC System
After successfully completing the vacuuming process, the next step is to recharge the AC system. Recharging involves adding refrigerant to the system, restoring its cooling capabilities. Follow these steps to recharge your car’s AC system:
- Read the manufacturer’s recommendations: Consult your vehicle’s manual or refer to the refrigerant container’s instructions to determine the appropriate type and amount of refrigerant needed for your specific AC system.
- Attach the R134a can tap: Connect the R134a can tap to the refrigerant can, following the manufacturer’s instructions. The can tap allows you to safely introduce the refrigerant into the AC system.
- Connect the R134a can tap to the low-side port: Attach the R134a can tap to the low-side port of the AC system. Ensure that the connection is secure and tight to prevent any leaks.
- Start the recharge: Following the instructions on the refrigerant can, start the recharge process. This usually involves turning the valve on the can tap, allowing the refrigerant to flow into the AC system.
- Monitor the pressure and system performance: Keep an eye on the low-side and high-side gauges to monitor the pressure within the AC system. Refer to the recommended pressure guidelines to ensure proper recharging.
- Stop the recharge: Once the AC system has reached the appropriate pressure, stop the recharge process by closing the valve on the R134a can tap.
- Disconnect the R134a can tap: Carefully disconnect the R134a can tap from the low-side port. Remove the can tap from the refrigerant can and properly dispose of it as per local regulations.
- Check for leaks: After recharging, inspect the AC system for any signs of leaks. Look for visible signs of refrigerant or oil around connections and components.
Recharging the AC system restores the refrigerant levels and cooling capability. It is important to follow the manufacturer’s guidelines and recommendations for the type and amount of refrigerant to ensure optimal performance and prevent damage to the system.
Throughout the recharge process, carefully monitor the pressure readings on the gauges to prevent overcharging or undercharging the system. Maintaining the correct pressure is essential for efficient and reliable cooling.
Once the recharge is complete, check for any leaks by inspecting the AC system. Any signs of refrigerant or oil leakage should be addressed promptly. If you suspect a leak, consult a professional technician for proper diagnosis and repair.
By properly recharging the AC system, you’ll be able to enjoy the cool comfort during your drives and restore the optimal performance of your car’s air conditioning system.
Conclusion
Vacuuming your car’s AC system is a crucial step in maintaining its cooling efficiency and ensuring a comfortable driving experience. By following the step-by-step process outlined in this guide, you can successfully vacuum your car’s AC system with confidence.
Starting with the necessary safety precautions, such as wearing protective gear and working in a well-ventilated area, you prioritize your well-being throughout the maintenance process. Gathering the right tools and equipment, including a vacuum pump, manifold gauge set, and refrigerant can tap, ensures a smooth and effective vacuuming process.
The step-by-step instructions guide you through preparing the vacuuming equipment, locating the AC system components, and connecting the vacuum pump. Opening the low-side valve and letting the system vacuum for the recommended time allows for the proper removal of air and moisture.
Monitoring the gauges and valve ensures that the vacuuming process is progressing smoothly, and closing the low-side valve prevents any air or moisture from re-entering the system. Safely disconnecting the vacuum pump concludes the vacuuming process.
Finally, the step of recharging the AC system by following the manufacturer’s recommendations and monitoring the pressure helps restore the cooling capability. Checking for leaks ensures the system’s integrity and performance.
By following these steps, you can effectively vacuum your car’s AC system and maintain its optimal functionality. However, if you are unsure or uncomfortable with any part of the process, it is always recommended to seek assistance from a professional technician to ensure the best results and your safety.
Remember, regular maintenance of your car’s AC system, including vacuuming and recharging, will not only keep you cool and comfortable but also prolong the life of the system and prevent potential issues in the future.
Stay cool and enjoy the refreshing breeze of a well-functioning AC system on your future drives!
Now that you've mastered vacuuming your car's AC system, you might wonder about professional repair options for more complex issues. If your AC isn't cooling as effectively as before, even after a thorough vacuum, checking out our detailed guide on reliable car AC repair services could be your next best step. This resource offers practical advice on selecting trustworthy technicians who can diagnose and fix any underlying problems with your vehicle's air conditioning.
Frequently Asked Questions about How To Vacuum A Car AC System
Was this page helpful?
At Storables.com, we guarantee accurate and reliable information. Our content, validated by Expert Board Contributors, is crafted following stringent Editorial Policies. We're committed to providing you with well-researched, expert-backed insights for all your informational needs.


0 thoughts on “How To Vacuum A Car AC System”