Articles
How To Vent A Gas Water Heater
Modified: May 6, 2024
Learn how to properly vent a gas water heater with our informative articles. Find step-by-step guides and expert tips to ensure safe and efficient ventilation.
(Many of the links in this article redirect to a specific reviewed product. Your purchase of these products through affiliate links helps to generate commission for Storables.com, at no extra cost. Learn more)
Introduction
When it comes to venting a gas water heater, it is crucial to follow the proper guidelines to ensure safety and efficiency. Proper venting allows the harmful combustion byproducts to escape while preventing any buildup of gas or carbon monoxide in your home. Understanding the different types of venting systems and their installation processes is essential for homeowners and professionals alike.
In this article, we will discuss the various methods of venting a gas water heater, emphasizing the importance of safety precautions, determining venting requirements, and providing step-by-step instructions for installation. Additionally, we will touch on troubleshooting common venting issues and the significance of regular maintenance and inspection.
Before diving into the details, it is crucial to note that working with gas appliances and venting systems can be potentially dangerous. If you are not confident in your abilities or lack experience, it is highly recommended to consult a professional for assistance.
Now, let’s delve into the world of gas water heater venting and explore the different systems and their installation procedures.
Key Takeaways:
- Prioritize safety by understanding and following manufacturer’s instructions, local building codes, and regulations when venting a gas water heater. Taking necessary precautions can mitigate potential risks.
- Regular maintenance and inspection are essential for the longevity and efficiency of a gas water heater’s venting system. By conducting routine tasks, potential issues can be identified and addressed promptly.
Read more: How To Restart A Gas Water Heater
Safety Precautions
When venting a gas water heater, safety should always be the top priority. Proper installation and adherence to safety guidelines can prevent accidents, ensure efficient operation, and protect the well-being of your household. Here are some essential safety precautions to keep in mind:
- Read the manufacturer’s instructions: Before starting any installation or maintenance work, thoroughly read the instructions provided by the water heater manufacturer. Familiarize yourself with the specific requirements and recommendations for venting.
- Ensure proper ventilation: Gas water heaters produce combustion byproducts, including carbon monoxide. It is crucial to have adequate ventilation to allow these gases to safely escape outdoors. The venting system must comply with local building codes and guidelines specified by the manufacturer.
- Inspect for gas leaks: Before starting any installation or maintenance work, check for gas leaks. Use a gas leak detector or a soapy water solution to test for any leaks in the gas connections. If you detect a strong odor of gas, turn off the gas supply immediately and contact a professional.
- Work in a well-ventilated area: Ensure that the area where you are working is well-ventilated. Open doors and windows to provide fresh air circulation while working on the venting system. Avoid working in confined spaces or areas without proper airflow.
- Use appropriate tools and equipment: When working with venting systems, use the proper tools and equipment as recommended by the manufacturer. This includes pipe cutters, wrenches, sealants, and any other specialized tools required for the specific installation method.
- Wear protective gear: Protect yourself by wearing safety goggles, gloves, and a mask to prevent any injuries or exposure to harmful substances such as dust, fumes, or insulation fibers.
- Turn off the gas and electricity: Prior to any installation or maintenance work, ensure that the gas supply and electricity to the water heater are turned off. This will prevent any accidents or electrical shocks during the process.
- Observe clearances and fire safety: Maintain clearances as specified by the manufacturer between the venting system and combustible materials such as insulation, walls, and ceilings. This will minimize the risk of fire and ensure the proper functioning of the vent.
- Regularly check for vent blockages: Periodically inspect the venting system for any blockages, such as debris or bird nests. Ensure that the vents are clear and unobstructed to allow for proper airflow and venting of the combustion byproducts.
- Seek professional assistance if unsure: If you are uncertain about any aspect of venting a gas water heater or encounter any issues, it is best to seek the help of a qualified professional. They have the expertise to ensure a safe and efficient venting system.
By following these safety precautions, you can minimize the risks associated with gas water heater venting and prioritize the well-being of your household.
Determine Venting Requirements
Before proceeding with the installation of a venting system for your gas water heater, it is crucial to determine the specific venting requirements. These requirements may vary depending on the type and model of your water heater, as well as local building codes and regulations. Here are some key factors to consider when determining the venting requirements:
- Water Heater Type: Different types of gas water heaters may have specific venting requirements. Common types include atmospheric vent, power vent, and direct vent water heaters. Consult the manufacturer’s instructions or the water heater’s documentation to identify the appropriate venting system.
- Location of the Water Heater: The location of the water heater within your home plays a significant role in determining venting requirements. Indoor water heaters typically require a venting system that directs combustion byproducts outside the building. Outdoor water heaters may have different venting requirements or may not require a vent at all.
- Local Building Codes: Local building codes and regulations may dictate specific venting requirements for gas appliances. These codes ensure the safety and efficiency of the venting system. Research your local building codes or consult a professional to ensure compliance with the regulations.
- Venting Material and Size: The venting material and size must comply with the manufacturer’s recommendations and local building codes. Common venting materials include metal pipes, PVC pipes, or flexible aluminum pipes. The diameter and length of the vent pipe will depend on the water heater’s BTU (British Thermal Unit) rating and the distance between the water heater and the vent termination point.
- Vertical or Horizontal Venting: Determine whether your gas water heater requires vertical or horizontal venting. This may be influenced by the water heater’s design and the available space for installation. Vertical venting involves directing the vent pipe upwards, while horizontal venting involves a horizontal run to the outside.
- Combustion Air Supply: Gas water heaters require proper combustion air supply to ensure optimal performance and safety. The amount of combustion air needed may vary based on the water heater’s BTU rating and the size of the room or enclosure where it is located. Adequate combustion air supply can be achieved through the use of louvered doors, vents, or a dedicated combustion air intake.
- Distance from Combustible Materials: Ensure that the venting system maintains proper clearances from combustible materials such as walls, ceilings, insulation, or other flammable objects. Follow the manufacturer’s instructions for the recommended clearances to minimize the risk of fire.
Take into account these factors when determining the venting requirements for your gas water heater. This will ensure a safe, efficient, and compliant venting system that meets the specific needs of your water heater and your local building codes. If you are unsure about any aspect of the venting requirements, consult a professional for guidance.
Types of Venting Systems
When it comes to venting a gas water heater, there are several types of venting systems to choose from. The type of system you select will depend on factors such as the water heater’s design, the location of the installation, and your specific needs. Let’s explore the three common types of venting systems: direct vent, power vent, and natural draft vent.
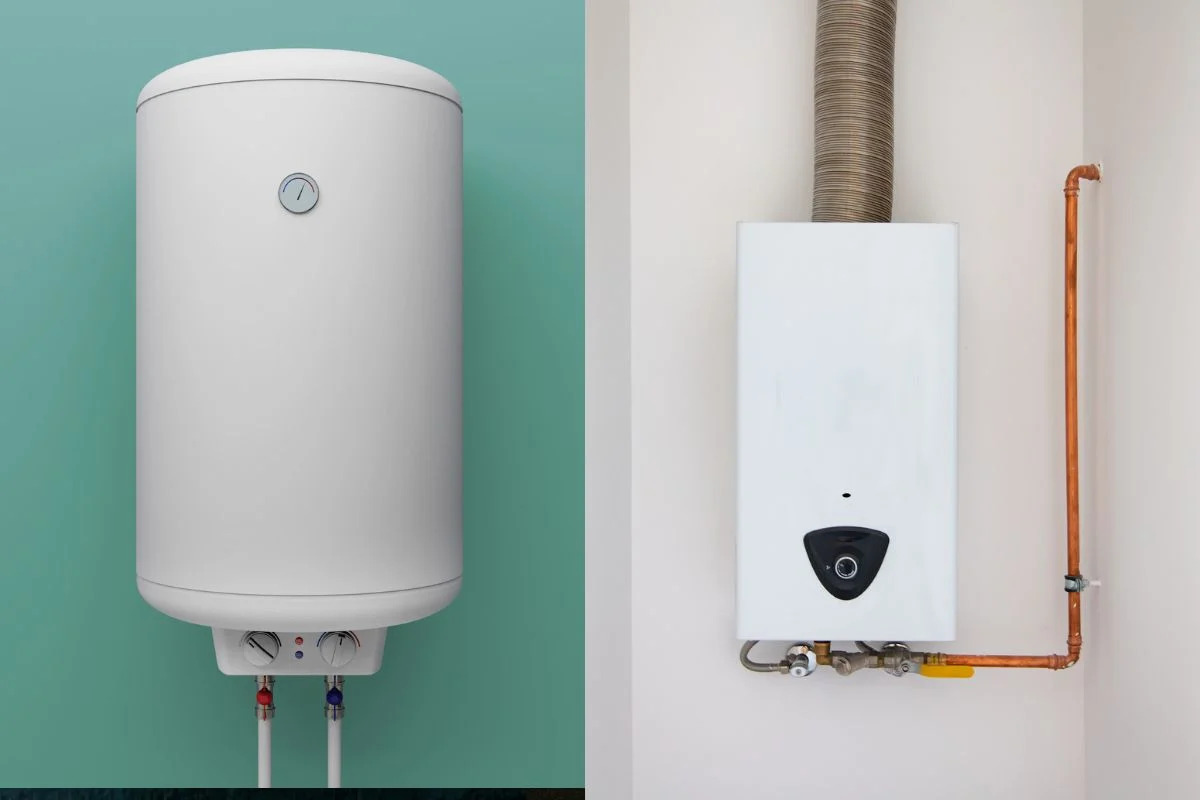
- Direct Vent System: A direct vent system is a sealed combustion system that draws air for combustion from outside the building, typically through a dedicated vent pipe. The combustion gases are then expelled directly to the outside through another vent pipe. This system does not rely on indoor air for combustion and offers high energy efficiency. It also provides greater flexibility in terms of installation location, as it can be vented horizontally or vertically.
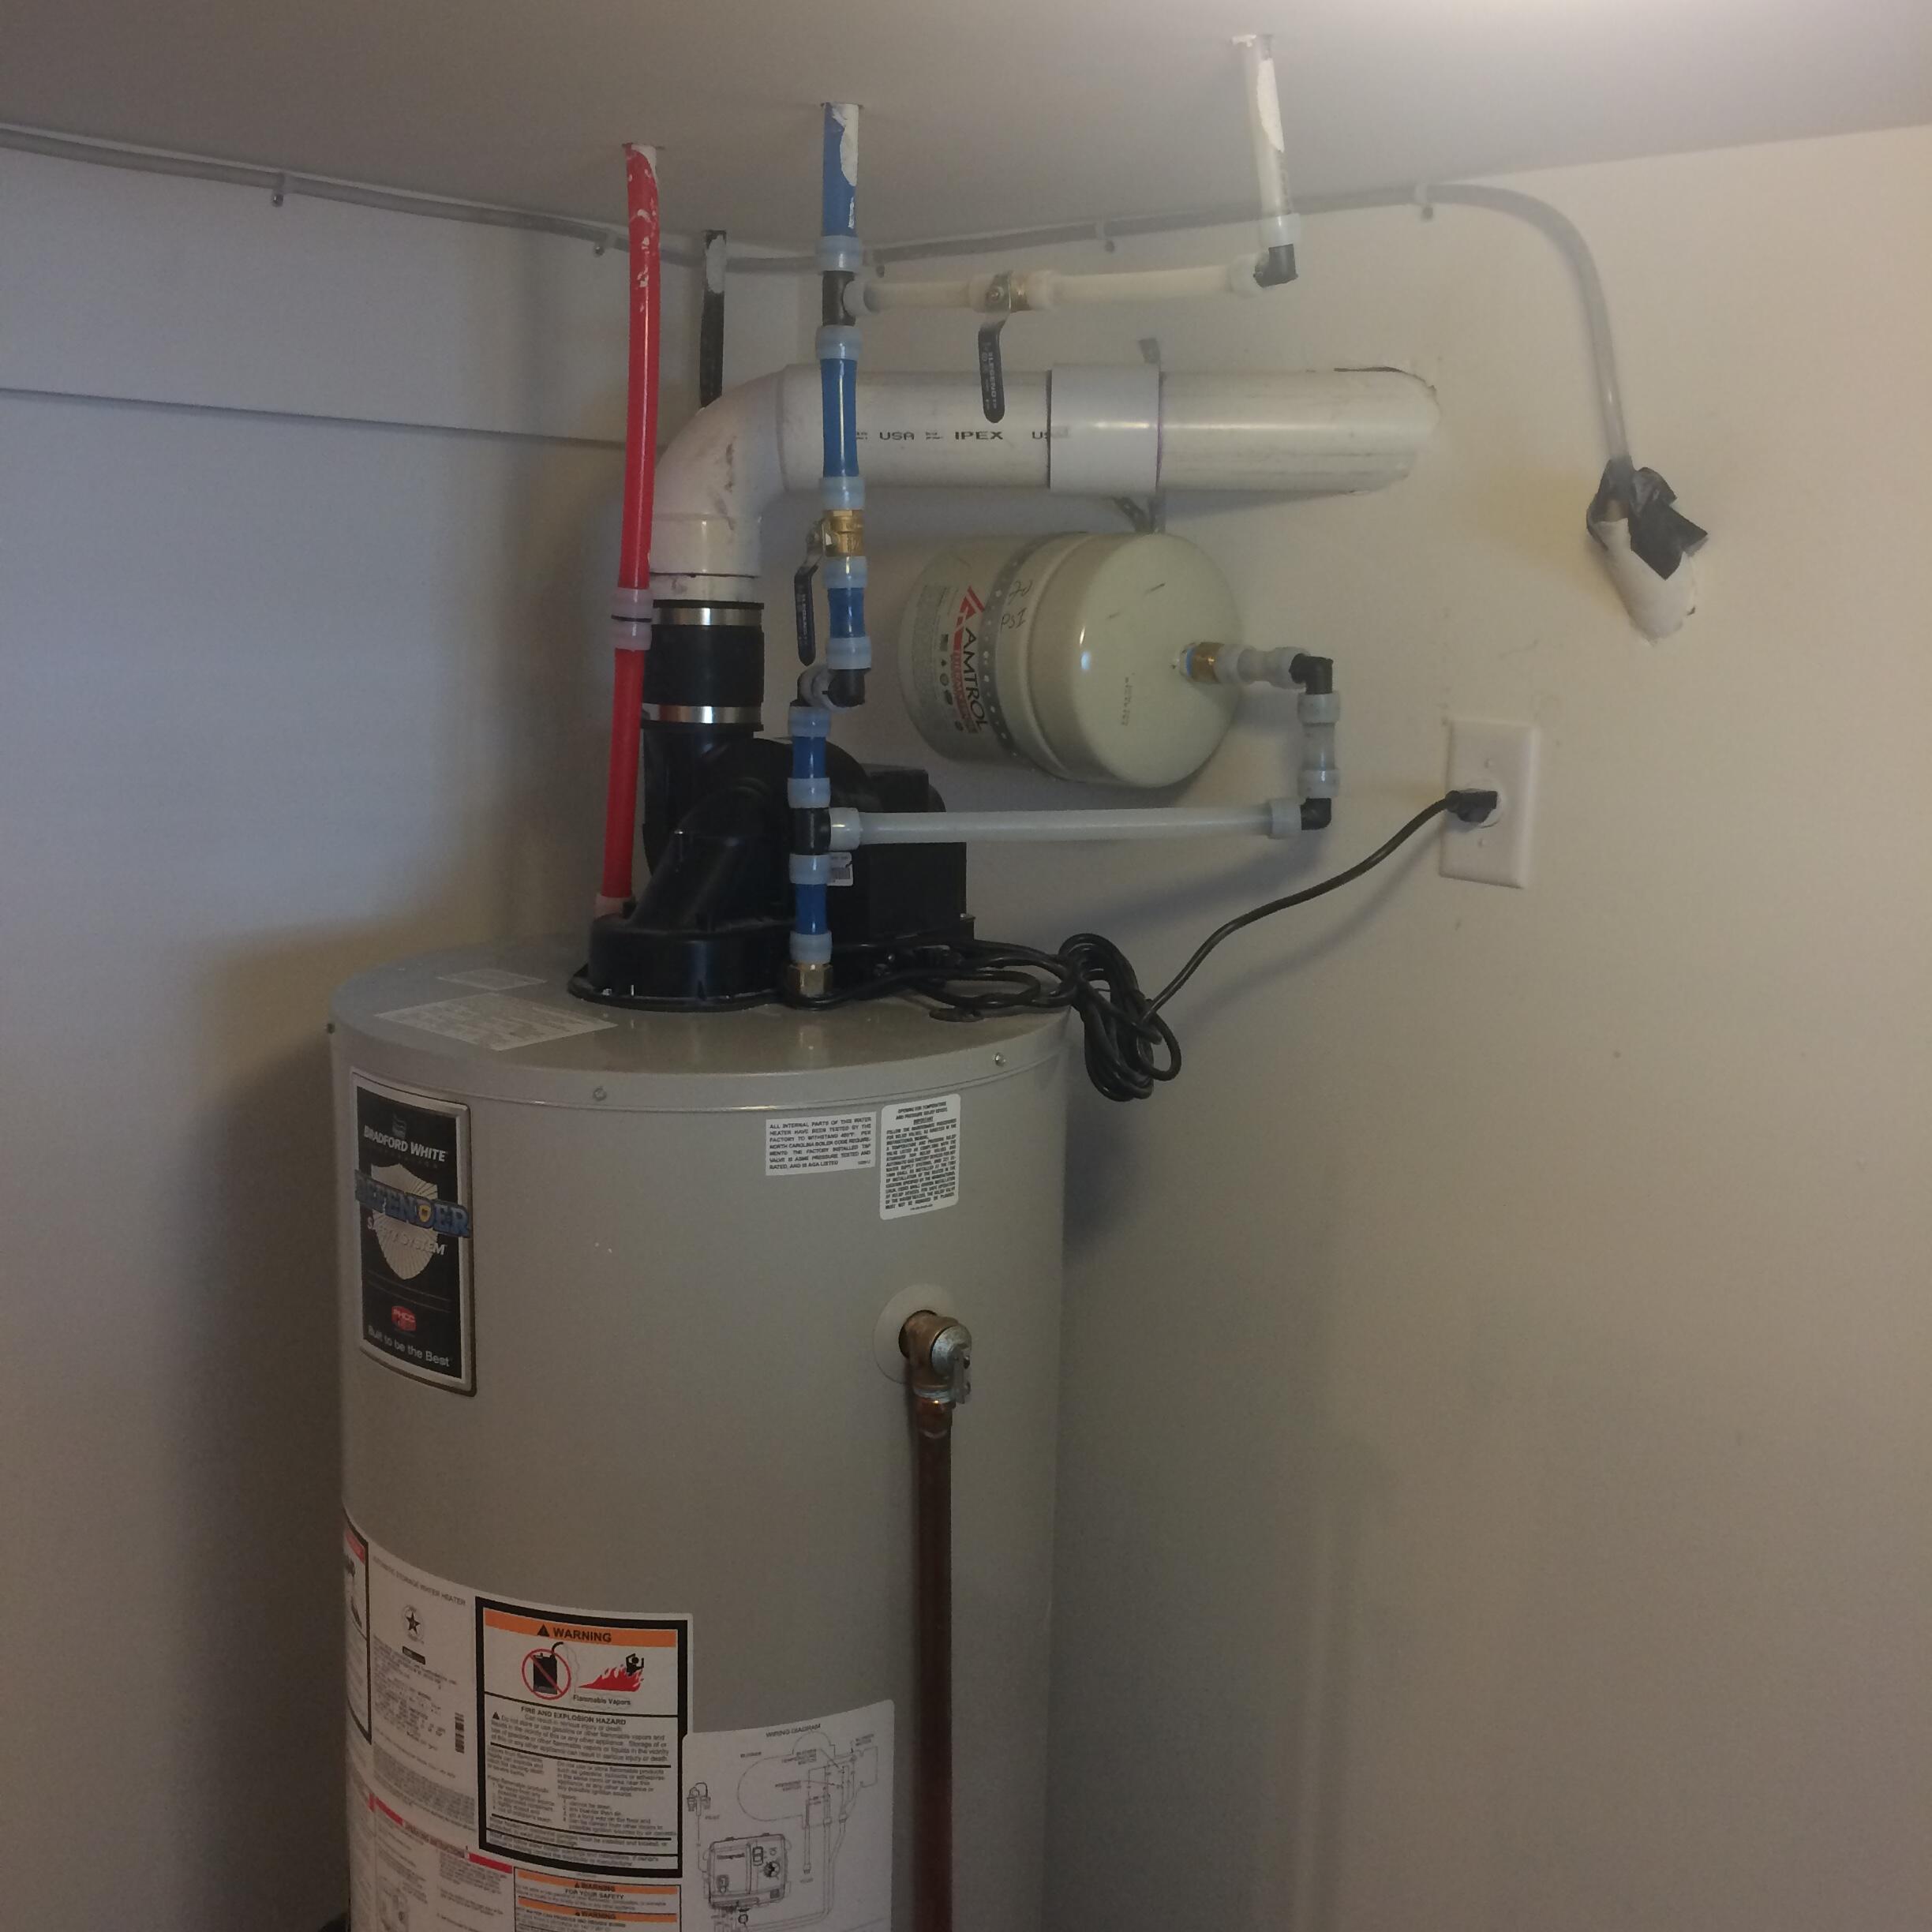
- Power Vent System: A power vent system utilizes a fan or blower to assist with the venting process. It pulls in outdoor air for combustion and exhausts the combustion gases out through a dedicated vent, typically using PVC pipes. This system is ideal when the water heater is located in an area where natural ventilation is limited or when longer venting runs are required. The power vent fan helps overcome the resistance of the vent pipe and allows for increased flexibility in placement.
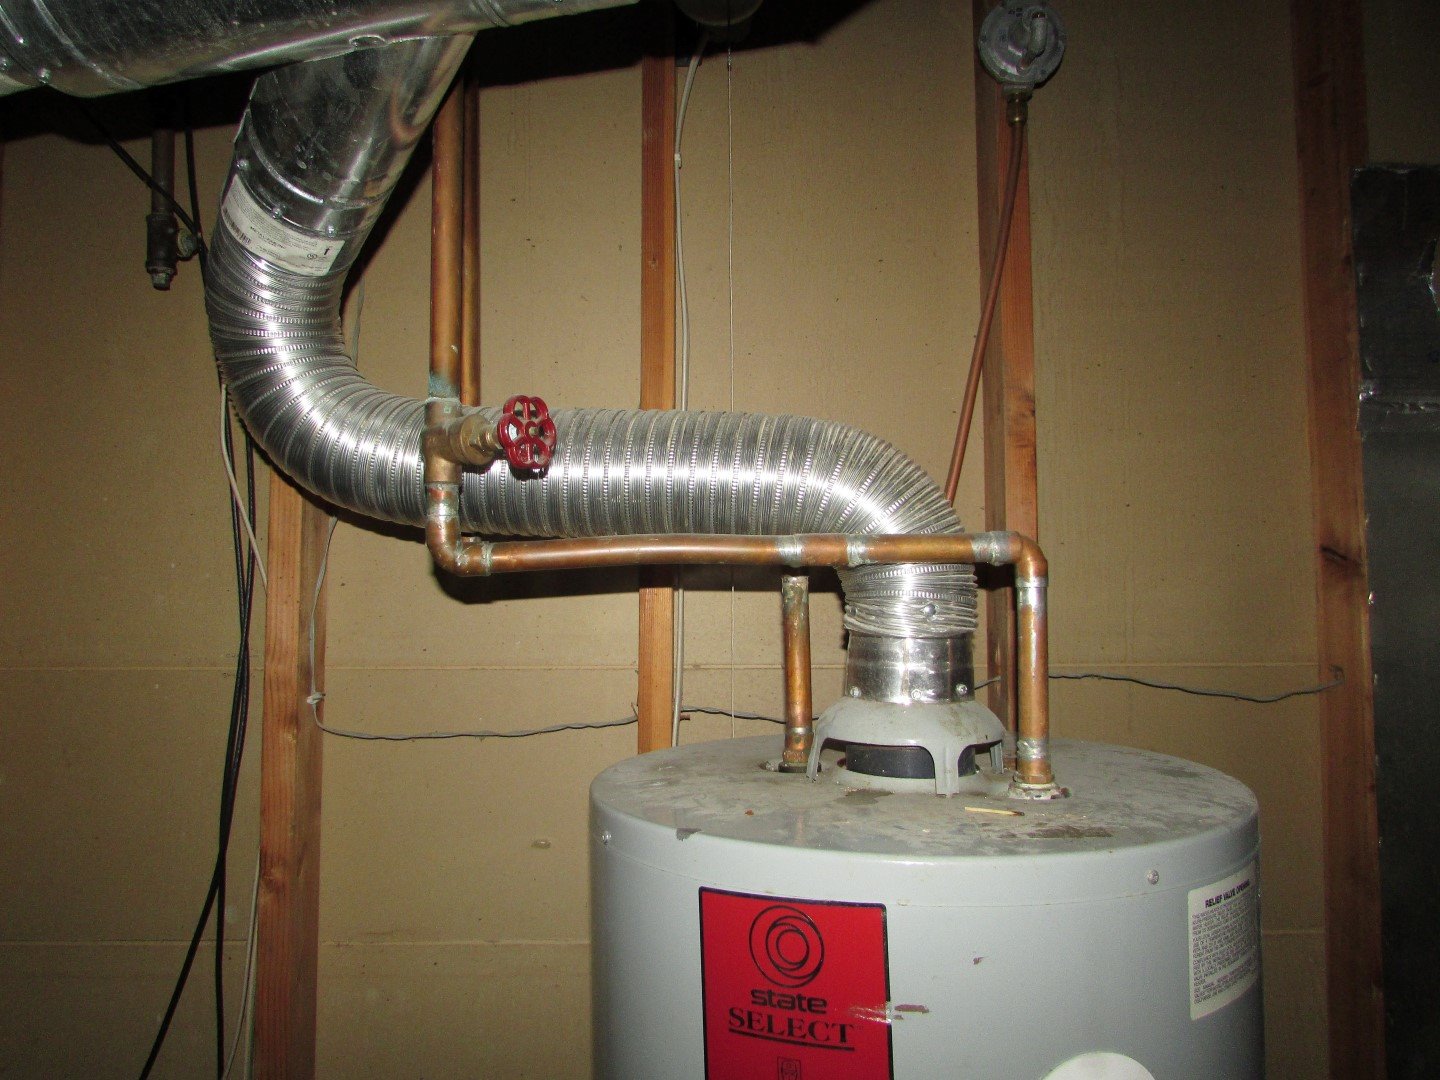
- Natural Draft Vent System: A natural draft vent system relies on the principle of hot air rising to create a natural draft that expels combustion gases. This system uses a metal chimney or flue to allow the gases to escape to the outside. Natural draft systems require proper air supply and rely on the stack effect for effective venting. It is typically used in situations where the water heater is located near an existing chimney or flue.
Each venting system has its advantages and considerations. Direct vent systems offer high energy efficiency and versatility in installation, while power vent systems are suitable for areas with limited natural ventilation. Natural draft vent systems are commonly used when an existing chimney or flue is available. Consider factors such as your home’s layout, available venting options, and local building codes to determine the most appropriate venting system for your gas water heater.
It is important to note that proper installation and adherence to manufacturer’s instructions and local building codes are crucial for the safe and effective operation of any venting system. If you are unsure about the installation process, it is recommended to consult a professional to ensure compliance and avoid potential hazards.
Direct Vent System Installation Process
The installation of a direct vent system for your gas water heater requires careful attention to detail and adherence to specific guidelines. Direct vent systems are advantageous because they are sealed combustion systems, drawing air from the outside for combustion and expelling combustion gases directly to the outside. Here is a step-by-step guide to installing a direct vent system:
- Select the appropriate location: Choose a location for your water heater that allows for proper venting. The direct vent system requires access to an exterior wall for vent pipe installation.
- Measure and cut the vent pipe: Measure the distance between the water heater and the exterior wall. Use a pipe cutter or appropriate tool to cut the vent pipe to the desired length, ensuring it reaches the exterior wall.
- Install the air intake pipe: Attach the air intake pipe to the designated intake port on the water heater. This pipe will draw fresh air from outside for combustion.
- Install the exhaust pipe: Attach the exhaust pipe to the designated exhaust port on the water heater. This pipe will carry the combustion gases to the exterior.
- Create a hole in the exterior wall: Drill a hole through the exterior wall at the appropriate height and location for the vent pipe to pass through. Ensure that there are no obstructions in the wall that could affect the venting process.
- Seal the vent pipe: Apply a high-temperature silicone sealant or approved vent pipe sealant to the joints and connections between the vent pipe sections to ensure a secure and leak-free installation.
- Attach termination cap: Install the termination cap on the exterior wall to cover the vent pipe opening. The termination cap should have a weatherproof design to prevent moisture or debris from entering the vent system.
- Test the system: After completing the installation, perform a thorough inspection of the venting system. Check for any leaks, ensure proper clearances from combustible materials, and confirm that the termination cap is securely in place.
- Turn on the water heater: Once the installation and inspection are complete, turn on the gas supply and restore power to the water heater. Verify that the water heater is functioning properly and that the venting system is effectively expelling the combustion gases to the outside.
It is vital to follow the manufacturer’s instructions and local building codes during the installation process. If you are uncertain about any aspect of the installation or encounter any issues, it is best to seek professional assistance to ensure the safe and effective operation of your direct vent system.
Make sure to always follow the manufacturer’s guidelines for venting a gas water heater to ensure proper ventilation and safety. It’s important to use the correct type and size of venting materials to prevent any potential hazards.
Read more: How To Replace A Gas Water Heater
Power Vent System Installation Process
The installation of a power vent system for your gas water heater requires careful attention to detail and adherence to specific guidelines. Power vent systems use a fan or blower to assist with the venting process by pulling in outdoor air for combustion and expelling the combustion gases through a dedicated vent. Here is a step-by-step guide to installing a power vent system:
- Select the appropriate location: Choose a location for your water heater that allows for proper venting and access to an electrical outlet. Power vent systems require both a gas supply and an electrical connection.
- Connect the vent pipe: Connect the vent pipe from the exhaust port of the water heater to the power vent unit. Ensure a secure and airtight connection using appropriate fittings and sealants specified by the manufacturer.
- Install the power vent unit: Mount the power vent unit on a nearby wall or a suitable location as specified by the manufacturer. Ensure proper clearances from combustible materials and follow the manufacturer’s instructions for mounting and securing the unit.
- Connect the air intake pipe: Attach the air intake pipe to the designated intake port on the power vent unit. This pipe will draw fresh air from outside for combustion.
- Install the termination cap: Install the termination cap at the end of the vent pipe to the exterior of your home. The termination cap should be weatherproof and designed to prevent debris or pests from entering the vent system.
- Connect the power supply: Ensure that the power vent unit is properly connected to a dedicated electrical outlet. Follow the manufacturer’s instructions for wiring and electrical connections to ensure proper operation.
- Test the system: After completing the installation, perform a thorough inspection of the power vent system. Check for any leaks, ensure proper clearances from combustible materials, and confirm that the termination cap is securely in place.
- Turn on the water heater: Once the installation and inspection are complete, turn on the gas supply and restore power to the water heater. Verify that the water heater is functioning properly and that the power vent system is effectively expelling the combustion gases to the outside.
It is vital to follow the manufacturer’s instructions and local building codes during the installation process. If you are uncertain about any aspect of the installation or encounter any issues, it is best to seek professional assistance to ensure the safe and effective operation of your power vent system.
Natural Draft Vent System Installation Process
The installation of a natural draft vent system for your gas water heater requires careful planning and adherence to specific guidelines. Natural draft systems rely on the principle of hot air rising to create a natural draft that expels combustion gases through a chimney or flue. Here is a step-by-step guide to installing a natural draft vent system:
- Select the appropriate location: Choose a location for your water heater that allows for proper venting and access to an existing chimney or flue. Ensure that the chimney or flue is in good condition and meets the necessary requirements for the water heater installation.
- Connect the vent pipe: Connect the vent pipe from the exhaust port of the water heater to the entry point of the chimney or flue. Ensure a secure and airtight connection using appropriate fittings and sealants specified by the manufacturer.
- Install the vent pipe supports: Use metal brackets or other recommended supports to secure the vent pipe along its vertical or horizontal span. This will prevent sagging, shifting, or damage to the vent pipe.
- Seal any gaps: Seal any gaps or joints with high-temperature silicone sealant or other approved sealants. This will ensure an airtight connection and prevent any leakage of combustion gases.
- Ensure proper clearance: Maintain the recommended clearance between the vent pipe and any combustible materials such as walls, ceilings, or insulation. Follow the manufacturer’s instructions for the specified clearances to avoid the risk of fire.
- Test the system: After completing the installation, perform a thorough inspection of the venting system. Check for any leaks, ensure proper clearances from combustible materials, and verify that the vent pipe is securely in place.
- Turn on the water heater: Once the installation and inspection are complete, turn on the gas supply and restore power to the water heater. Verify that the water heater is functioning properly and that the natural draft vent system is effectively expelling the combustion gases through the chimney or flue.
It is important to follow the manufacturer’s instructions and local building codes during the installation process. Proper installation and maintenance of the chimney or flue are crucial to ensure the safe and effective operation of the natural draft vent system. If you are uncertain about any aspect of the installation or encounter any issues, it is best to seek professional help to ensure compliance and avoid potential hazards.
Troubleshooting Venting Issues
Occasionally, venting issues may arise with your gas water heater that require troubleshooting to ensure efficient and safe operation. Recognizing and addressing these issues promptly can help prevent potential hazards. Here are some common venting issues and troubleshooting steps:
- Poor or weak draft: If you notice a weak or inadequate draft, it may indicate a blockage or restriction in the venting system. Inspect the vent pipe for any obstructions, such as debris, bird nests, or ice accumulation. Clear any blockages and ensure that the vent pipe is free from restrictions.
- Backdraft or downdraft: In some cases, the venting system may experience a backdraft, where combustion gases flow back into the living space, or a downdraft, where external air or downdrafts interfere with the proper venting of gases. Ensure that there are no obstructions or negative air pressure issues in and around the vent pipe. Consider installing a draft hood or vent cap to prevent backdrafts or downdrafts.
- Condensation or moisture buildup: Excessive condensation or moisture buildup within the venting system can indicate an issue with the vent pipe insulation or inadequate venting. Check for any gaps or damage in the insulation surrounding the vent pipe. Replace or repair any damaged insulation and ensure that the vent pipe is properly sealed to prevent moisture intrusion.
- Unusual smells or odors: If you detect unusual smells or odors, such as gas or sulfur, it could indicate a gas leak or improper venting of combustion byproducts. In such cases, it is crucial to shut off the gas supply and contact a professional immediately to inspect the system and address any potential safety concerns.
- Inadequate combustion air supply: Insufficient combustion air supply can affect the venting system’s performance and lead to incomplete combustion, improper venting, or backdrafts. Check for any blockages or restrictions in the air intake pipe and ensure it is free from debris or obstructions. Improve ventilation in the water heater’s location if necessary.
- Flue gas spillage: Flue gas spillage occurs when combustion byproducts, including carbon monoxide, are not properly expelled through the venting system and enter the living space. This is a serious safety issue and should be addressed immediately. Ensure that the vent pipe is adequately sized, properly installed, and free from any blockages or obstructions. Consider installing a carbon monoxide detector in the vicinity of the water heater for added safety.
If you encounter any venting issues with your gas water heater, it is essential to address them promptly and in accordance with manufacturer’s instructions and local building codes. When in doubt or if you are unable to troubleshoot the issue yourself, seek the assistance of a qualified professional to ensure the safe and efficient operation of your venting system.
Regular Maintenance and Inspection
To ensure the longevity, efficiency, and safety of your gas water heater’s venting system, regular maintenance and inspection are essential. By following a routine maintenance schedule and conducting periodic inspections, you can identify and address any potential issues before they escalate. Here are some key maintenance and inspection tasks to perform:
- Inspect for physical damage: Regularly inspect the vent pipe and components for any signs of physical damage, such as cracks, corrosion, or loose fittings. Address any issues promptly to prevent leaks or deterioration.
- Check for blockages: Inspect the vent pipe for any blockages, obstructions, or debris that may impede proper venting. Clear any debris or obstructions to maintain optimal airflow and prevent backdrafts.
- Monitor draft stability: Observe the stability of the draft while the water heater is in operation. A steady and consistent draft is essential for proper venting. If you notice any fluctuations or irregularities in the draft, investigate and address the potential causes.
- Check vent pipe connections: Ensure that all connections between the vent pipe sections are secure and properly sealed. Leaks or loose fittings can affect the venting system’s efficiency and integrity.
- Inspect insulation: Check the insulation surrounding the vent pipe to ensure it is intact and in good condition. Replace or repair any damaged or deteriorated insulation to prevent condensation or heat loss.
- Test carbon monoxide detectors: If you have installed carbon monoxide detectors in the vicinity of your gas water heater, regularly test them to ensure they are functioning properly. Carbon monoxide is a colorless and odorless gas that can be harmful if not detected in a timely manner.
- Verify clearances: Confirm that there is sufficient clearance between the vent pipe and any combustible materials, such as walls, ceilings, or insulation. Clearances should adhere to the manufacturer’s recommendations and local building codes to prevent fire hazards.
- Consult manufacturer’s instructions: Always refer to the water heater manufacturer’s instructions for specific maintenance recommendations, such as flushing sediment and inspecting other components of the water heater system.
- Schedule professional inspection: It is advisable to have a professional inspect your gas water heater and venting system periodically. They can identify any potential issues, conduct a thorough cleaning, and ensure compliance with safety standards.
By performing regular maintenance tasks and inspections, you can identify and address any venting issues or concerns in a timely manner. This will help maintain the efficiency of your gas water heater and ensure the safe operation of the venting system for years to come.
Read more: How To Vent Tankless Water Heater
Conclusion
Venting a gas water heater is a crucial aspect of ensuring the safe and efficient operation of your system. By following the proper guidelines and implementing the appropriate venting system, you can protect your home and loved ones from the harmful effects of combustion byproducts, such as carbon monoxide. Through this article, we have explored the importance of safety precautions, determining venting requirements, and the installation processes for different types of venting systems.
It is essential to prioritize safety by understanding and following the manufacturer’s instructions, local building codes, and regulations. Taking the necessary precautions, such as wearing protective gear, checking for gas leaks, and working in well-ventilated areas, can help mitigate potential risks.
When determining the venting requirements for your gas water heater, consider factors such as the water heater type, location, local building codes, venting material, and the need for proper combustion air supply. The appropriate venting system, whether it be direct vent, power vent, or natural draft vent, should be selected to meet your specific needs.
The installation of a venting system requires careful attention to detail and adherence to manufacturer’s guidelines. Whether it is the direct vent system, power vent system, or natural draft vent system, each has its own installation process with specific steps to follow. Ensuring proper sealing, clearances, and secure connections are critical for effective venting and safe operation.
Regular maintenance and inspection play a vital role in the longevity and efficiency of the venting system. By conducting routine maintenance tasks, such as inspecting for damage, checking for blockages, and verifying clearances, you can identify and address any potential issues before they escalate.
In conclusion, understanding and implementing proper venting for your gas water heater is essential for the safety and efficiency of your system. By following safety precautions, determining the venting requirements, installing the appropriate system, troubleshooting issues, and conducting regular maintenance, you can ensure a safe and reliable venting system that protects your home and promotes efficient operation of your gas water heater.
Now that you've mastered venting systems for gas water heaters, why not consider upgrading your equipment? Our next read highlights top water heater models set to make waves in 2024. Whether seeking efficiency, longevity, or power, this guide offers valuable insights to help you choose the perfect model for your home. Don't miss out on optimizing your water heating solutions!
Frequently Asked Questions about How To Vent A Gas Water Heater
Was this page helpful?
At Storables.com, we guarantee accurate and reliable information. Our content, validated by Expert Board Contributors, is crafted following stringent Editorial Policies. We're committed to providing you with well-researched, expert-backed insights for all your informational needs.

0 thoughts on “How To Vent A Gas Water Heater”