Articles
How To Replace A Gas Water Heater
Modified: August 21, 2024
Learn how to replace a gas water heater with our informative articles. Gain the knowledge and confidence to tackle this project yourself and save money.
(Many of the links in this article redirect to a specific reviewed product. Your purchase of these products through affiliate links helps to generate commission for Storables.com, at no extra cost. Learn more)
Introduction
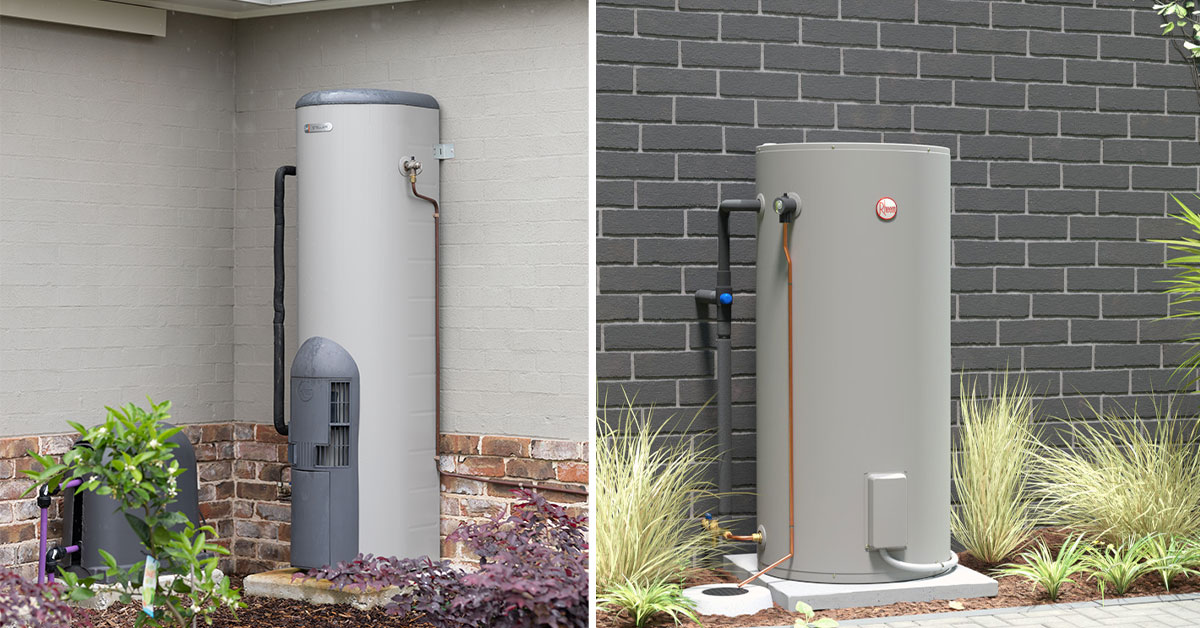
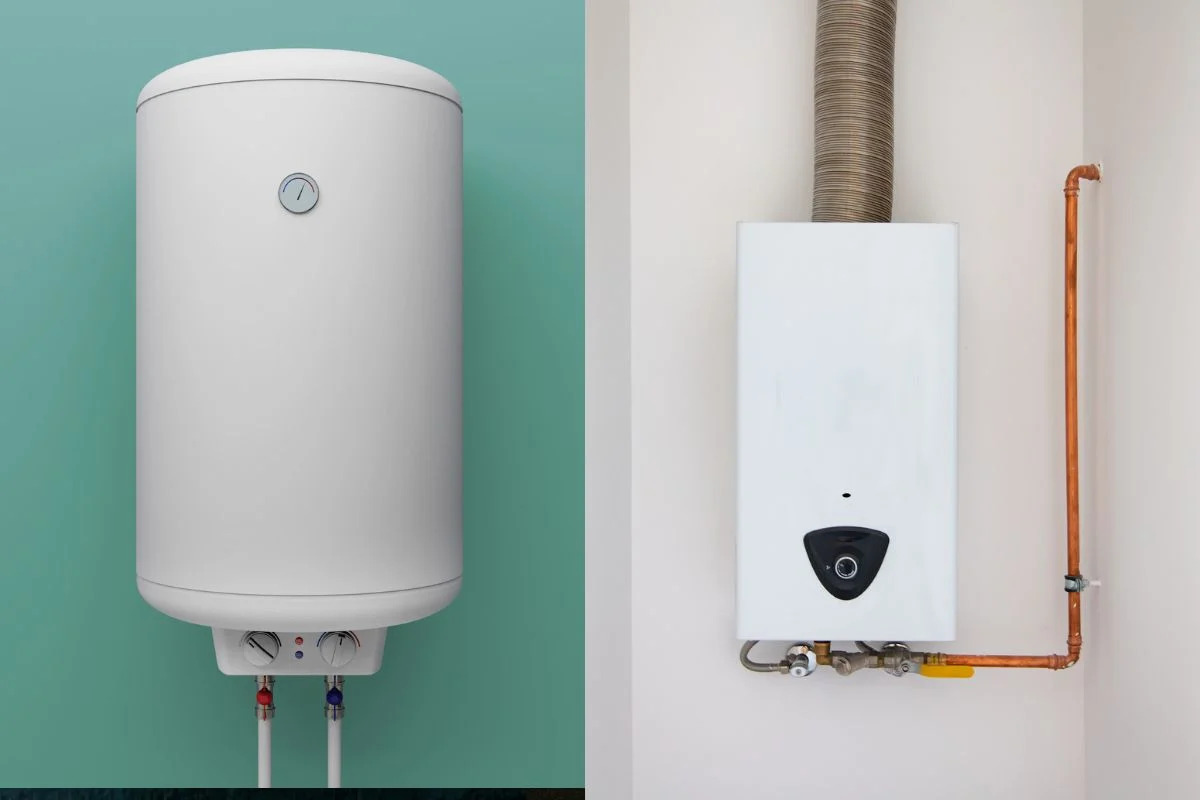
Replacing a gas water heater may seem like a daunting task, but with the right knowledge and tools, it can be a manageable do-it-yourself project. Whether your current water heater is malfunctioning or you’re looking to upgrade to a more energy-efficient model, this article will guide you through the step-by-step process of replacing a gas water heater.
Having a basic understanding of how gas water heaters work and following safety precautions is crucial before attempting any repairs or replacements. It’s important to note that if you’re not confident in completing the task or unsure about the necessary steps, it’s always best to consult a professional plumber for assistance.
In this comprehensive guide, we will cover everything you need to know to replace your gas water heater efficiently and effectively. From turning off the gas supply to connecting the water lines and testing the new unit, we’ll walk you through the process to ensure a successful installation.
Before starting the replacement process, make sure to gather all the required tools and materials. These may include an adjustable wrench, pipe wrench, pipe cutters, Teflon tape, a screwdriver, a bucket or hose for drainage, and, of course, the new gas water heater itself. It’s also essential to check the manufacturer’s instructions and warranty information for the specific model you’re installing.
Remember, safety should always be the top priority when working with gas appliances. Ensure proper ventilation and ventilation clearances, and take necessary precautions to prevent gas leaks or other hazards. When in doubt, contact a licensed professional to handle the installation.
With these important considerations in mind, let’s dive into the step-by-step process of replacing a gas water heater and restoring hot water to your home.
Key Takeaways:
- Safety First! Prioritize safety by turning off the gas supply, draining the water heater, and carefully reconnecting gas and water lines. Always consult a professional if unsure about any step to avoid potential hazards.
- Proper installation is key. Follow manufacturer’s instructions, secure all connections, and test the water heater for leaks and functionality. Enjoy a reliable supply of hot water with a successfully replaced gas water heater.
Read more: How To Replace Gas Valve On Water Heater
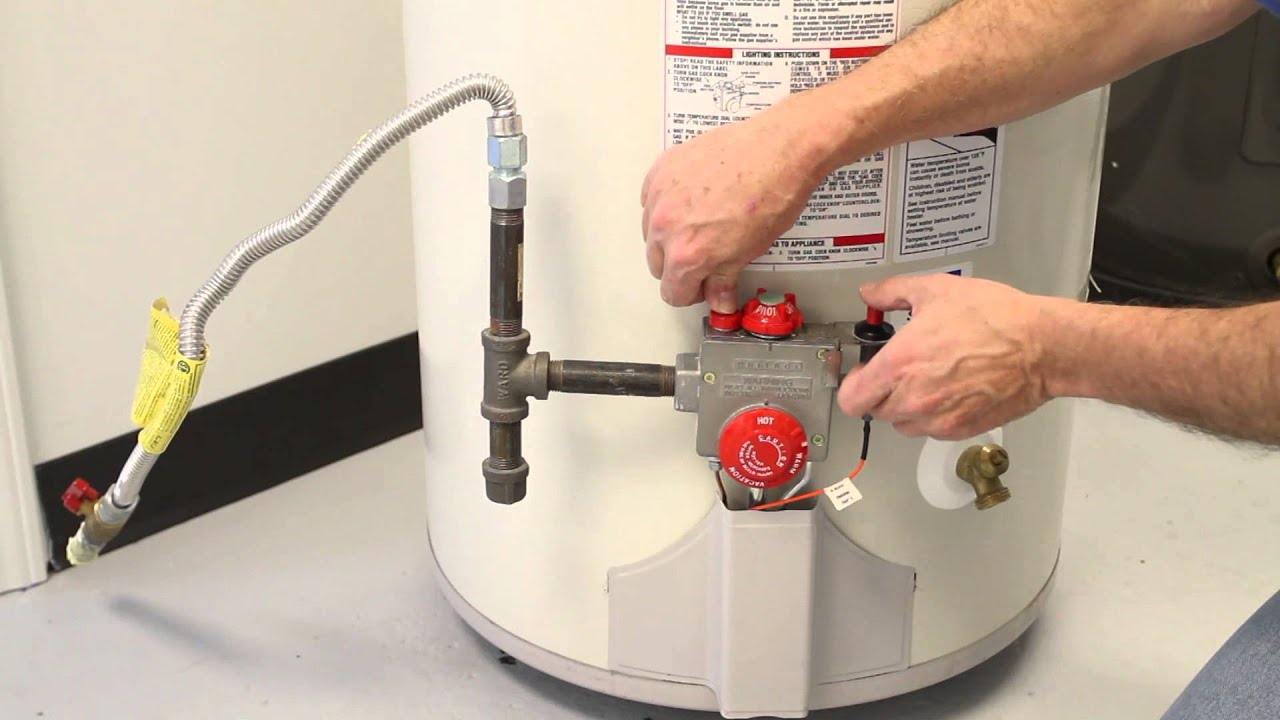
Step 1: Turn off the Gas Supply
The first and most crucial step in replacing a gas water heater is to turn off the gas supply. This ensures your safety and prevents any potential gas leaks or accidents during the installation process.
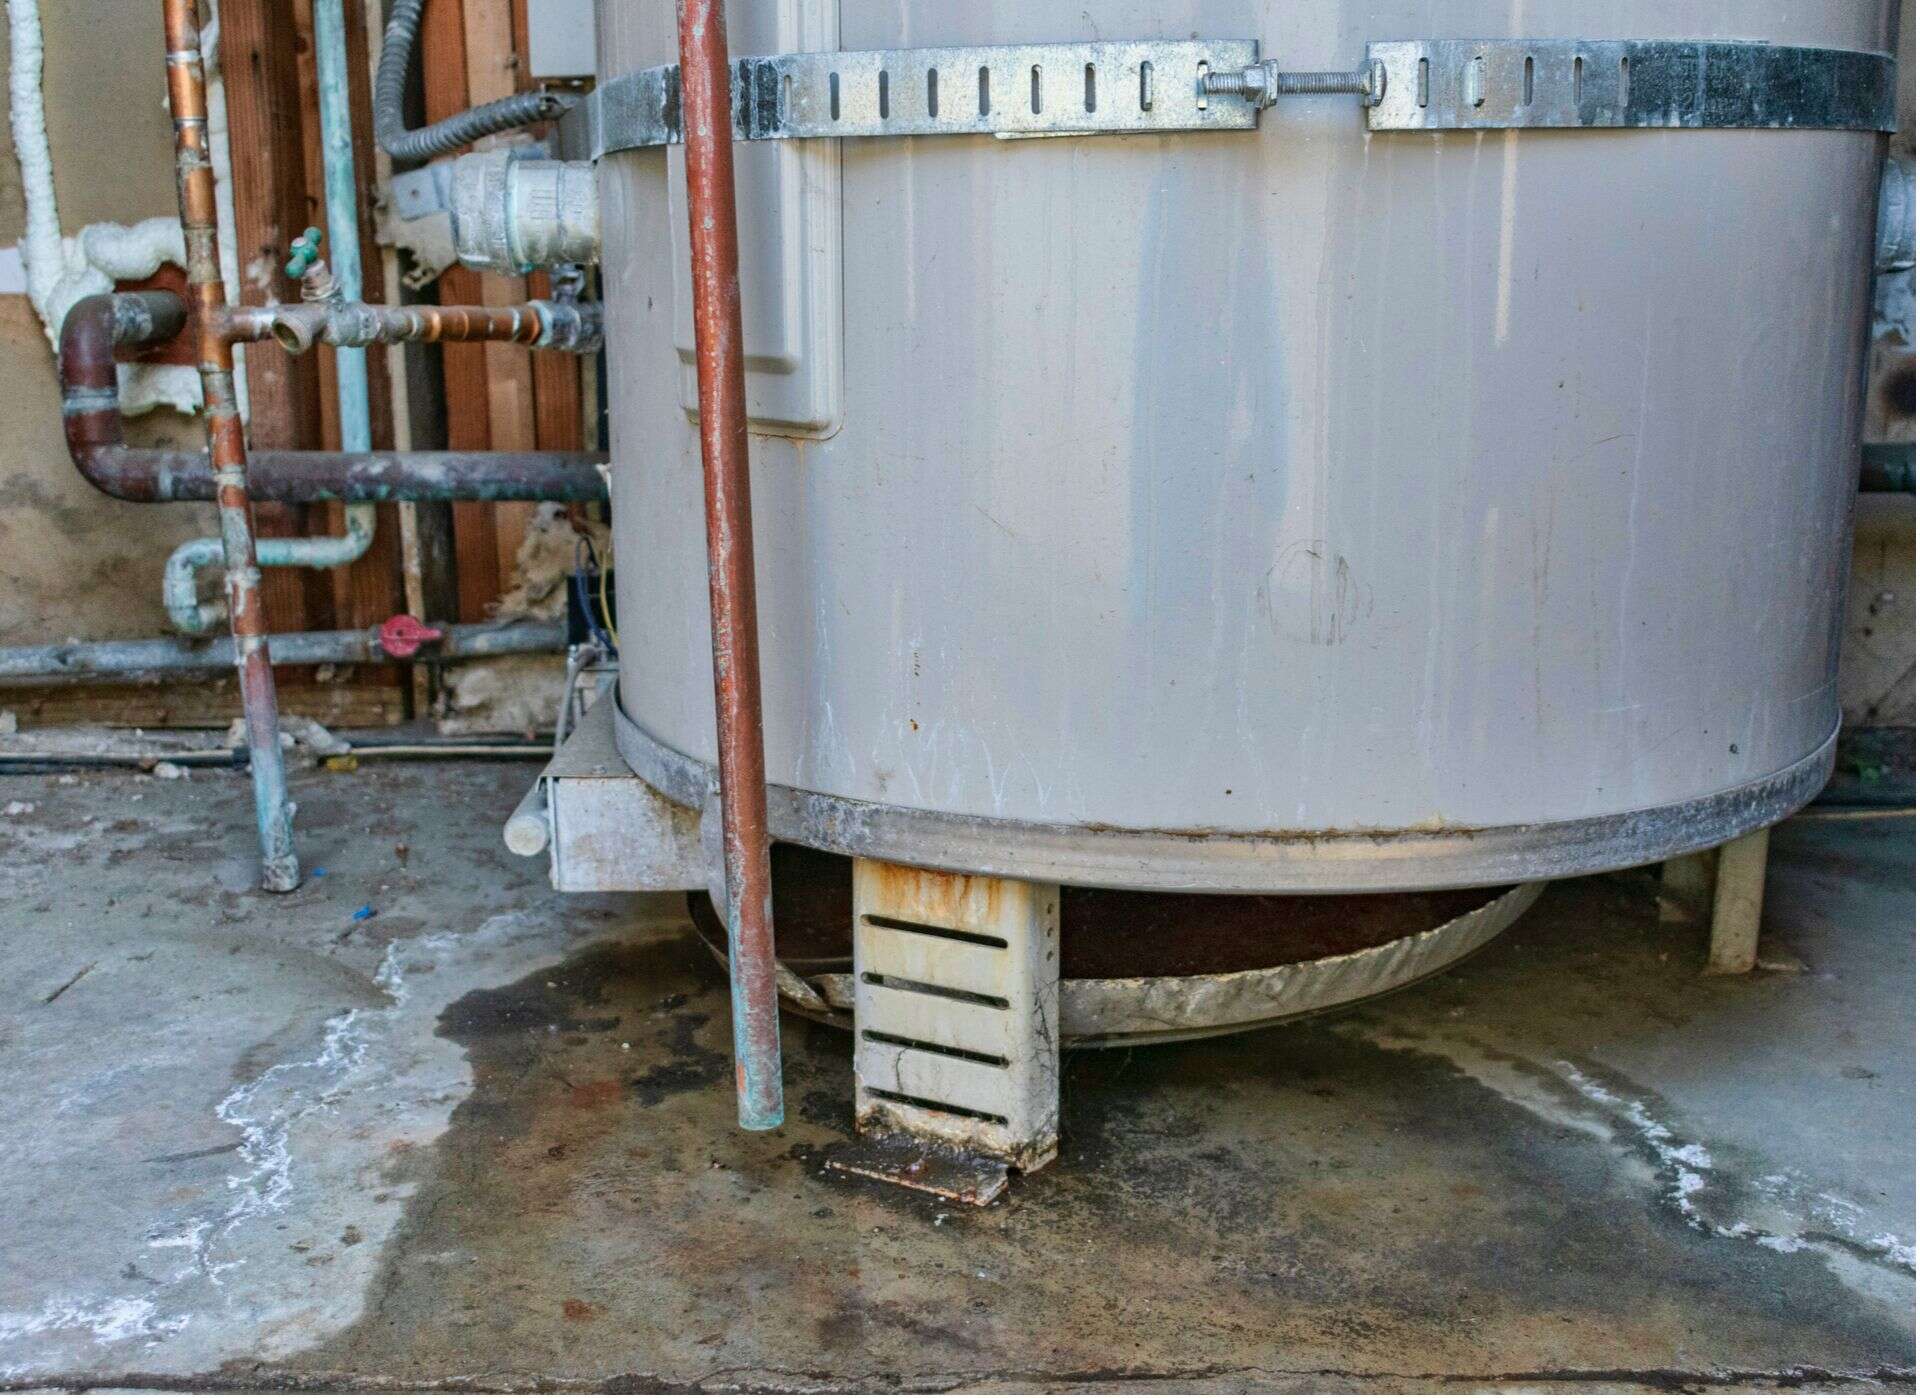
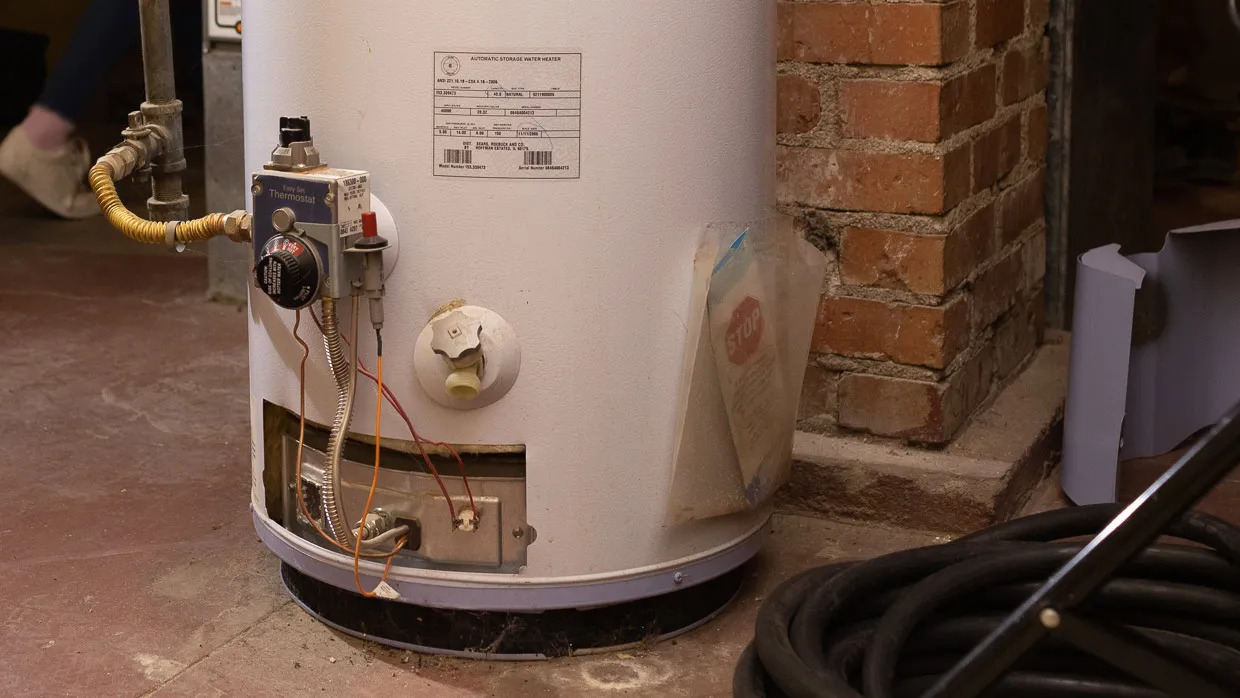
Locate the gas control valve on the current water heater. This valve is typically located near the bottom of the unit, close to the gas line connection. Rotate the valve to the “Off” position to shut off the gas supply.
Next, locate the main gas shut-off valve for your home. This valve is typically located near the gas meter or on the exterior wall of the house. Rotate the valve to the “Off” position to cut off the gas flow to the entire house.
It’s essential to ensure that the gas supply is completely turned off before proceeding with any further steps. Double-check the control valve on the water heater and the main shut-off valve to ensure they are both in the “Off” position.
To verify that the gas supply is indeed turned off, you can check the pilot light on the water heater. If it’s still lit, the gas supply has not been successfully shut off, and you should recheck the valves or call a professional for assistance.
Turning off the gas supply is a crucial safety measure that should not be skipped or overlooked. It’s important to exercise caution and take the necessary steps to prevent any potential gas-related incidents during the replacement process.
Once you’ve confirmed that the gas supply is turned off, you can proceed to the next step: draining the water heater.
Step 2: Drain the Water Heater
Before removing the old gas water heater, it’s important to drain it of any remaining water. This step prevents any water from splashing or leaking during the removal process, ensuring a clean and smooth replacement.
Start by connecting a hose to the drain valve located near the bottom of the water heater tank. Make sure the other end of the hose is positioned in a suitable drainage area, such as a floor drain or outside your home.
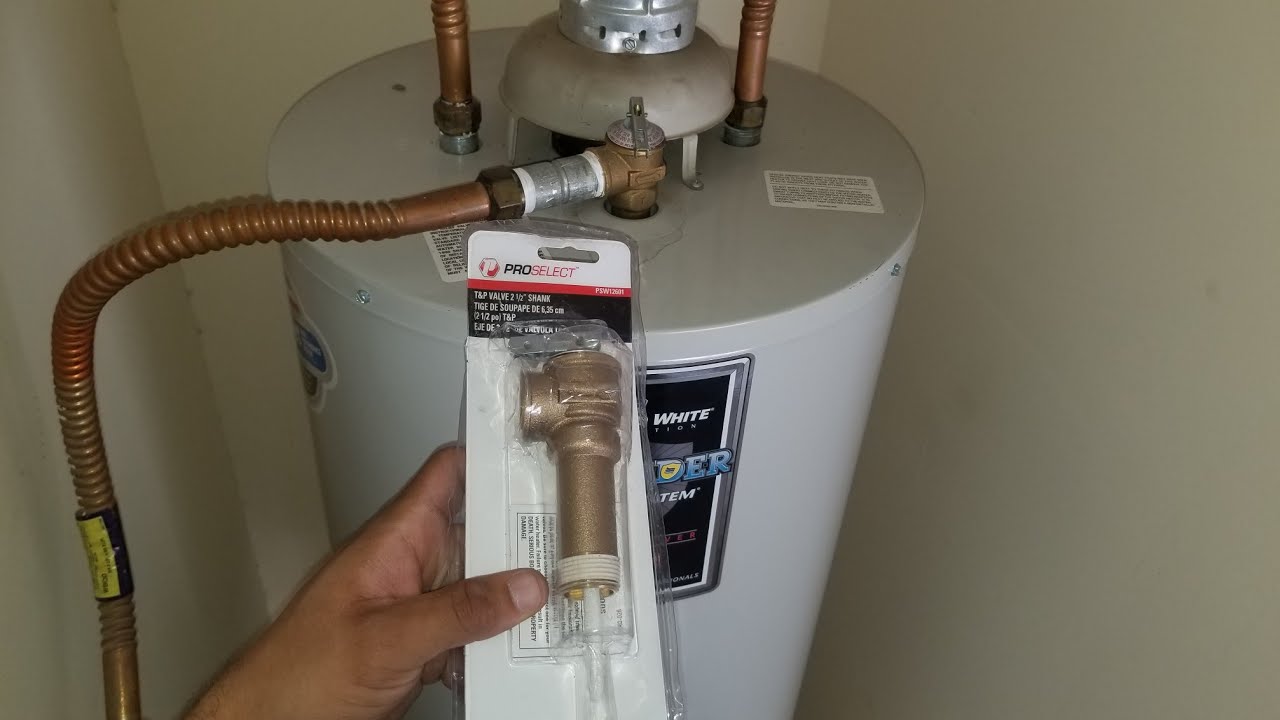
Next, locate the pressure relief valve on the top of the water heater. Lift the lever or turn the knob to open the valve. This helps to relieve any built-up pressure inside the tank and allows for easier draining.
Once the pressure relief valve is open, open the drain valve by turning it counterclockwise. The water will begin to flow out through the hose and into the drainage area. You may need to use a screwdriver or other tool to open the valve fully if it’s stiff or stuck.
It’s important to note that the water coming out of the heater may be hot, so exercise caution and use heat-resistant gloves if needed. Additionally, be mindful that the water may contain sediment, so it’s best to direct it to an appropriate drainage location.
Allow the water heater to fully drain by leaving the drain valve open until the water stops flowing. Once the tank is empty, close the drain valve by turning it clockwise.
To ensure that the tank is completely drained, you can briefly open a hot water faucet in your home. This helps to release any remaining water or pressure from the system.
Now that the water heater is drained, you can move on to disconnecting the gas line in the next step.
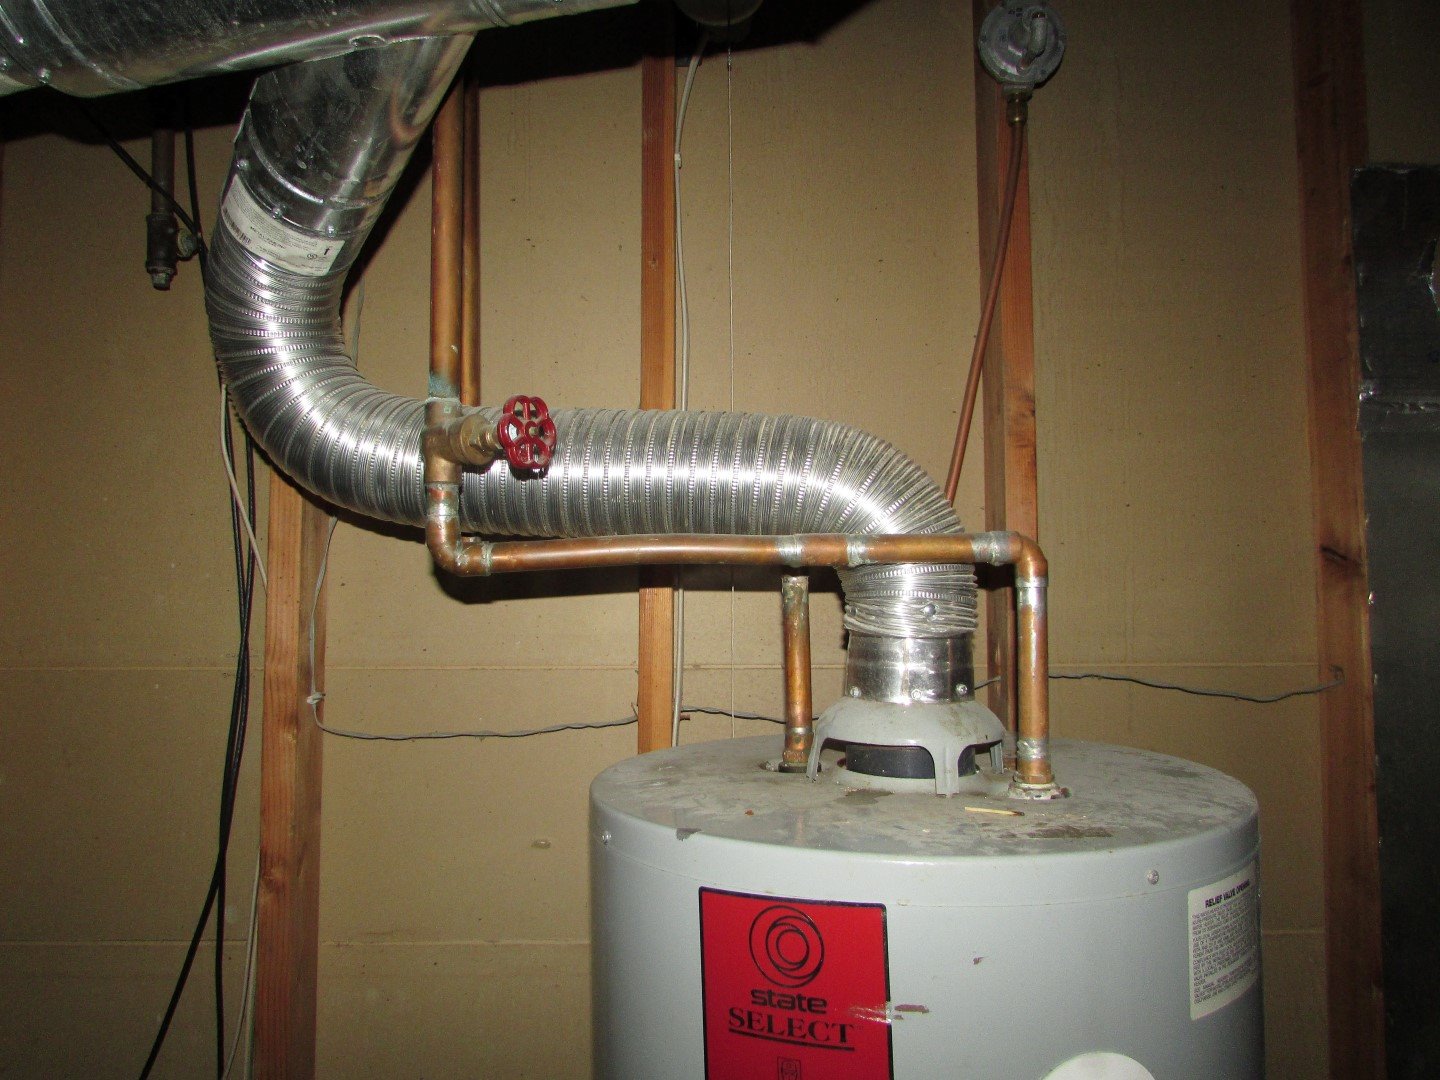
Step 3: Disconnect the Gas Line
With the water heater drained, it’s time to disconnect the gas line to prepare for the removal of the old unit. Disconnecting the gas line ensures that there are no gas leaks or hazards during the installation of the new water heater.
Start by locating the gas supply line connected to the water heater. The line is usually connected near the bottom of the heater, close to the control valve.
Using an adjustable wrench, carefully loosen and disconnect the gas line connection. Turn the wrench counterclockwise to loosen the fittings. Be aware that there may be residual gas in the line, so it’s important to take precautions and avoid any open flames or sparks in the vicinity.
Once the gas line is disconnected, cap it off using a suitable cap or plug. This prevents any gas leakage and ensures the safety of the area during the replacement process. Make sure the cap is secure and properly tightened.
It’s important to note that if you encounter any difficulty in disconnecting the gas line or are unsure about the process, it’s best to seek professional assistance. Gas line connections require proper handling to avoid any potential gas leaks or accidents.
With the gas line safely disconnected and capped, you can move on to the next step: disconnecting the water lines.
Step 4: Disconnect the Water Lines
Before removing the old water heater, it’s important to disconnect the water lines to ensure a clean and efficient replacement process. Disconnecting the water lines involves turning off the water supply and disconnecting the inlet and outlet connections.
Start by locating the shut-off valve on the cold water supply line connected to the water heater. This valve is typically located above or near the water heater. Rotate the valve clockwise to turn off the water supply.
Once the water supply is turned off, relieve any remaining pressure in the system by opening a hot water faucet in your home. This will help drain any residual water from the lines.
Using a wrench or pliers, carefully loosen and disconnect the water lines connected to the water heater. The cold water inlet line is usually located at the top of the tank, while the hot water outlet line is located near the top as well.
Turn the fittings counterclockwise to loosen them and ensure a smooth disconnection. Be prepared for some residual water to come out when disconnecting the lines, so have a bucket or towel handy to catch any drips.
Once the water lines are disconnected, inspect the fittings for any signs of damage or wear. Replace the fittings if necessary to ensure a secure connection between the new water heater and the water lines.
It’s important to note that if you’re unsure about disconnecting the water lines or encounter any complications, it’s best to consult a professional plumber for assistance. Water line connections require proper handling to avoid any leaks or water damage.
With the water lines successfully disconnected, you’re ready to move on to the next step: removing the old water heater.
Step 5: Remove the Old Water Heater
Now that the gas and water lines are disconnected, it’s time to remove the old water heater from its current location. Removing the old water heater allows you to create space for the new unit and ensures a clean installation process.
Start by assessing the location of the water heater and any surrounding obstacles. Clear any objects or debris that may hinder the removal process, making sure to create a safe and unobstructed workspace.
Depending on the size and weight of the water heater, you may need an extra pair of hands or a dolly to assist with the removal. Carefully lift and maneuver the old water heater out of its space, being mindful of any sharp edges or protruding parts.
It’s important to have a designated disposal plan for the old water heater. In many cases, local regulations or waste disposal guidelines may dictate how to properly dispose of old appliances.
If the old water heater is still in usable condition, you may consider donating it to a local charity or organization that accepts appliances. Alternatively, you can check with your local recycling center to see if they accept old water heaters for proper recycling.
Ensure that the area where the old water heater was removed from is clean and ready for the installation of the new unit. Remove any debris or leftover water to create a clean and level surface.
With the old water heater successfully removed, you can move on to installing the new water heater in the next step. Take extra care when handling the new unit to avoid any damage and ensure a smooth installation process.
When replacing a gas water heater, be sure to turn off the gas supply and the water supply before beginning the installation process. This will ensure safety and prevent any potential accidents.
Step 6: Install the New Water Heater
Now that the old water heater has been removed, it’s time to install the new water heater. Proper installation ensures the efficient and safe operation of your new unit, providing you with a reliable source of hot water.
Before installing the new water heater, carefully read and follow the manufacturer’s instructions and guidelines. This ensures that you’re familiar with any specific requirements or recommendations for your particular model.
First, position the new water heater in the designated location. Ensure that there is ample space around the unit for proper ventilation and access for future maintenance.
If necessary, use leveling tools to ensure that the new water heater is installed on a level surface. A level water heater prevents any issues with water accumulation or damage to the unit.
Next, reconnect the water lines to the new water heater. Use Teflon tape or pipe joint compound to create a secure and watertight connection between the water lines and the new unit.
Start by connecting the cold water supply line to the designated inlet on the water heater. Use an adjustable wrench or pliers to tighten the fitting, ensuring a snug and leak-free connection.
Repeat the process for the hot water outlet line, connecting it to the appropriate outlet on the water heater. Again, use a wrench or pliers to tighten the fitting securely.
Ensure that all connections are properly tightened, but be cautious not to over-tighten, as this may lead to damaged fittings or leaks.
Once the water lines are connected, repeat the process for the gas line. Reconnect the gas line to the control valve on the water heater, following the manufacturer’s instructions for proper connection and use of pipe joint compound or Teflon tape.
Take extra care when tightening the gas line connection, ensuring that it is secure but not overly tight. A properly connected gas line ensures safe and efficient operation of the water heater.
Lastly, double-check all connections and fittings to ensure that they are tight and secure. Inspect for any signs of leakage and make any necessary adjustments if needed.
With the new water heater installed and all connections secure, you’re ready to move on to the next step: connecting the water lines.
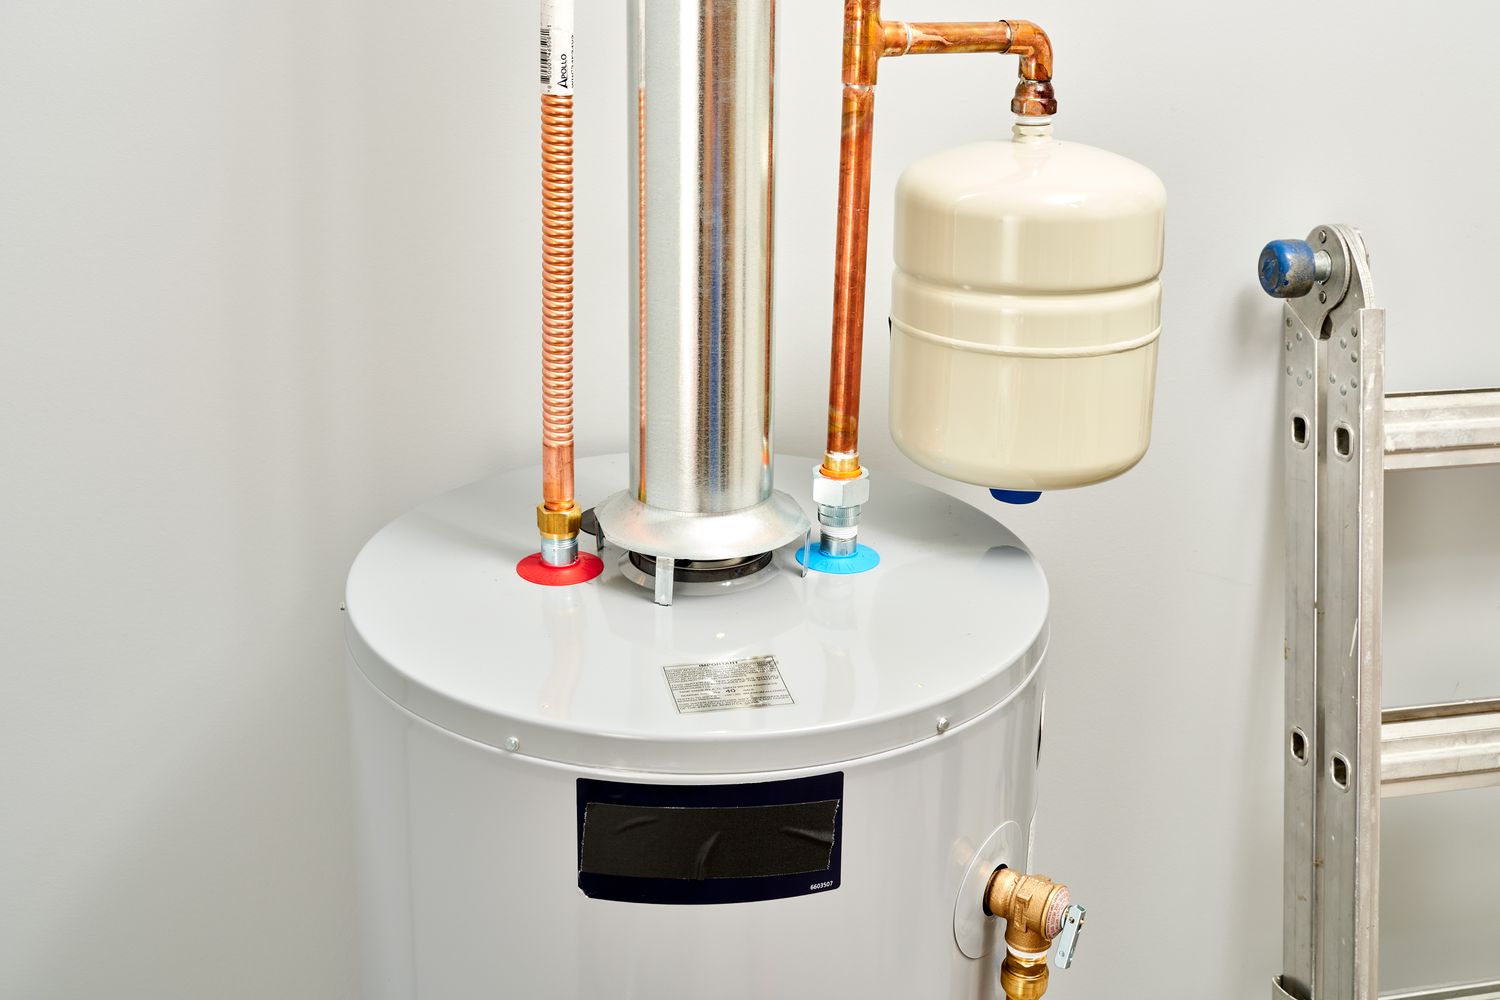
Step 7: Connect the Water Lines
With the new water heater installed, it’s time to connect the water lines to ensure a proper and functional setup. Connecting the water lines allows for the supply of cold water and the distribution of hot water from the new water heater.
Start by ensuring that the cold water supply shut-off valve is still in the closed position. This prevents any water from flowing into the system before the connections are fully secured.
Next, connect the cold water supply line to the designated inlet on the new water heater. Use Teflon tape or pipe joint compound to create a secure seal between the water line and the inlet fitting.
Tighten the connection using an adjustable wrench or pliers, ensuring that it is snug and leak-free. Avoid over-tightening, as it may damage the fittings or cause leaks.
Once the cold water line is connected, move on to the hot water outlet line. Connect the line to the appropriate outlet on the water heater using the same method of applying Teflon tape or pipe joint compound.
Tighten the connection securely, again being careful not to over-tighten. The hot water outlet line allows for the distribution of hot water from the water heater to the various faucets and fixtures in your home.
After connecting both the cold and hot water lines, check all connections for any signs of leakage. Use a dry cloth or towel to wipe away any excess water and ensure a dry and secure connection.
If you notice any leaks, tighten the connections further or make any necessary adjustments to create a watertight seal. It’s important to address any leaks immediately to prevent water damage and ensure optimal performance of the water heater.
Once all connections are secure and free from leaks, slowly open the cold water supply shut-off valve. This allows water to flow into the system and fills the water heater tank.
Keep an eye out for any further leakage during this process. If you notice any leaks, immediately shut off the water supply and address the issue before proceeding.
With the water lines successfully connected and functioning properly, you can move on to the next step: reconnecting the gas line.
Step 8: Reconnect the Gas Line
Reconnecting the gas line is an important step in ensuring the safe and efficient operation of your newly installed water heater. Properly connecting the gas line allows for the supply of gas to the burner, which heats the water in the tank.
Before proceeding, ensure that the gas shut-off valve leading to the water heater is in the closed position. This prevents any gas flow during the connection process.
Start by inspecting the gas line for any signs of damage or wear. If the existing line is in good condition, you can proceed with reconnecting it to the control valve on the water heater. However, if the gas line is damaged or showing signs of corrosion, it’s recommended to replace it with a new line for safety purposes.
Apply pipe joint compound or wrap Teflon tape around the threaded ends of the gas line fitting. This helps create a secure and gas-tight seal when connecting the gas line.
Carefully thread the gas line onto the control valve connection, ensuring that it is aligned properly. Use an adjustable wrench or pliers to tighten the connection, but be cautious not to over-tighten, as it may damage the fittings.
With the gas line connected to the control valve, check for any signs of leakage around the connection. Apply a mixture of soapy water to the connection area and observe for any escaping bubbles. If bubbles appear, it indicates a gas leak, and you should immediately shut off the gas supply and seek professional assistance to rectify the issue.
Once you are confident that the gas line connection is secure and leak-free, slowly open the gas shut-off valve leading to the water heater. This allows gas to flow into the system.
It’s essential to perform a final check for any gas leaks. Use the soapy water mixture to inspect all connections, joints, and fittings along the gas line. If you detect any leaks or the smell of gas, shut off the gas supply immediately and seek professional help to address the issue.
With the gas line reconnected and functioning properly, you’re one step closer to enjoying hot water once again. However, before turning on the water heater, there are a few more essential steps to complete, including filling and testing the unit.
Read more: How To Restart A Gas Water Heater
Step 9: Fill and Test the Water Heater
Now that the gas line is reconnected, it’s time to fill and test the water heater to ensure its proper operation and functionality. This crucial step ensures that the unit is ready to provide you with a steady supply of hot water.
Start by double-checking that all connections, including the gas and water lines, are secure and free from leaks. Inspect each connection visually and use a soapy water solution to check for any escaping bubbles that indicate a leak.
If you notice any leaks, immediately shut off the gas and water supply, and rectify the issue before proceeding. It’s essential to address any leaks to prevent water damage or gas-related hazards.
Once you have confirmed that all connections are secure, open a hot water faucet in your home. This helps to release any trapped air from the system and allows for a smoother filling process.
Slowly open the cold water supply shut-off valve to allow water to fill the tank. Keep an eye on the open faucet as water begins to flow through it. Once a steady stream of water is flowing without any sputtering or air bubbles, close the faucet.
Continue to let the water heater fill until it reaches its maximum capacity, as indicated by the manufacturer’s specifications. This can vary depending on the size and model of the water heater.
While the water heater is filling, be mindful of any unusual sounds or odors. If you detect any unusual noises or strange smells such as rotten eggs, it may indicate a potential issue with the water heater, such as a faulty gas valve or a gas leak. In such cases, immediately shut off the gas supply and seek professional assistance.
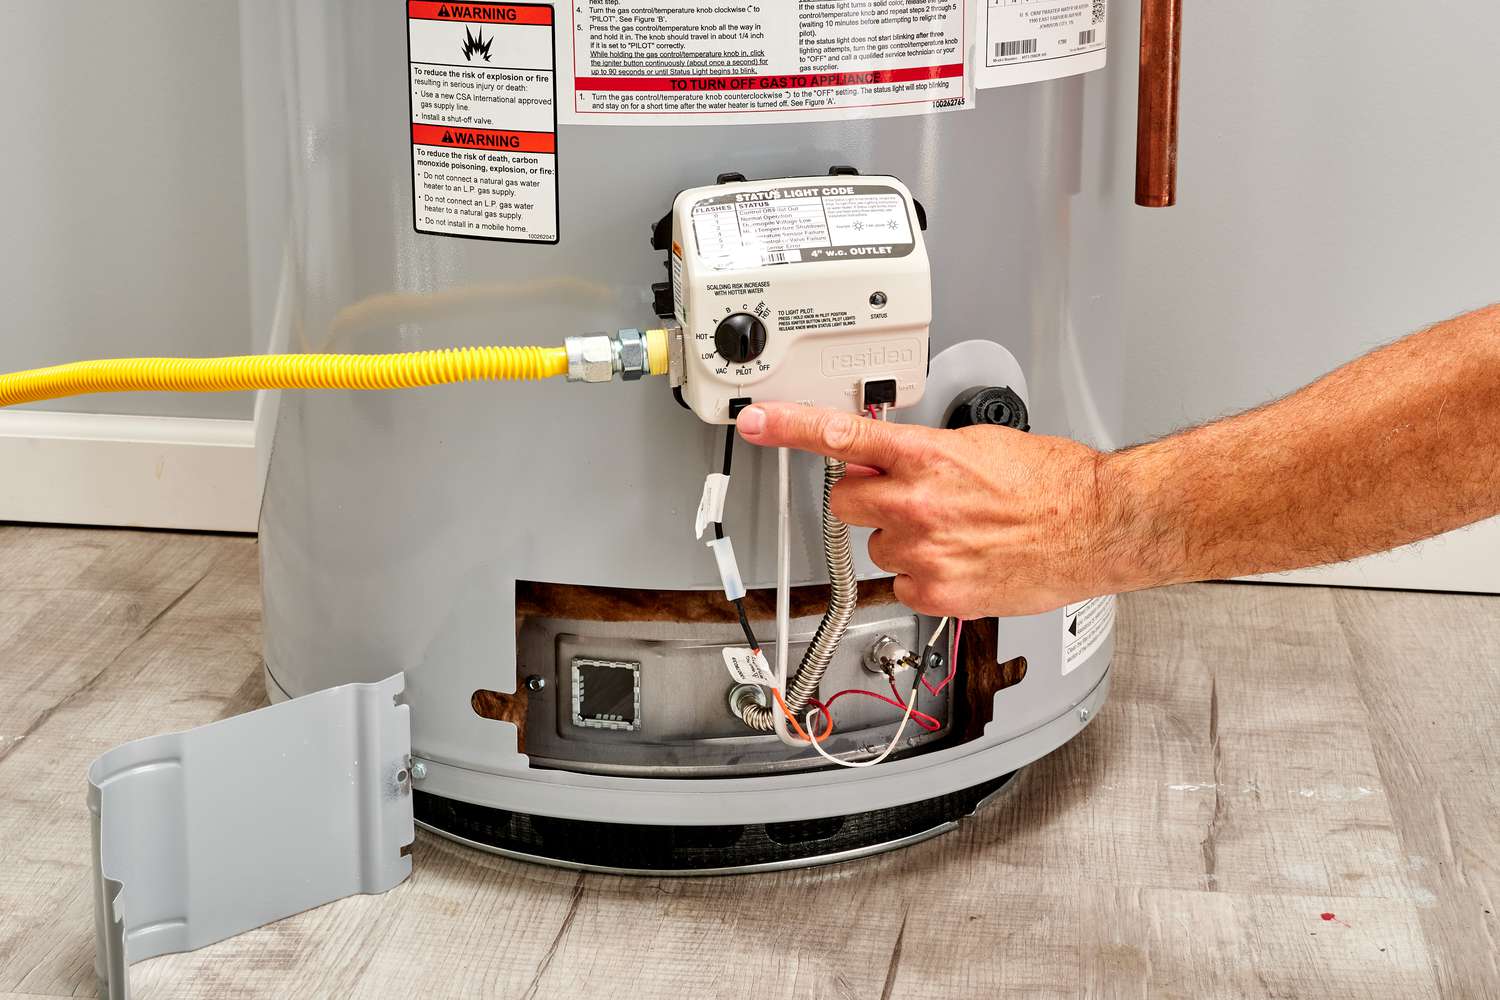
Once the water heater is filled to capacity, turn on the gas supply to the unit. Follow the manufacturer’s instructions on how to safely ignite the pilot light or ignite the burner, depending on the type of ignition system your water heater has.
Monitor the water heater for a few minutes to ensure that the pilot light or burner ignites and remains lit without any issues. If you encounter any difficulties or the flame goes out, consult the manufacturer’s instructions or call a professional plumber for assistance.
Finally, test the hot water supply in your home to ensure that your new water heater is providing hot water as expected. Allow the water to run for a few minutes to determine if the temperature is consistent and meets your preferences.
If you experience any issues with temperature, pressure, or consistency of the hot water, refer to the manufacturer’s instructions or consult a professional plumber to diagnose and resolve the problem.
Congratulations! You have successfully replaced the gas water heater and restored hot water to your home. Remember to keep the manufacturer’s instructions and warranty information for future reference as you enjoy the benefits of your newly installed water heater.
Conclusion
Replacing a gas water heater may seem like a complex task, but with the right knowledge and careful execution, it can be a manageable project to tackle. By following the step-by-step guide outlined in this article, you can successfully replace your gas water heater and enjoy a reliable supply of hot water in your home.
Throughout the process, it’s crucial to prioritize safety. Always turn off the gas supply before starting any work, and be mindful of potential gas leaks or hazards. If you’re unsure about any step or encounter difficulties, it’s best to consult a professional plumber to ensure a safe and proper installation.
Remember to gather all the necessary tools and materials before beginning the replacement. This includes an adjustable wrench, pipe wrench, pipe cutters, Teflon tape, and a screwdriver. Familiarize yourself with the manufacturer’s instructions and warranty information specific to your new water heater.
Each step of the replacement process is important, from turning off the gas supply and draining the water heater to disconnecting the gas and water lines and removing the old unit. Installing the new water heater involves connecting the gas and water lines with proper care and attention to detail.
Once the installation is complete, filling and testing the water heater ensures its proper operation. Check for any leaks and ignite the pilot light or burner as instructed by the manufacturer. Test the hot water supply in your home to ensure a consistent and satisfactory temperature.
By carefully following these steps and taking the necessary precautions, you can replace your gas water heater efficiently and effectively. However, if you’re uncertain or uncomfortable with any part of the process, it’s always best to seek professional assistance to avoid any potential risks or complications.
Now that you have successfully replaced your gas water heater, enjoy the benefits of a reliable and efficient hot water supply in your home. Remember to keep the manufacturer’s instructions and warranty information for future reference and any necessary maintenance.
With proper care and maintenance, your new gas water heater can provide you with years of reliable service and hot water comfort. Cheers to a successful replacement and continued hot water satisfaction!
Frequently Asked Questions about How To Replace A Gas Water Heater
Was this page helpful?
At Storables.com, we guarantee accurate and reliable information. Our content, validated by Expert Board Contributors, is crafted following stringent Editorial Policies. We're committed to providing you with well-researched, expert-backed insights for all your informational needs.
0 thoughts on “How To Replace A Gas Water Heater”